F5 Distributed Cloud > F5 Distributed Cloud - Intro to Multi-Cloud Networking > Module 1: Network Connect Source | Edit on
Lab 1: Building an XC Node (CE)
Objective:
Get familiar with the UDF Lab Environment.
Deploy an XC Node to define the Customer Edge at the UDF Data Center.
Explore and become familiar with the Distributed Cloud Console.
Narrative:
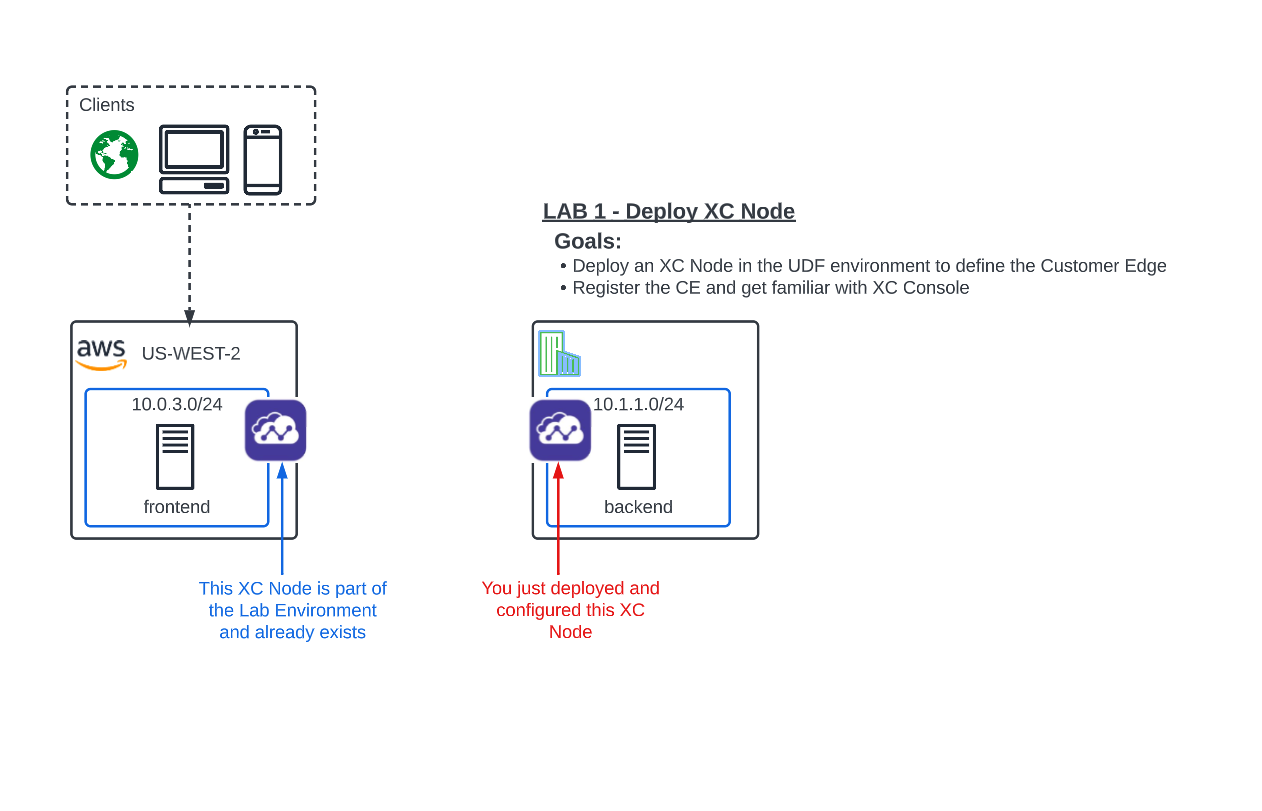
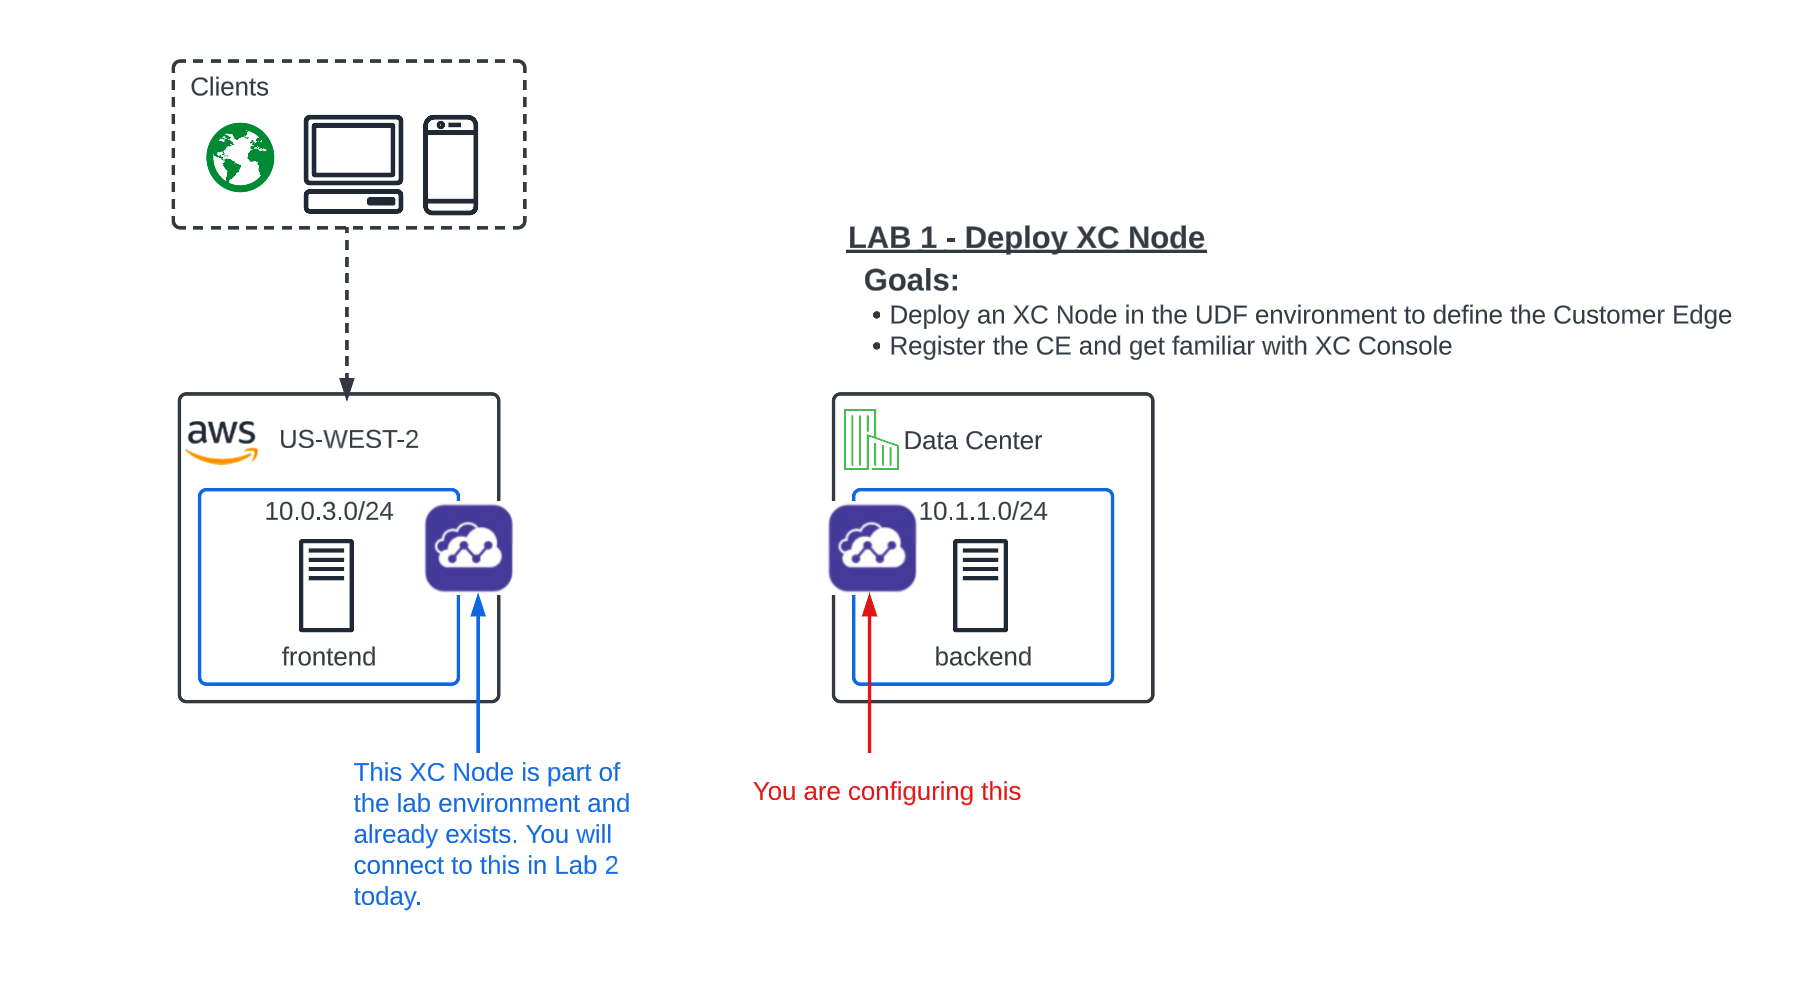
After consulting with your trusty F5 Solutions Engineer, you decide to setup F5 Distributed Cloud, Network Connect. This will allow for privately routed network connectivity between two disparate networks. You also found out that you can use the F5 Distributed Cloud, Enhanced Firewall to provide network security between Sites. We already did a push-button deployment of the AWS XC Node to define the Customer Edge in the ACME VPC, which only took a few moments.
Now, Lab 1 starts right after you have loaded the downloadable XC Node OVA on to your Data Center’s local hypervisor (VMWARE or KVM).
Note
Your Data Center environment in these labs is the F5 UDF platform, which uses KVM as it’s underlying virtualization technology. The OVA has already been imported for you. We also have hardware and container deployment options for Production XC Nodes.
Prerequisite
Note
You should have received an email from F5 Distributed Cloud User Management <no-reply@volterratmails.io> with the content as follows:
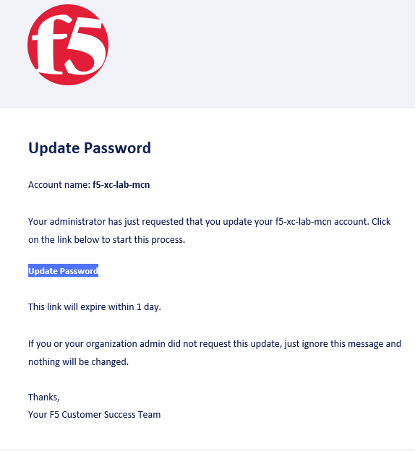
If you have not already, please click on Update Password, and change your credentials. Ensure you adhere to the password strength restrictions and make a mental note of these credentials as you will need them several times throughout the labs today.
Once you’ve set your new password (make sure to include 1 upper, 1 lower and 1 special character), you will be asked to “Log In” and then presented with the following screen:
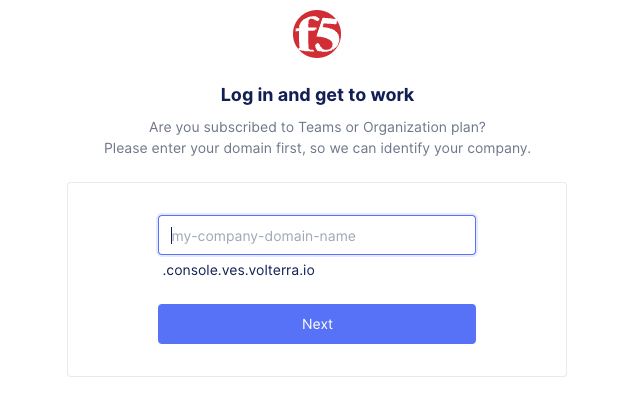
In the domain field, enter: f5-xc-lab-mcn, click Next and sign in with your email address and password you’ve just set, and proceed to accepting the Terms and Conditions.
Warning
If you have not received the email to change your credentials or ran into problems changing your credentials, please stop and get help from one of the Lab Assistants.
Logging into the XC Console
After accepting the Terms of Service and Privacy Policy, you will need to select your “Persona”.
Enter your persona as “NetOps” and click next.
Enter your level as “Intermediate” and then click Get Started.
Your persona will highlight workflows within F5 Distributed Cloud. You will be able to access all services, but making use of personas can focus your view on particular tasks that are relevant to your role.
You can change these settings at any time.
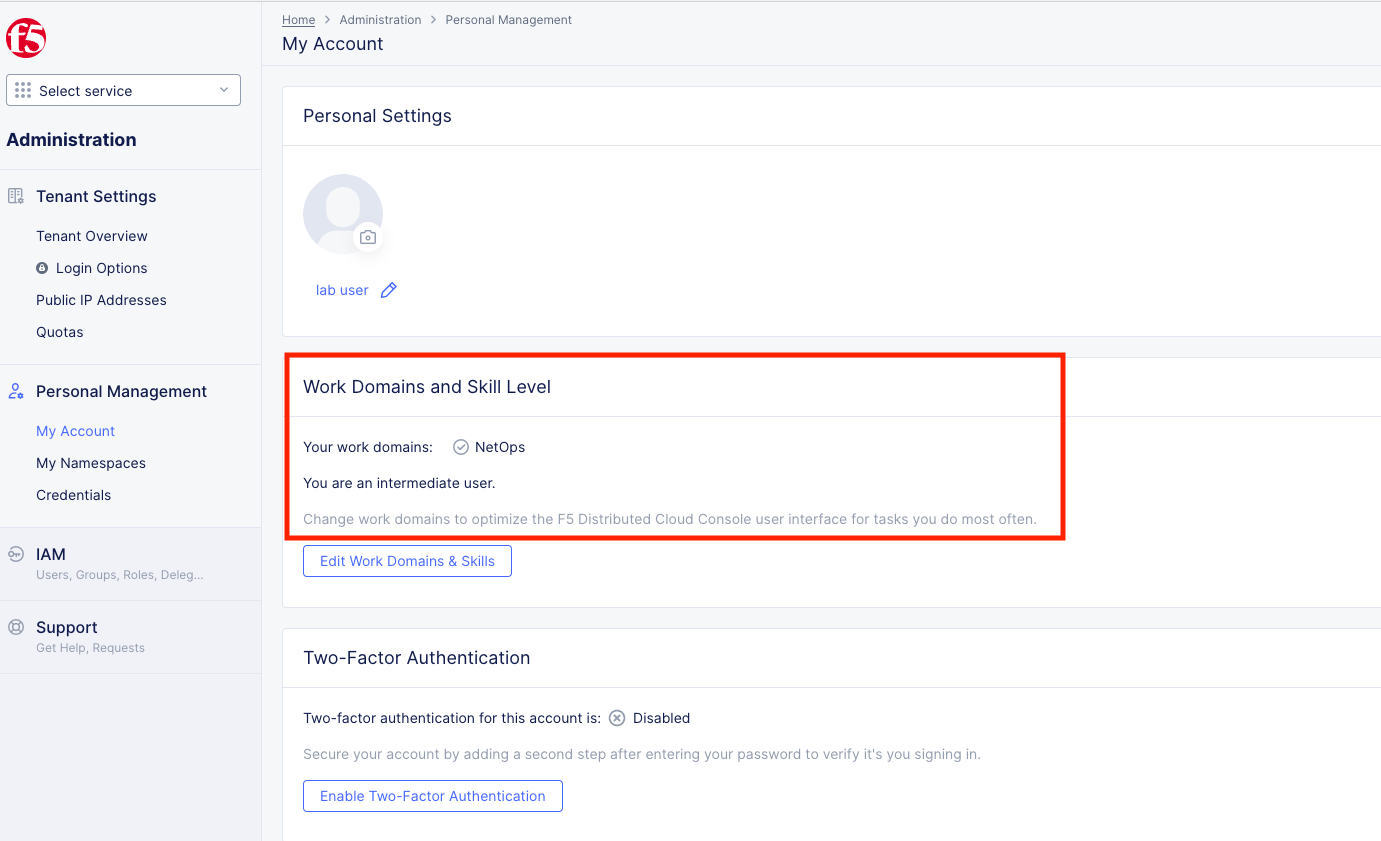
Click on “Account Settings” by expanding the “Account” icon in the top right of the screen and clicking on “Account Settings”. In the resulting window you can observe the Work domains and skill level section and other administrative functions.
Note
For the purposes of this lab, permissions have been restricted to lab operations. Some menus/functions will be locked and/or not visible.

For informational purposes only:
Find your Namespace
Namespaces, which provide an environment for isolating configured applications or enforcing role-based access controls, are leveraged within the F5 Distributed Cloud Console. For the purposes of this lab, each lab attendee has been pre-assigned a unique namespace.
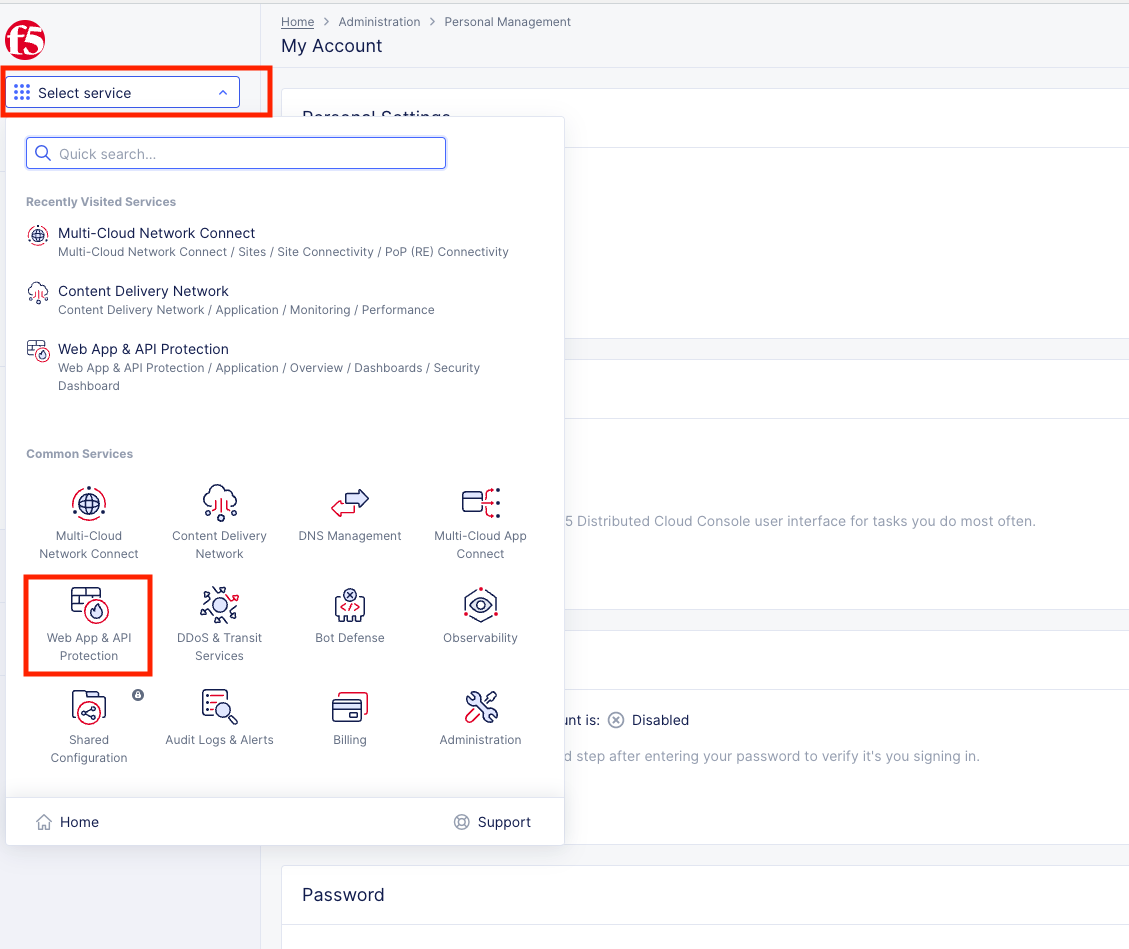
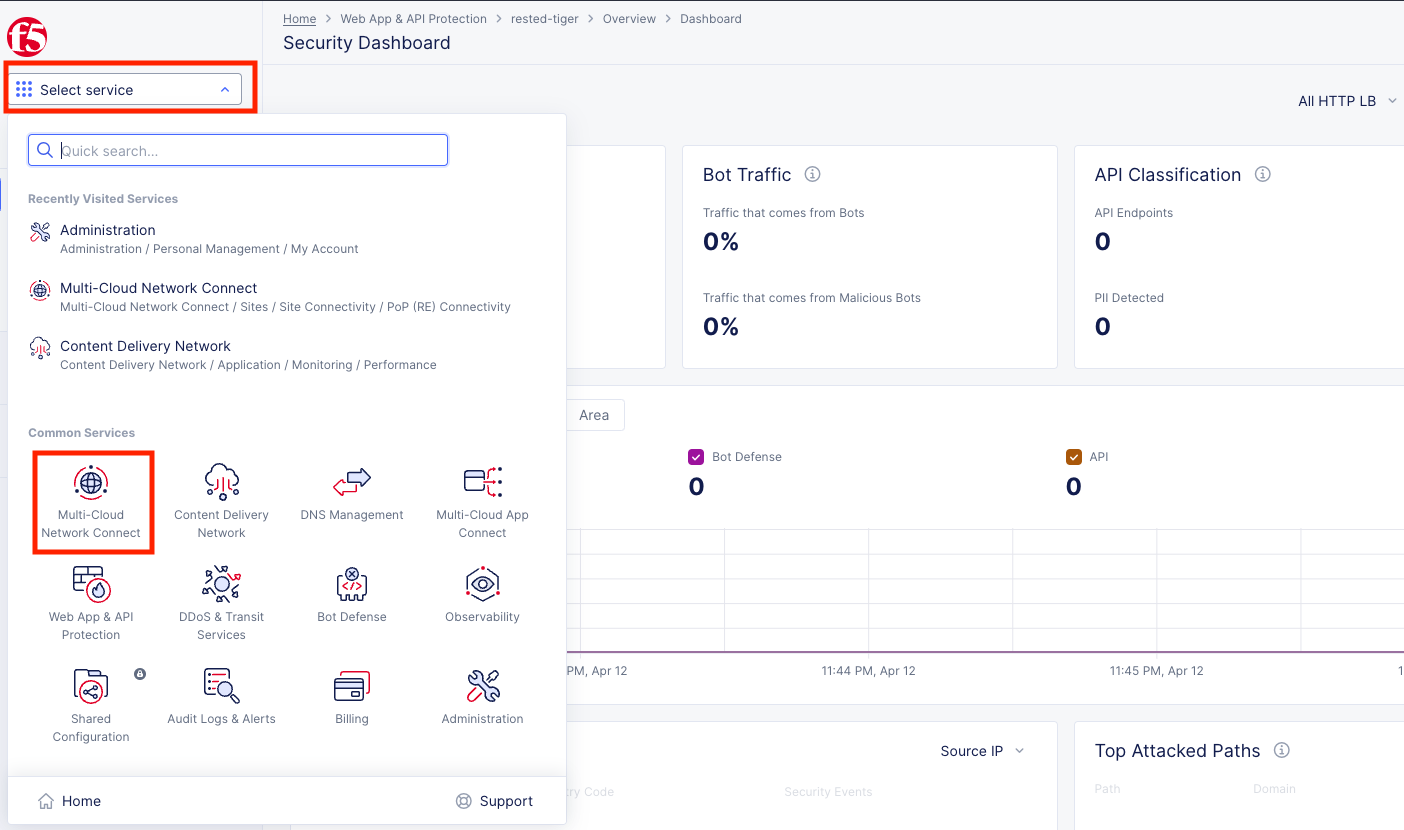
From the Select service menu, click on Web App & API Protection.
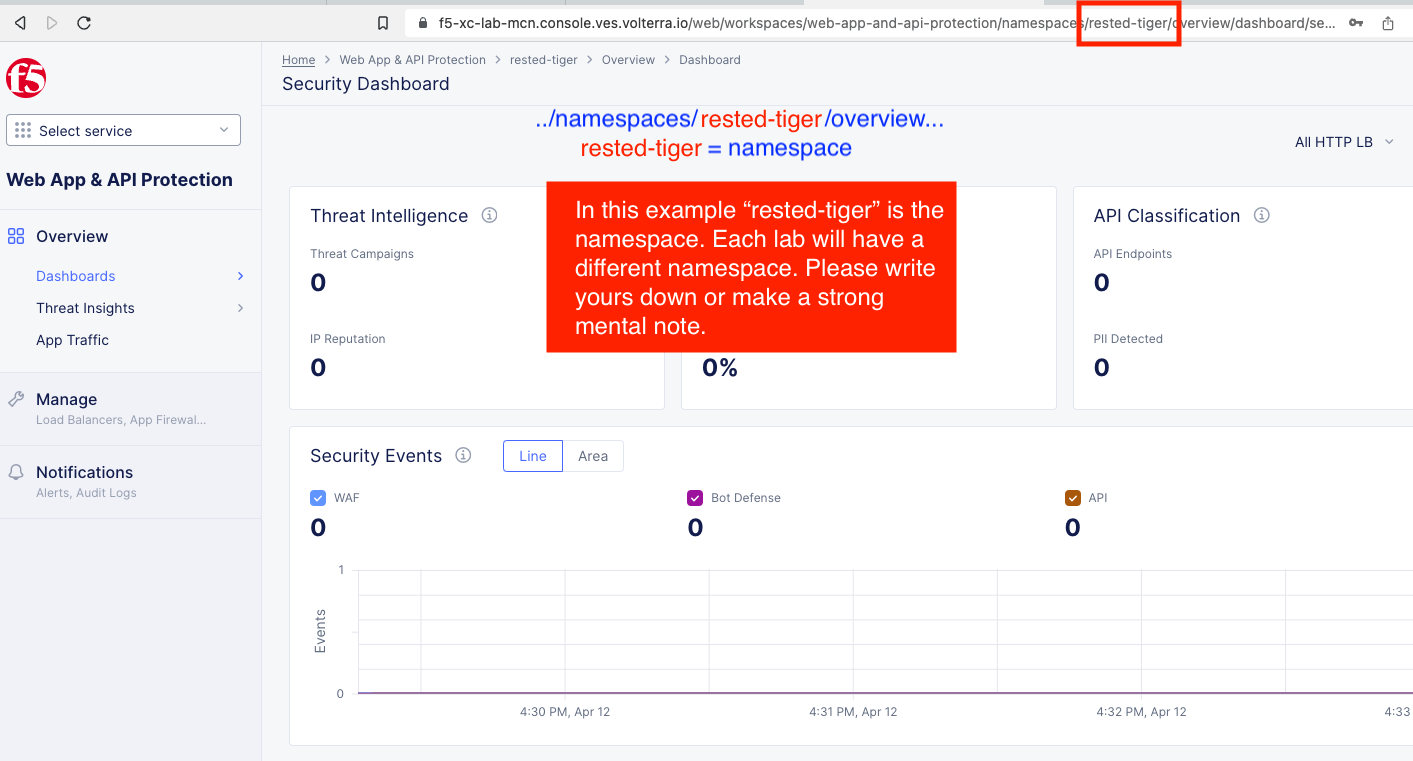
In the Web App & API Protection Security Dashboard configuration screen observe the browser URL. In the URI path, locate the <adjective-animal> namespace that you have been assigned. It will be located in the portion of the URI path between /namespaces/ and /overview/ as shown in this example: …/namespaces/<namespace>/overview/.
Note your namespace as it will be used throughout the labs today.
Warning
If you have problems locating your namespace, please see a lab assistance.
Note
Administratively, there are other ways to find namespaces. Due to permission restrictions for this particular lab, those menus are not available.
Site Token
Soon, you will be configuring an XC Node in the F5 UDF Lab Environment (Data Center) that will need a way to authenticate to the Distributed Cloud Infrastructure and associate it with your tenant. For this, you will need a Site Token.
If you are not already logged into the console, please do so now by opening the following URL in your browser:
https://f5-xc-lab-mcn.console.ves.volterra.io/
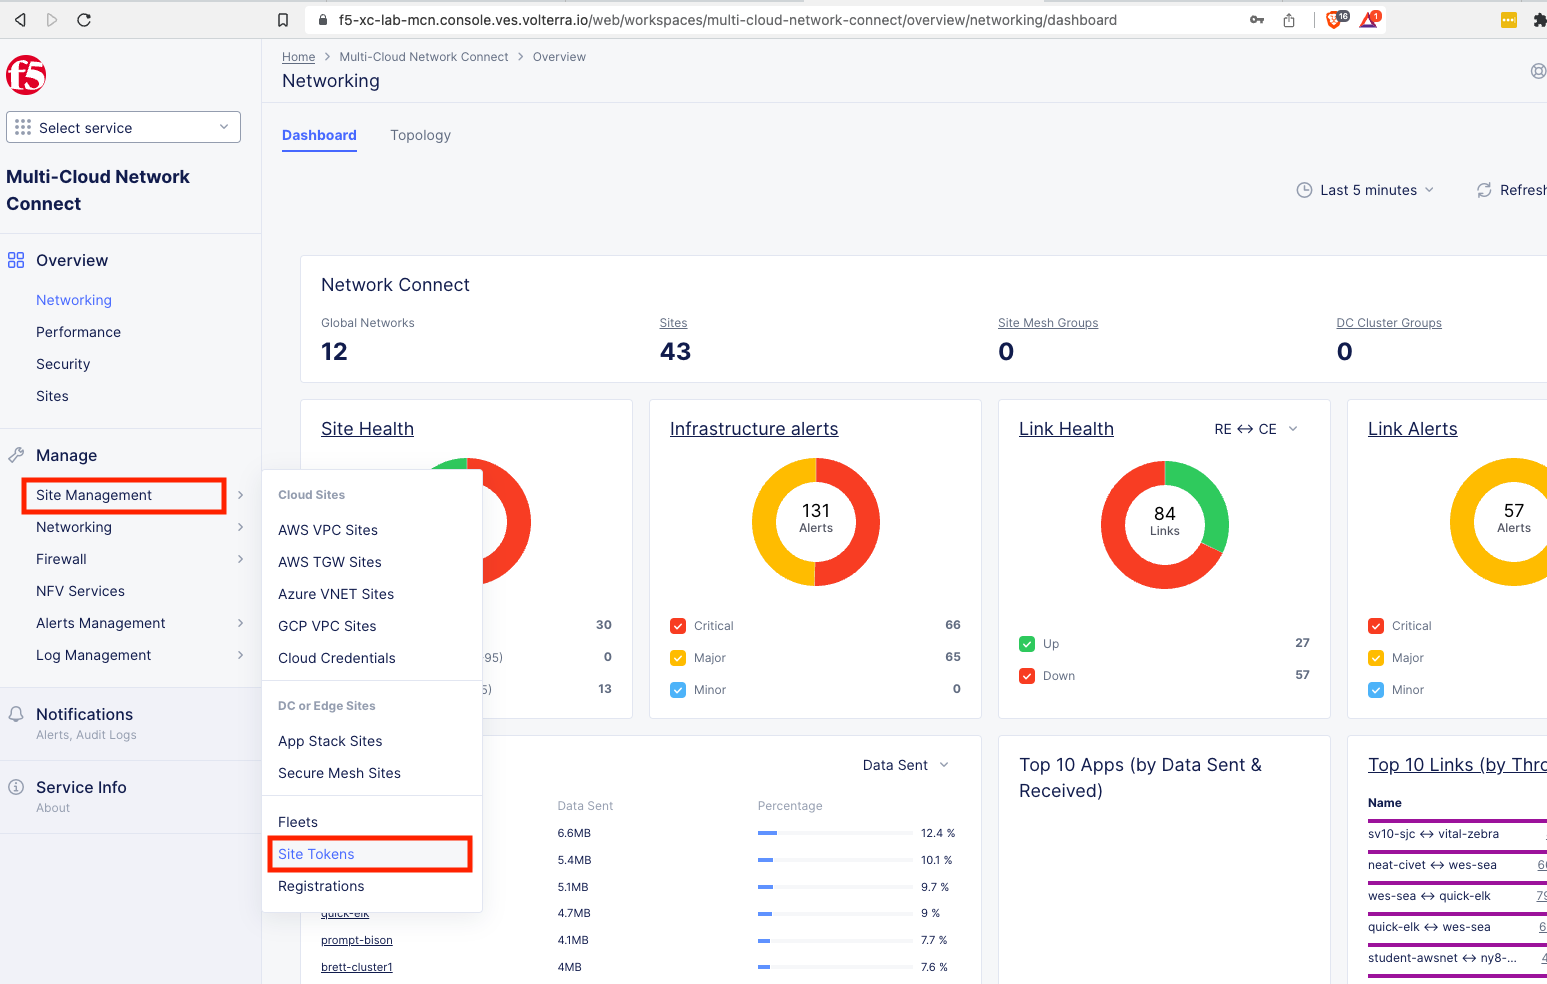
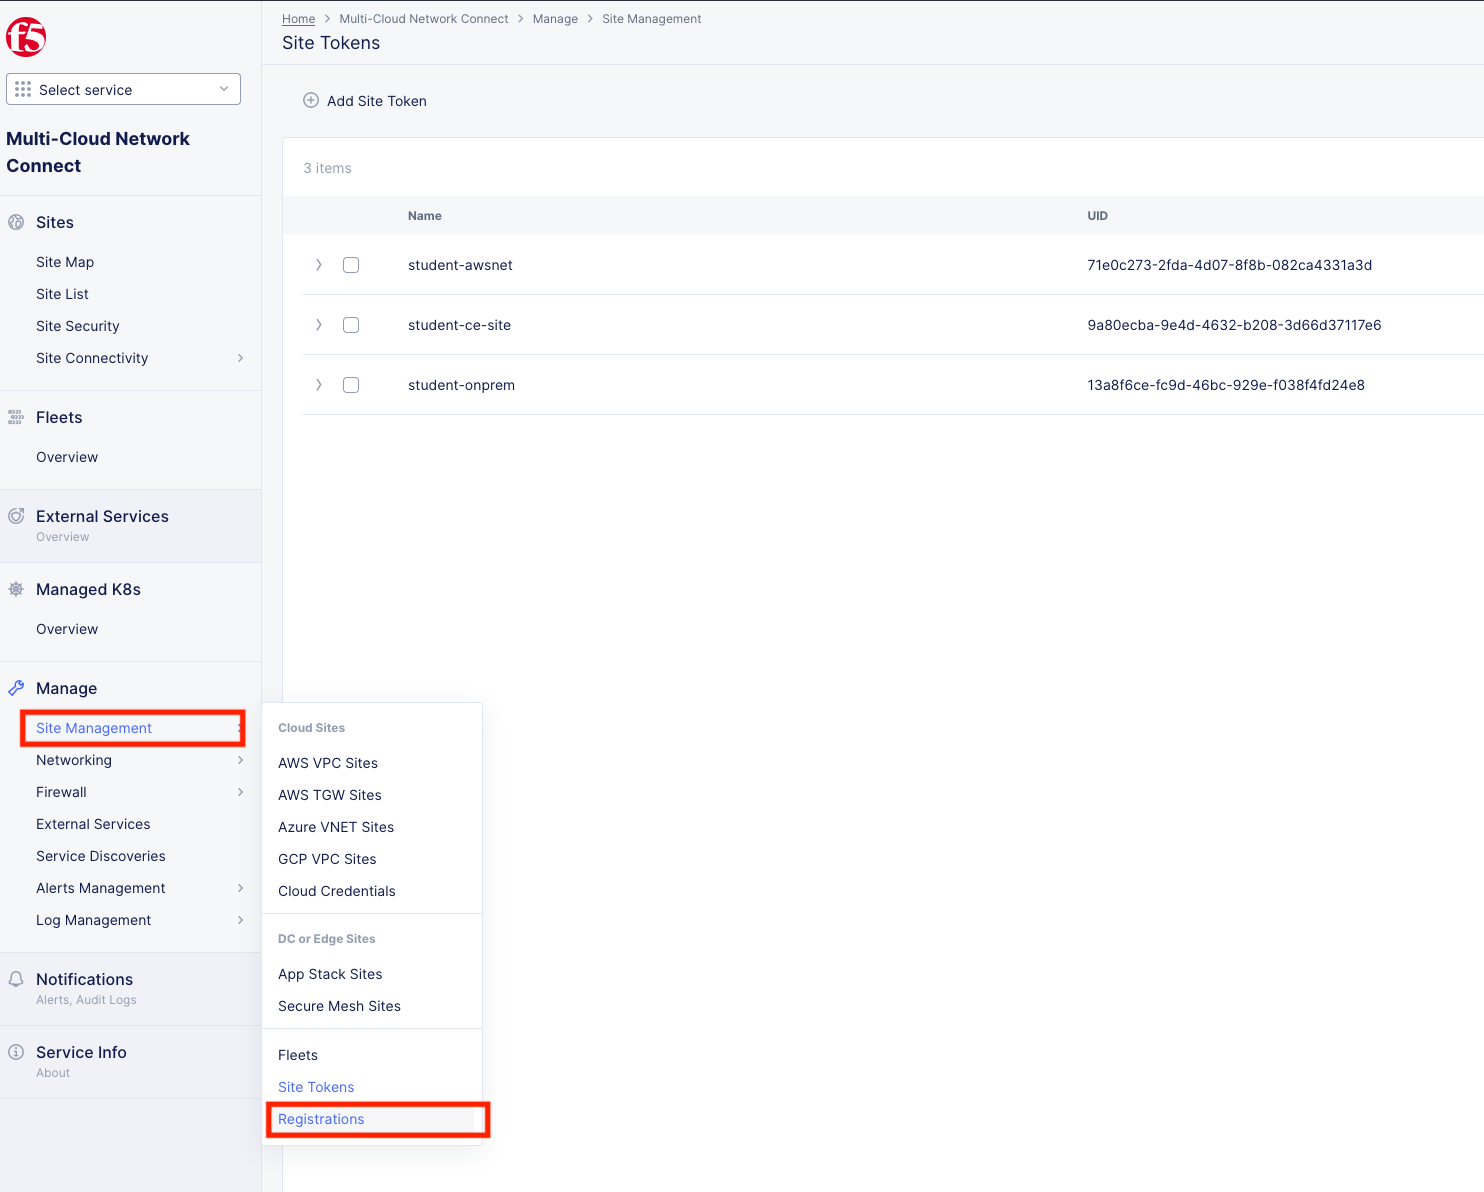
From the Select service menu, click on Multi-Cloud Network Connect.
On the side menu go down to Manage, then select Site Management >> Site Tokens
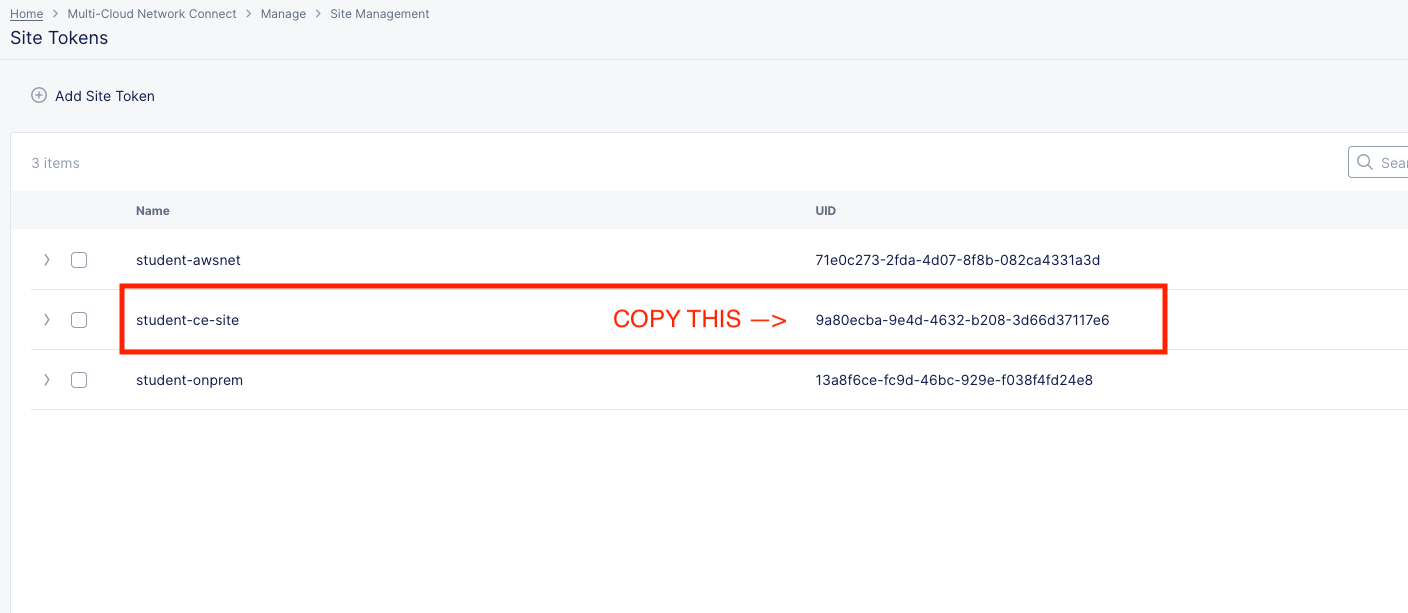
In the lab we have generated a Site Token for you to use named student-ce-site. In your production environment you will need to create your own Site Token to register your Customer Edge Node, which is literally two clicks and a name. Very simple!
Copy the UID of the the student-ce-site token and paste it somewhere you can reference later (word, notepad etc).
Setting up the Customer Edge
There are two approaches for setting up your Customer Edge deployment both will be reviewed in the sections that follow. Select the method designated by your lab team instructions
Option 1: CLI Site Setup
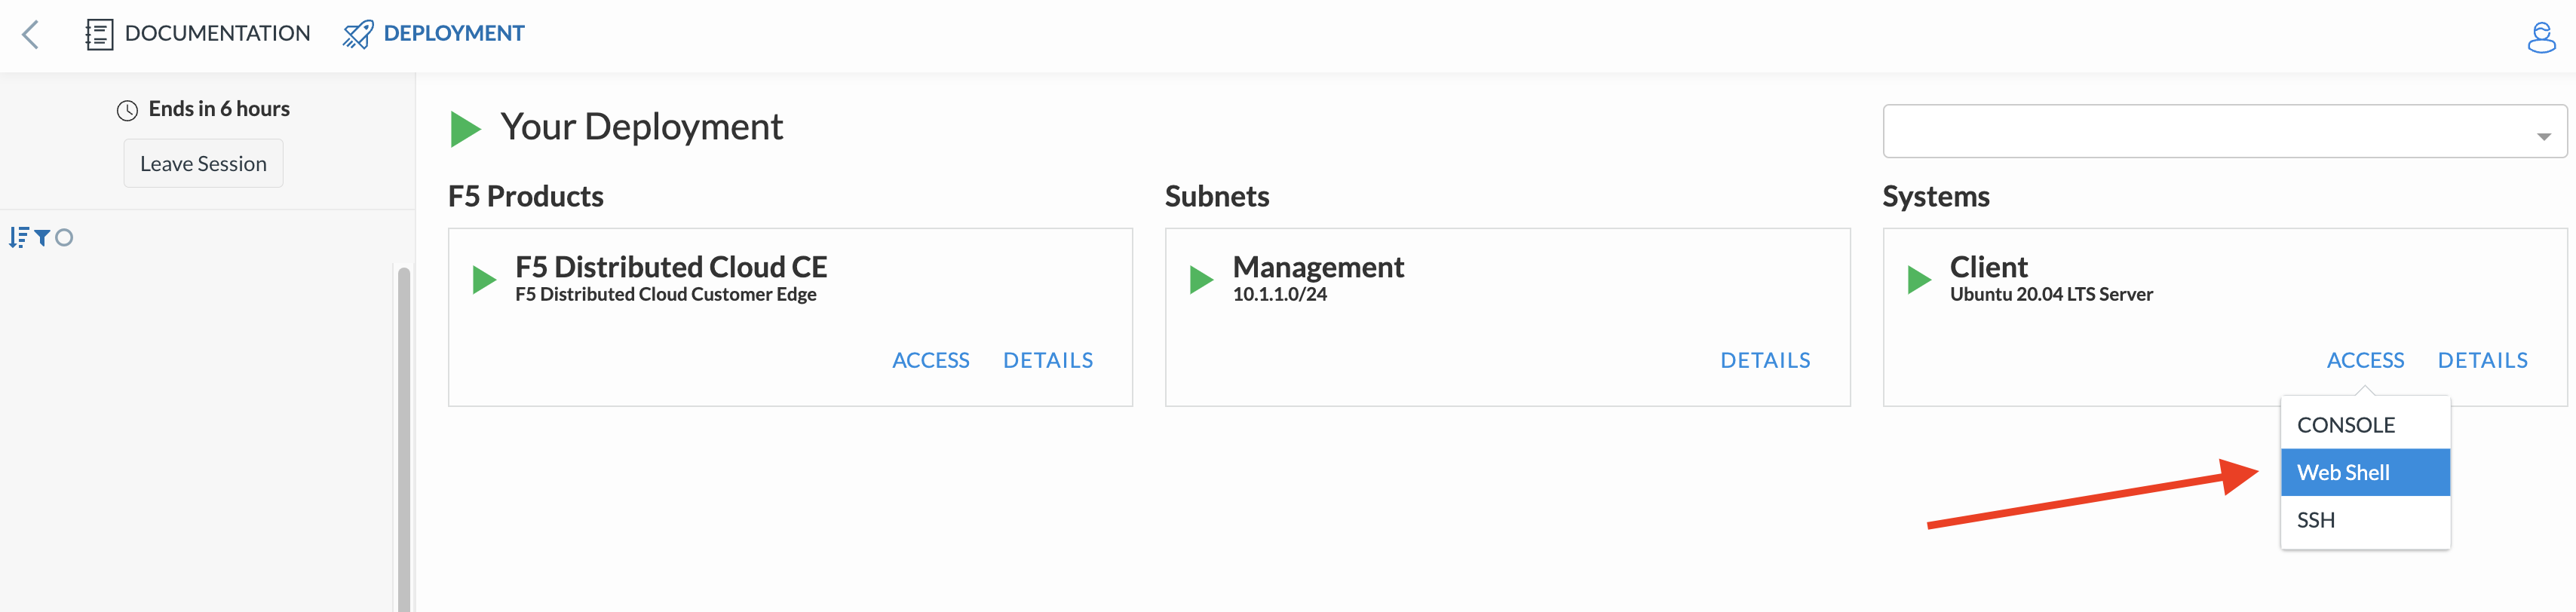
In your browser, you should have a tab open to the UDF course. Under Systems -> Client, click on Access >> Web Shell
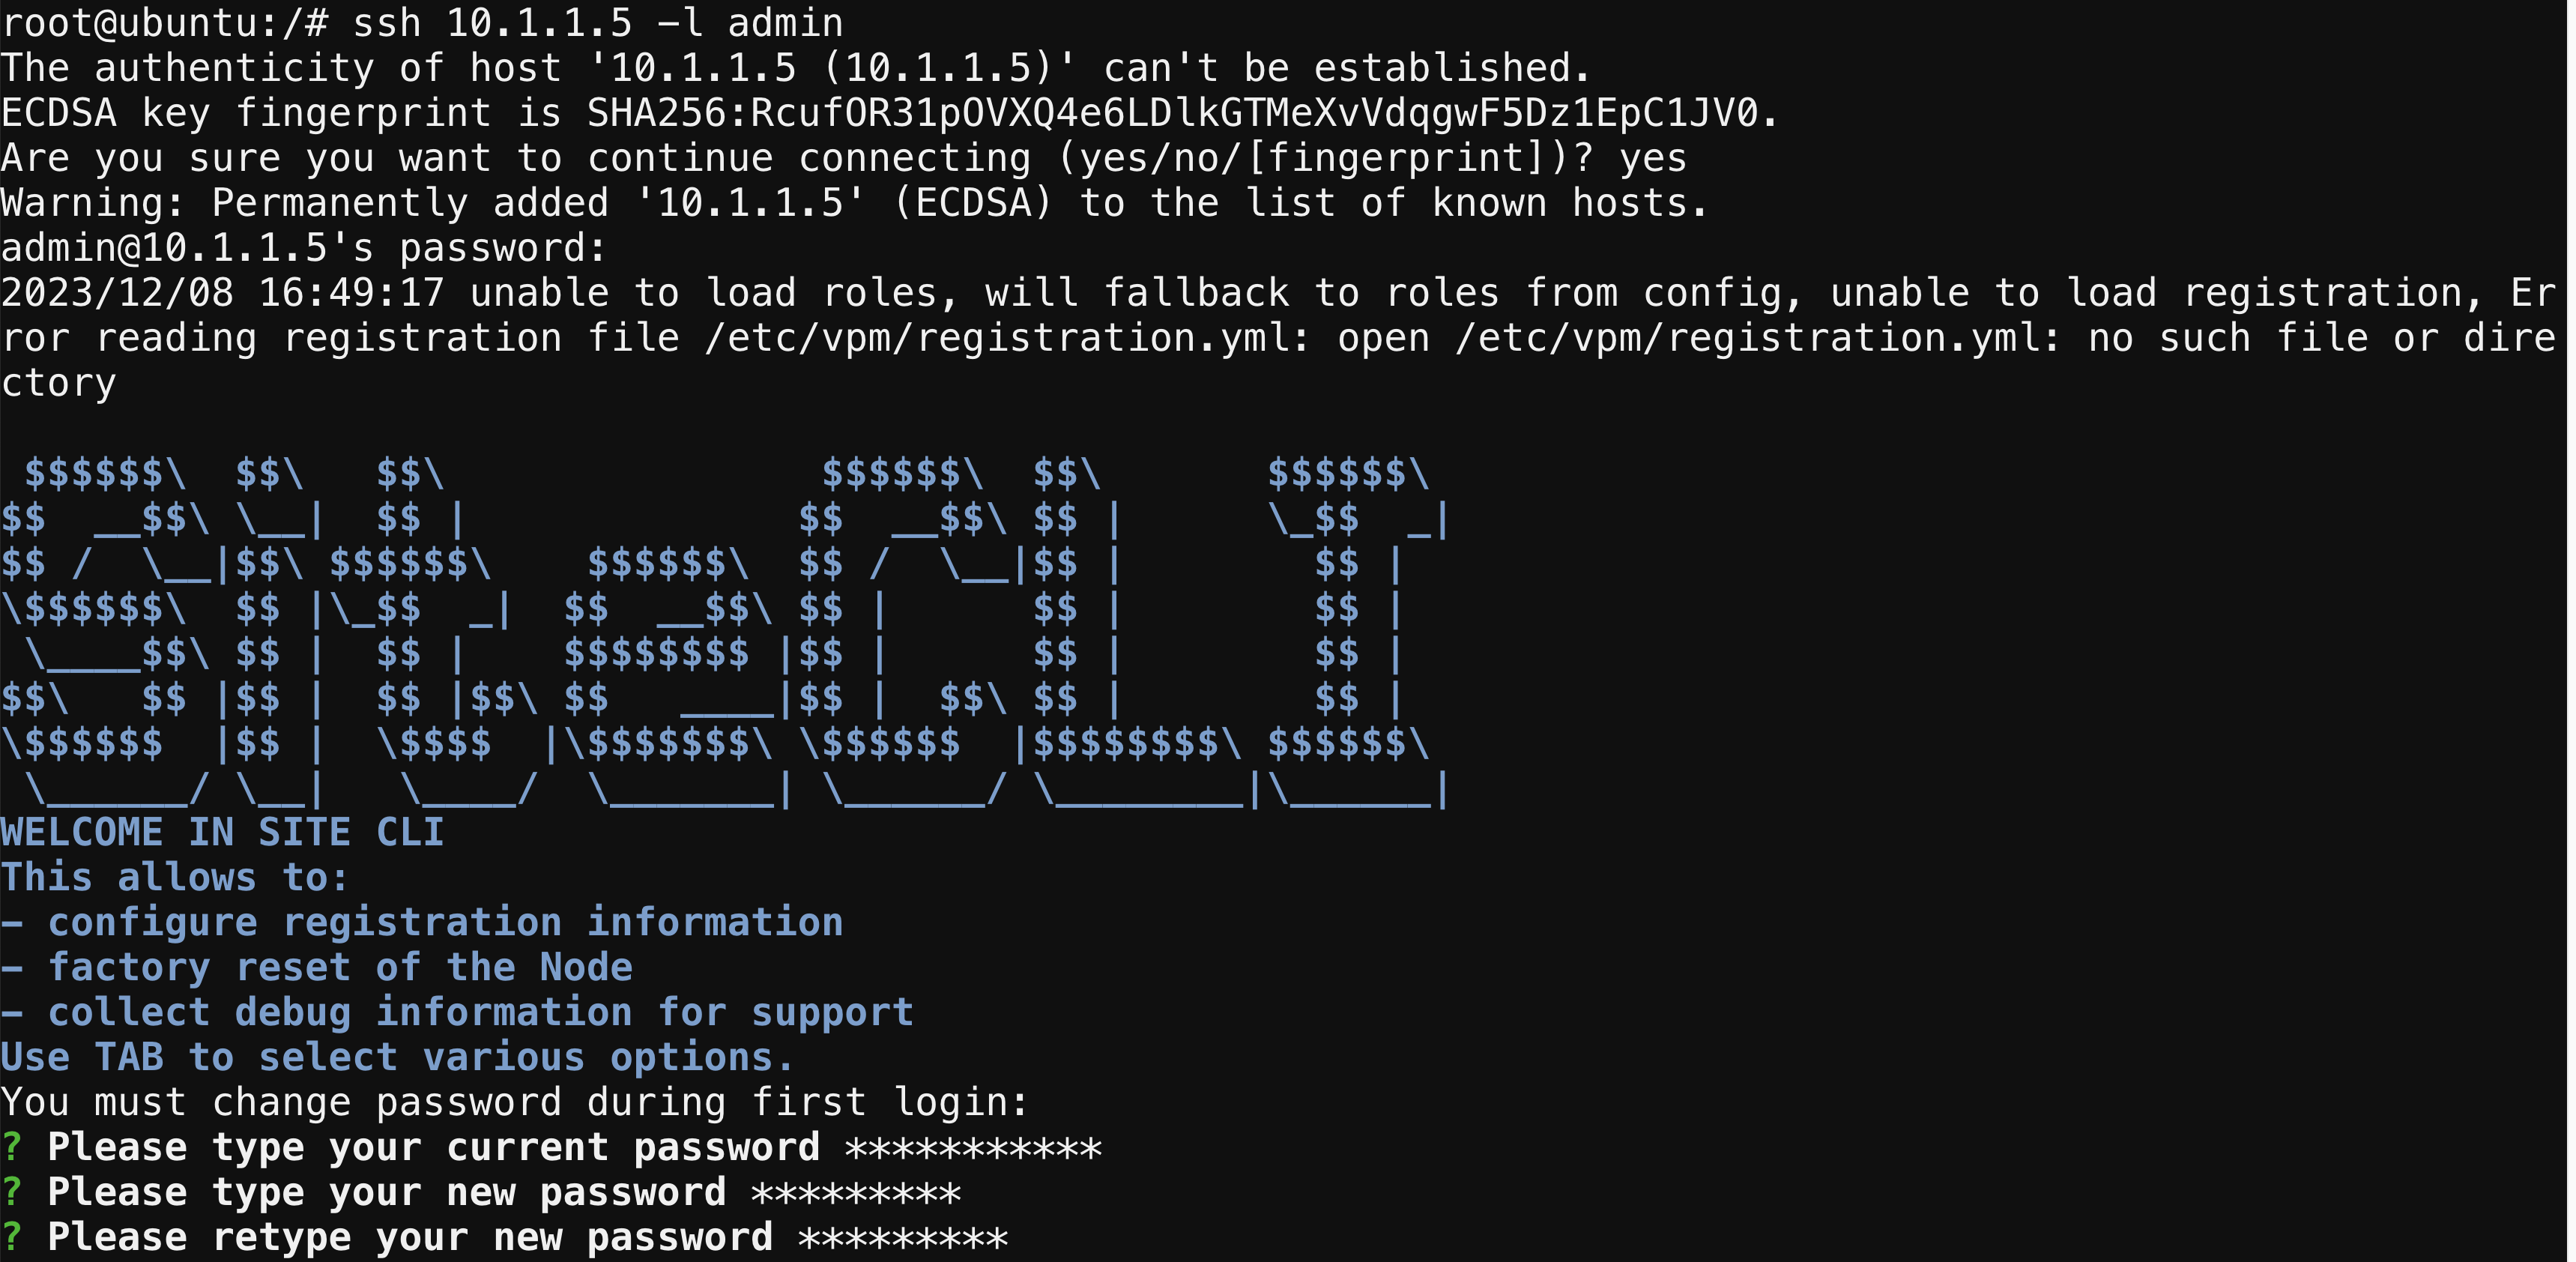
This will redirect you to a new browser tab with a shell prompt on the Ubuntu system. From the shell prompt type in the following to SSH to the Customer Edge (CE) Node:
ssh 10.1.1.5 -l admin
This will get you connected to the CLI on the CE and prompt for authentication. Type in the default username/password:
Change the password as directed (lowercase, uppercase, number, min 8 characters is the requirement). Remember the new password should you need to log in again.
Variable |
Value |
|---|---|
Default Username: |
admin |
Default Password: |
Volterra123 |
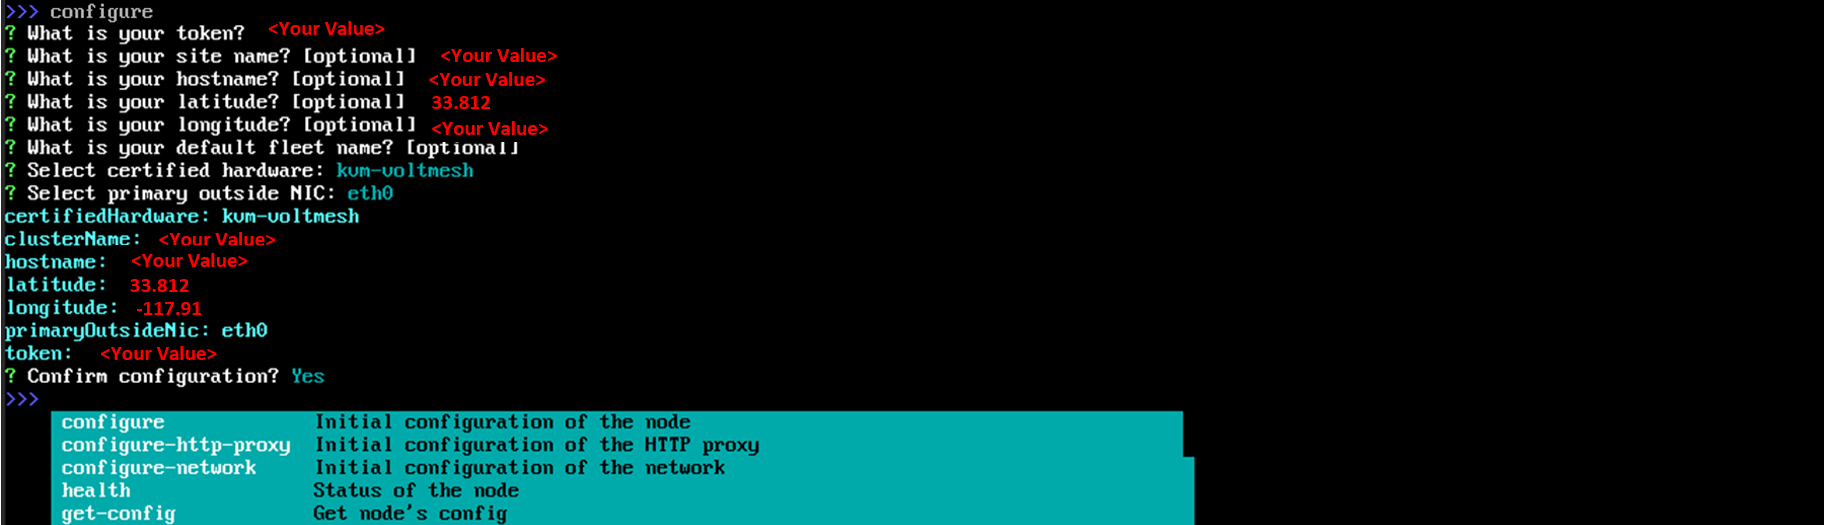
At the >>> type the word configure and then enter.

Use the following response values to complete the prompts:
Question |
Response Value |
|---|---|
What is your token? |
Insert the Site Token UID you collected earlier |
What is your site name? |
Insert your unique namespace <verb-animal> |
What is your hostname? |
Insert your unique namespace <verb-animal> |
What is your latitude? |
33.812 |
What is your longitude? |
-117.91 |
What is your default fleet name? |
Enter (This selects the default of optional) |
Select your certified hardware? |
Enter (This selects the default of kvm-voltmesh) |
Select your primary outside NIC? |
Enter (This selects the default of eth0) |
The response values will then be summarized. Confirm they are correct and type y for yes. If not, answer n and correct any values.
We will now go accept the Customer Edge registration in Distributed Cloud console. Proceed to Registering the Customer Edge.
Option 2: Site UI Site Setup
In your browser, you should have a tab open to the UDF course. Under the F5 Distributed Cloud CE, click on Access >> Site UI
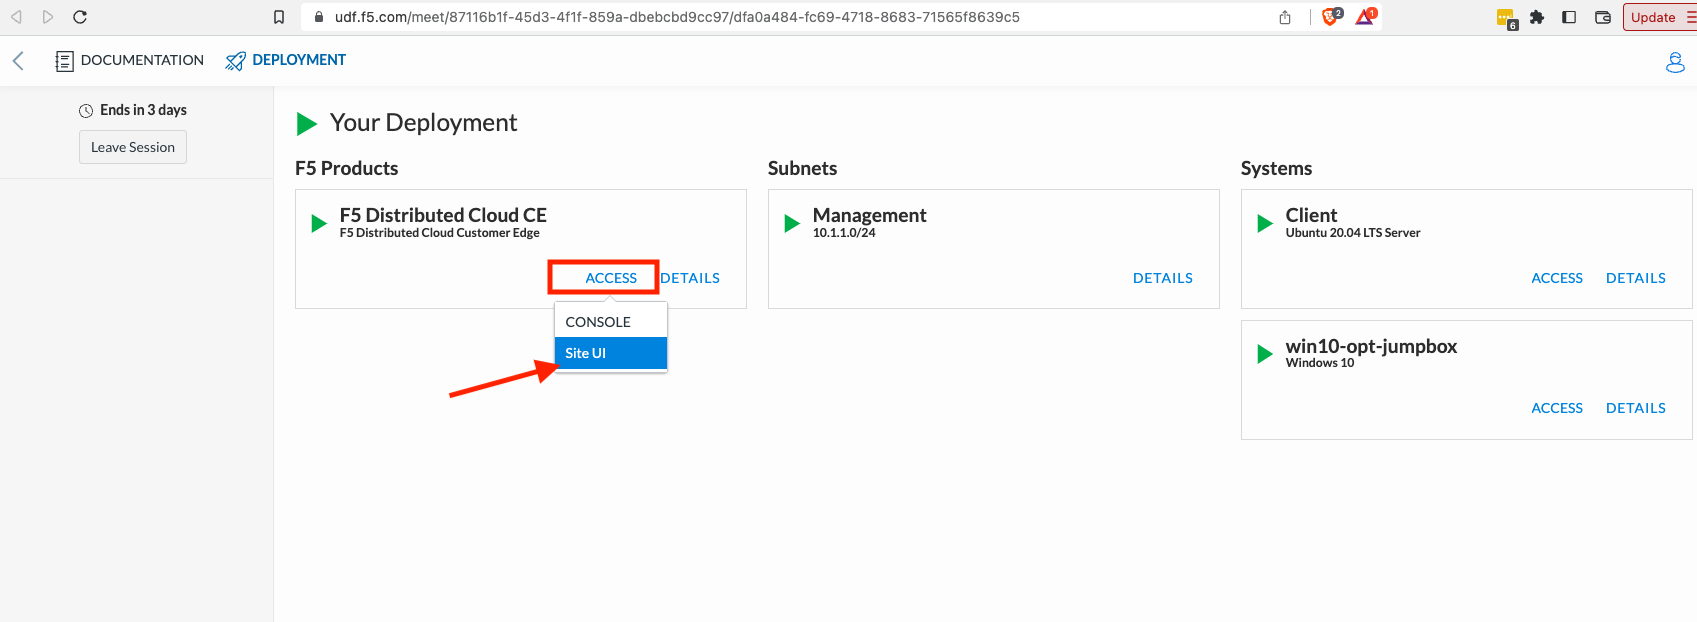
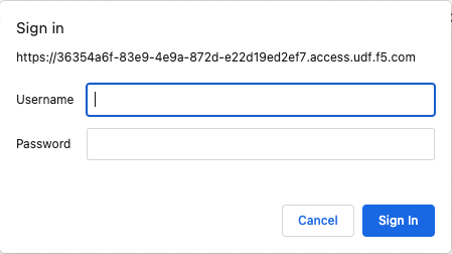
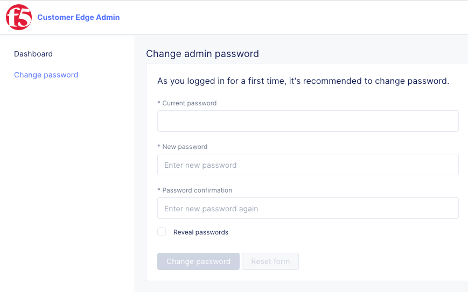
This should prompt you for authentication and then open the Customer Edge Node Admin portal.
Type in the default username/password:
Variable |
Value |
|---|---|
Default Username: |
admin |
Default Password: |
Volterra123 |
You will be prompted to change the password at the initial log in. Make a mental note of these credentials as you will need them several times throughout the labs today.
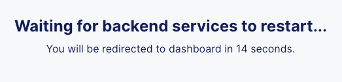
After you set the password, the services will need to restart and then the Customer Edge node will present the Dashboard
Note
You may have to Refresh your browser and log in again.
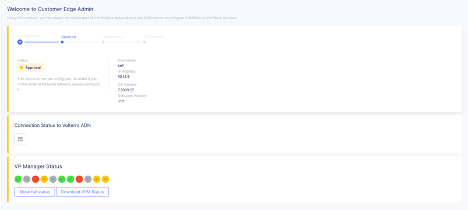
Once all services are up and running you should see the Dashboard which will have various colors and state as shown:
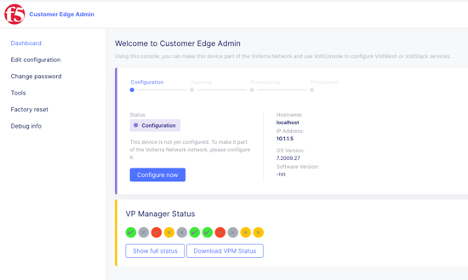
If you mouse-over each of the icons, the specific services will report their status in addition to the status reflected by the icon.
Mouse over each of the components under VP Manager Status and note the components and their condition. You can also click on “Show full status” and see a JSON report that is used to present the VP Manager Status in detail.
You can also scroll down and see hardware details that describe the platform that the Customer Edge is installed on.
Click the blue Configure Now button.
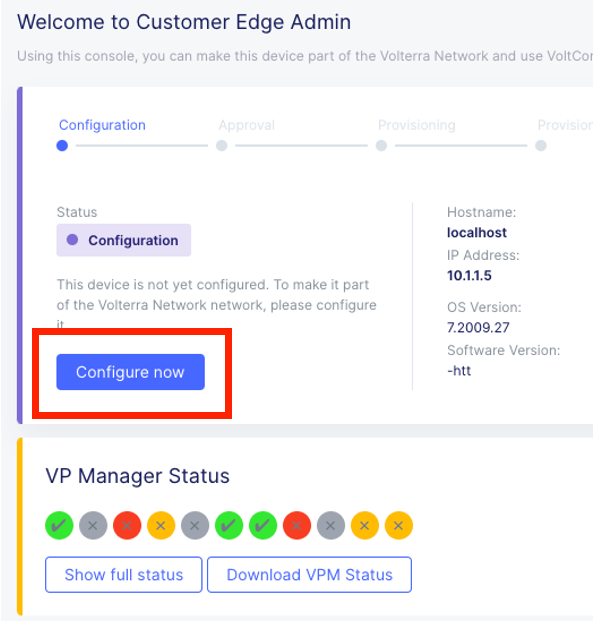
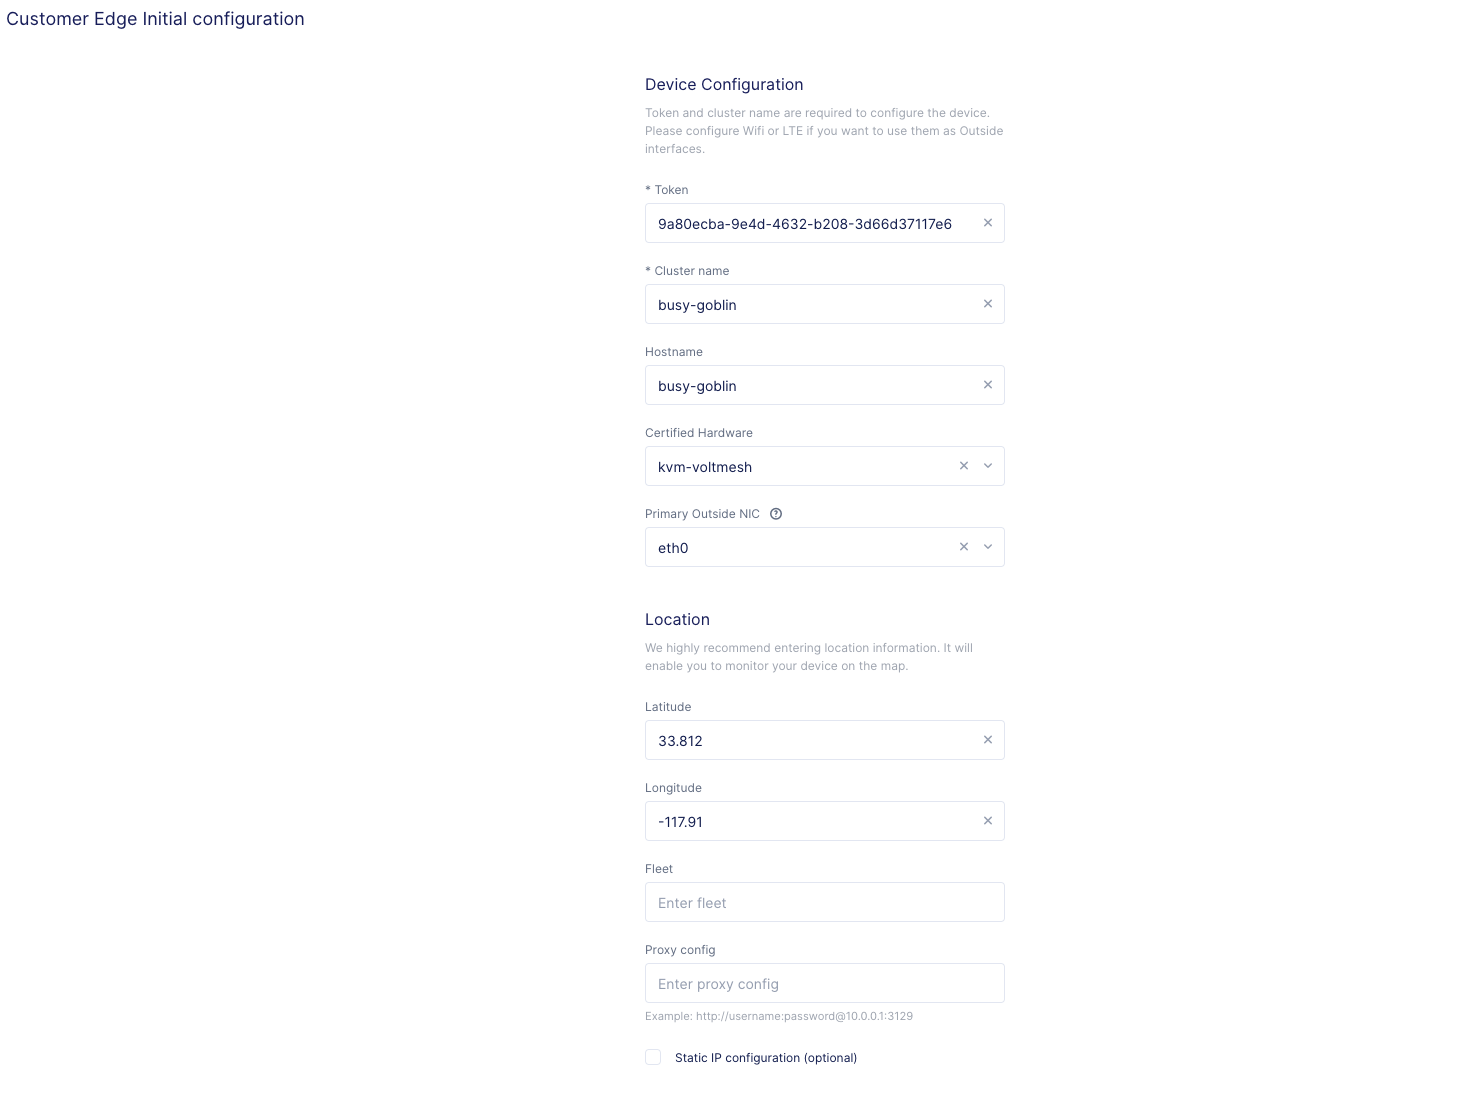
This will take you to the Customer Edge Device Configuration page.
Set the following parameters and leave everything else as default:
Variable |
Value |
|---|---|
Token |
Insert the Site Token UID you collected earlier |
Cluster Name |
Insert your unique namespace <verb-animal> |
Hostname |
Insert your unique namespace <verb-animal> |
Latitude |
33.812 |
Longitude |
-117.91 |
The end result should look like the image below, and then click Save Configuration.
After you save the configuration, you will be taken back to the Dashboard, notice the status change to “Approval” after a few moments. (May need to refresh page)
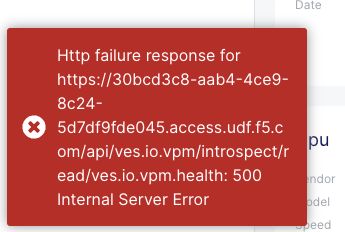
If you encounter it, you can safely ignore this benign timing error due to the UDF lab environment.
We will now go accept the Customer Edge registration in Distributed Cloud console. Proceed to Registering the Customer Edge.
Registering the Customer Edge
Go back to the Distributed Cloud console. If the session timed out, you will need to log back into the console using the following URL or refreshing your browser:
https://f5-xc-lab-mcn.console.ves.volterra.io/
From the Select service menu, click on Multi-Cloud Network Connect.
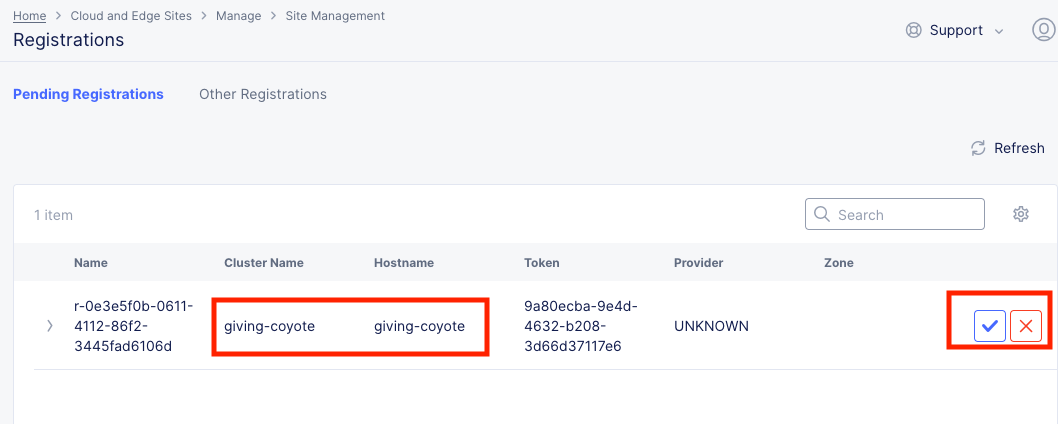
On the side menu go down to Manage >> Site Management >> Registrations.
The Customer Edge node you configured from the previous step should appear on this list, if not give it a couple moments and refresh the screen by clicking the Refresh button at the top right-hand corner.
Tip
This process can take a few minutes for the node to register with Distributed Cloud.
Once the Node appears in the Registration list, accept the registration by clicking on the blue check mark.
Click the blue check mark to accept the registration.
Note
If you DO NOT see a blue check mark, it’s likely your browser width is NOT wide enough. Simply increase the width of the browser and you should see the blue checkmark to approve the registration.
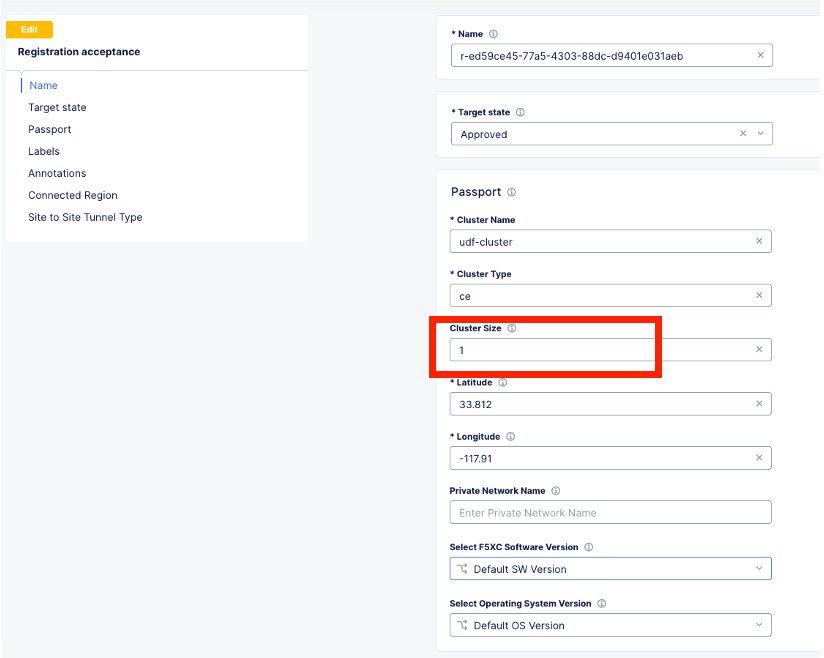
Once you have clicked the checkmark, the console will bring up the Registration Acceptance menu which shows all the settings of the Customer Edge node. Note the parameters you’ve entered from the previous exercise are populated into the appropriate fields.
Important
Look at the Cluster Size parameter and notice this is set to 1. In this lab, we will only deploy a single-node-cluster and thus leave this setting as 1. In a production environment, the best practice is to deploy a 3-node-cluster minimum. In that case, the Cluster Size parameter would be set to 3 so an appropriately sized cluster can be formed.
Leave the cluster size set to 1
Scroll down to Site to Site Tunnel Type and click on the drop down arrow
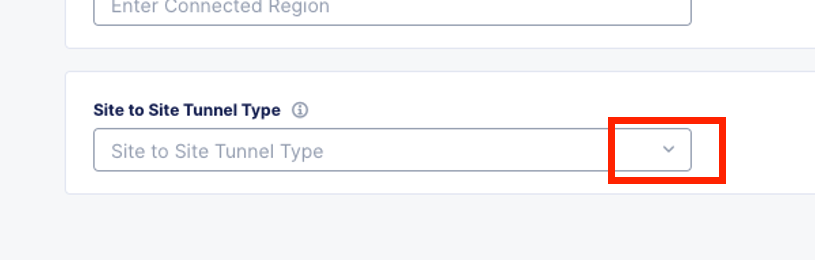
This setting determines the VPN connectivity protocols used between the Customer Edge and the Regional Edges. The XC Node will automatically bring up redundant tunnels to two different RE’s. These tunnels are self-healing and can fallback when using the configuration setting of IPSEC or SSL. Select IPSEC or SSL from the list.
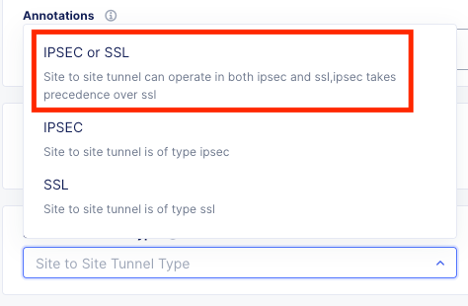
Click Save and Exit.
Once the registration completes, you can see the cluster in the “Other Registrations” tab and the current state will be ADMITTED.

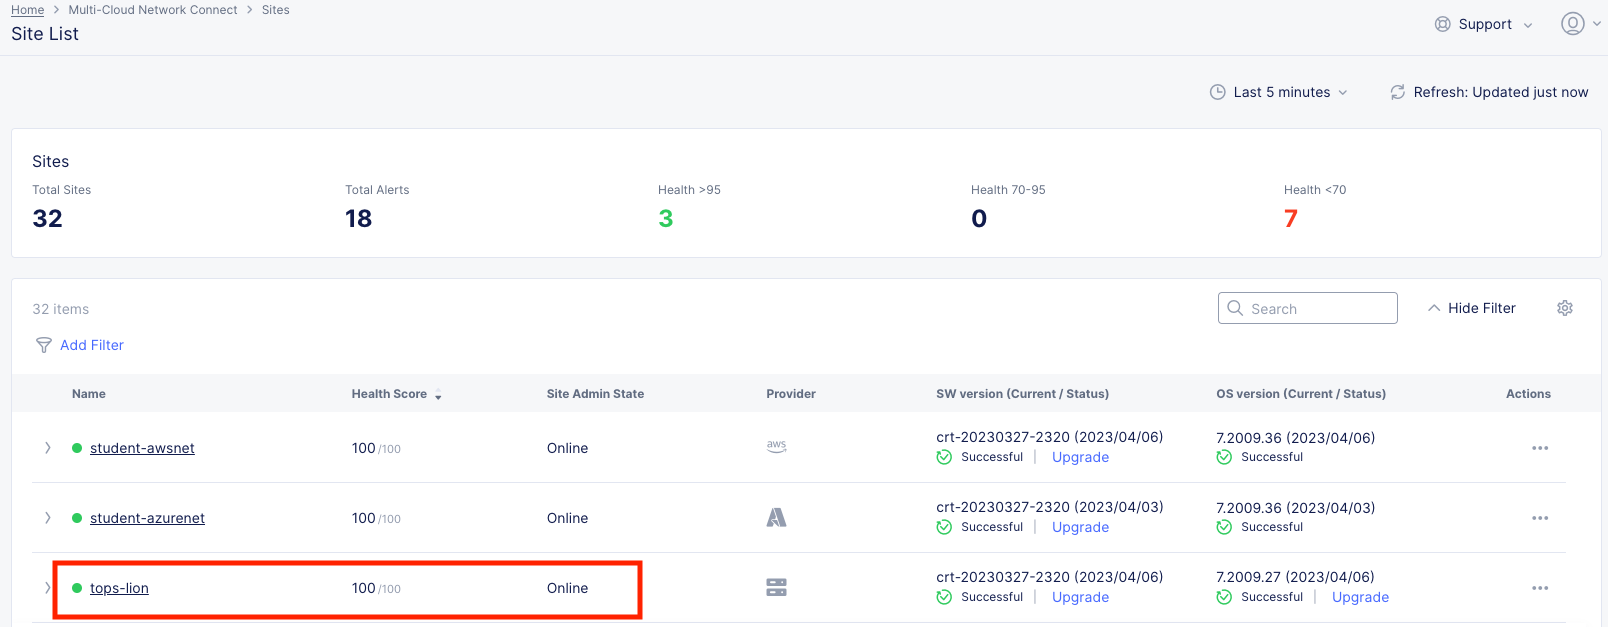
The Customer Edge Node Admin portal will also reflect some changes in its status, although the node still requires some additional configuration. From the menu on the left click on Sites and observe your Nodes (animal-name). Hint: You may have to hit Refresh in the upper right corner.
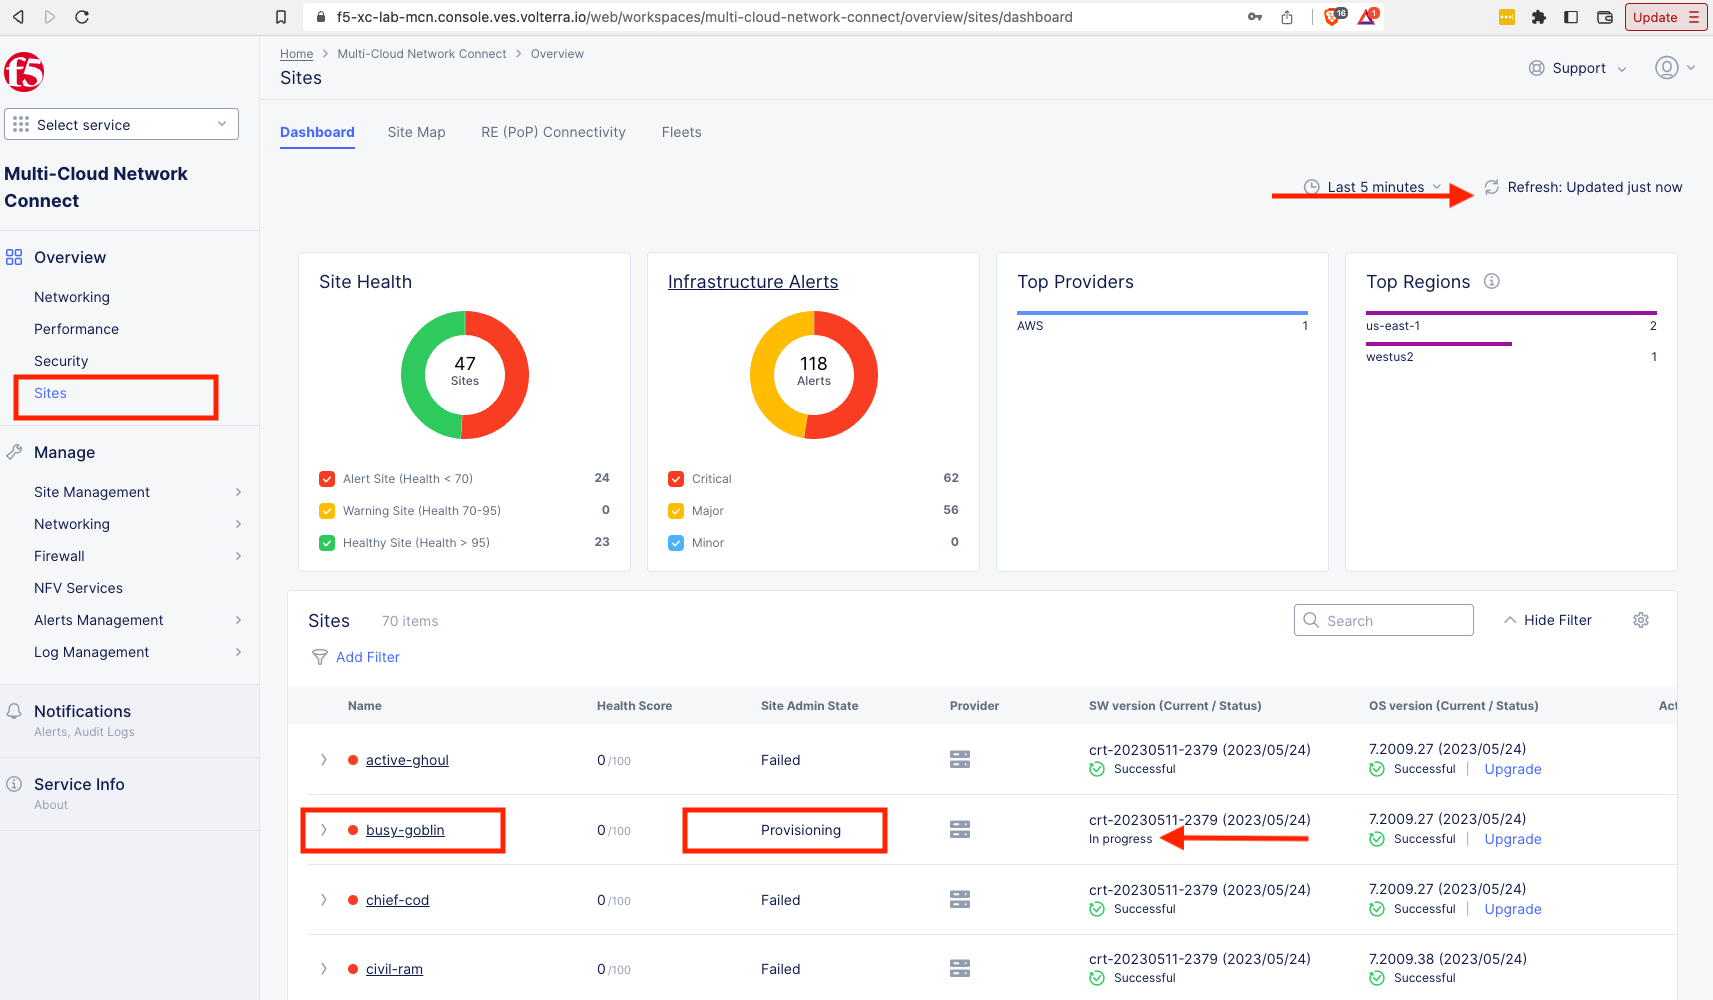
You should see the CE you just deployed on this list go through several phases of provisioning and you can observe the Site Admin State, Health Score, and Software Version and OS version. You may also observe the Health score going up and down as services are spun up and restarted.
Note
This step takes about 10 -15 minutes to complete and will finish up while we start our presentation and lecture.
The end result should look something like the following screen where the node is green at 100 percent health and has the latest software version.
Important
Do not move on to Lab 2 until the CE is fully provisioned and Online.