F5 Distributed Cloud > F5 Distributed Cloud - WAF Policy Supervisor Source | Edit on
Lab 1: Managing BIG-IP Advanced WAF with Policy Supervisor
Policy Supervisor is an online unified configuration solution for security policies, built with the purposes of managing and converting configuration across multiple F5 Web App Firewall solutions. It enables operators of F5 WAF technologies to easily convert policy files from BIG-IP AWAF, F5 Distributed Cloud WAF, and NGINX NAP formats. In the process Policy Supervisor generates and uses an intermediate JSON-based common declarative format called CDP (Common Declarative Policy) for policy lifecycle management. After a policy is converted to CDP, it can then be deployed to any supported WAF Solution, which is referred to as a Provider in Policy Supervisor lingo.
Please refer to the Tutorial in the GitHub repo (https://github.com/f5devcentral/ps-convert) for currently supported Provider types.
Policy Supervisor provides a graphical interface for visual policy creation, editing and management for traditional SecOps personas.
Task 1: Create a new Policy Supervisor Provider
The following steps will walk you through connecting Policy Supervisor to your BIG-IP WAF.
The first step is to create a Provider.
A Provider is a generic name used by Policy Supervisor to indicate an F5 Web App Firewall. The supported Provider types are: F5 Distributed Cloud WAF, BIG-IP Advanced WAF (AWAF), and NGINX Application Protection (NAP). Add and connect providers in Policy Supervisor to enable the deployment of your configuration policies across endpoints and load balancers for complete WAF protection.
When you add a BIG-IP instance as a provider, you must first set up an agent and associated secret on the private network to enable a secure connection between the BIG-IP instance and Policy Supervisor.
The agent must be connected to the same private network where the provider is running to ensure a secure connection between Policy Supervisor and the provider.
The agent machine must also have outbound Internet access for connectivity back to Policy Supervisor.
The Policy Supervisor Agent is a Linux binary that is first installed on this machine/VM and is registered using a unique token generated in the Policy Supervisor UI for your Policy Supervisor workspace only.
The Agent is used to create Secrets, which are stored in your environment only and are never transmitted outside of your network.
These secrets are used to connect to your BIG-IP AWAF or NGINX NAP instance to execute various policy-related functions within a Docker container environment on that machine/VM.
Note
Prerequisites:
Installation of the Policy Supervisor Agent requires the following applications to be installed on your Linux machine/VM:
Docker
wget
Access the F5 Policy Supervisor console at https://policysupervisor.io as instructed in the previous Introduction section of this lab guide.
Warning
Policy Supervisor uses the Microsoft Azure AD authentication service for login. You must have a valid Azure AD account to proceed with this lab.
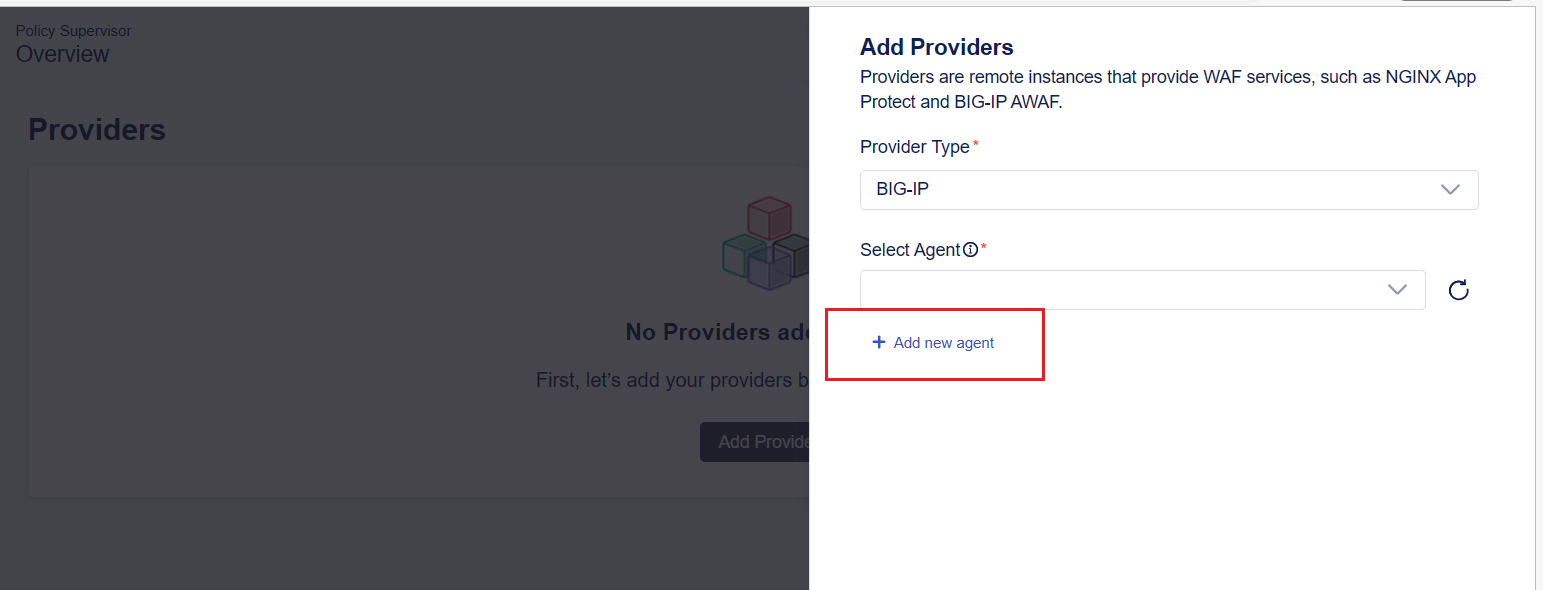
On the Overview > Providers page, click Add Provider. If this is the first provider being added, there are two Add Provider buttons on the screen. The Add Providers pane will appears.
|

There are no agents configure yet. Choose BIG-IP for the Provider Type and click + Add new agent that will appear below the Select Agent drowpdown after a Provider Type has been selected. The Add Agent pane will appear and a token will be automatically generated as a long text string.
|
Copy & paste (save) the value of the Token to a text file or notepad. (This token will be required in Task 2 below.)
|
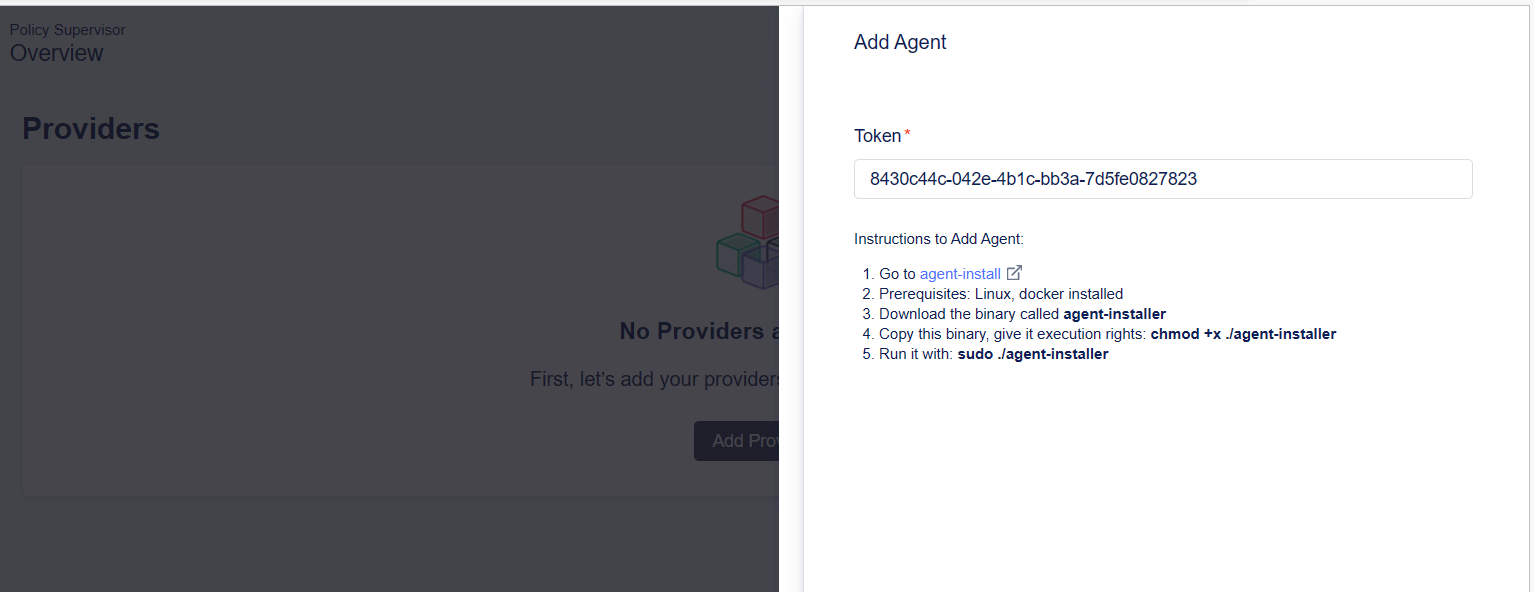
From within the Add Agent pane, locate and click the link to go to the agent-install page (step 1.). The corresponding GitLab repository page will open.
|
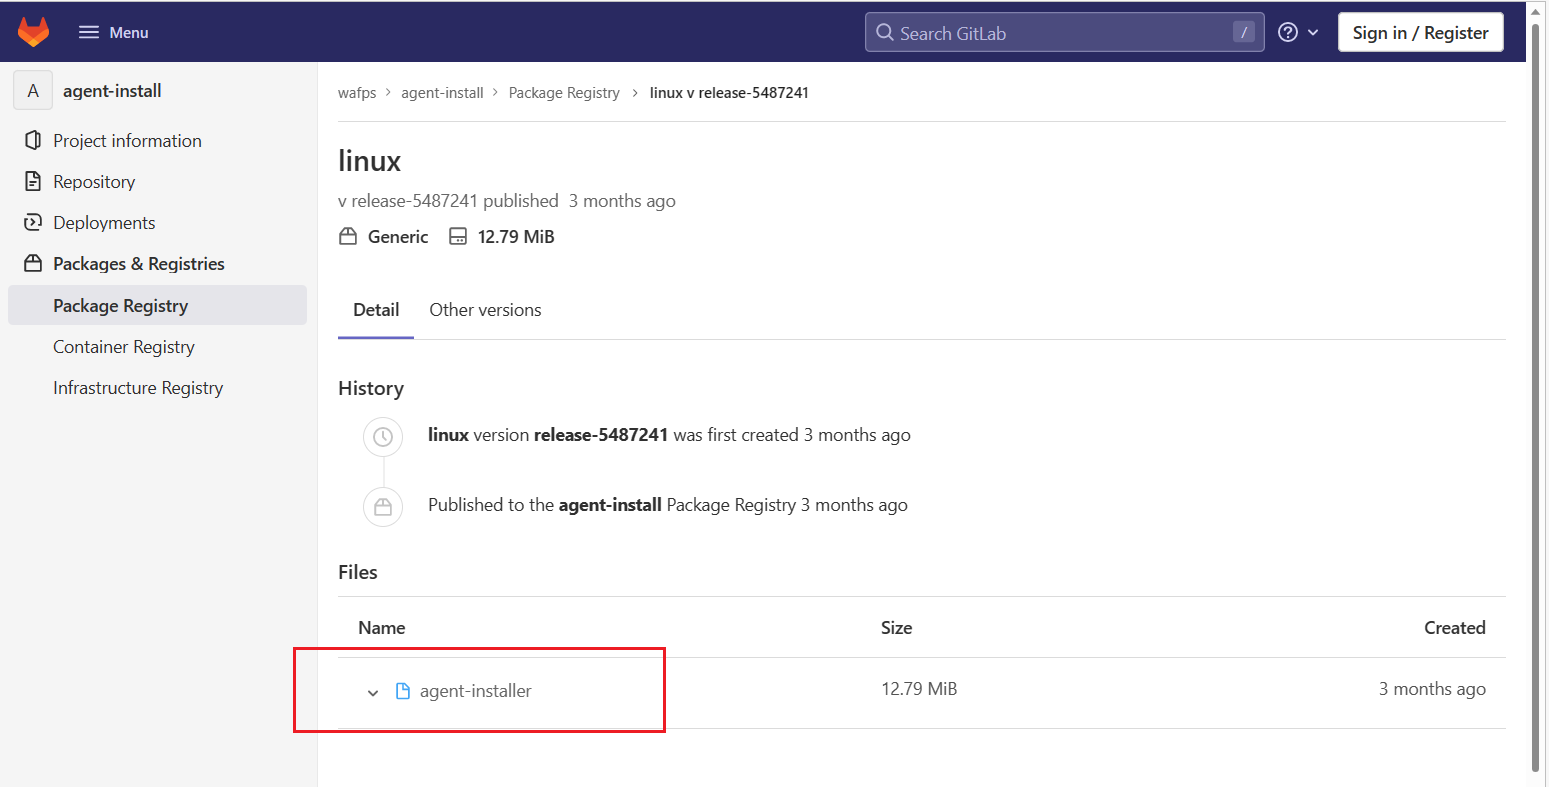
At the bottom of the Package Registry page, right-click on the agent-installer file name and select Copy Link. (This URL will be required in Task 2 below.)
Note
The URL for the agent-installer file changes from time to time when it is updated.
Task 2: Install a Policy Supervisor Agent
Next, we will use the token and the URL obtained in task 1 above to install the Agent on your UDF virtual lab environment. For this lab, the Agent must be installed on your SuperJumpHost Linux machine, which is connected to the same management network as your BIG-IP. The SuperJumpHost is pre-configured in your lab environment with permission to communicate with the Policy Supervisor across the Internet.
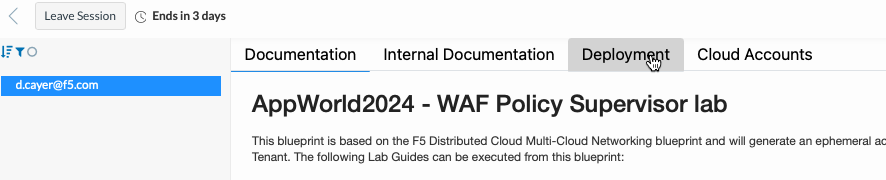
Browse to your lab session at https://udf.f5.com again and find the Deployment tab to see your virtual machines.
|
Find the SuperJumpHost system and click its ACCESS link to see a list of access options.
|
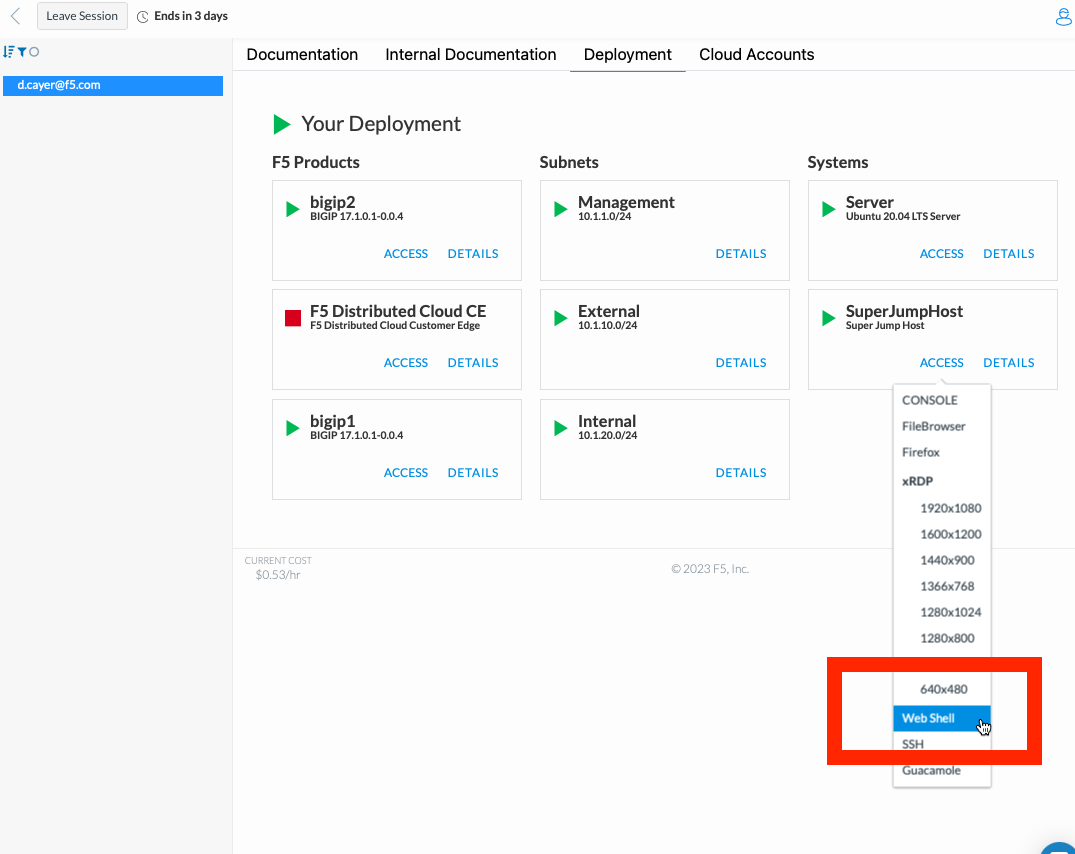
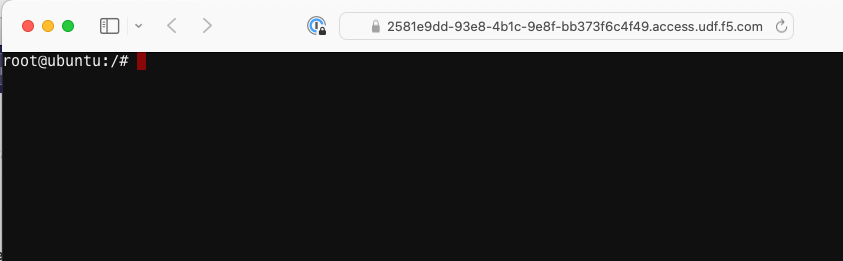
Select Web Sell to access the SuperJumpHost machine’s command line interface in a new browser tab. (You will be automatically logged in as root.)
|
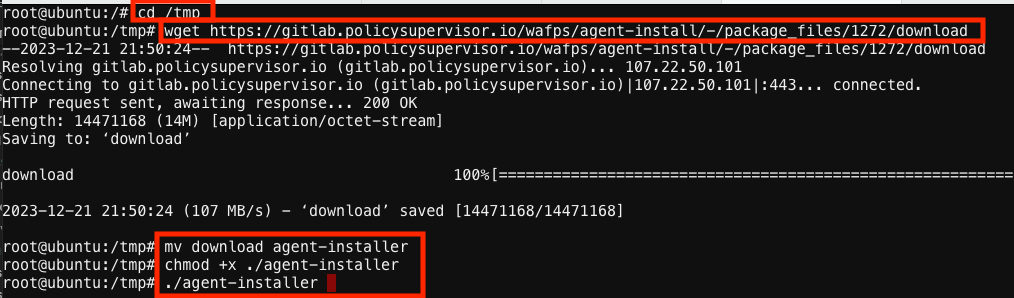
Set your working directory to /tmp with the “cd /tmp” linux command.
cd /tmp
Use the URL copied at step 5 above to download the installer via the command line: “wget <…insert URL from above Task 1 here…>”
wget <...insert URL here...>
After the download completes, rename the file with this linux command: “mv download agent-installer”
mv download agent-installer
Next, give the installer package execution rights to enable it to run: “chmod +x ./agent-installer”
chmod +x ./agent-installer
Run the agent installer by using the following command: “./agent-installer”
./agent-installer
|
Wait for the “Enter agent token” prompt and paste the token copied from Task 1 above. (command-V on a MAC, Ctrl-Shift-V on Windows)
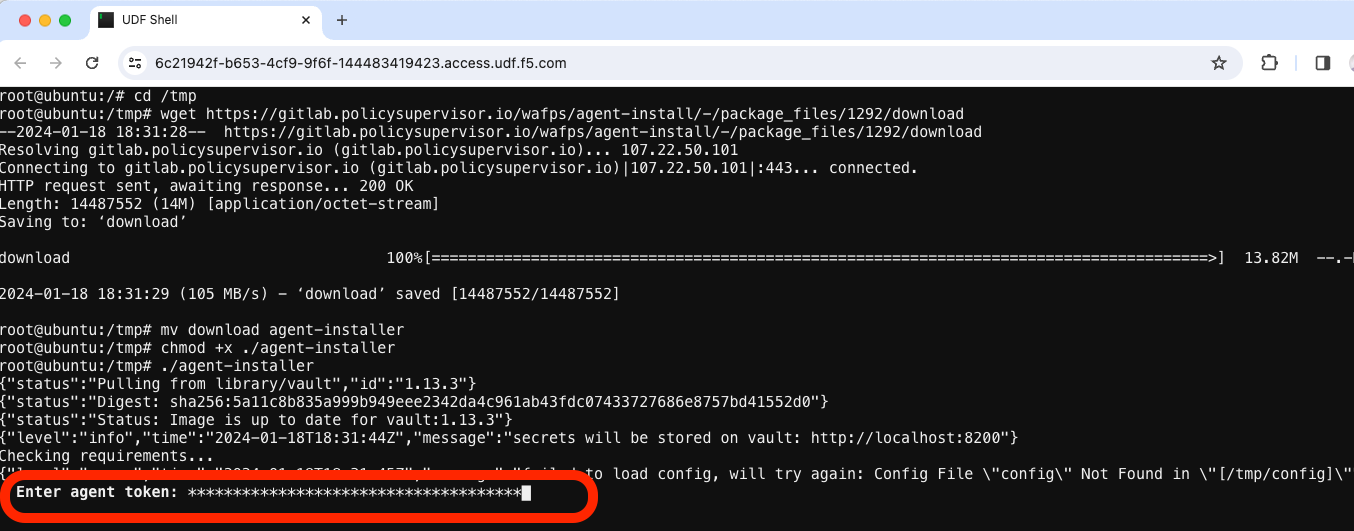
|
Paste the value of the Token obtained in Task 1 above.
|

Enter the name “udf” when prompted for the agent name. Wait for registration to complete successfully (takes a few minutes). You will be prompted to “Enter secret name”.
|
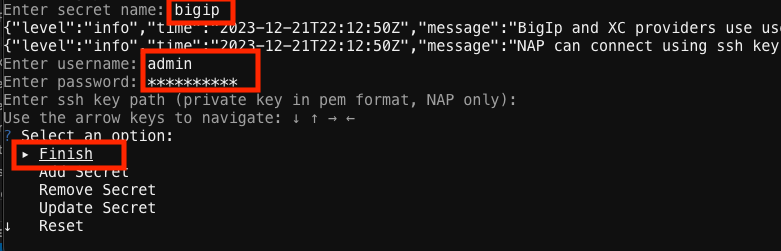
Select Add Secret and/or type “bigip” when prompted for the secret name. If the secret already exists, you must first select **Remove Secret* and delete it before attempting to add it again.*
Type “admin” when prompted for the username.
Type “Canada123!” when prompted for a password.
Press “Enter” when prompted for the ssh key path (we’re not using one in this demo).
Press “Enter” when prompted to select an option (choose the default “Finish” option).
Task 3: Finish adding a first provider in Policy Supervisor
The configuration of the new Provider can be completed now that the Agent is ready.
1. Go to https://policysupervisor.io again and click Done (return to the Add Provider Pane with BIG-IP selected for the Provider Type).
|
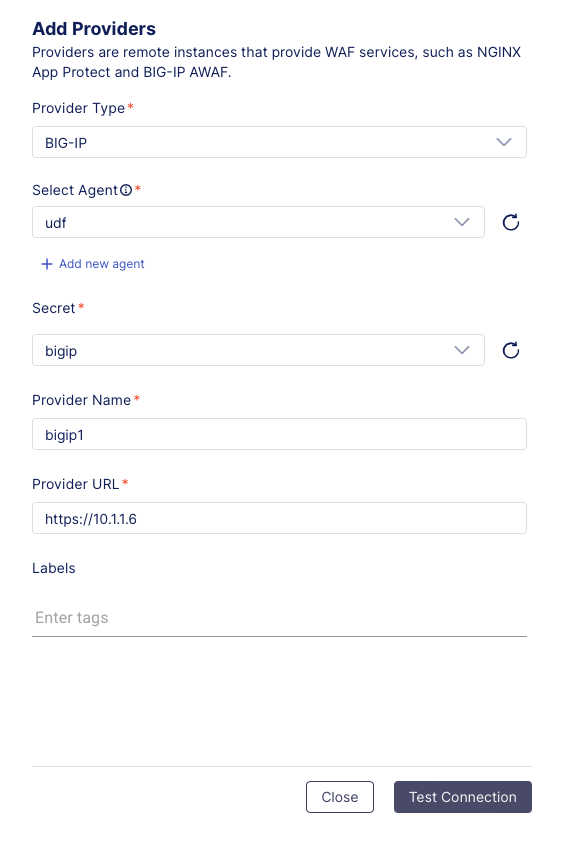
2. Select the new udf option that should now be visible on the dropdown list for the Agent field (the provider that was created in the previous task).
3. Choose the new bigip option that should now be visible on the drop-down list for the Secrets field (the secret that was created in the previous task) and click Continue.
The Provider Name and Provider URL fields will now appear.
Type “bigip1” for the Provider Name* and type “https://10.1.1.6” for the Provider URL as shown above.
Click the Test Connection button and wait for the tests to complete successfully.
Task 4: Add a 2nd BIG-IP provider in Policy Supervisor
We will re-use the same udf Agent and bigip Secret created in Task 2 above to manage the WAF policies on your 2nd BIG-IP because they are connected to the same management network in your UDF virtual lab environment.
Click the Add another Provider button to add the second BIG-IP appliance in your virtual lab environment.
|
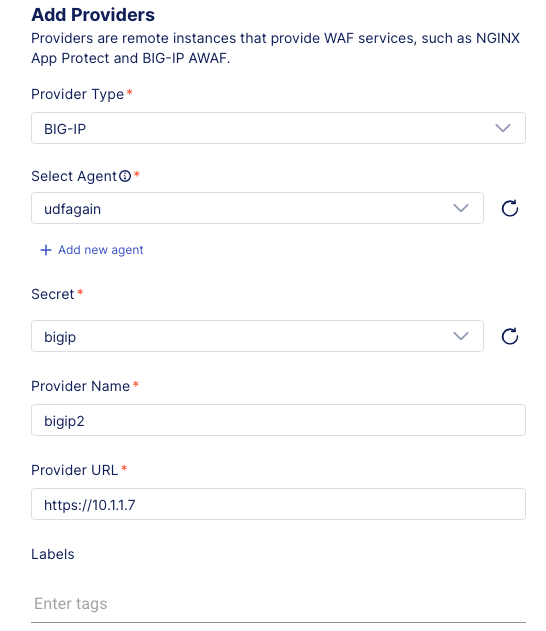
Select the BIG-IP option for the provider type.
Select the udf option for Agent.
Select the bigip option for Secret (the two BIG-IP’s have been configured with the same password).
Click Continue.
The Provider Name and Provider URL fields will now appear.
Type “bigip2” for the Provider Name and type “https://10.1.1.7” for the Provider URL.
Click the Test Connection button and wait for the tests to complete successfully.
Click the Go to overview link.
|
You now have two BIG-IP providers configured in Policy Supervisor.
Task 5: Ingest an existing BIG-IP WAF policy in Policy Supervisor
BIG-IP1 is already configured with a WAF policy attached to the web_app virtual server. Let’s ingest this WAF policy into Policy Supervisor.
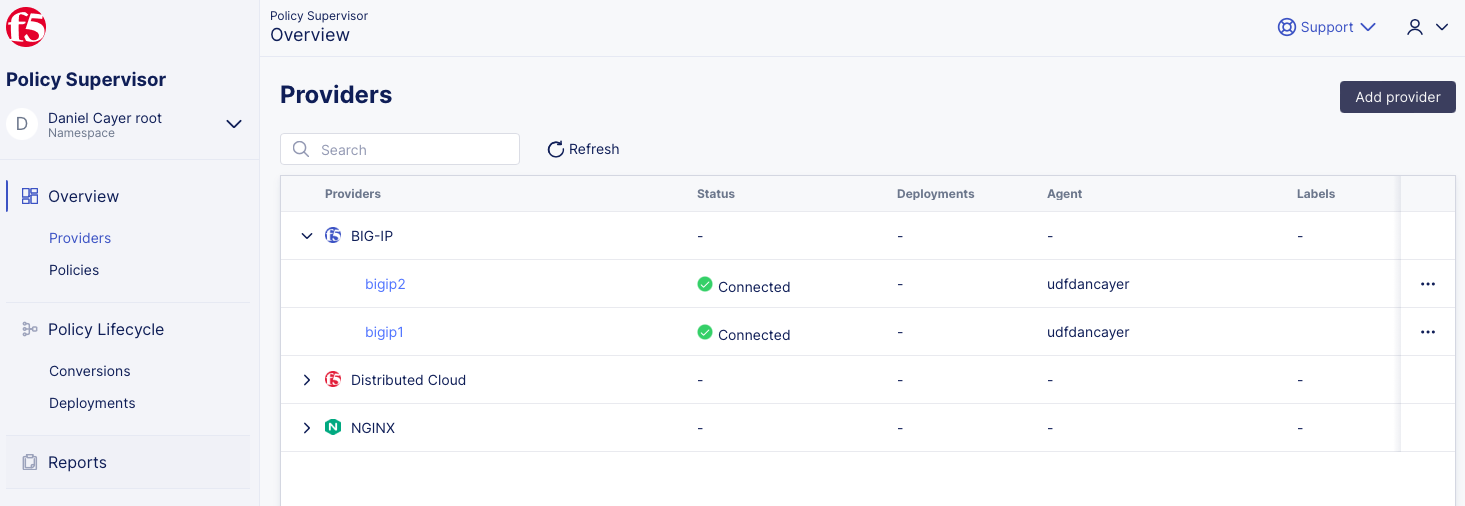
Start from the Providers Overview page.
|
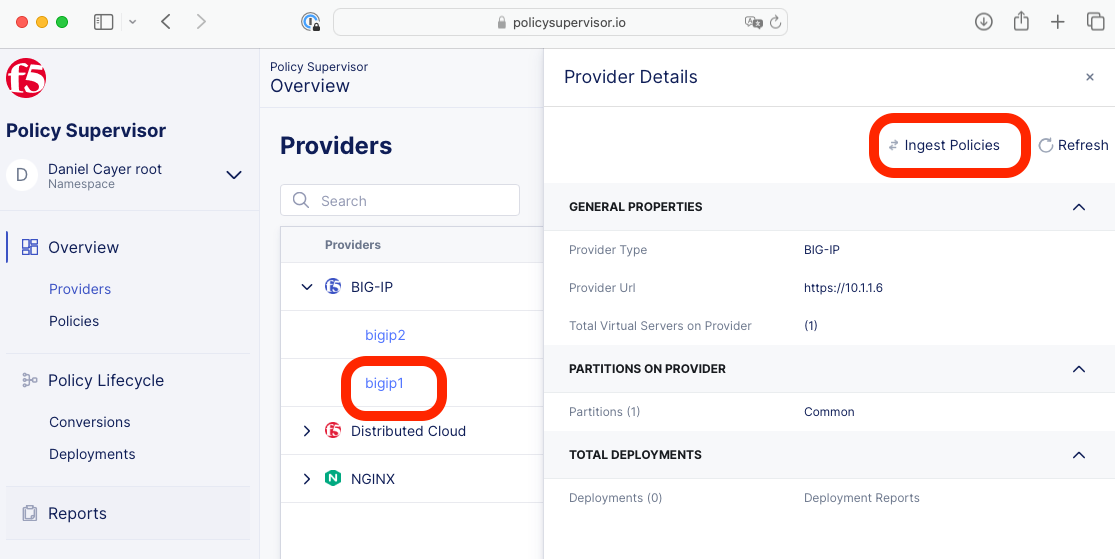
Click to select bigip1, then click Ingest Policies.
|
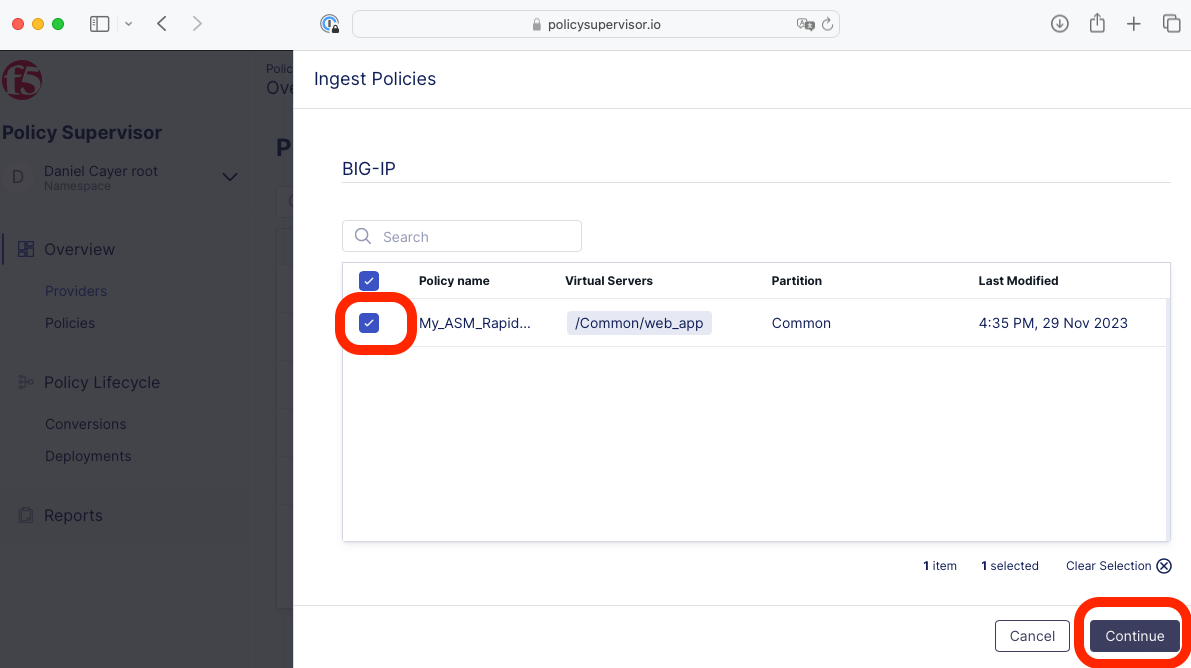
Select the discovered policy (i.e., My_ASM_Rapid…) and click Continue.
|
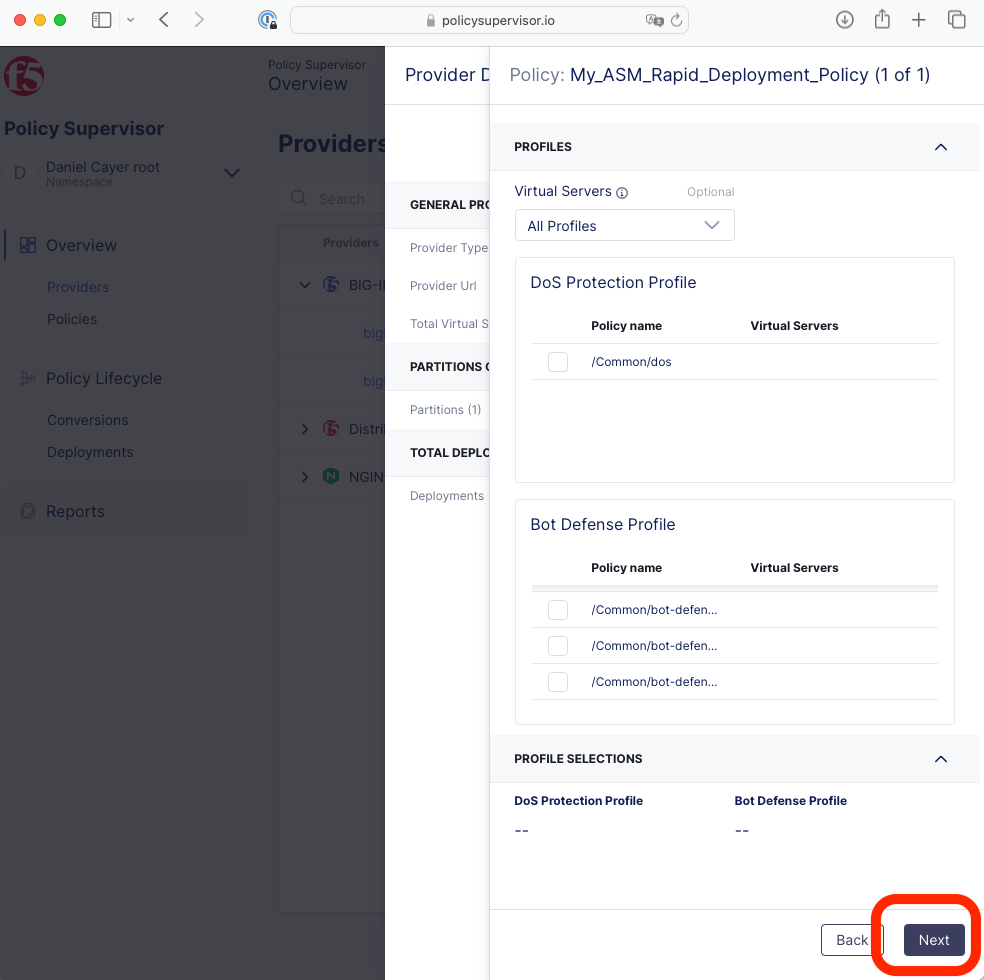
Click Next.
|
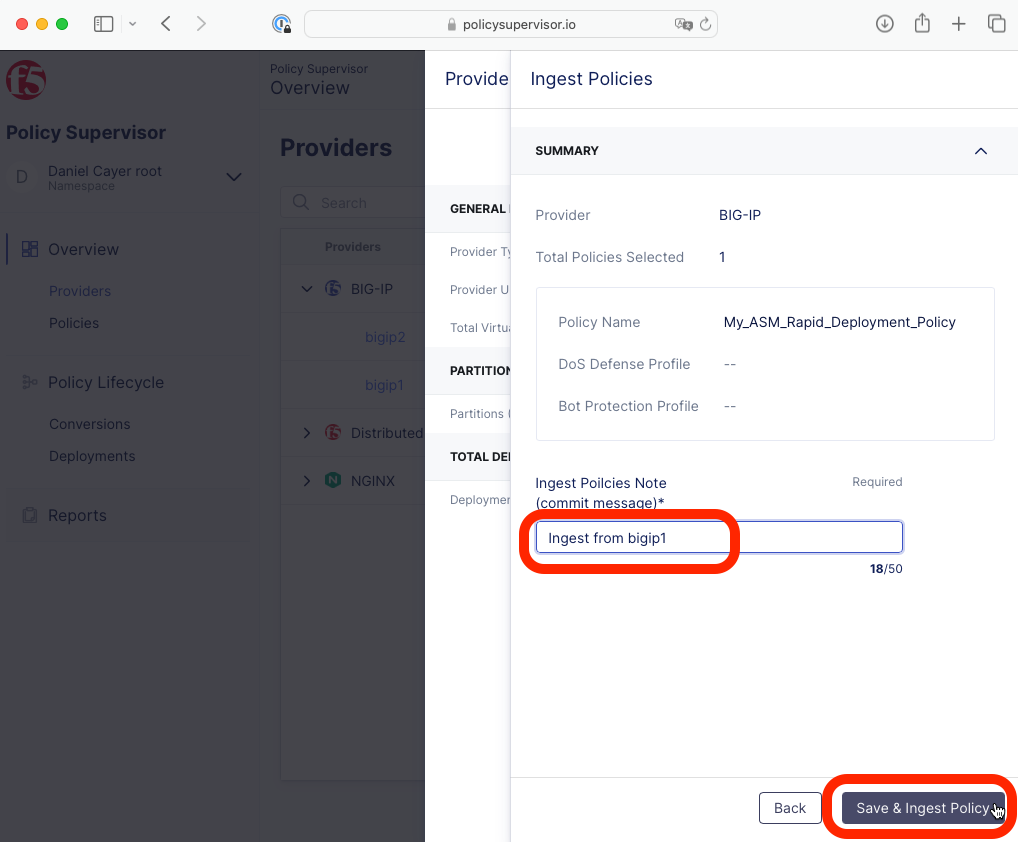
Type “Ingest from bigip1” for the required commit message,
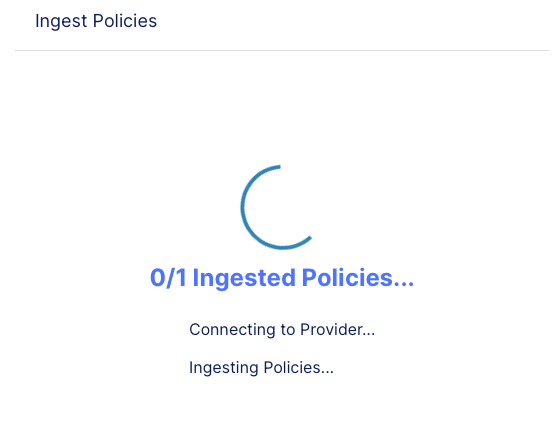
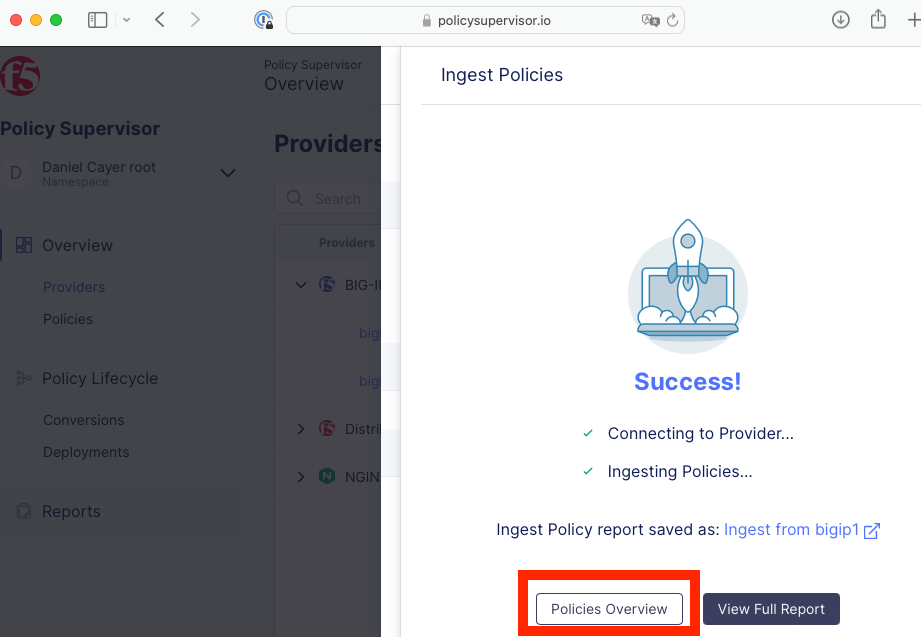
click Save & Ingest Policy, then wait for the ingestion to complete successfully.
|
|
Task 6 (optional): Import an existing BIG-IP WAF policy in Policy Supervisor
F5 WAF policies can be imported instead of ingested. This option is useful when the installation of a Policy Supervisor agent is not possible or when the BIG-IP appliance cannot be configured or managed as a Provider.
Browse to https://udf.f5.com again and find the Deployment tab to see your virtual machines.
|
Find bigip1 under F5 Products and click its ACCESS link to see a list of access options.
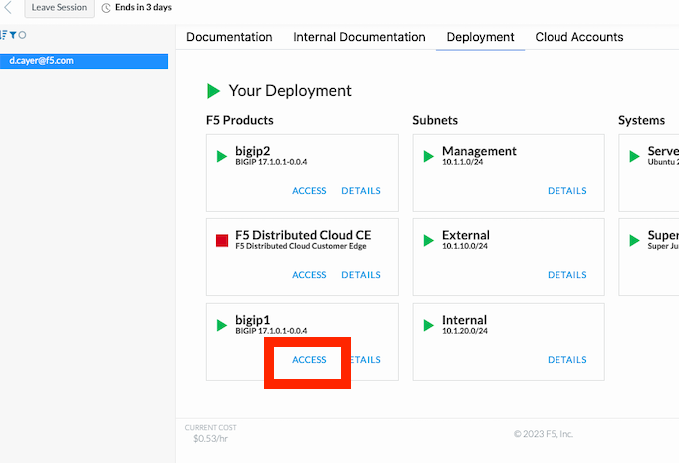
|
Select the TMUI option to opoen bigip1’s GUI management interface in a new browser tab.
|
Login with username “admin” and password “Canada123!”.
|
Click to the “Security -> Application Security -> Security Policies -> Policies List” page.

|
Click on your policy’s name (My_ASM_Rapid_Deployment_Policy).
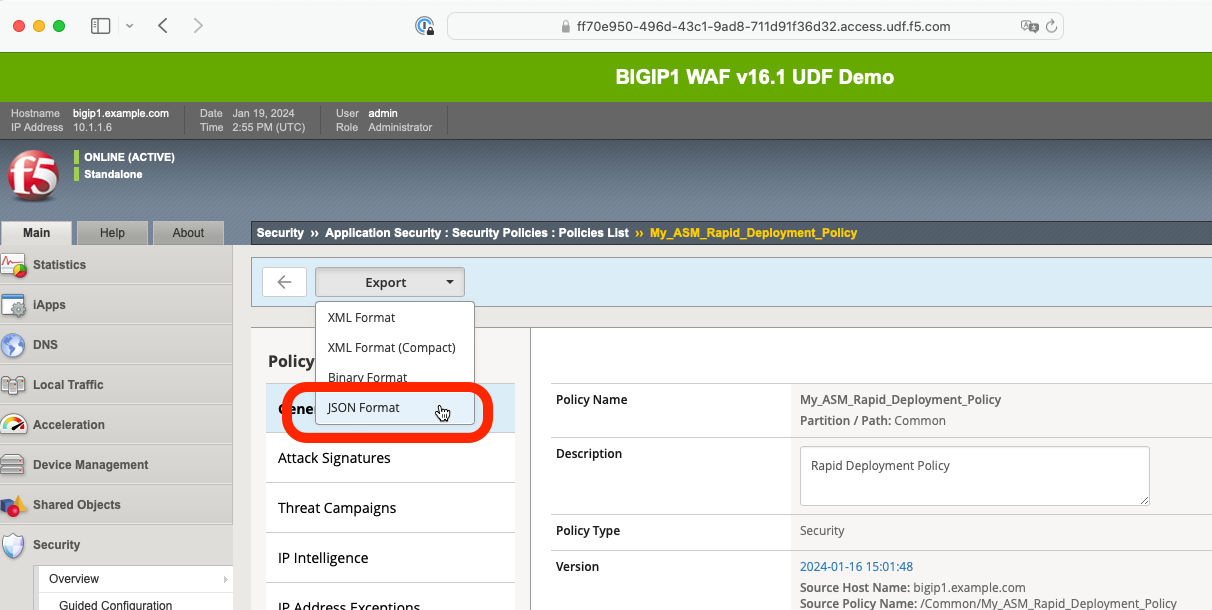
|
Click the EXPORT button and select the JSON Format option.
|
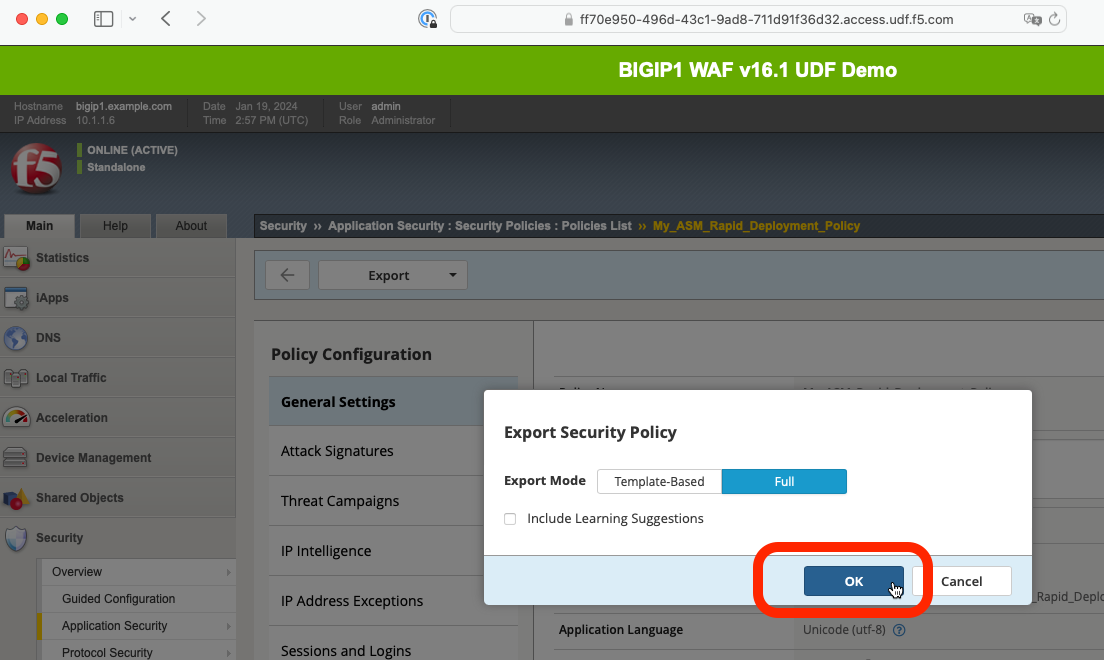
Click the OK button and wait a few momemts for the export process to complete.
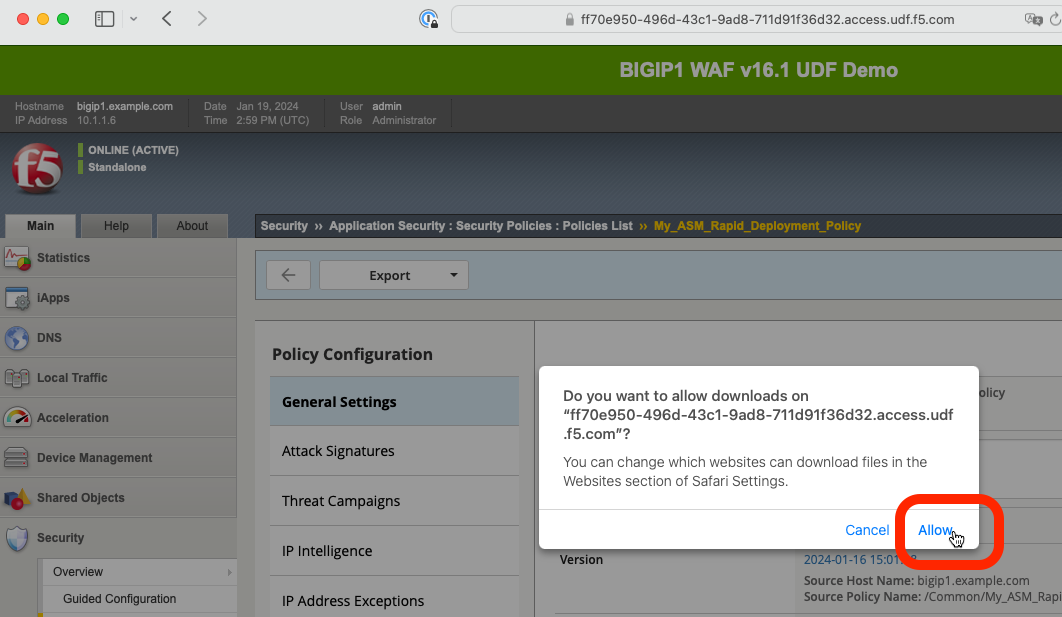
|
If prompted, click Allow to complete the download of the exported policy to your workstation. The resulting JSON file should now be in your Downloads folder.
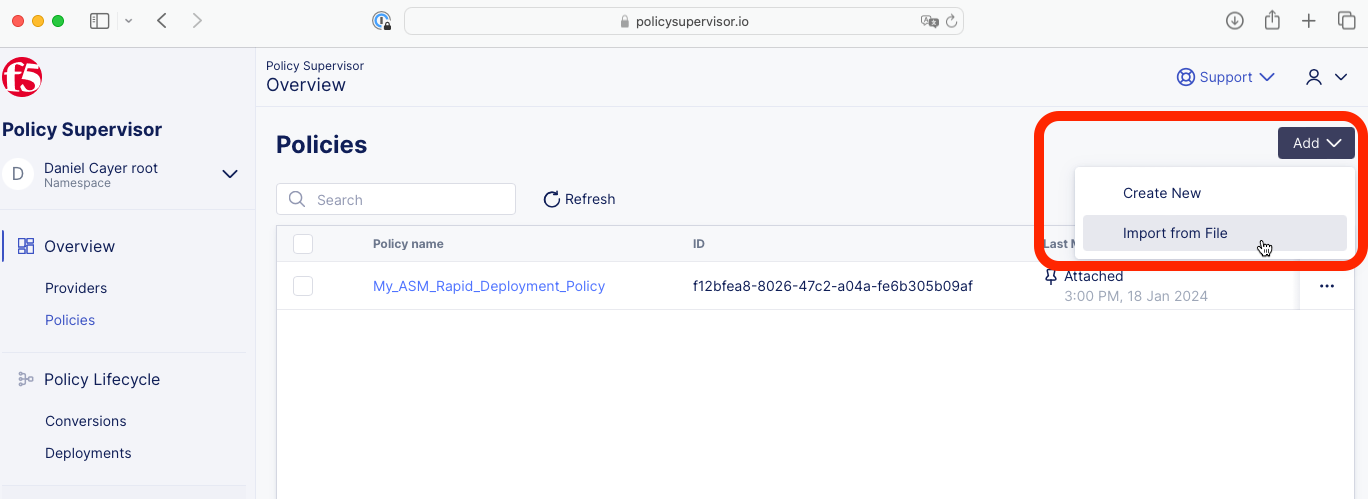
Browse back to the Policy Supervisor Policy Overview page (*https://policysupervisor.io/).
|
Click the Add button and select the Import from File option.
|
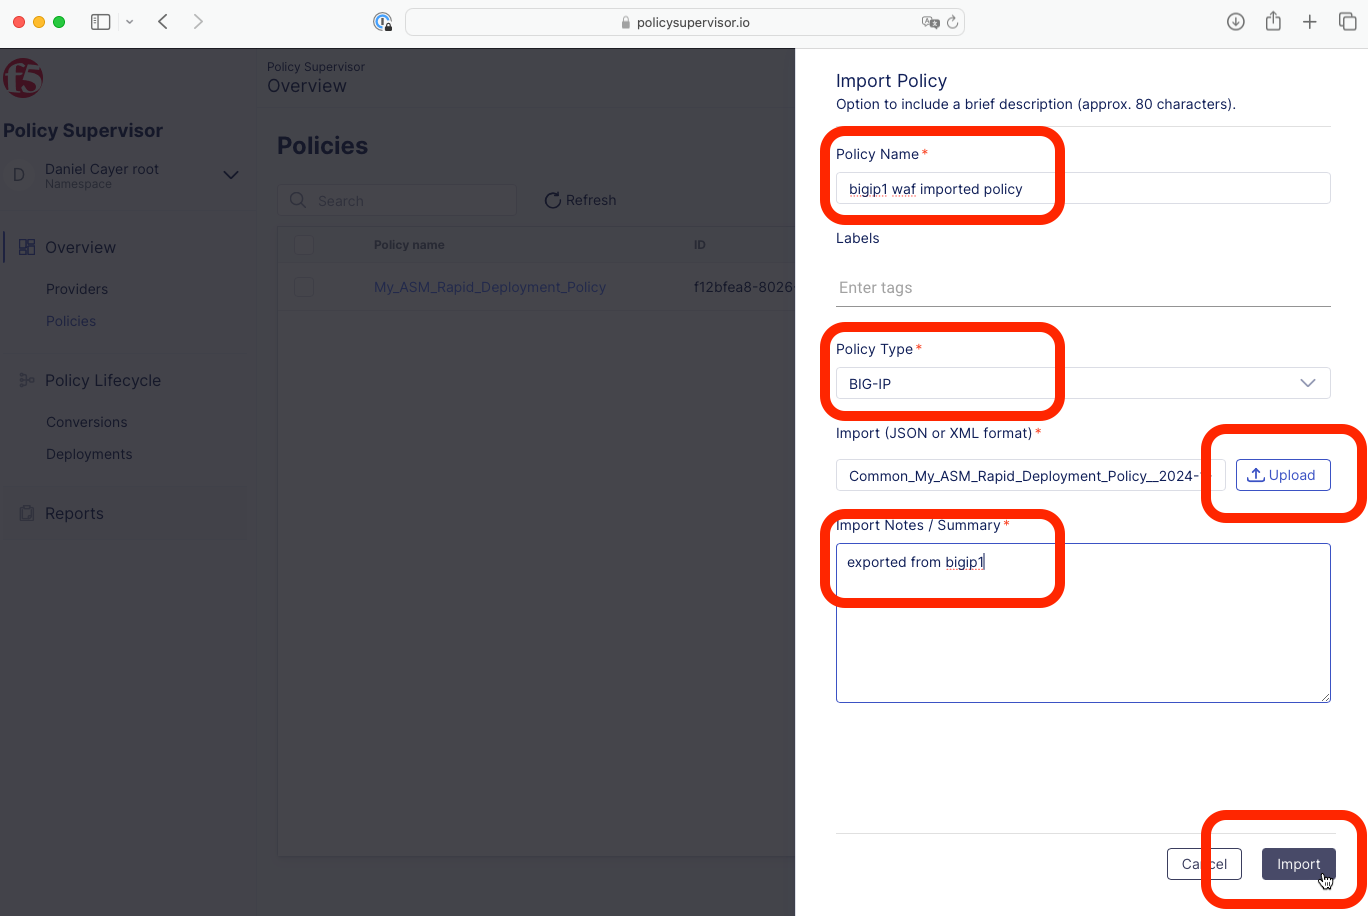
Enter a name in the Policy Name text box (for example: bigip1 waf imported policy).
Select the BIG-IP option form the Policy Type dropdown list.
Click the Upload button, then locate and select the previously downloaded JSON file.
Enter a note in the Import Notes / Summary text box.
Click the Import button.
|
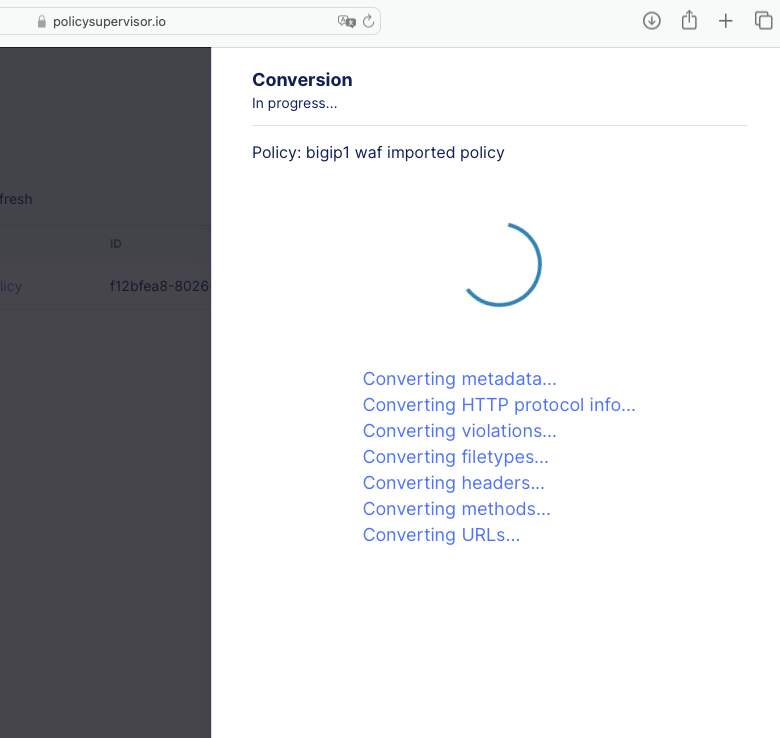
Wait for the import process to complete.
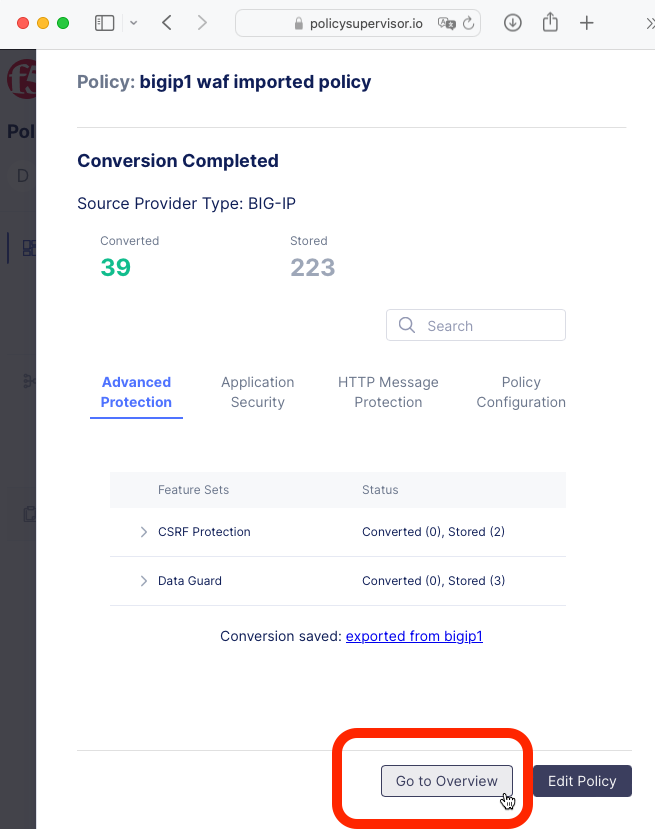
|
Click the Go to Overview button.
|
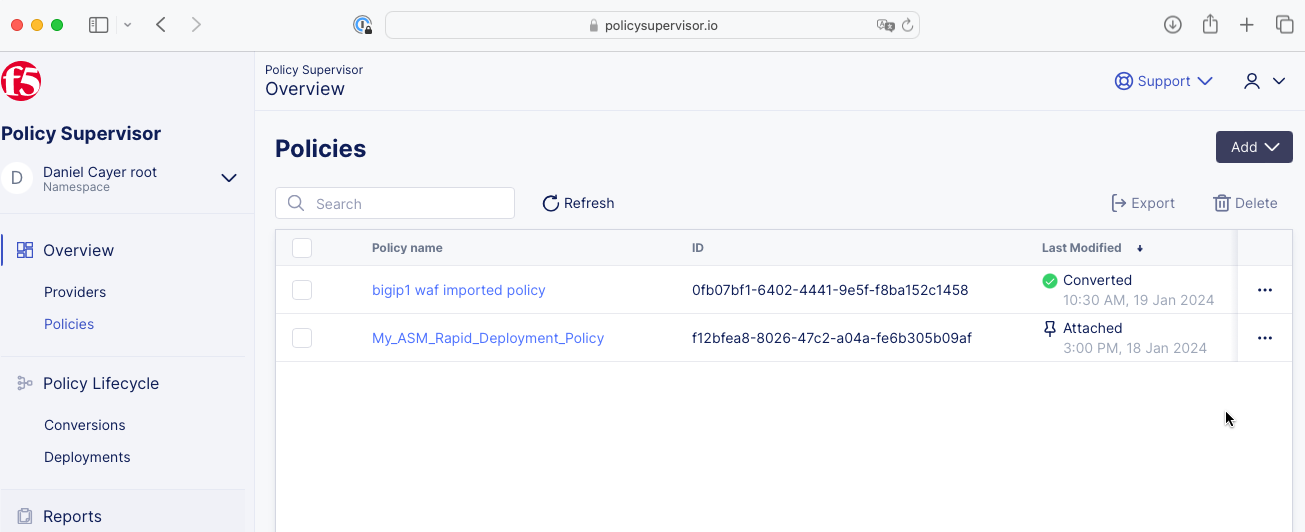
The imported WAF policy will be listed on the Policies Overview page as shown in the screenshot image above, which shows two WAF policies: one that was just imported in the steps above and the other was previously imported using the Ingest method.
Task 7: Deploy a WAF policy to a BIG-IP
In Policy Supervisor, browse to the Policies Overview page.
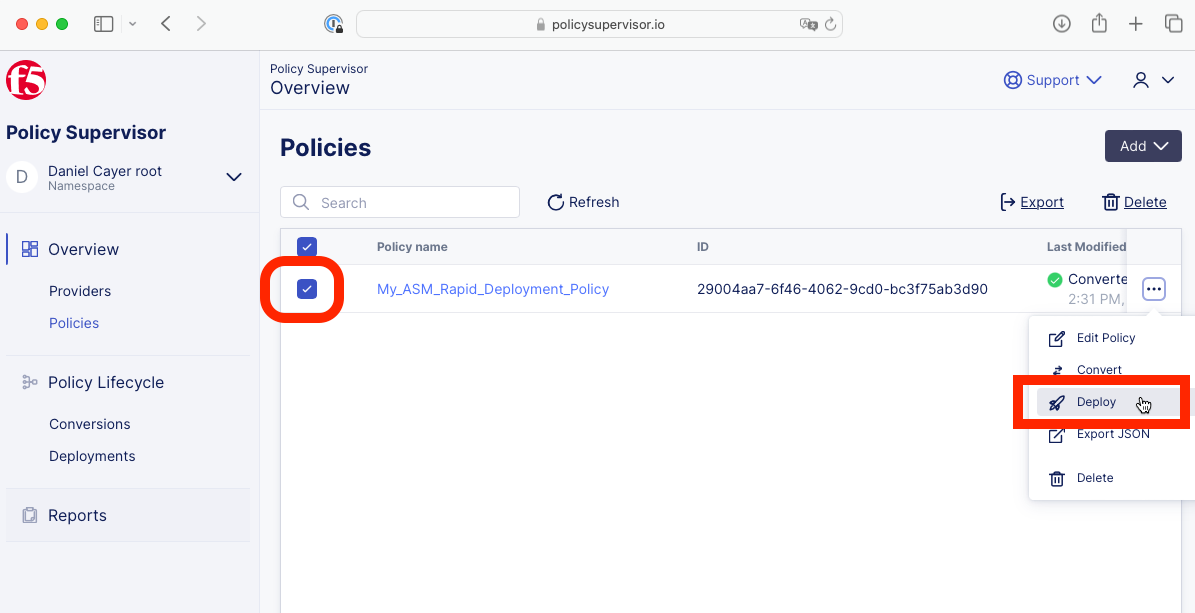
|
|
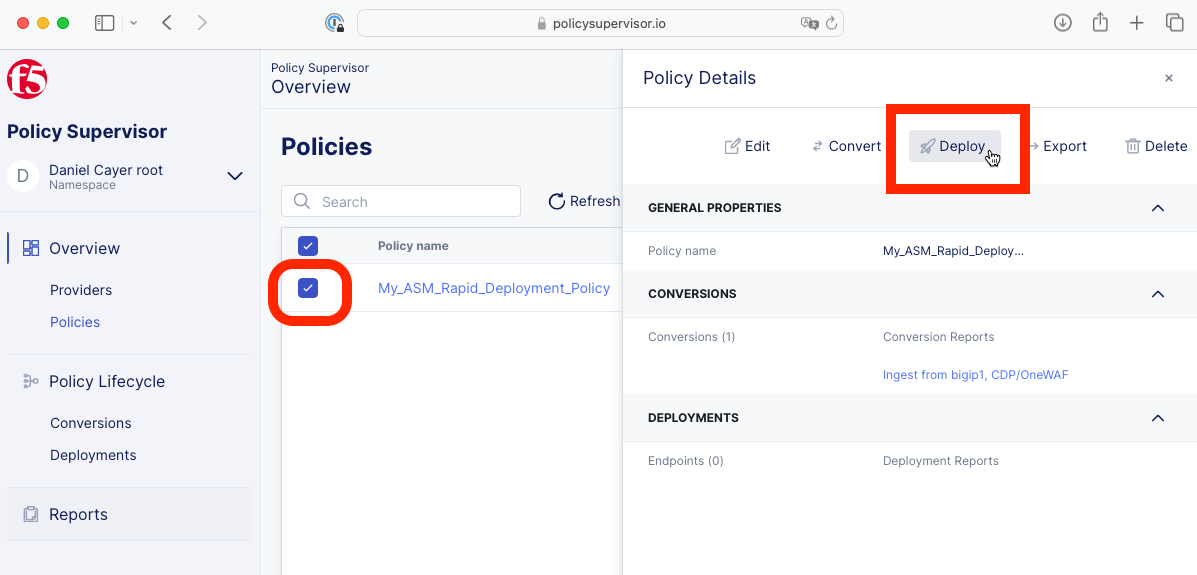
Select a policy then find and click on the Deploy button.
|
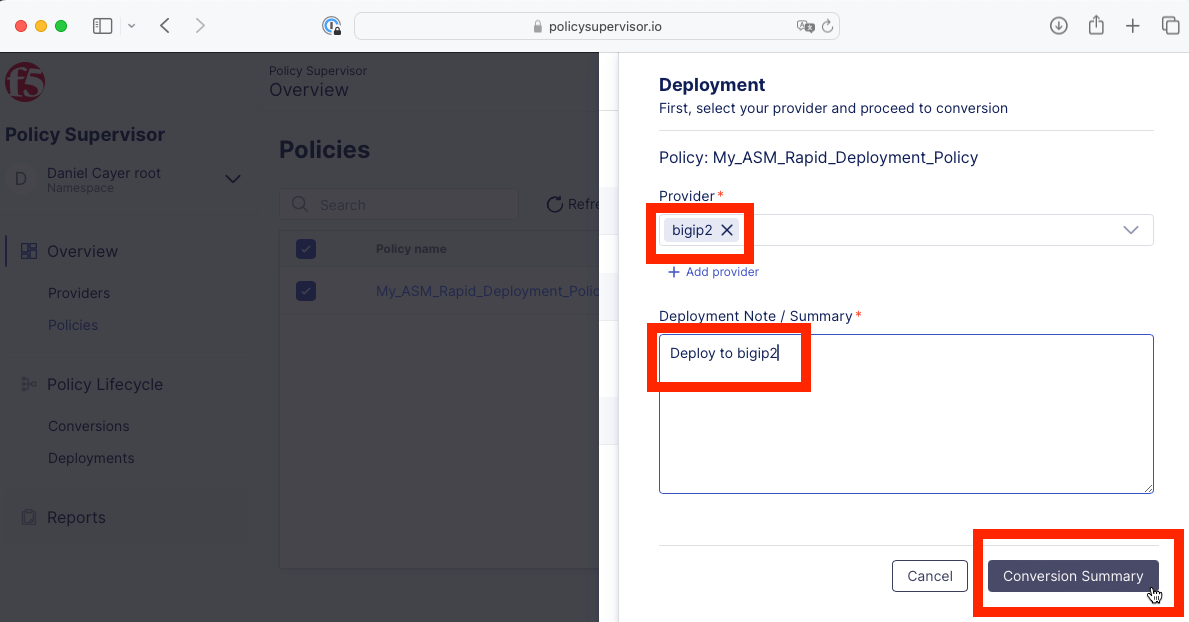
Select bigip2 option from the Provider options and type “Deploy to bigip2” in the mandatory commit message text box and click the Conversion Summary button.

|
Wait for the Conversion Summary screen to appear.
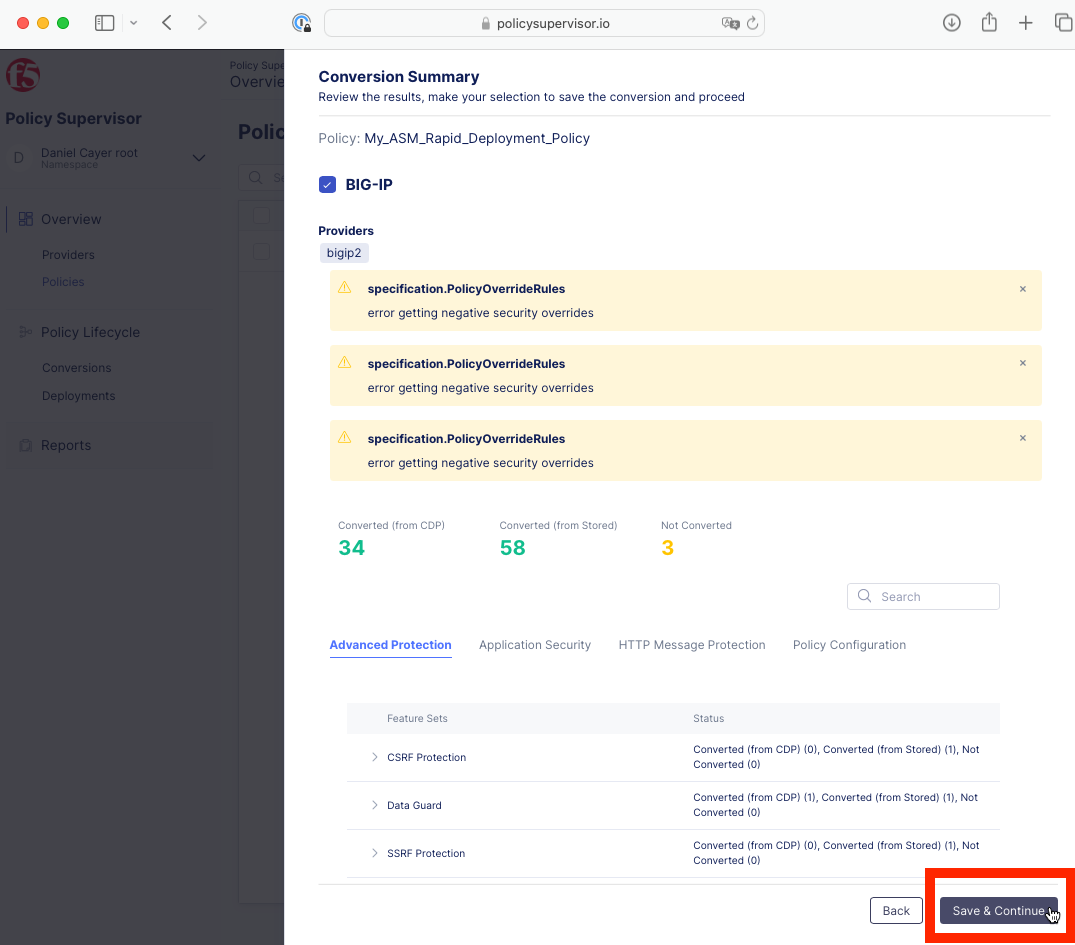
|
Click the Save & Continue button.
|
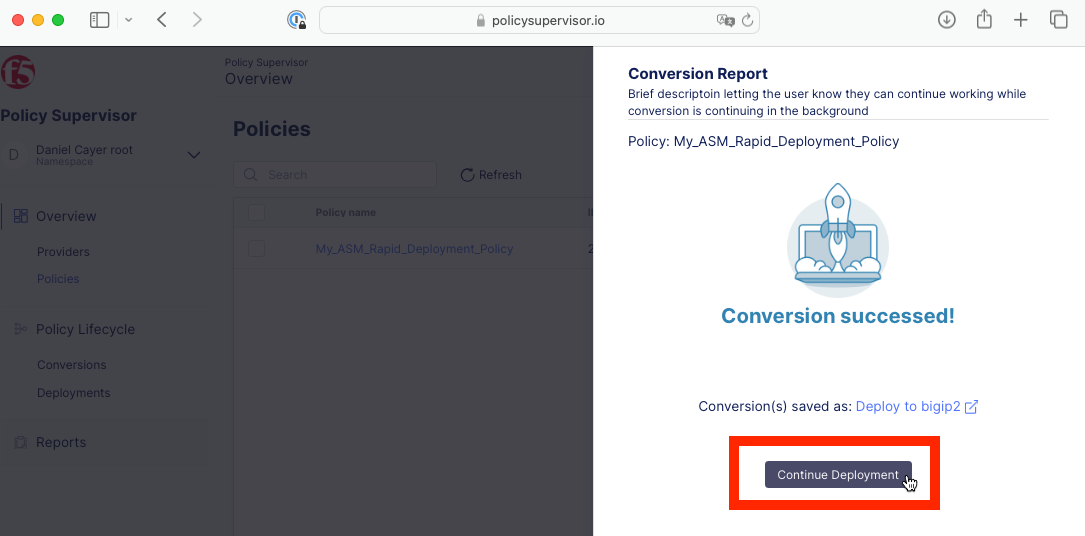
Click the Continue Deployment button on the Conversion Report screen that appears.
|
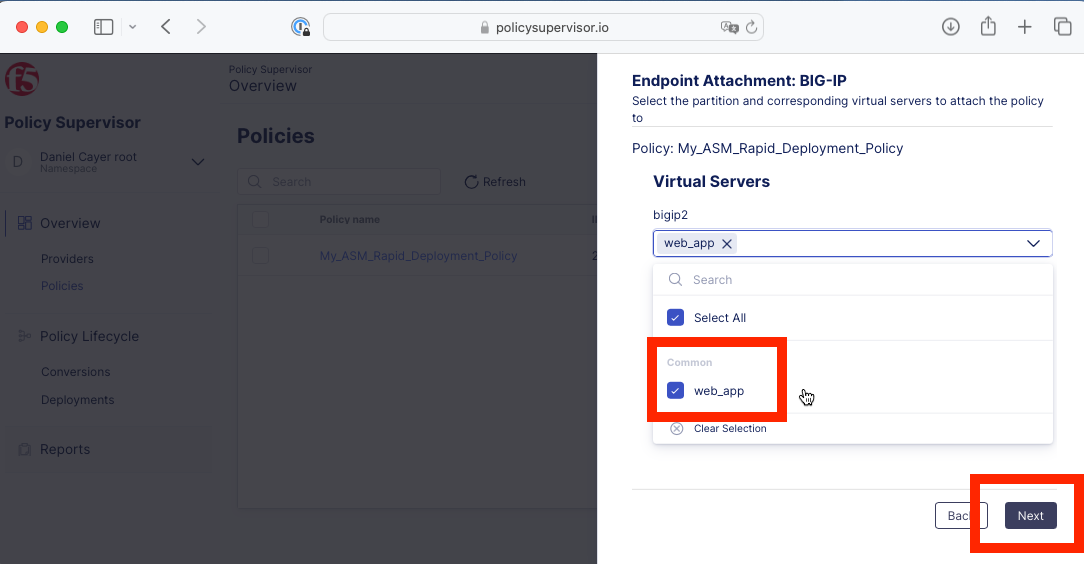
Select the web_app virtual server from the dropdown list and click the Next button.
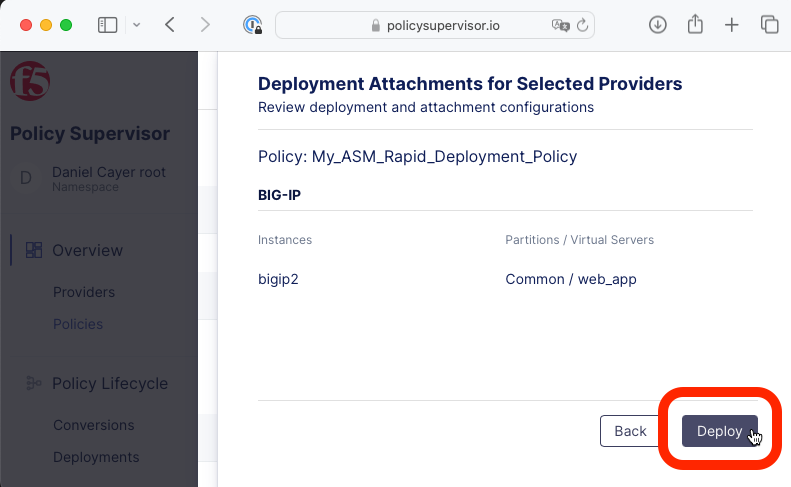
|
Click the Deploy button.
|
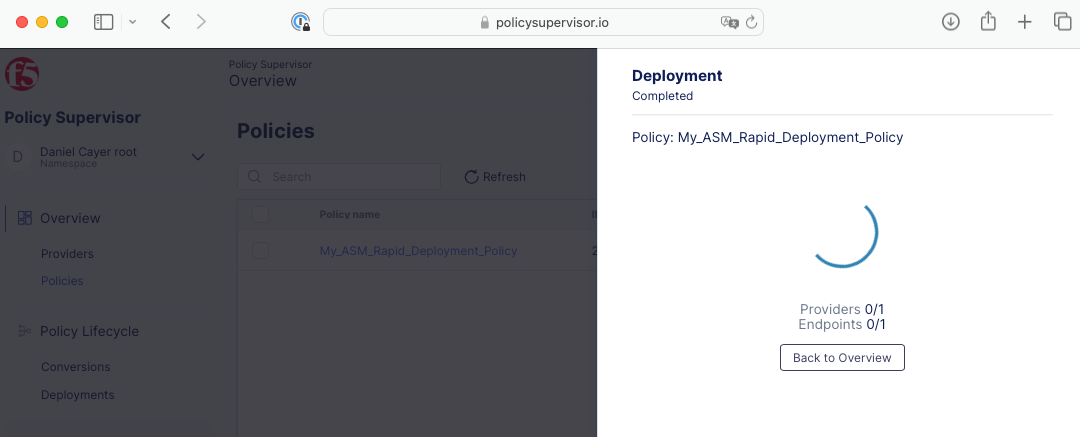
|
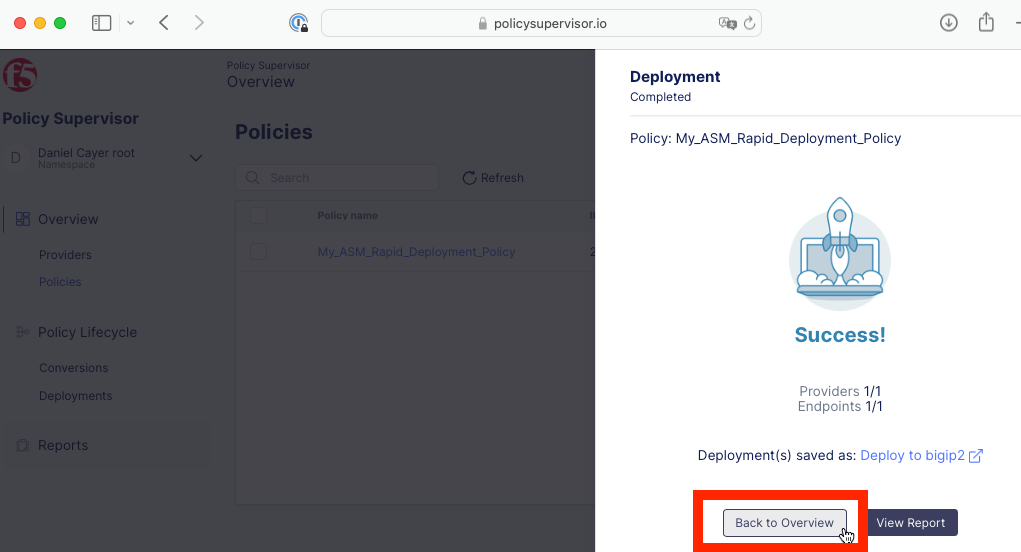
Wait for the deployment to successfully complete. and click the Back to Overview button.
|
|
Task 8: Confirm successful deployment of the WAF policy on BIG-IP2
Note
The password for the admin account on your BIG-IP appliances is set to Canada123!
Browse to https://udf.f5.com again and find the Deployment tab to see your virtual machines.
|
Find bigip2 under F5 Products and click its ACCESS link to see a list of access options.
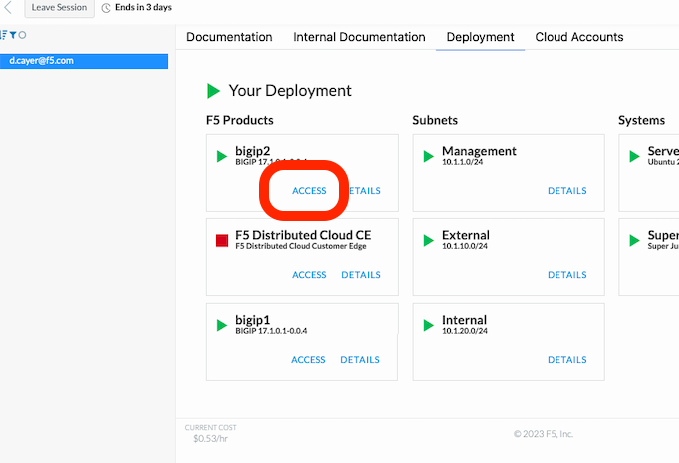
|
Select the TMUI option to opoen bigip2’s GUI management interface in a new browser tab.
|
|
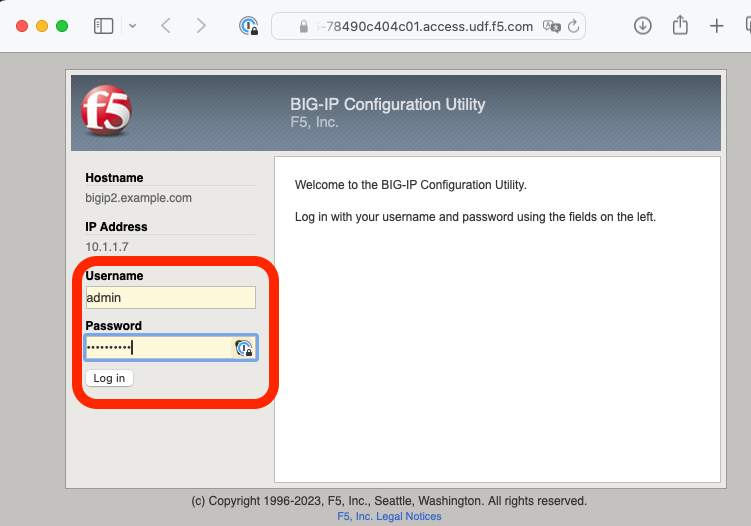
Login with username “admin” and password “Canada123!”.
|
|
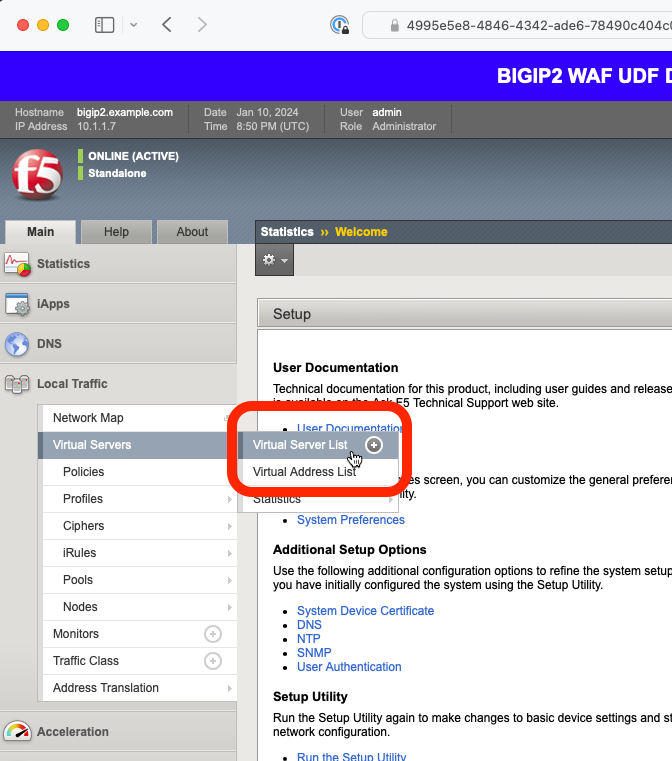
Browse to the virtual servers list page.
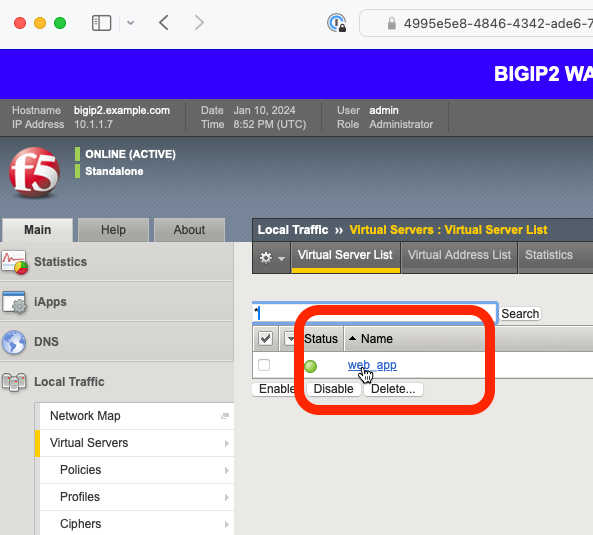
|
Click on the web_app name to view the virtual sever’s properties page.
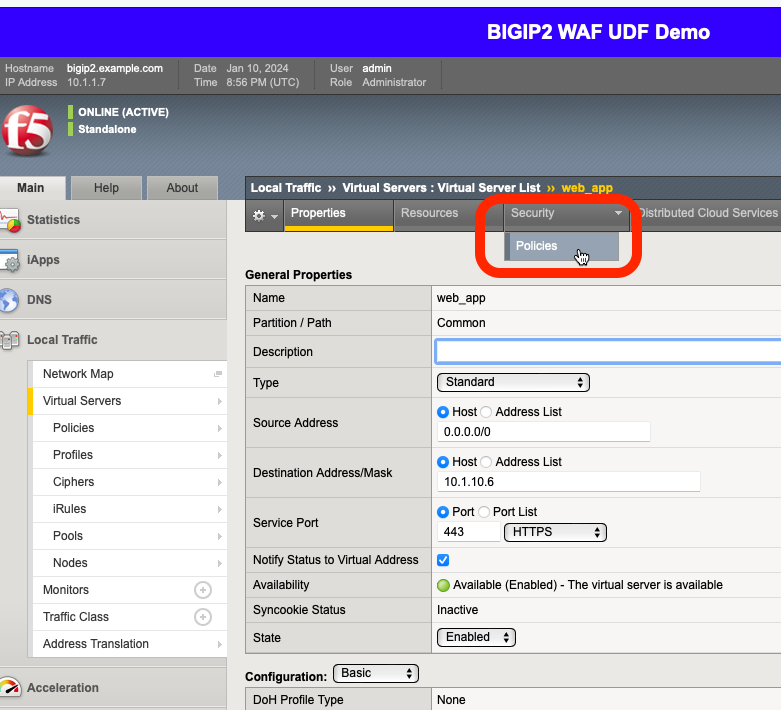
|
Browse to the virtual sever’s Security -> Policies page.
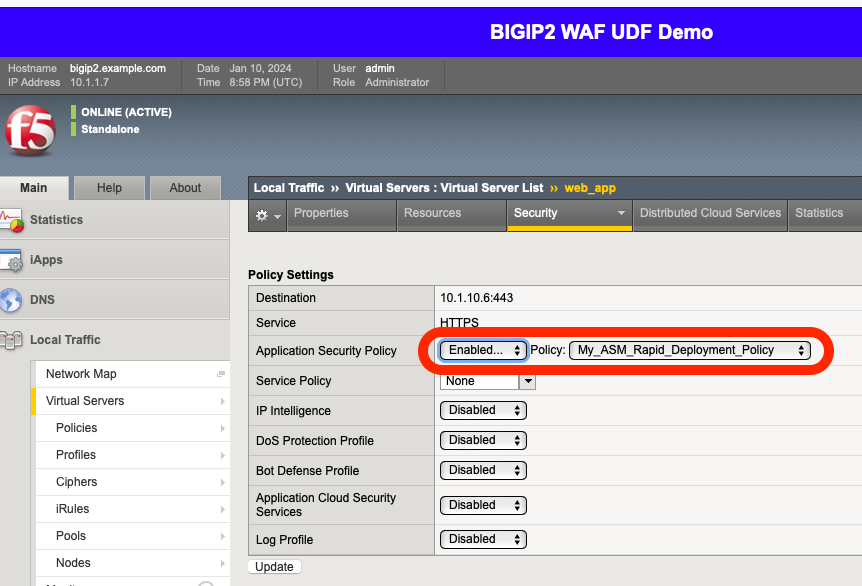
|
Observe that the Application Security Policy (e.g., the WAF policy) is Enabled.
WELL DONE!!!
In the next lab we will deploy a WAF policy ingested from a BIG-IP appliance to an F5 Distributed Cloud WAF.
|