F5 Distributed Cloud > F5 Distributed Cloud - WAF Policy Supervisor Source | Edit on
Lab 2: Managing F5 Distributed Cloud WAF with Policy Supervisor
Policy Supervisor is an online unified configuration solution for security policies, built with the purposes of managing and converting configuration across multiple F5 Web App Firewall solutions. It enables operators of F5 WAF technologies to easily convert policy files from BIG-IP AWAF, F5 Distributed Cloud WAF, and NGINX NAP formats. In the process Policy Supervisor generates and uses an intermediate JSON-based common declarative format called CDP (Common Declarative Policy) for policy lifecycle management. After a policy is converted to CDP, it can then be deployed to any supported WAF Solution, which is referred to as a Provider in Policy Supervisor lingo.
Please refer to the Tutorial in the GitHub repo (https://github.com/f5devcentral/ps-convert) for currently supported Provider types.
Policy Supervisor provides a graphical interface for visual policy creation, editing and management for traditional SecOps personas.
Note
The ephemeral accounts that are created in Distributed Clound for students of this lab do not have sufficient privileges/rights to configure Policy Supervisor as described in this lab. The steps below are therefore provided here for demonstration purposes only.
Task 1: Obtain an authentication token for your F5 Distributed Cloud tenant
A valid F5 Distributed Cloud authentication token before it can be added as a provider.
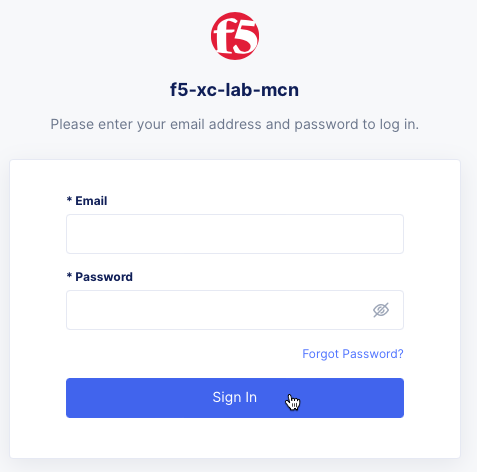
1- Browse to your Distributed Cloud console (for example: https://f5-xc-lab-mcn.console.ves.volterra.io) and sign as described in the introduction section of this lab guide.
|
2- Click Sign In
|
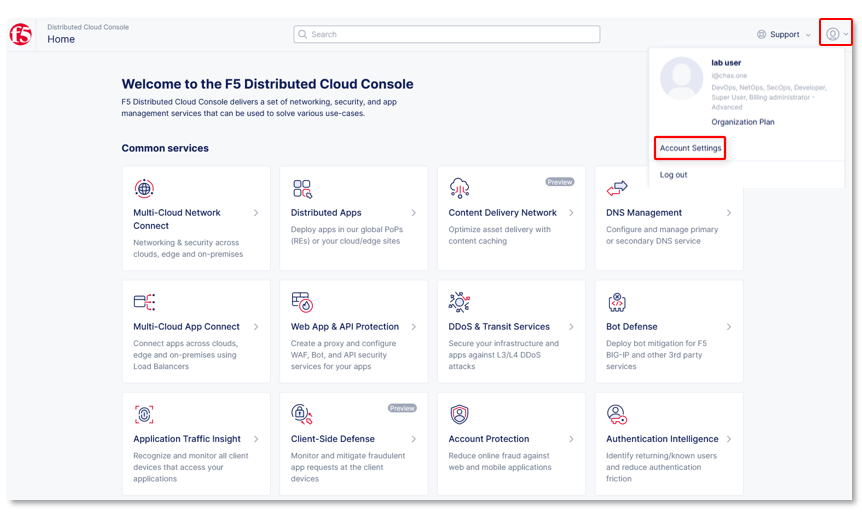
3- Click your profile icon at the top right corner of the page and select Account Settings.
|
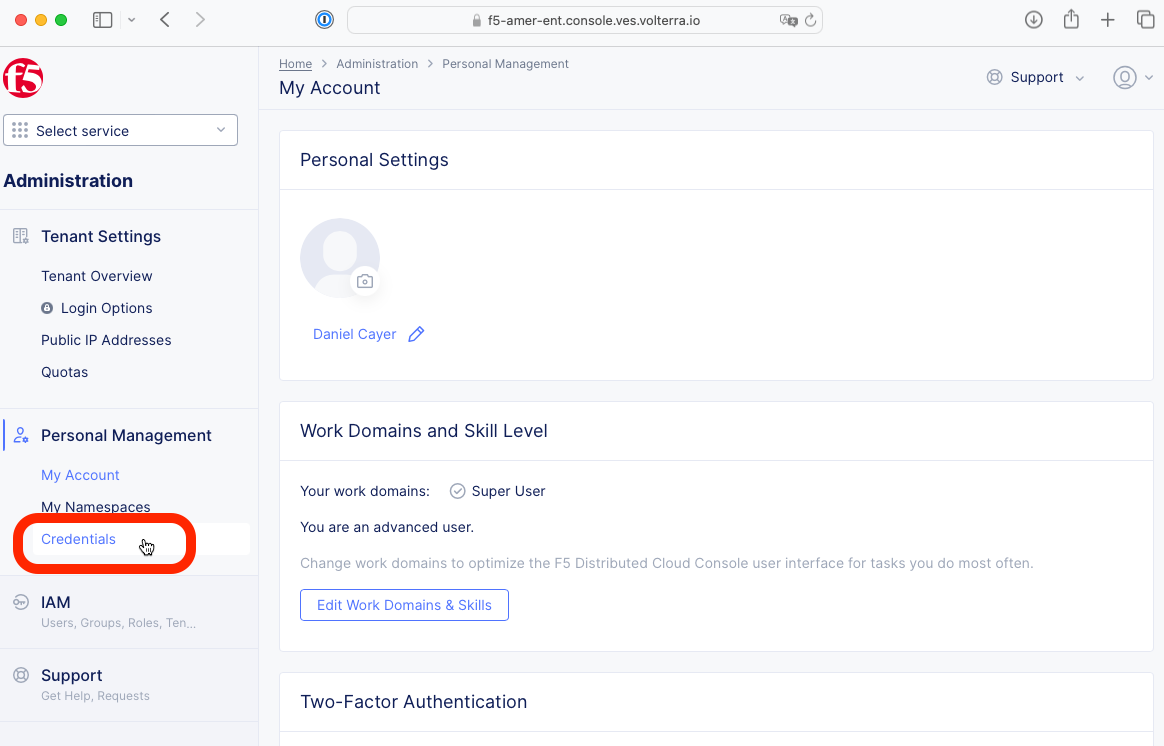
4- Find and click on Credentials under the Personal Management section on the left side of the page.
|
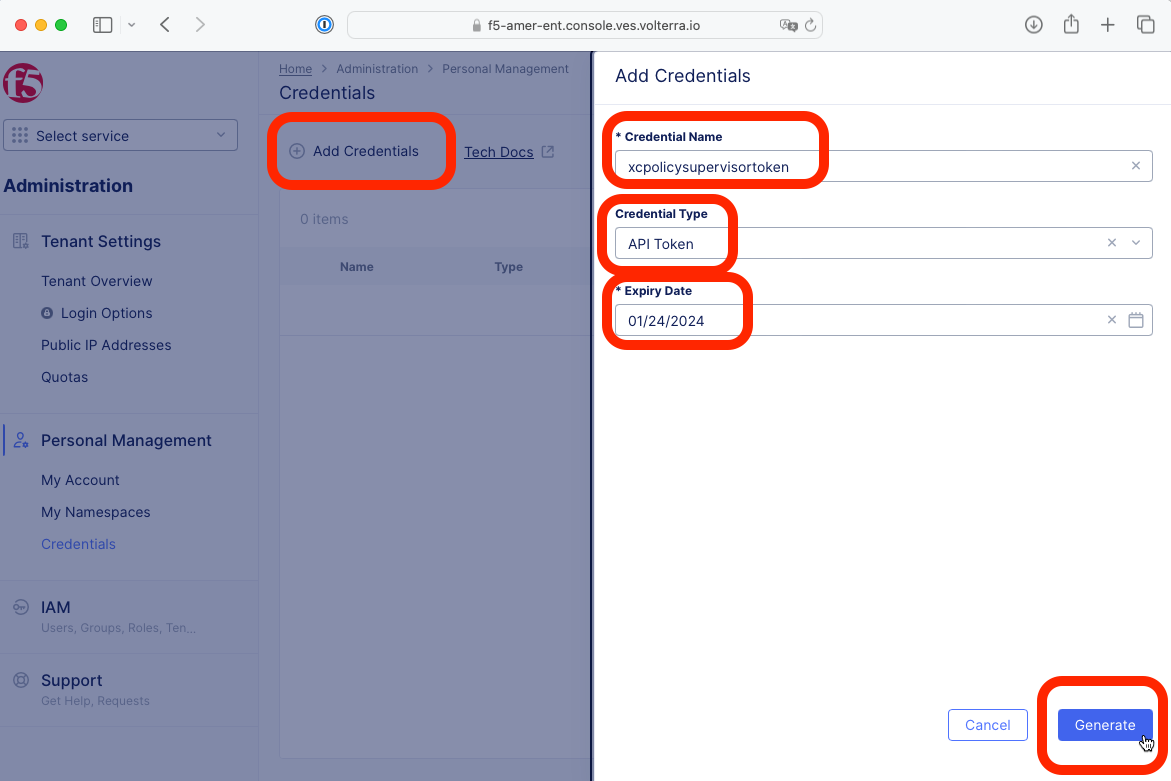
5- Find and click on Add Credentials on the Credentials page, then fill in the fields as shown in the picture above and click Generate.

|
6- Click Copy and save the token’s value to a text file or notepad now. The token is required for the next task.
7- Click Done
Task 2: Create a new Policy Supervisor Provider
Note
The ephemeral accounts that are created in Distributed Clound for students of this lab do not have sufficient privileges/rights to configure Policy Supervisor as described in this lab. The steps below are therefore provided here for demonstration purposes only.
1- Browse to the Policy Supervisor Providers page (http://policysupervisor.io) and login if required *(login instructions can be found in the introduction section of this lab guide).
|
2- Click Add provider.
|
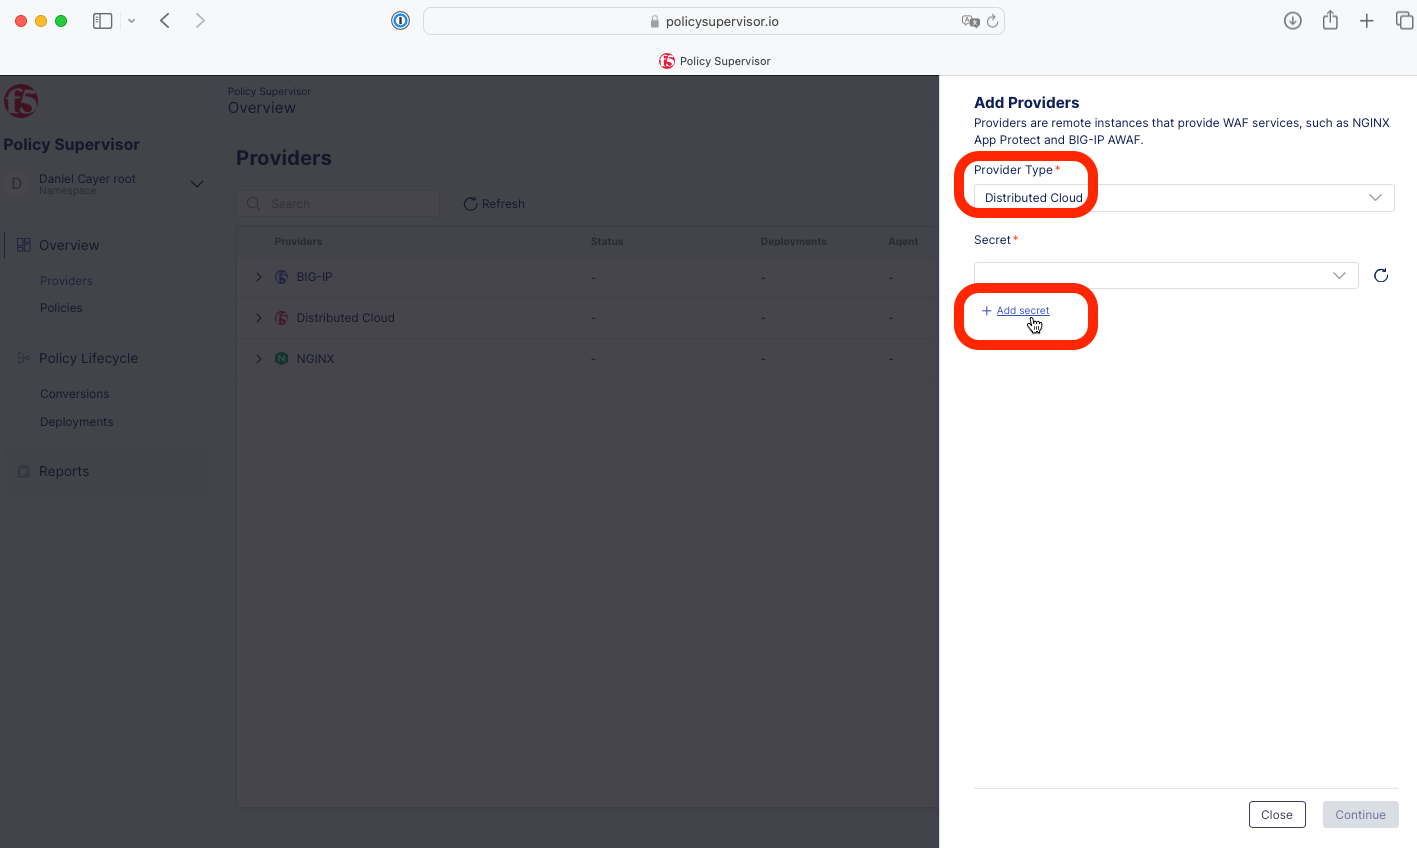
3- Select Distributed Cloud for the Provider Type and click + Add secret.
|
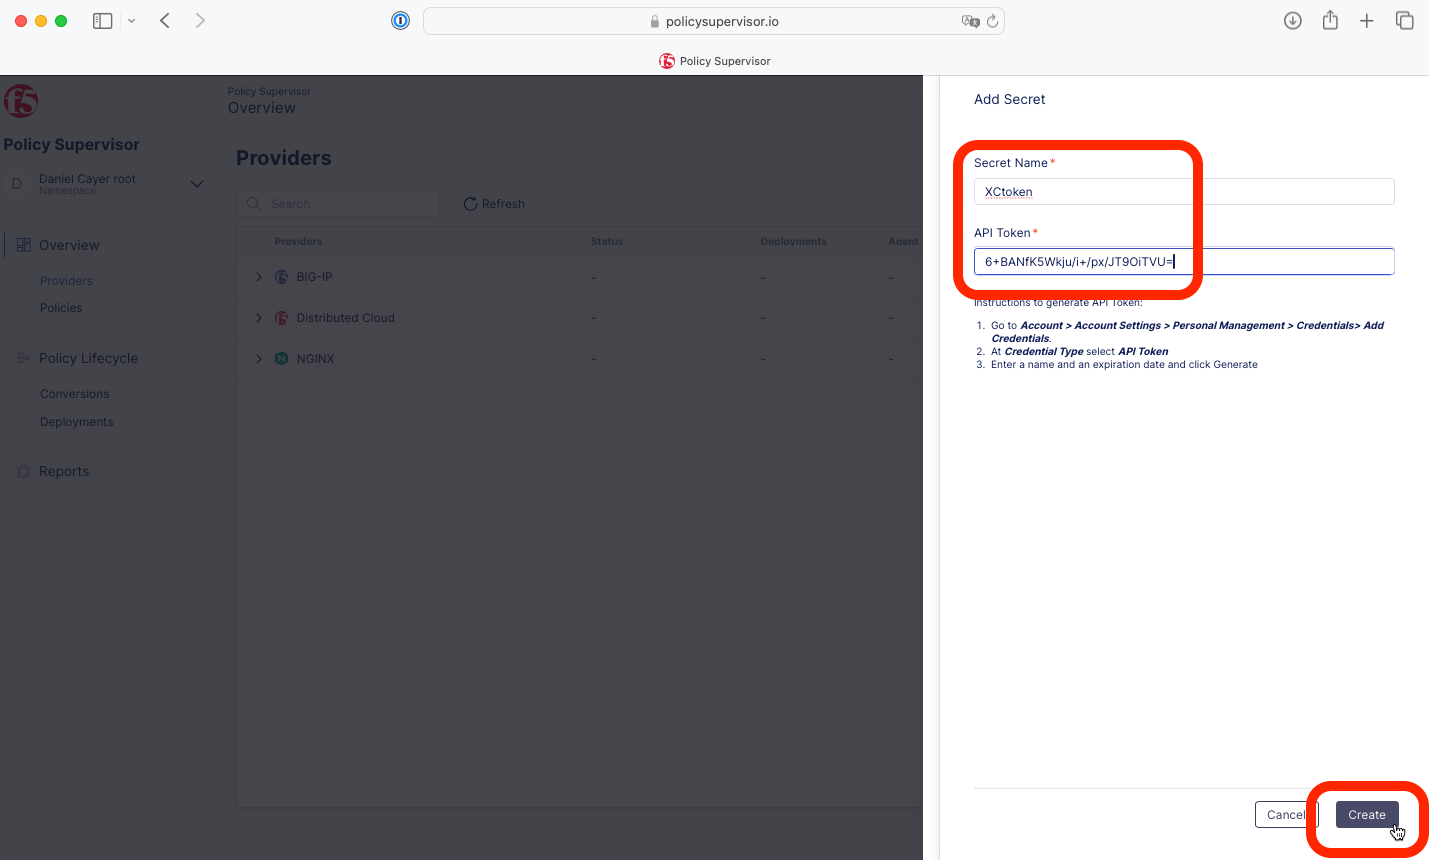
4- Enter a name, paste the value of the Distributed Cloud token obtained in Task 1 above, and click Create.
|
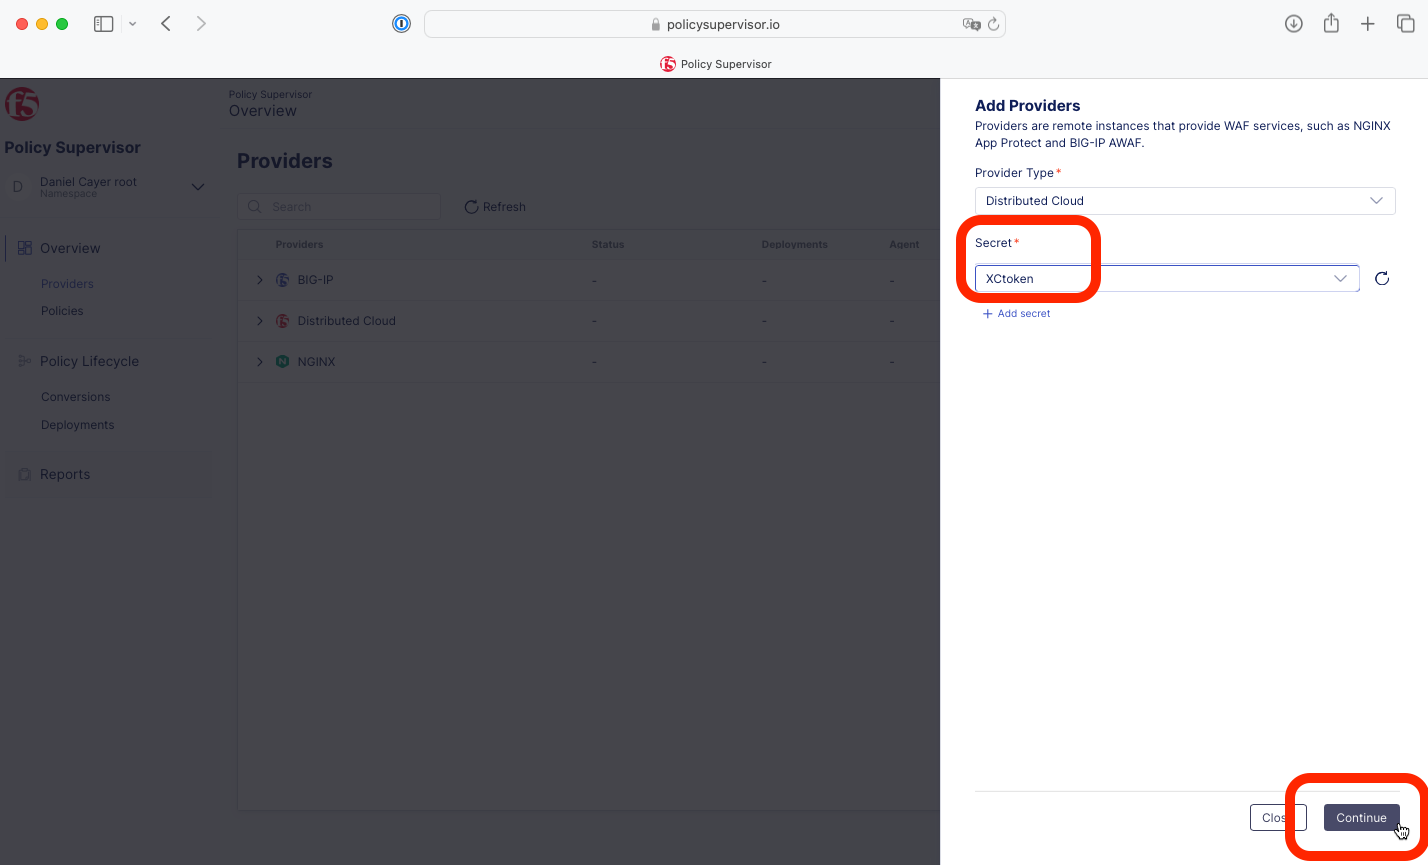
5- Select this newly created secret from the drop-down list and click Continue.
|
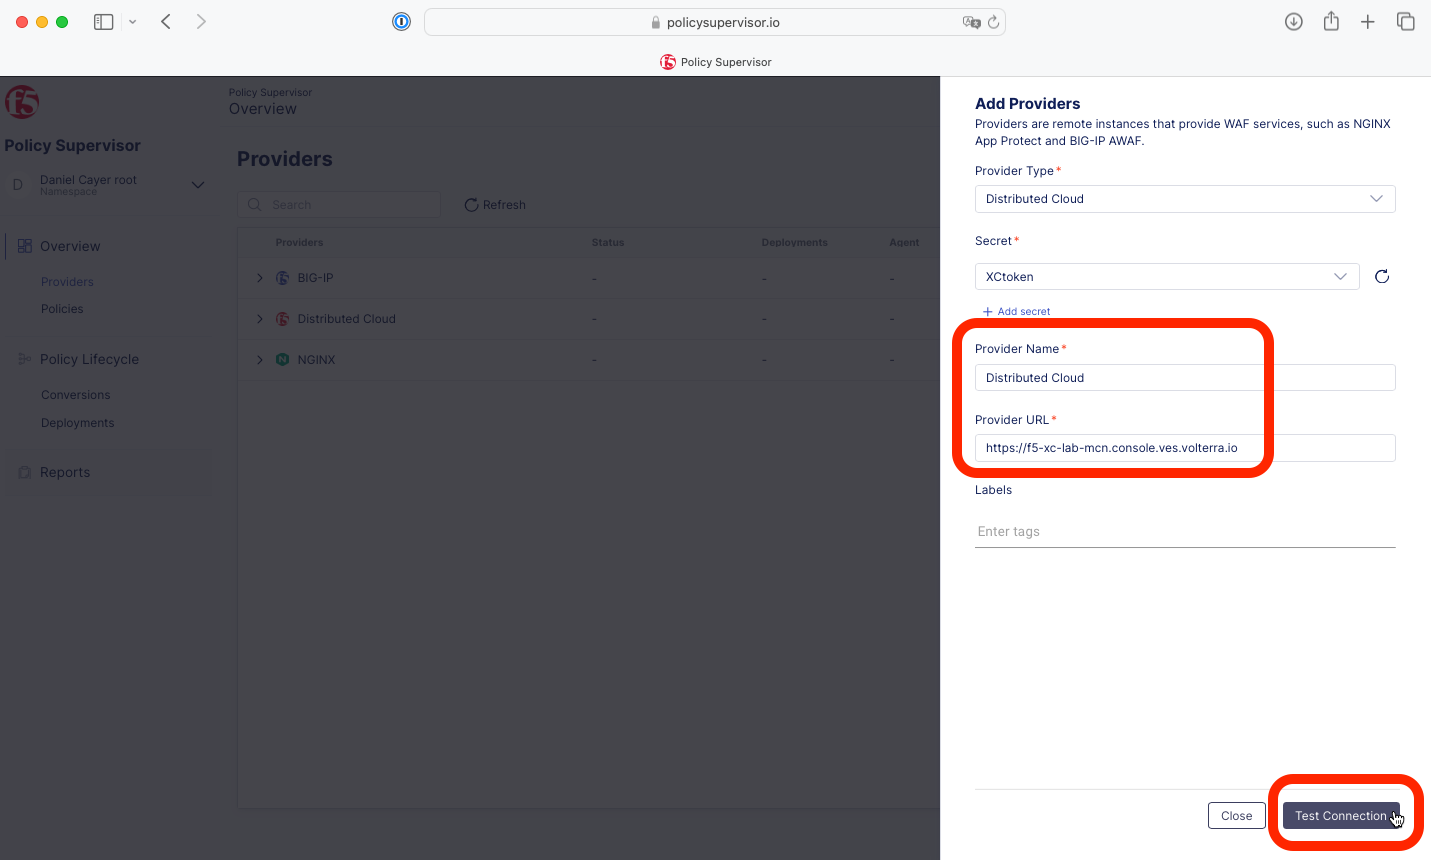
6- Enter a name for this provider (for example: Distributed Cloud), type or paste the URL for your Distributed Cloud domain/tenant (for example: https://f5-xc-lab-mcn.console.ves.volterra.io) and click Test Connection.
|
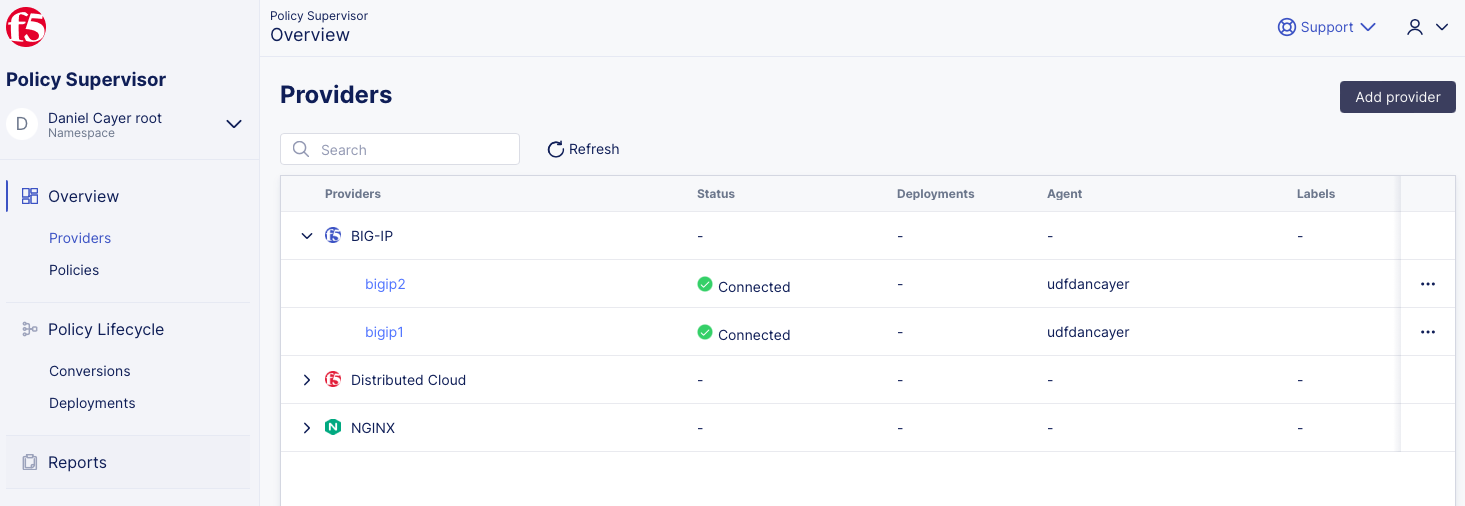
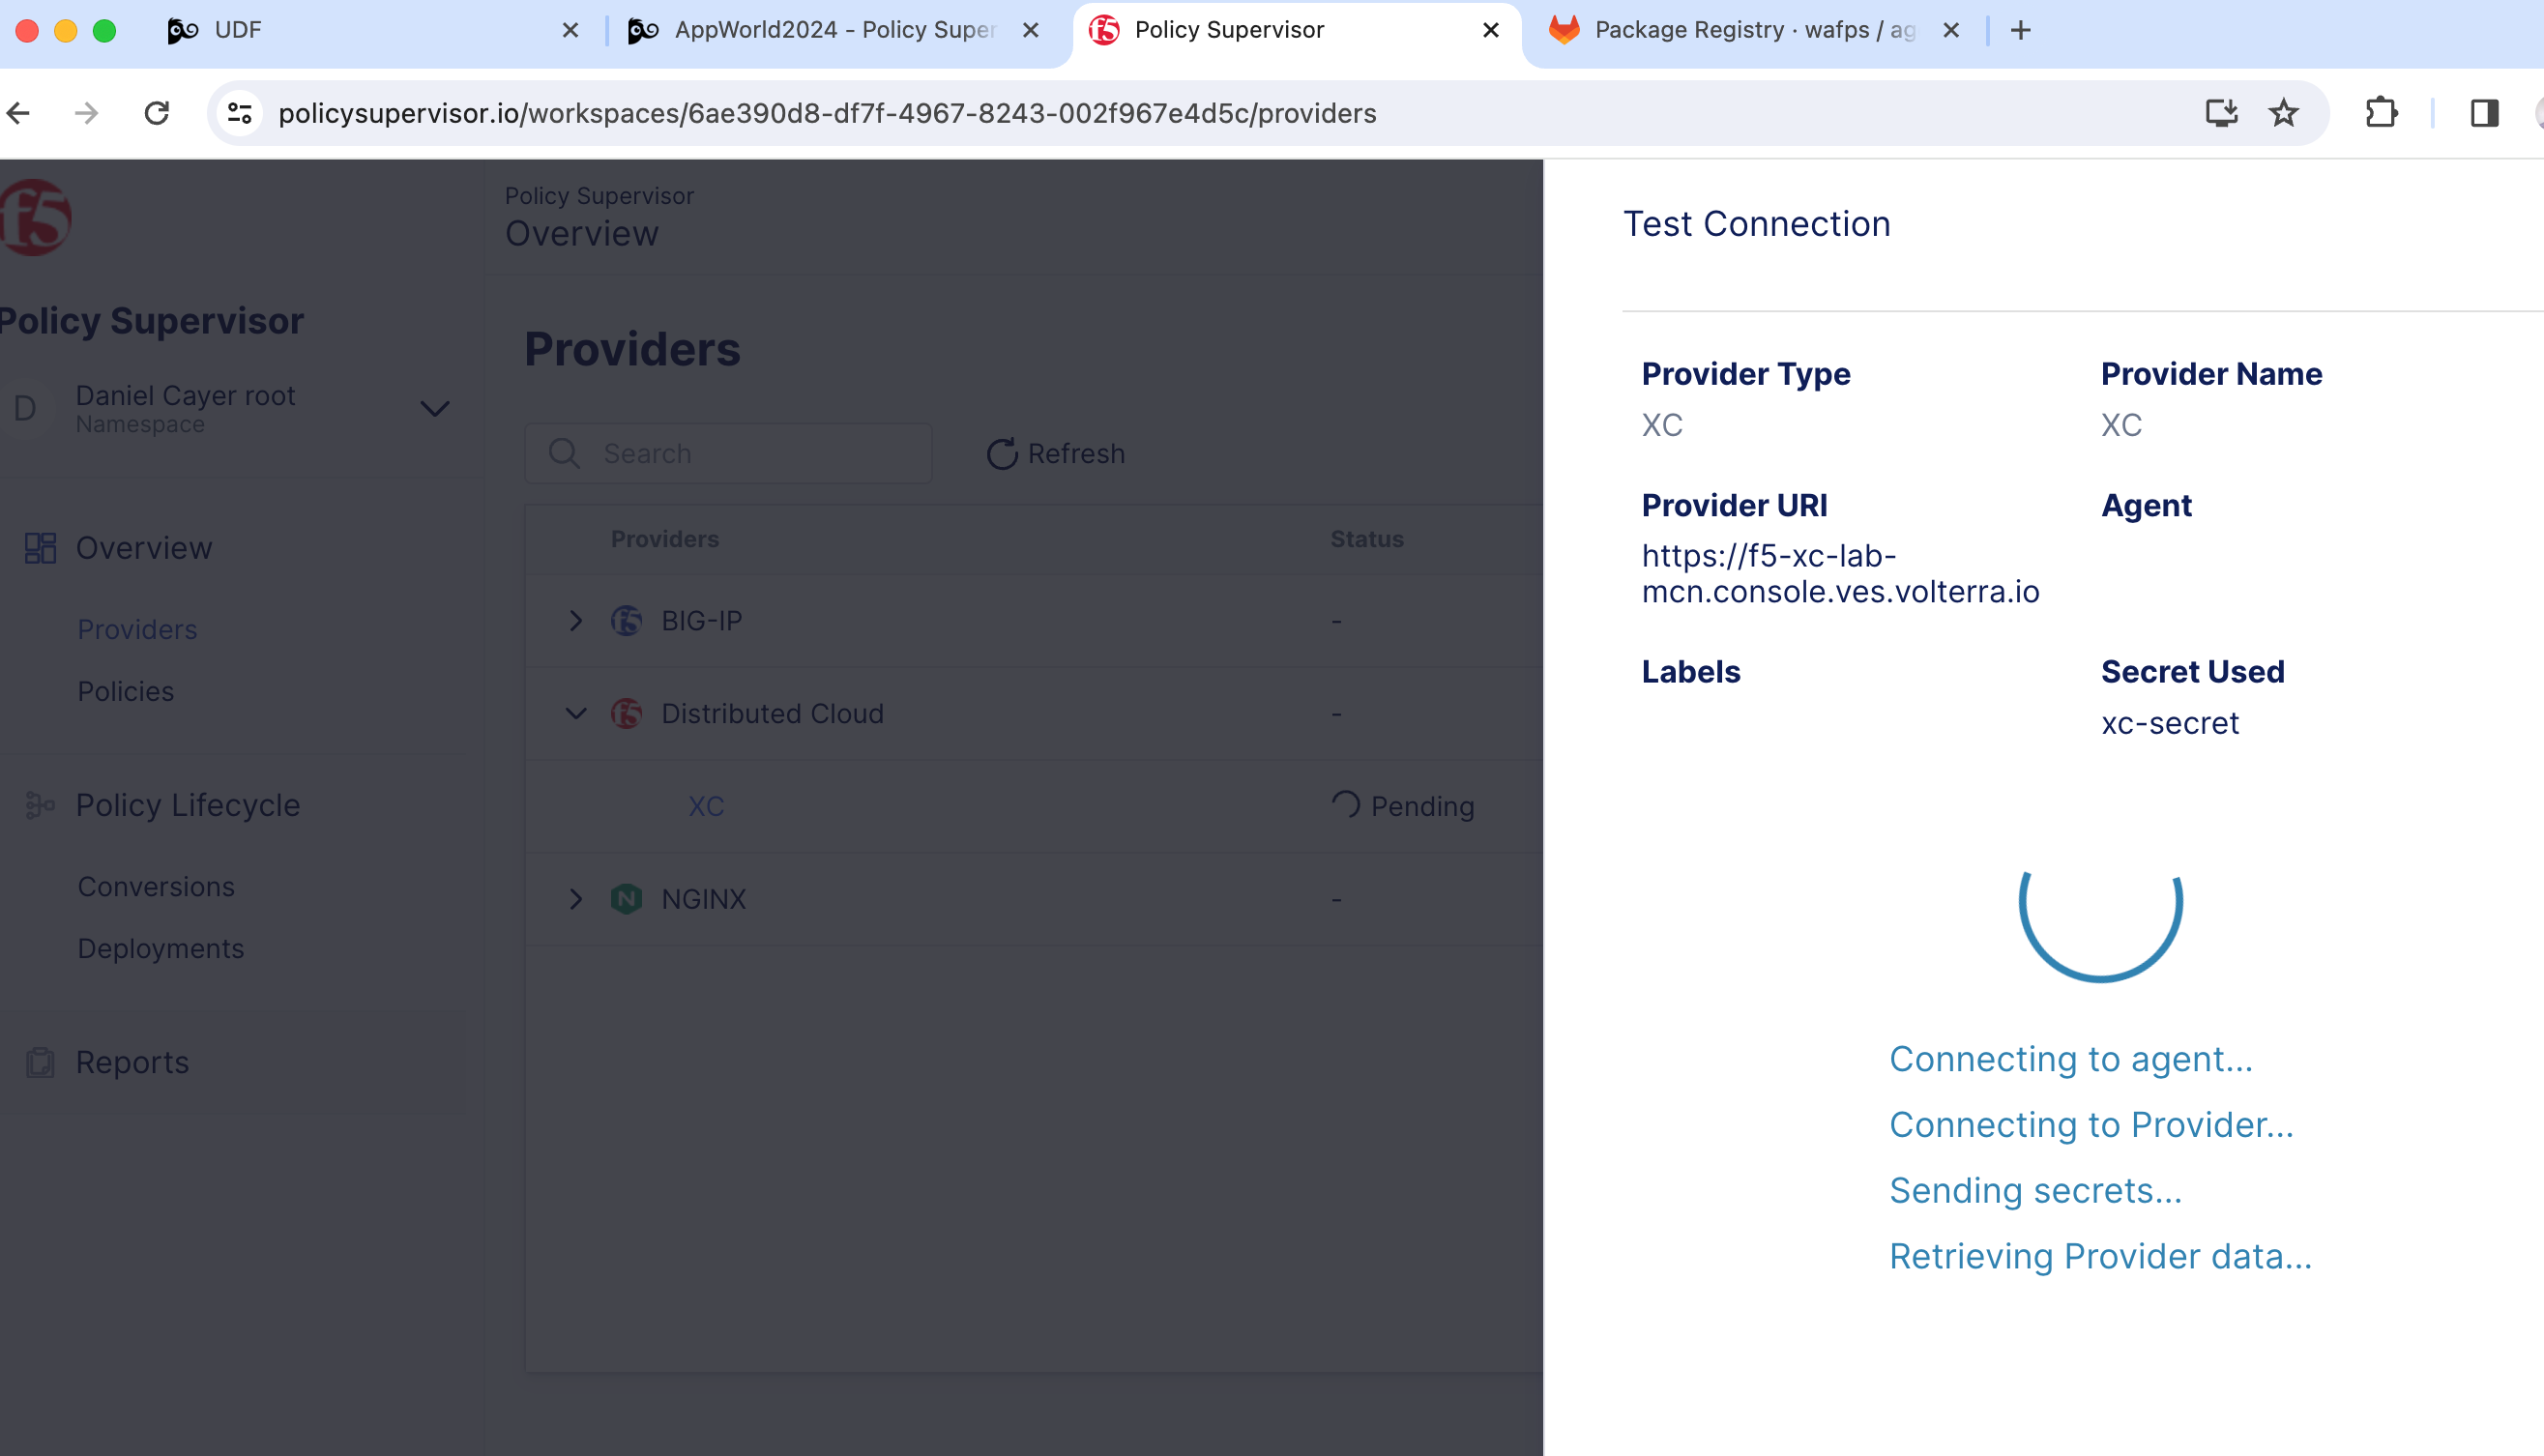
7- Wait for the test to complete, then click Go to overview to return to the Providers Overview page.
Task 3: Deploy an existing WAF policy to an existing F5 Distributed Cloud Load Balancer
With a Distribured Cloud Provider successfully configured, Policy Supervisor can deploy WAF policies to any pre-existing HTTP Load Balancer in the corresponding Distributed Cloud tenant.
The steps to deploy a WAF policy to Distribured Cloud are basically the same as those provided in Lab 1 for deploying a WAF policy to a BIG-IP.
Note
Creating Distributed Cloud HTTP Load Balancer is out of scope for this lab. The steps below are therefore provided here for demonstration purposes only.
1- In Policy Supervisor, browse to the Policies page (http://policysupervisor.io).
Option 1: 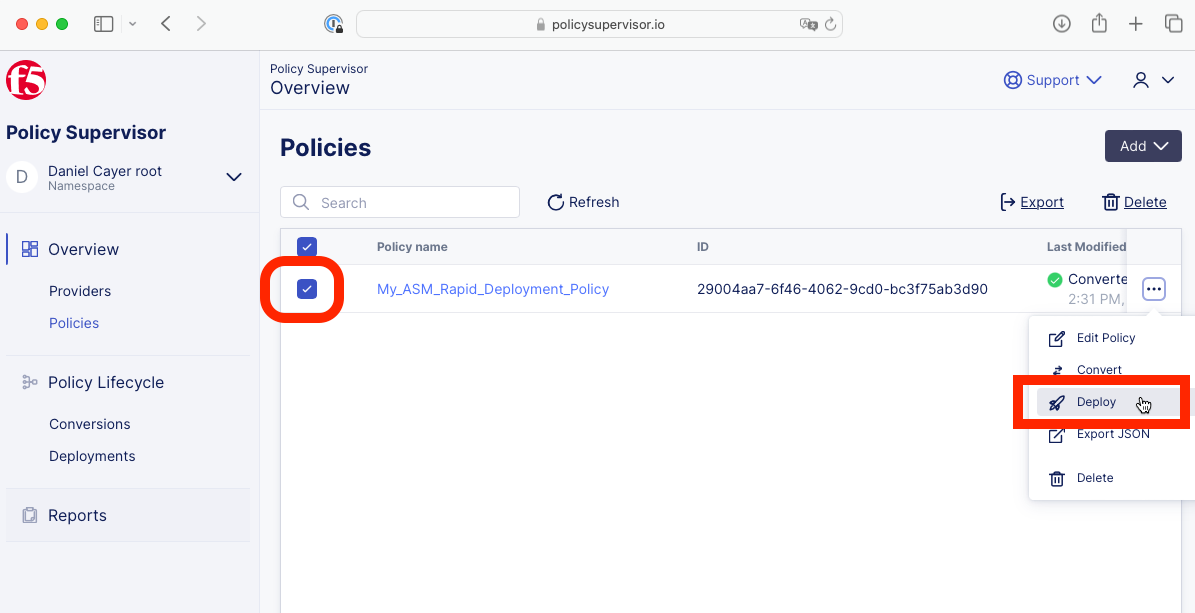
|
Option 2: 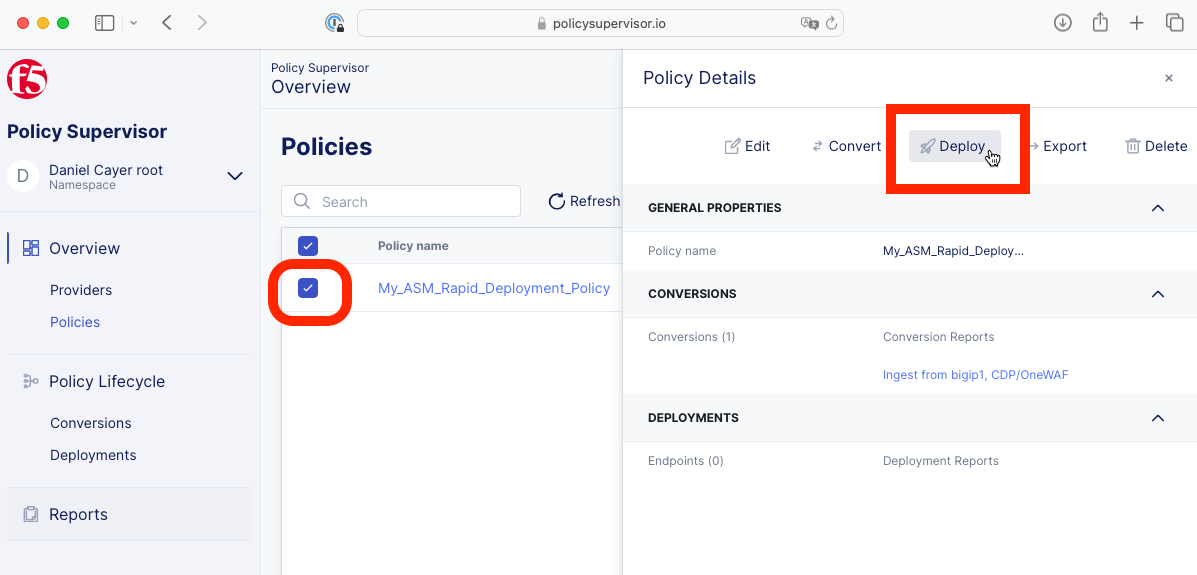
|
2- Locate and click on the Deploy button for the policy you wish to deploy.
|
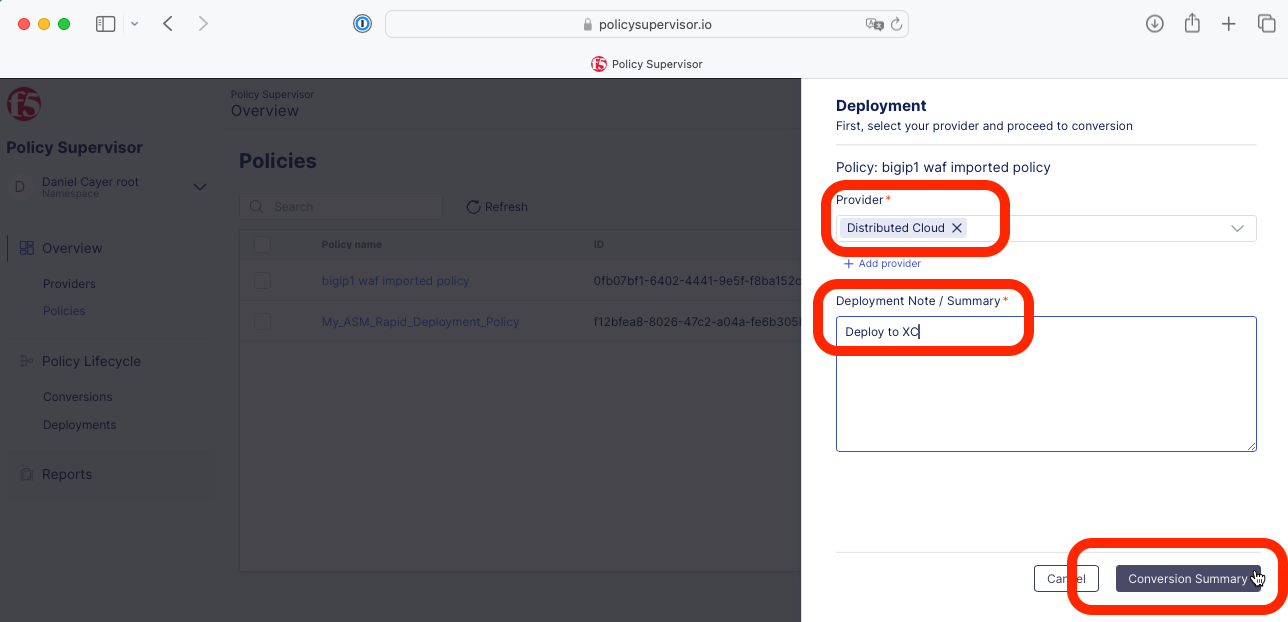
3- Select the Distribured Cloud Provider that was configured in the previous task, enter the required note in the text box and click Conversion Summary.
You can select multiple different Providers if you wish to simultaneously deploy this WAF policy to multiple different F5 platforms *(platform don’t have to be of the same type).
|
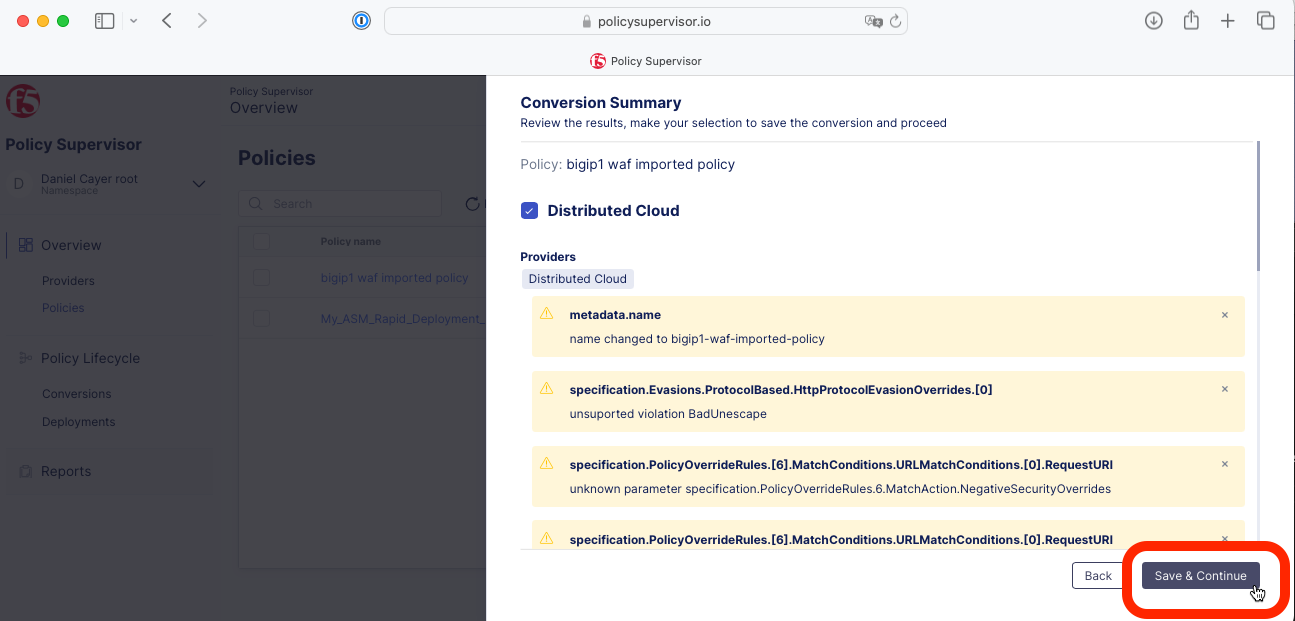
4- Wait for the conversion process to complete, then click Save & Continue, and click Continue Deployment.
|
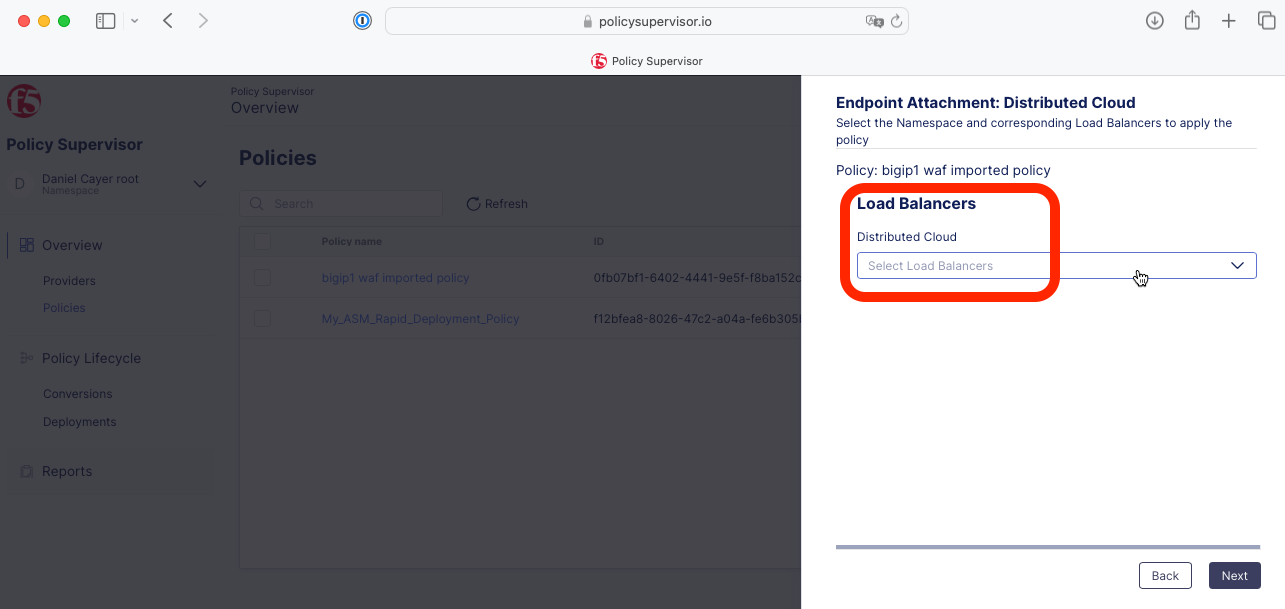
5- Select the target Distributed Cloud Load Balancer where you want this policy to be deployed/attached.
This HTTP Load Balancer must be pre-configured and available in the corresponding tenant.
Note
Creating Distributed Cloud HTTP Load Balancer is out of scope for this lab. The steps below are therefore provided here for demonstration purposes only.
Task 4: Confirm that the WAF policy was deployed as expected
1- Browse back to your Distributed Cloud tenant (for example: https://f5-xc-lab-mcn.console.ves.volterra.io) and find the HTTP Load Balancer that was targeted in the previous task.
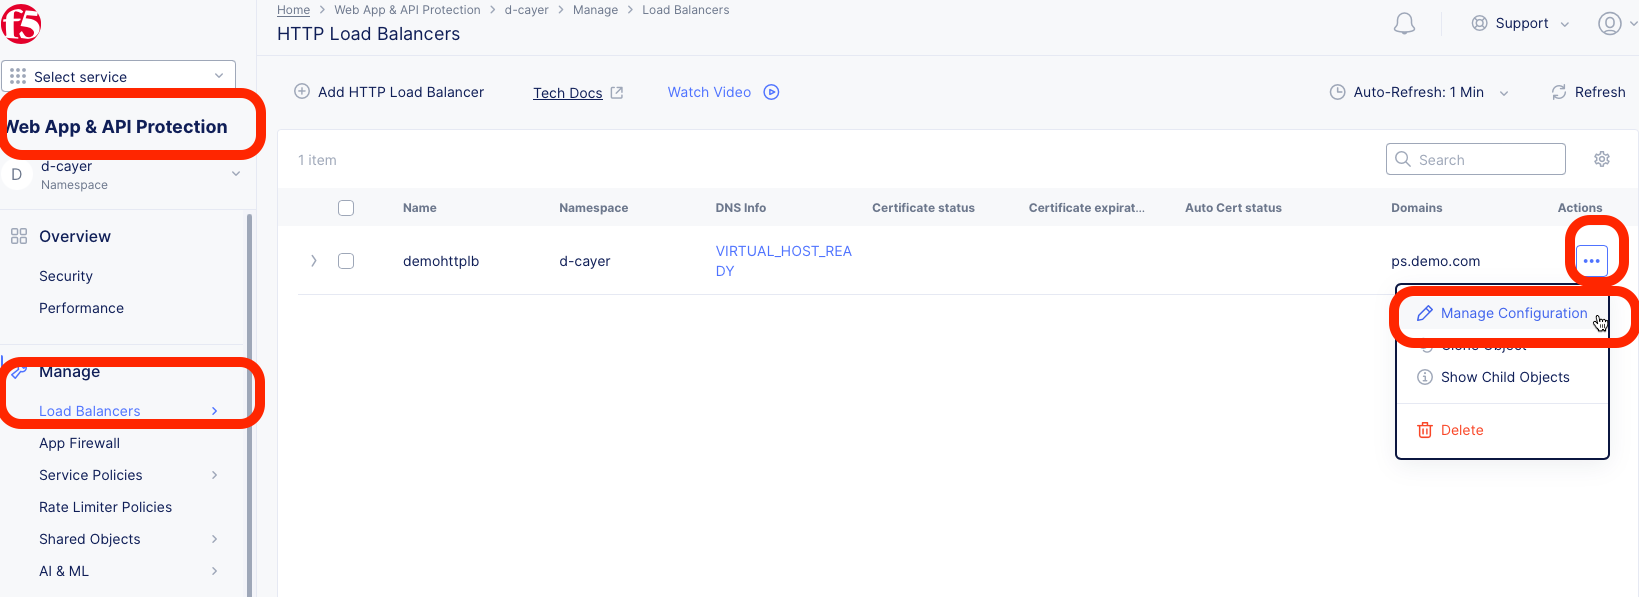
2- Go to the Web App & API Protection tile/service.
|
3- Select the corresponding HTTP Load Balancer and click the Manage Configuration link that can be found on the right side of the screen after clicking the three dots (…) in the Actions colum.
|
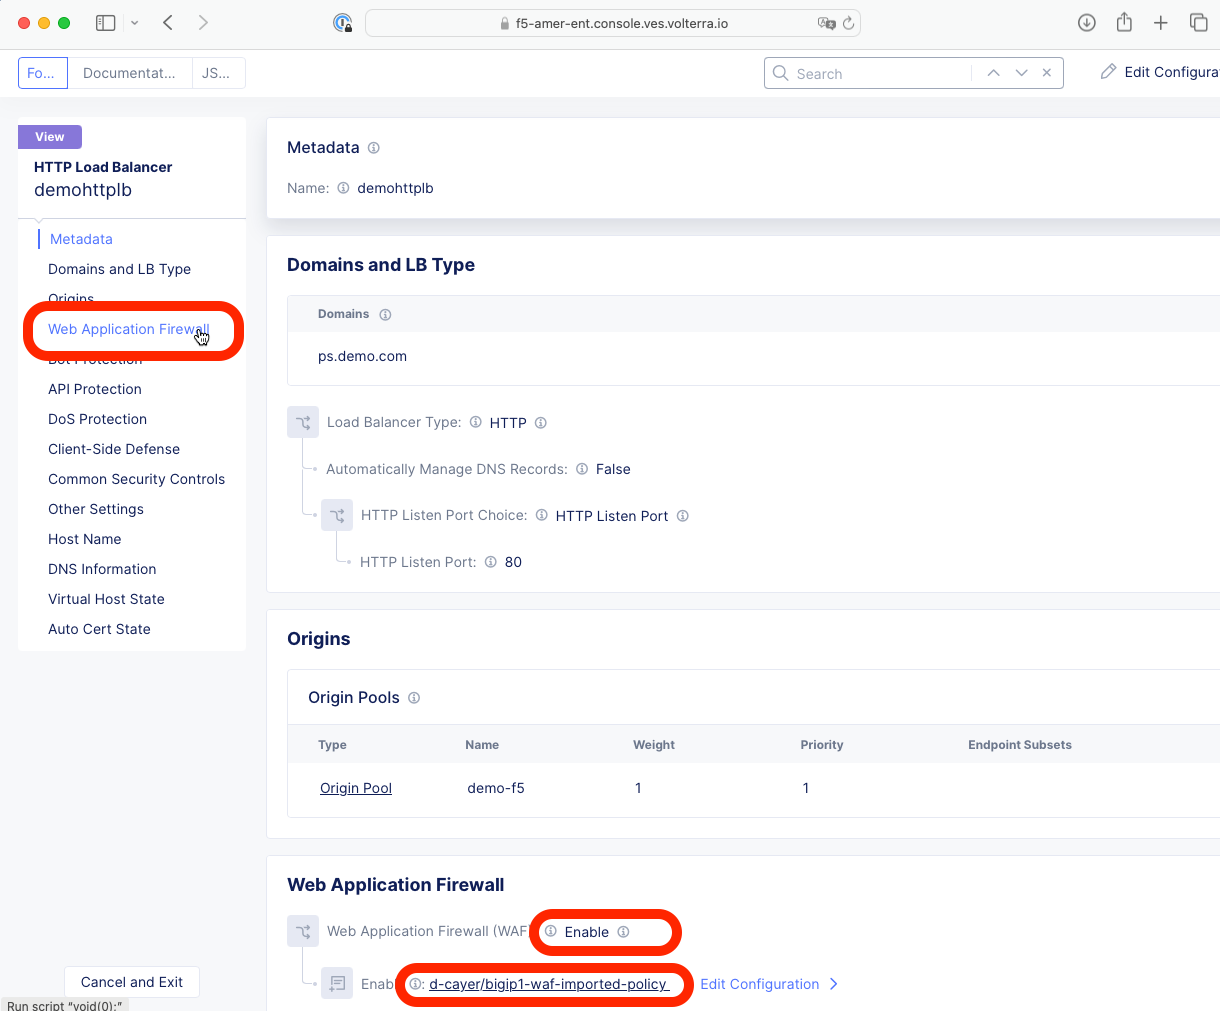
4- Scroll down to the Web Applicaiton Firewall section and observe that WAF is enabled with the correct policy.

|
5- Optional testing step: Scroll further down to find the host name or IP address of your HTTP Load Balancer and browse to the corresponding URL.
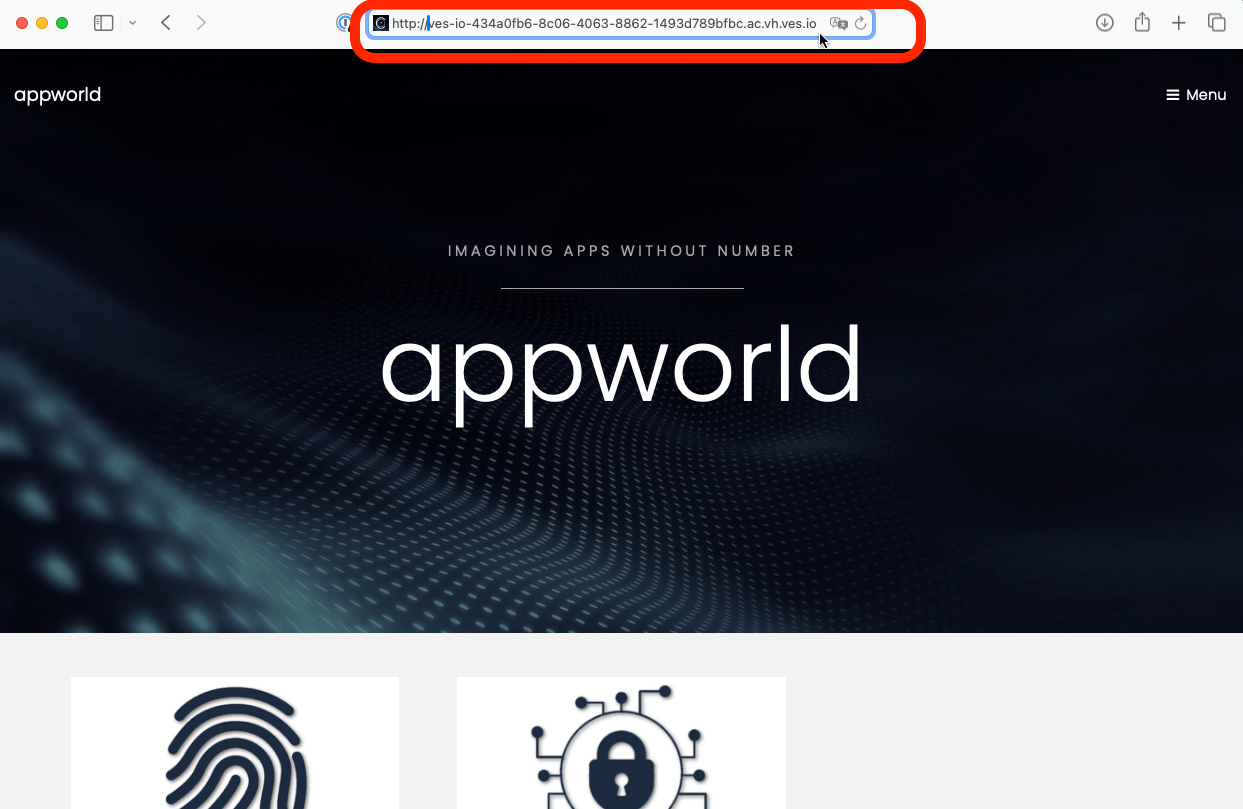
|
If the WAF policy is correctly applied and configured to be in blocking mode, forefully browsing to URI paths that are illegal will result in a blocking page. To validate, add the following path to the URL in your browser’s address bar for your HTTP Load Balancer’s host name (this represents a known SQL injection attack with a corresponding matching WAF signature):
/rest/products/search?q=qwert%27%29%29%20UNION%20SELECT%20id%2C%20email%2C%20password%2C%20%274%27%2C%20%275%27%2C%20%276%27%2C%20%277%27%2C%20%278%27%2C%20%279%27%20FROM%20Users--
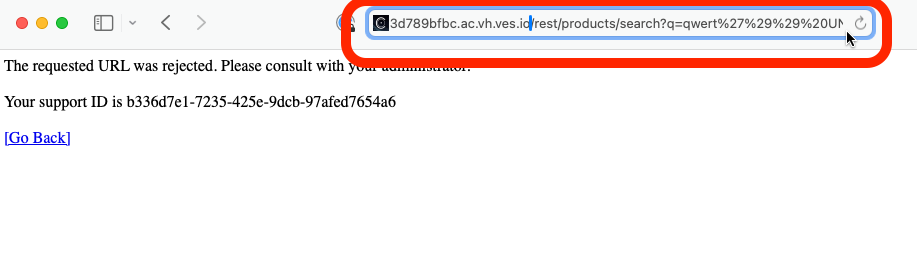
|
The above rejected message represents the default F5 WAF blocking page.
Hint: If the SQL injection attack is not blocked, go back to verify the configuration of the WAF policy in Distributed Cloud and change it to blocking mode!
WELL DONE!!!
This concludes the lab.