F5 rSeries Planning Guide Source |
Deploying an rSeries BIG-IP Tenant
Tenant Image Types
rSeries allows different packaging options for tenant images. It will be up to administrators to choose the image that is best suited for their environment. The main differences between the image types will be how much space they can consume on disk, and whether they allow in-place upgrades. rSeries only supports specific TMOS releases as defined in the following solution article:
K86001294: F5OS hardware/software support matrix
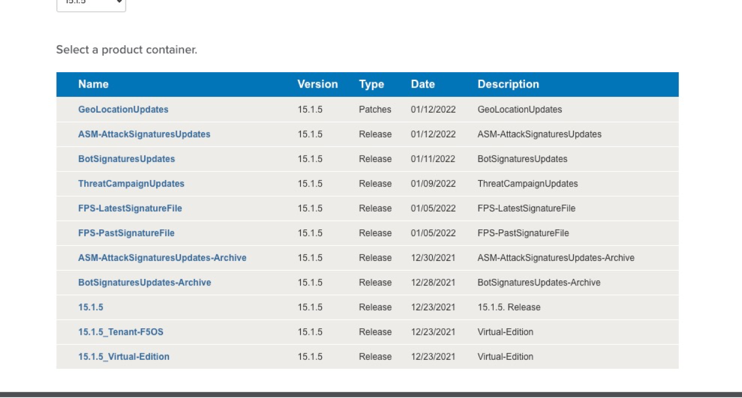
F5OS tenant images can be found on downloads.f5.com:
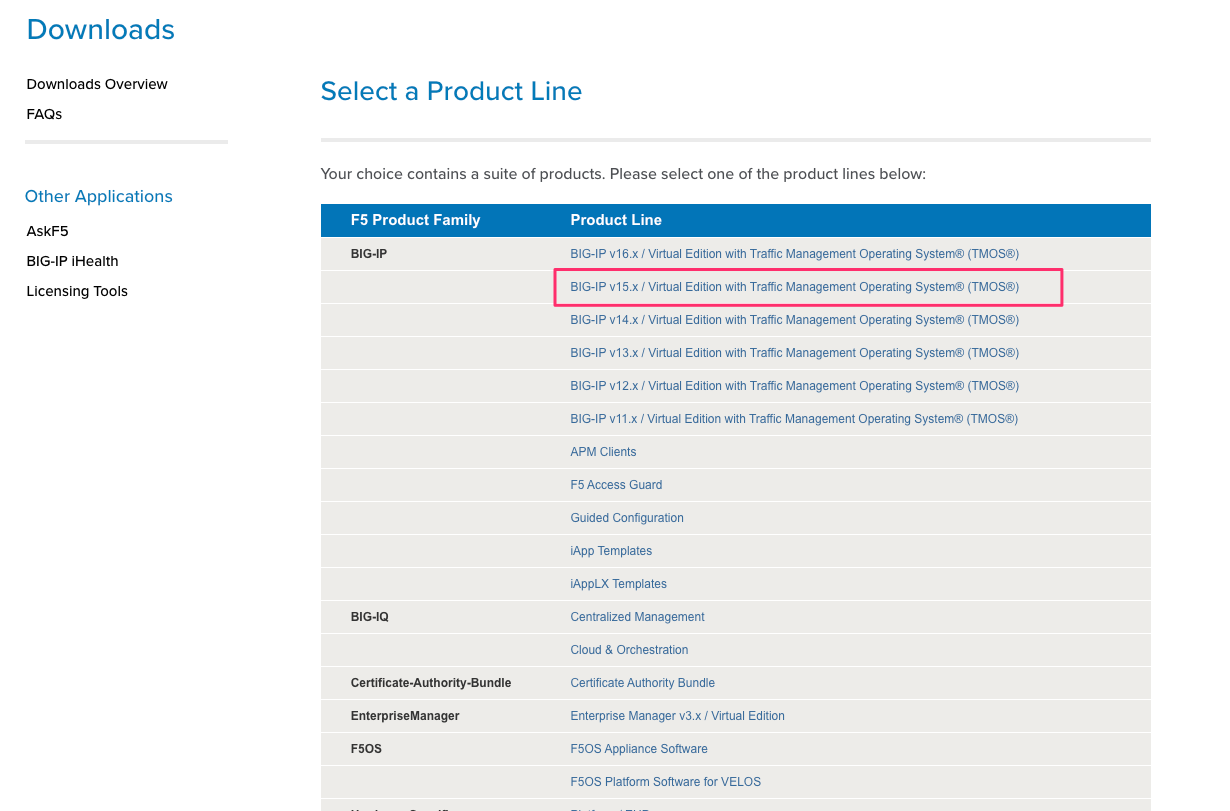
Ensure you choose the option that is labeled specifically for rSeries that is xx.x.x_Tenant-F5OS, these are the tenant images for F5OS based systems:
There are 4 different types of tenant images to choose from as seen below; please read the rest of this section to determine the best image type for your environment:

The T1-F5OS image type should be used with extreme caution. It is the smallest of the image sizes, but it only has one slot/volume (boot location) for TMOS software, meaning it does not support upgrades (not even for hotfixes). This type of image is geared towards more modern environments where pave and nuke strategies are preferred over in-place upgrades.

The remaining images (T2-F5OS, ALL-F5OS, T4-F5OS) all support in-place upgrades (they support multiple boot locations); however, they each default to different consumption of disk space that can be used by the tenant. No matter which image you chose you can always expand tenant disk space later using the Virtual Disk Size parameter in the tenant deployment options. This will require an outage. Although you can expand the virtual disk, you cannot shrink it, so it is best to not overestimate the image type you need.
The T2-F5OS image is intended for a tenant that will run LTM and or DNS only, it is not suitable for tenants needing other modules provisioned (AVR may be an exception). This type of image is best suited in a high-density tenant environment where the number of tenants is going to be high per appliance and using minimum CPU resources (1 or 2 vCPUs per tenant). You may want to limit the amount of disk space each tenant can use as a means of ensuring the filesystem on the appliance does not become full. As an example, there is 1TB of disk space per r5000 and r10000 appliance, and 36 tenants each using the 142GB T4-F5OS image would lead to an over-provisioning situation. Because tenants are deployed in sparse mode which allows over-provisioning, this may not be an issue initially but could become a problem later in the tenant’s lifespan as it writes more data to the disk. To keep the tenants in check, you can deploy smaller T2-F5OS images which can consume 45GB each. LTM/DNS deployments use much less disk space than other BIG-IP modules, which do extensive local logging and utilize databases on disk.
The All-F5OS image is suitable for any module configuration and supports a default of 77GB or 82GB (depending on the TMOS version) for the tenant. It is expected that the number of tenants per blade would be much less, as the module combinations that drive the need for more disk space typically require more CPU/memory which will artificially reduce the tenant count per appliance. Having a handful of 76GB or 156GB images per appliance should not lead to an out of space condition. There are some environments where some tenants may need more disk space, and the T4-F5OS image can provide for that. Now that Virtual Disk expansion utilities are available you can always grow the disk consumption later so starting small and expanding later is a good approach; it may be best to default using the T4-F5OS image (if tenant density is not too dense) as that is essentially the default size for vCMP deployments today.
The T4-F5OS image also supports any module combination but has additional disk capacity. If you intend to have lot of software images, databases for modules, run modules like SWG which utilize a lot of disk space, and local logging then the added capacity is recommended. More detail on the image types can be found in the following solution article.
K45191957: Overview of the BIG-IP tenant image types
Note that the image sizes in the chart are the default amount of space a tenant could use, not necessarily what it will consume on the physical disk. rSeries tenants are deployed in sparse mode on the file system when they are created. That means that a tenant may think it has a certain amount of disk space, but most of the space that is unutilized is zeroed-out and not consuming any space on the disk.
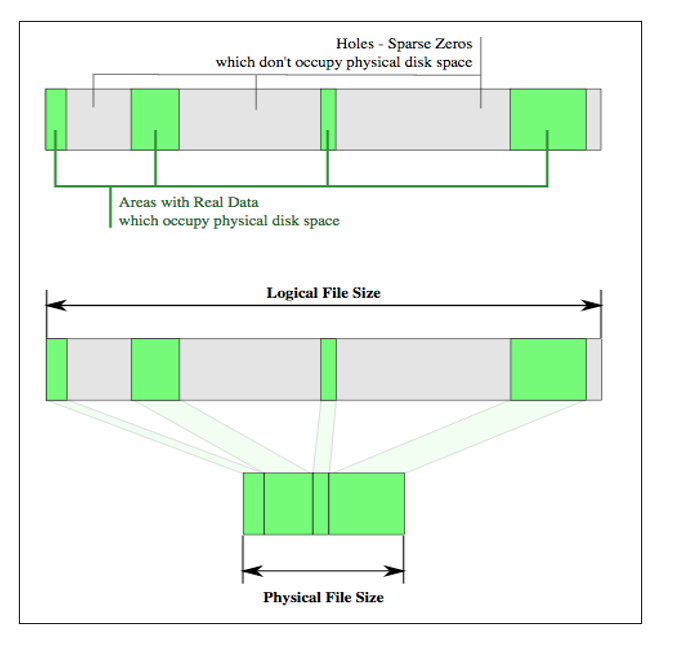
This means the disk consumption on the rSeries disk is much smaller than what appears inside the tenant. In the example below the tenant believes it has 77GB of disk allocated:
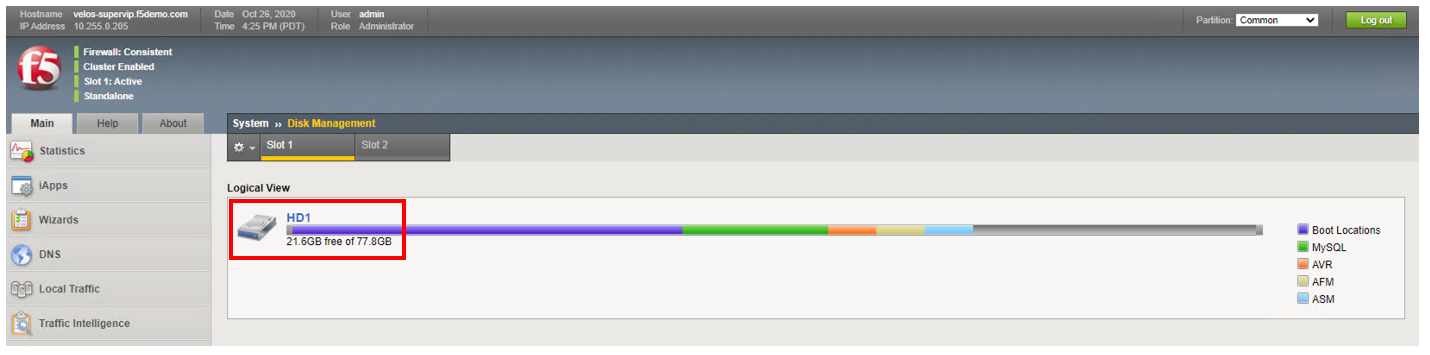
However, the 76GB image is allocated in a sparse manner meaning the tenant is only utilizing what it needs and on the filesystem of the appliance it is consuming only 6.4GB on the disk. You can confirm this by logging into the bash shell of F5OS as root. Then listing the contents of the directory /var/F5/system/cbip-disks, here you will see directories for each tenant. Enter the command ls -lsh <tenant-directory-name> and the output will show the size the tenant thinks it has (76GB) and the actual size used on disk (in this case 6.4GB).

This is analogous to thin provisioning in a hypervisor where you can over-allocate resources. vCMP as an example today uses an image similar in size to the T4-F5OS image. There may be rare instances where a tenant running in production for a long time can end up with a lot of extra space consumed on disk. This could be due to many in-place software upgrades, local logging, core files, database use etc… There is no utility available to reclaim that space that may have been used at one point but is no longer used. If the disk utilization becomes over-utilized, you could back up the tenant configuration, create a new fresh tenant, and restore the configuration from the old tenant, and then delete the old tenant. This would free up all the unused space again.
The Dashboard in the webUI has been enhanced in F5OS-A 1.8.0 to provide more visibility into the tenants usage of disk vs. what they think they have available to them.

There is also more granularity showing Storage Utilization. In the below example, you can see that F5OS has utilized 60% of the 109.7GB of disk it has dedicated. You can also see that there is 448.6GB available for F5OS Tenant Disks (BIG-IP Tenant) virtual disks, and that currently only 5% is used. This is the space shared by all BIG-IP Tenants virtual disks. It is important to remember that TMOS based BIG-IP virtual disks utilize thin provisioning, so the TMOS tenant may think it has more storage but in reality, it is using much less capacity on the physical disk. You can see this by the BIG-IP Tenant utilizations. In the output below, there are two BIG-IP tenants (fix-ll & test-tenant). One has been allocated 80GB of disk while the other has been allocated 82GB of disk, however the actual size on disk is much lower (~5-7GB each). Lastly, there is a single BIG-IP Next tenant that has 25GB allocated to it but is currently utilizing 7% of that space.
Note
Storage utilization and allocation may be different on various rSeries platforms.

You may also view the storage utilization from the F5OS CLI using the command show components.
r10900-1# show components component platform
components component platform
fantray fan-stats fan-1-speed 16233
fantray fan-stats fan-2-speed 16242
fantray fan-stats fan-3-speed 16322
fantray fan-stats fan-4-speed 16216
fantray fan-stats fan-5-speed 16207
fantray fan-stats fan-6-speed 16260
fantray fan-stats fan-7-speed 16384
fantray fan-stats fan-8-speed 16251
fantray fan-stats fan-9-speed 16251
fantray fan-stats fan-10-speed 16242
fantray fan-stats fan-11-speed 16304
fantray fan-stats fan-12-speed 16313
state description    r10900
state serial-no      f5-xpdn-ngmu
state part-no        "200-0413-02 REV 2"
state empty          false
state tpm-integrity-status Valid
state memory total    270014504960
state memory available 23909154816
state memory free     16769794048
state memory used-percent 91
state memory platform-total 34219122688
state memory platform-used 9518714880
state memory platform-used-percent 27
state temperature current 23.9
state temperature average 23.7
state temperature minimum 23.5
state temperature maximum 24.0
                                                                                        USED
AREA                          CATEGORY            TOTAL         FREE          USED         PERCENT
----------------------------------------------------------------------------------------------------
platform/sysroot              F5OS System         117807665152  44277043200   67522703360  60
platform/big-ip-tenant-disks  F5OS Tenant Disks   481671176192  434169815040  23010193408  5
tenant/fix-ll                 BIG-IP Tenant       85899345920   77861031936   8038313984   9
tenant/test-tenant            BIG-IP Tenant       88046829568   80219897856   7826931712   8
platform/images               F5OS Images         240700620800  182133891072  46316216320  20
tenant/bigip-next-f5demo-net  BIG-IP Next Tenant  26830438400   24771969024   2058469376   7

                                                                            UPDATE
NAME                        VALUE                              CONFIGURABLE  STATUS
-------------------------------------------------------------------------------------
QAT0                        Lewisburg C62X Crypto/Compression  false         -
QAT1                        Lewisburg C62X Crypto/Compression  false         -
QAT2                        Lewisburg C62X Crypto/Compression  false         -
QAT3                        Lewisburg C62X Crypto/Compression  false         -
QAT4                        Lewisburg C62X Crypto/Compression  false         -
QAT5                        Lewisburg C62X Crypto/Compression  false         -
fw-version-bios             2.02.145.1                         false         none
fw-version-bios-me          4.4.4.603                          false         none
fw-version-cpld             02.0B.00                           false         none
fw-version-drive-nvme0      VDV10170                           false         none
fw-version-drive-nvme1      VDV10170                           false         none
fw-version-drive-u.2.slot1  VDV10184                           false         none
fw-version-drive-u.2.slot2  VDV10184                           false         none
fw-version-lcd-app          1.01.069.00.1                      false         none
fw-version-lcd-bootloader   1.01.027.00.1                      false         none
fw-version-lcd-ui           1.13.12                            false         none
fw-version-lop-app          2.00.357.0.1                       false         none
fw-version-lop-bootloader   1.02.062.0.1                       false         none
fw-version-sirr             1.1.72                             false         none

                                                                                                                    READ                                       WRITE
DISK                                                                                TOTAL  READ    READ                LATENCY  WRITE     WRITE                   LATENCY
NAME     MODEL                VENDOR  VERSION   SERIAL NO           SIZE      TYPE  IOPS   IOPS    MERGED  READ BYTES  MS       IOPS      MERGED    WRITE BYTES   MS
---------------------------------------------------------------------------------------------------------------------------------------------------------------------------
nvme0n1  INTEL SSDPE2KX010T8  Intel   VDV10184  PHLJ1082028K1P0FGN  684.00GB  nvme  0      364078  329634  7207222272  72559    23708925  23792718  238635919360  1547867
nvme1n1  INTEL SSDPE2KX010T8  Intel   VDV10184  PHLJ108203XB1P0FGN  684.00GB  nvme  0      132095  272411  4044277760  44936    23708924  23792719  238635919360  1769061

cpu state cpu-utilization thread cpu
cpu state cpu-utilization current 1
cpu state cpu-utilization five-second-avg 2
cpu state cpu-utilization one-minute-avg 3
cpu state cpu-utilization five-minute-avg 3
cpu state cpu-utilization used-by ""
CPU               CORE                           THREAD
INDEX  CACHESIZE  CNT   FREQ           STEPPING  CNT     MODELNAME
----------------------------------------------------------------------------------------------------
0      36864(KB)  24    3099.902(MHz)  6         48      Intel(R) Xeon(R) Gold 6312U CPU @ 2.40GHz

                        FIVE    ONE     FIVE
THREAD                   SECOND  MINUTE  MINUTE
INDEX   THREAD  CURRENT  AVG     AVG     AVG     USED BY
------------------------------------------------------------------------
0       cpu0    0        0       1       1       F5OS Dedicated
1       cpu1    0        0       1       1       F5OS Dedicated
2       cpu2    0        0       1       1       F5OS Dedicated
3       cpu3    0        0       0       1       F5OS Dedicated
4       cpu4    0        0       0       1       F5OS Dedicated
5       cpu5    0        0       0       1       F5OS Dedicated
6       cpu6    2        2       3       3       F5OS
7       cpu7    0        0       0       1       bigip-next-f5demo-net
8       cpu8    3        2       4       3       F5OS
9       cpu9    0        0       0       1       bigip-next-f5demo-net
10      cpu10   2        2       4       3       F5OS
11      cpu11   5        5       5       5       fix-ll
12      cpu12   2        1       4       3       F5OS
13      cpu13   3        3       4       3       F5OS
14      cpu14   1        1       3       3       F5OS
15      cpu15   5        4       3       3       F5OS
16      cpu16   14       4       5       5       test-tenant
17      cpu17   5        4       5       5       fix-ll
18      cpu18   2        4       3       3       F5OS
19      cpu19   4        4       4       5       test-tenant
20      cpu20   2        3       3       3       F5OS
21      cpu21   3        3       3       3       F5OS
22      cpu22   4        3       4       3       F5OS
23      cpu23   1        2       3       3       F5OS
24      cpu24   2        1       1       1       F5OS Data Mover
25      cpu25   1        1       1       1       F5OS Data Mover
26      cpu26   1        1       1       1       F5OS Data Mover
27      cpu27   0        1       1       1       F5OS Data Mover
28      cpu28   0        1       1       1       F5OS Data Mover
29      cpu29   1        1       1       1       F5OS Data Mover
30      cpu30   5        4       6       6       F5OS
31      cpu31   0        0       0       1       bigip-next-f5demo-net
32      cpu32   1        1       4       5       F5OS
33      cpu33   0        0       0       1       bigip-next-f5demo-net
34      cpu34   0        1       5       5       F5OS
35      cpu35   1        7       6       7       fix-ll
36      cpu36   1        1       4       5       F5OS
37      cpu37   1        1       7       5       F5OS
38      cpu38   0        1       5       5       F5OS
39      cpu39   1        1       5       5       F5OS
40      cpu40   5        4       5       5       test-tenant
41      cpu41   0        1       4       5       fix-ll
42      cpu42   1        1       4       5       F5OS
43      cpu43   3        5       5       6       test-tenant
44      cpu44   3        1       4       4       F5OS
45      cpu45   2        2       3       5       F5OS
46      cpu46   1        2       6       5       F5OS
47      cpu47   1        5       4       5       F5OS

FPGA                            NUM  NUM
INDEX   VERSION  ID  SLOT  DID  DMS  SEPS
-------------------------------------------
asw_0   71.5.1
atse_0  72.5.4   0   1     15   3    64
atse_1  72.5.4   1   1     63   3    64
nso_0   70.5.1

r10900-1#
Tenant Deployments
Tenants can easily be deployed via the F5OS CLI, webUI, or API.
Tenant Deployment via CLI
Uploading a Tenant Image via CLI
Tenant software images are loaded directly into the F5OS platform layer. For the initial release of rSeries, supported tenant versions are v15.1.5 for the r5000 and r10000, and v15.1.6 for the r2000 and r4000. For other models, and details on supported TMOS versions the following solution article is the official source:
K86001294: F5OS hardware/software support matrix
No other TMOS versions are supported other than hotfixes or rollups based on those versions of software, and upgrades to newer versions of TMOS happen within the tenant itself, not in the F5OS layer. The images inside F5OS are for initial deployment only. rSeries tenants do not support versions 16.0, 16.0 or 17.0, you can run either the minimum 15.1.x release or later for a given platform or any versions 17.1.x and later.
Before deploying any tenant, you must ensure you have a proper tenant software release loaded into the F5OS platform layer. If an HTTPS/SCP/SFTP server is not available, you may upload a tenant image using SCP directly to the F5OS platform layer. Simply SCP an image to the out-of-band management IP address using the admin account and a path of IMAGES. There are also other upload options available in the webUI (Upload from Browser) or API (HTTPS/SCP/SFTP). Below is an example of using SCP from a remote client.
scp BIGIP-15.1.5-0.0.8.ALL-F5OS.qcow2.zip.bundle admin@10.255.0.132:IMAGES
You may also import the tenant image file from the F5OS CLI. Use the file import command to get the tenant image file from a remote HTTPS server or from a remote server over SCP or SFTP. Below is an example of importing from a remote HTTPS server. Note the target directory should be images/tenant:
Boston-r10900-1# file import remote-host 10.255.0.142 remote-file /upload/BIGIP-15.1.4-0.0.47.ALL-VELOS.qcow2.zip.bundle local-file images/tenant/BIGIP-15.1.4-0.0.47.ALL-VELOS.qcow2.zip.bundle username corpuser insecure
Value for 'password' (<string>): ********
result File transfer is initiated.(images/tenant/BIGIP-15.1.4-0.0.47.ALL-VELOS.qcow2.zip.bundle)
If a remote HTTPS server is not available, you may also import the file from the CLI over SCP by adding the protocol scp option to the command line:
Boston-r10900-1# file import remote-host 10.255.0.142 remote-file /var/www/server/1/upload/BIGIP-15.1.4-0.0.47.ALL-VELOS.qcow2.zip.bundle local-file images/tenant/BIGIP-15.1.4-0.0.47.ALL-VELOS.qcow2.zip.bundle username root insecure protocol scp
Value for 'password' (<string>): ********
result File transfer is initiated.(images/tenant/BIGIP-15.1.4-0.0.47.ALL-VELOS.qcow2.zip.bundle)
The command file transfer-status will provide details of the transfer progress and any errors:
Boston-r10900-1# file import remote-host 10.255.0.142 remote-file /var/www/server/1/upload/BIGIP-15.1.4-0.0.47.ALL-VELOS.qcow2.zip.bundle local-file images/tenant/BIGIP-15.1.4-0.0.47.ALL-VELOS.qcow2.zip.bundle username root insecure protocol scp
Value for 'password' (<string>): ********
result File transfer is initiated.(images/tenant/BIGIP-15.1.4-0.0.47.ALL-VELOS.qcow2.zip.bundle)


Boston-r10900-1# show file transfer-operations
LOCAL FILE PATH                                               REMOTE HOST   REMOTE FILE PATH                                                         OPERATION    PROTOCOL  STATUS                                TIMESTAMP
--------------------------------------------------------------------------------------------------------------------------------------------------------------------------------------------------------------------------------------------
images/import/BIGIP-15.1.4-0.0.47.ALL-VELOS.qcow2.zip.bundle  10.255.0.142  /upload/BIGIP-15.1.4-0.0.47.ALL-VELOS.qcow2.zip.bundle                   Import file  HTTPS              Completed                    Wed Dec 22 22:11:47 2021
images/tenant/BIGIP-15.1.4-0.0.47.ALL-VELOS.qcow2.zip.bundle  10.255.0.142  /upload/BIGIP-15.1.4-0.0.47.ALL-VELOS.qcow2.zip.bundle                   Import file  HTTPS     Unauthorized Request, HTTP Error 401  Wed Dec 22 22:21:59 2021
images/tenant/BIGIP-15.1.4-0.0.47.ALL-VELOS.qcow2.zip.bundle  10.255.0.142  /upload/BIGIP-15.1.4-0.0.47.ALL-VELOS.qcow2.zip.bundle                   Import file  SCP       Failed to recv file                   Wed Dec 22 22:22:57 2021
images/tenant/BIGIP-15.1.4-0.0.47.ALL-VELOS.qcow2.zip.bundle  10.255.0.142  /var/www/server/1/upload/BIGIP-15.1.4-0.0.47.ALL-VELOS.qcow2.zip.bundle  Import file  SCP       In Progress (7.0%)                    Wed Dec 22 22:25:14 2021
You can view the current tenant images and their status in the F5OS CLI by using the show images command:
r10900-1# show images
                                                IN
NAME                                             USE    TYPE                STATUS
---------------------------------------------------------------------------------------
BIG-IP-Next-20.0.2-2.139.10+0.0.165              false  helm-image          processed
BIG-IP-Next-20.0.2-2.139.10+0.0.165.tar.bundle   false  helm-bundle         verified
BIG-IP-Next-20.0.2-2.139.10+0.0.165.yaml         false  helm-specification  verified
BIG-IP-Next-20.1.0-2.263.4                       false  helm-image          processed
BIG-IP-Next-20.1.0-2.263.4.tar.bundle            false  helm-bundle         verified
BIG-IP-Next-20.1.0-2.263.4.yaml                  false  helm-specification  verified
BIG-IP-Next-20.2.1-2.429.1                       false  helm-image          processed
BIG-IP-Next-20.2.1-2.429.1.tar.bundle            false  helm-bundle         verified
BIG-IP-Next-20.2.1-2.429.1.yaml                  false  helm-specification  verified
BIG-IP-Next-20.2.1-2.429.4                       true   helm-image          processed
BIG-IP-Next-20.2.1-2.429.4.tar.bundle            true   helm-bundle         verified
BIG-IP-Next-20.2.1-2.429.4.yaml                  true   helm-specification  verified
BIGIP-15.1.10.1-0.0.9.ALL-F5OS.qcow2.zip.bundle  false  vm-image            verified
BIGIP-15.1.10.2-0.0.2.ALL-F5OS.qcow2.zip.bundle  false  vm-image            verified
BIGIP-15.1.6.1-0.0.10.ALL-F5OS.qcow2.zip.bundle  false  vm-image            verified
BIGIP-17.1.1.1-0.0.2.T4-F5OS.qcow2.zip.bundle    true   vm-image            verified
BIGIP-17.1.1.2-0.0.1.T2-F5OS.qcow2.zip.bundle    true   vm-image            verified
BIGIP-17.1.1.2-0.0.10.ALL-F5OS.qcow2.zip.bundle  false  vm-image            verified

r10900-1#
Creating a Tenant via CLI
Tenant lifecycle can be fully managed via the CLI using the tenants command in config mode. Using command tab completion and question marks will help display all the tenant options. Enter config mode and enter the command tenants tenant <tenant-name> where <tenant-name> is the name of the tenant you would like to create. This will put you into a mode for that tenant and you will be prompted for some basic information to create the tenant via a CLI wizard. After answering basic information you may configure additional tenant parameters by entering config ? within the tenant mode, and that will provide all the additional configuration options:
Boston-r10900-1(config)# tenants tenant tenant2
Value for 'config image' (<string>): BIGIP-15.1.5-0.0.8.ALL-F5OS.qcow2.zip.bundle
Value for 'config nodes' (list): 1
Value for 'config mgmt-ip' (<IP address>): 10.255.0.136
Value for 'config prefix-length' (<unsignedByte, 0 .. 128>): 24
Value for 'config gateway' (<IP address>): 10.255.0.1
Boston-r10900-1(config-tenant-tenant2)#
NOTE: The nodes value is currently required in the interactive CLI mode to remain consistent with VELOS but should be set for 1 for rSeries tenant deployments.
When inside the tenant config mode, you can enter each configuration item one line at a time using tab completion and question mark for help. Type config ? to see all the available options.
Boston-r10900-1# config
Entering configuration mode terminal
Boston-r10900-1(config)# tenants tenant tenant2
Boston-r10900-1(config-tenant-test-tenant)# config ?
Possible completions:
    appliance-mode           Appliance mode can be enabled/disabled at tenant level
    cryptos                  Enable crypto devices for the tenant.
    dag-ipv6-prefix-length   Tenant default value of IPv6 networking mask used by disaggregator algorithms
    gateway                  User-specified gateway for the tenant static mgmt-ip.
    image                    User-specified image for tenant.
    mac-data
    memory                   User-specified memory in MBs for the tenant.
    mgmt-ip                  User-specified mgmt-ip for the tenant management access.
    nodes                    User-specified node-number(s) in the partition to schedule the tenant.
    prefix-length            User-specified prefix-length for the tenant static mgmt-ip.
    running-state            User-specified desired state for the tenant.
    storage                  User-specified storage information
    type                     Tenant type.
    vcpu-cores-per-node      User-specified number of logical cpu cores for the tenant.
    virtual-wires            User-specified virtual-wires from virtual-wire table for the tenant.
    vlans                    User-specified vlan-id from vlan table for the tenant.
Boston-r10900-1(config-tenant-tenant2)# config ?
Boston-r10900-1(config-tenant-tenant2)# config cryptos enabled
Boston-r10900-1(config-tenant-tenant2)# config vcpu-cores-per-node 4
Boston-r10900-1(config-tenant-tenant2)# config type BIG-IP
Boston-r10900-1(config-tenant-tenant2)# config vlans 500
Boston-r10900-1(config-tenant-tenant2)# config vlans 3010
Boston-r10900-1(config-tenant-tenant2)# config vlans 3011
Boston-r10900-1(config-tenant-tenant2)# config running-state deployed
Boston-r10900-1(config-tenant-tenant2)# config memory 14848
Any changes must be committed for them to be executed:
Boston-r10900-1(config-tenant-tenant2)# commit
Commit complete.
Boston-r10900-1(config-tenant-tenant2)#
You may alternatively put all the parameters on one line instead of using the interactive mode above:
Boston-r10900-1(config)# tenants tenant tenant2 config image BIGIP-15.1.5-0.0.8.ALL-F5OS.qcow2.zip.bundle vcpu-cores-per-node 2 nodes 1 vlans [ 500 3010 3011 ] mgmt-ip 10.255.0.136 prefix-length 24 gateway 10.255.0.1 name tenant2 running-state deployed
Boston-r10900-1(config-tenant-tenant2)# commit
Commit complete.
Boston-r10900-1(config-tenant-tenant2)#
Validating Tenant Status via CLI
After the tenant is created you can run the command show running-config tenants to see what has been configured:
Boston-r10900-1# show running-config tenants
tenants tenant tenant2
config name         tenant2
config type         BIG-IP
config image        BIGIP-15.1.5-0.0.8.ALL-F5OS.qcow2.zip.bundle
config nodes        [ 1 ]
config mgmt-ip      10.255.0.136
config prefix-length 24
config gateway      10.255.0.1
config vlans        [ 500 3010 3011 ]
config cryptos      enabled
config vcpu-cores-per-node 4
config memory       14848
config storage size 76
config running-state deployed
config appliance-mode disabled
!
Boston-r10900-1#
To see the actual status of the tenants, issue the CLI command show tenants.
Boston-r10900-1# show tenants
tenants tenant test-tenant
    state unit-key-hash    IHJti+ctR9YrfmTuj3F7dElBgXtFyOBFpa+7AudyYif3neHybBiP5v3tyt5AMd7WwDypOCz58US8I9NXzvgqnQ==
    state type             BIG-IP
    state image            BIGIP-17.1.1.2-0.0.1.T2-F5OS.qcow2.zip.bundle
    state mgmt-ip          10.255.2.12
    state prefix-length    24
    state gateway          10.255.2.252
    state dag-ipv6-prefix-length 128
    state vlans            [ 3010 3011 ]
    state cryptos          enabled
    state vcpu-cores-per-node 4
    state qat-vf-count     6
    state memory           14848
    state storage size 82
    state running-state    deployed
    state appliance-mode disabled
    state feature-flags stats-stream-capable true
    state namespace        default
    state status           Running
    state primary-slot     1
    state image-version    "BIG-IP 17.1.1.2 0.0.1"
    state mac-data base-mac 00:94:a1:69:59:2b
    state mac-data mac-pool-size 1
MAC
-------------------
00:94:a1:69:59:2b

NODE  CPUS
-----------------------
1     [ 16 19 40 43 ]

                    INSTANCE  TENANT
NODE  POD NAME       ID        SLOT    PHASE    CREATION TIME         READY TIME            STATUS                   MGMT MAC
----------------------------------------------------------------------------------------------------------------------------------------
1     test-tenant-1  1         1       Running  2024-08-01T16:23:56Z  2024-08-01T16:24:38Z  Started tenant instance  00:94:a1:69:59:2c

Boston-r10900-1#
Tenant Deployment via webUI
Uploading Tenant Images via webUI
Before deploying any tenant, you must ensure you have a proper tenant software release loaded into F5OS. Under Tenant Management there is a page for uploading tenant software images. There are TMOS images specifically for rSeries. Only supported rSeries TMOS releases should be loaded into this system. Do not attempt to load older or even newer images unless there are officially supported on rSeries.
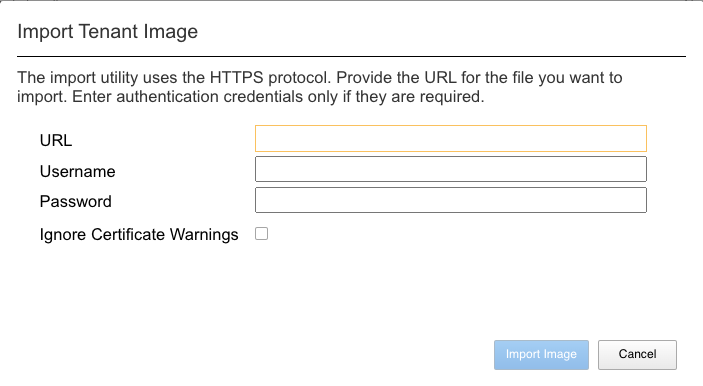
You can upload a tenant image via the webUI in two different places. The first is by going to the Tenant Management > Tenant Images page. There are two options on this page; you can click the Import button, and you will receive a pop-up asking for the URL of a remote HTTPS server with optional credentials, and the ability to ignore certificate warnings.
The second option is to click the Upload button to select an image file that you have previously downloaded directly from your computer via the browser.

After the image is uploaded, you need to wait until it shows Verified status before deploying a tenant. The second option in the webUI to upload files is via the System Settings > File Utilities page. In the drop down for the Base Directory select images/tenant, and here you will see all the available tenant images on the system. You can use the same Import and Upload options as outlined in the previous example.

If an HTTPS server is not available and uploading from a client machine is not an option, you may upload a tenant image using SCP directly to the appliance. Simply SCP an image to the F5OS out-of-band management IP address using the admin account and a path of IMAGES.
scp BIGIP-15.1.5-0.0.8.ALL-VELOS.qcow2.zip.bundle admin@10.255.0.148:IMAGES
Creating a Tenant via webUI
You can deploy a tenant from the webUI using the Add button in the Tenant Management > Tenant Deployments screen.

The tenant deployment options are almost identical to deploying a vCMP guest, with a few minor differences. Supply a name for the tenant and choose the TMOS tenant image for it to run. Next you will assign an out-of-band management address, prefix, and gateway, and assign VLANs you want the tenant to inherit. There is also an option to adjust the virtual disk size if this tenant will need more space. There are Recommended and Advanced options for resource provisioning; choosing recommended will automatically adjust memory based on the vCPUs allocated to the tenant. Choosing Advanced will allow you to over-allocate memory which is something iSeries did not support. You can choose different states (Configured, Provisioned, Deployed) just like vCMP and there is an option to enable/disable HW Crypto and Compression Acceleration (recommended this stay enabled). And finally, there is an option to enable Appliance mode which will disable root/bash access to the tenant. Once you click Save the tenant will move to the desired state of Configured, Provisioned, or Deployed.

Validating Tenant Status via webUI
Once the tenant is deployed you can monitor its status in the Tenant Management > Tenant Deployments webUI page. You’ll see the State show Deployed but the Status column will be empty until the tenant starts initializing. The tenant will cycle through various phases as the tenant starts initializing. It should go from an empty status to Starting.

The tenant will then go from Starting to Running.

Finally, when the tenant is fully operational you can click the arrow button on the far right to get more detailed status of the tenant. The Running Version should display the actual software version of the tenant.

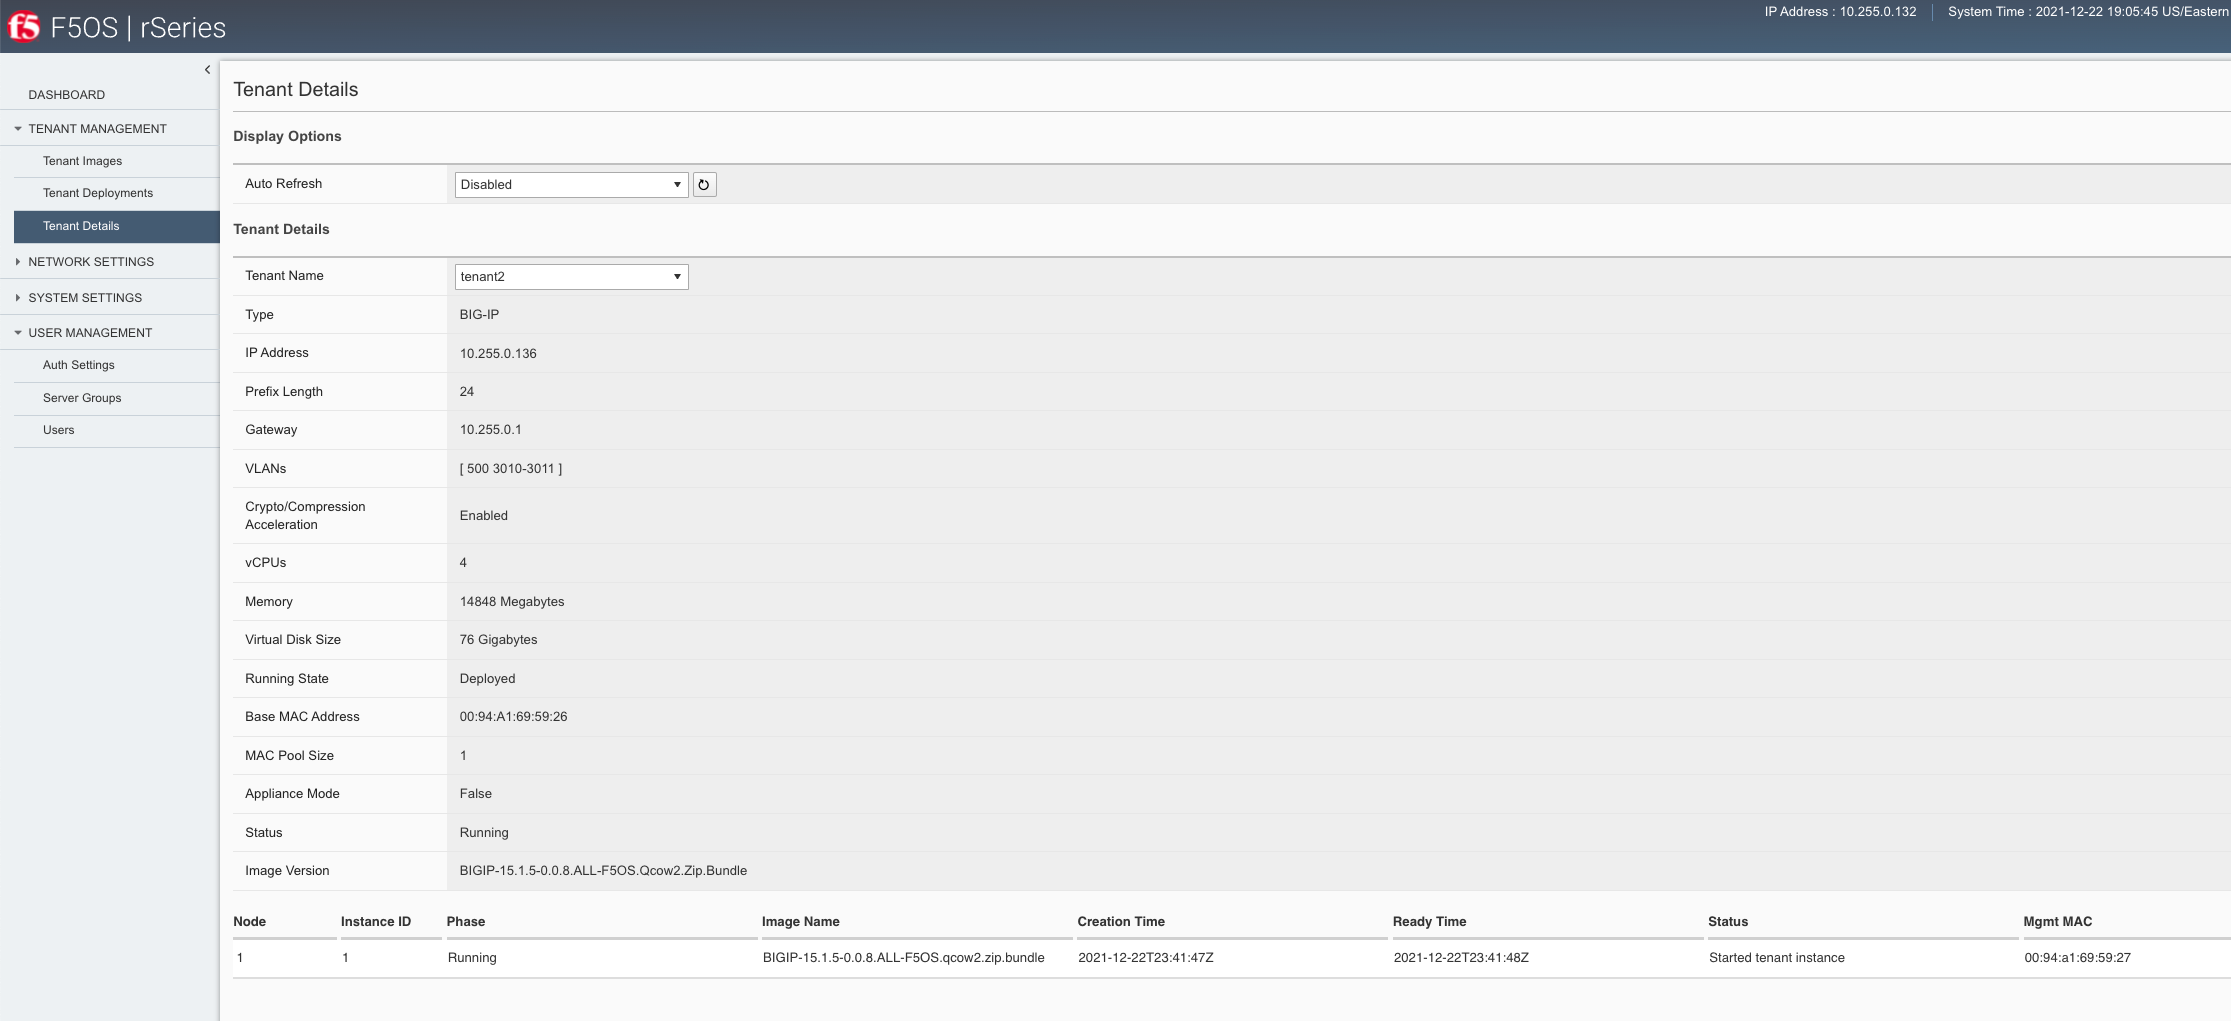
You can view a more detailed tenant status using the Tenant Management > Tenant Details webUI page. You may select a tenant to view and refresh period, to monitor in deeper detail. As of F5OS-A 1.8.0 this page will display real time and historical tenant CPU, Memory, and Disk usage.

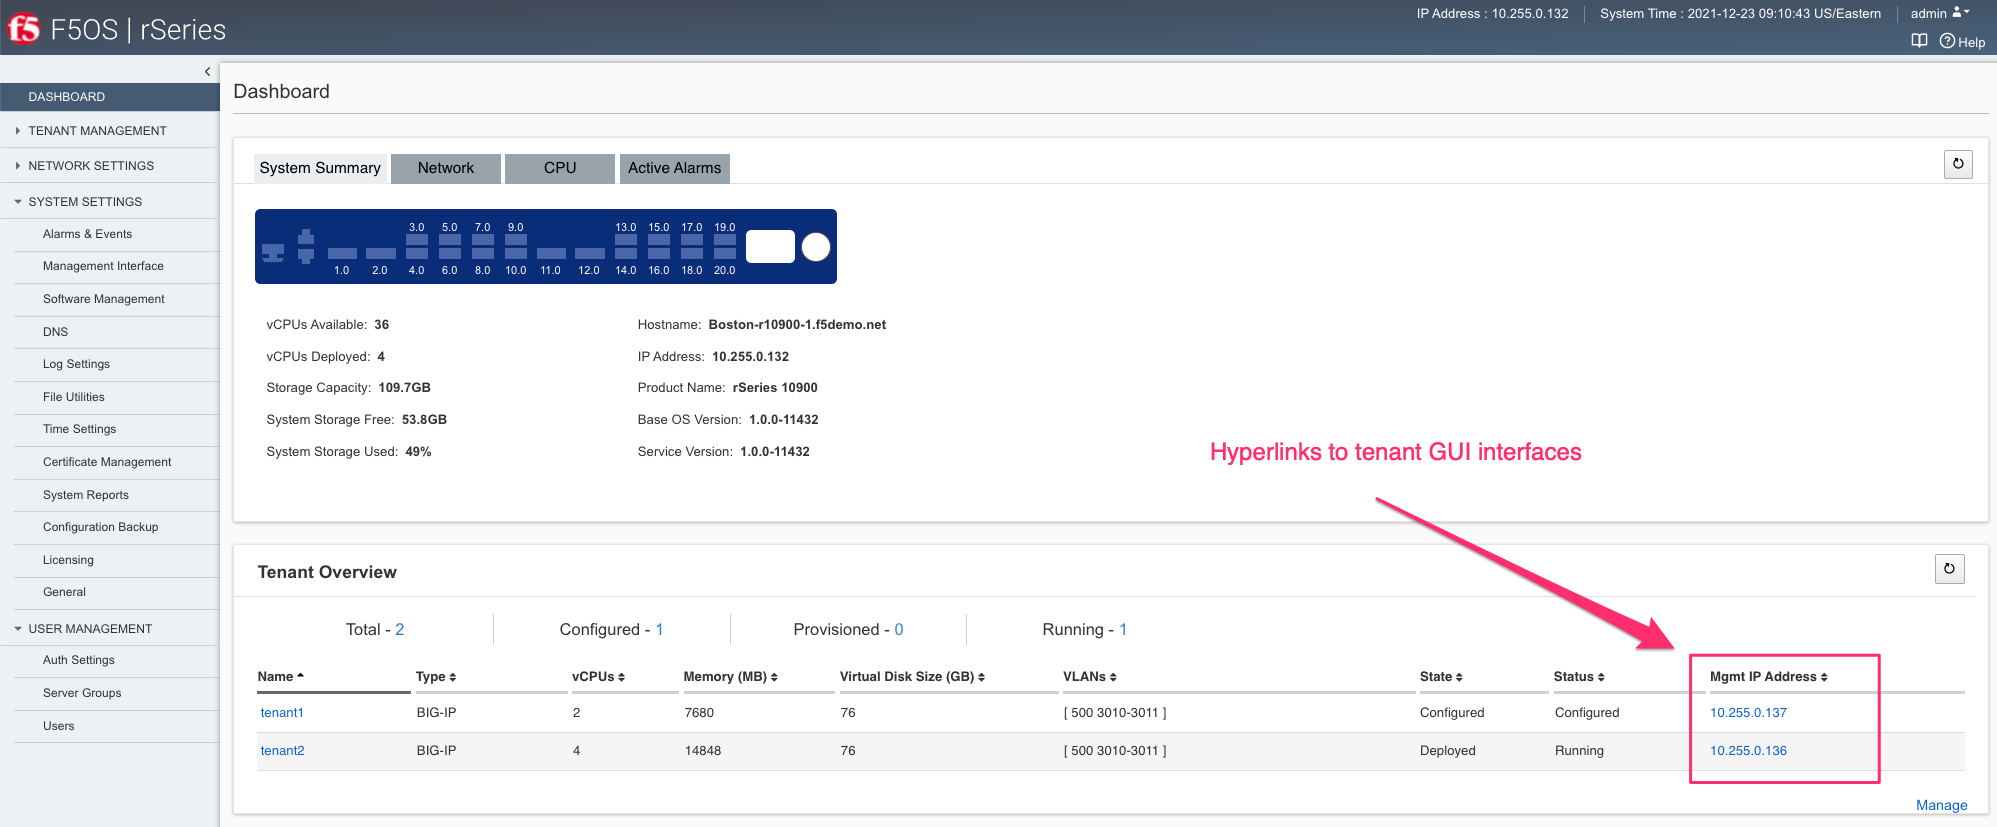
At this point, the tenant should be running and can be accessed via its out-of-band management IP address. You can go to the Dashboard page in the webUI and then click on Tenant Overview to see the running tenants. There is a hyperlink that will connect to the tenant’s webUI IP address as seen below.
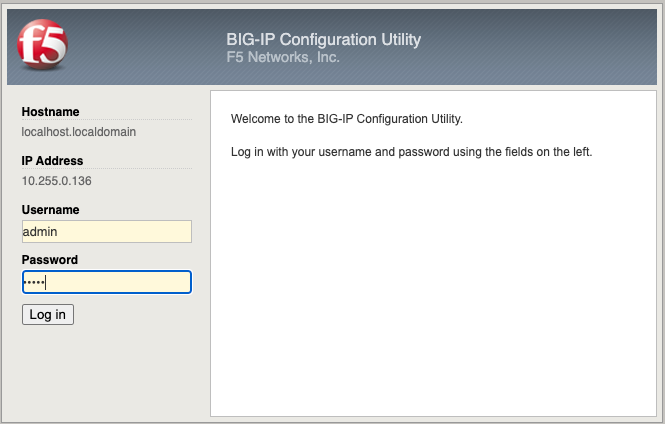
Clicking on one of the hyperlinks will bring you to the BIG-IP webUI of that tenant, and you’ll need to login with default credentials of admin/admin. You will be prompted to change the password for the admin account.
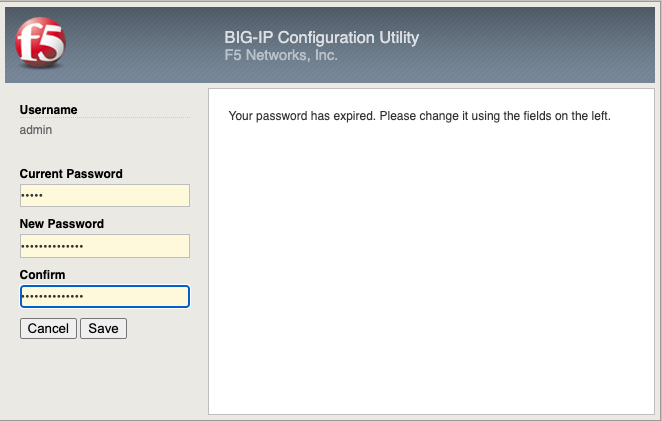
Now login with the new admin password, and you’ll be brought into the initial setup wizard of the BIG-IP tenant.
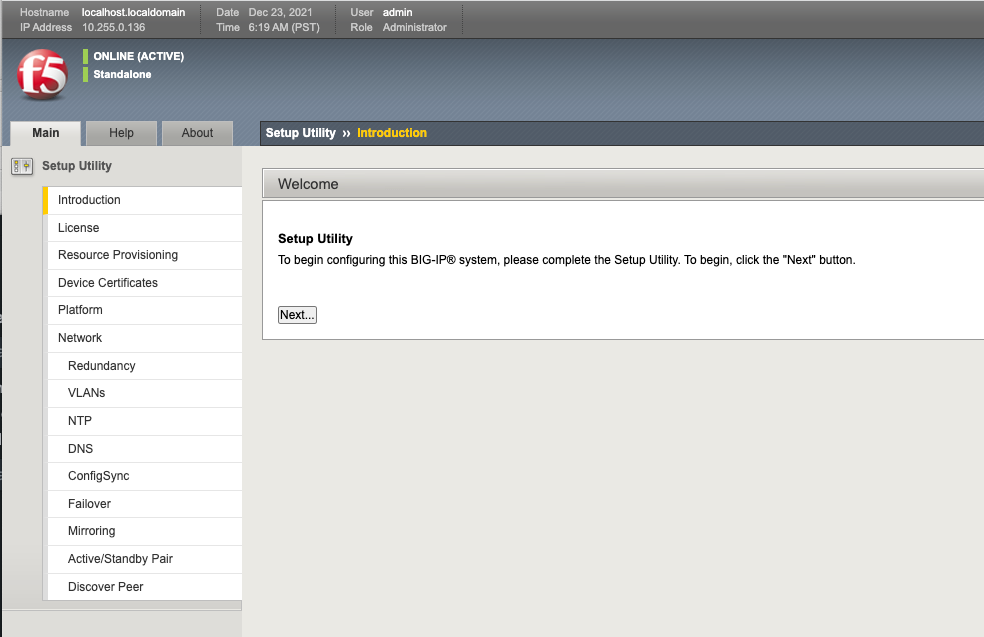
At this point you can configure the tenant as you normally would any BIG-IP device. You could use Declarative Onboarding (DO) to configure all the lower-level network and system settings, and then use AS3 to automate application deployments.
Tenant Deployment via API
Loading Tenant Images from a Remote Server via API
To copy a tenant image into F5OS over the API, use the following API call to the F5OS out-of-band management IP address. The example below copies a tenant image from a remote HTTPS server. You may also edit the API call to copy from remote SFTP or SCP servers by adding the proper protocol option.
POST https://{{rseries_appliance1_ip}}:8888/restconf/data/f5-utils-file-transfer:file/import
In the body of the API call, enter the following JSON information.
{
    "input": [
        {
            "remote-host": "10.255.0.142",
            "remote-file": "upload/{{Appliance_Tenant_Image}}",
            "local-file": "images/tenant/{{Appliance_Tenant_Image}}",
            "insecure": "",
            "f5-utils-file-transfer:username": "corpuser",
            "f5-utils-file-transfer:password": "Pa$$w0rd"
        }
    ]
}
To list the current tenant images available on the appliance, use the following API Call:
GET https://{{rseries_appliance1_ip}}:8888/restconf/data/f5-tenant-images:images
Below is output generated from the previous command:
{
    "f5-tenant-images:images": {
        "image": [
            {
                "name": "BIGIP-15.1.4-0.0.26.ALL-VELOS.qcow2.zip.bundle",
                "in-use": false,
                "status": "verified"
            },
            {
                "name": "BIGIP-15.1.5-0.0.3.ALL-F5OS.qcow2.zip.bundle",
                "in-use": false,
                "status": "verified"
            },
            {
                "name": "BIGIP-15.1.5-0.0.8.ALL-F5OS.qcow2.zip.bundle",
                "in-use": true,
                "status": "verified"
            },
            {
                "name": "BIGIP-bigip15.1.x-europa-15.1.5-0.0.210.ALL-F5OS.qcow2.zip.bundle",
                "in-use": false,
                "status": "verified"
            },
            {
                "name": "BIGIP-bigip15.1.x-europa-15.1.5-0.0.222.ALL-F5OS.qcow2.zip.bundle",
                "in-use": false,
                "status": "verified"
            },
            {
                "name": "BIGIP-bigip15.1.x-europa-15.1.5-0.0.225.ALL-F5OS.qcow2.zip.bundle",
                "in-use": false,
                "status": "verified"
            },
            {
                "name": "BIGIP-bigip151x-miranda-15.1.4.1-0.0.171.ALL-VELOS.qcow2.zip.bundle",
                "in-use": false,
                "status": "verified"
            },
            {
                "name": "BIGIP-bigip151x-miranda-15.1.4.1-0.0.173.ALL-VELOS.qcow2.zip.bundle",
                "in-use": false,
                "status": "verified"
            },
            {
                "name": "BIGIP-bigip151x-miranda-15.1.4.1-0.0.176.ALL-VELOS.qcow2.zip.bundle",
                "in-use": false,
                "status": "verified"
            },
            {
                "name": "F5OS-A-1.0.0-11432.R5R10.iso",
                "in-use": false,
                "status": "verification-failed"
            }
        ]
    }
}
Uploading Tenant Images from a Client Machine via the API
You can upload an F5OS tenant image from a client machine over the API. First you must obtain an upload-id using the following API call.
POST https://{{rseries_appliance1_ip}}:8888/restconf/data/f5-utils-file-transfer:file/f5-file-upload-meta-data:upload/start-upload
In the body of the API call enter the size, name, and file-path as seen in the example below.
{
    "size":2239554028,
    "name": "BIGIP-15.1.10.1-0.0.9.ALL-F5OS.qcow2.zip.bundle",
    "file-path": "images/tenant/"
}
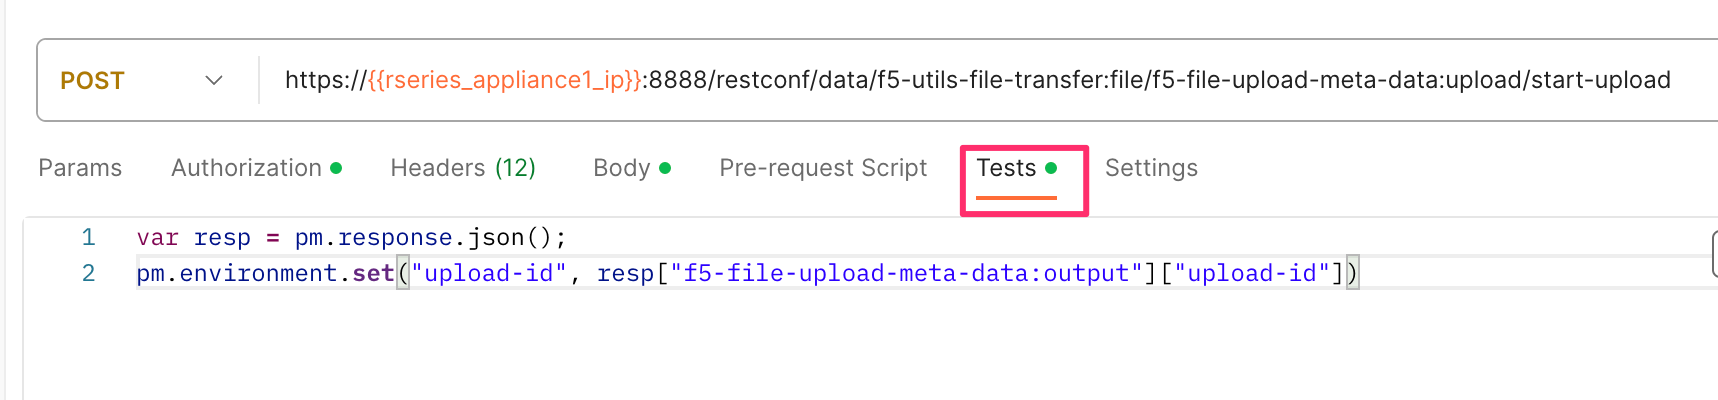
If you are using Postman, the API call above will generate an upload-id that will need to be captured so it can be used in the API call to upload the file. Below is an example of the code that should be added to the Test section of the API call so that the upload-id can be captured and saved to a variable called upload-id for subsequent API calls.
var resp = pm.response.json();
pm.environment.set("upload-id", resp["f5-file-upload-meta-data:output"]["upload-id"])
Below is an example of how this would appear inside the Postman interface under the Tests section.
Once the upload-id is captured, you can then initiate a file upload of the F5OS TENANT_NAME image using the following API call.
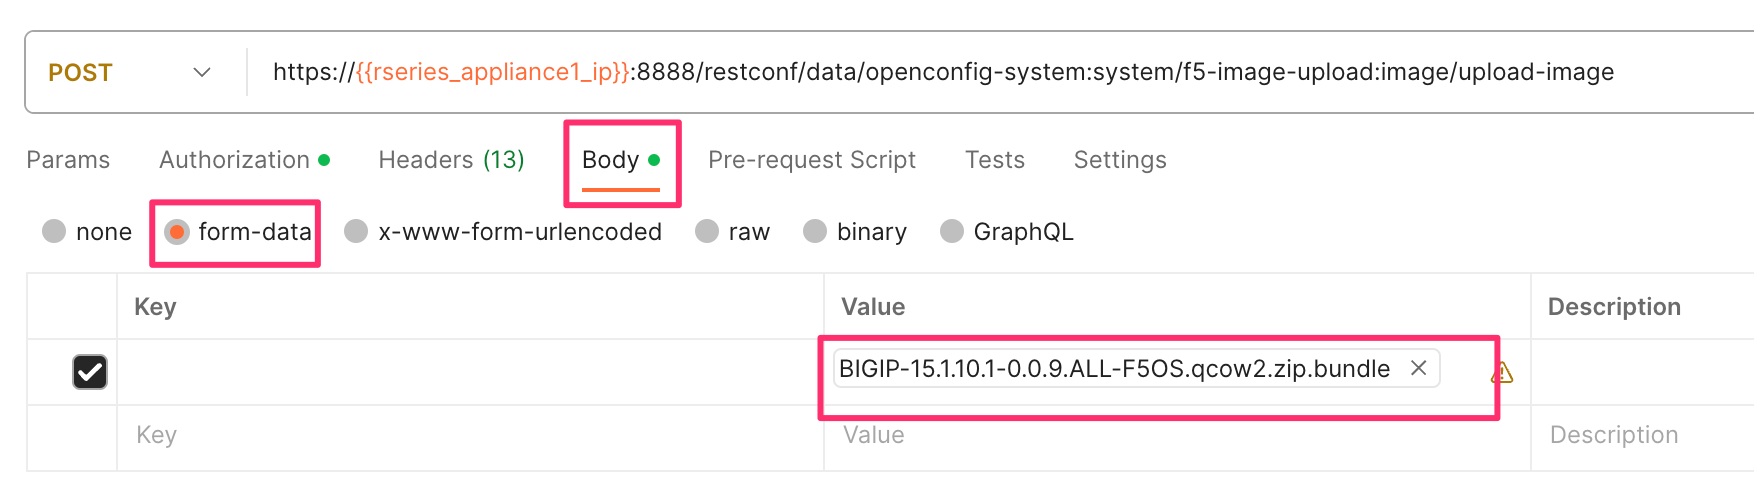
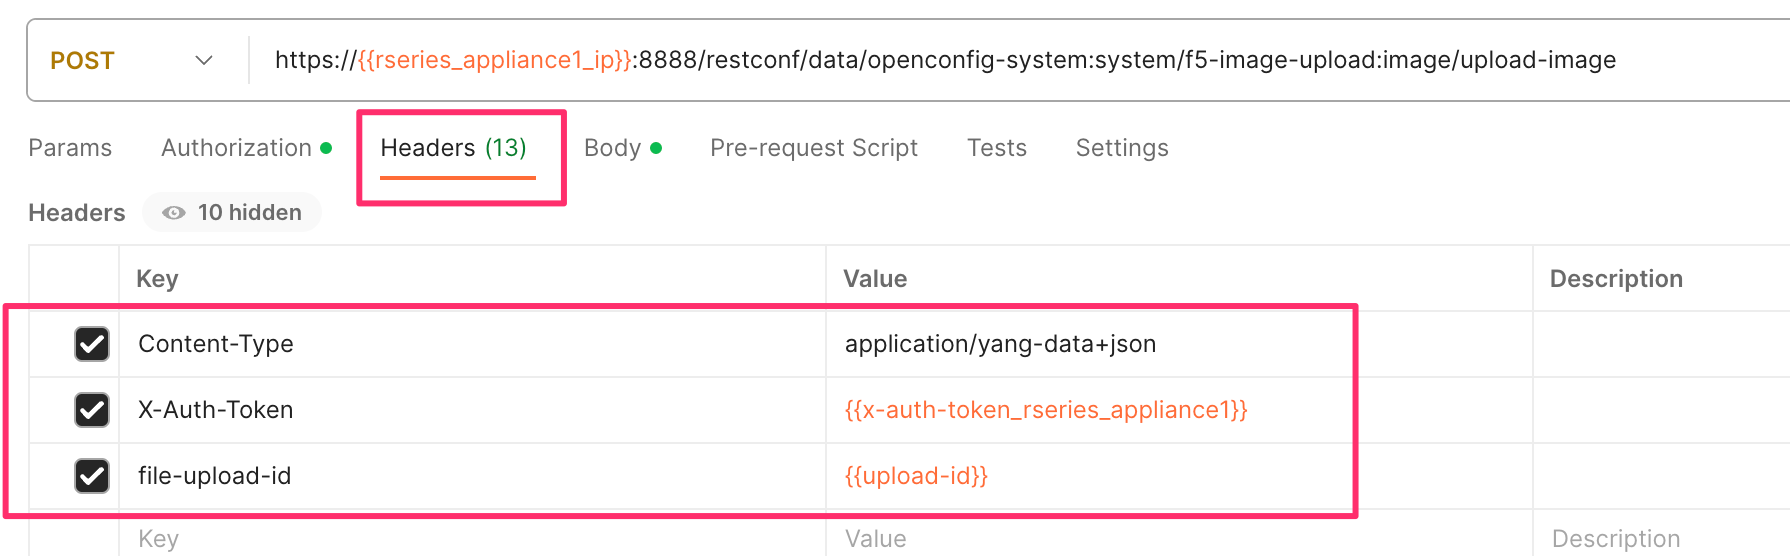
POST https://{{rseries_appliance1_ip}}:8888/restconf/data/openconfig-system:system/f5-image-upload:image/upload-image
In the body of the API call select form-data, and then in the Value section click Select Files and select the F5OS tenant image you want to upload as seen in the example below.
In the Headers section ensure you add the file-upload-id header, with the variable used to capture the id in the previous API call.
Creating a Tenant via API
Tenant creation via the API is as simple as defining the parameters below and sending the POST to the rSeries out-of-band IP address. The API call below will create a tenant; many of the fields are defined as variables in Postman. That way the API calls don’t have to be rewritten for different tenant names or IP addressing, or images, and they can be reused easily and adapted to any environment. In the example below, the running-state will be set for Configured and then a subsequent API call will set it to Deployed, but this could all be done via a single API call. This is done to show how changes can be made to the tenant status after its created.
POST https://{{rseries_appliance1_ip}}:8888/restconf/data/f5-tenants:tenants
Below is the body of the API call above.
{
    "tenant": [
        {
            "name": "{{New_Tenant1_Name}}",
            "config": {
                "image": "{{Appliance_Tenant_Image}}",
                "nodes": [
                    1
                ],
                "mgmt-ip": "{{Appliance1_Tenant1_IP}}",
                "gateway": "{{OutofBand_DFGW}}",
                "prefix-length": 24,
                "vlans": [
                    3010,
                    3011,
                    500
                ],
                "vcpu-cores-per-node": 2,
                "memory": 7680,
                "cryptos": "enabled",
                "running-state": "configured"
            }
        }
    ]
}
Validating Tenant Status via API
The command below will show the current state and status of the tenant. Remember it has not been changed to the Deployed state yet.
GET https://{{rseries_appliance1_ip}}:8888/restconf/data/f5-tenants:tenants
The output of the above API call shows the state and status of the tenant.
{
    "f5-tenants:tenants": {
        "tenant": [
            {
                "name": "tenant1",
                "config": {
                    "name": "tenant1",
                    "type": "BIG-IP",
                    "image": "BIGIP-15.1.5-0.0.8.ALL-F5OS.qcow2.zip.bundle",
                    "nodes": [
                        1
                    ],
                    "mgmt-ip": "10.255.0.149",
                    "prefix-length": 24,
                    "gateway": "10.255.0.1",
                    "vlans": [
                        500,
                        3010,
                        3011
                    ],
                    "cryptos": "enabled",
                    "vcpu-cores-per-node": 2,
                    "memory": "7680",
                    "storage": {
                        "size": 76
                    },
                    "running-state": "configured",
                    "appliance-mode": {
                        "enabled": false
                    }
                },
                "state": {
                    "name": "tenant1",
                    "unit-key-hash": "ec+5rtpwnIt6awtkadYqXyWzJ/Oty4tRbfPICaz6OzPSw4KILtQMJZETeq/Q6pbfBh8zXQfBPTetgvPw2dW2ig==",
                    "type": "BIG-IP",
                    "mgmt-ip": "10.255.0.149",
                    "prefix-length": 24,
                    "gateway": "10.255.0.1",
                    "mac-ndi-set": [
                        {
                            "ndi": "default",
                            "mac": "00:94:a1:69:59:24"
                        }
                    ],
                    "vlans": [
                        500,
                        3010,
                        3011
                    ],
                    "cryptos": "enabled",
                    "vcpu-cores-per-node": 2,
                    "memory": "7680",
                    "storage": {
                        "size": 76
                    },
                    "running-state": "configured",
                    "mac-data": {
                        "base-mac": "00:94:a1:69:59:26",
                        "mac-pool-size": 1
                    },
                    "appliance-mode": {
                        "enabled": false
                    },
                    "status": "Configured"
                }
            }
        ]
    }
}
Next a new API call will be sent to set the tenant’s running-state to Deployed. Note this uses a PATCH command.
PATCH https://{{rseries_appliance1_ip}}:8888/restconf/data/f5-tenants:tenants/tenant={{New_Tenant1_Name}}/config/running-state
The body/payload of the API call will set the running-state to Deployed:
{
    "running-state": "deployed"
}
You may then re-check the tenant status and see how the state changes, and the additional information that is displayed:
GET https://{{rseries_appliance1_ip}}:8888/restconf/data/f5-tenants:tenants
Below is the output from the above API call:
{
    "f5-tenants:tenants": {
        "tenant": [
            {
                "name": "tenant1",
                "config": {
                    "name": "tenant1",
                    "type": "BIG-IP",
                    "image": "BIGIP-15.1.5-0.0.8.ALL-F5OS.qcow2.zip.bundle",
                    "nodes": [
                        1
                    ],
                    "mgmt-ip": "10.255.0.149",
                    "prefix-length": 24,
                    "gateway": "10.255.0.1",
                    "vlans": [
                        500,
                        3010,
                        3011
                    ],
                    "cryptos": "enabled",
                    "vcpu-cores-per-node": 2,
                    "memory": "7680",
                    "storage": {
                        "size": 76
                    },
                    "running-state": "deployed",
                    "appliance-mode": {
                        "enabled": false
                    }
                },
                "state": {
                    "name": "tenant1",
                    "unit-key-hash": "QnBzdWEYTr3oTmTgtyvQLc9m+ANYIrHlwcd6Z84qKOiYa61b3eqqbxBtaVTzWFOxn19xrXp37gz4CKC8Et2PsQ==",
                    "type": "BIG-IP",
                    "mgmt-ip": "10.255.0.149",
                    "prefix-length": 24,
                    "gateway": "10.255.0.1",
                    "mac-ndi-set": [
                        {
                            "ndi": "default",
                            "mac": "00:94:a1:69:59:24"
                        }
                    ],
                    "vlans": [
                        500,
                        3010,
                        3011
                    ],
                    "cryptos": "enabled",
                    "vcpu-cores-per-node": 2,
                    "memory": "7680",
                    "storage": {
                        "size": 76
                    },
                    "running-state": "deployed",
                    "mac-data": {
                        "base-mac": "00:94:a1:69:59:26",
                        "mac-pool-size": 1
                    },
                    "appliance-mode": {
                        "enabled": false
                    },
                    "status": "Running",
                    "instances": {
                        "instance": [
                            {
                                "node": 1,
                                "instance-id": 1,
                                "phase": "Running",
                                "image-name": "BIGIP-15.1.5-0.0.8.ALL-F5OS.qcow2.zip.bundle",
                                "creation-time": "2021-12-23T15:30:07Z",
                                "ready-time": "2021-12-23T15:30:08Z",
                                "status": "Started tenant instance",
                                "mgmt-mac": "00:94:a1:69:59:27"
                            }
                        ]
                    }
                }
            }
        ]
    }
}
Resizing a Tenant
rSeries tenants have static vCPU and memory allocations just like vCMP. These can be changed after a tenant has been deployed, but the tenant will have to be suspended (put in the Provisioned state), then the change to CPU and or memory allocation can be made. A tenant can be expanded assuming adequate resources are available. Once the changes are completed the tenant can be put into the Deployed state and returned to service.
Expanding a Tenant via webUI
Below is webUI output of a single tenant that is in the deployed and running state configured with 2 vCPUs and 7680MB of memory. The workflow below will cover expanding the tenant from 2 to 4 vCPUs and the memory from 7680MB to 14848MB. Click the check box next to the tenant, and then select the Provision button.

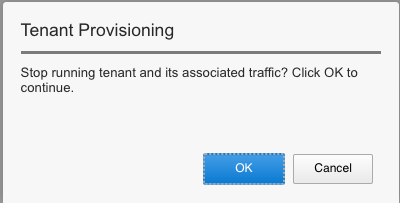
A pop-up will appear letting you know this will stop the tenant and disrupt traffic. Click OK.
This will move the tenant from Deployed to Provisioned state. You will see the tenant go from Running, to Stopping, and finally to the Provisioned Status.


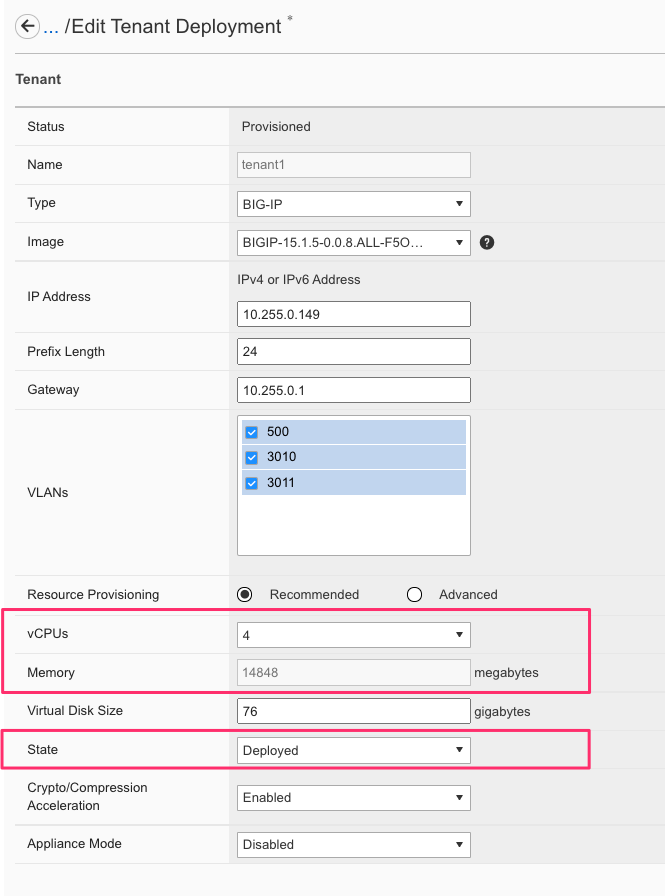
Next click on the hyperlink for tenant1. This will bring you into the configuration page for that tenant. Change the vCPUs to 4, and the Memory to 14848 and set the state back to Deployed. When finished, click Save and the tenant will start up again with the new configuration.

Expanding a Tenant via CLI
Expanding a tenant via the CLI follows the same workflows as the webUI. You must first put the tenant in a Provisioned state, and then make configuration changes, and then change back to a Deployed state. You can view the current configuration of the tenant by issuing the show running-config tenants command. Note the tenant currently has 2 vCPUs, and 7680 MB of memory.
Boston-r10900-1# show running-config tenants
tenants tenant tenant1
config name         tenant1
config type         BIG-IP
config image        BIGIP-15.1.5-0.0.8.ALL-F5OS.qcow2.zip.bundle
config nodes        [ 1 ]
config mgmt-ip      10.255.0.149
config prefix-length 24
config gateway      10.255.0.1
config vlans        [ 500 3010 3011 ]
config cryptos      enabled
config vcpu-cores-per-node 2
config memory       7680
config storage size 76
config running-state provisioned
config appliance-mode disabled
!
Boston-r10900-1#
You can also view the tenant’s running status by issuing the CLI command show tenants.
Boston-r10900-1# show tenants
tenants tenant tenant1
state name          tenant1
state unit-key-hash QnBzdWEYTr3oTmTgtyvQLc9m+ANYIrHlwcd6Z84qKOiYa61b3eqqbxBtaVTzWFOxn19xrXp37gz4CKC8Et2PsQ==
state type          BIG-IP
state mgmt-ip       10.255.0.149
state prefix-length 24
state gateway       10.255.0.1
state vlans         [ 500 3010 3011 ]
state cryptos       enabled
state vcpu-cores-per-node 2
state memory        7680
state storage size 76
state running-state provisioned
state mac-data base-mac 00:94:a1:69:59:26
state mac-data mac-pool-size 1
state appliance-mode disabled
state status        Provisioned
state primary-slot  1
state image-version "BIG-IP 15.1.5 0.0.8"
NDI      MAC
----------------------------
default  00:94:a1:69:59:24

    INSTANCE                                                                 CREATION  READY          MGMT
NODE  ID        PHASE            IMAGE NAME                                    TIME      TIME   STATUS  MAC
--------------------------------------------------------------------------------------------------------------
1     1         Ready to deploy  BIGIP-15.1.5-0.0.8.ALL-F5OS.qcow2.zip.bundle                           -

Boston-r10900-1#
To change the tenant configuration, you must first enter config mode and then change the tenant running state to the provisioned. The change won’t take effect until the commit command is issued:
Boston-r10900-1# config
Entering configuration mode terminal
Boston-r10900-1(config)# tenants tenant tenant1 config running-state provisioned
Boston-r10900-1(config-tenant-tenant1)# commit
Commit complete.
You can monitor the tenant transition to provisioned state using the show commands above. Once in the provisioned state you can change the vCPU and memory configurations as well as the running-state back to deployed. Then issue the commit command to execute the changes.
Boston-r10900-1# config
Entering configuration mode terminal
Boston-r10900-1(config)# tenants tenant tenant1 config vcpu-cores-per-node 4 memory 14848 running-state deployed
Boston-r10900-1(config-tenant-tenant1)# commit
Commit complete.
Expanding a Tenant via API
First get the current tenant status via the API and note the current CPU allocation. The tenant in the example below is currently configured and has 2 vCPUs and 7680 of memory:
GET https://{{rseries_appliance1_ip}}:8888/restconf/data/f5-tenants:tenants
The API output:
{
    "f5-tenants:tenants": {
        "tenant": [
            {
                "name": "tenant1",
                "config": {
                    "name": "tenant1",
                    "type": "BIG-IP",
                    "image": "BIGIP-15.1.5-0.0.8.ALL-F5OS.qcow2.zip.bundle",
                    "nodes": [
                        1
                    ],
                    "mgmt-ip": "10.255.0.149",
                    "prefix-length": 24,
                    "gateway": "10.255.0.1",
                    "vlans": [
                        500,
                        3010,
                        3011
                    ],
                    "cryptos": "enabled",
                    "vcpu-cores-per-node": 2,
                    "memory": "7680",
                    "storage": {
                        "size": 76
                    },
                    "running-state": "deployed",
                    "appliance-mode": {
                        "enabled": false
                    }
                },
                "state": {
                    "name": "tenant1",
                    "unit-key-hash": "ppgxFYFyOnpn4GT6fL5Ej8Y+PbR5UUu/pBQb0P2nFOwCx1eQpHtFgvWdwqCKpwofjlRKNossj5y5y9OE0vCWpw==",
                    "type": "BIG-IP",
                    "mgmt-ip": "10.255.0.149",
                    "prefix-length": 24,
                    "gateway": "10.255.0.1",
                    "mac-ndi-set": [
                        {
                            "ndi": "default",
                            "mac": "00:94:a1:69:59:24"
                        }
                    ],
                    "vlans": [
                        500,
                        3010,
                        3011
                    ],
                    "cryptos": "enabled",
                    "vcpu-cores-per-node": 2,
                    "memory": "7680",
                    "storage": {
                        "size": 76
                    },
                    "running-state": "deployed",
                    "mac-data": {
                        "base-mac": "00:94:a1:69:59:26",
                        "mac-pool-size": 1
                    },
                    "appliance-mode": {
                        "enabled": false
                    },
                    "status": "Running",
                    "instances": {
                        "instance": [
                            {
                                "node": 1,
                                "instance-id": 1,
                                "phase": "Running",
                                "image-name": "BIGIP-15.1.5-0.0.8.ALL-F5OS.qcow2.zip.bundle",
                                "creation-time": "2021-12-23T17:14:05Z",
                                "ready-time": "2021-12-23T17:14:06Z",
                                "status": "Started tenant instance",
                                "mgmt-mac": "00:94:a1:69:59:27"
                            }
                        ]
                    }
                }
            }
        ]
    }
}
If you attempt to change the tenant configuration while it is in the deployed state it will fail with an error like the one below. It will notify you that config changes when in the deployed state are not allowed:
{
    "errors": {
        "error": [
            {
                "error-message": "/tenants/tenant{tenant1}/config/vcpu-cores-per-node (value \"4\"): cannot change vcpu-cores-per-node when tenant is in deployed state",
                "error-path": "/f5-tenants:tenants/tenant=tenant1/config/vcpu-cores-per-node",
                "error-tag": "invalid-value",
                "error-type": "application"
            }
        ]
    }
}
The workflow to change the tenant configuration is to first change the tenant state to provisioned then make the configuration change. Use the following API PATCH call to move the tenant to the provisioned state:
PATCH https://{{rseries_appliance1_ip}}:8888/restconf/data/f5-tenants:tenants/tenant={{New_Tenant1_Name}}/config/running-state
For the JSON body of the API call, change the running-state to provisioned:
{
    "running-state": "provisioned"
}
Next reissue the GET command above to obtain the tenant status and note that its running state has changed to provisioned:
"vcpu-cores-per-node": 2,
"memory": "7680",
"storage": {
    "size": 76
},
"running-state": "provisioned",
"mac-data": {
    "base-mac": "00:94:a1:69:59:26",
    "mac-pool-size": 1
},
Send a PATCH API command to change the CPU and memory configuration so the tenant can expand from 2 to 4 vCPUs and from 7680 to 14848 GB of memory. It’s important to change both the CPU and memory allocation when expanding the tenant.
PATCH https://{{rseries_appliance1_ip}}:8888/restconf/data/f5-tenants:tenants/tenant={{New_Tenant1_Name}}/config/vcpu-cores-per-node
The payload should contain the following:
{
    "vcpu-cores-per-node": 4,
    "memory": 14848
}
Finally change the tenant status back to deployed and then check the status again to confirm the change. The tenant should boot up with the expanded memory and CPU.
PATCH https://{{rseries_appliance1_ip}}:8888/restconf/data/f5-tenants:tenants/tenant={{New_Tenant1_Name}}/config/running-state
The payload should contain the following:
{
    "running-state": "deployed"
}
Validate the new status of the tenant with the correct vCPU and memory sizes, and the running-state of deployed:
GET https://{{rseries_appliance1_ip}}:8888/restconf/data/f5-tenants:tenants
The API output:
{
    "f5-tenants:tenants": {
        "tenant": [
            {
                "name": "tenant1",
                "config": {
                    "name": "tenant1",
                    "type": "BIG-IP",
                    "image": "BIGIP-15.1.5-0.0.8.ALL-F5OS.qcow2.zip.bundle",
                    "nodes": [
                        1
                    ],
                    "mgmt-ip": "10.255.0.149",
                    "prefix-length": 24,
                    "gateway": "10.255.0.1",
                    "vlans": [
                        500,
                        3010,
                        3011
                    ],
                    "cryptos": "enabled",
                    "vcpu-cores-per-node": 4,
                    "memory": "14848",
                    "storage": {
                        "size": 76
                    },
                    "running-state": "deployed",
                    "appliance-mode": {
                        "enabled": false
                    }
                },
                "state": {
                    "name": "tenant1",
                    "unit-key-hash": "ppgxFYFyOnpn4GT6fL5Ej8Y+PbR5UUu/pBQb0P2nFOwCx1eQpHtFgvWdwqCKpwofjlRKNossj5y5y9OE0vCWpw==",
                    "type": "BIG-IP",
                    "mgmt-ip": "10.255.0.149",
                    "prefix-length": 24,
                    "gateway": "10.255.0.1",
                    "mac-ndi-set": [
                        {
                            "ndi": "default",
                            "mac": "00:94:a1:69:59:24"
                        }
                    ],
                    "vlans": [
                        500,
                        3010,
                        3011
                    ],
                    "cryptos": "enabled",
                    "vcpu-cores-per-node": 4,
                    "memory": "14848",
                    "storage": {
                        "size": 76
                    },
                    "running-state": "deployed",
                    "mac-data": {
                        "base-mac": "00:94:a1:69:59:26",
                        "mac-pool-size": 1
                    },
                    "appliance-mode": {
                        "enabled": false
                    },
                    "status": "Running",
                    "primary-slot": 1,
                    "image-version": "BIG-IP 15.1.5 0.0.8",
                    "instances": {
                        "instance": [
                            {
                                "node": 1,
                                "instance-id": 1,
                                "phase": "Running",
                                "image-name": "BIGIP-15.1.5-0.0.8.ALL-F5OS.qcow2.zip.bundle",
                                "creation-time": "2021-12-23T17:19:16Z",
                                "ready-time": "2021-12-23T17:19:17Z",
                                "status": "Started tenant instance",
                                "mgmt-mac": "00:94:a1:69:59:27"
                            }
                        ]
                    }
                }
            }
        ]
    }
}
Deleting a Tenant
If you need to delete a tenant, it can be removed from the F5OS CLI, webUI, or API.
Deleting a Tenant via the CLI
To delete a tenant from the CLI, enter config mode and then enter the command no tenants tenant <tenant-name>. You will then need to issue the commit command for the change to take effect. You can then verify that the tenant has been deleted by using the show tenants command.
Boston-r10900-1# config
Entering configuration mode terminal
Boston-r10900-1(config)# no tenants tenant tenant1
Boston-r10900-1(config)# commit
Commit complete.
Boston-r10900-1(config)#
Boston-r10900-1# show tenants
% No entries found.
Boston-r10900-1#
Deleting a Tenant via the webUI
To delete a tenant from the webUI, go to the Tenant Management > Tenant Deployments page. Select the check box next to the tenant you wish to remove, and then click the Delete button.

You will be prompted before confirming the delete:
Deleting a Tenant via the API
To delete a tenant from the API, issue the following DELETE API call.
DELETE https://{{rseries_appliance1_ip}}:8888/restconf/data/f5-tenants:tenants/tenant={{New_Tenant1_Name}}
There is no need to enter anything in the payload of the API call. This should delete the specified tenant.