F5 BIG-IP SSL Orchestrator Training Lab > All SSL Orchestrator Lab Guides > SSLO 102: Diving into SSL Orchestrator for BIG-IP Next (AppWorld 2024 | 2 hours) > 6. Lab 4 - Automate a Deployment via API Source | Edit on
6.4. Creating a Deployment via API
Multiple API calls will be required to create an SSL Orchestrator and application deployment.
6.4.1. Get BIG-IP Instance ID
Retrieve the BIG-IP Next instance's id. This value is needed to reference the BIG-IP Next instance in other API calls.
If needed, send the CM Login API request again to refresh your access token.
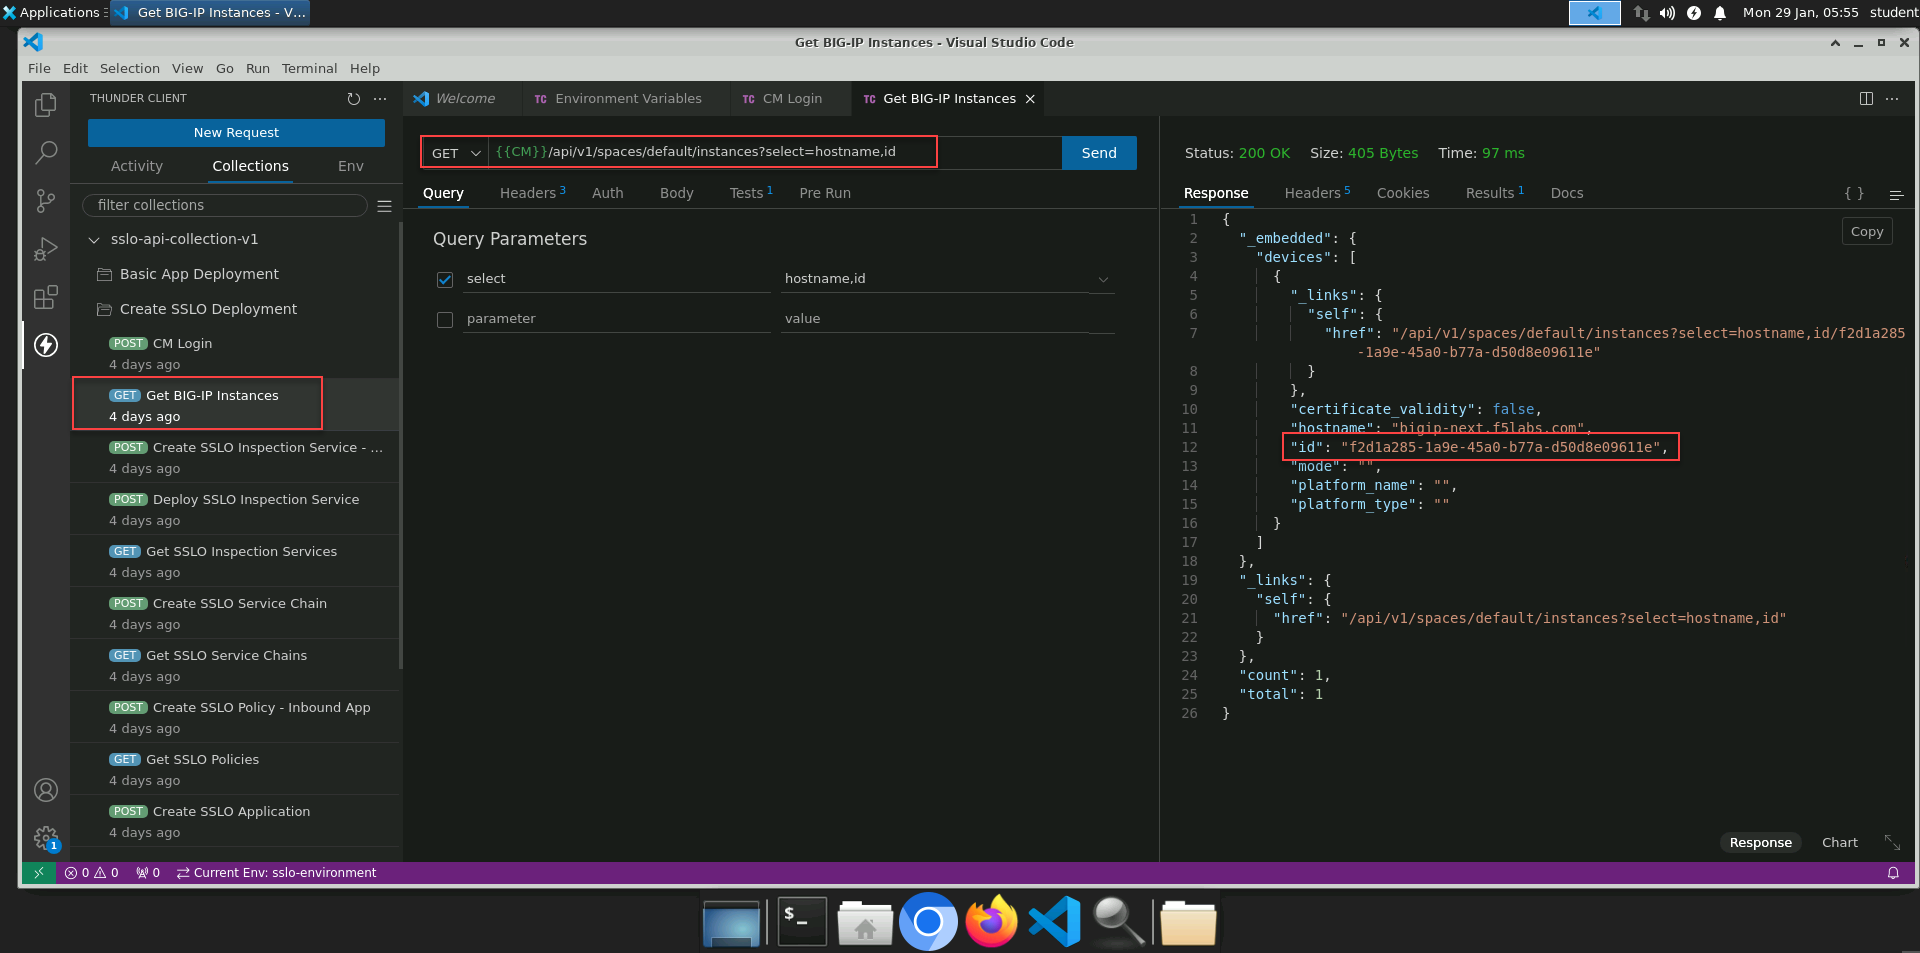
In the Thunder Client Create SSLO Deployment folder, click on the Get BIG-IP Instances request to select it.
Review the JSON Content panel to see the body of the API call.
Click on the Send button to submit the request to the BIG-IP CM API.
In the Response panel, verify that you received an HTTP 200 OK status and look for the id attribute and value.
Note
The id attribute is actually _embedded.devices[0].id. If you look at the Tests > Scripts tab in the Request panel, you will see that the value gets saved to the my_instance_id environment variable.
6.4.2. Create an Inspection Service Definition
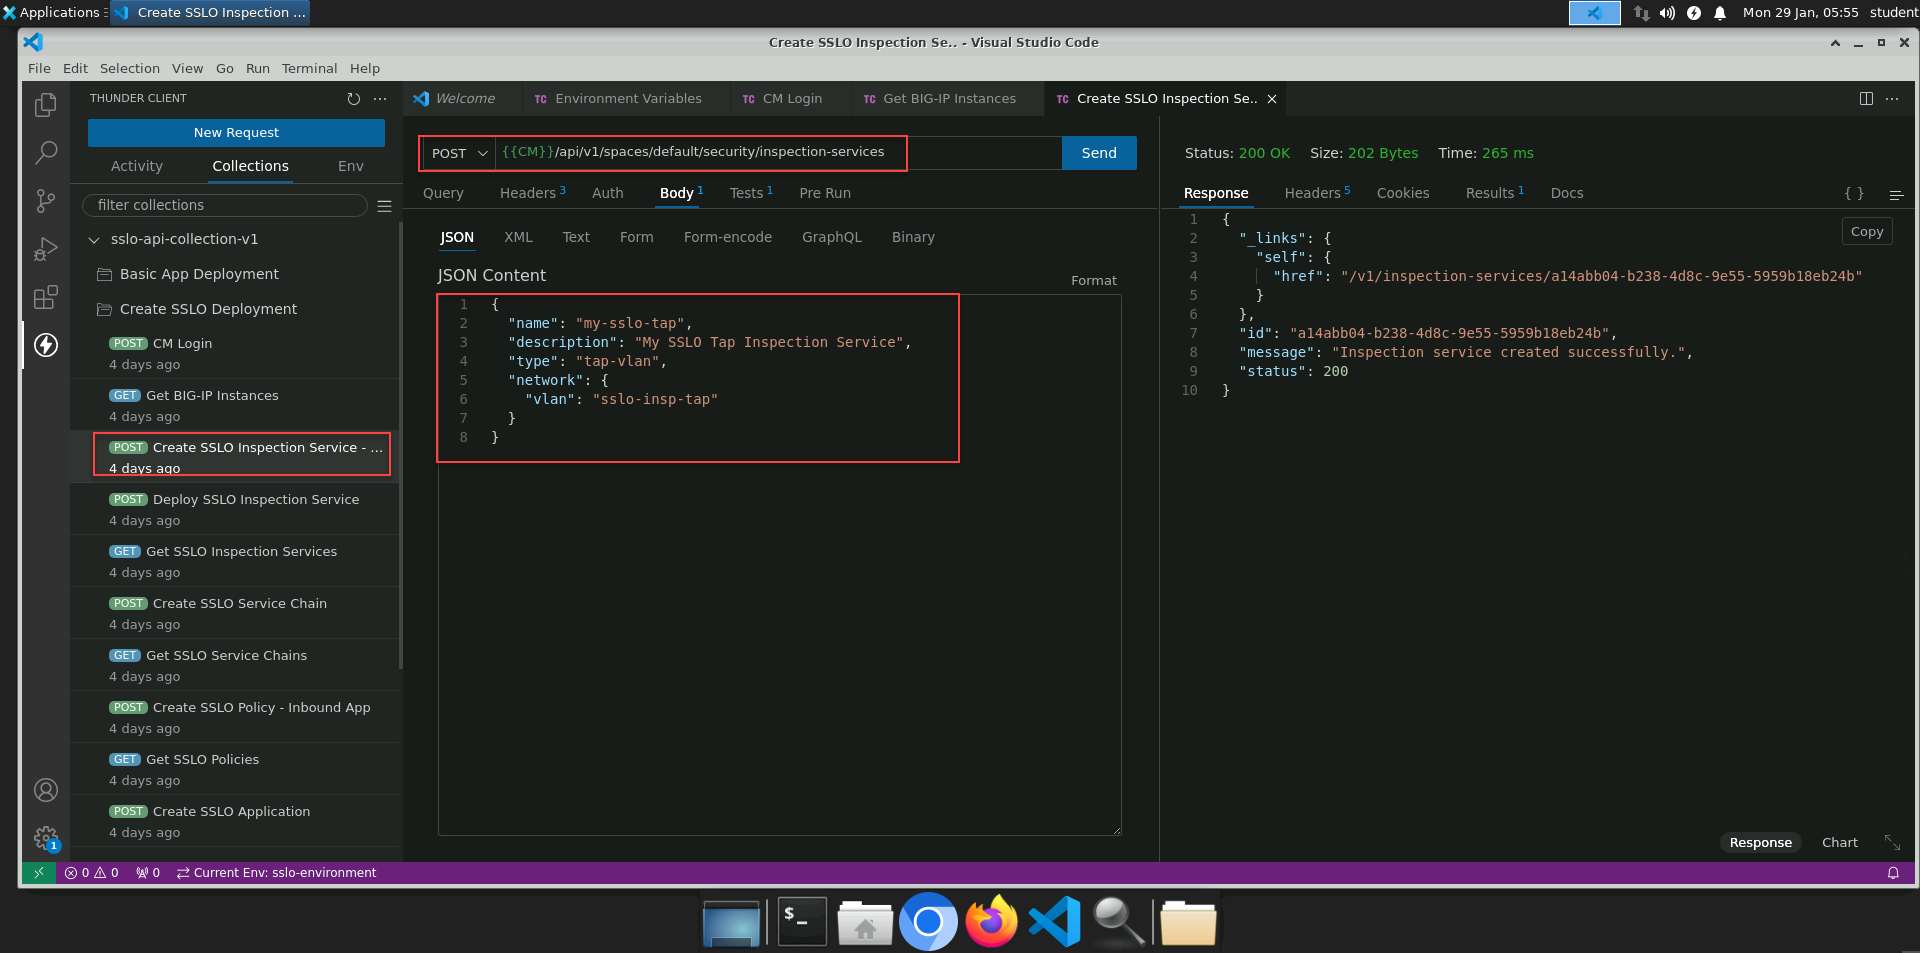
Creation of an SSL Orchestrator Inspection Service involves two steps: creating the Inspection Service definition, and then deploying it to a BIG-IP Next instance. First, let's create a TAP inspection service definition.
Click on the Create SSLO Inspection Service - TAP request to select it.
In the JSON Content panel, review the body of the API call.
Click on the Send button to submit the request to the BIG-IP CM API.
In the Response panel, verify that you received an HTTP 200 OK status and look for the id value of the new TAP Inspection Service object.
Note
The id attribute gets saved to the {{insp-tap-id}} environment variable and will be used in the instance deploy API call, as well as the service chain creation API call.
6.4.3. Deploy an Inspection Service
Once defined in BIG-IP CM, the Inspection Service must then be deployed to a BIG-IP Next instance. The instance deployment will need the BIG-IP Next instance id which you retrieved earlier with the Get BIG-IP Instances API request.
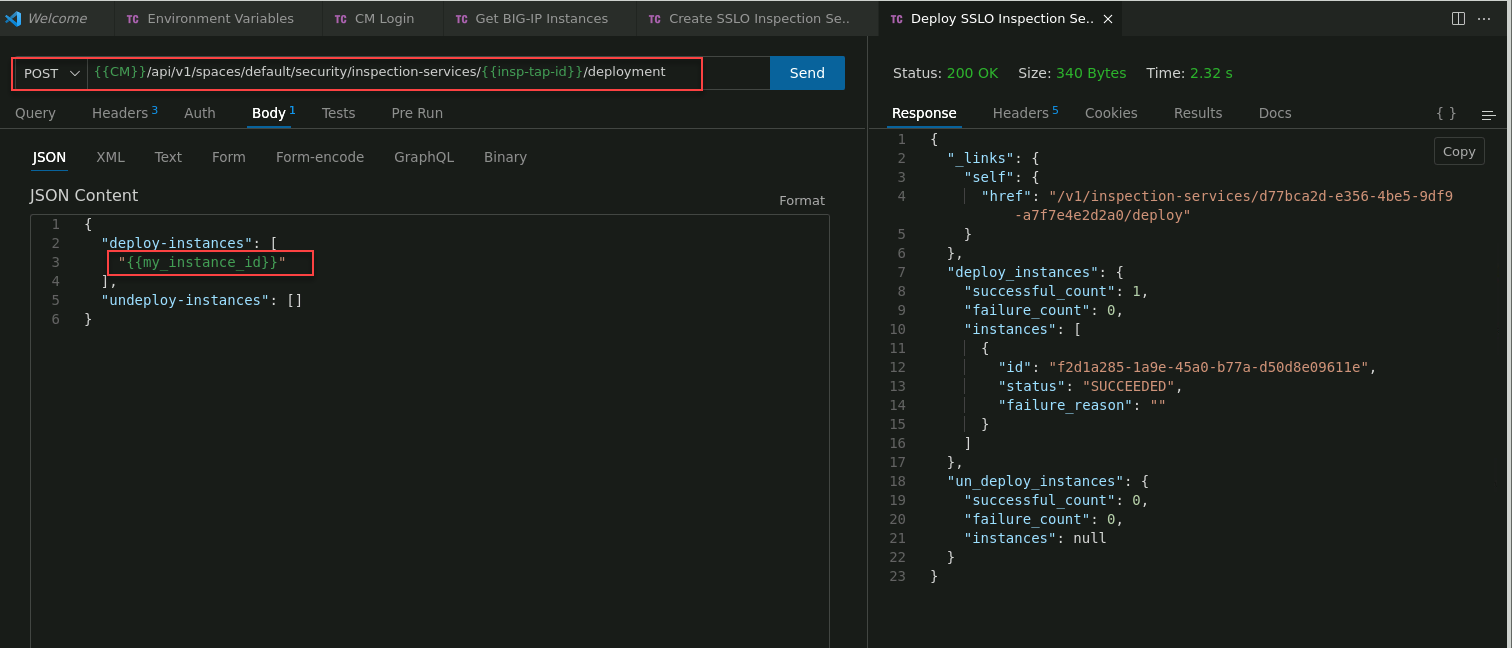
Click on the Deploy SSLO Inspection Service request to select it.
In the API request URL, you will see the {{insp-tap-id}} variable. This variable contains the id value of the previously created TAP Inspection Service definition.
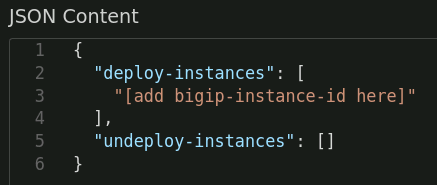
In the JSON Content panel, review the body of the API call. Notice that the deploy-instances attribute has a placeholder value of "[add bigip-instance-id here]". Replace the placeholder (everything between the quotes) with the BIG-IP Next instance id from the Get BIG-IP Instances response.
Hint
You can switch to that request tab to retrieve the id value.
Note
The deploy-instances array can accept a comma-delimited list of instance IDs (if deploying to multiple instances).
Click on the Send button to submit the request to the BIG-IP CM API.
In the Response panel, verify that you received an HTTP 200 OK status. You will also see SUCCEEDED under each BIG-IP Next instance id (if deployed to multiple instances).
Next, you will add this inspection service to a service chain.
6.4.4. Create a Service Chain
With one or more inspection services created, it's now time to create a service chain that will define an ordered set of these for use in a security policy. Service chain creation minimally requires the name of the service chain and the id value of each inspection service in an array block. The inspection service id value was captured earlier and saved to the {{insp-tap-id}} variable.
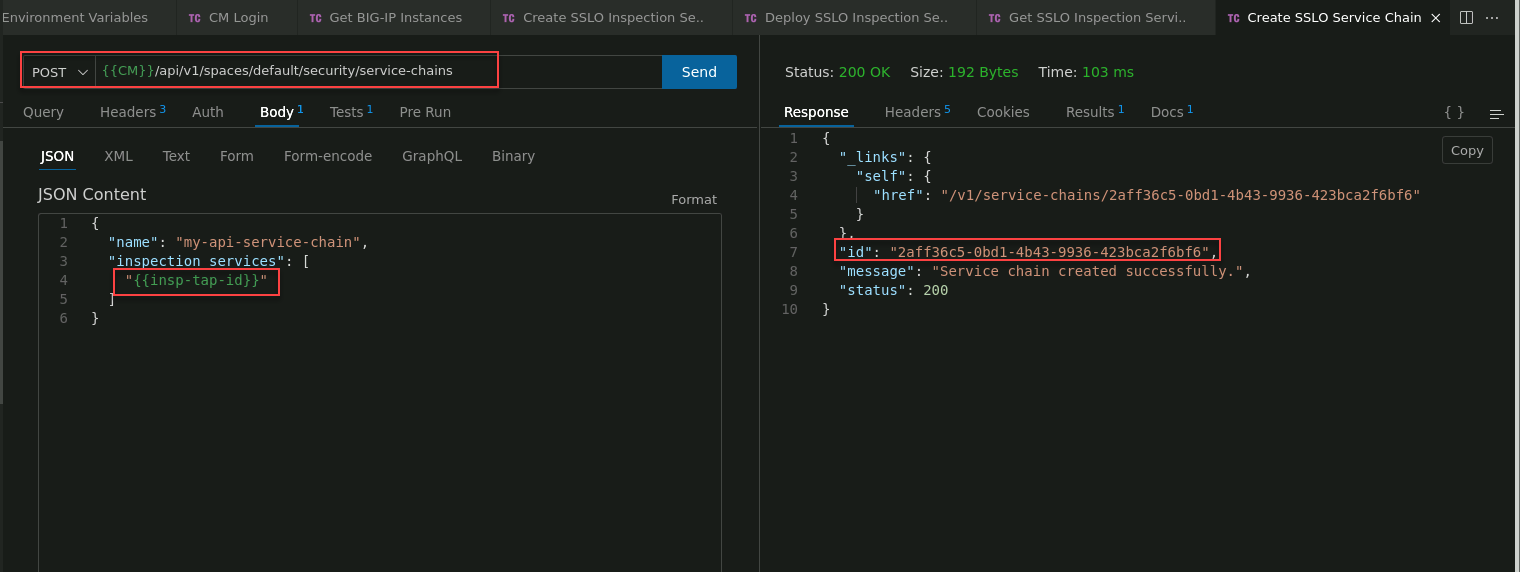
Click on the Create SSLO Service Chain request to select it.
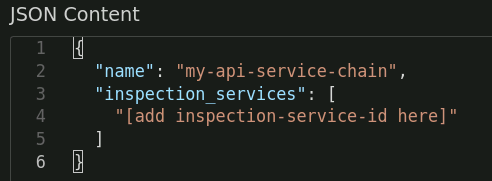
In the JSON Content panel, review the body of the API call. Notice that the inspection services attribute references the {{insp-tap-id}} variable.
Notice that the inspection services attribute has a placeholder value of "[add inspection-service-id here]". Replace the placeholder (everything between the quotes) with the inspection service id from the Create SSLO Inspection Service - TAP response.
Hint
You can switch to that request tab to retrieve the id value.
Note
The inspection services array can accept a comma-delimited and ordered list of inspection service IDs (if adding multiple inspection services to the service chain).
Click on the Send button to submit the request to the BIG-IP CM API.
In the Response panel, verify that you received an HTTP 200 OK status. You will also see Service chain created successfully under the service chain id.
6.4.5. Create a Traffic Policy
You will now create an SSL Orchestrator traffic policy for an inbound application. This is the set of traffic rules that will control TLS decryption and bypass decisions, and dynamic service chaining to the Inspection Services.
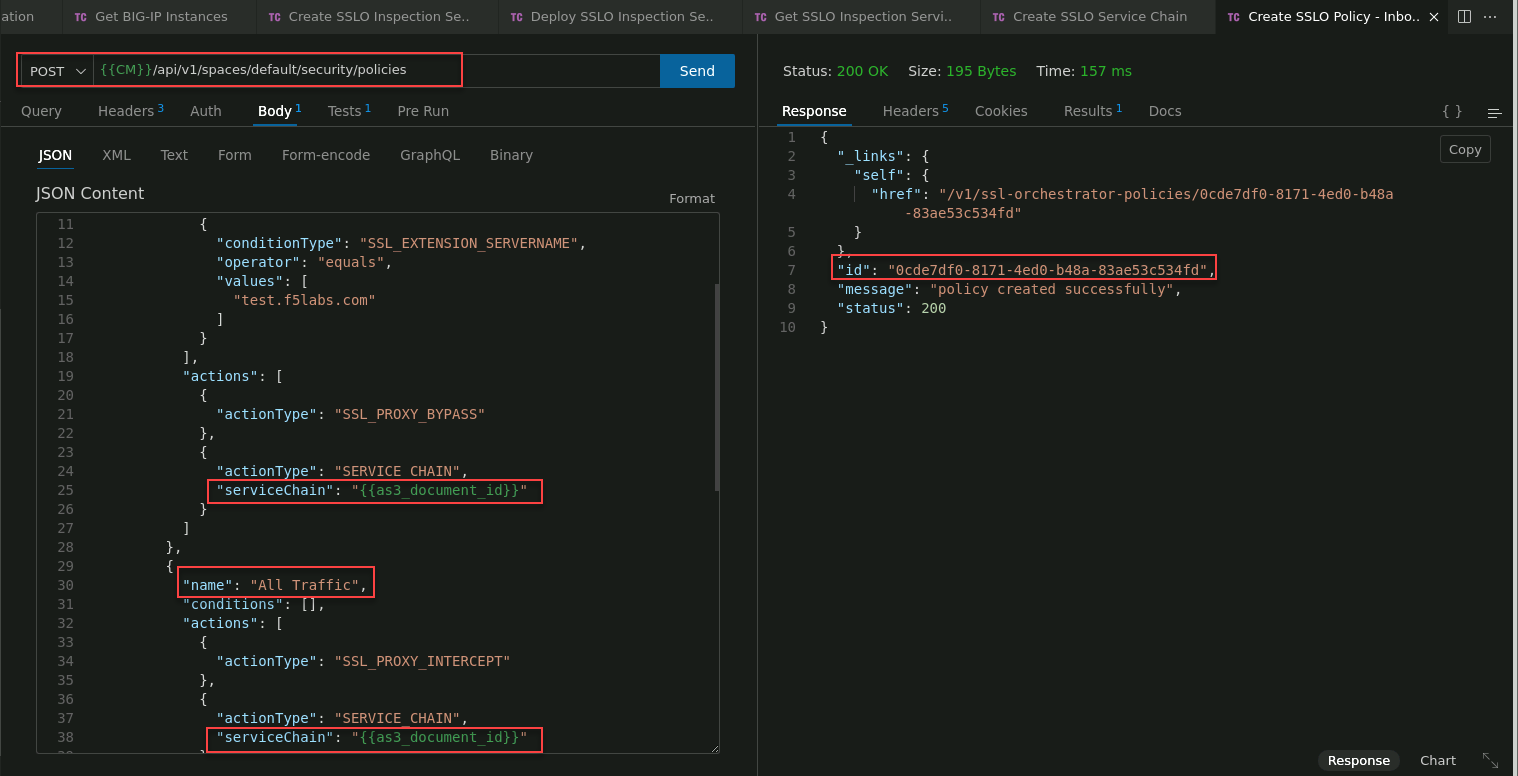
Click on the Create SSLO Policy - Inbound App request to select it.
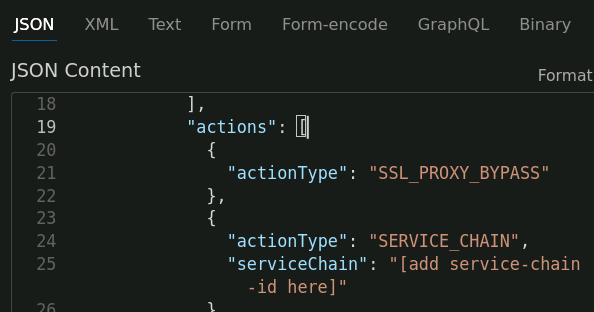
In the JSON Content panel, review the body of the API call. This API call is much larger than the page viewer, so you will need to scroll down to see all of it.
Notice that there are 2 traffic rules: rule1 and All Traffic. Each rule contains the serviceChain attribute with a placeholder value of "[add service-chain-id here]". Replace the 2 placeholders (everything between the quotes) with the service chain id from the Create SSLO Service Chain response.
Hint
You can switch to that request tab to retrieve the id value.
There is also a logging rule that logs for port 443 traffic.
Click on the Send button to submit the request to the BIG-IP CM API.
In the Response panel, verify that you received an HTTP 200 OK status. You will also see policy created successfully under the traffic policy id.
6.4.6. Create an Application with an SSL Orchestrator Policy
The last step is to apply the traffic policy to an application. However, now you will using the BIG-IP CM API (instead of the GUI) to create a new HTTPS application.
An Application definition on BIG-IP Next CM leverages the F5 BIG-IP AS3 (Application Services 3 Extension) declarative API endpoint. Note that you will need to send a subsequent API request to deploy that application to a BIG-IP Next instance.
Let's first define the application.
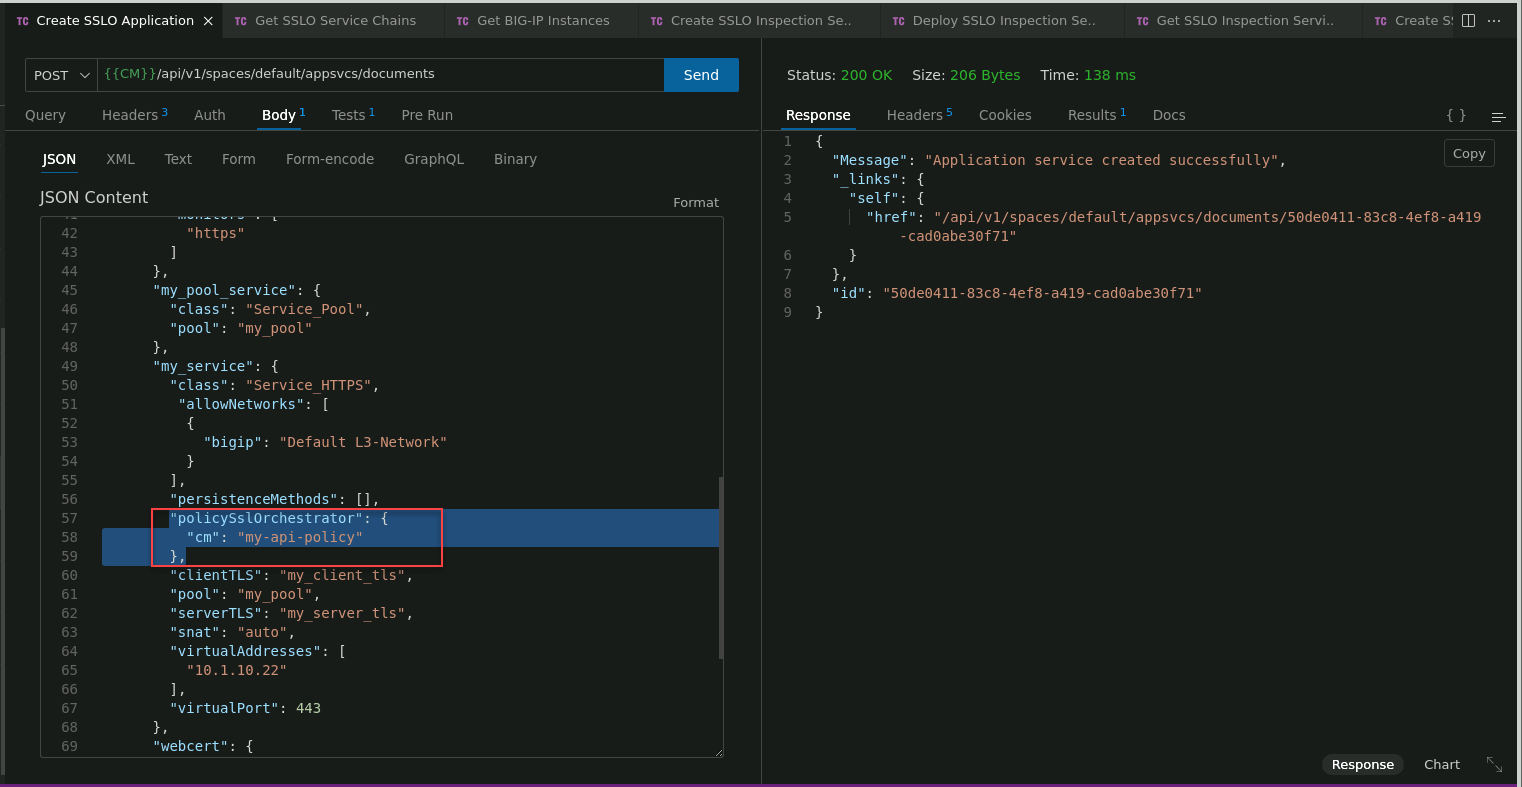
Click on the Create SSLO Application request to select it.
In the JSON Content panel, review the body of the API call. This API call is larger than the page viewer, so you will need to scroll down to see all of it.
This is a simple AS3 declaration that defines a pool with 3 members, monitor, certificate, TLS profiles, listener IP address and port, and attaches an SSL Orchestrator traffic policy.
Notice the SSL Orchestrator policy configuration section:
- "policySslOrchestrator": {
"cm": "my-api-policy"
}
Click on the Send button to submit the request to the BIG-IP CM API.
In the Response panel, verify that you received an HTTP 200 OK status. You will also see Application service created successfully and the Application service id.
Note
The id attribute gets saved to the {{as3_document_id}} environment variable and will be used in the next API call.
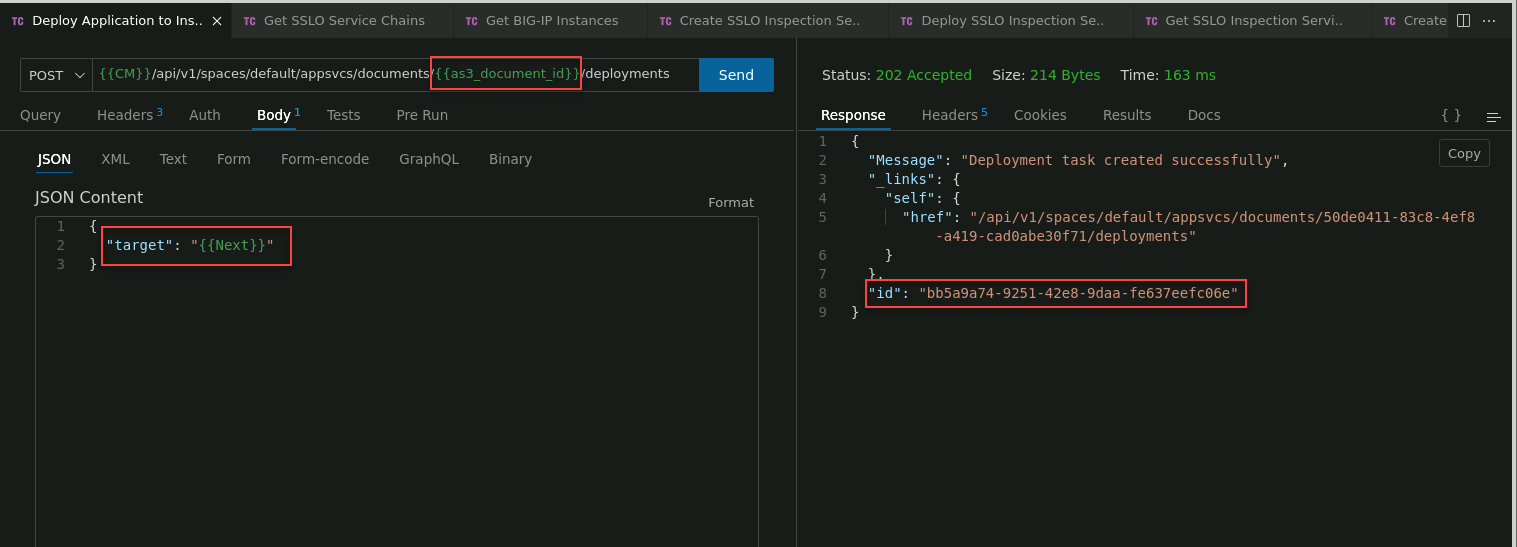
You will now deploy the Application to the BIG-IP Next instance. Click on the Deploy Application to Instance request to select it.
In the API request URL, you will see the {{as3_document_id}} variable. This variable contains the id value of the previously created Application Service definition.
In the JSON Content panel, review the body of the API call.
The {{Next}} variable contains the management IP address of the BIG-IP Next instance.
Click on the Send button to submit the request to the BIG-IP CM API.
In the Response panel, verify that you received an HTTP 200 OK status. You will also see Deployment task created successfully and the deployment id.