F5 BIG-IP SSL Orchestrator Training Lab > All SSL Orchestrator Lab Guides > SSLO 203: F5 BIG-IP SSL Orchestrator: Plug, play, automate (AppWorld 2026 | 2 hours) > 3. Lab 2: DNS-over-HTTPS (DoH) Guardian Source | Edit on
3.4. Implement Sinkhole mode for DoH Guardian
We have confirmed BIG-IP SSL Orchestrator can successfully blackhole DoH requests we deem necessary, we will now build upon the existing DoH Guardian Service Extension by adding the capability to sinkhole DoH requests. This will allow you to display a custom blocking page to the user when a DoH request matches a specified URL Category.
- During this portion, we will perform the following tasks:
Understand how sinkhole differs from blackhole.
Download and run the Sinkhole installation script.
Configure the Sinkhole mode on the DoH Guardian iRule to block any DoH requests that are categorized as Sports or Information Technology.
Test the new sinkhole finctionality by going to any site that is categorized as Sports or Information Technology by BIG-IP SSL Orchestrator.
3.4.1. How does the sinkhole functionality work?
In a sinkhole response, the resolver sends back an IP address that points to a local blocking server. In contrast to a blackhole, a DNS sinkhole is diverting to something. The sinkhole destination is then able to respond to the client's request, so instead of just dying, the user might get a blocking page instead. In a DoH/DNS sinkhole without SSL Orchestrator, a client would initiate a TLS handshake to this server (believing it's the real site) and would get a certificate error because the server certificate on that blocking server doesn't match the Internet hostname requested by the client.
- The SSL Orchestrator solution requires two configurations:
A sinkhole internal virtual server that simply hosts the "blank" certificate that SSL Orchestrator will use to mint a trusted server certificate to the client.
An SSL Orchestrator outbound L3 topology modified to listen on the sinkhole destination IP and to inject the blocking response content.
3.4.2. Download and run the Sinkhole installation script
Go back to the BIG-IP SSL Orchestrator Web Shell and run the following commands:
cd /tmp
curl -s https://raw.githubusercontent.com/f5devcentral/sslo-service-extensions/refs/heads/main/doh-guardian/doh-create-sinkhole-internal-config.sh -o doh-create-sinkhole-internal-config.sh
chmod +x doh-create-sinkhole-internal-config.sh
export BIGUSER='admin:admin'
./doh-create-sinkhole-internal-config.sh
This will create several resources on the BIG-IP SSL Orchestrator: - A new virtual server with the name
sinkhole-internal-vip- A new SSL Certificate and Key namedsinkhole-certthat contains an empty subject field for SSL Orchestrator to dynamically modify the SAN field. - A new Client SSL configuration namedsinkhole-clientsslwith the newly created sinkhole-cert (cert and key combo) - A new iRule namedsinkhole-target-rule
3.4.3. Create a new L3 Outbound Proxy Topology for to sinkhole functionality
With the Sinkhole configuration created, we need to create a new L3 Outbound Proxy Topology to identify the DoH requests that need to be blocked.
Return the BIG-IP SSL Orchestrator tab and navigate to SSL Orchestrator > Configuration. Click on Topologies, then add.
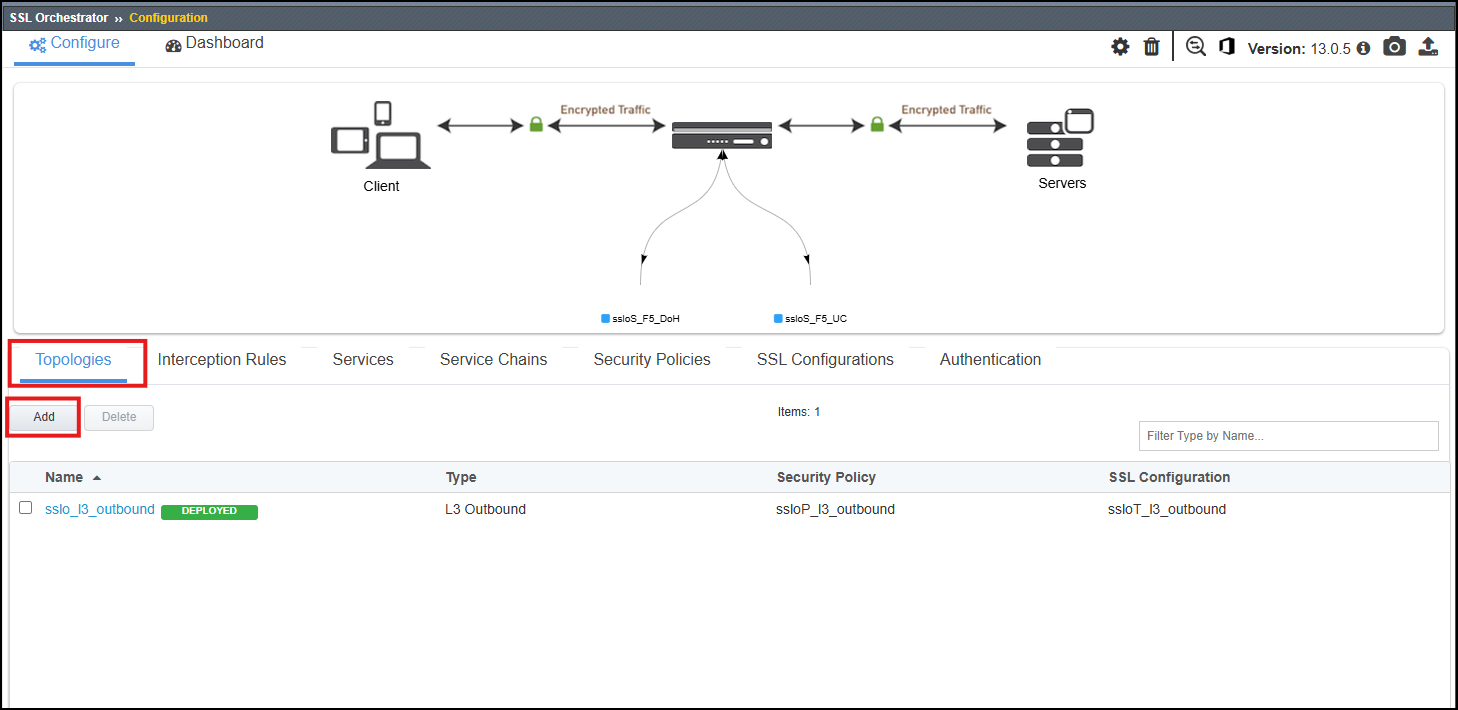
Scroll to the bottom of the Configuration introduction page and click on the Next button to start creating a new Topology.
Enter
doh_sinkholeas the topology name.Select the L3 Outbound topology type.
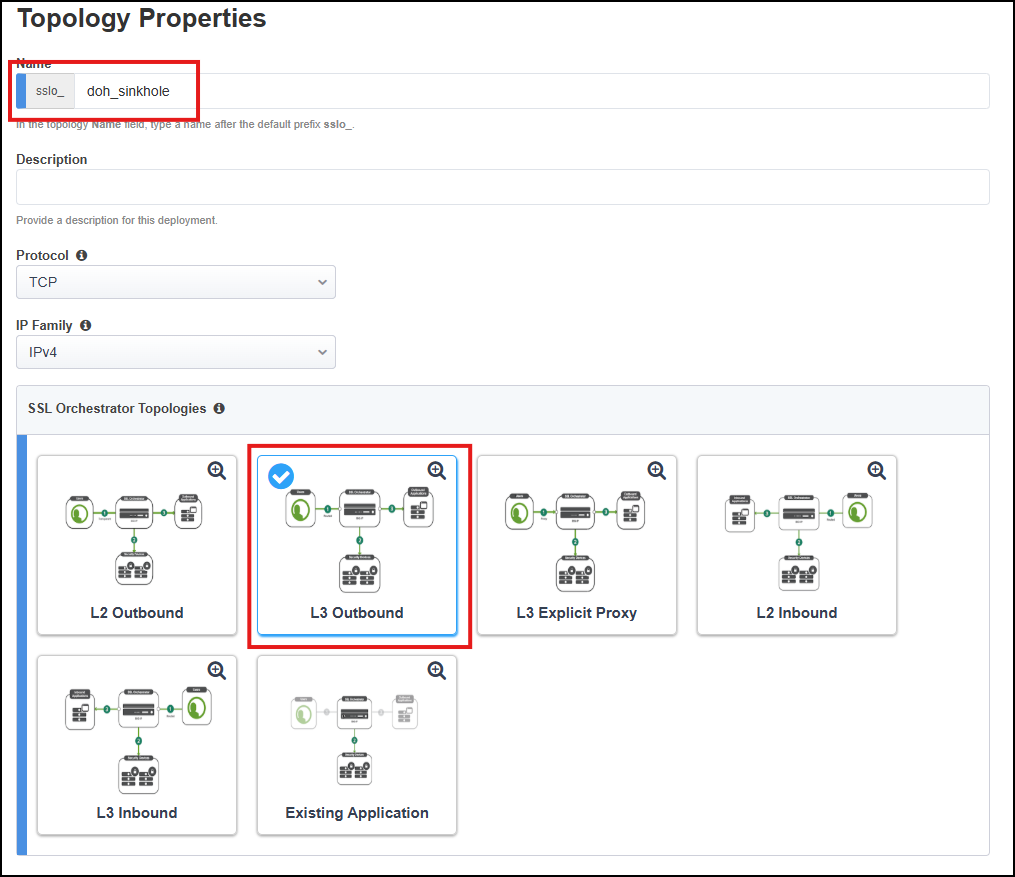
Scroll down to the bottom of the page and click on the Save & Next button.
In the SSL Configurations section, click on the Show Advanced Settings button in the top right of the page. Leave the name as
doh_sinkhole.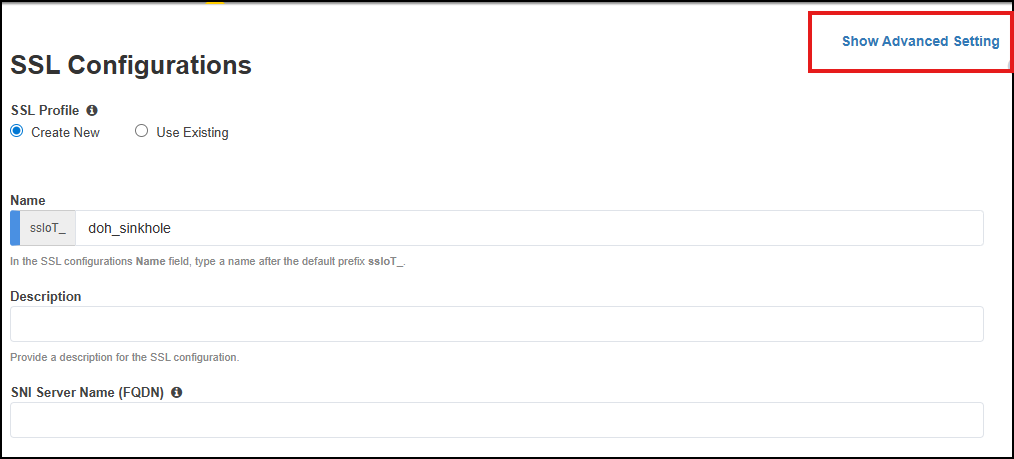
In the CA Certificate Key Chain section, click on the Edit (pencil) icon.
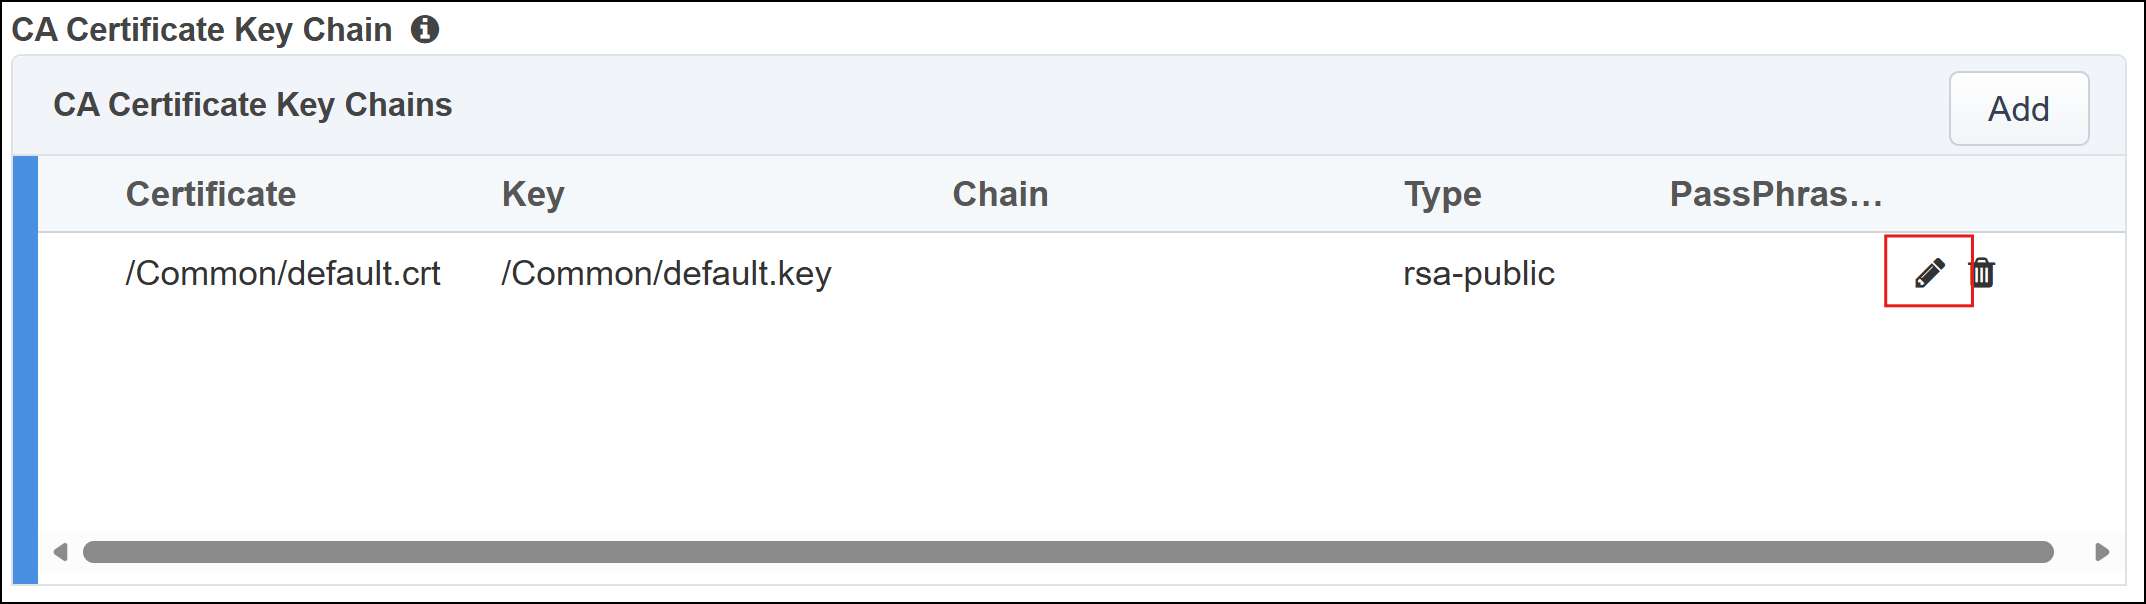
In the Certificate drop-down list, select subrsa.f5labs.com to replace the default value.
In the Key drop-down list, select subrsa.f5labs.com to replace the default value.
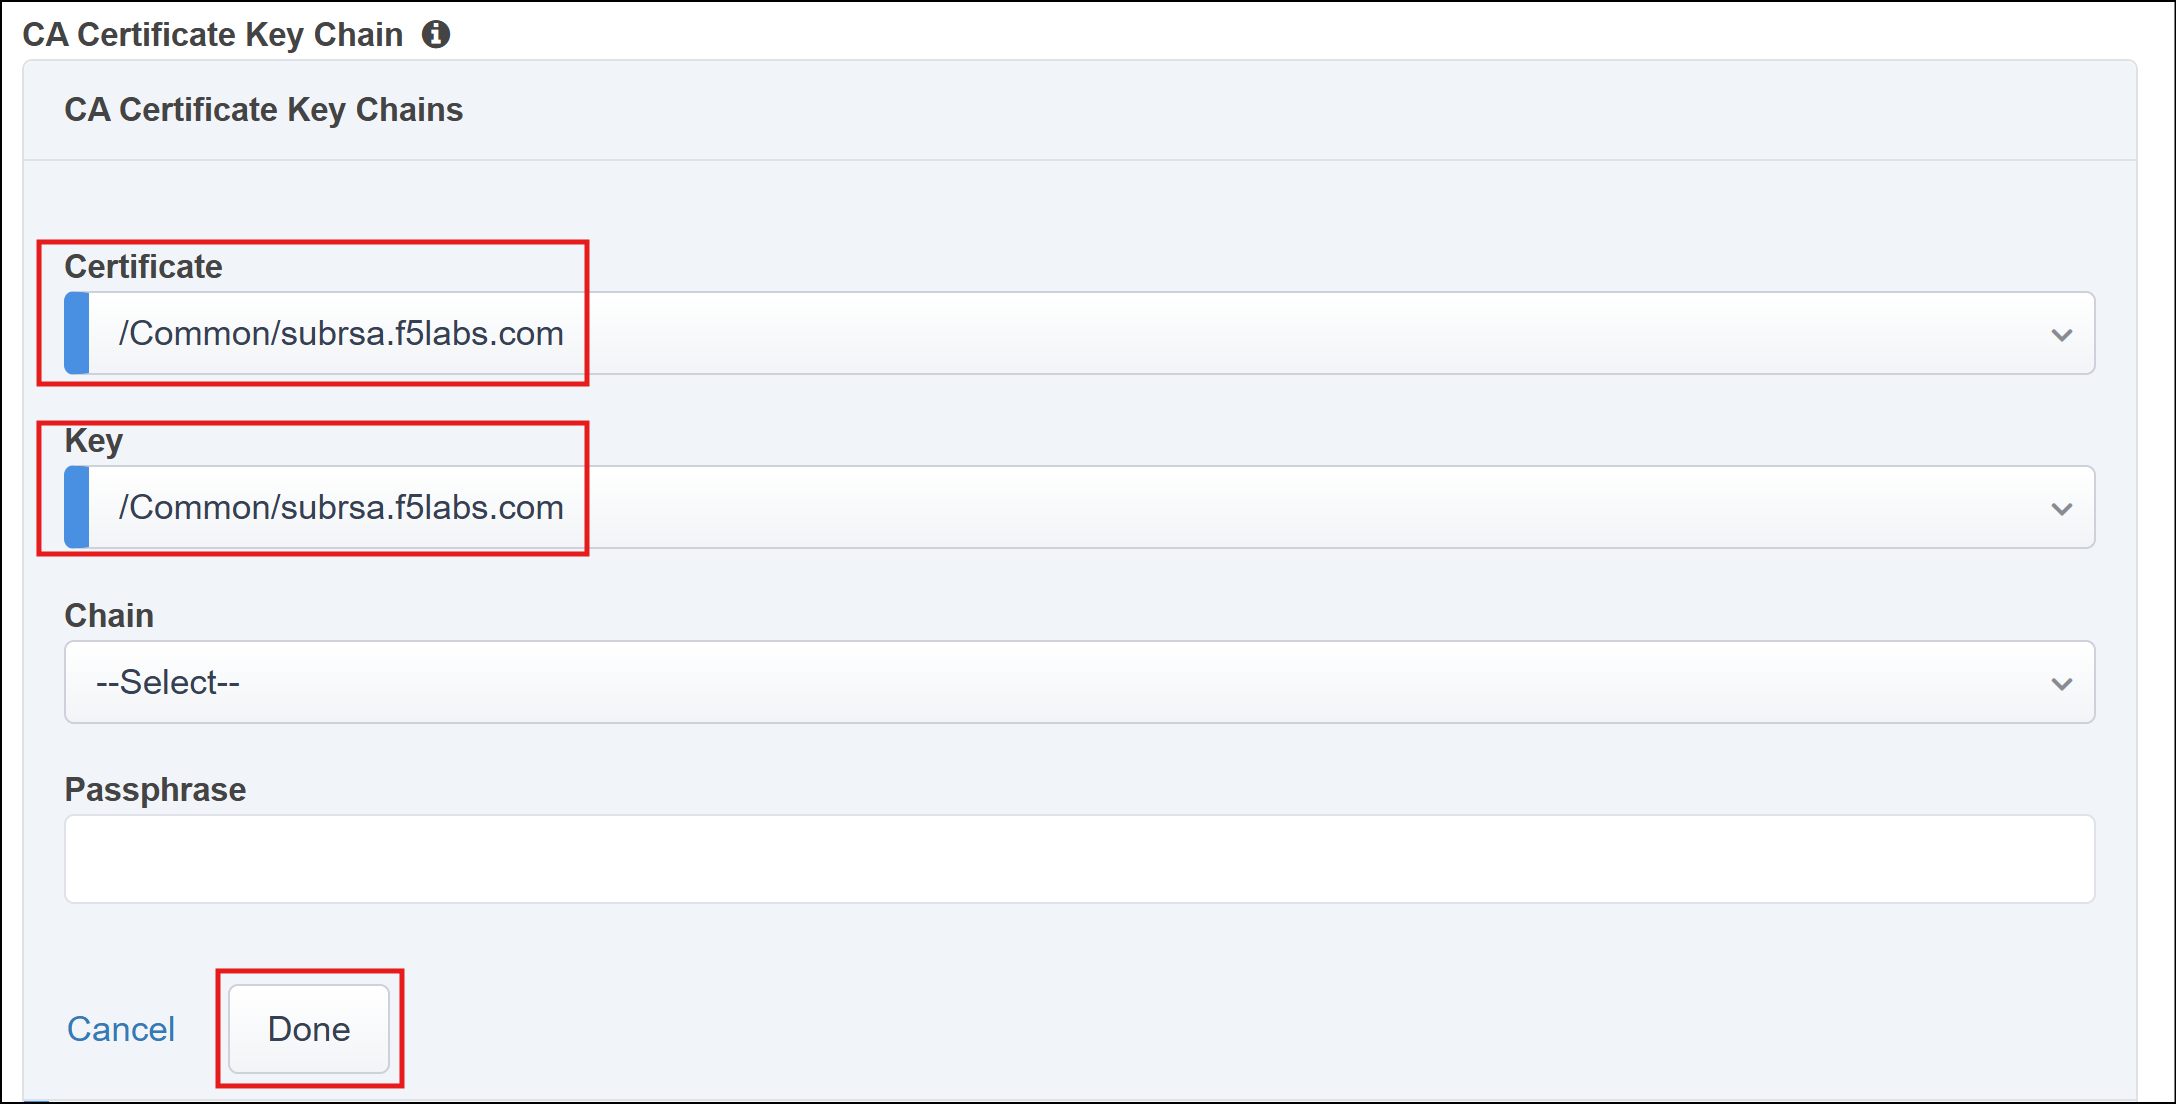
Click on the Done button to apply the config change.
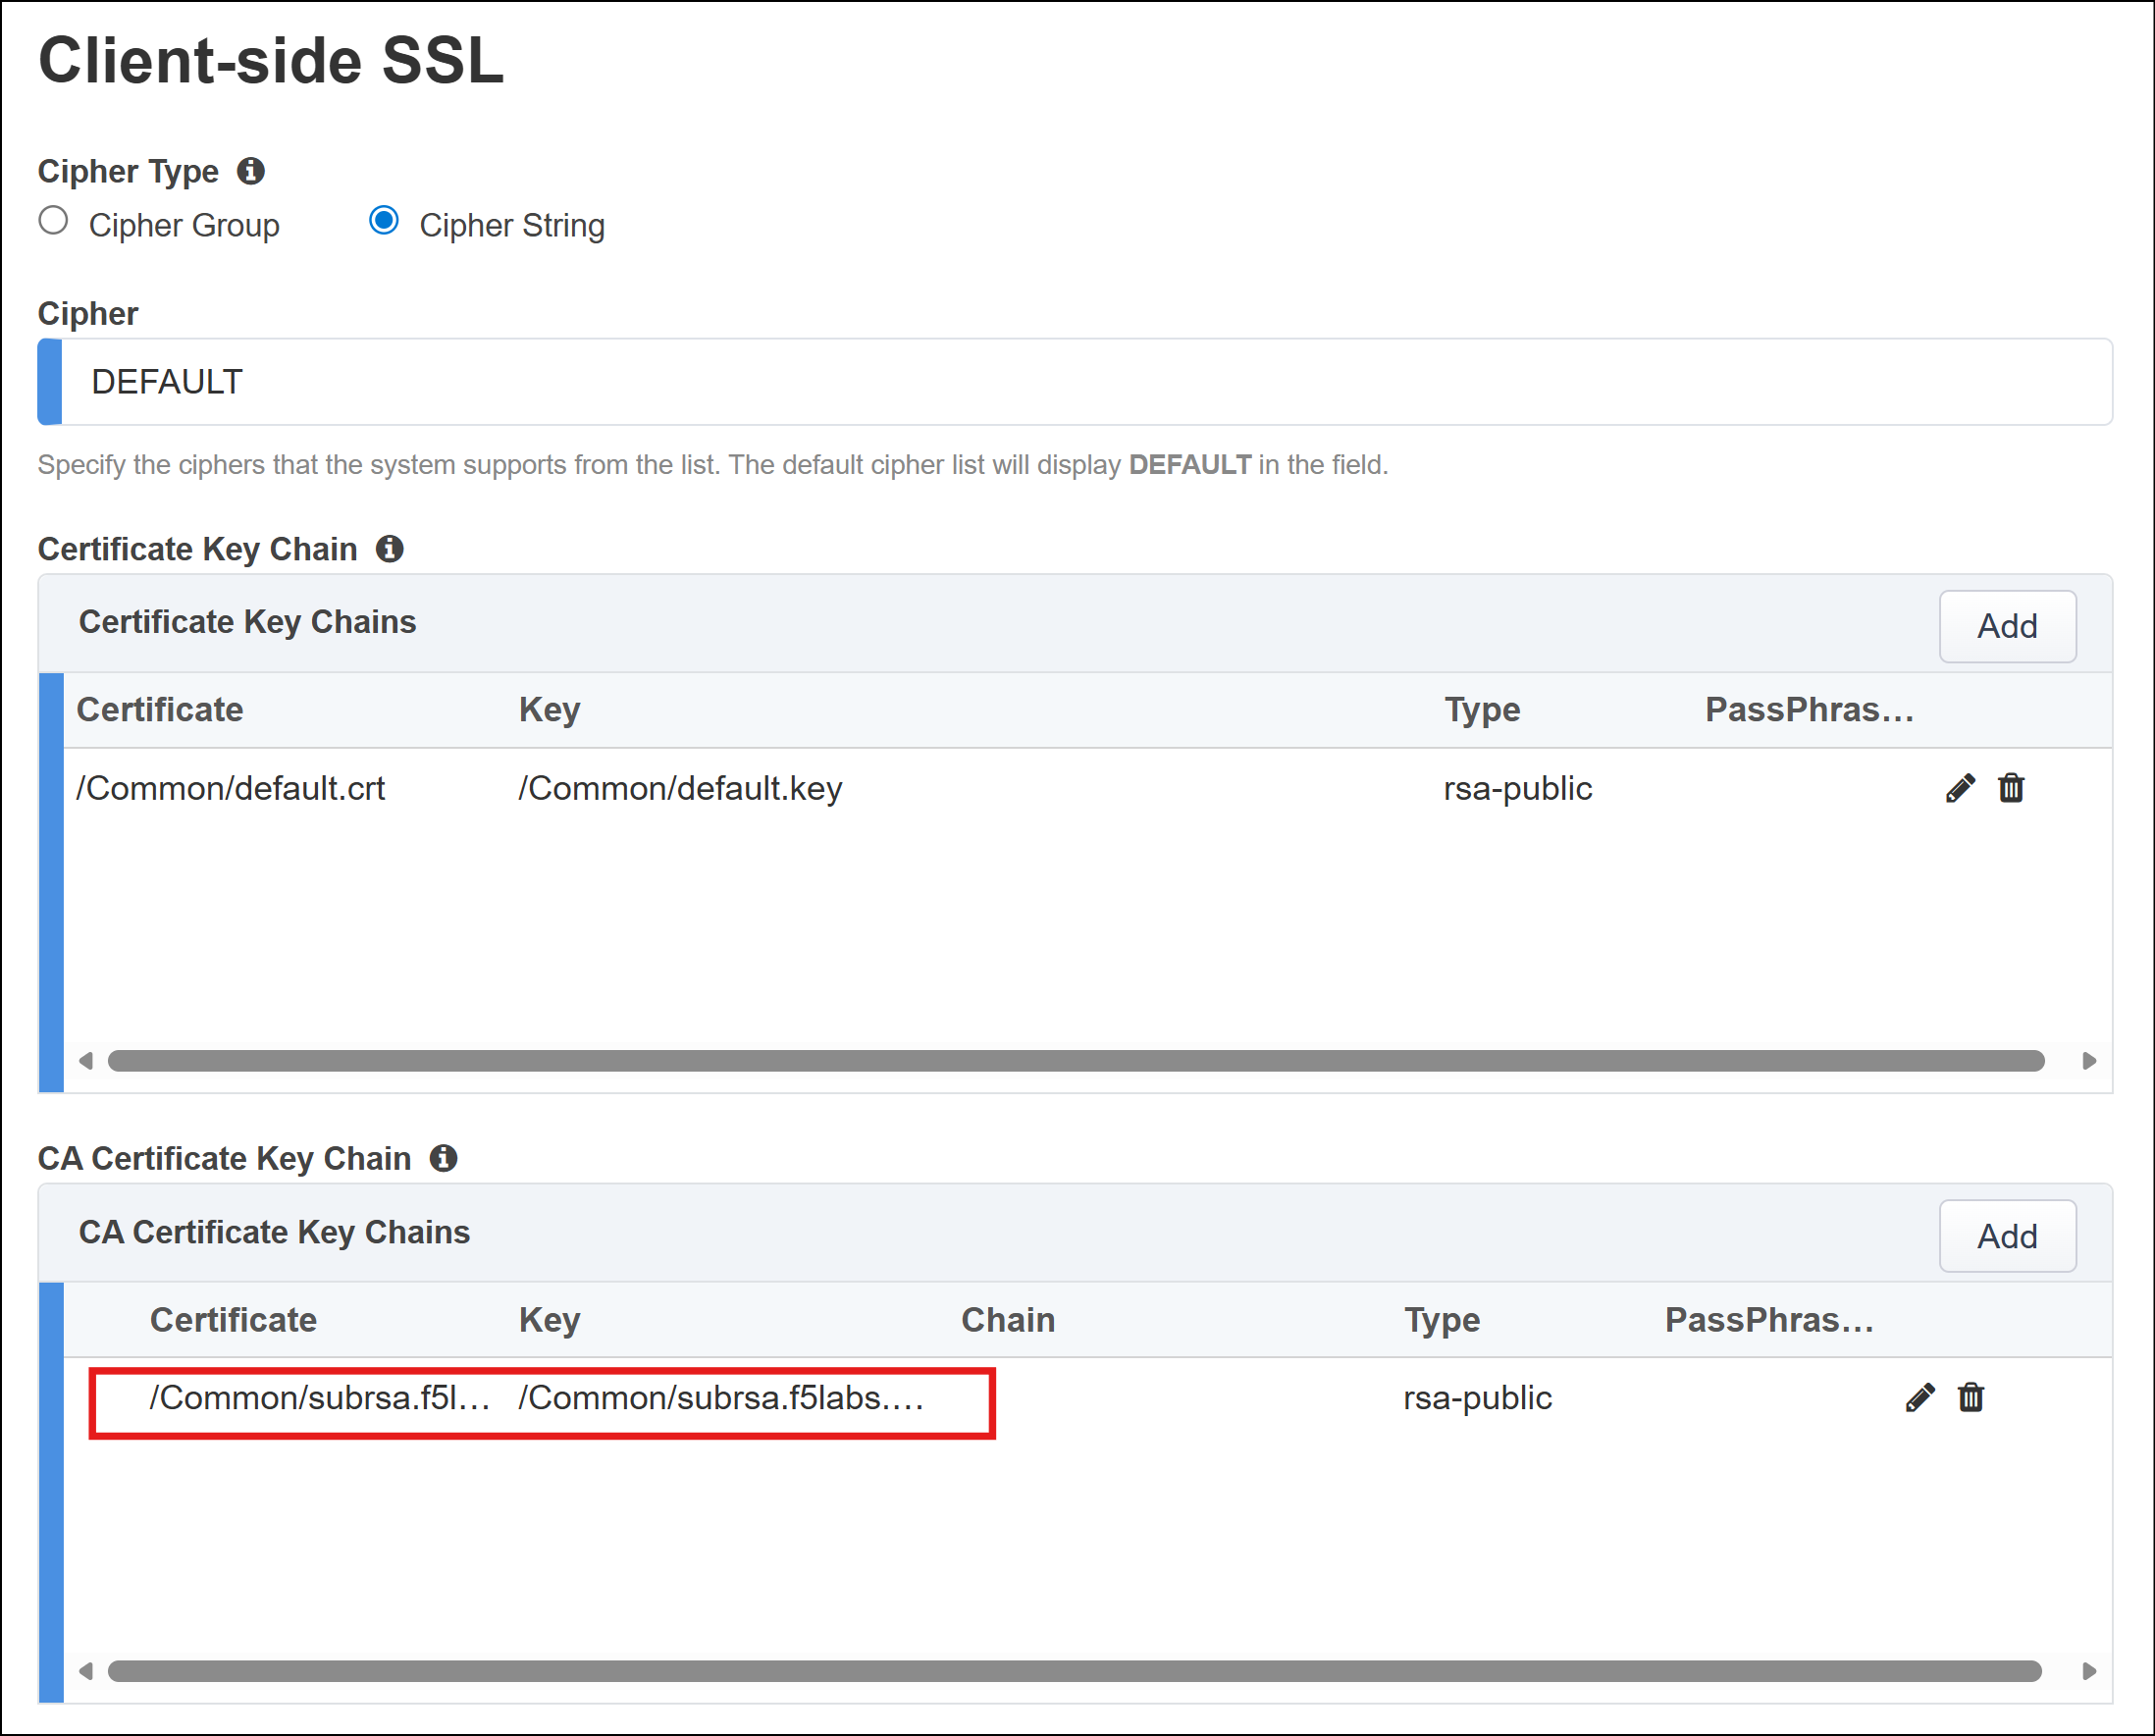
Scroll to the
Expire Certificate ResponseandUntrusted Certificate Authorityand mark both from drop to mask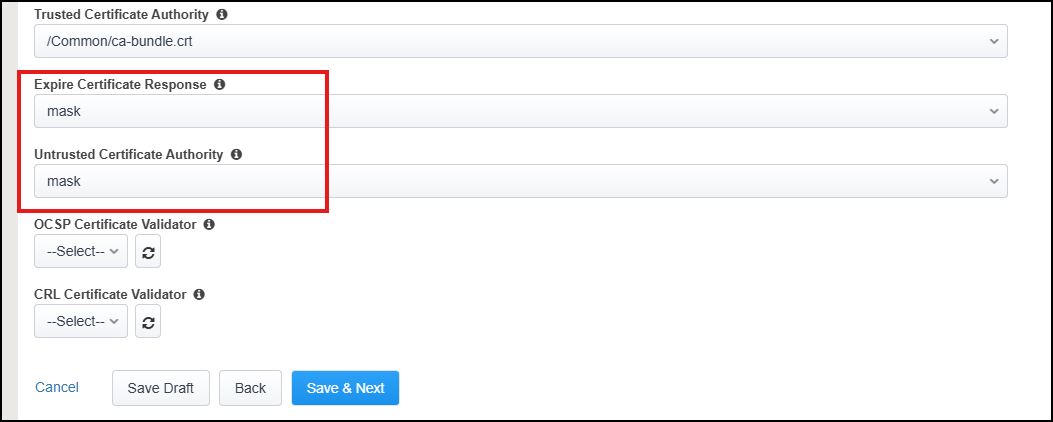
Click Save & Next and keep clicking until you get to the Security Policy page.
We need modify the Security Policy. Remove the Pinners_Rule by clicking the trashcan icon on the right of the rule.
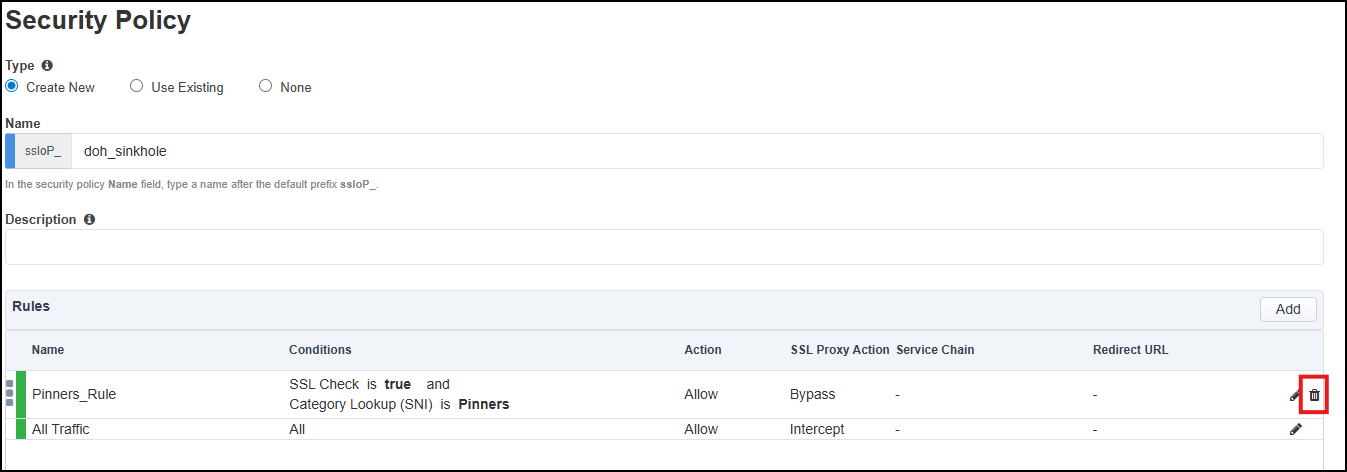
Click Save & Next
On the Interception Rule page we need to modify the
Destination Address/Mask, add the properVLAN, and confirmSSL Configurationssettings.- Destination Address/Mask: enter the client-facing IP address/mask configured in the doh-guardian-rule. Default is
10.1.10.160%0/32 This will be the address sent to clients from the DNS for the sinkhole.
- Destination Address/Mask: enter the client-facing IP address/mask configured in the doh-guardian-rule. Default is
Ingress Network/VLANs: double-click the
/Common/client-vlanto add it to the Selected Box.SSL Configurations: ensure the
ssloT_doh_sinkholeis in the Selected Box.
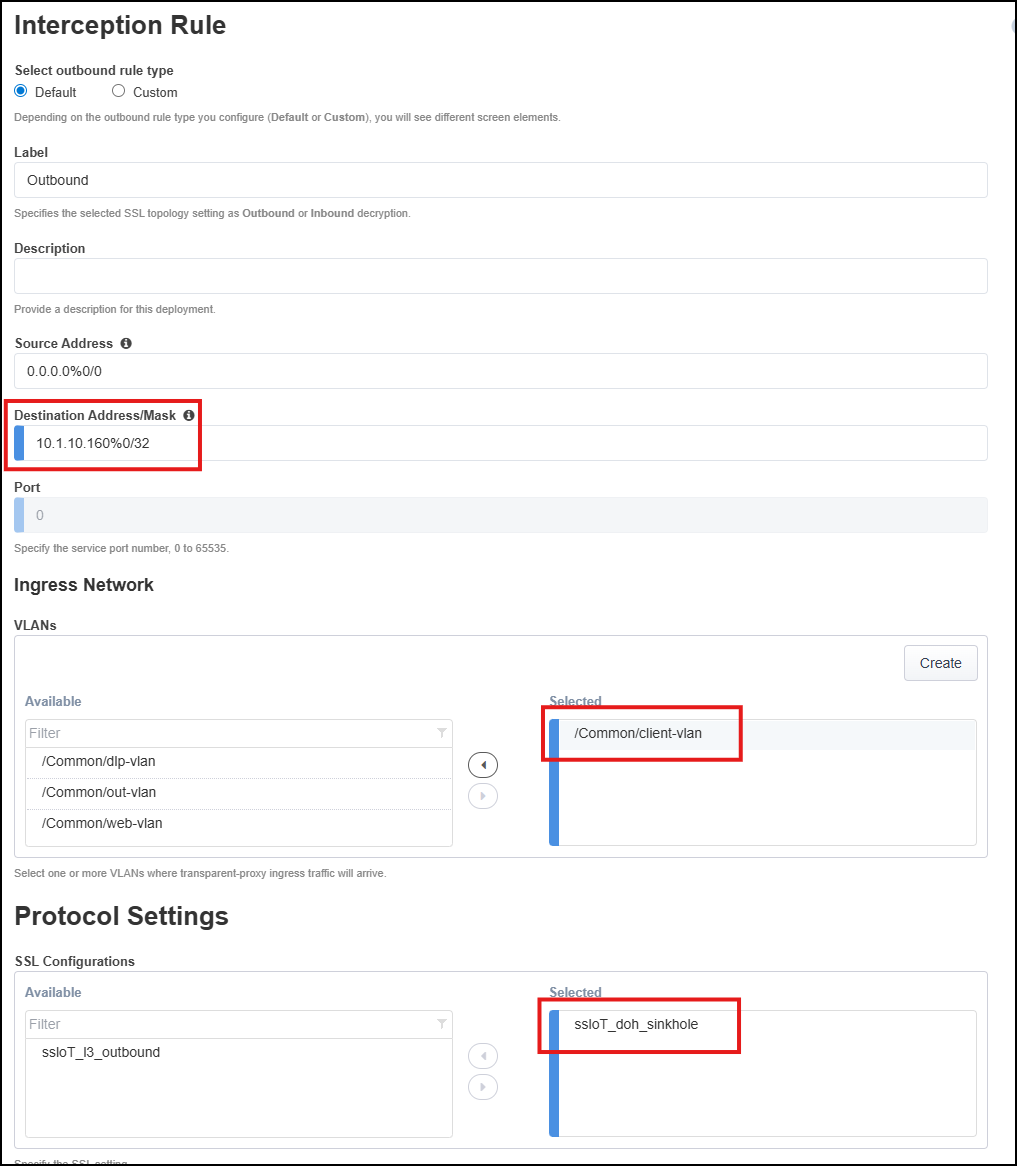
Click Save & Next and keep clicking until you get to the Summary page and click Deploy.
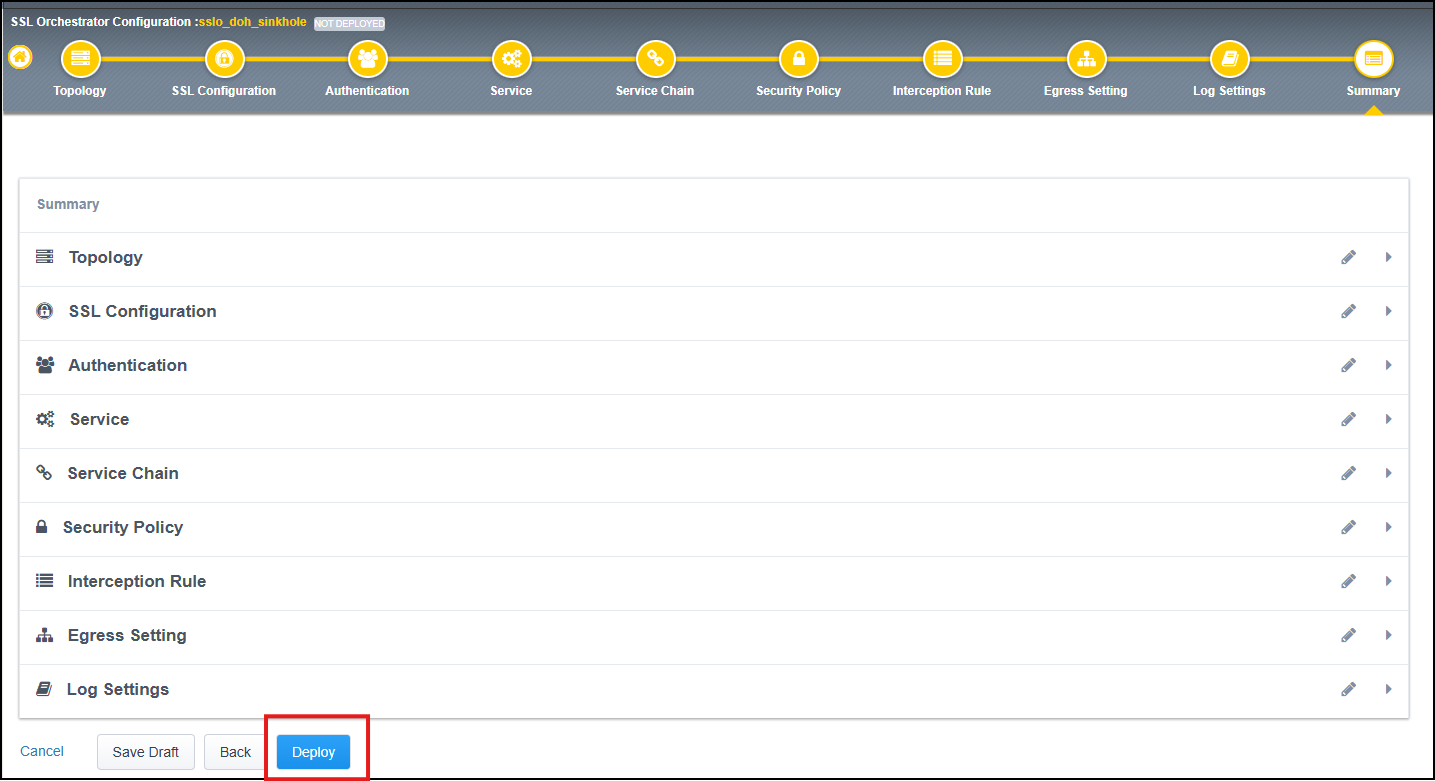
3.4.4. Modify Interception Rule
From the SSL Orchestrator Configuration Screen, click on Interception Rules and select the
sslo_doh_sinkhole-in-t-4rule.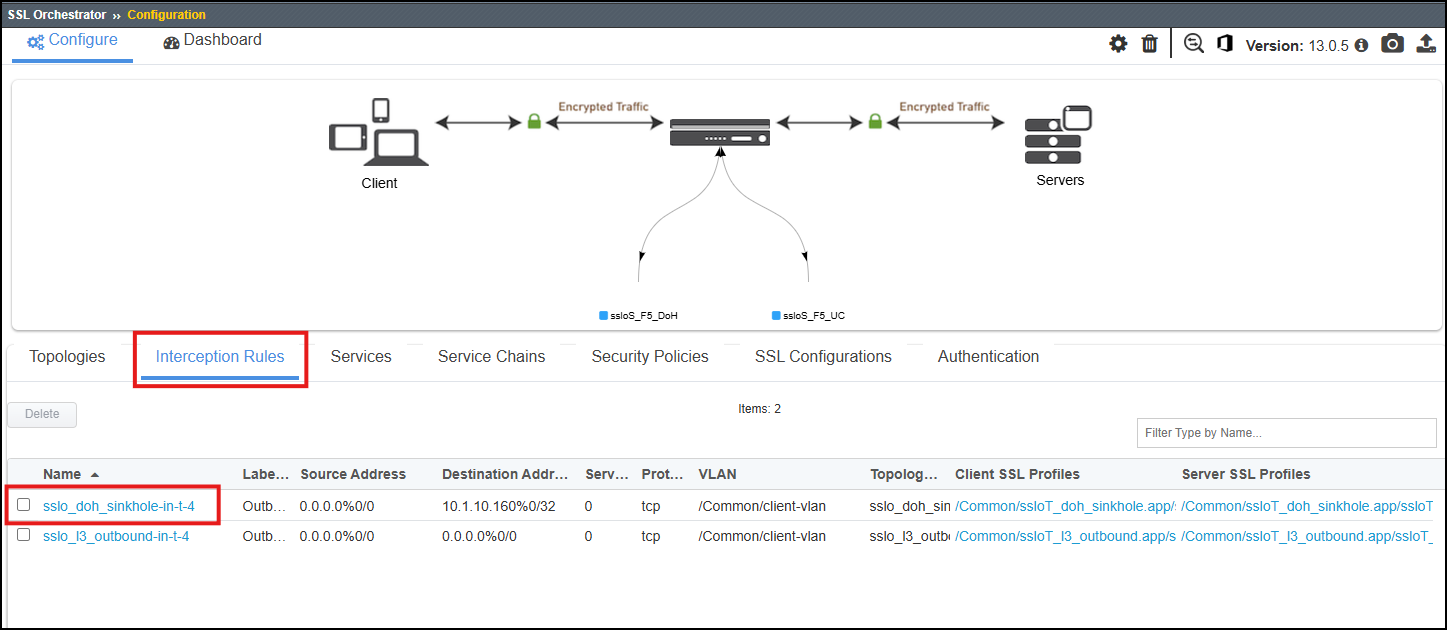
Click on the pencil (edit) icon to modify the rule.
Scroll down to the Resources/ section and add the
sinkhole-target-ruleto the Selected Box. Ignore all other settings and click Save & Next.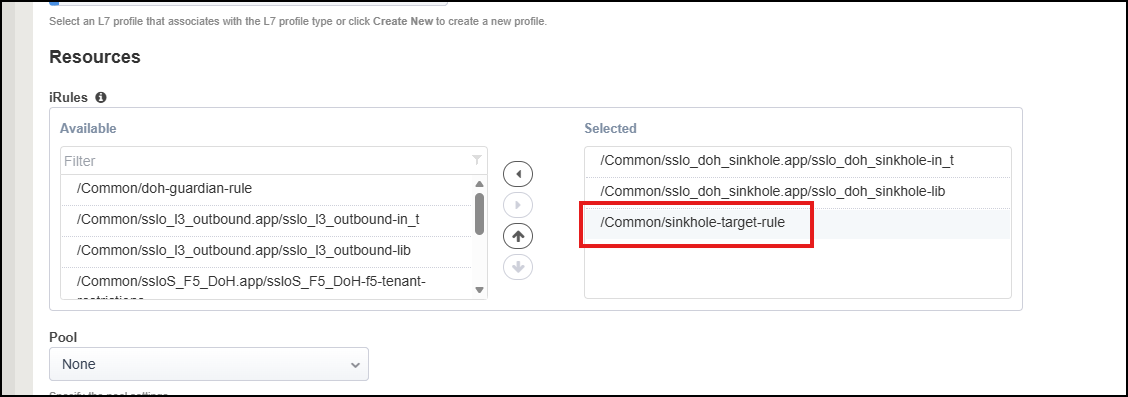
Click Deploy
Note
You will see a new information bubble next to the sslo_doh_sinkhole Topology. This is expected as we have manually modified how the interception rules will occur with the Topology.
3.4.5. Modify the doh-guardian-rule iRule
Start by opening the doh-guardian-rule in the Local Traffic > iRules > iRule List
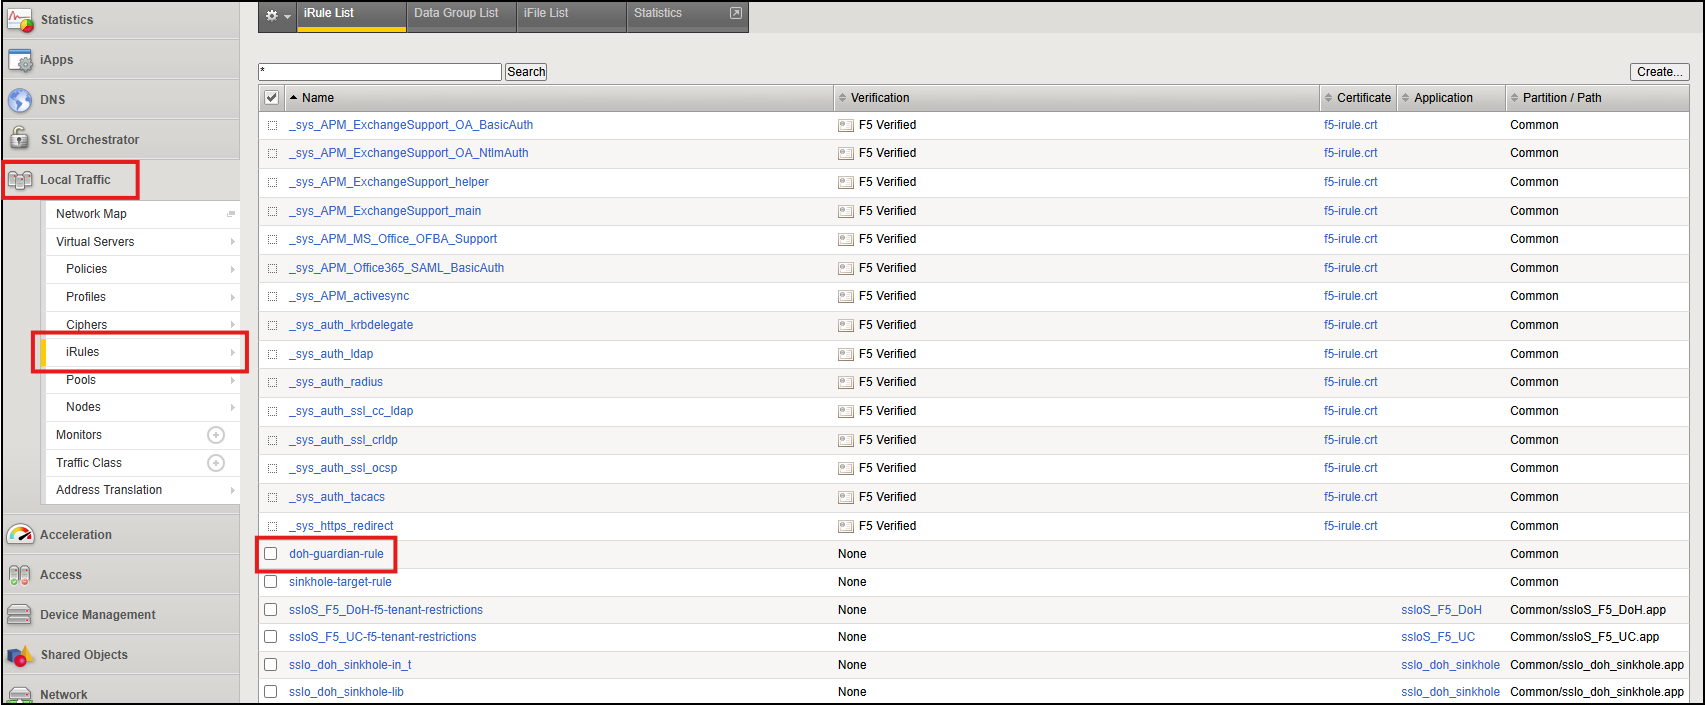
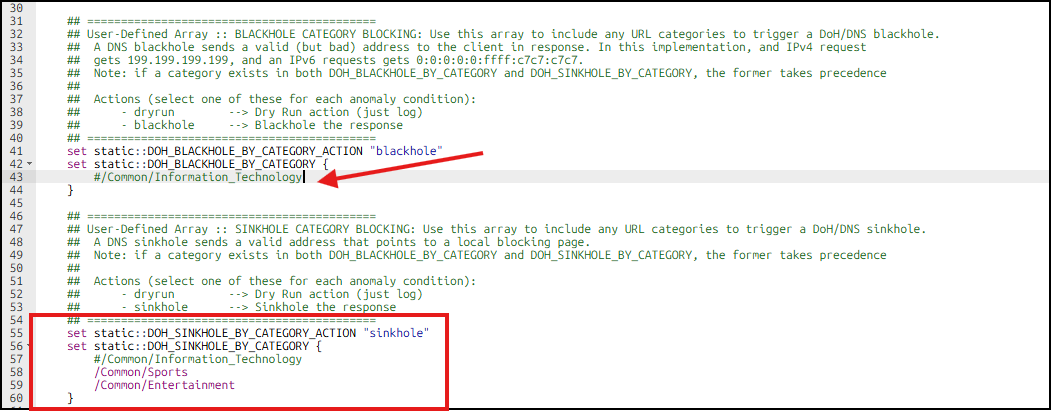
We are going to add the following lines to the sinkhole portion of the rule.
/Common/Sports
/Common/Entertainment
Note
While adding the URL categories to the sinkhole portion, we will also remove the
/Common/Sportscategory from the blackhole portion of the rule.Your iRule should look like the following:
Click Update
3.4.6. Enable Firefox to accept RFC1918 addresses as a Trusted Recursive Resolver (TRR)
If you have closed the Ubuntu-Client WEBRDP session, open it again.
Open the Firefox browser and navigate to
about:config, and accept the risk.Search for
network.trr.allow-rfc1918and set it totruewith the toggle switch. It should look like the following: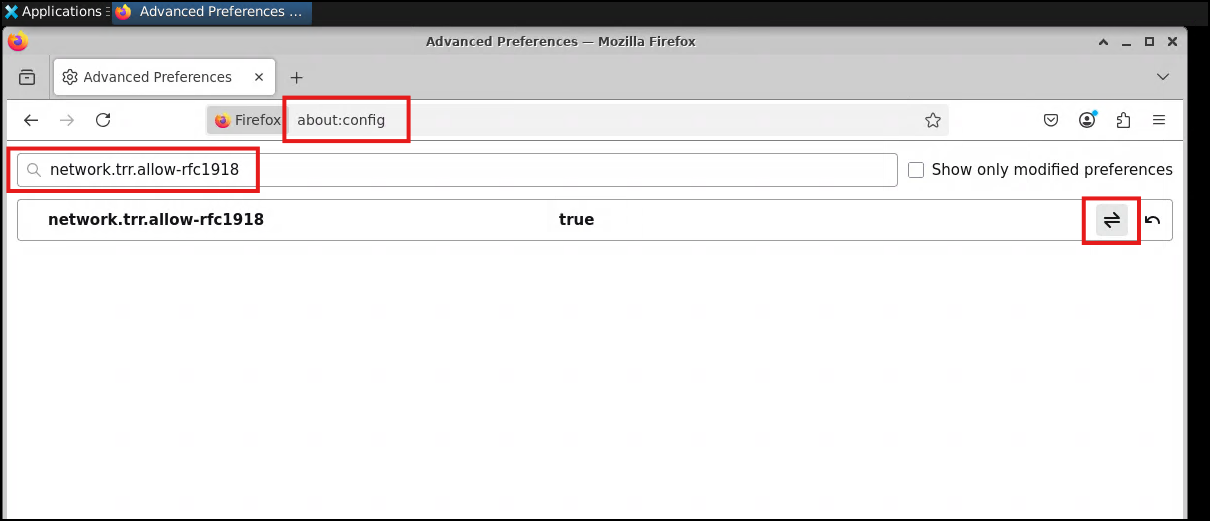
After setting the toggle switch, close and reopen the browser.
3.4.7. Conclusion
At this time, the following changes and updates have been made.
L3 Outbound Topology has been created and deployed for DoH sinkhole functionality.
The Interception Rule has been updated to include the
sinkhole-target-ruleiRule.The
doh-guardian-rulehas been updated to sinkhole the URL categoriesSportsandEntertainment.Configured the Firefox browser in the Ubuntu-Client to accept the RFC1918 sinkhole IP address as a Trusted Recursive Resolver (TRR).
In the next section, we will test the DoH Guardian Sinkhole functionality with browser and curl.