BIG-IP Ingestion and Association
Sending data from BIG-IP to F5 Beacon is easily configured using the declarative API called Telemetry Streaming (TS) that runs on BIG-IP itself. Telemetry Streaming (part of the F5 Automation Toolchain) enables you to declaratively aggregate, normalize, and forward statistics and events from the BIG-IP to F5 Beacon by POSTing a single JSON declaration. That data will then be used by F5 Beacon to provide health, statistics, and insights for the Applications associated with it.
Configure TS
In this section we are going to authenticate to our BIG-IP API and Configure TS to send data to F5 Beacon.
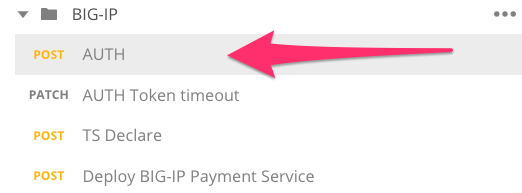
Open Postman and navigate to the BIG-IP folder and select the AUTH request. This request will acquire an API token for configuring the BIG-IP.
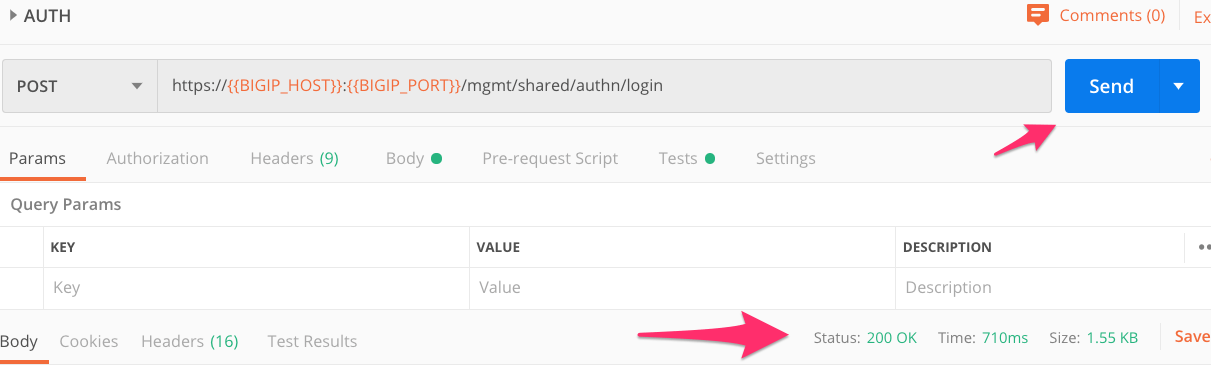
Click Send for the Auth request and verify that you receive a Status of 200 OK.
Next we will extend the Token timeout so we do not have to re-authenticate throughout our session. Select the AUTH Token timeout request and click Send. Verify that you receive a Status of 200 OK just as the other requests.
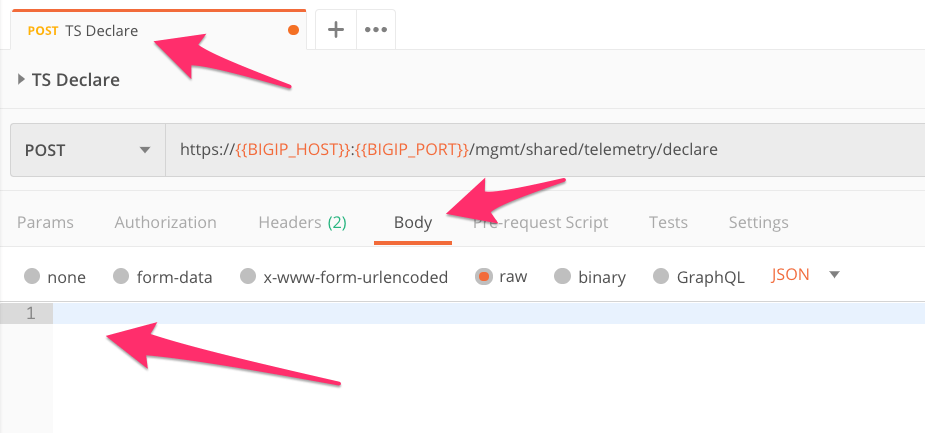
Now that we have authenticated, lets tell the BIG-IP how and where to send its Telemetry Data so that it is received by F5 Beacon. Click on the TS Declare request in Postman and then select the Body tab. You will notice that the Body/Payload is empty. Luckily the F5 Beacon portal will show us how to configure each one of its integrations, so lets check there.
Go back to the F5 Beacon portal and navigate to Configuration >> Integrations and then click on Show Integration Details under the F5 BIG-IP section.
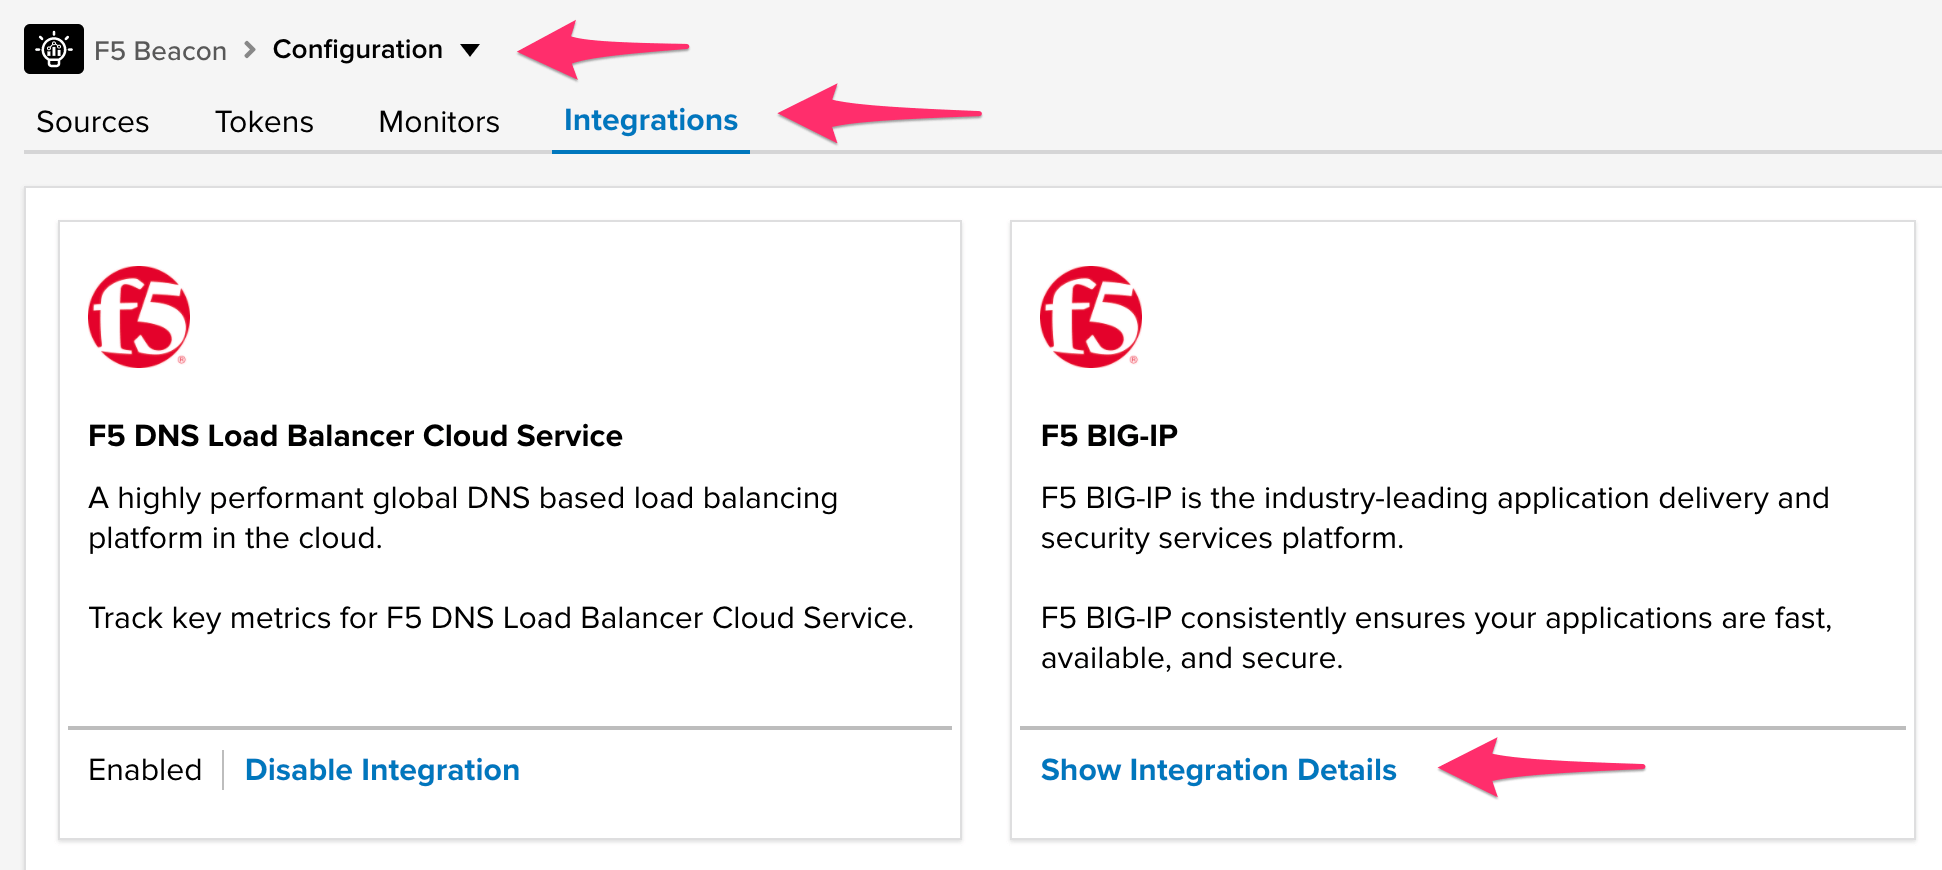
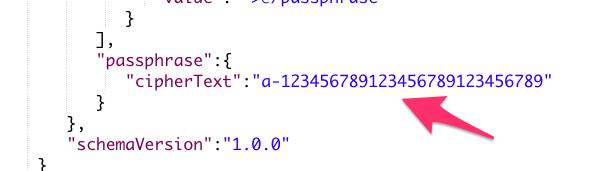
The Postman request is already configured with the correct URI endpoint, all we need is the payload/body. Click the
 button next to the payload and then paste it into the Body section of our Postman request.
This payload tells the BIG-IP what data to collect and where to send it. In this case we are sending it to F5 Beacon. Within the Postman Body there is one attribute that you need to update so that F5 Beacon knows that the BIG-IP data is for your account.
Near the bottom, update the cipherText parameter with the F5 Beacon Token that you created in the previous section.
Note
You can retrieve this Token again by navigating to Configuration >> Tokens and selecting the data_ingest token.
Now that our payload is ready we can now click Send. Verify that you receive a Status 200 OK as your response and a message showing success

At this point all Services that exist on the BIG-IP will be forwarded to F5 Beacon to be used as data that can be referenced from our defined Applications. In the next step we will create our Payment service so that everyone using the Guide has a similar experience.
Configure Mobile App - Payment Service on BIG-IP
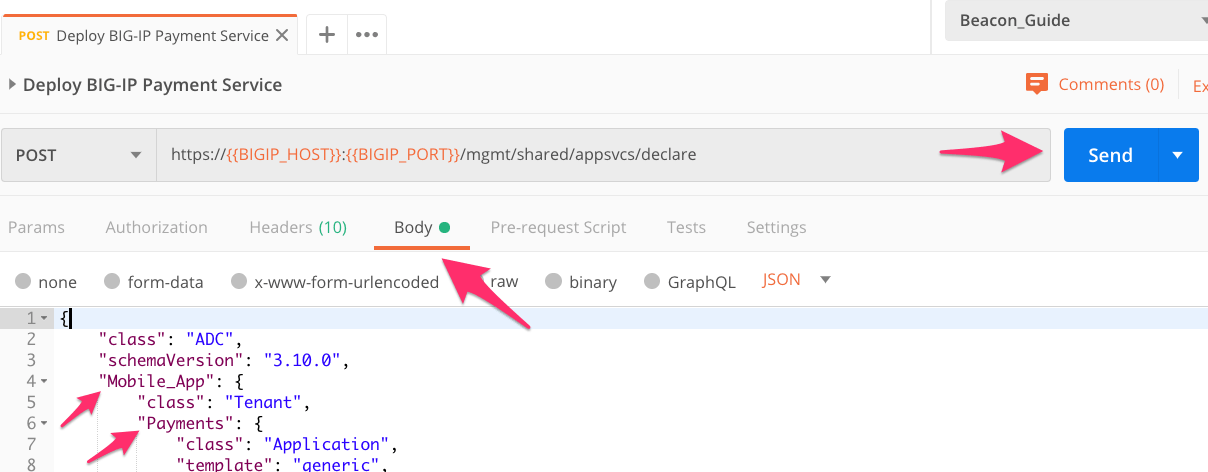
In the Postman collection open the request titled Deploy BIG-IP Payment Service. Review the Body to see the Payment service that we are creating on BIG-IP. Notice that there is a Tenant named Mobile_App and an Application named Payments. We will use that data later within the F5 Beacon portal to associate the service with our Application. Select Send and verify that the request returns a Status 200 OK.
Note
This request leverages Application Services 3 (AS3) which is F5s declarative API for creating application services on the BIG-IP. We are able to create an App, Service, Pool, monitors, and members all with 1 JSON payload. The intent of this guide is not to cover AS3, but you can read more about this on the AS3 Docs page.
Map the BIG-IP Service to our Beacon App
Now that we have our Payment service created and TS sending data from the BIG-IP to F5 Beacon we can go see this in the F5 Beacon portal and associate it with our Mobile_App.
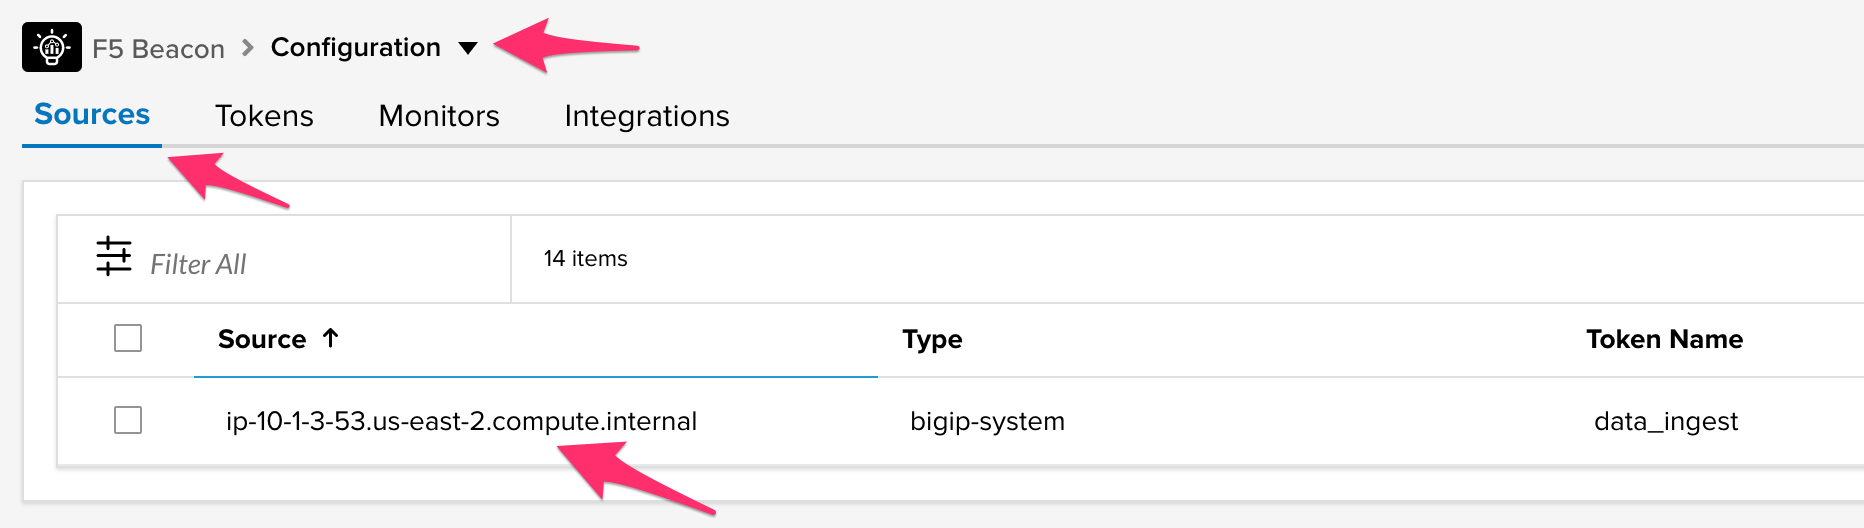
Head back to the F5 Beacon Portal and navigate back to Configuration >> Sources. You should now see your BIG-IP hostname listed a source coming into F5 Beacon. You can also see that it is using the data_ingest Token that we created.
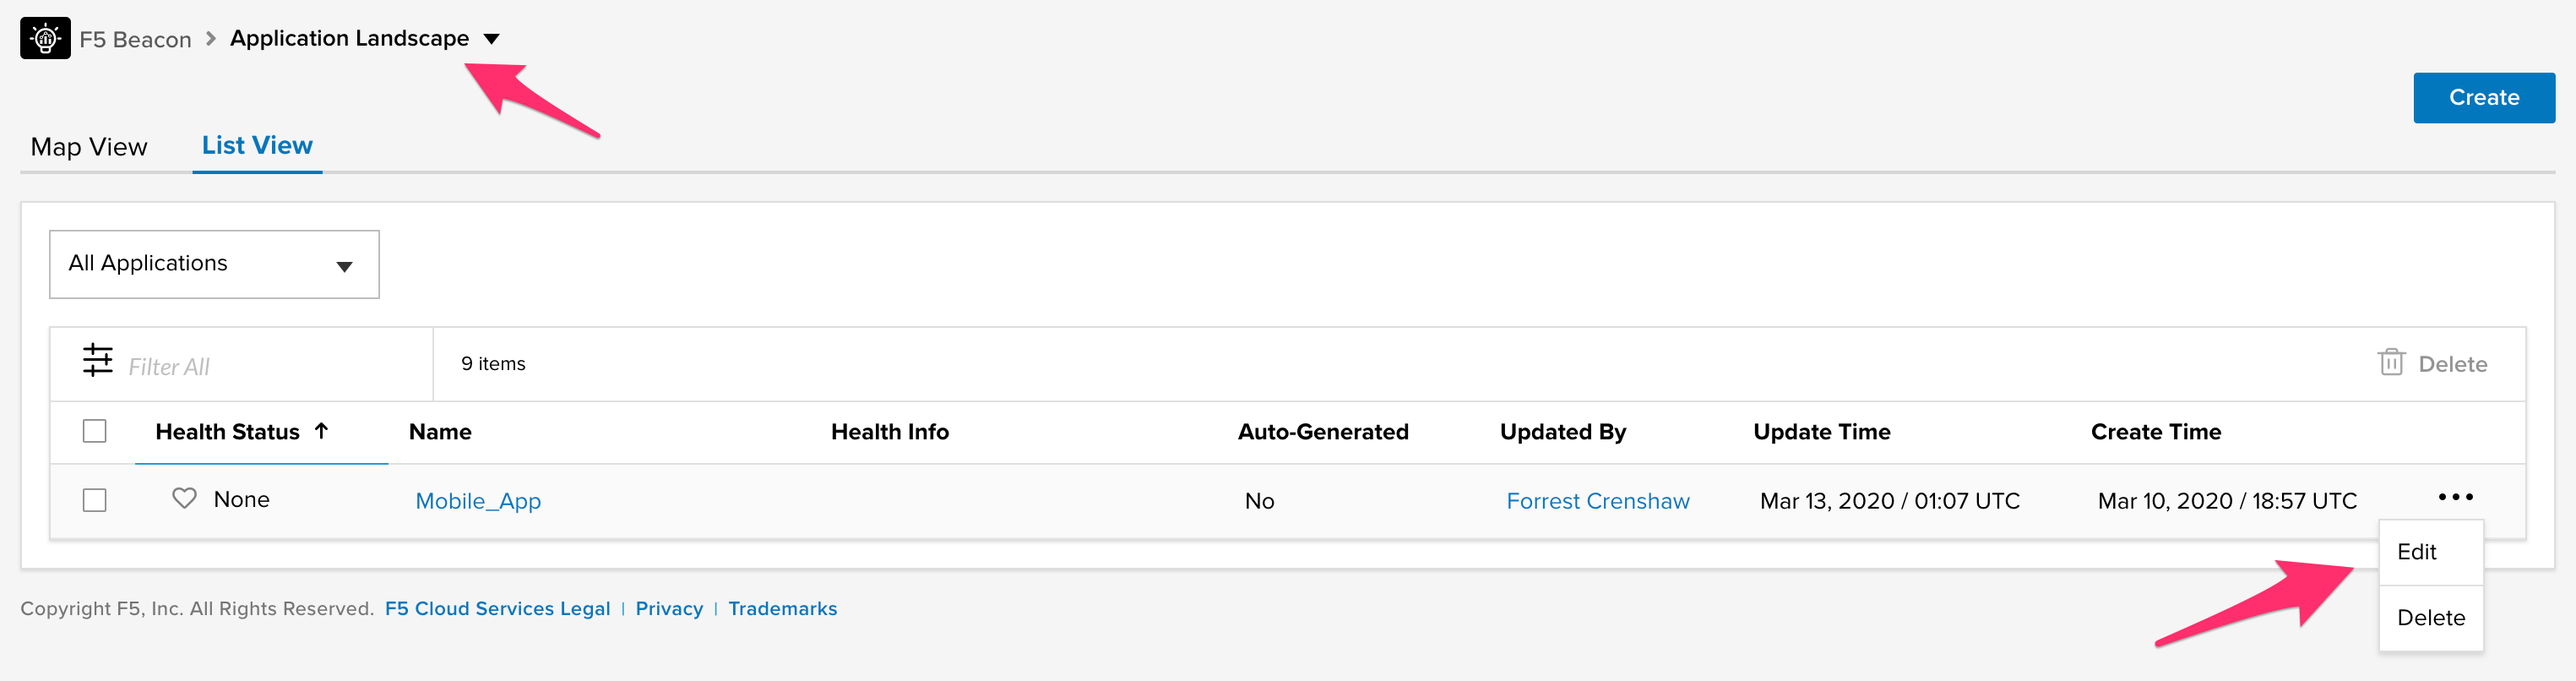
Navigate back to Application Landscape and click on the ellipsis next to our Mobile_App to select Edit.
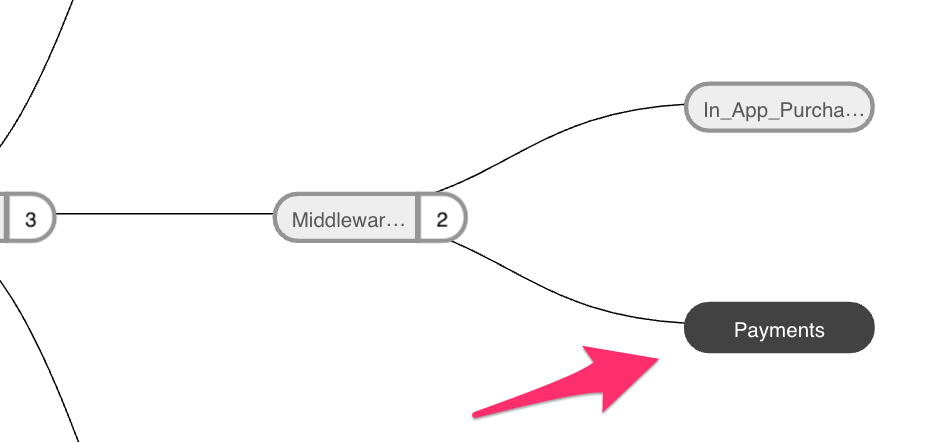
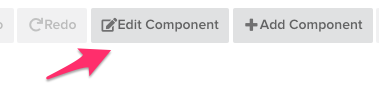
Click on the Payments object in our Application Map and click Edit Component.
In the edit form we can now map the Payment Service we created on BIG-IP to this Application Component. For the Metric Health Condition section add a metric with the following values and then click Save:
- Source Type: bigip-virtual
- Filters: name as …/Mobile_App/Payment/app_vs… (your exact name may be different based on your BIG-IPs hostname)

Note
This step was done in the Portal to familiarize you with how it works. You can also make this update in the F5 Beacon declarative API and POST the payload again. Below is an example of the updates that would be made in the Payload.
 ...
 {
 "name": "Payments",
 "description": "",
 "labels": {},
 "dependencies": [],
     "healthSourceSettings": {
         "metrics": [
         {
             "measurementName": "bigip-virtual",
             "tags": {
             "name": "/Mobile_App/Payments/app_vs",
             "source": "ip-10-1-3-53.us-east-2.compute.internal"
             }
         }
         ]
     }
 }
 ...

Click Save & Close for the entire Application in the upper right.

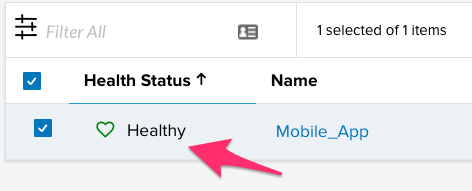
Now that the data is associated with our Mobile_App it may take a few moments to update in the portal. From the Application Landscape page in the Portal if you do not see the Mobile_App as
 please refresh the browser.
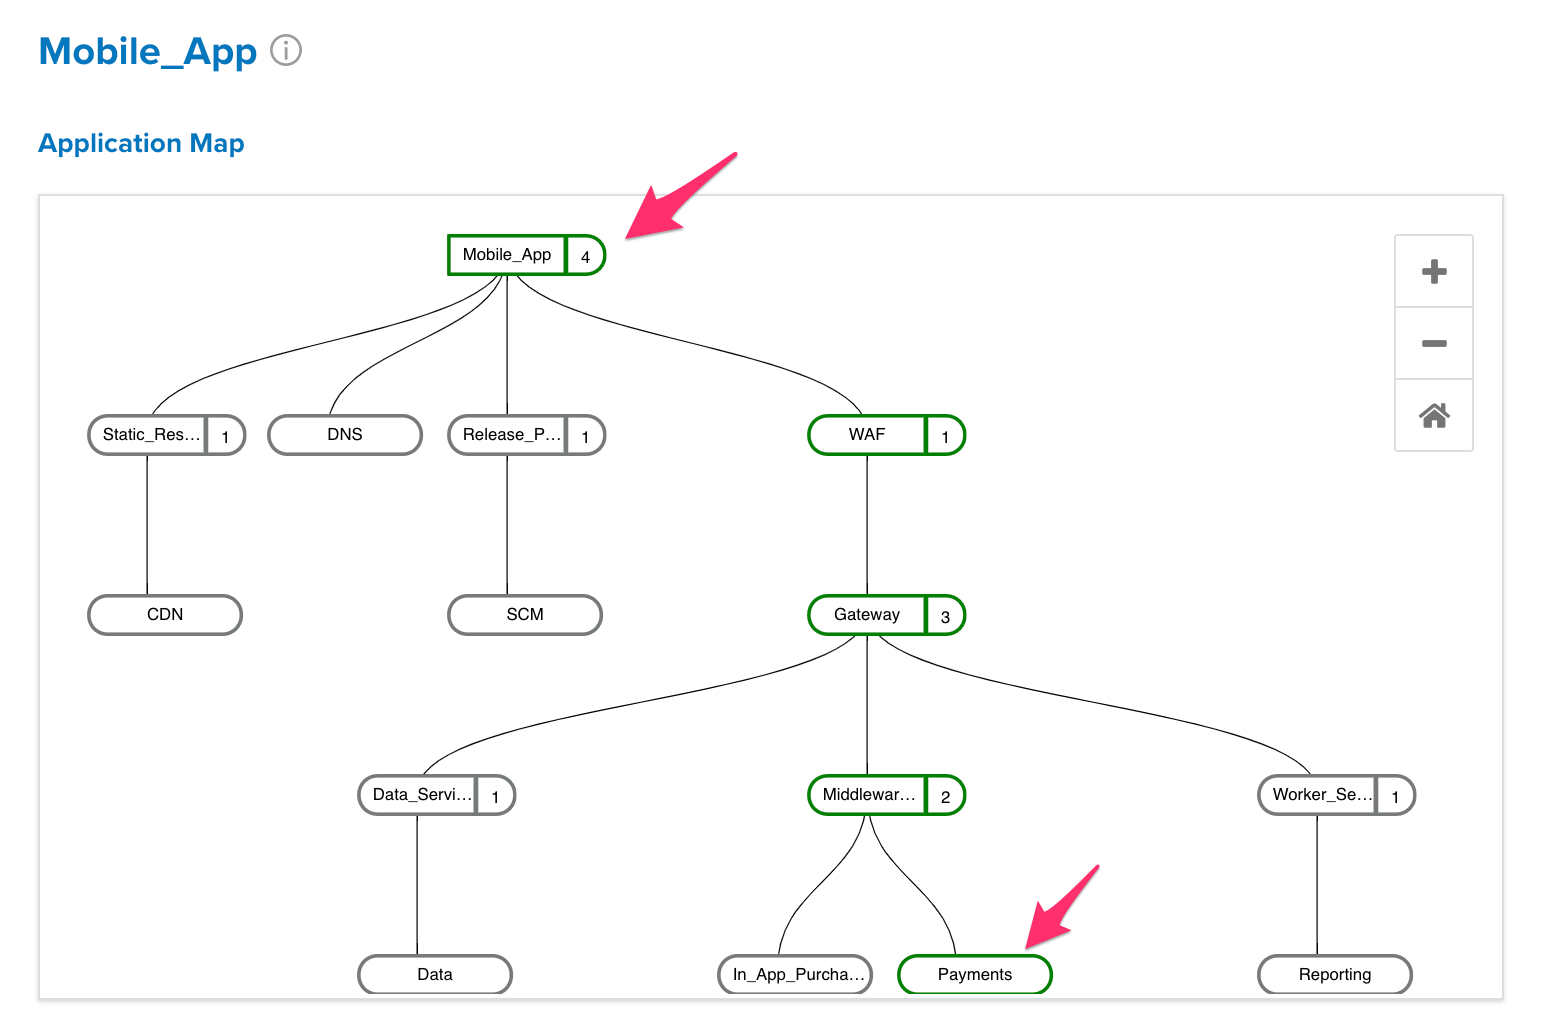
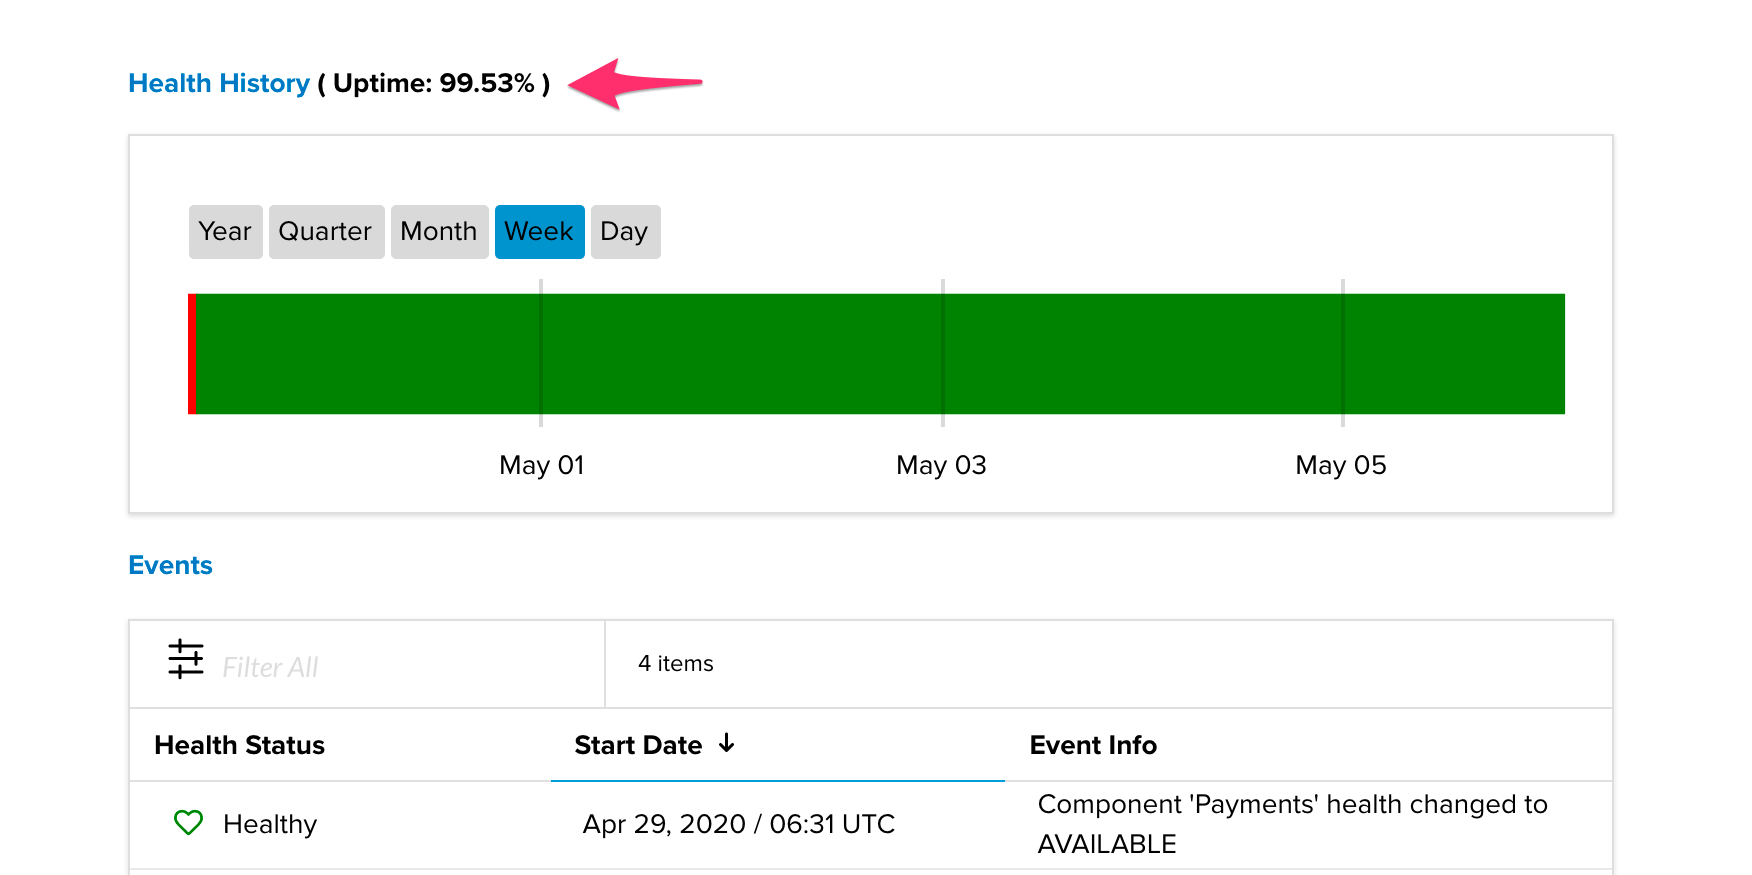
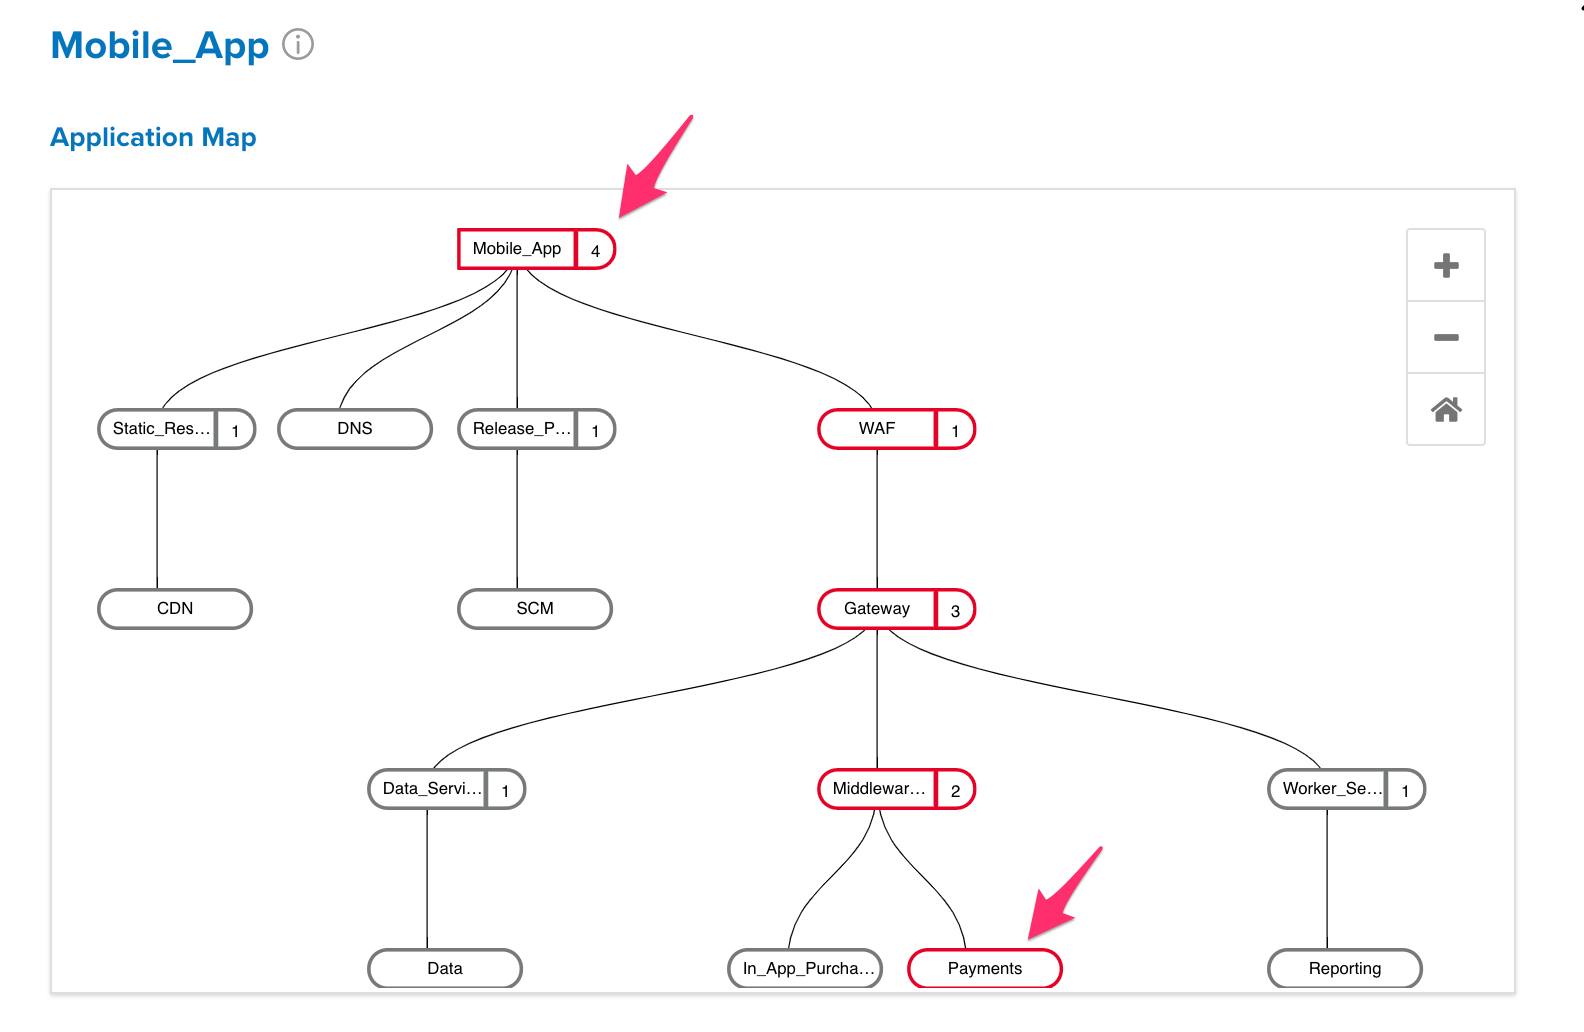
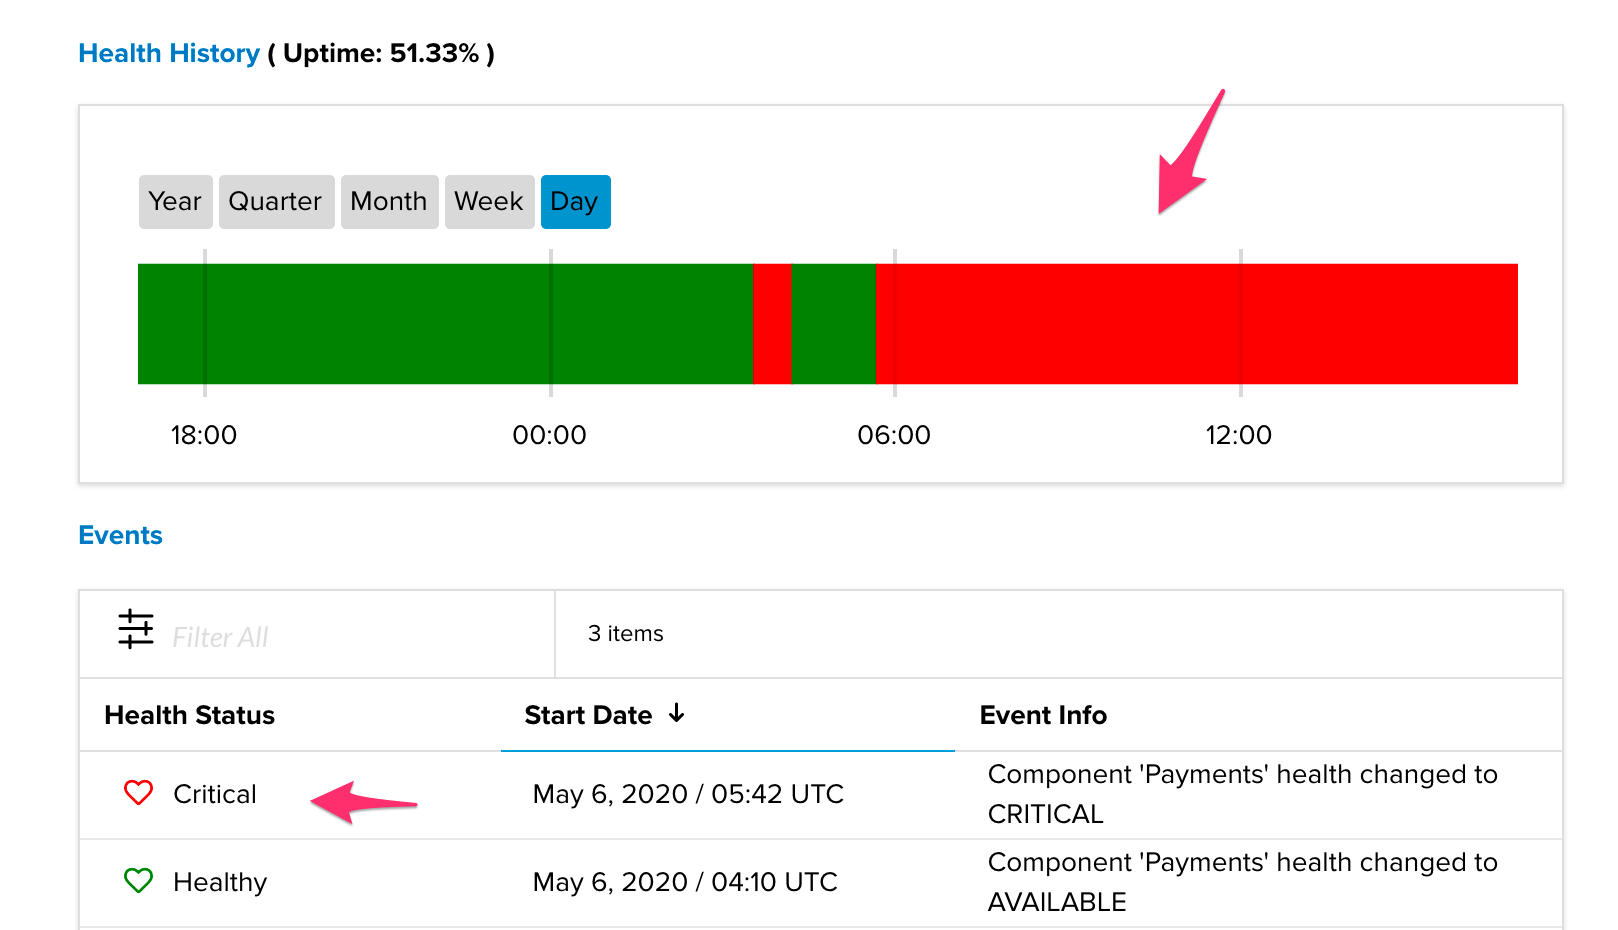
Click on the Health Status of the Mobile_App to see the Application Map with the health status populated all the way up to the top level of the Application. Below the Map you can also see the Health History and related Events. You can hover over objects on this page to get more information about them.
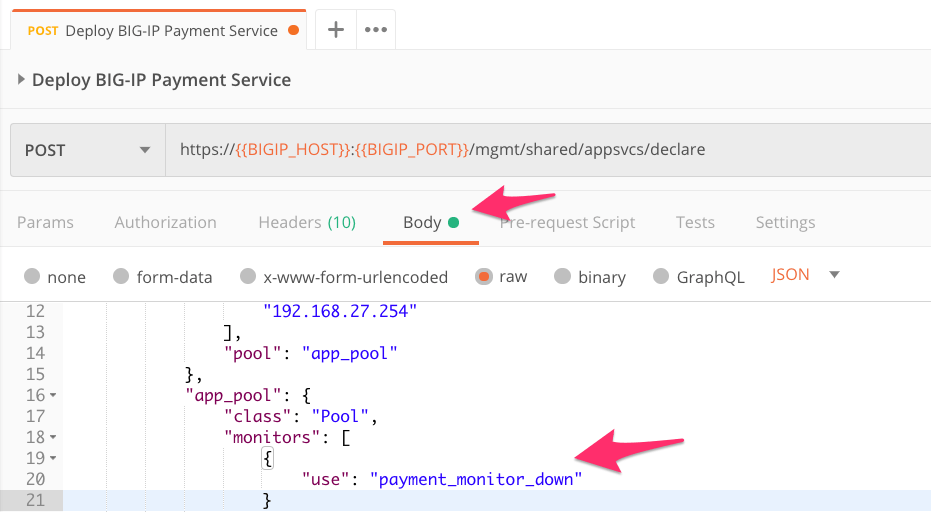
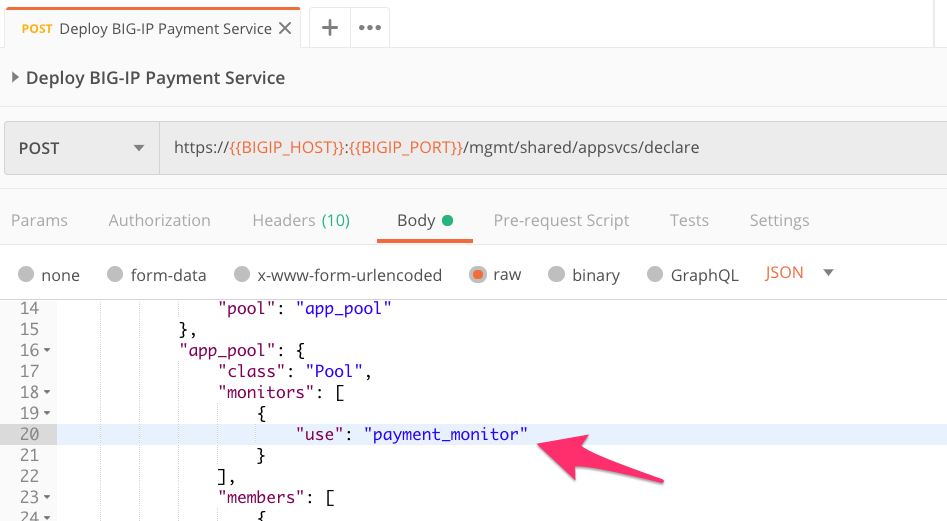
Before we conclude this section let’s cause a failure for this Payment service on BIG-IP so we can see it reflect in F5 Beacon. Open up Postman and go back to the Deploy BIG-IP Payment Service request. Click on the Body tab and edit the payment_monitor to payment_monitor_down and then click Send. You should again receive a status of 200 OK.
The F5 Beacon portal should now show the entire Mobile_App in critical state as one of its dependencies is offline.
Note
TS by default sends updates to F5 Beacon every 60 seconds. It can take around this long before you see the update reflected within F5 Beacon. Please refresh the page in the portal to see the updates.
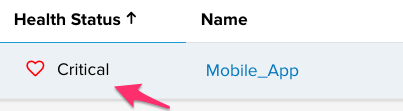
Click on the Health Status Critical to view the details again.
Important
The value of F5 Beacon really starts to show at this point. Please follow other portions of this guide to walk through configuring additional data sources to send to F5 Beacon. Aggregating this data and correlating it with Application Components will allow you to get a holistic view of your application state. At that point F5 Beacon will start providing valuable insights about your applications and their associated components.
Finally lets turn our Payment service back on. Navigate back to the same Postman request of Deploy BIG-IP Payment Service and select the Body tab. Edit payment_monitor_down to payment_monitor and click Send. You should again receive a status of 200 OK.
Navigate back to the Data Ingestion to F5 Beacon page to add more sources of data to our Mobile_App or proceed to Creating Dashboards in F5 Beacon to put this application into an F5 Beacon Dashboard.