F5 BIG-IQ Centralized Management Lab > BIG-IQ All Labs > Class 8: BIG-IQ Web Application Security > Module 1: Advanced Web Application Firewall (WAF) on BIG-IQ Source | Edit on
Lab 1.3: WAF Policy Management via GitLab CI/CD pipeline with default WAF template and AS3
Note
Estimated time to complete: 25 minutes
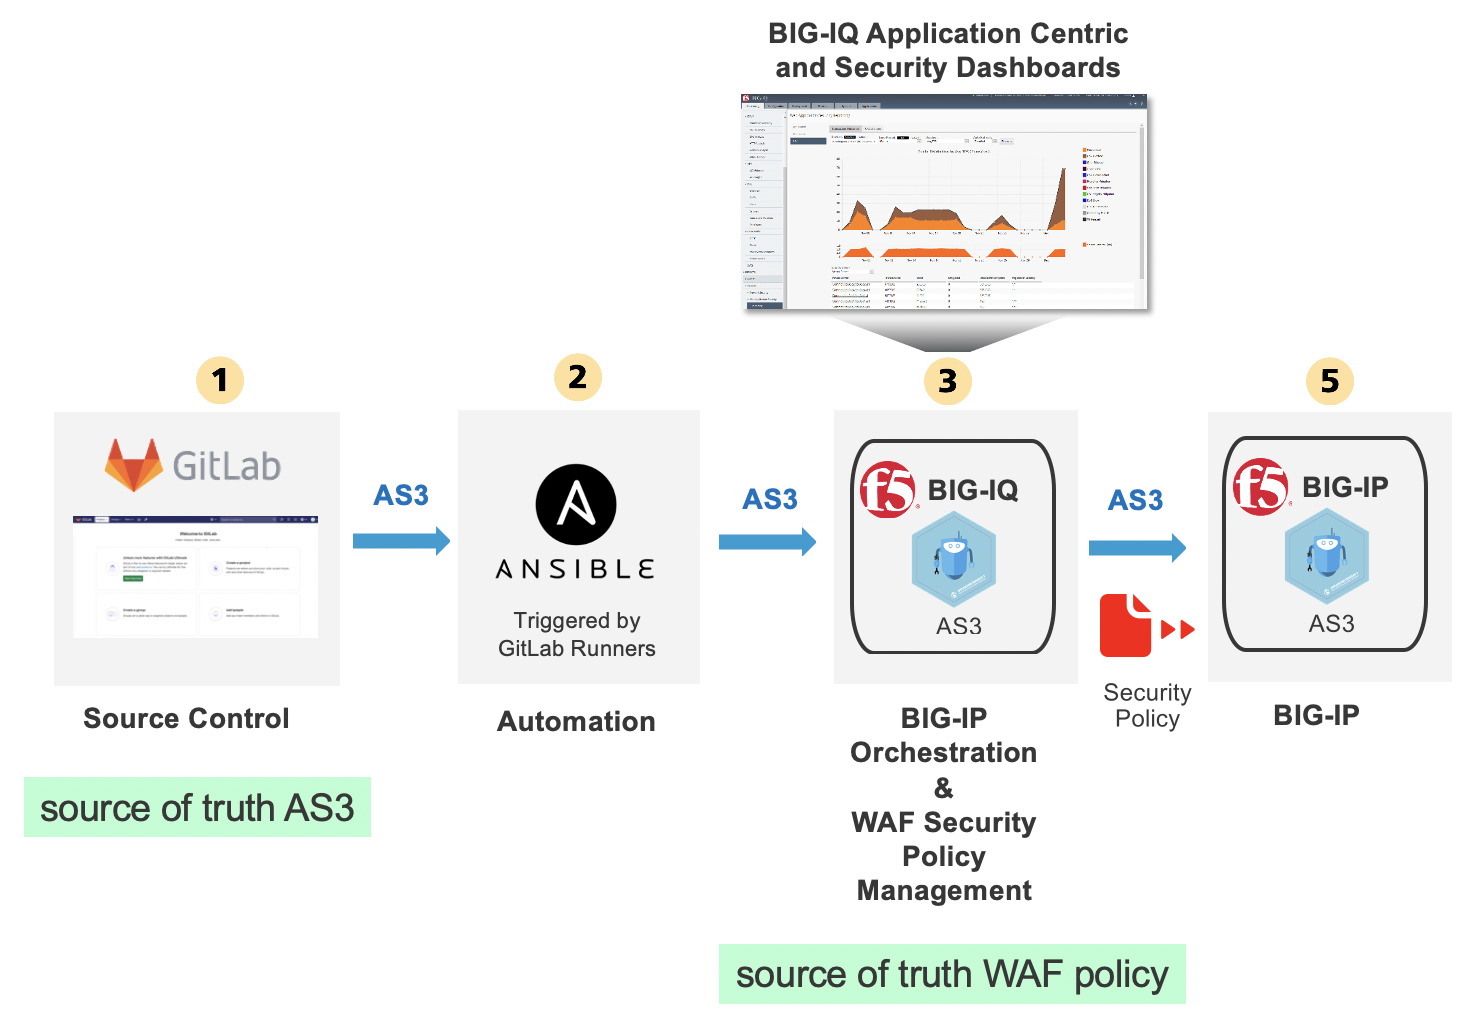
In this lab, we are going to use GitLab to store the BIG-IP configuration (AS3 declaration) and deploy it through BIG-IQ to BIG-IP using Ansible. The AS3 declaration will be referencing a WAF policy which will be created prior based of a WAF template available in BIG-IQ.
We are leveraging a CI/CD pipeline in GitLab in order to make changes on the BIG-IP device.
Ansible is an open-source software provisioning, configuration management, and application-deployment tool enabling infrastructure as code.
GitLab is a web-based DevOps lifecycle tool that provides a Git-repository manager providing wiki, issue-tracking and continuous integration and deployment pipeline features.
GitLab will keep track of the changes and control user access to the application service configuration of the F5 BIG-IP. We are using BIG-IQ to provide visibility with enhanced analytics (HTTP/TCP) to the DevOps/Application owner.
Once the Application Service will be deployed along with a new WAF policy, the security admin will be able to manage and update the WAF policy from BIG-IQ independently from the VIP, pool and pool members.
- This lab will be using the following F5 Ansible Galaxy roles:
- bigiq_pinning_deploy_objects ansible Role: Pin objects (e.g. Cert & Key, WAF policy, Security Logging Profile) on BIG-IQ and deploy it to BIG-IP(s).
- atc_deploy ansible Role: Allows AS3 declaration to be sent to automation tool chain service.
- bigiq_move_app_dashboard ansible Role: Move Application Service(s) in BIG-IQ Application Dashboard.
Lab environment access
If you have not yet visited the page Getting Started, please do so.
Workflow
- Start GitLab and create new a project
- Create WAF policy and security logging profile on BIG-IQ using the BIG-IQ UI
- Clone gitlab project:
- Deploy WAF policy and logging profile to BIG-IQ with API through Gitlab and Ansible
- Deploy AS3 WAF HTTPS offload application service to a BIG-IP through Gitlab and Ansible
- Update policy through BIG-IQ, deploy policy update using the BIG-IQ UI
Start GitLab and create new a project
Connect via
SSHorWeb Shellto the system Ubuntu Lamp Server. (if you use the Web Shell, login as f5student first: su - f5student).Execute the following commands:
./gitlab/start-gitlab.sh
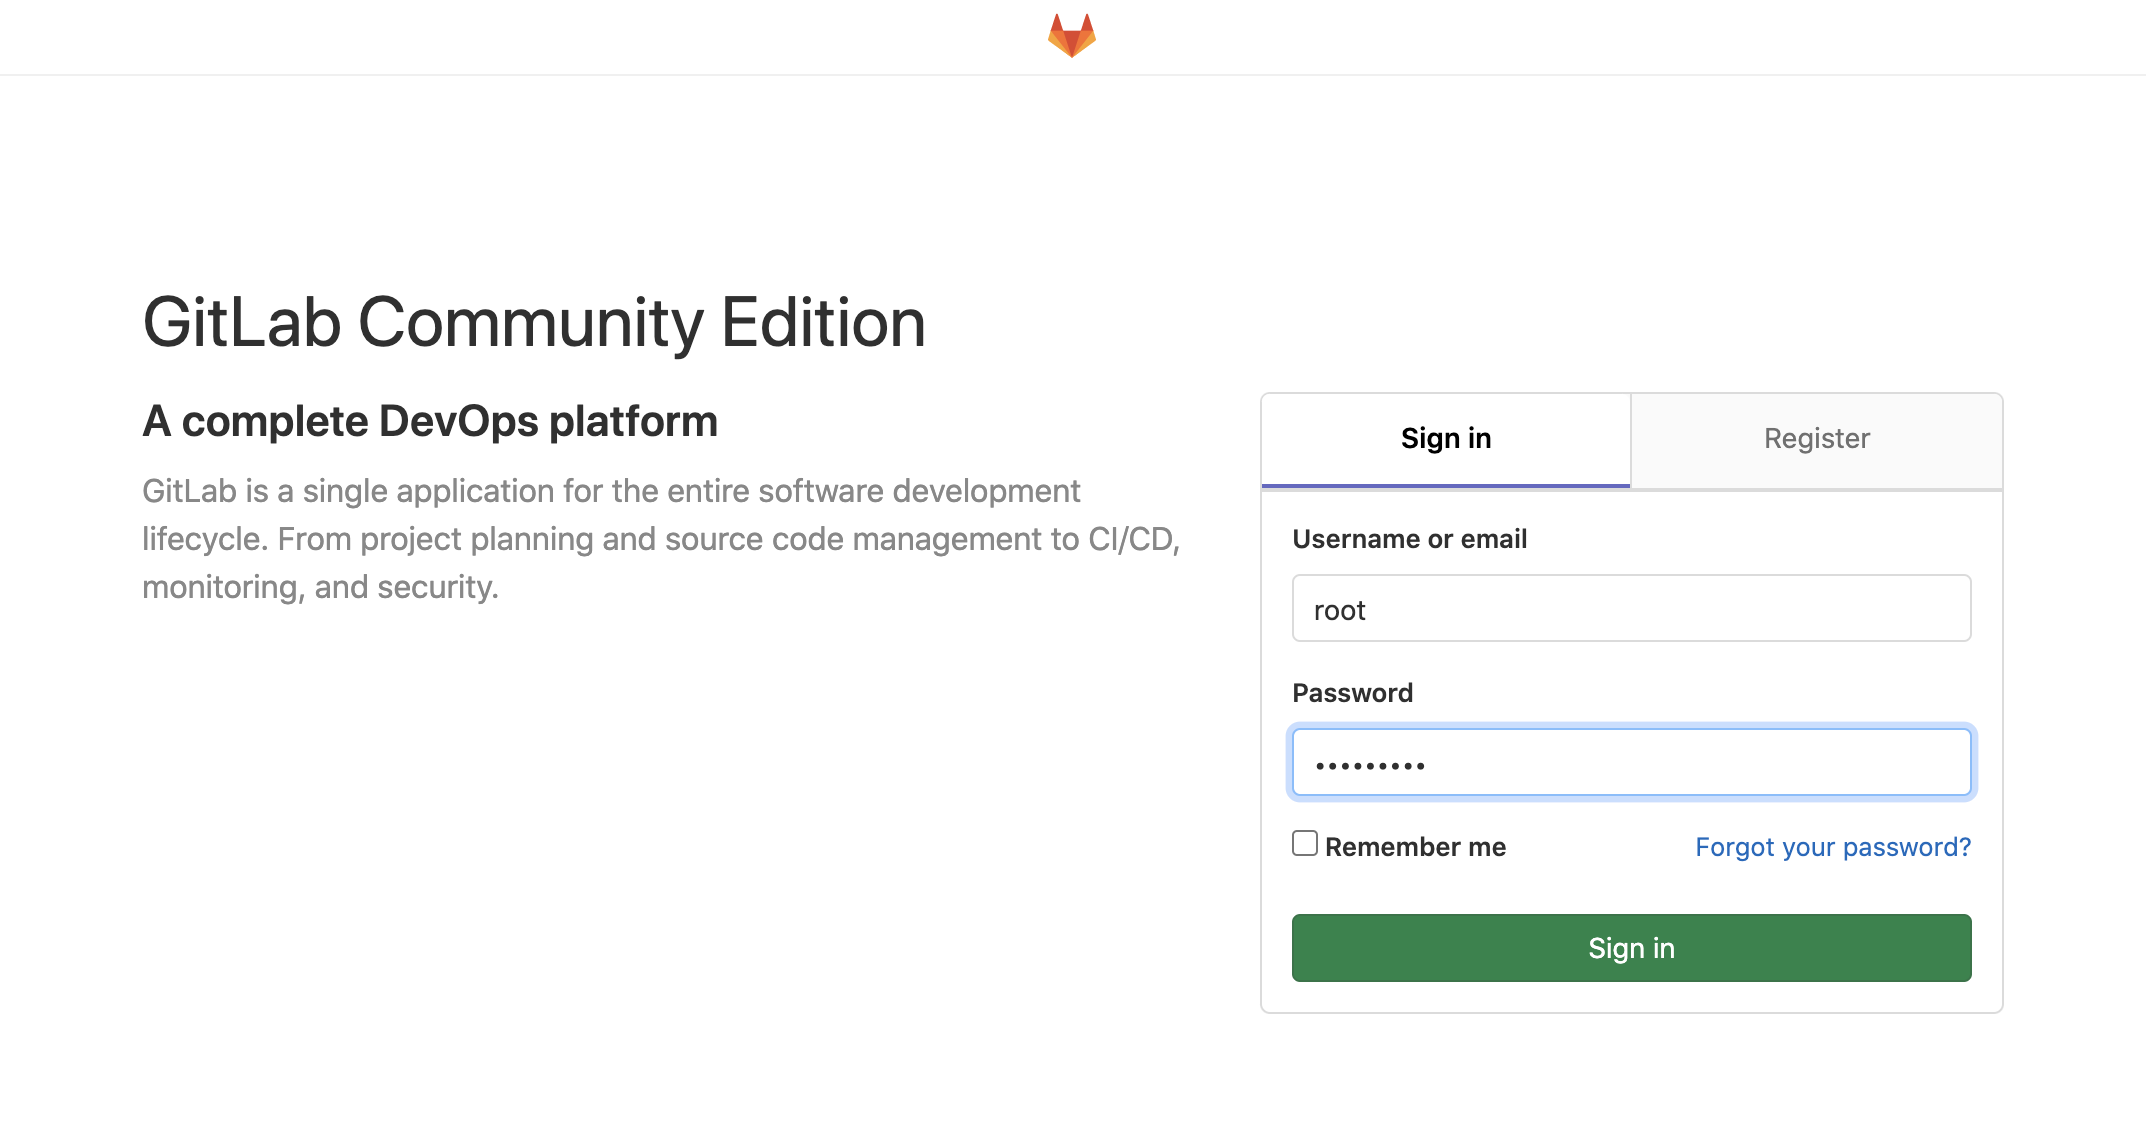
Wait ~10 min to open GitLab web UI from the lab environment. Click on the ACCESS button of the Ubuntu Lamp Server system and click on GitLab. The login/password is
root/purple123. Or openhttp://localhost:7002from Google Chrome browser in the Jumphost.
Note
You can check GitLab status with docker exec gitlab_gitlab_1 gitlab-ctl status and GitLab logs with docker logs gitlab_gitlab_1.
- Click on the GitLab button on the system Ubuntu Lamp Server in the lab environment. Create a new project and name it
mywebapp.
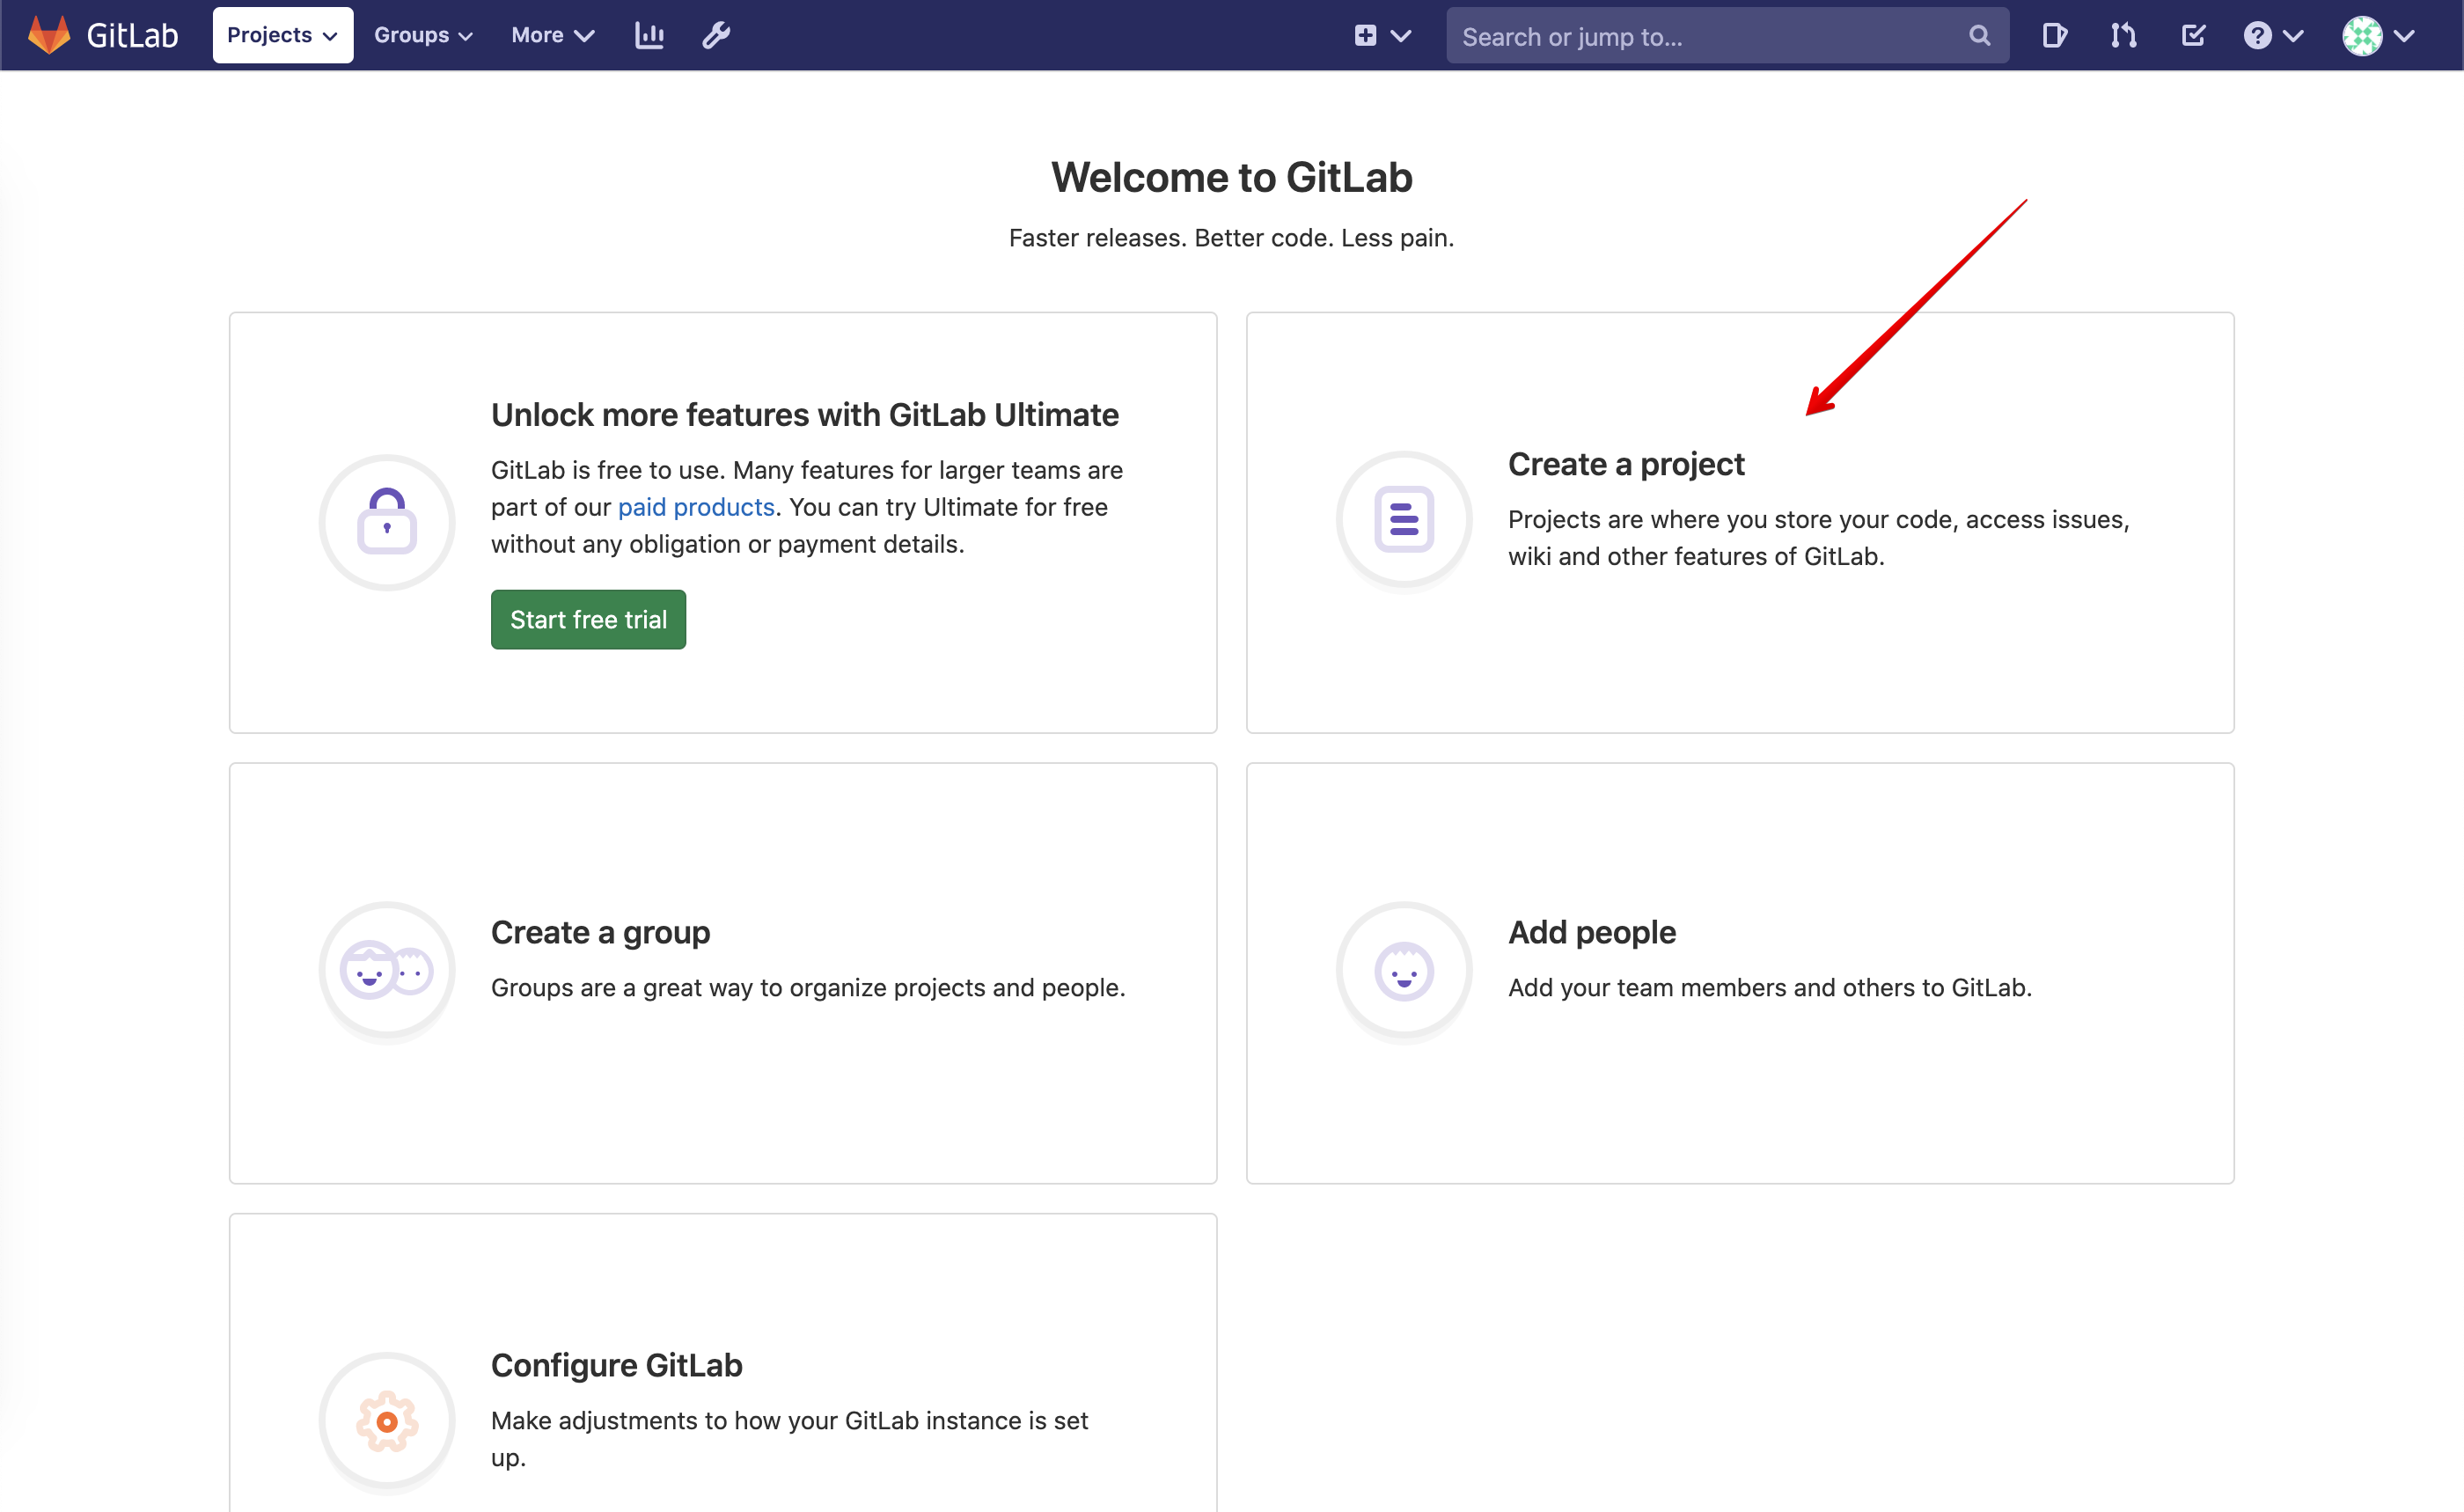
Select Initialize repository with a README.

Copy the Jumphost Ubuntu Lamp Server ssh public key:
cat ~/.ssh/id_rsa.pub
Back in GitLab, click on Add SSH Key.
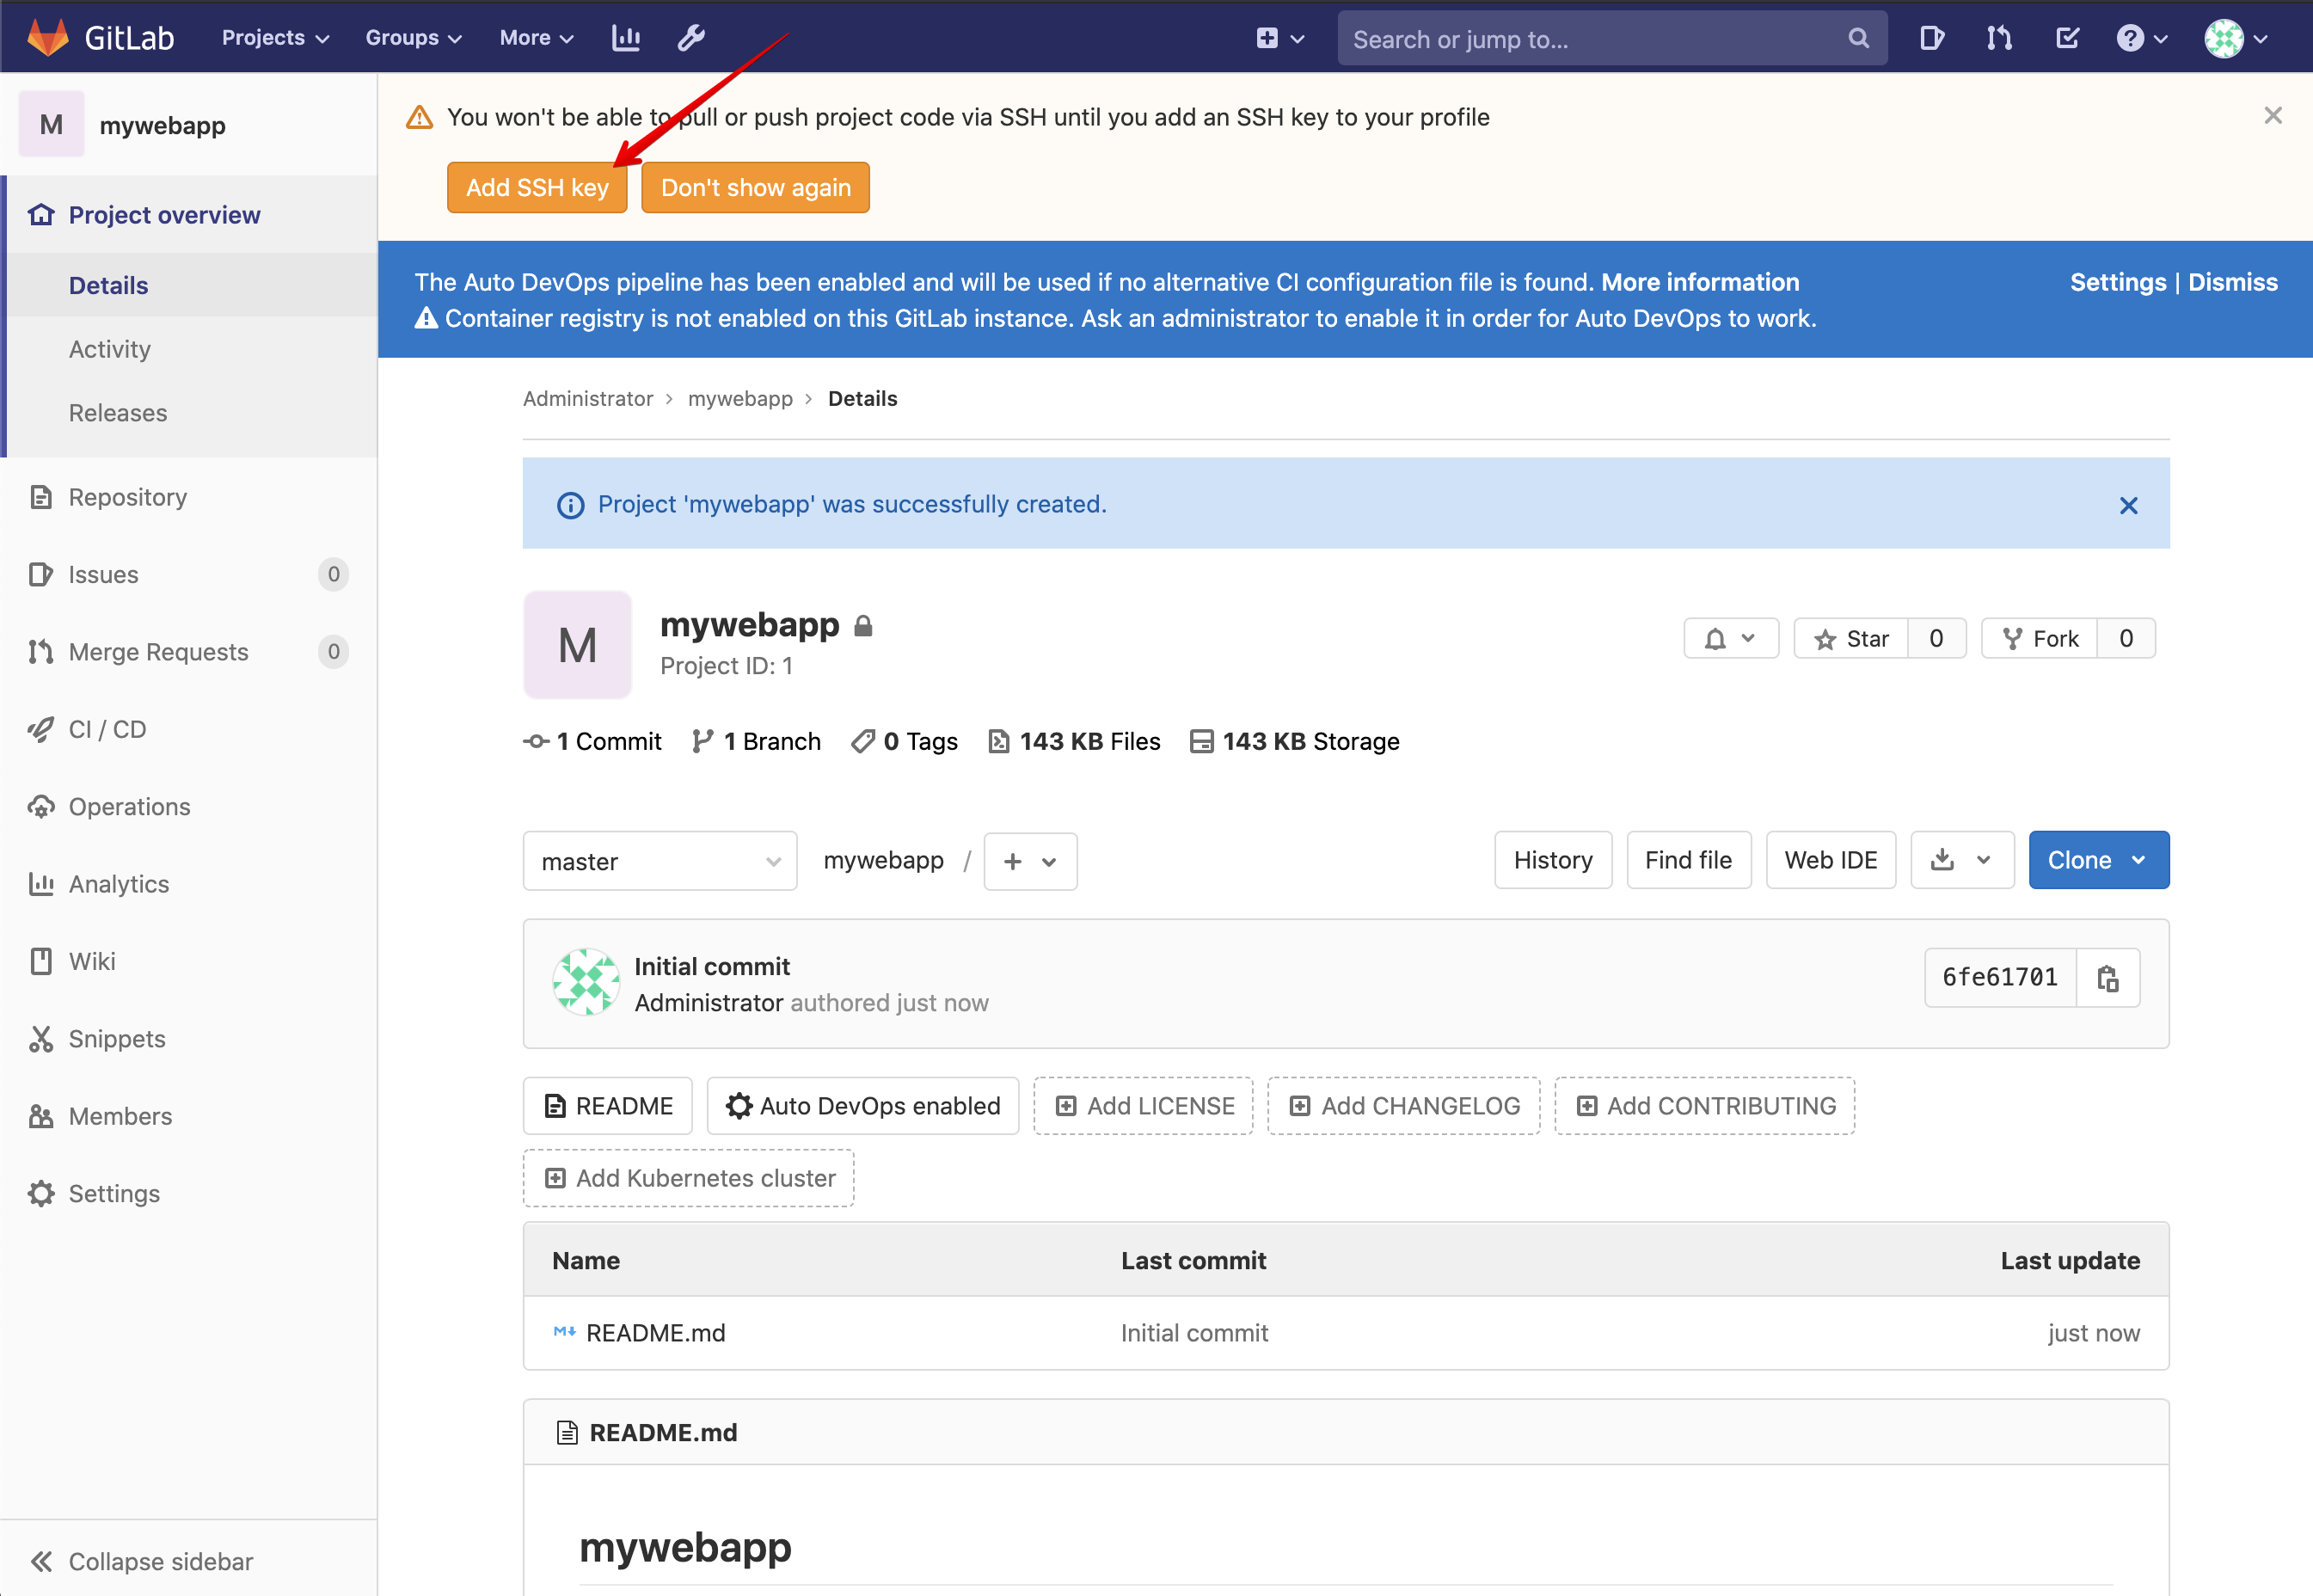
Paste the public key and click om Add Key.

- Let’s now configure the gitlab runner with this project. This runner will be used to trigger pipelines when a commit is done on the project and allow us to automatically trigger a set of tasks.
First Let’s open your project, click Your Projects.
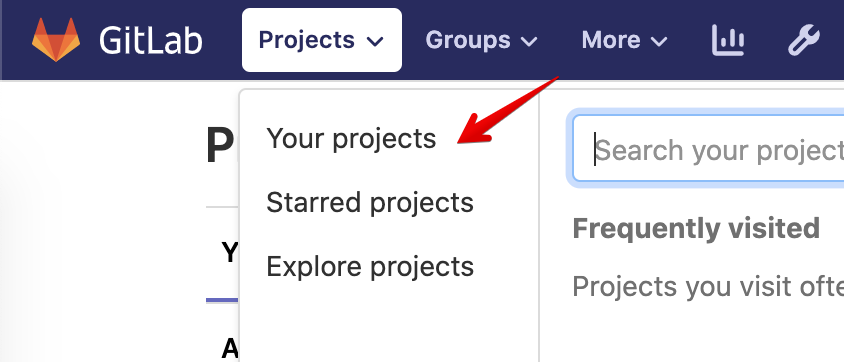
Click on mywebapp.
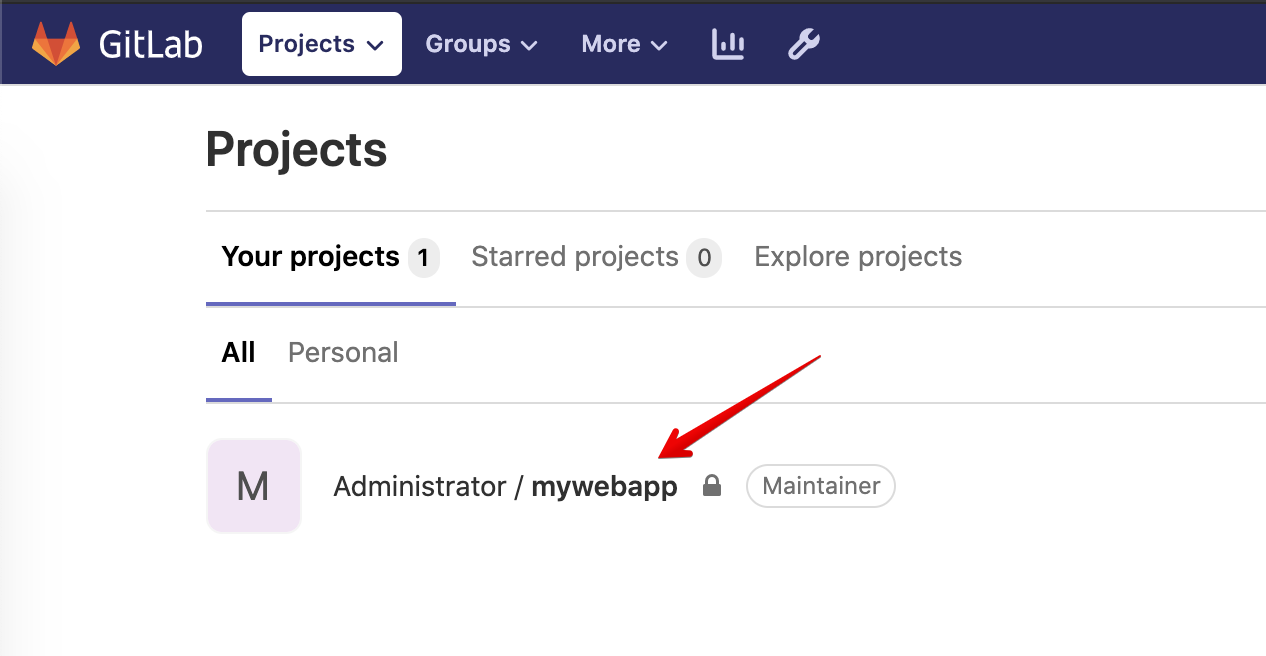
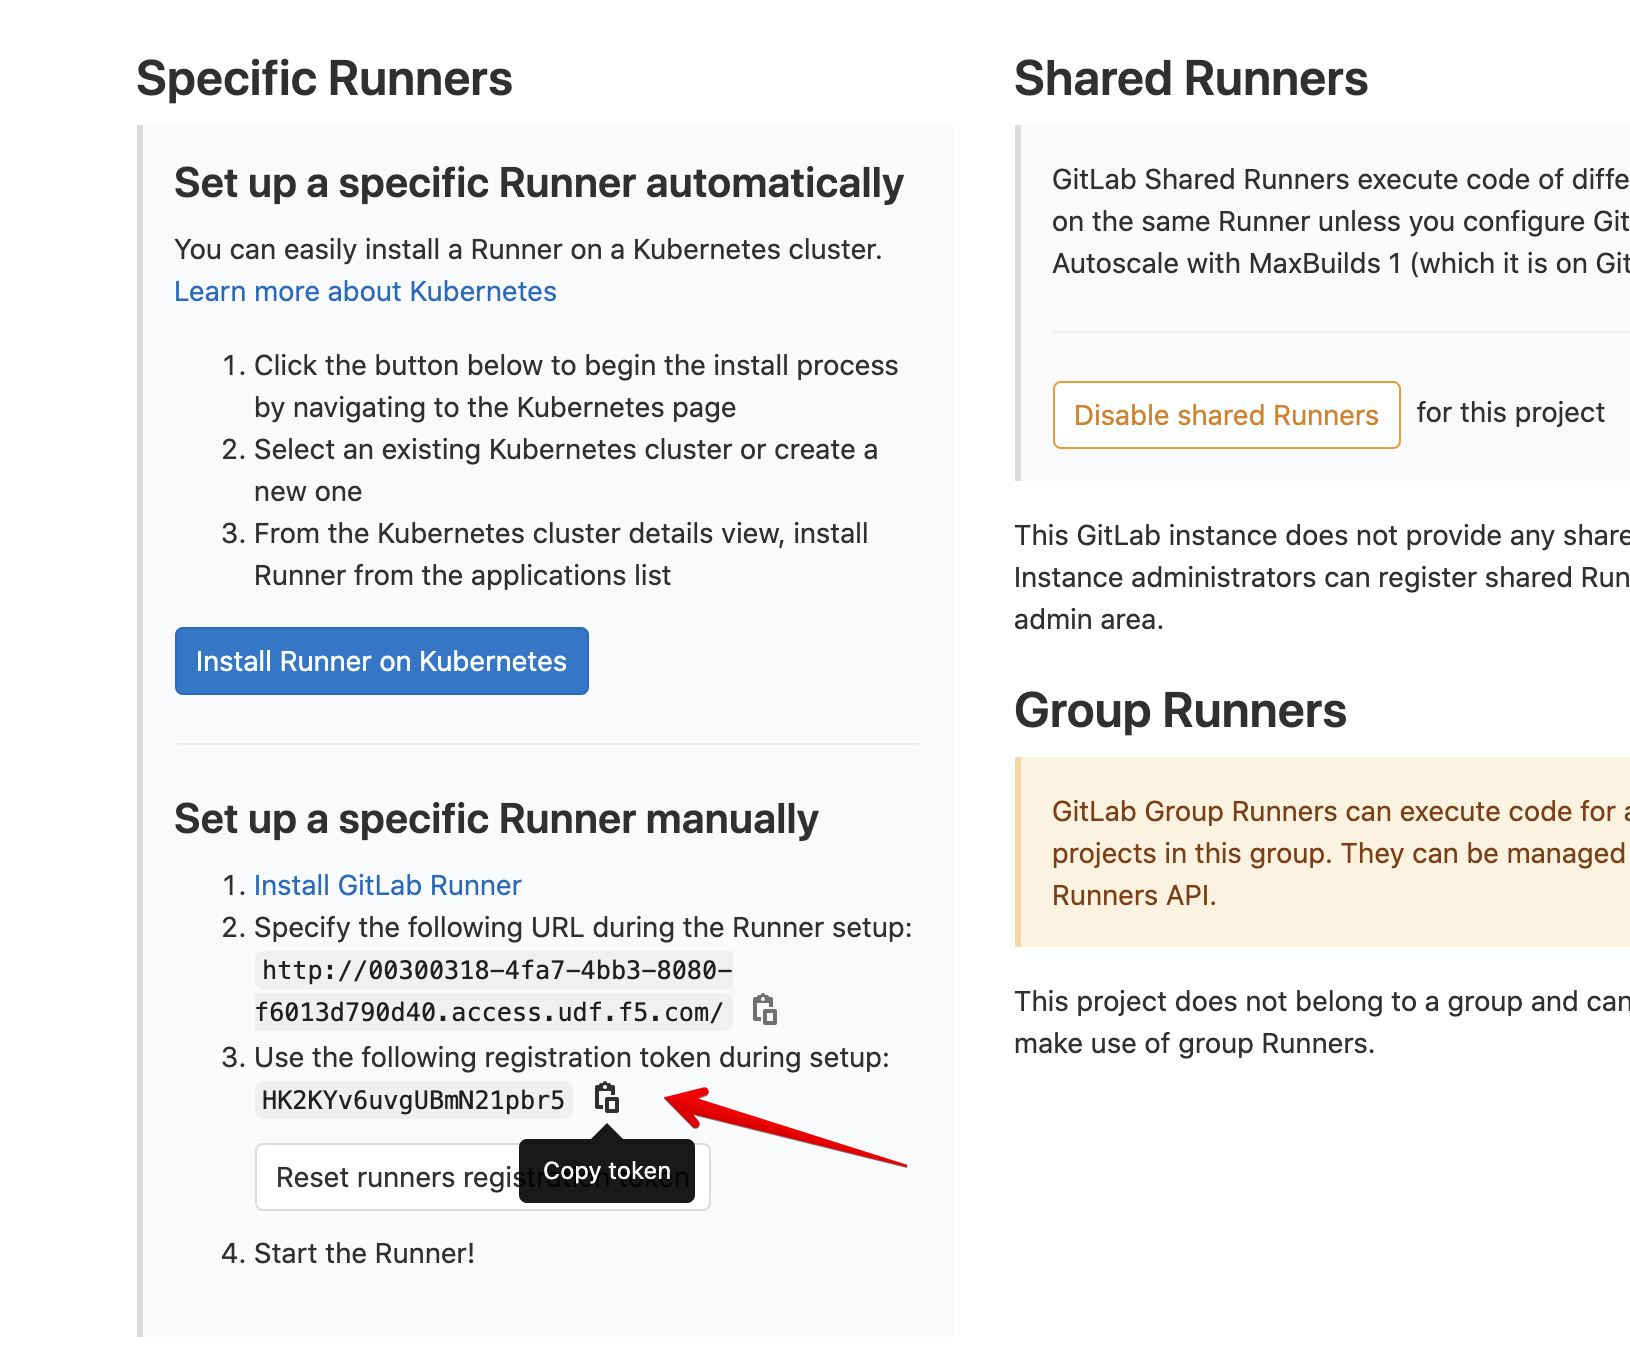
Navigate the CI/CD option copy the token value.
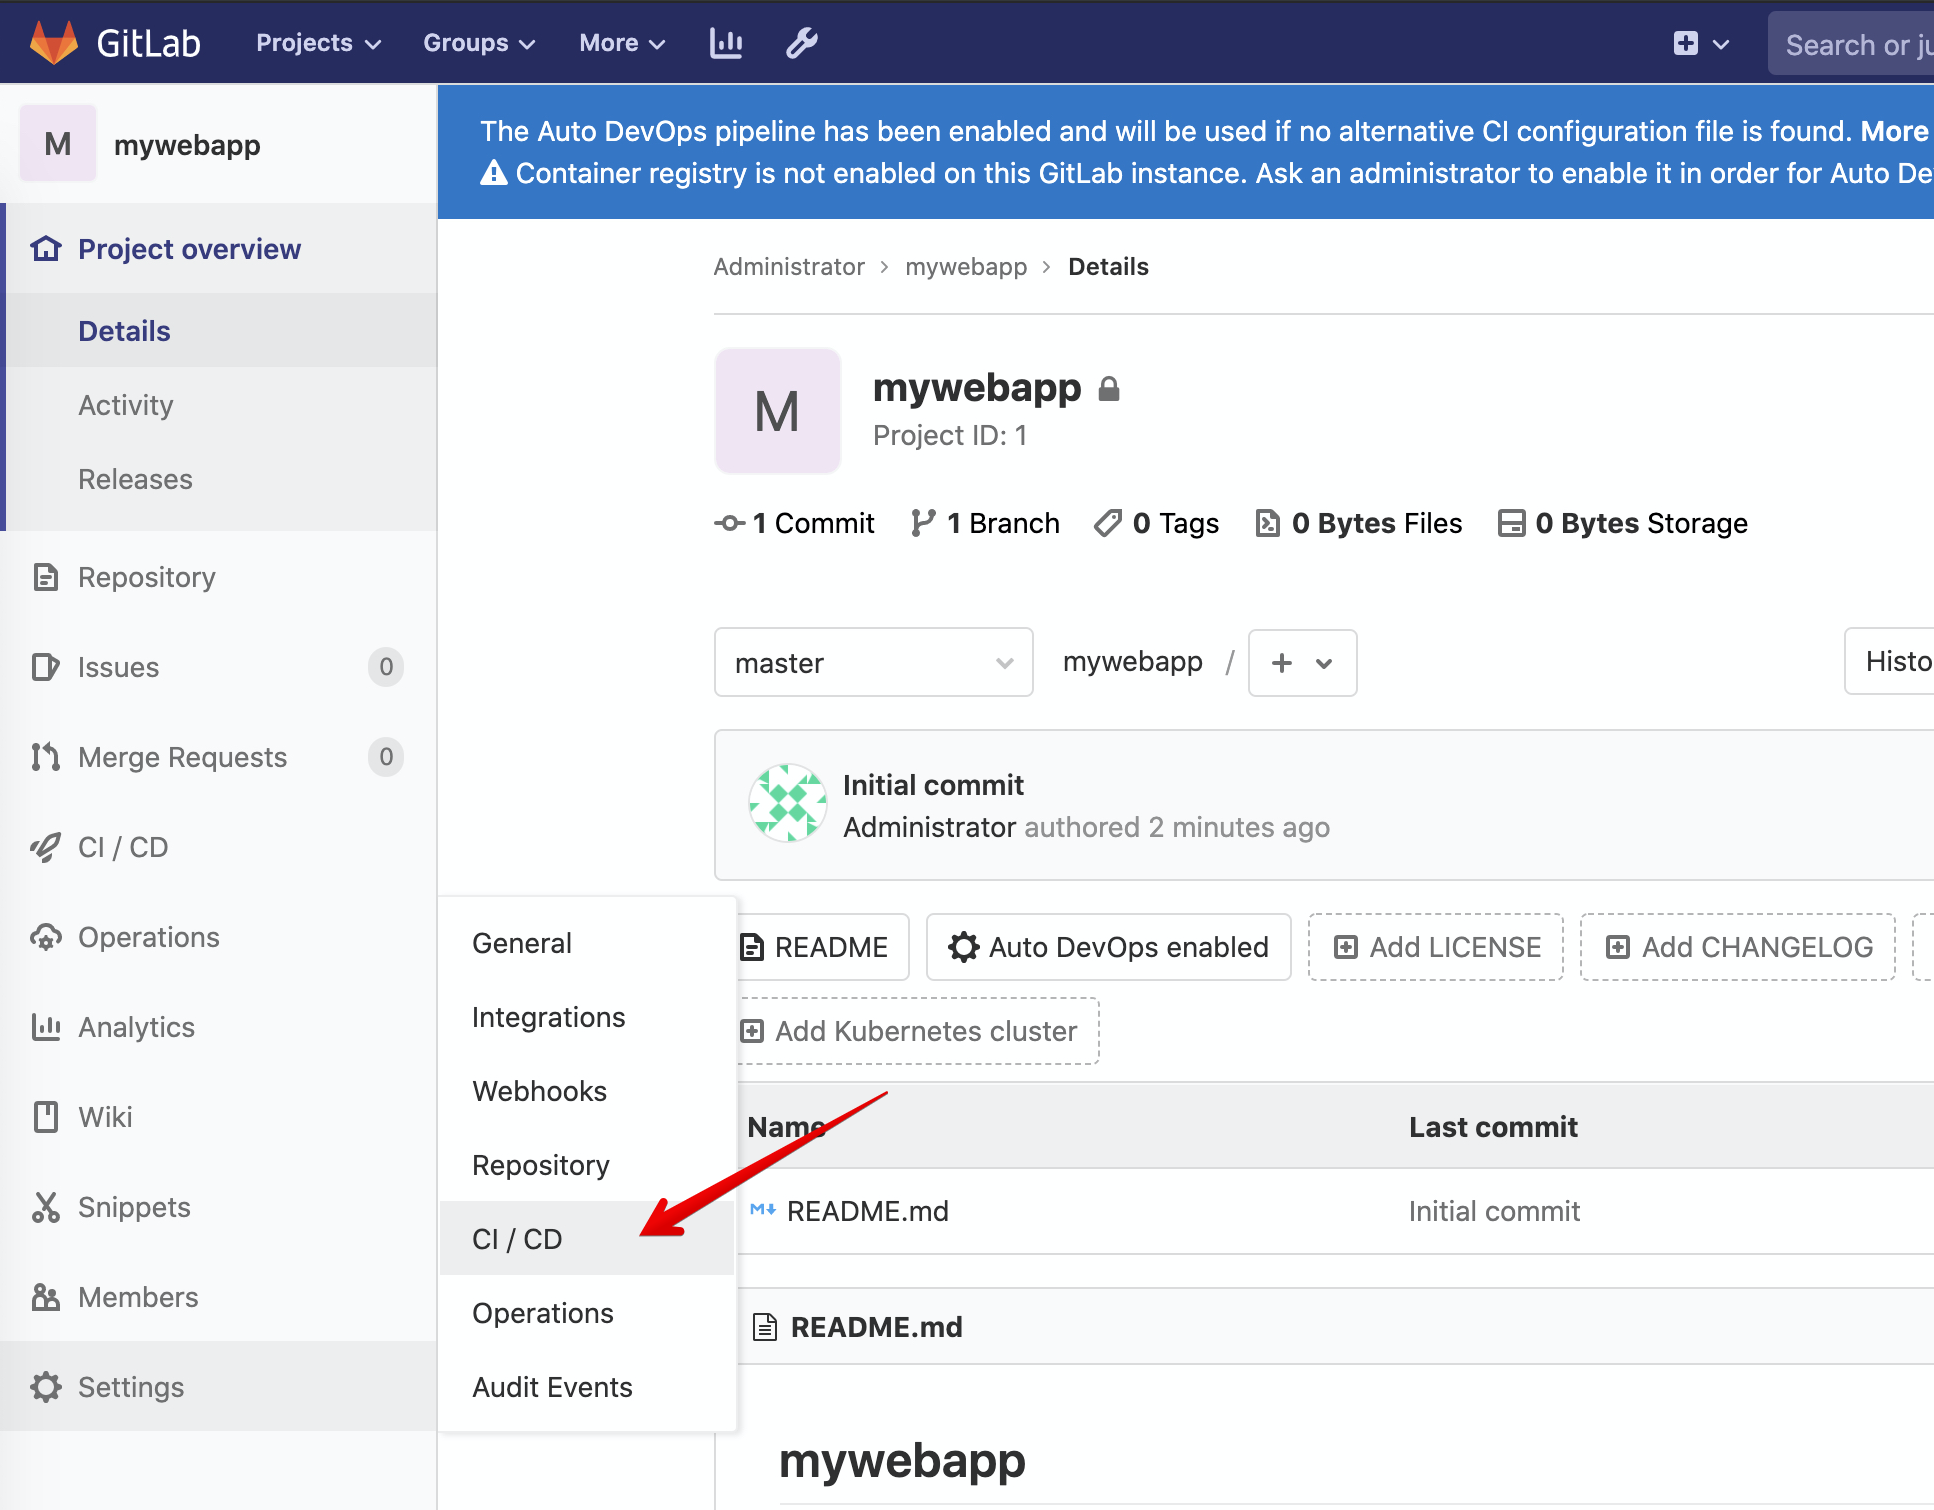
Click on Settings > CI/CD.
Find and expand the Runner section.
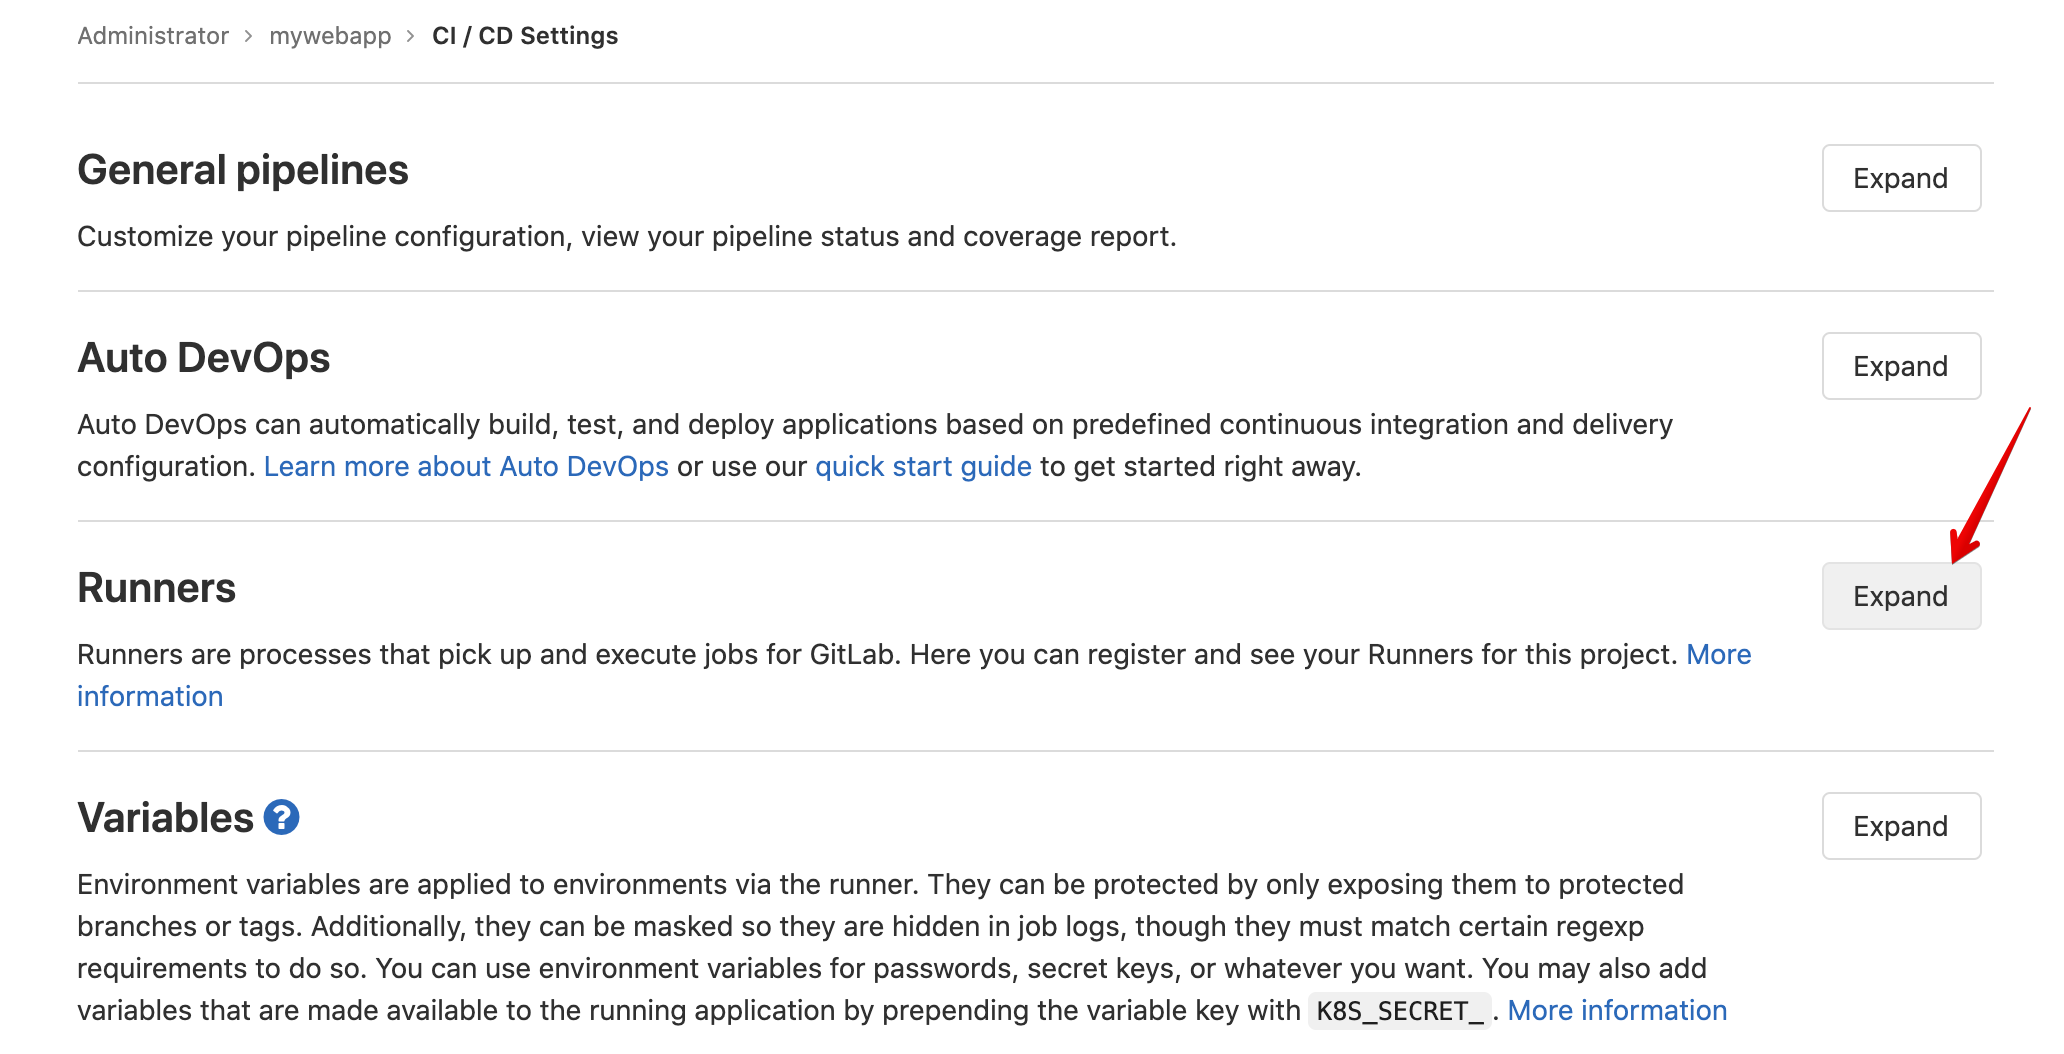
Finally copy the token value.
Back in the Linux Jumphost, run the following command to register the gitlab runner using the token value:
./gitlab/gitlab-runner-register.sh <token>
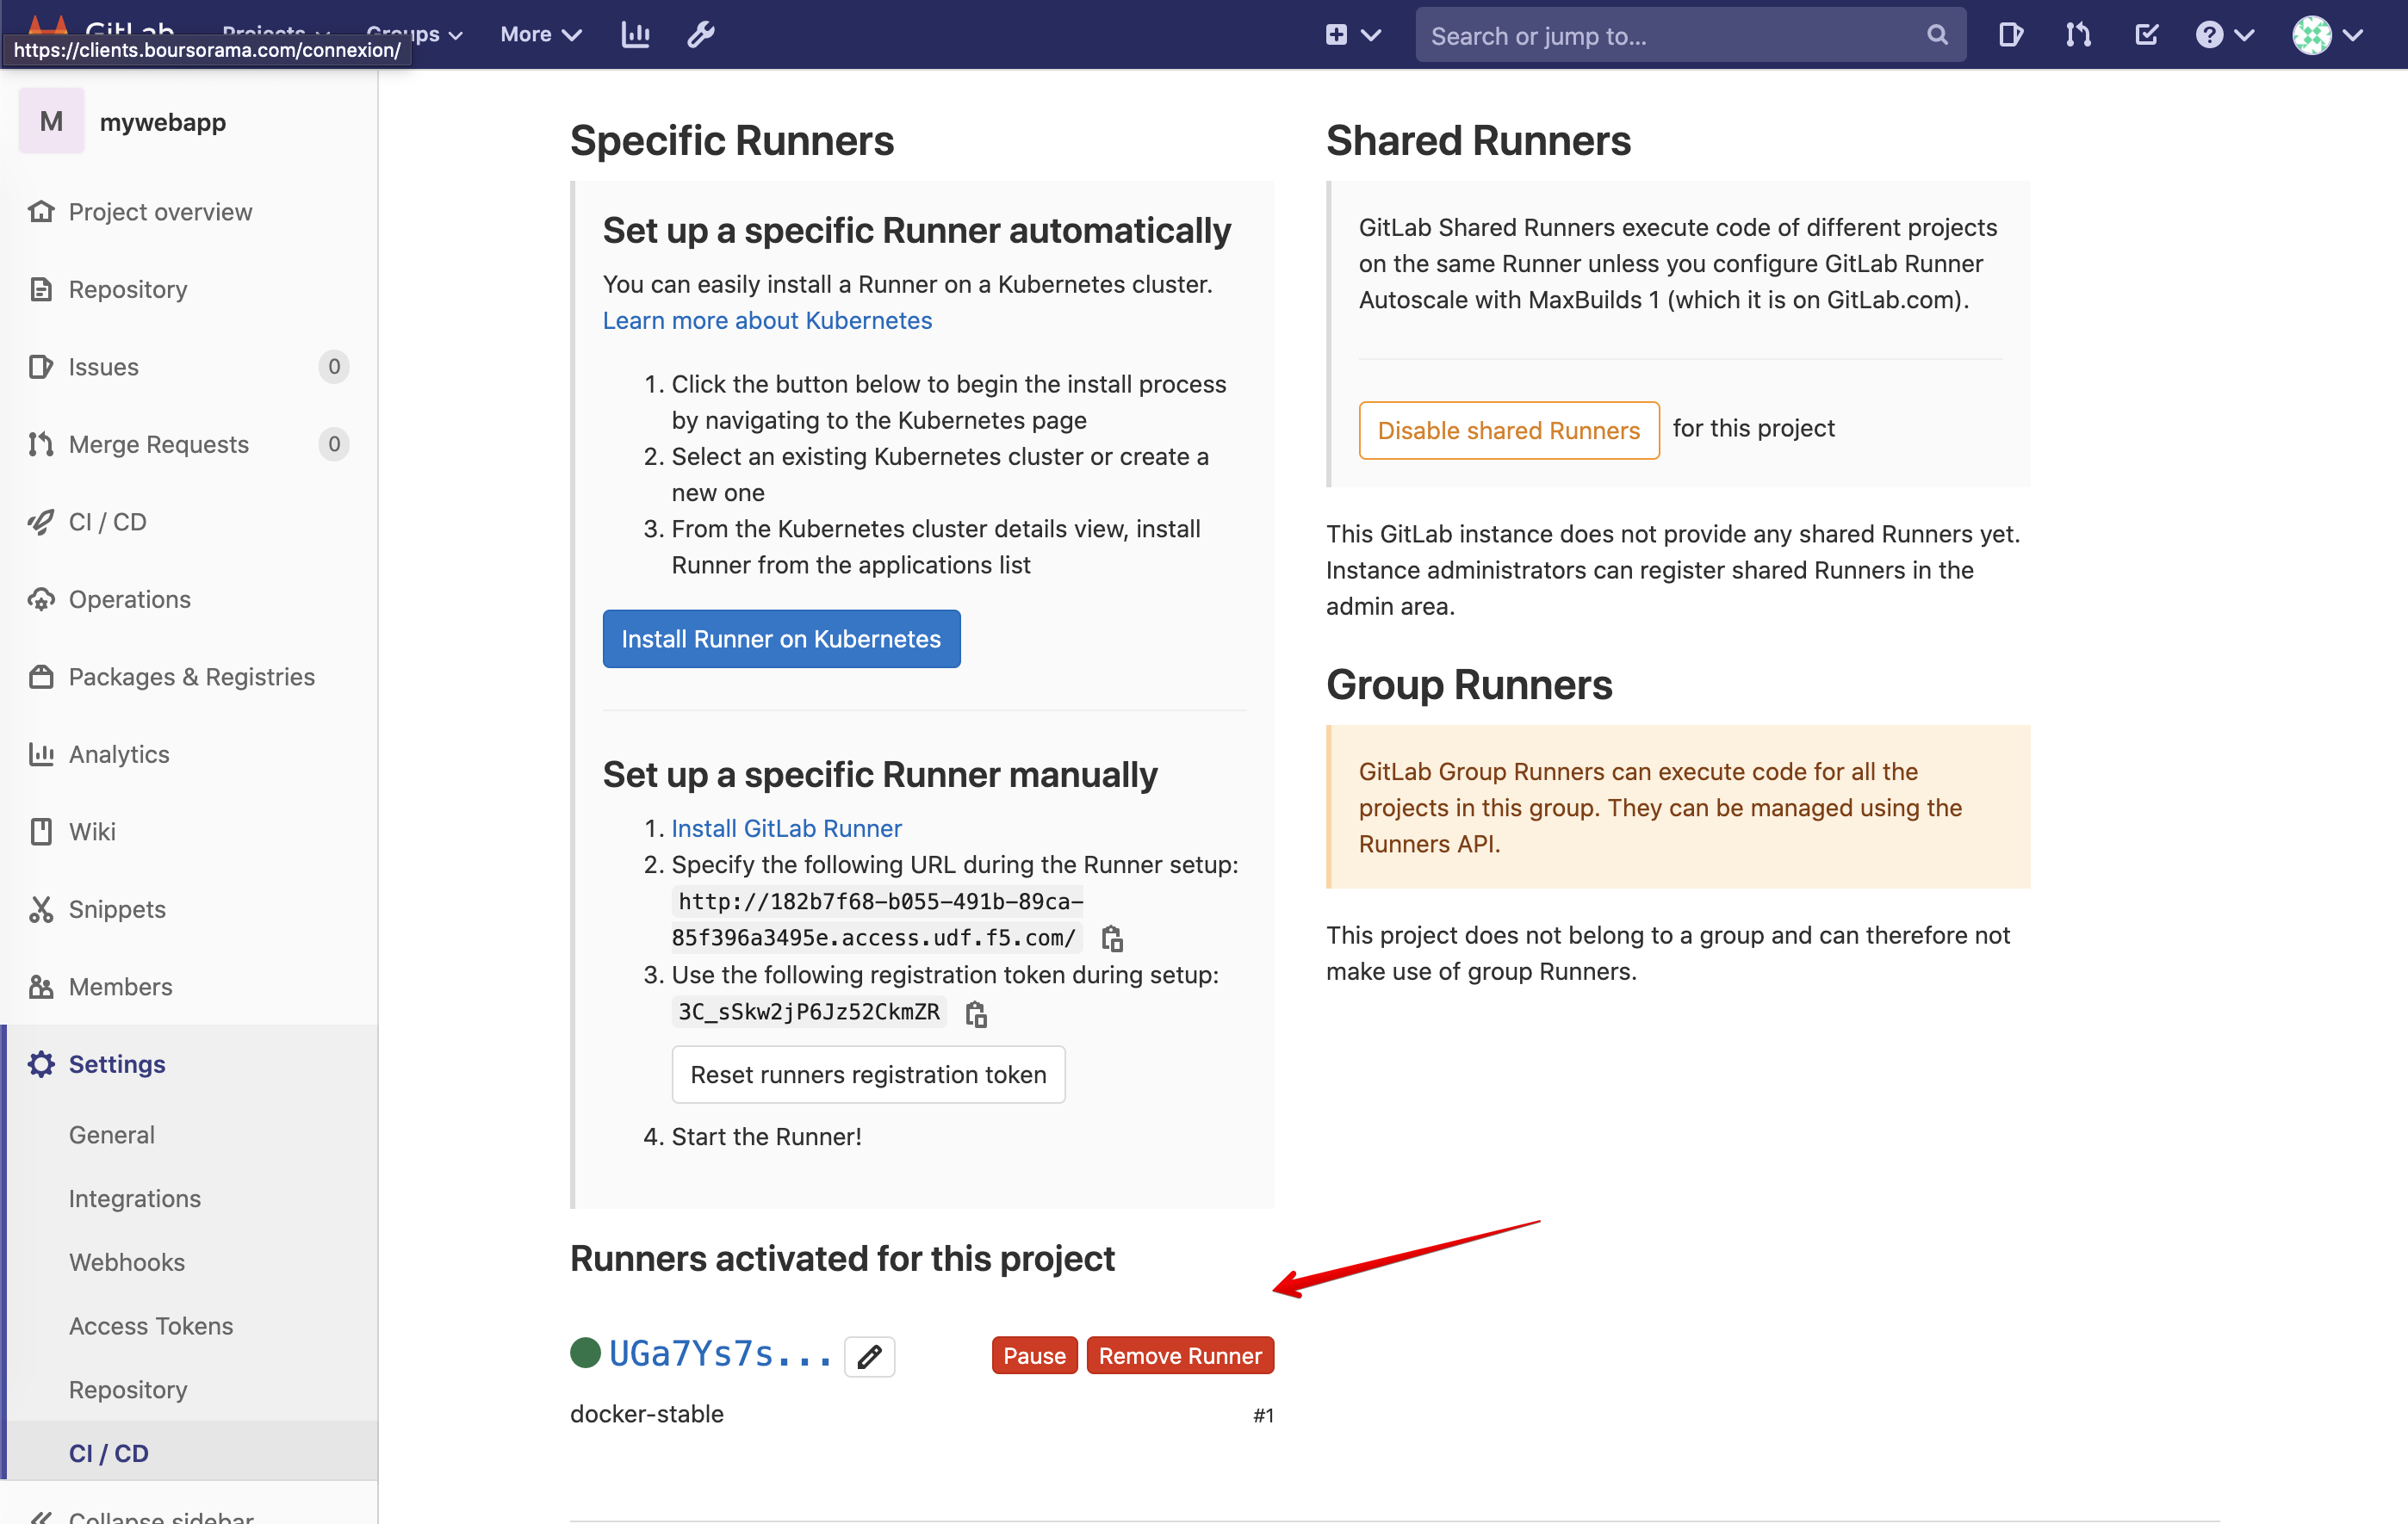
In GitLab, confirm the GitLab runner is correctly attached to your project. Navigate to the same location where you copy the token.
WAF policy template and security logging profile on BIG-IQ
- Login as larry and go to Configuration > Security > Web Application Security > Policy Templates.
See the list of WAF Policy Templates available in BIG-IQ.
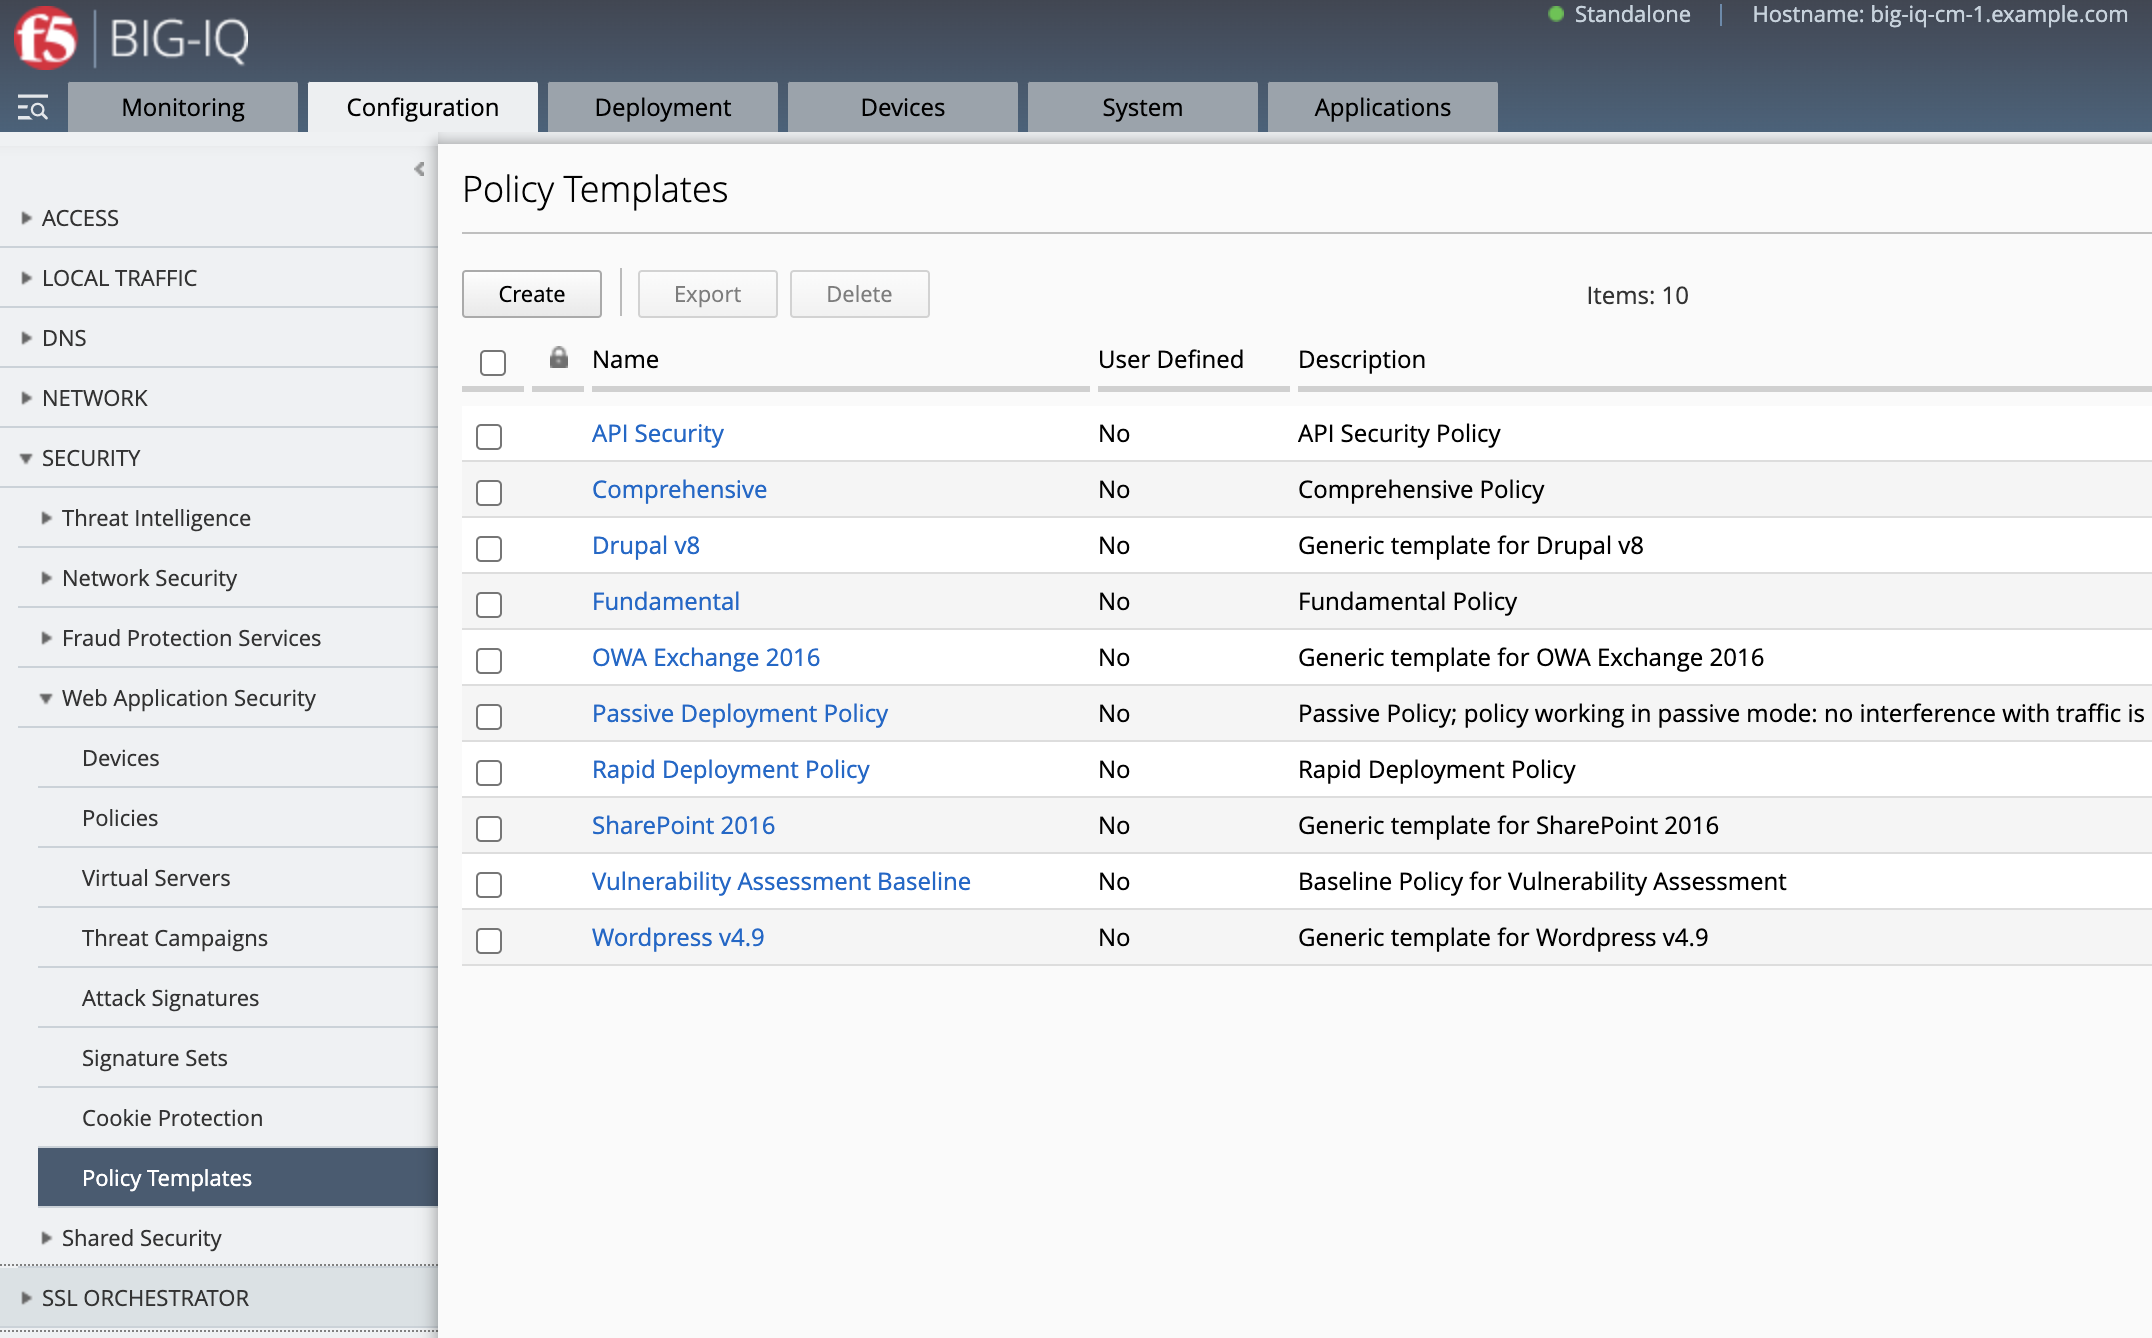
We are not going to create a custom policy template but use one of the default for this lab, Rapid Deployment Policy policy template.
- In this lab, we are going to use one of the existing Security Logging Profile
templates-default. This profile will enable the ASM events to be sent to BIG-IQ DCD.
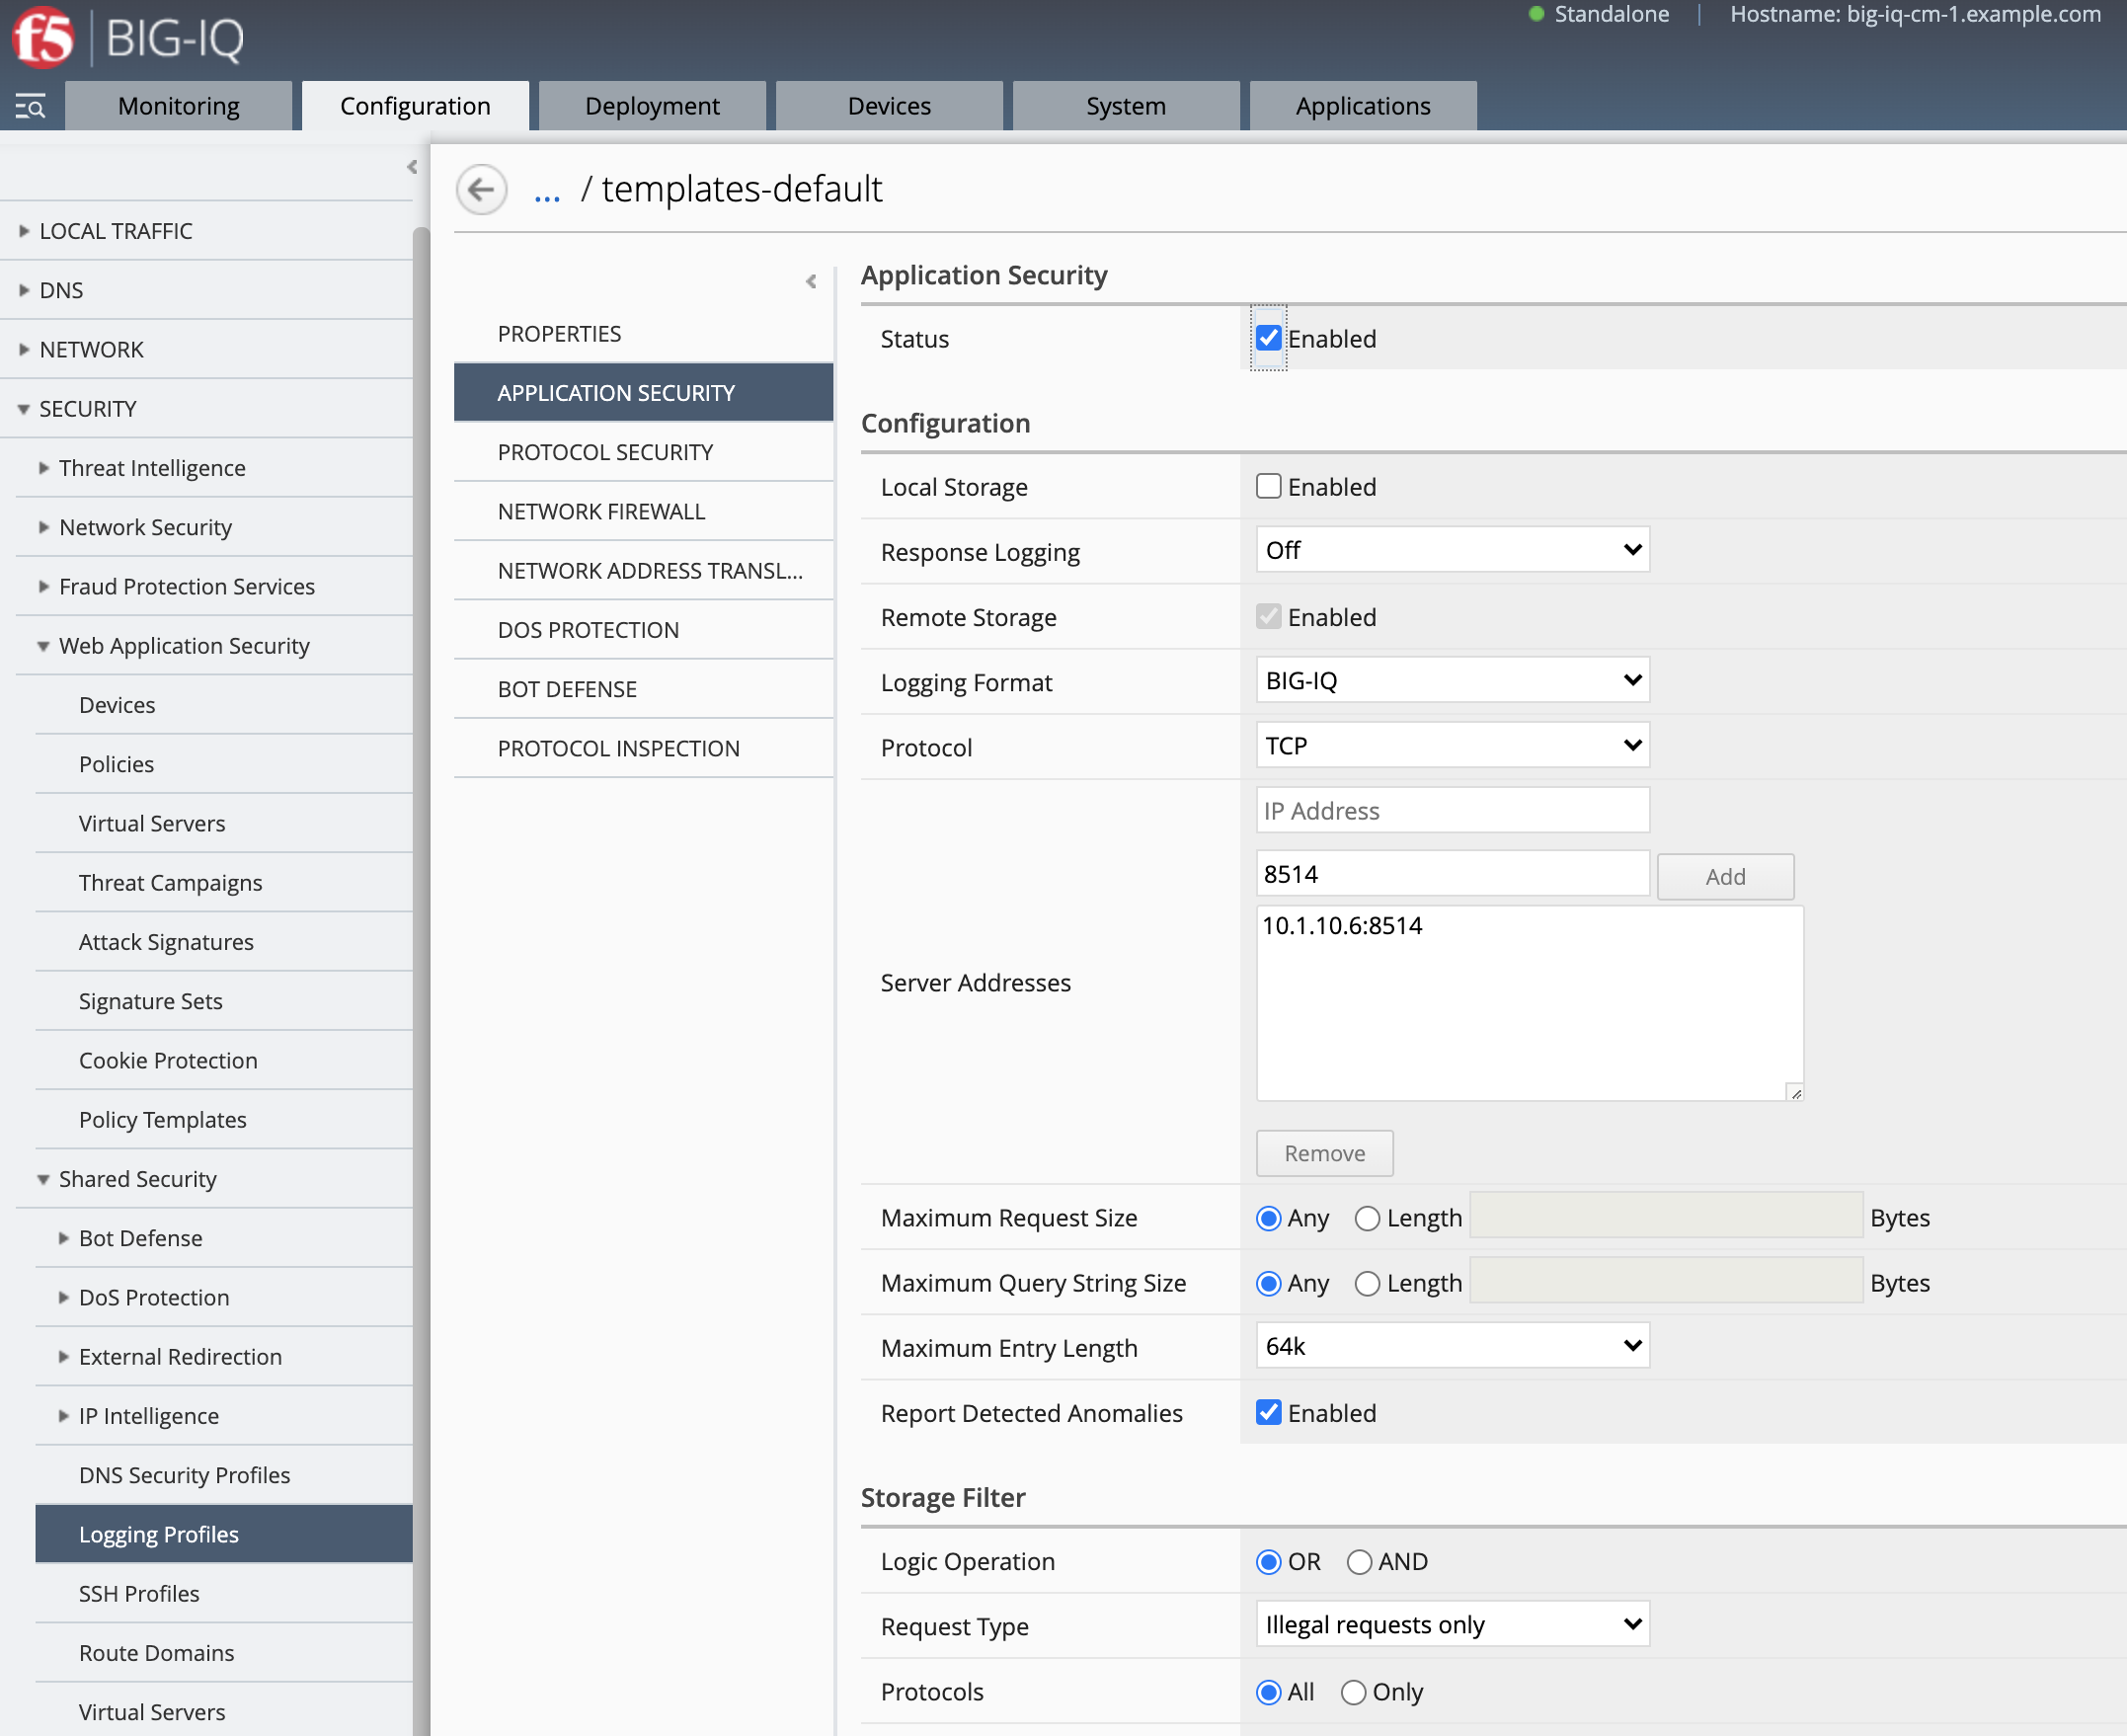
- Both WAF policy template and security logging profile will be use in the next task as variable in the Ansible Playbook.
1 2 3 4 5 6 7 | vars:
target_device: "10.1.1.7"
certificate: "default.crt"
privateKey: "default.key"
security_logging_profile: "templates-default"
waf_policy_template: "Rapid Deployment Policy"
waf_policy_name: "gitlab_demo"
|
Note
We are not automating this step as creating the policy template and logging profile with BIG-IQ is a one time operation.
Clone gitlab project and deploy AS3 WAF HTTPS offload application service to a BIG-IP through BIG-IQ
From the Linux Jumphost, open a ssh session and clone the repository:
git clone ssh://git@localhost:7022/root/mywebapp.git
Or order to be able to commit and push changes, we will need to configure the user email and name in git:
git config --global user.email "admin@example.com"
git config --global user.name "root"
Copy the lab files into the
mywebapprepository:cd mywebapp cp -r ~/gitlab/lab2/* ~/gitlab/lab2/.gitlab-ci.yml . ls -la ls -l as3
- This folder contains:
- .gitlab-ci.yml: pipeline definition
- hosts: ansible host file with BIG-IQ access information
- bigiq_waf_policy_and_as3_deploy.yml: ansible playbook to deploy the WAF policy, Security Logging Profile and AS3 application services
- as3/my_waf_https_app_service1.j2: AS3 declaration Jinja2 templates defining WAF HTTPS offload application service load balancer
The Ansible playbook will contain the various call to create the WAF policy, deploy it to the BIG-IP, then create the Application Service with AS3.
We have defined at the top of the playbook some variable to use for this service. You can keep everything as is.
1 2 3 4 5 6 7 | vars:
target_device: "10.1.1.7"
certificate: "default.crt"
privateKey: "default.key"
security_logging_profile: "templates-default"
waf_policy_template: "Rapid Deployment Policy"
waf_policy_name: "gitlab_demo"
|
You can look at each file on the lab GitHub repository.
Add and commit the new files to the
mywebapprepository:git status git add . git status git commit -m "Add .gitlab-ci.yml, Ansible playbook, host file and AS3 declaration" git status
Push the changes to gitlab:
git push origin master
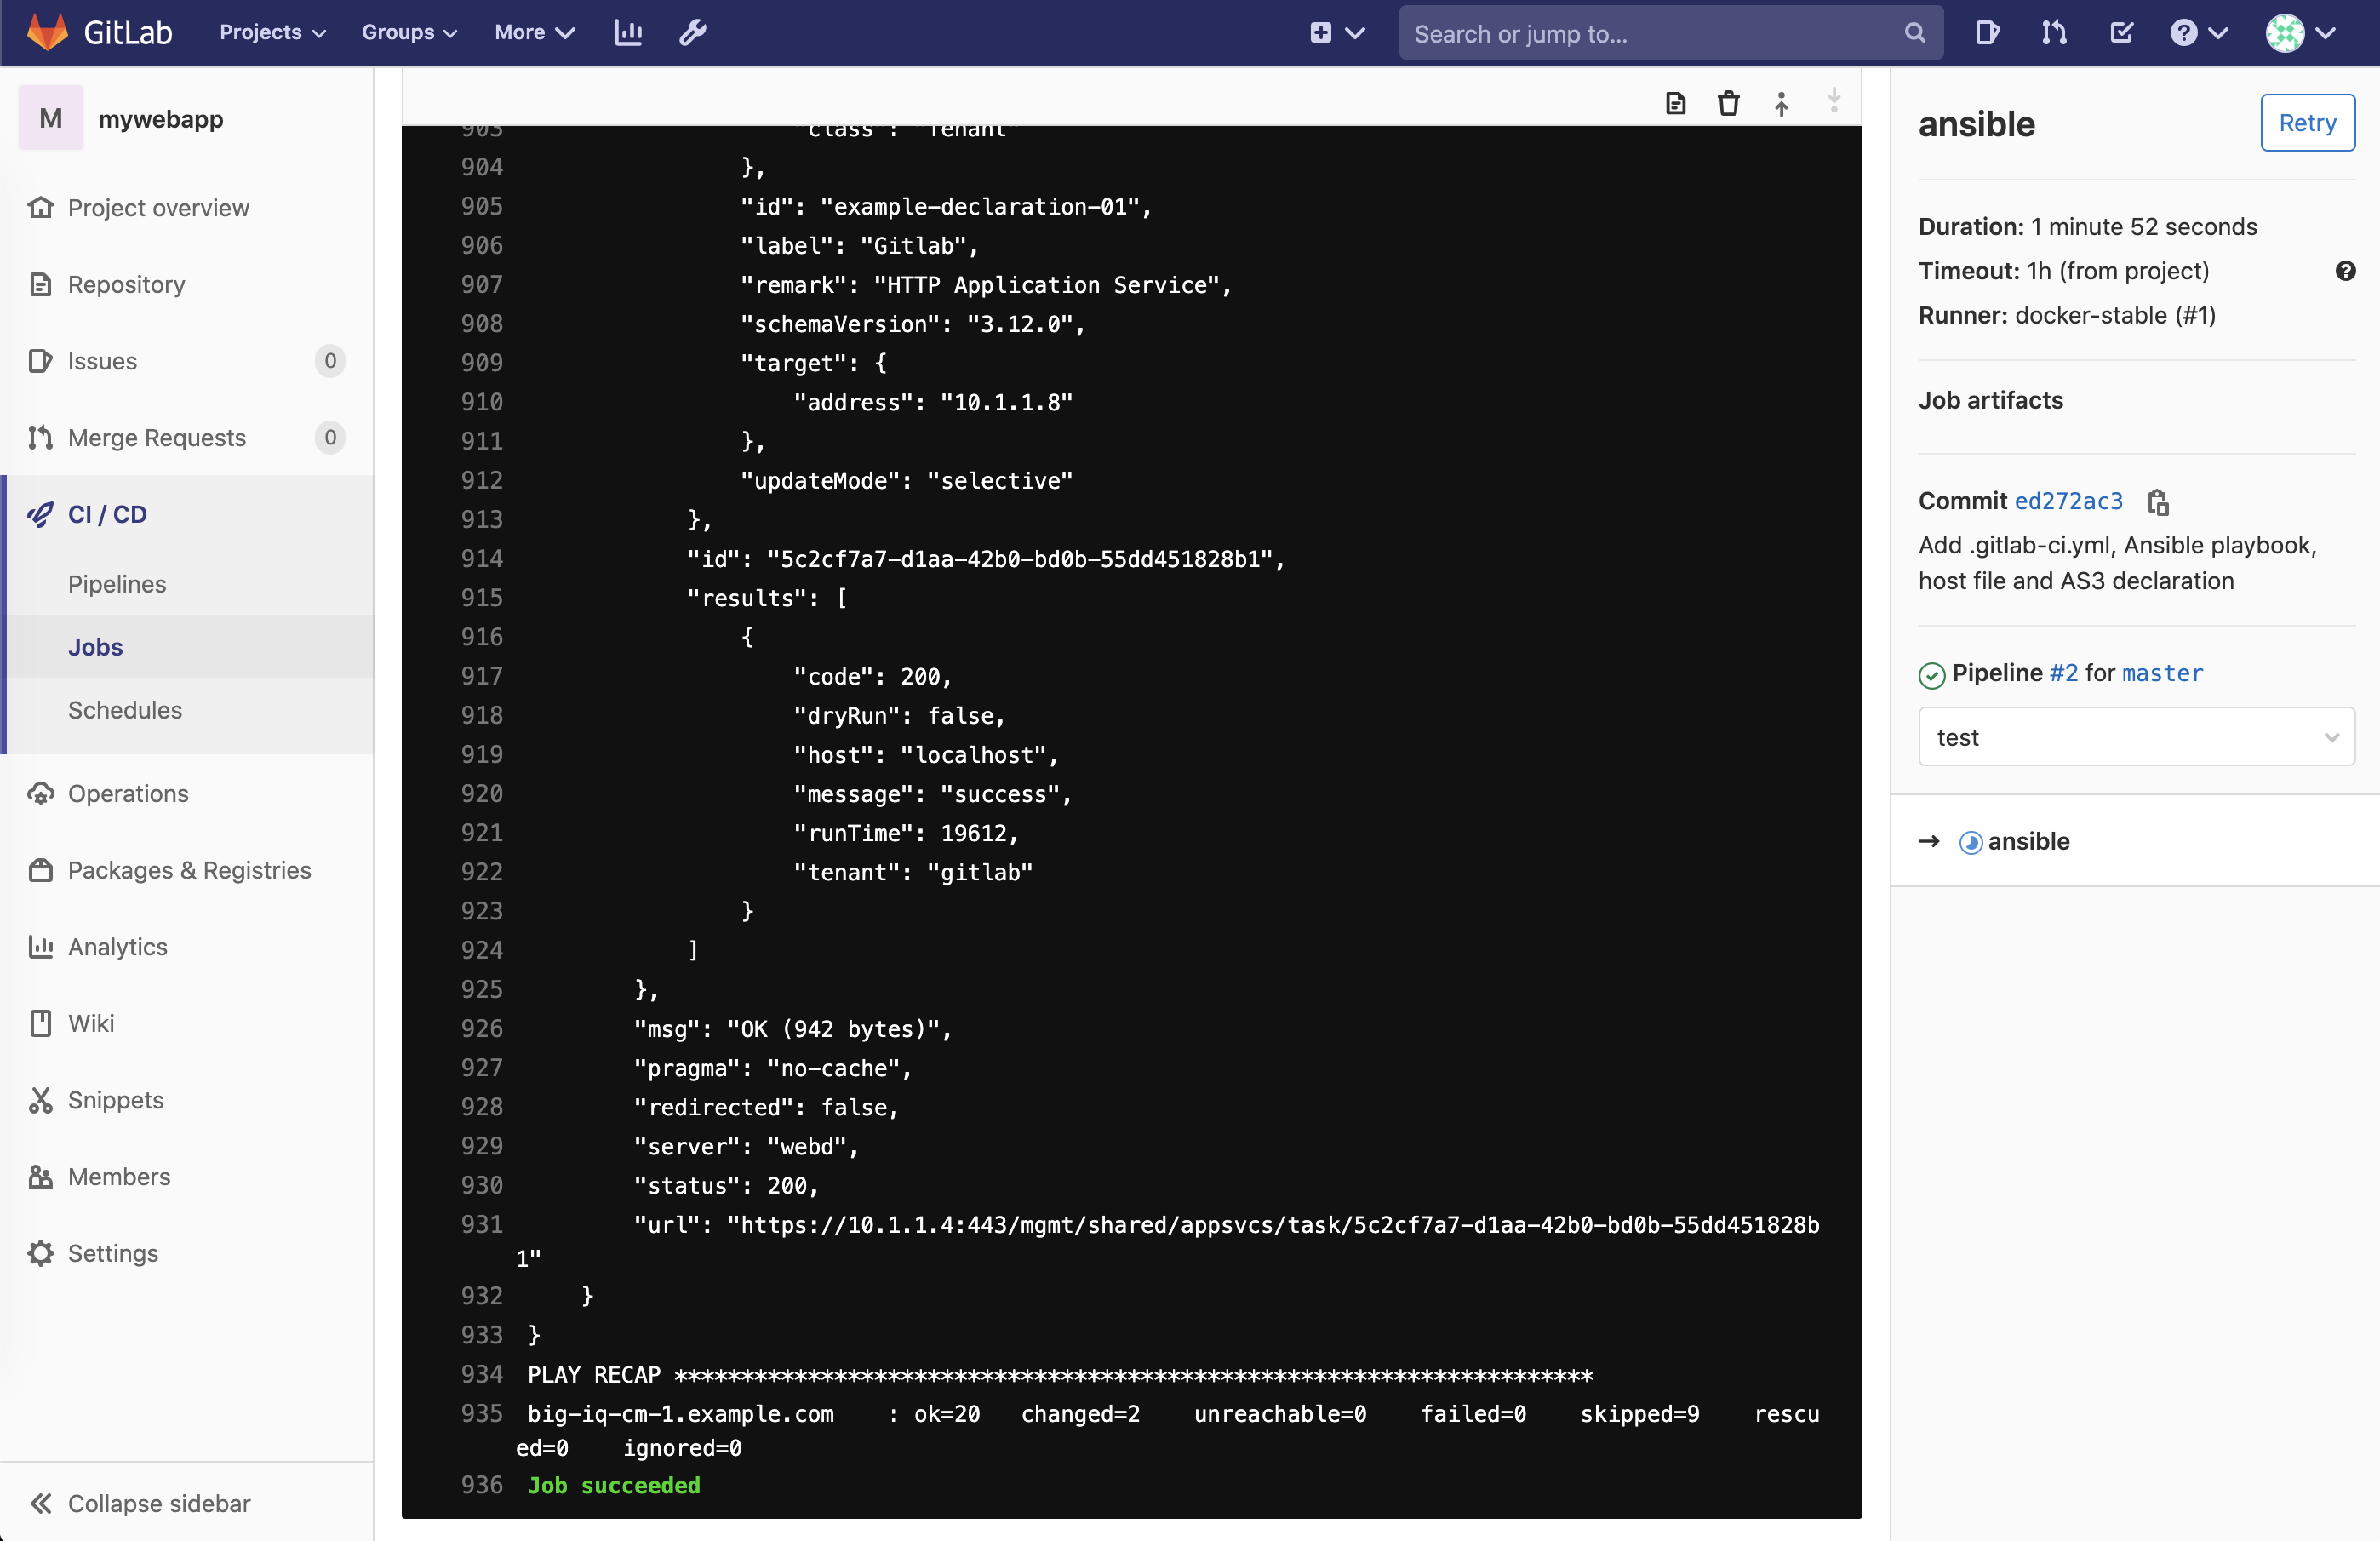
Back in gitlab, navigate under jobs and click on the running jobs, display output.
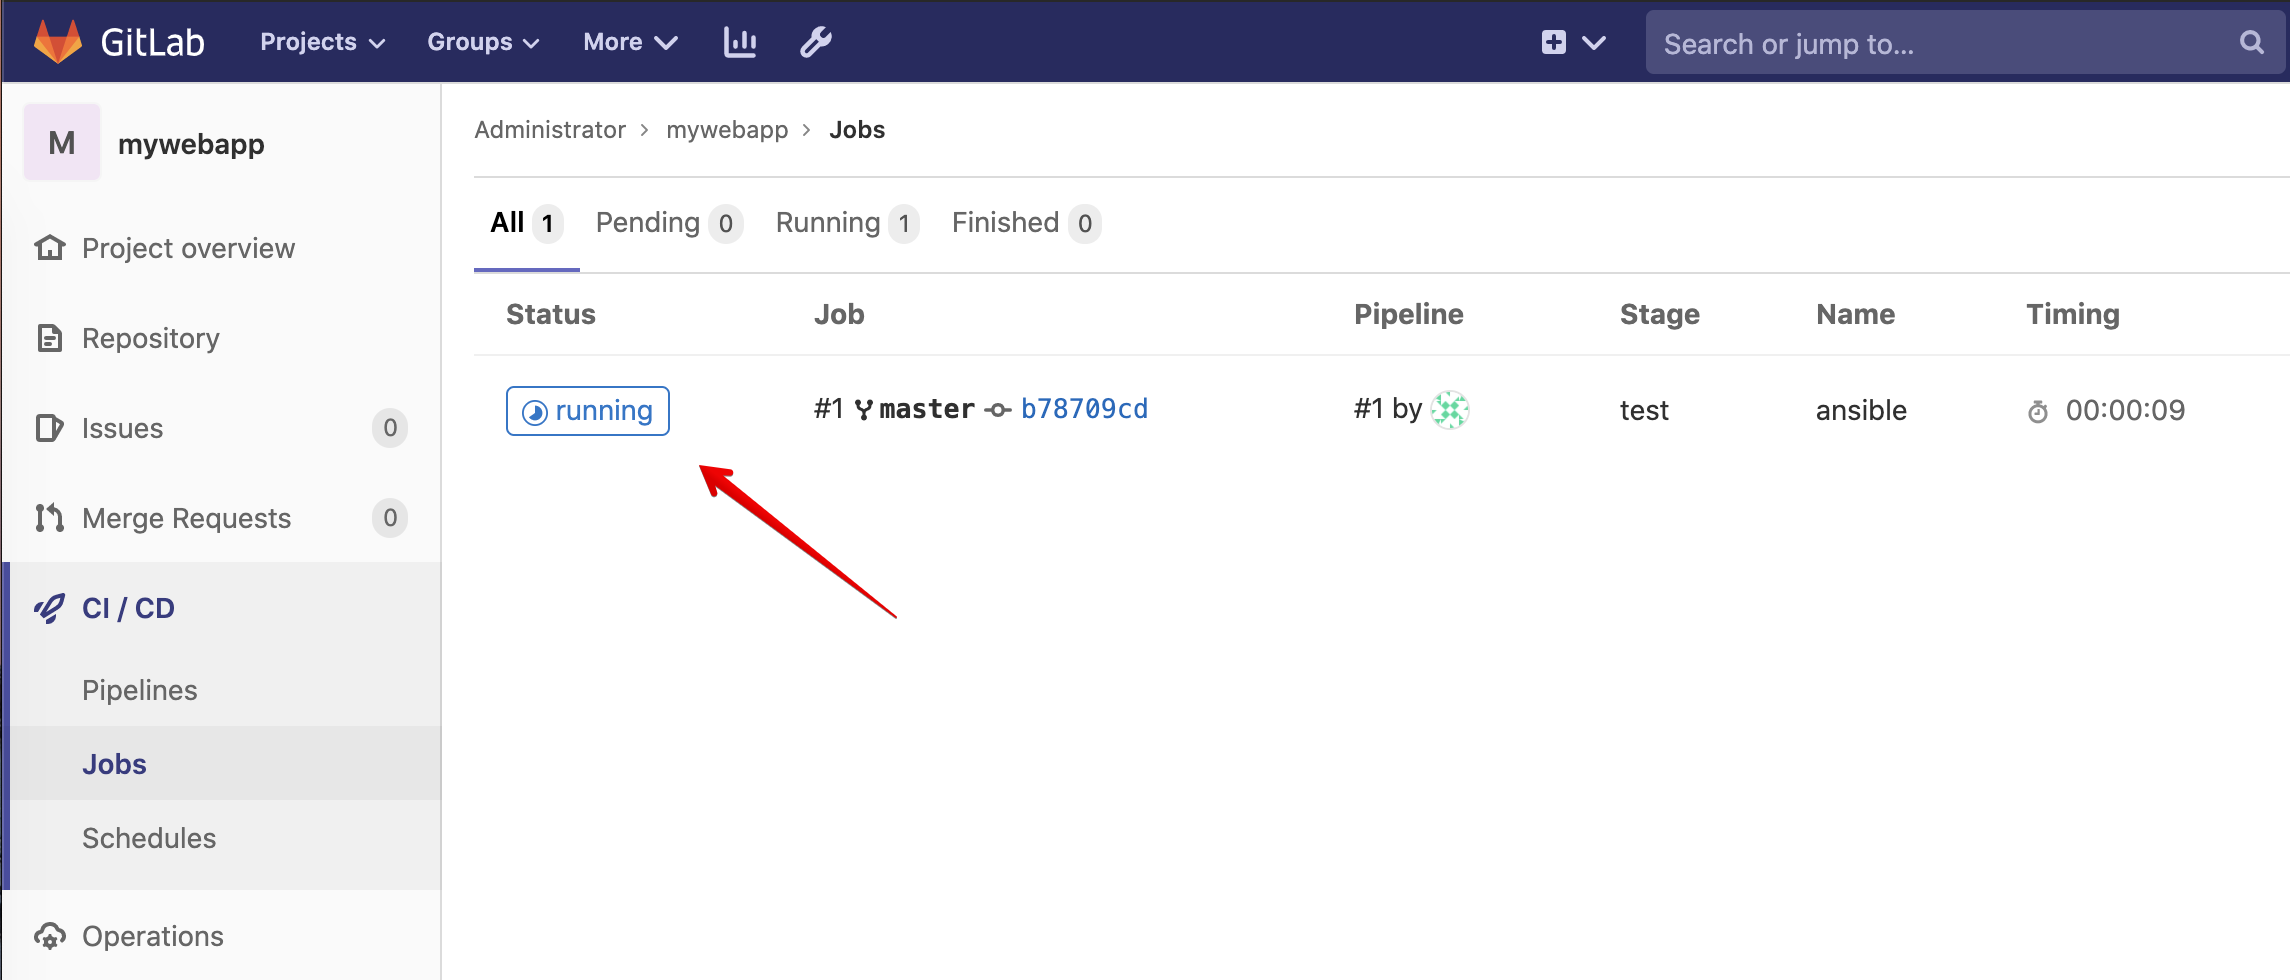
Follow the execution of the job and wait for it to end.
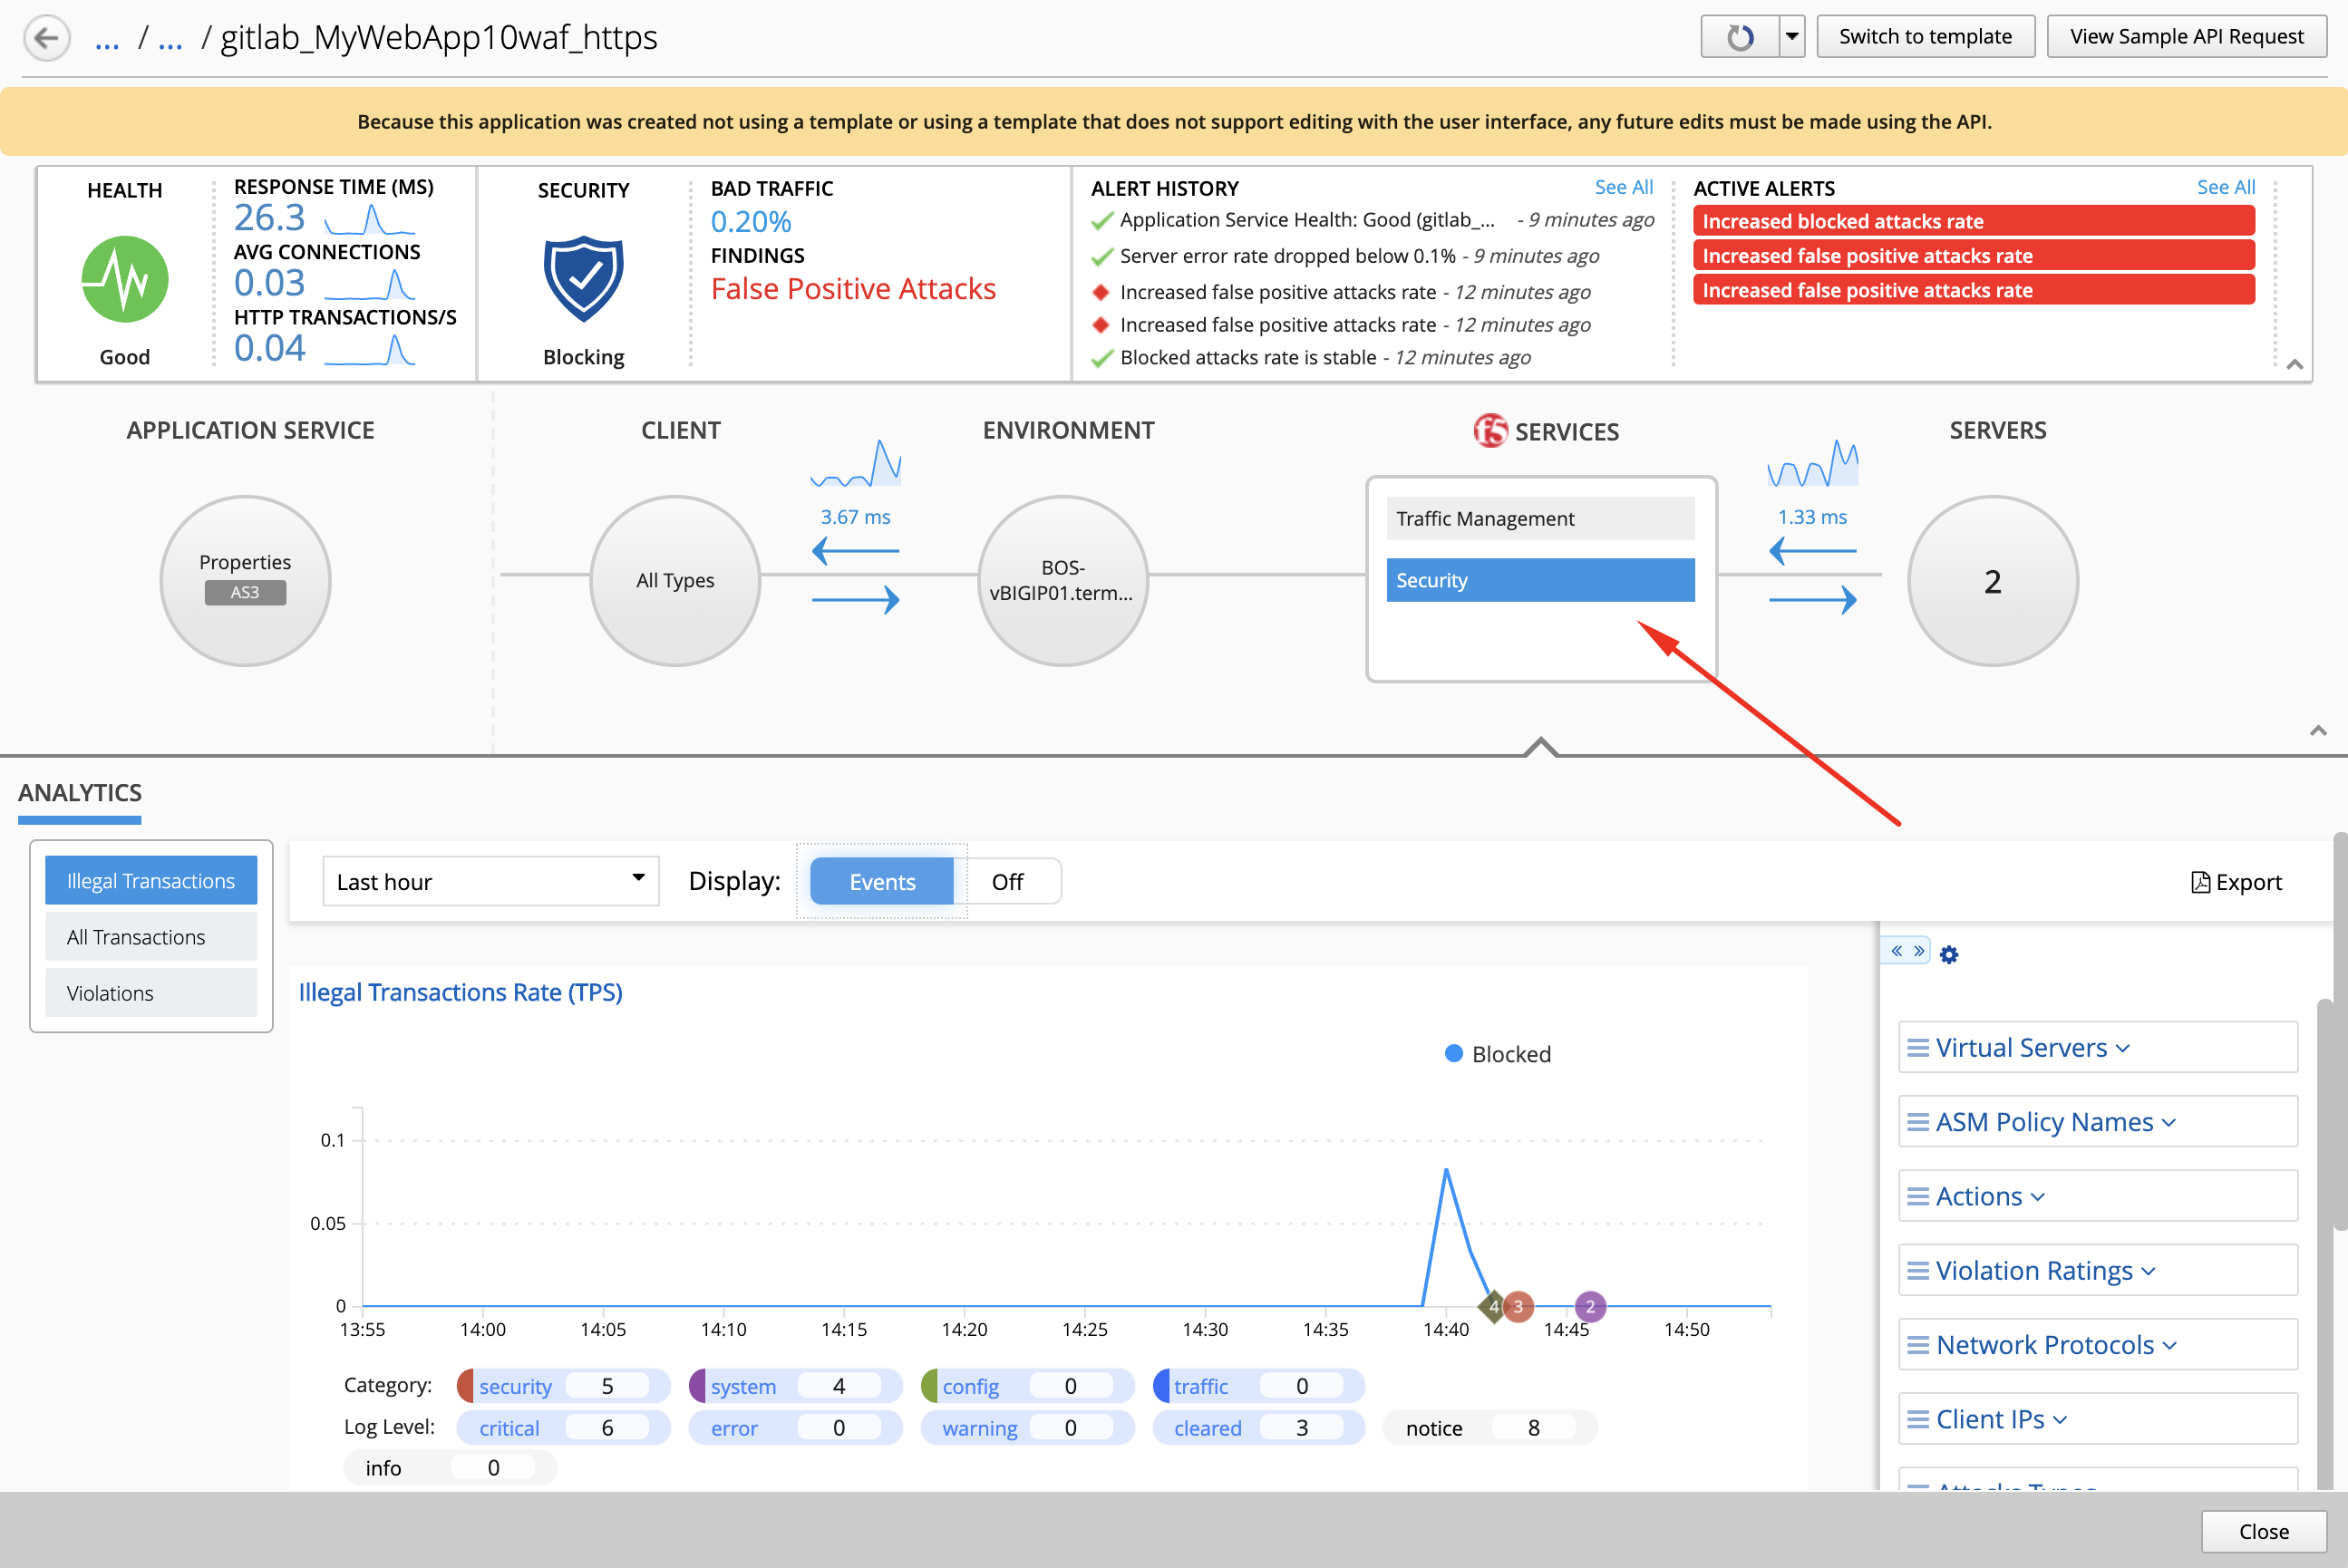
- Login on BIG-IQ as david, go to Applications tab, under``LAB_gitlab`` Application, check the application is there and analytics are showing.
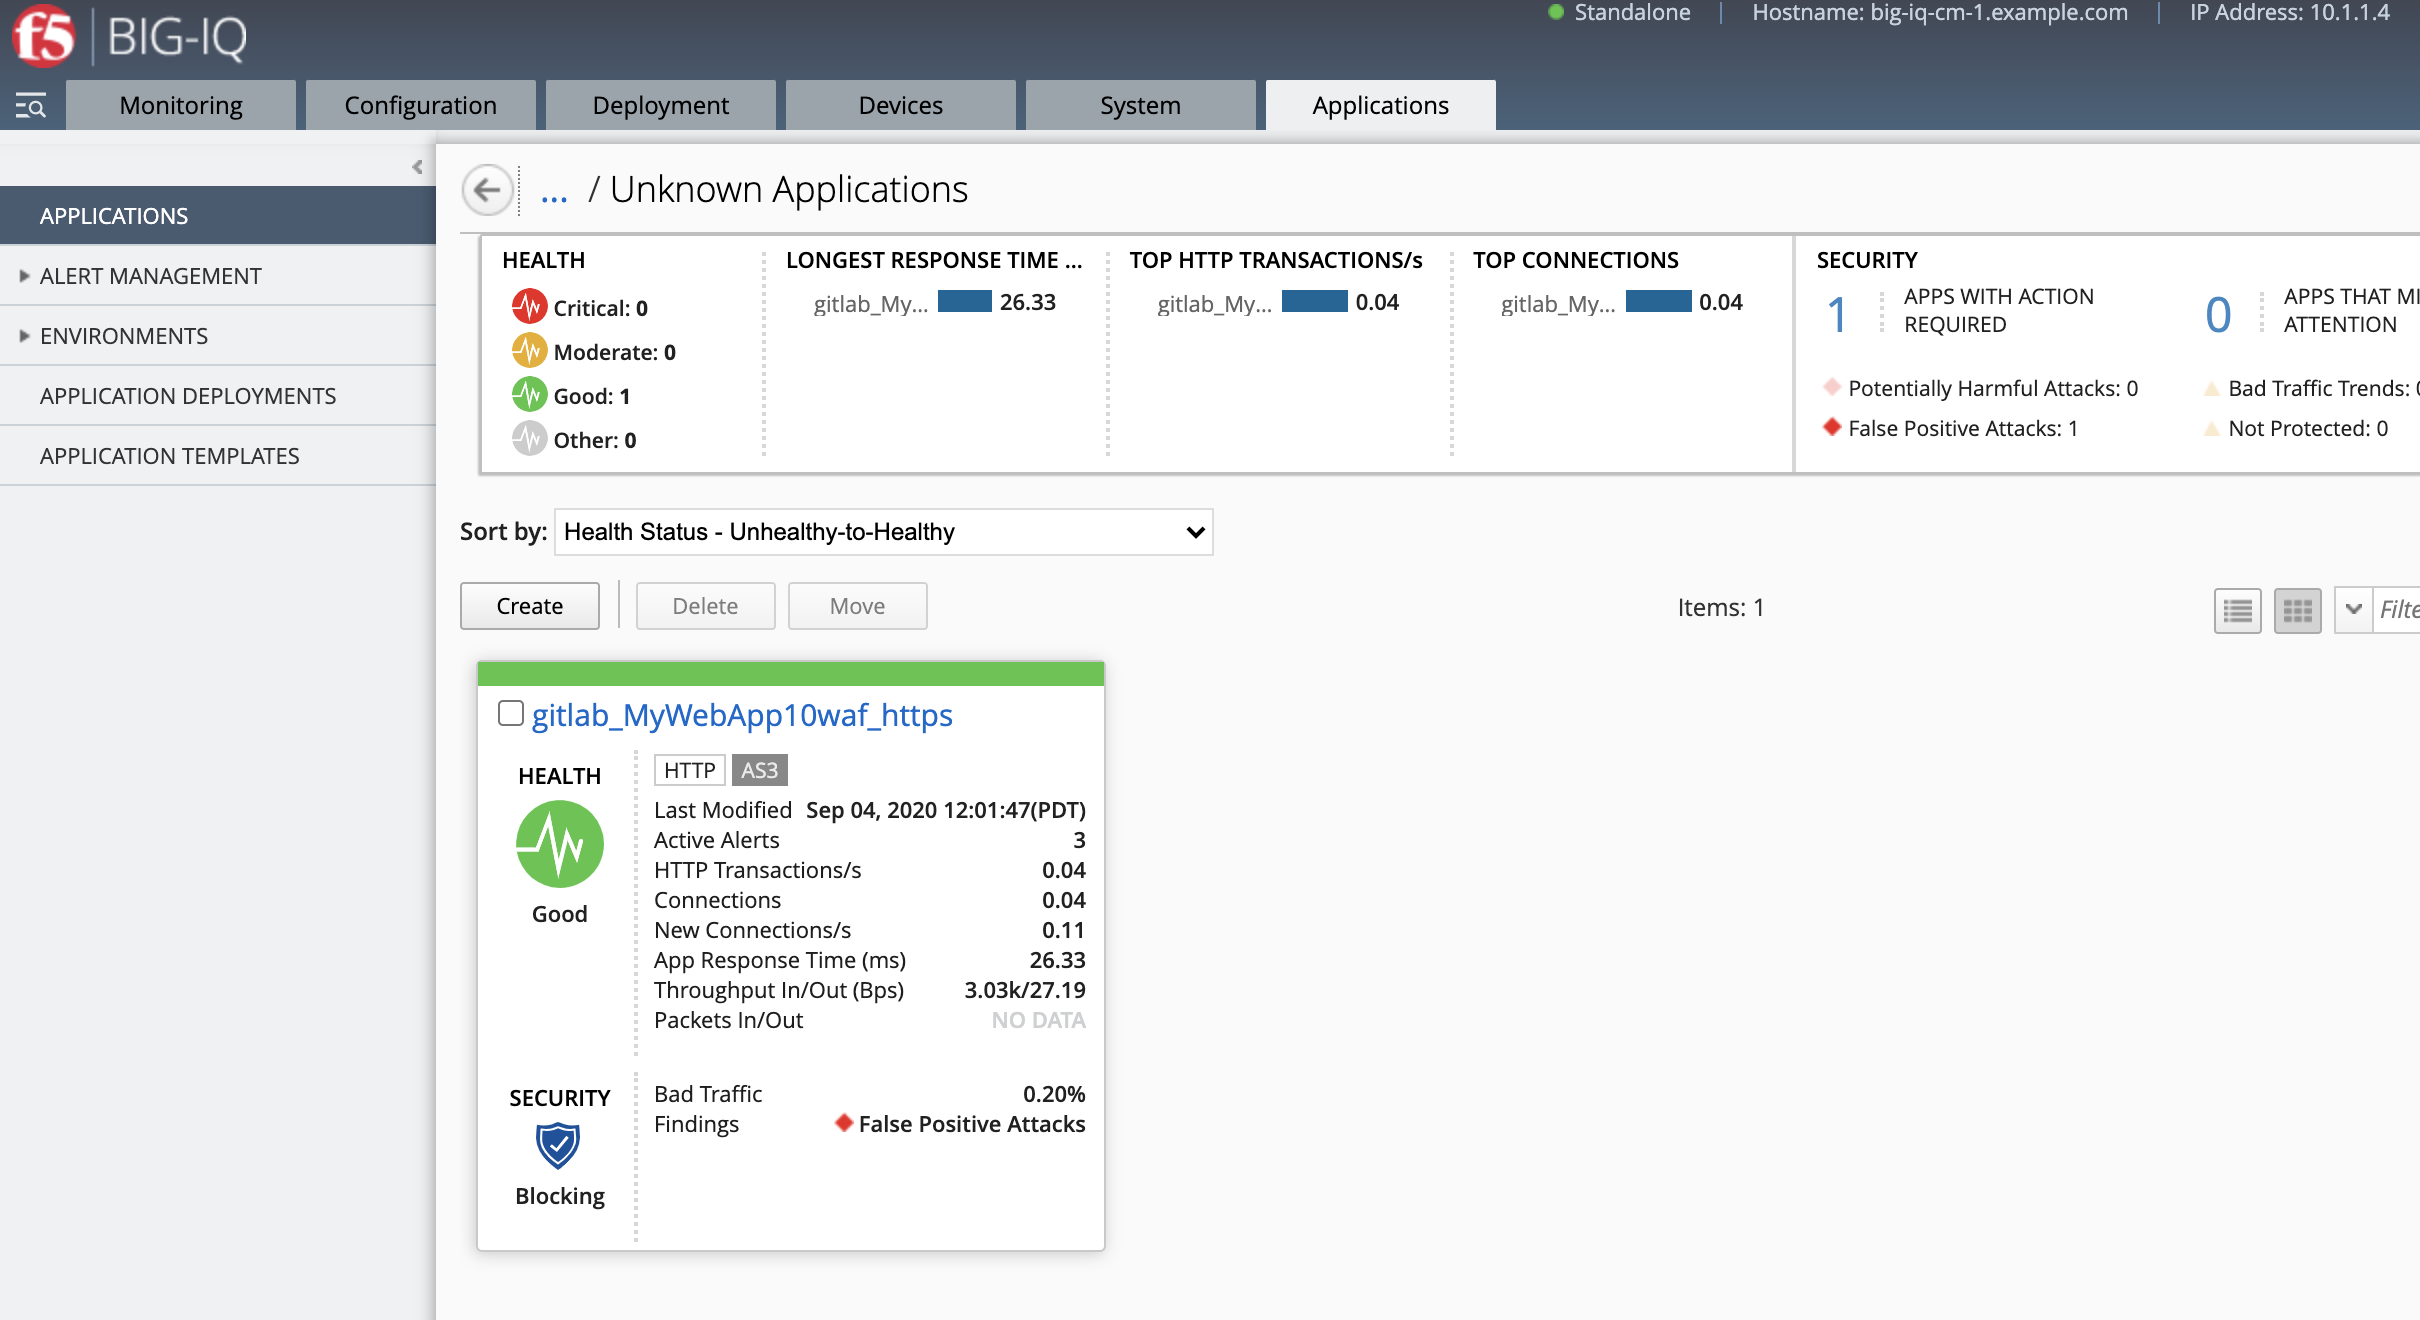
Warning
Starting 7.0, BIG-IQ displays AS3 application services created using the AS3 Declare API as Unknown Applications. You can move those application services using the GUI, the Move/Merge API, bigiq_move_app_dashboard F5 Ansible Galaxy role or create it directly into Application in BIG-IQ using the Deploy API to define the BIG-IQ Application name.
Update policy through BIG-IQ, deploy policy update using the BIG-IQ UI
- Login as larry and go to Configuration > Security > Web Application Security > Policies.
See the policy gitlab_demo created through the automation in previous task.
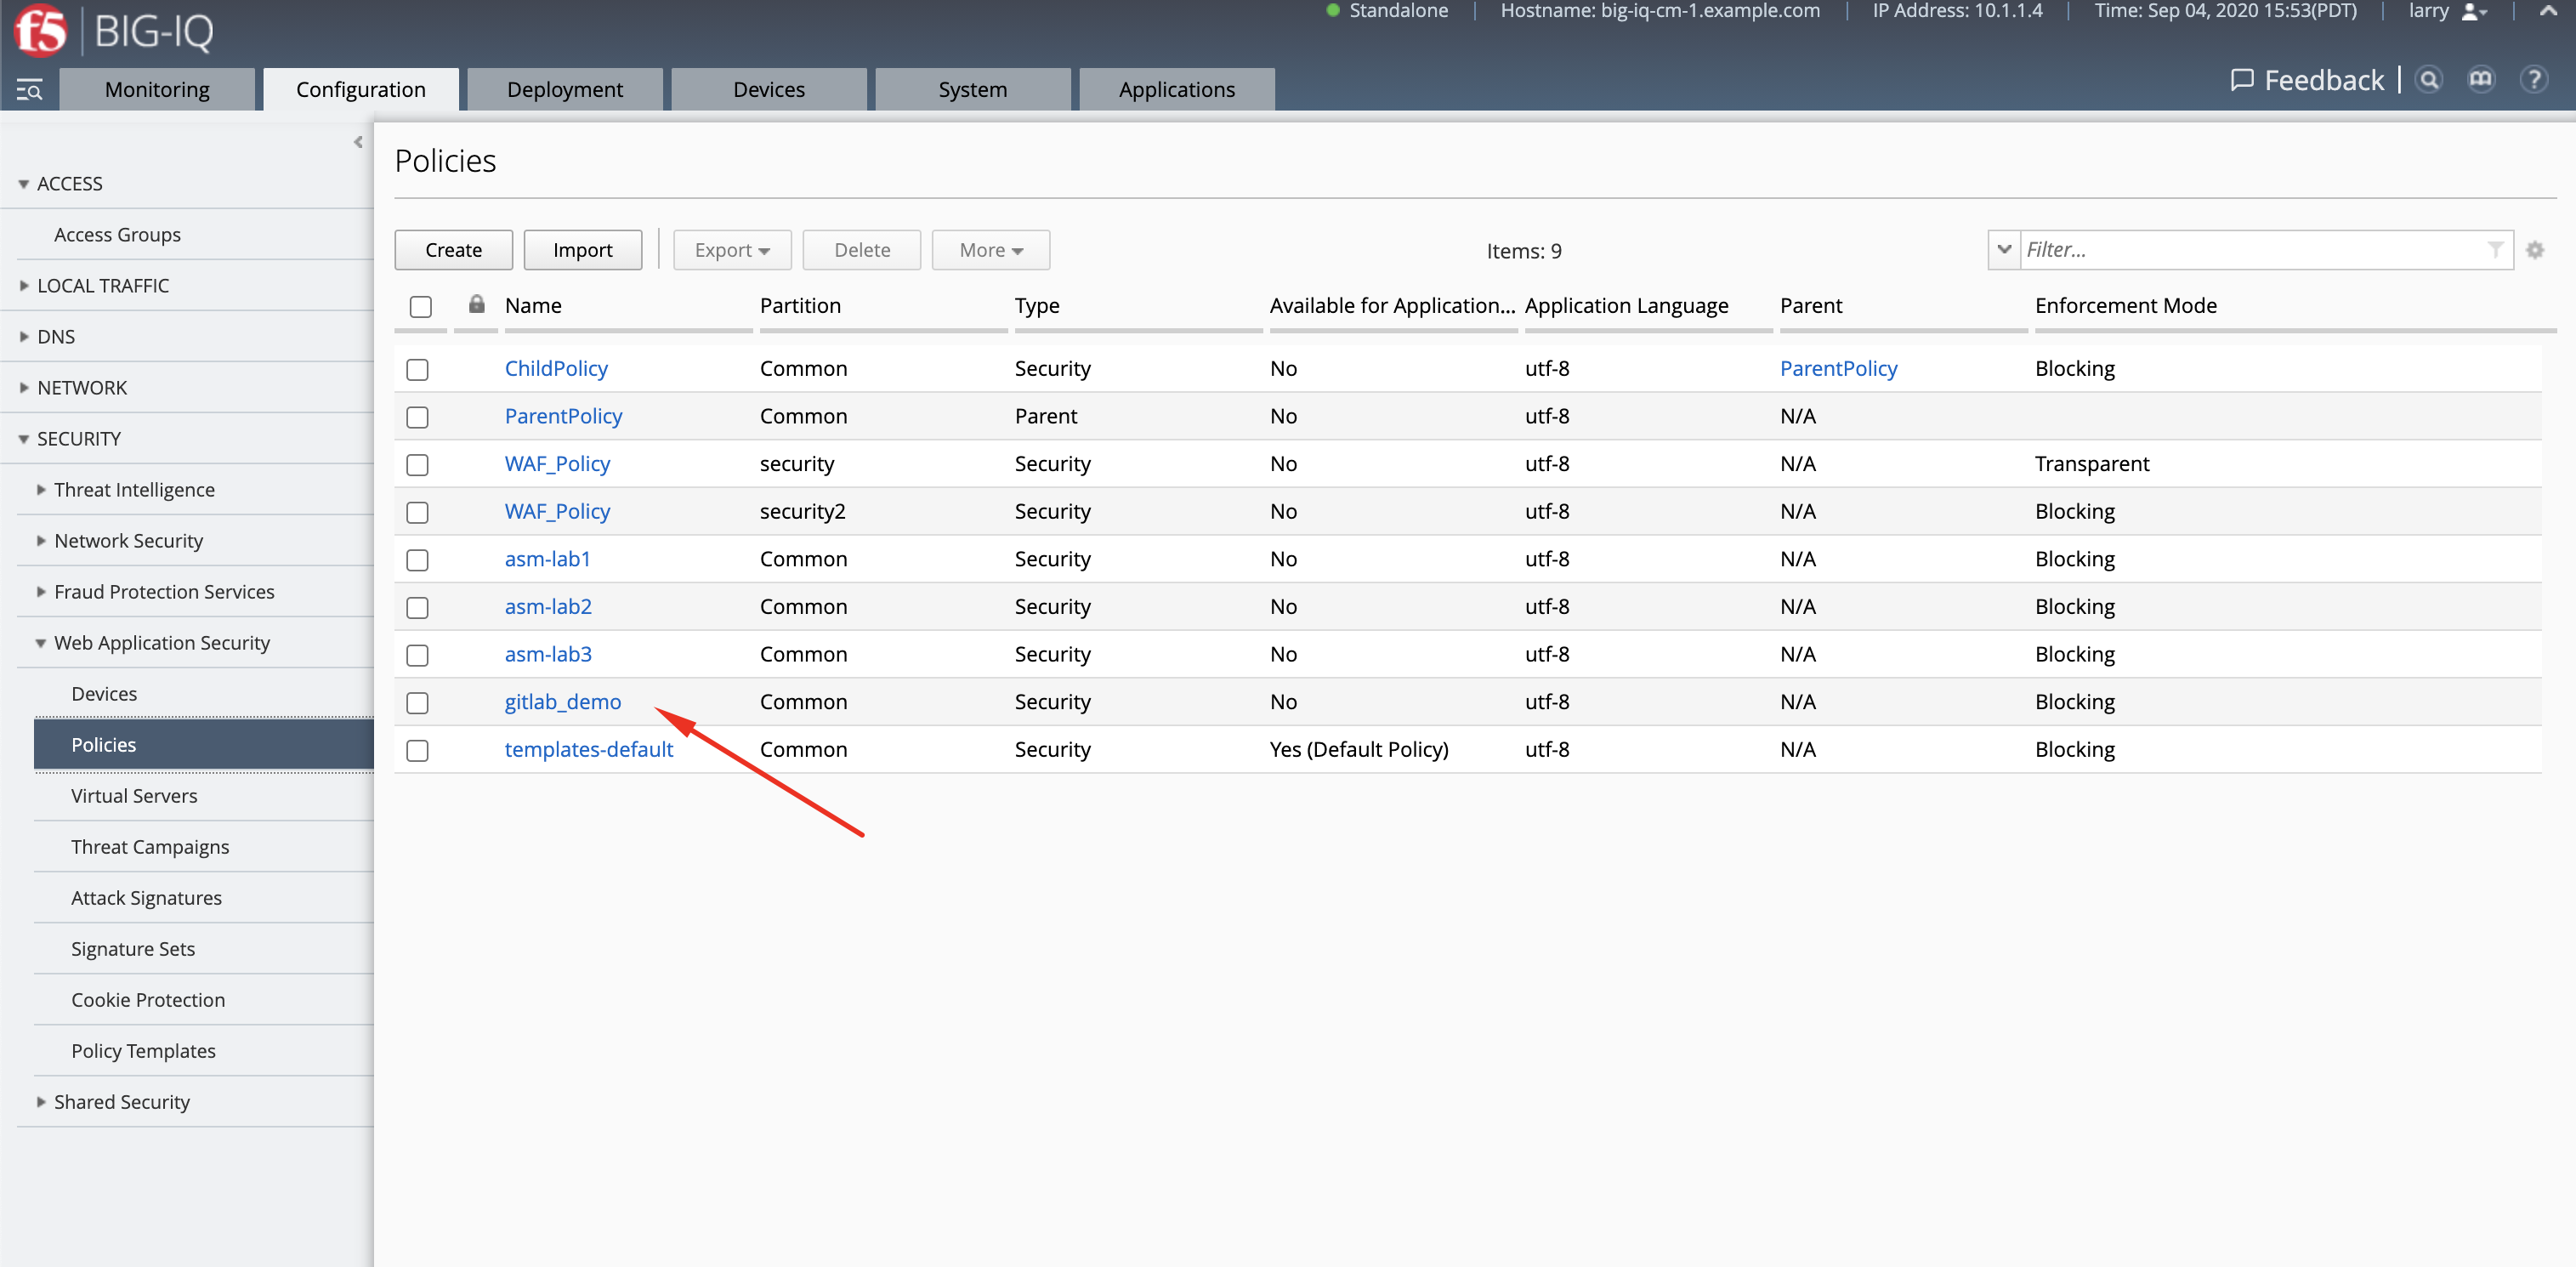
- Select
gitlab_demo, under General Properties, edit the list ofAllowed Response Codesand remove code407(Proxy Authentication Required client error status).
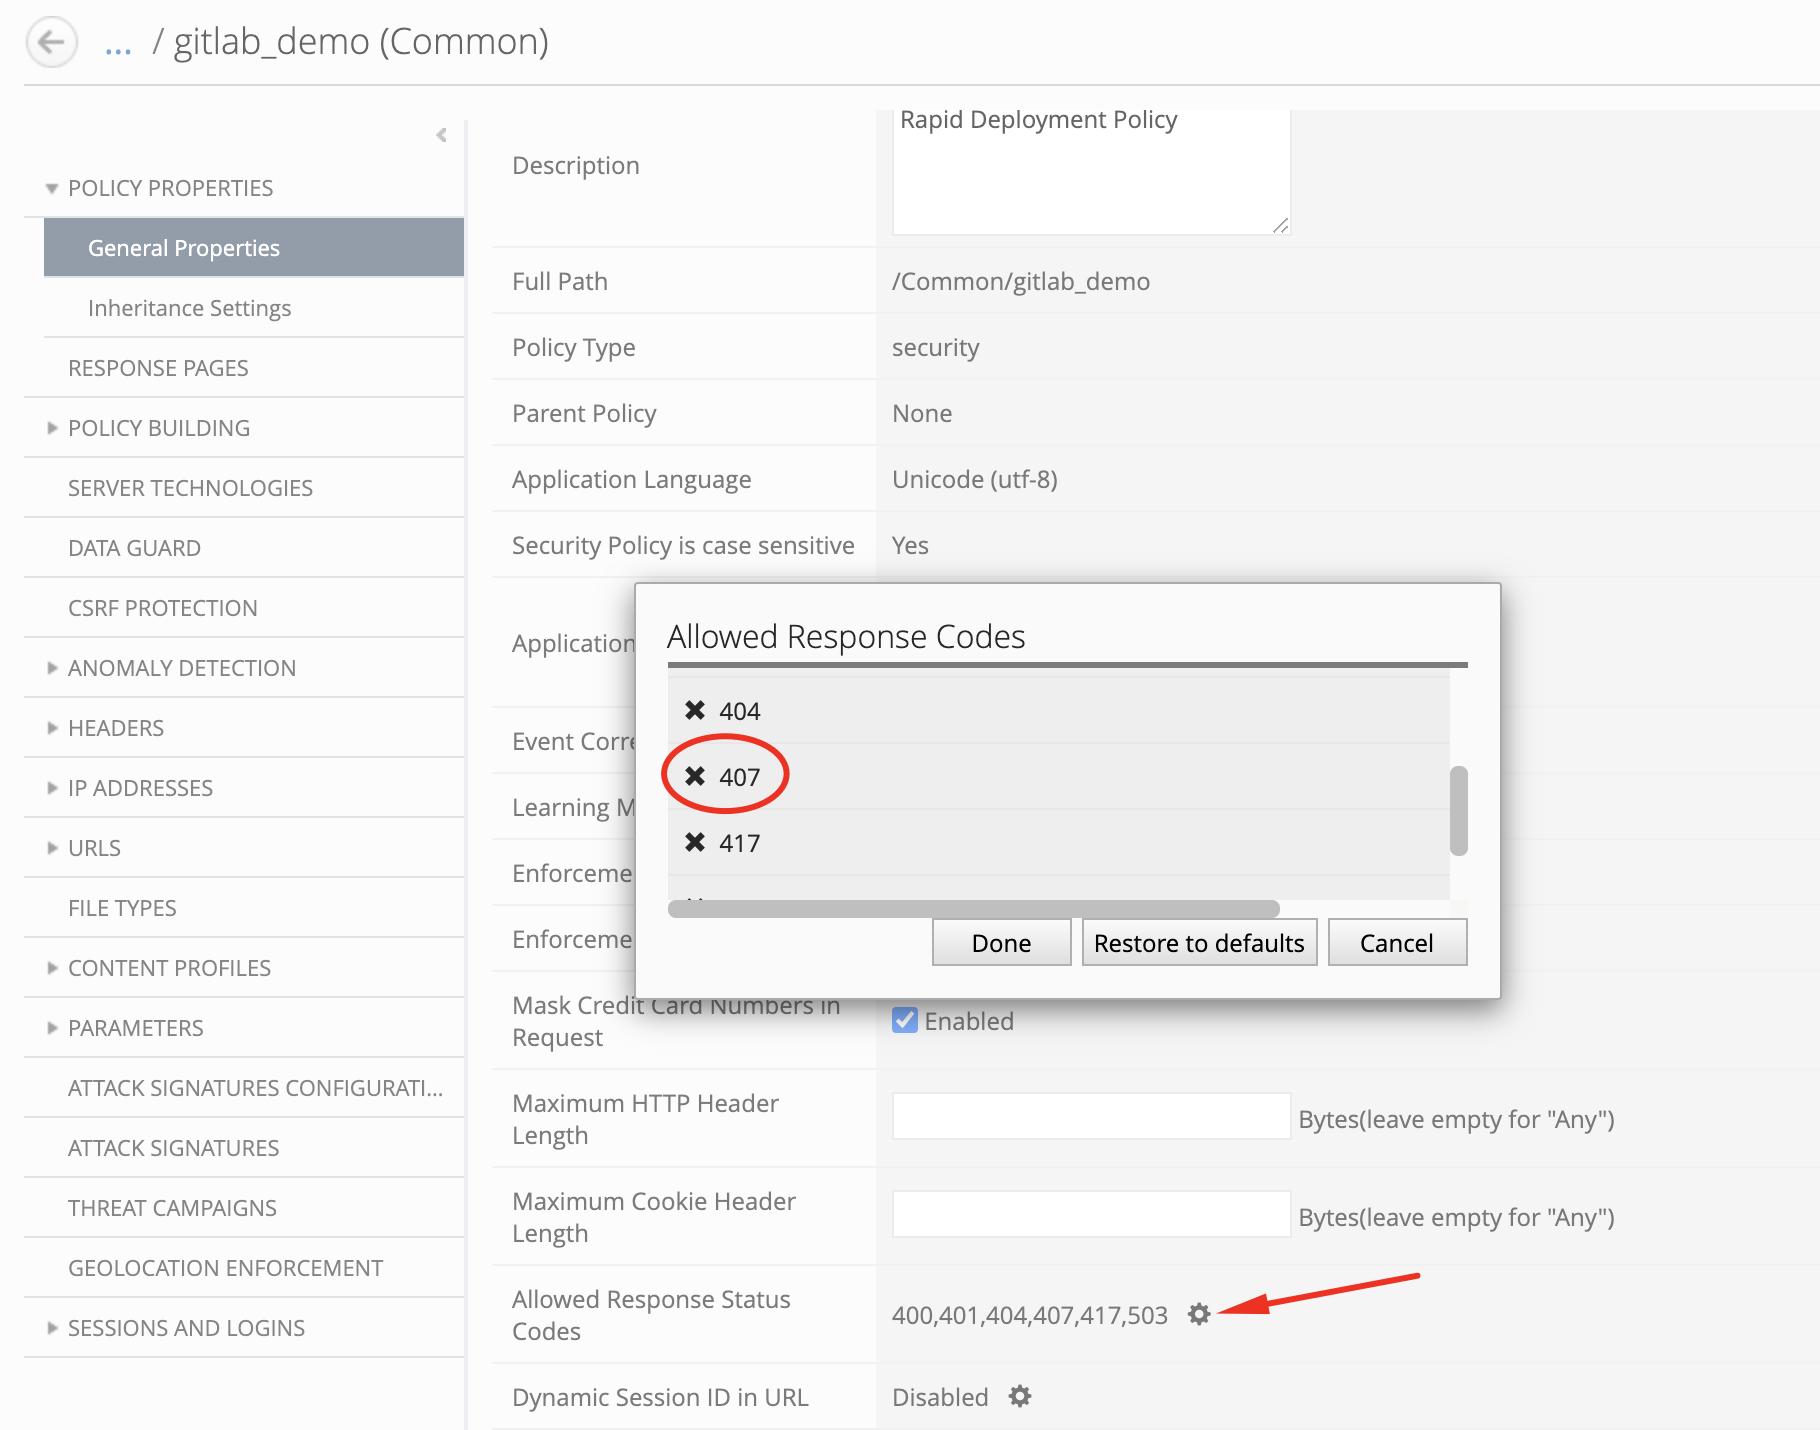
Click on Save & Close.
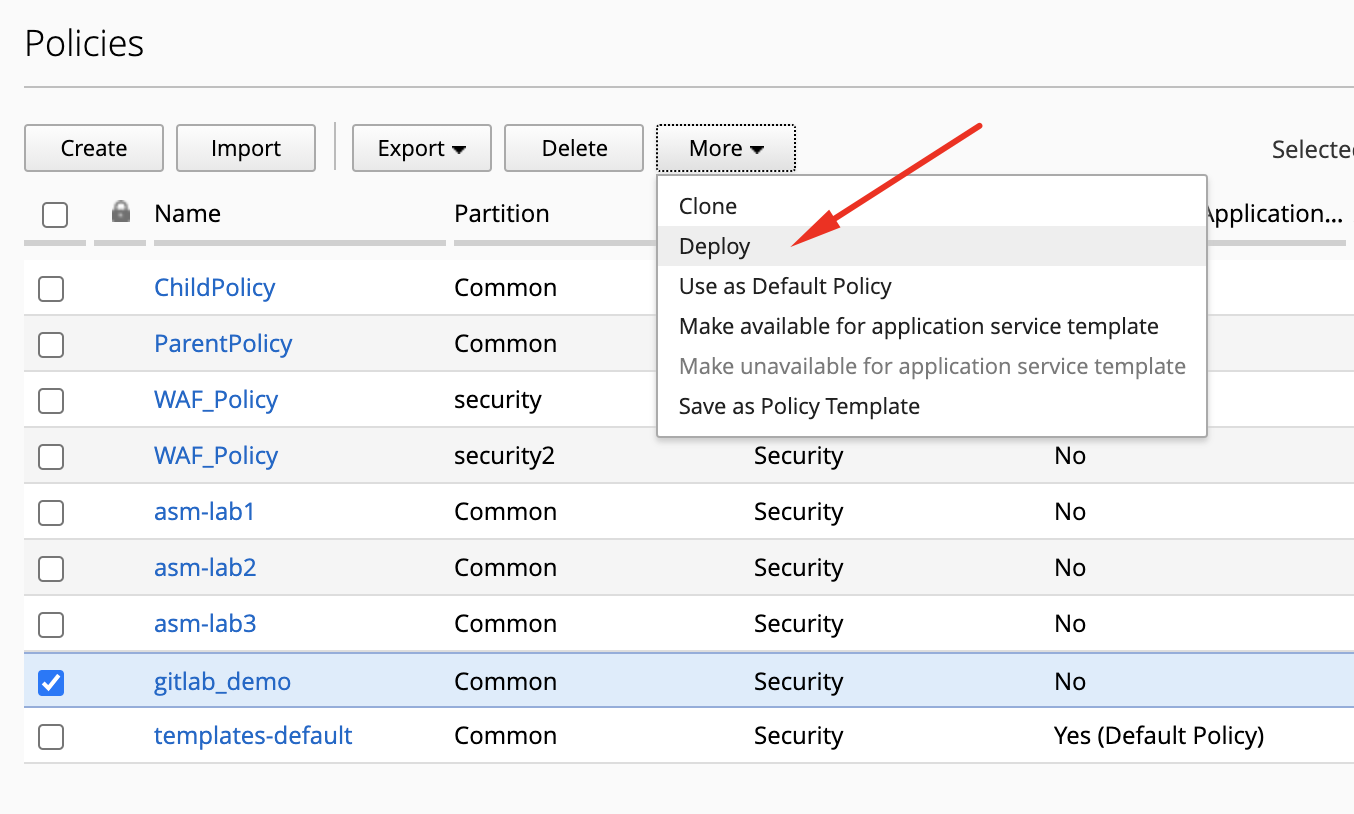
- Let’s now deploy the changes to the BIG-IP. Select the
gitlab_demoWAF policy, and click on Deploy from the menu.
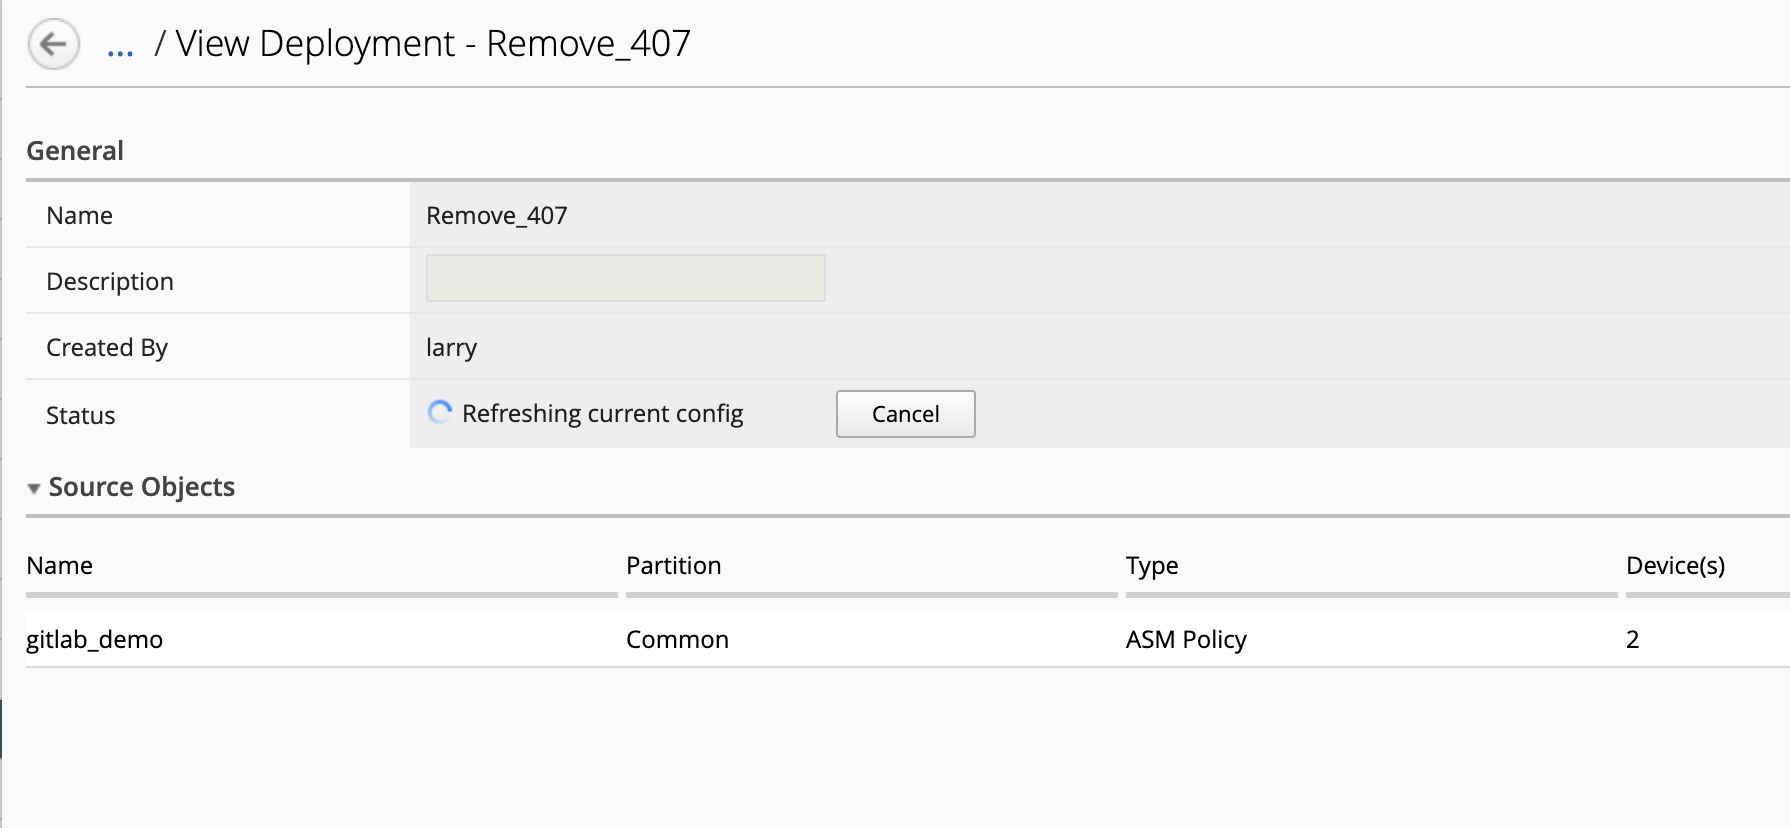
The deployment window opens. Type a name, select Deploy immediately for the Method.
Under the Target Device(s) section, click on Find Relevant Devices
and select both BOS-vBIGIP01.termmarc.com and BOS-vBIGIP02.termmarc.com devices. Then, click on Deploy.
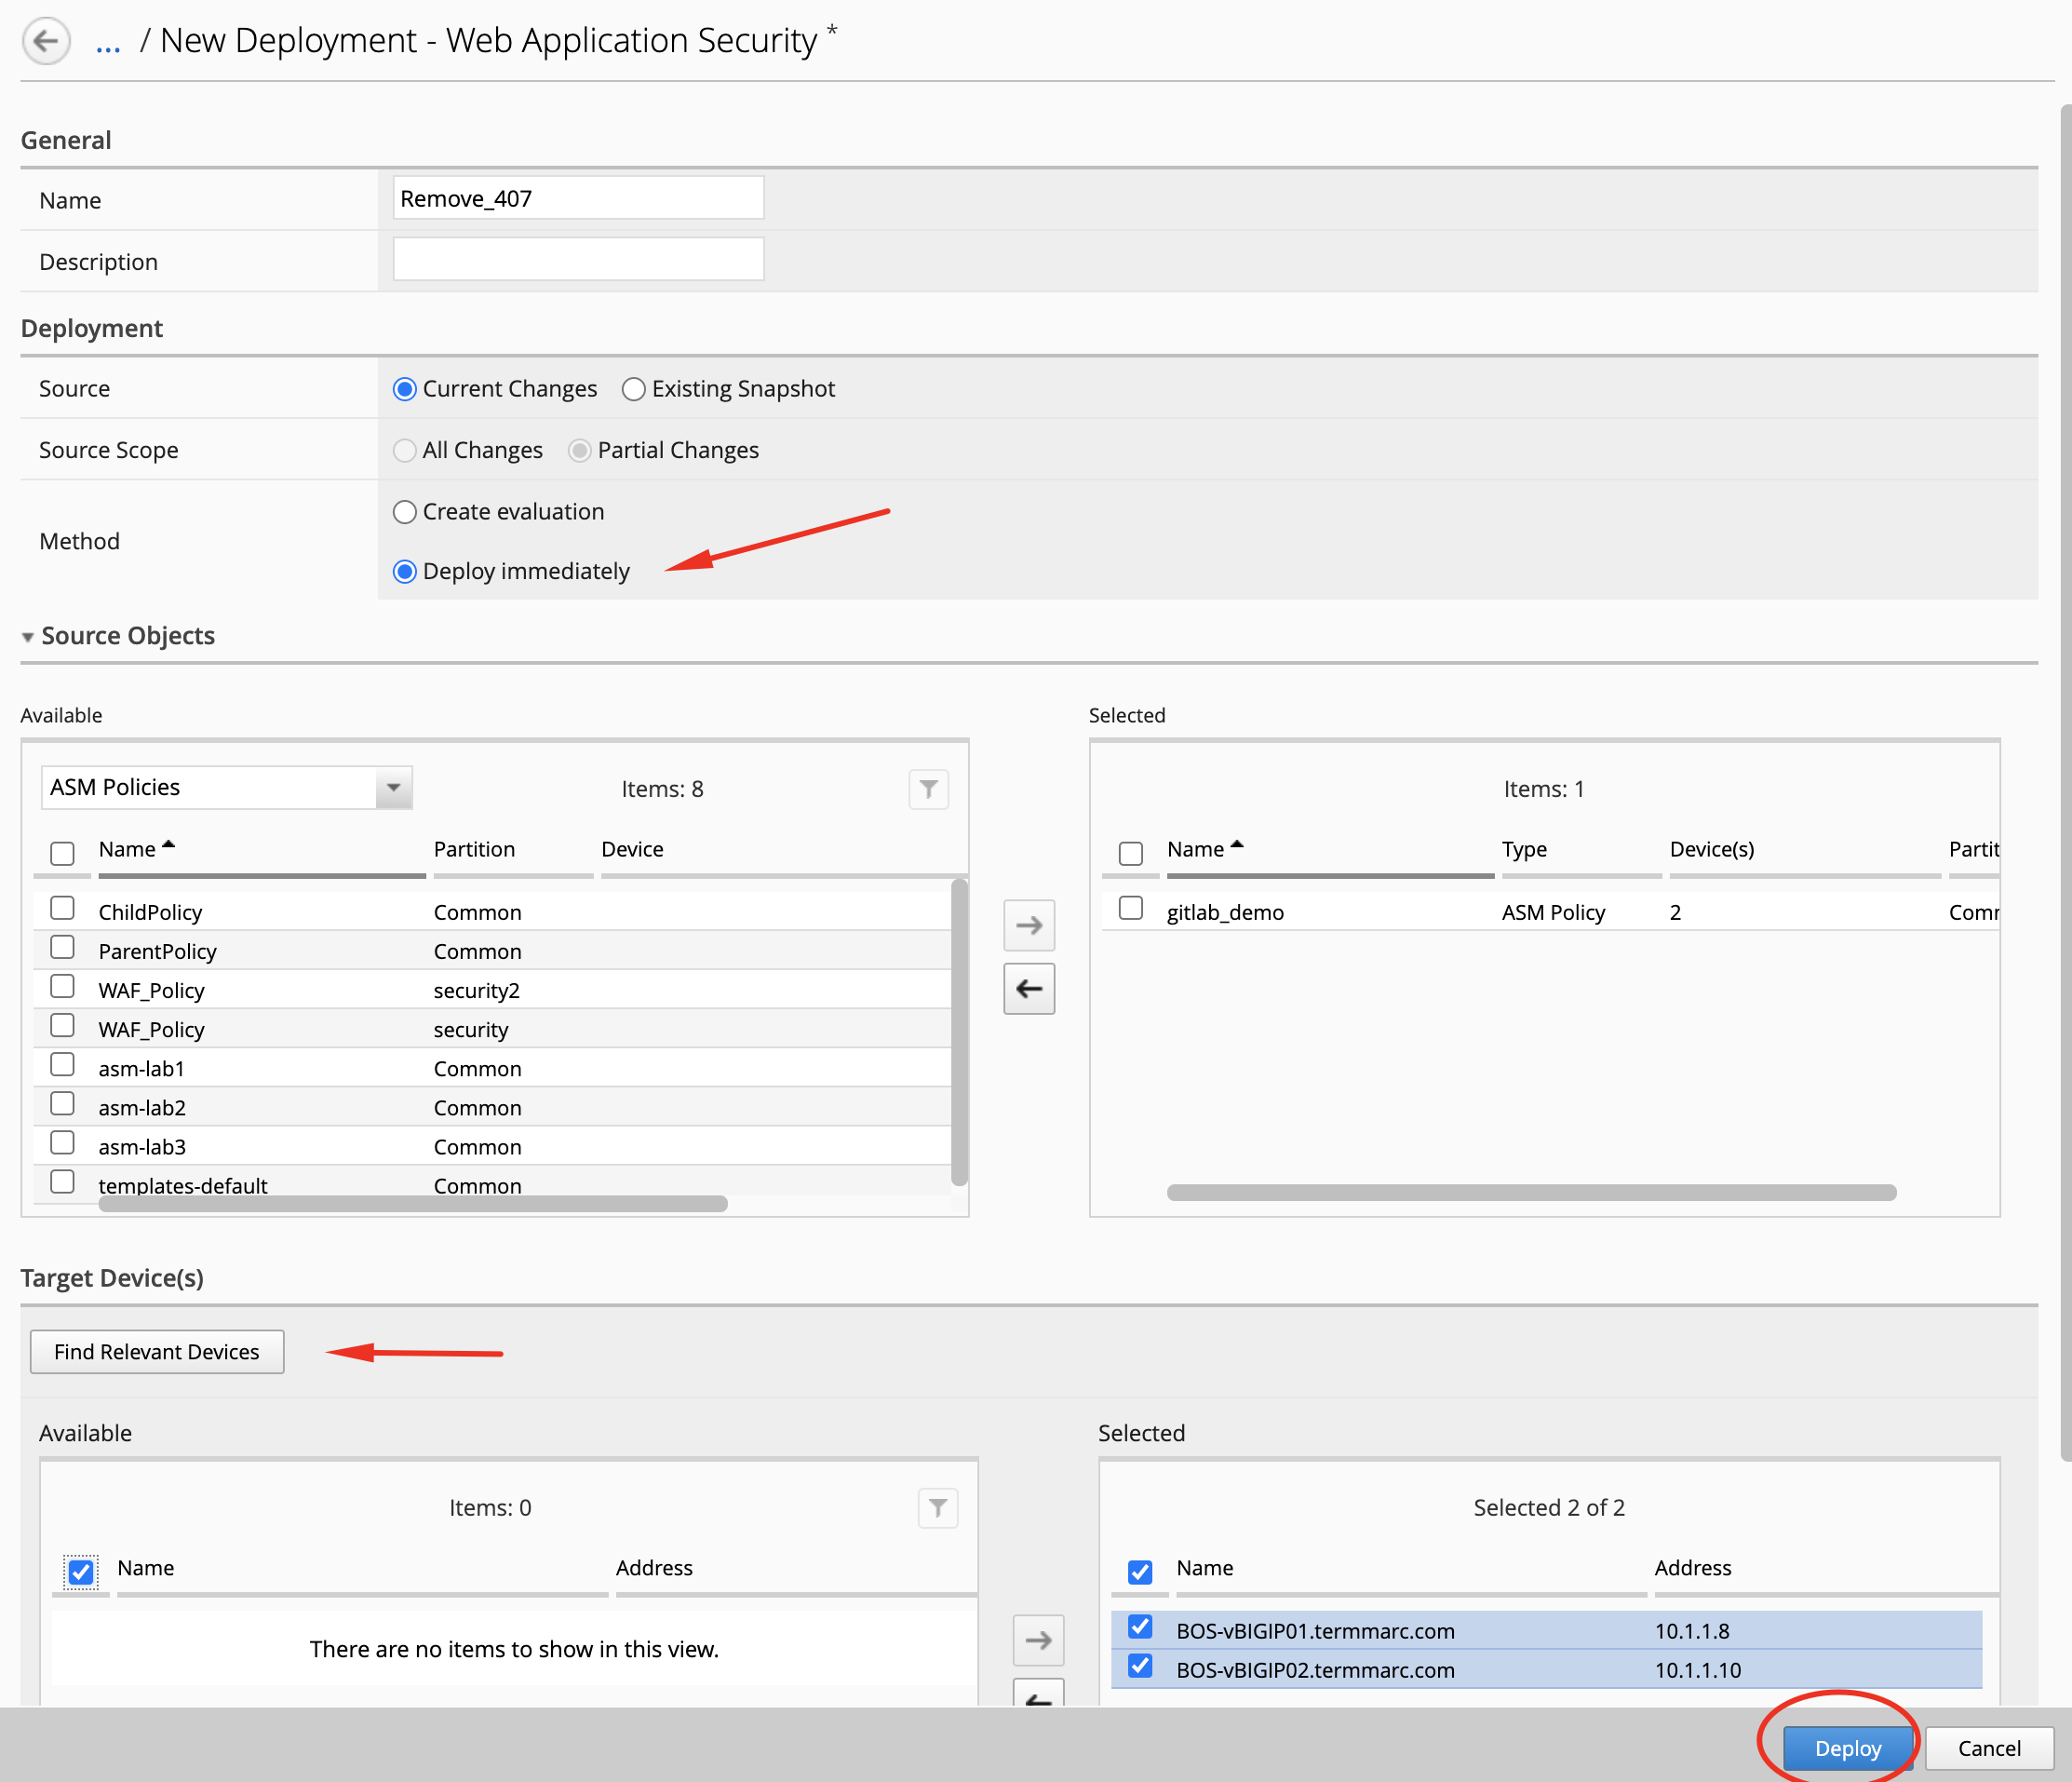
Wait until the deployment completes.
- The policy is now updates. Larry, Security Manager, can update the WAF policy if needed in the future and the Application Owner or SuperNetops can update the Application Service via the automation pipeline (e.g. adding a pool member, see Class 1 Module 2 Lab 1.12).