F5 Distributed Cloud > F5 Distributed Cloud: Automating Build & Operations Source | Edit on
Lab 1: API-First Console
This lab will focus on demonstrating the API-first capabilities of the F5 Distributed Cloud Console. Students will begin by creating an API token for authenticating to the API, followed by exploring the Distributed Cloud Developer Portal and utilizing it to query a live configuration. Finally, the lab concludes with using the Distributed Cloud Developer Portal to create an Application Firewall.
For the tasks that follow, you should have already noted your individual namespace. If you failed to note it, return to the Introduction section of this lab, follow the instructions provided and note your namespace accordingly. The Delegated Domain and the F5 Distributed Cloud Tenant are listed below for your convenience as they will be the same for all lab attendees.
Delegated Domain: .lab-app.f5demos.com
F5 Distributed Cloud Tenant: https://f5-xc-lab-app.console.ves.volterra.io
By following the tasks in the prior Introduction Section, you should now be able to access the F5 Distributed Cloud Console, having set your Work Domain Roles and Skill levels. If you have not done so already, please login to your tenant for this lab and proceed to Task 1.
Expected Lab Time: 20 minutes
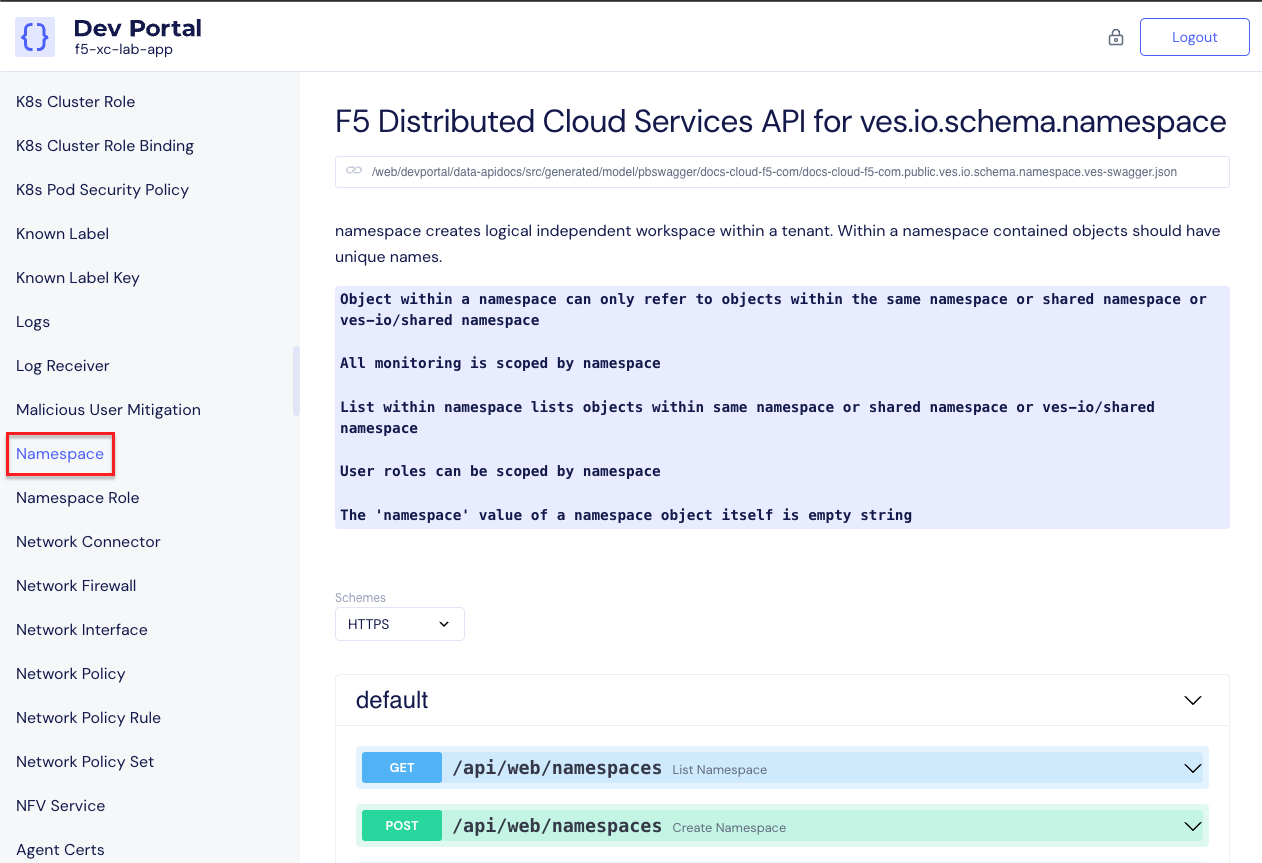
Task 1: Review Developer Portal
The following steps will allow you to create an API Token and query the Distributed Cloud API utilizing the Developer Portal.
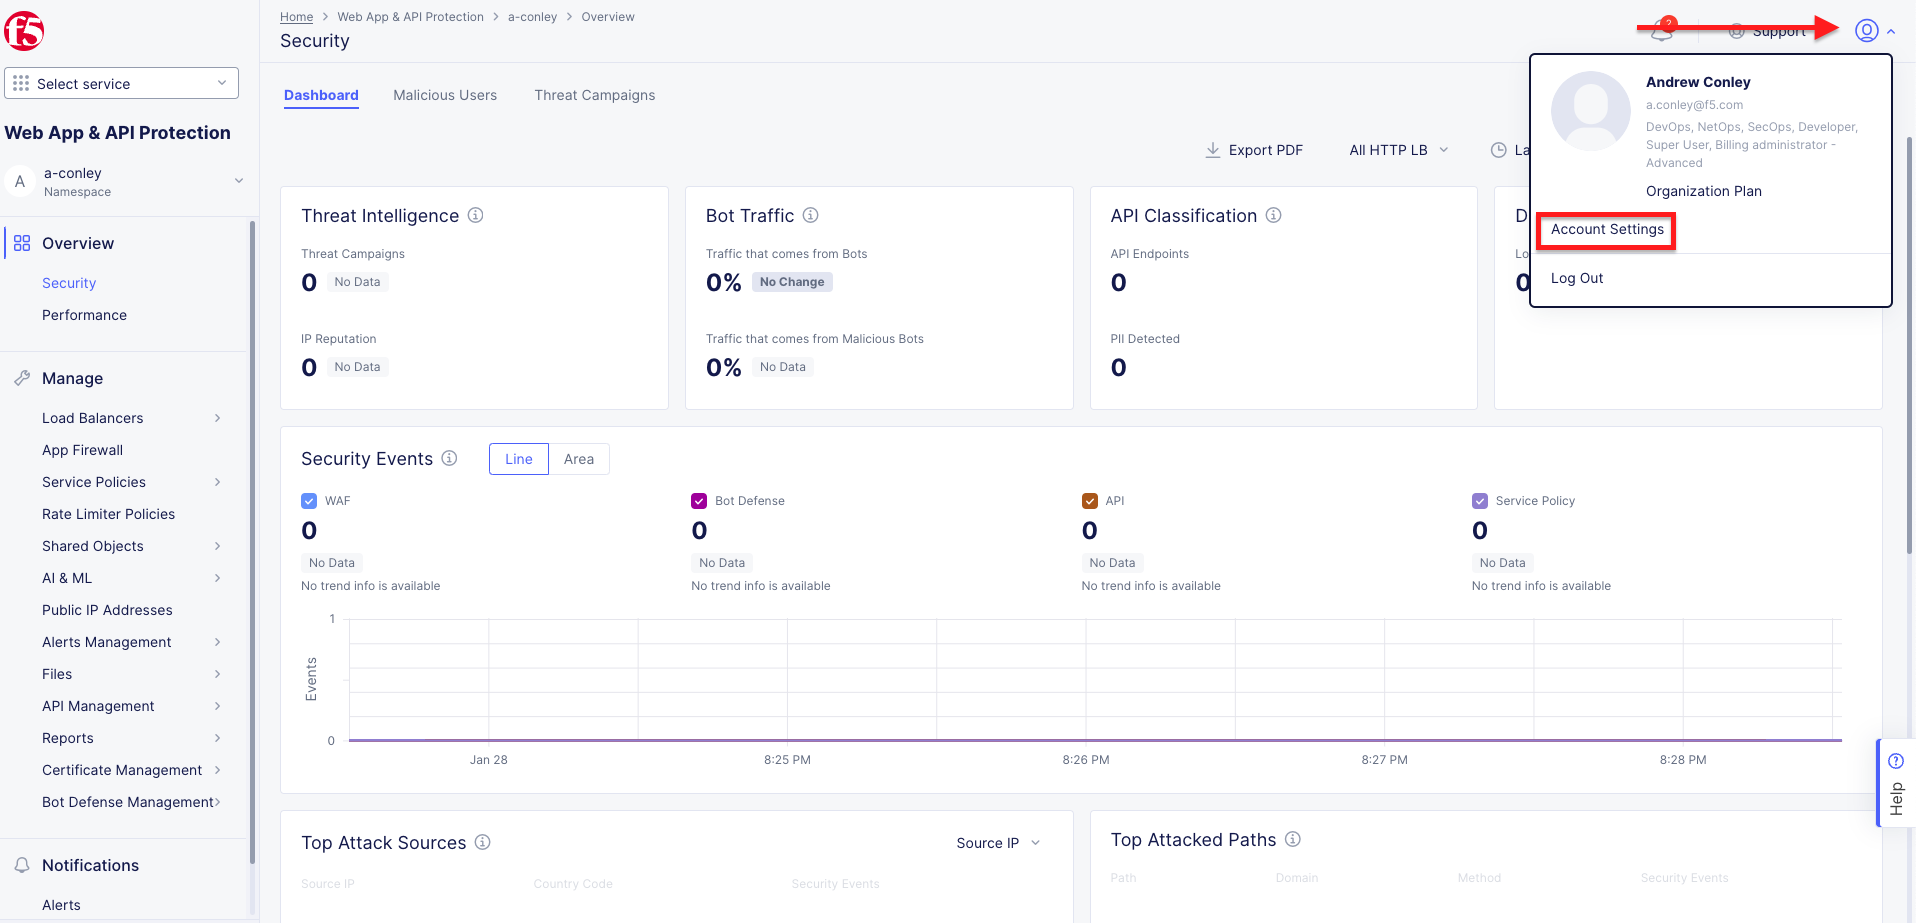
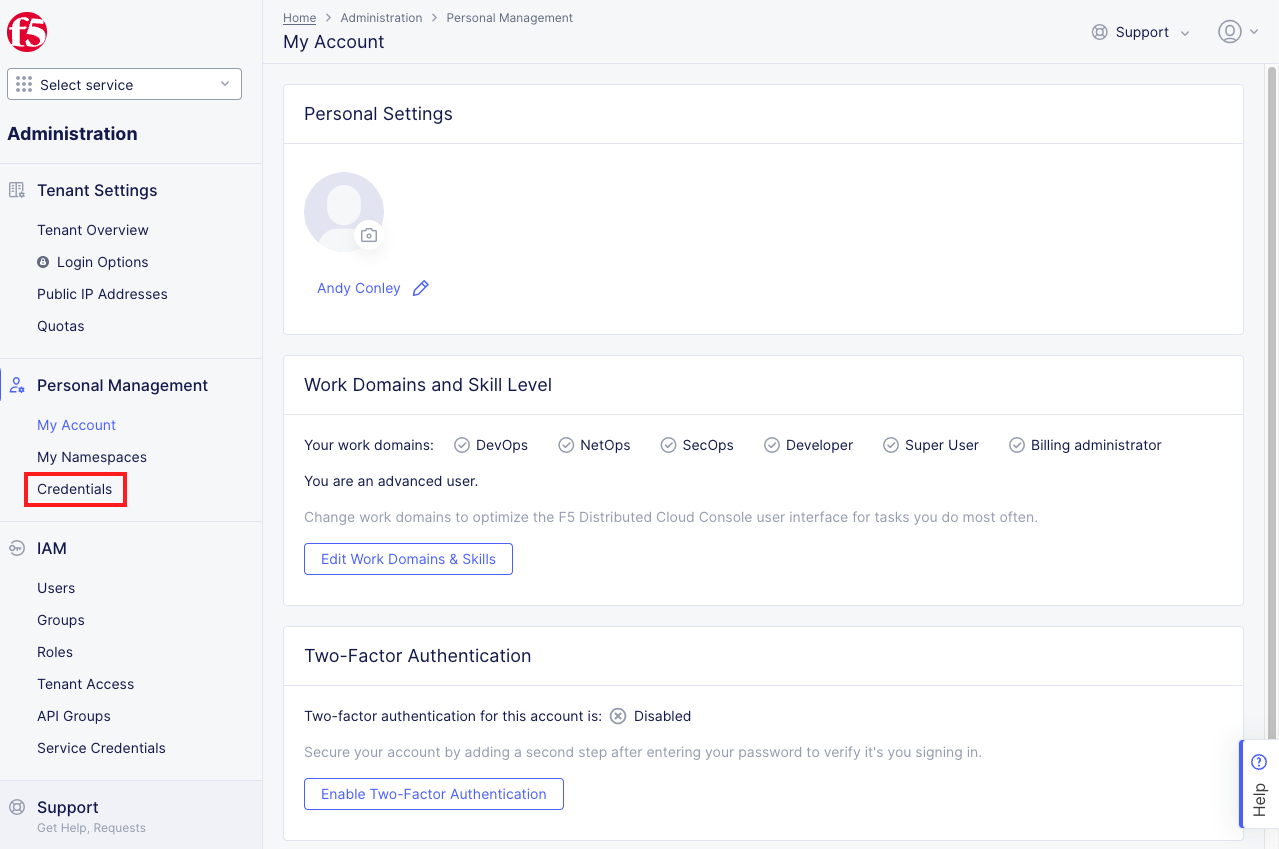
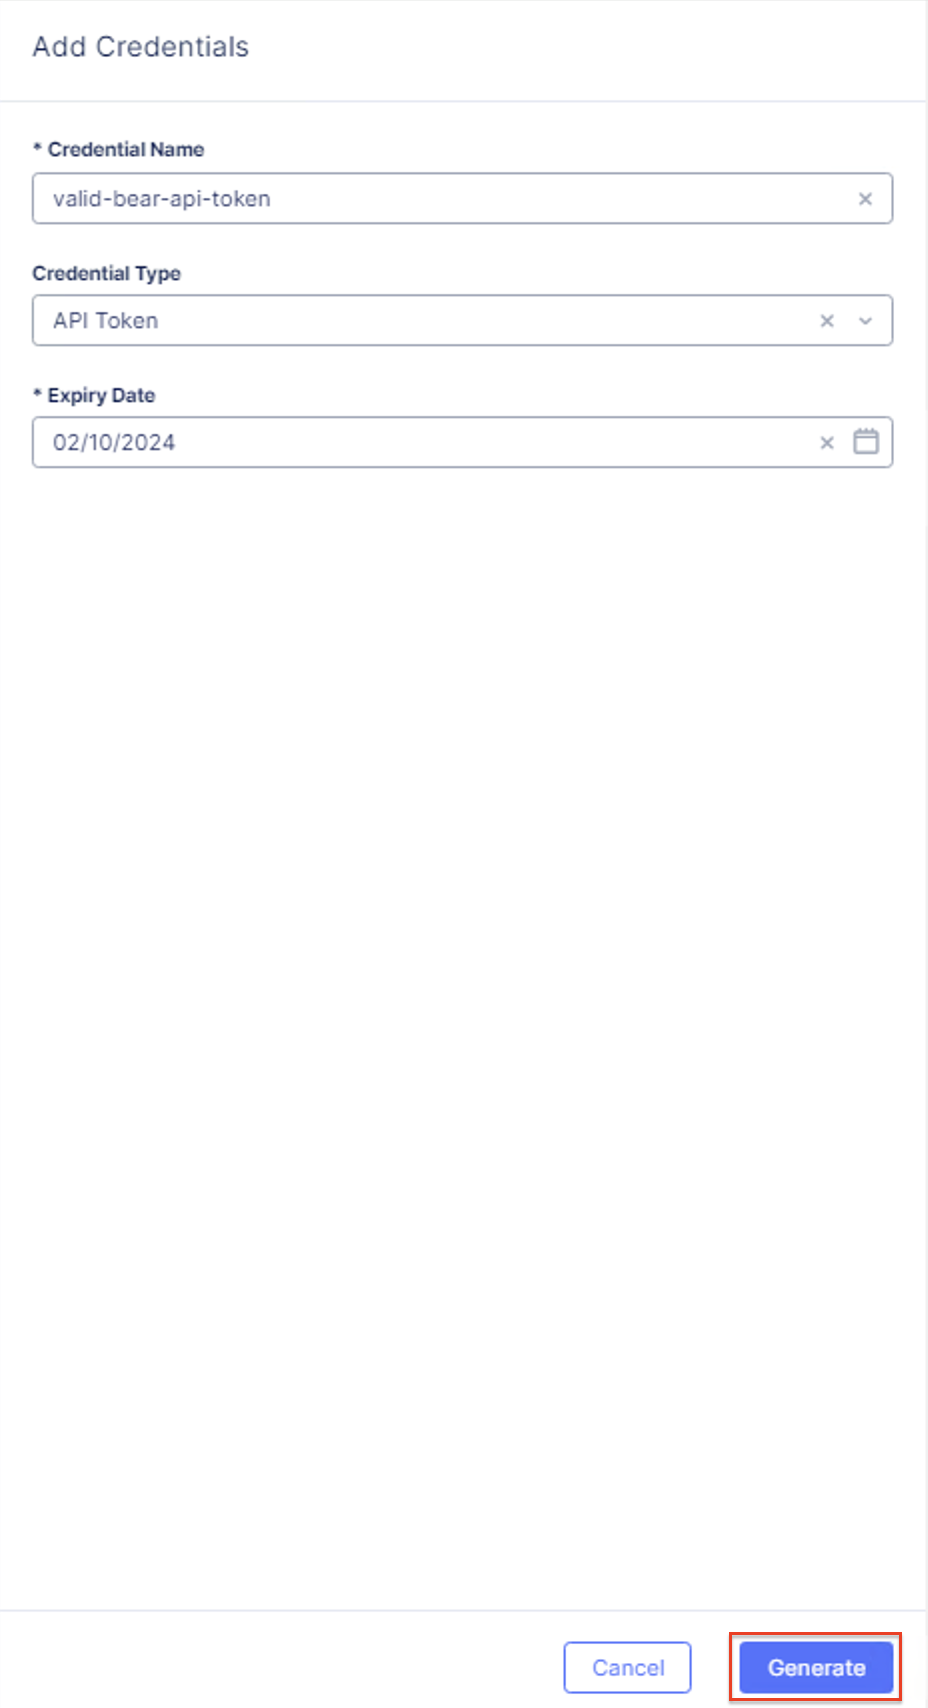
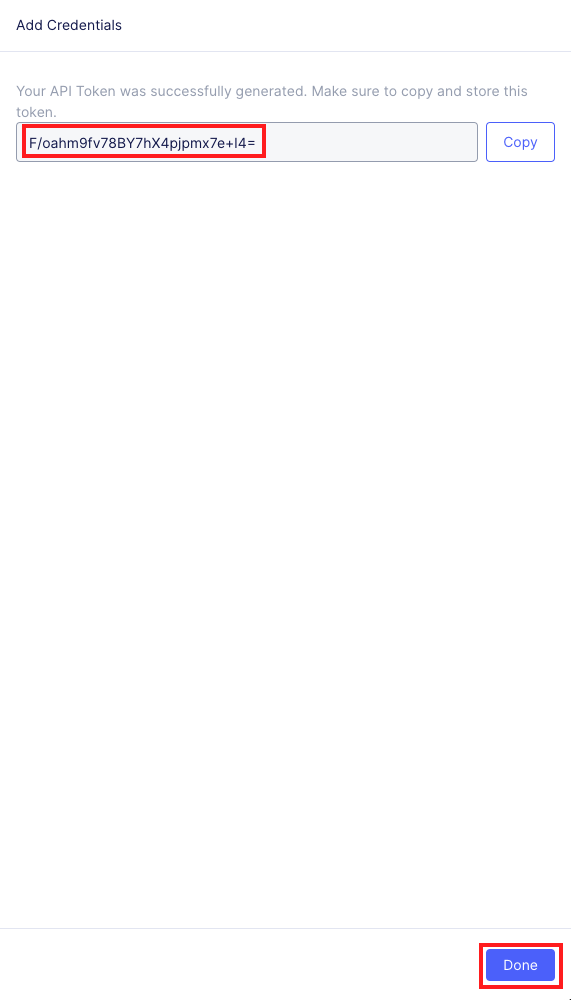
Create API Token from the Distributed Cloud Console |
|---|
|
|
|
|
Note If you don’t save your API token or you lose it, you will need to generate a new API token. After an API token is generated, it cannot be retrieved again later. |

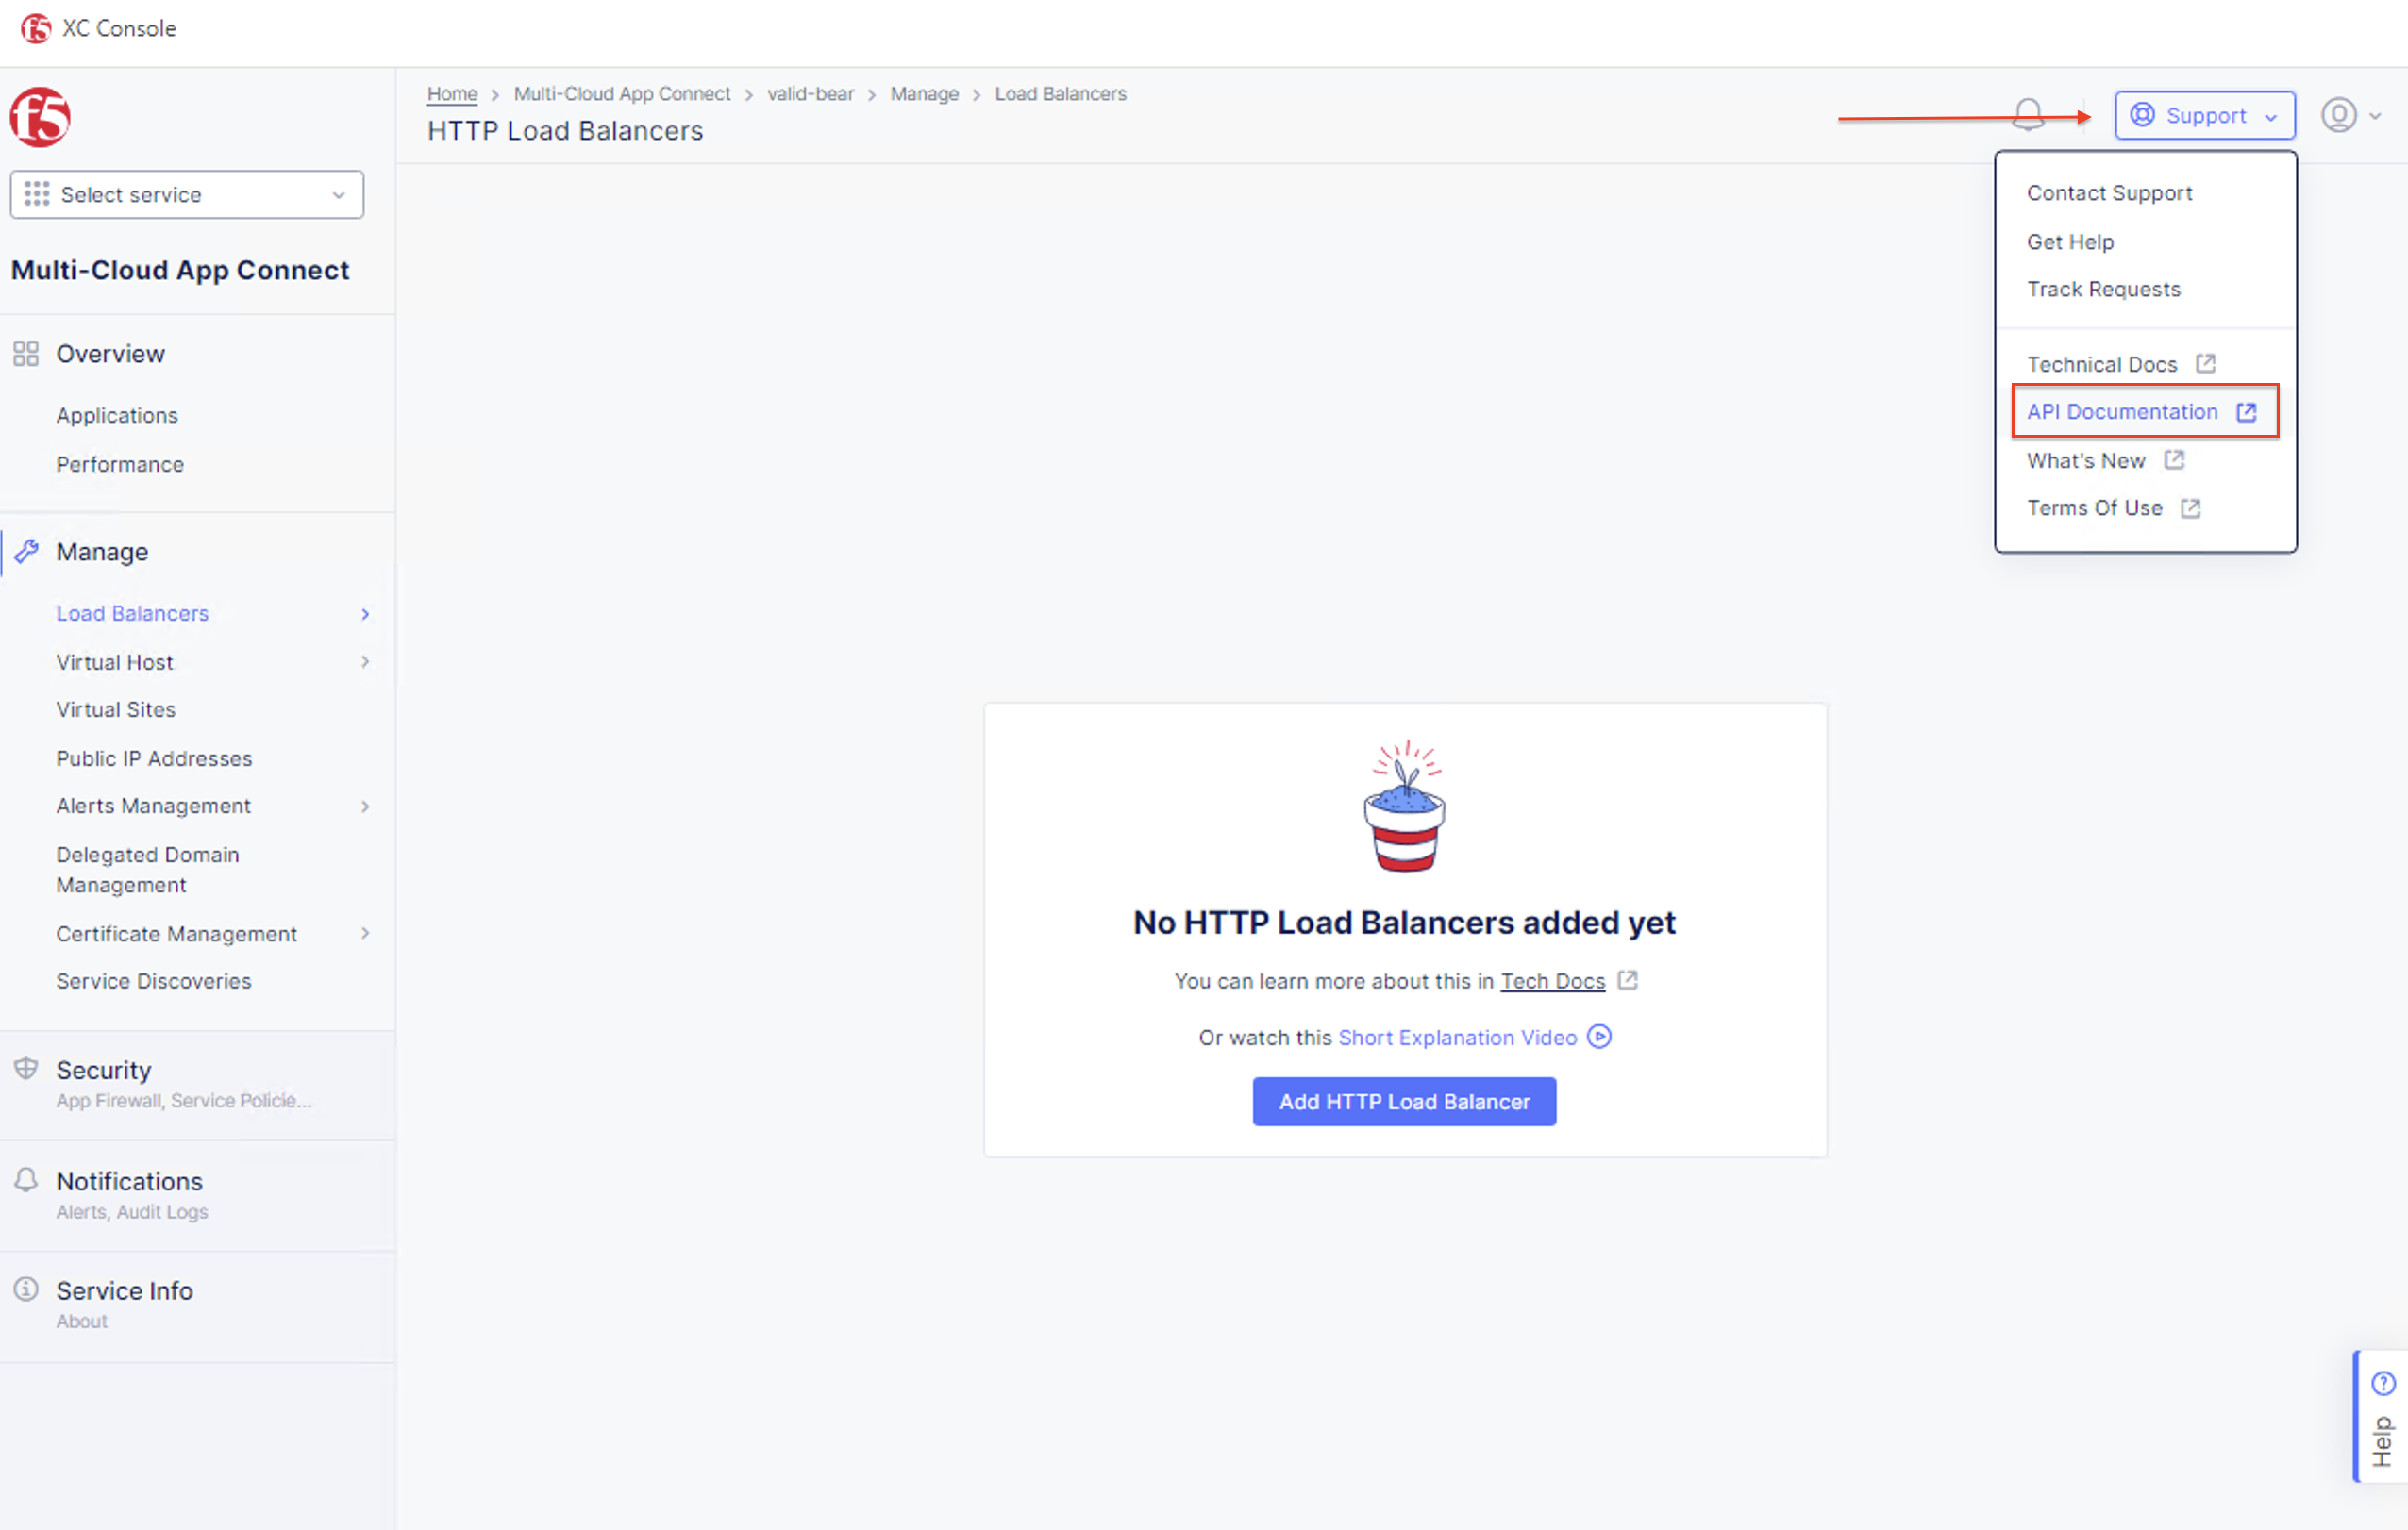
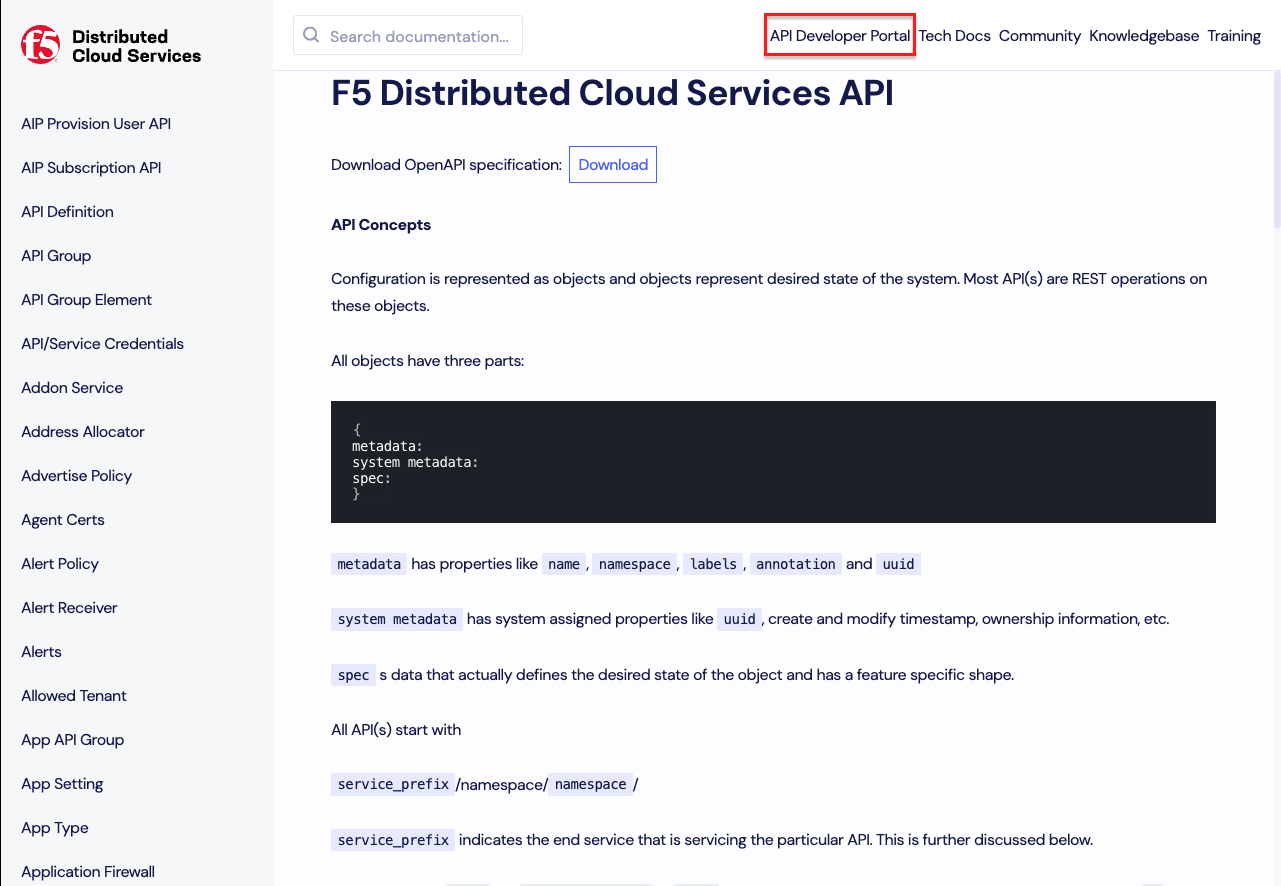
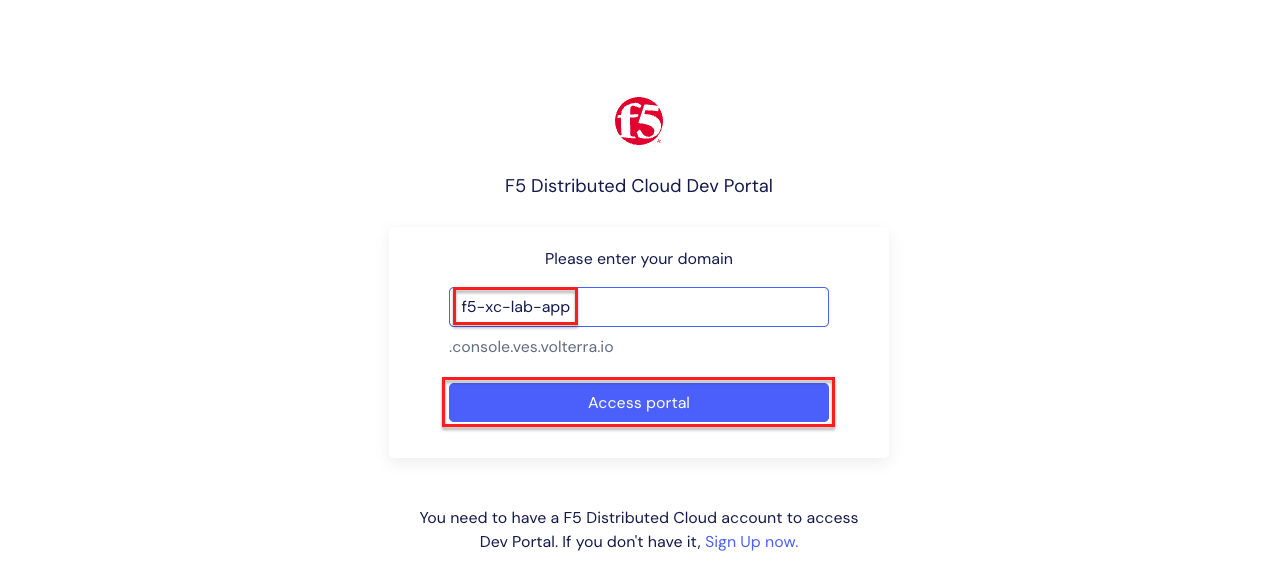
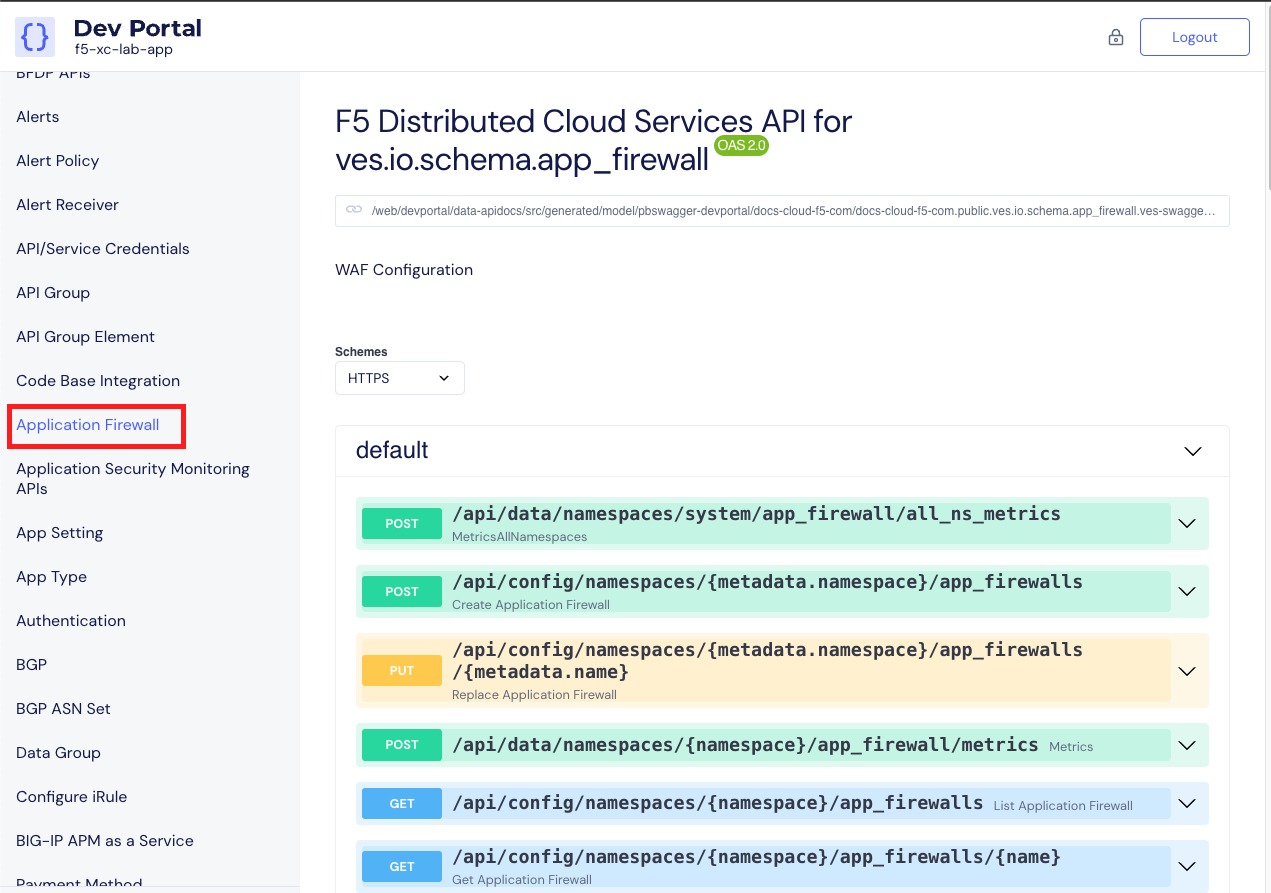
Access the Distributed Cloud Developer Portal |
|---|
Note This takes you to the online documentation for the F5 Distributed Cloud Services API. Here, you can review or download the API specification. |
|
|
|
|
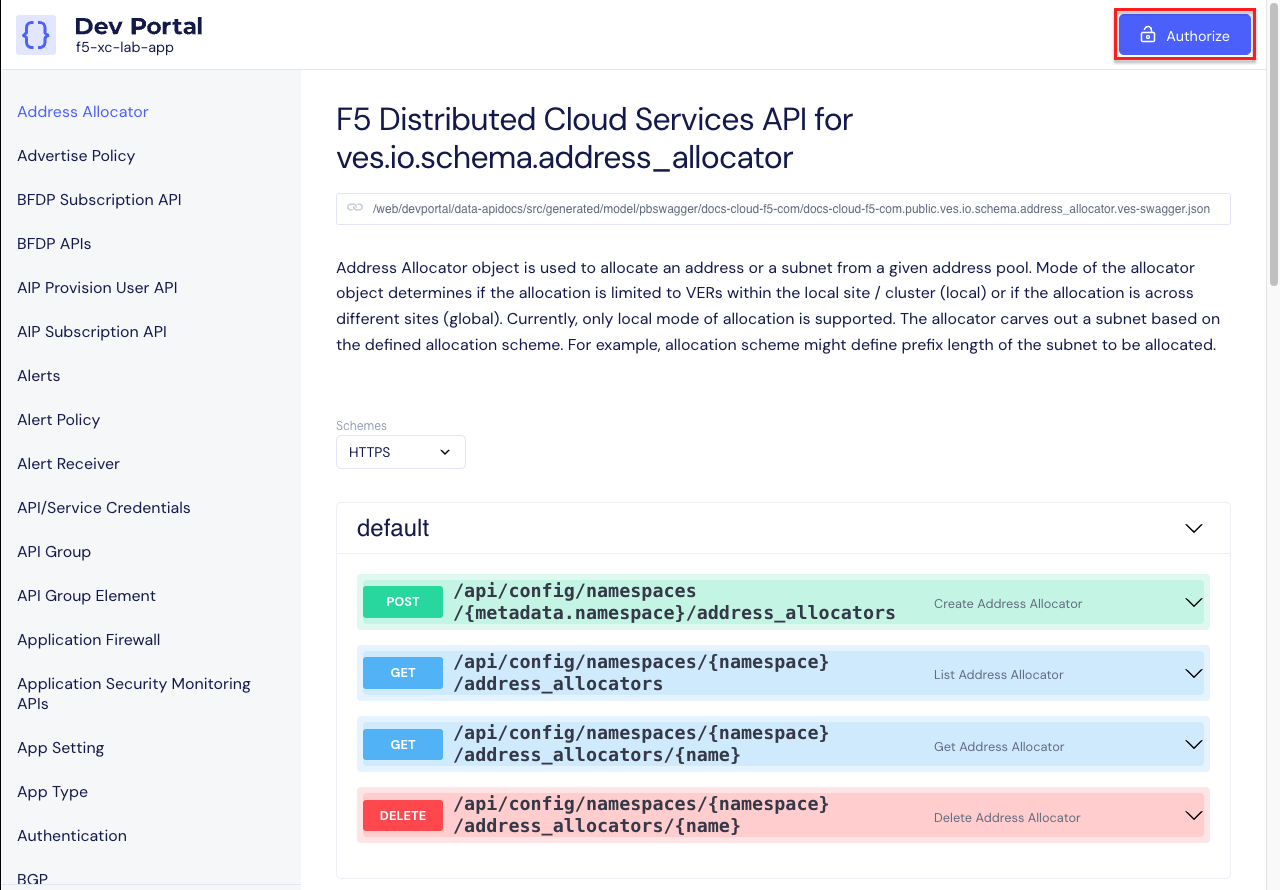

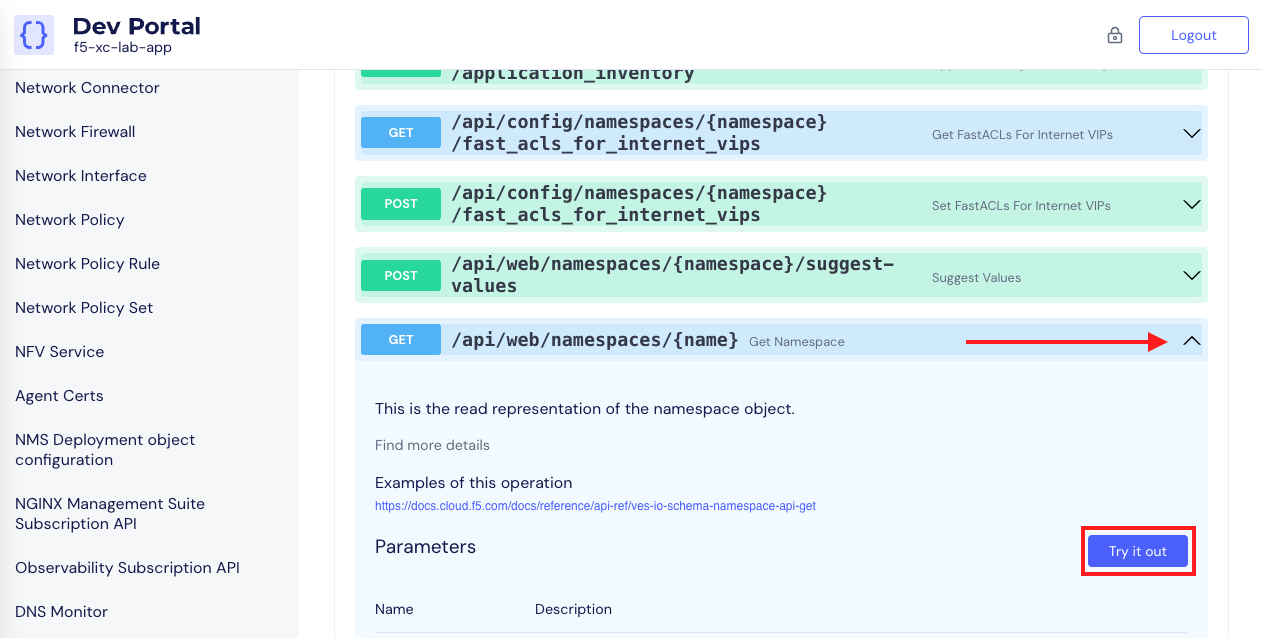
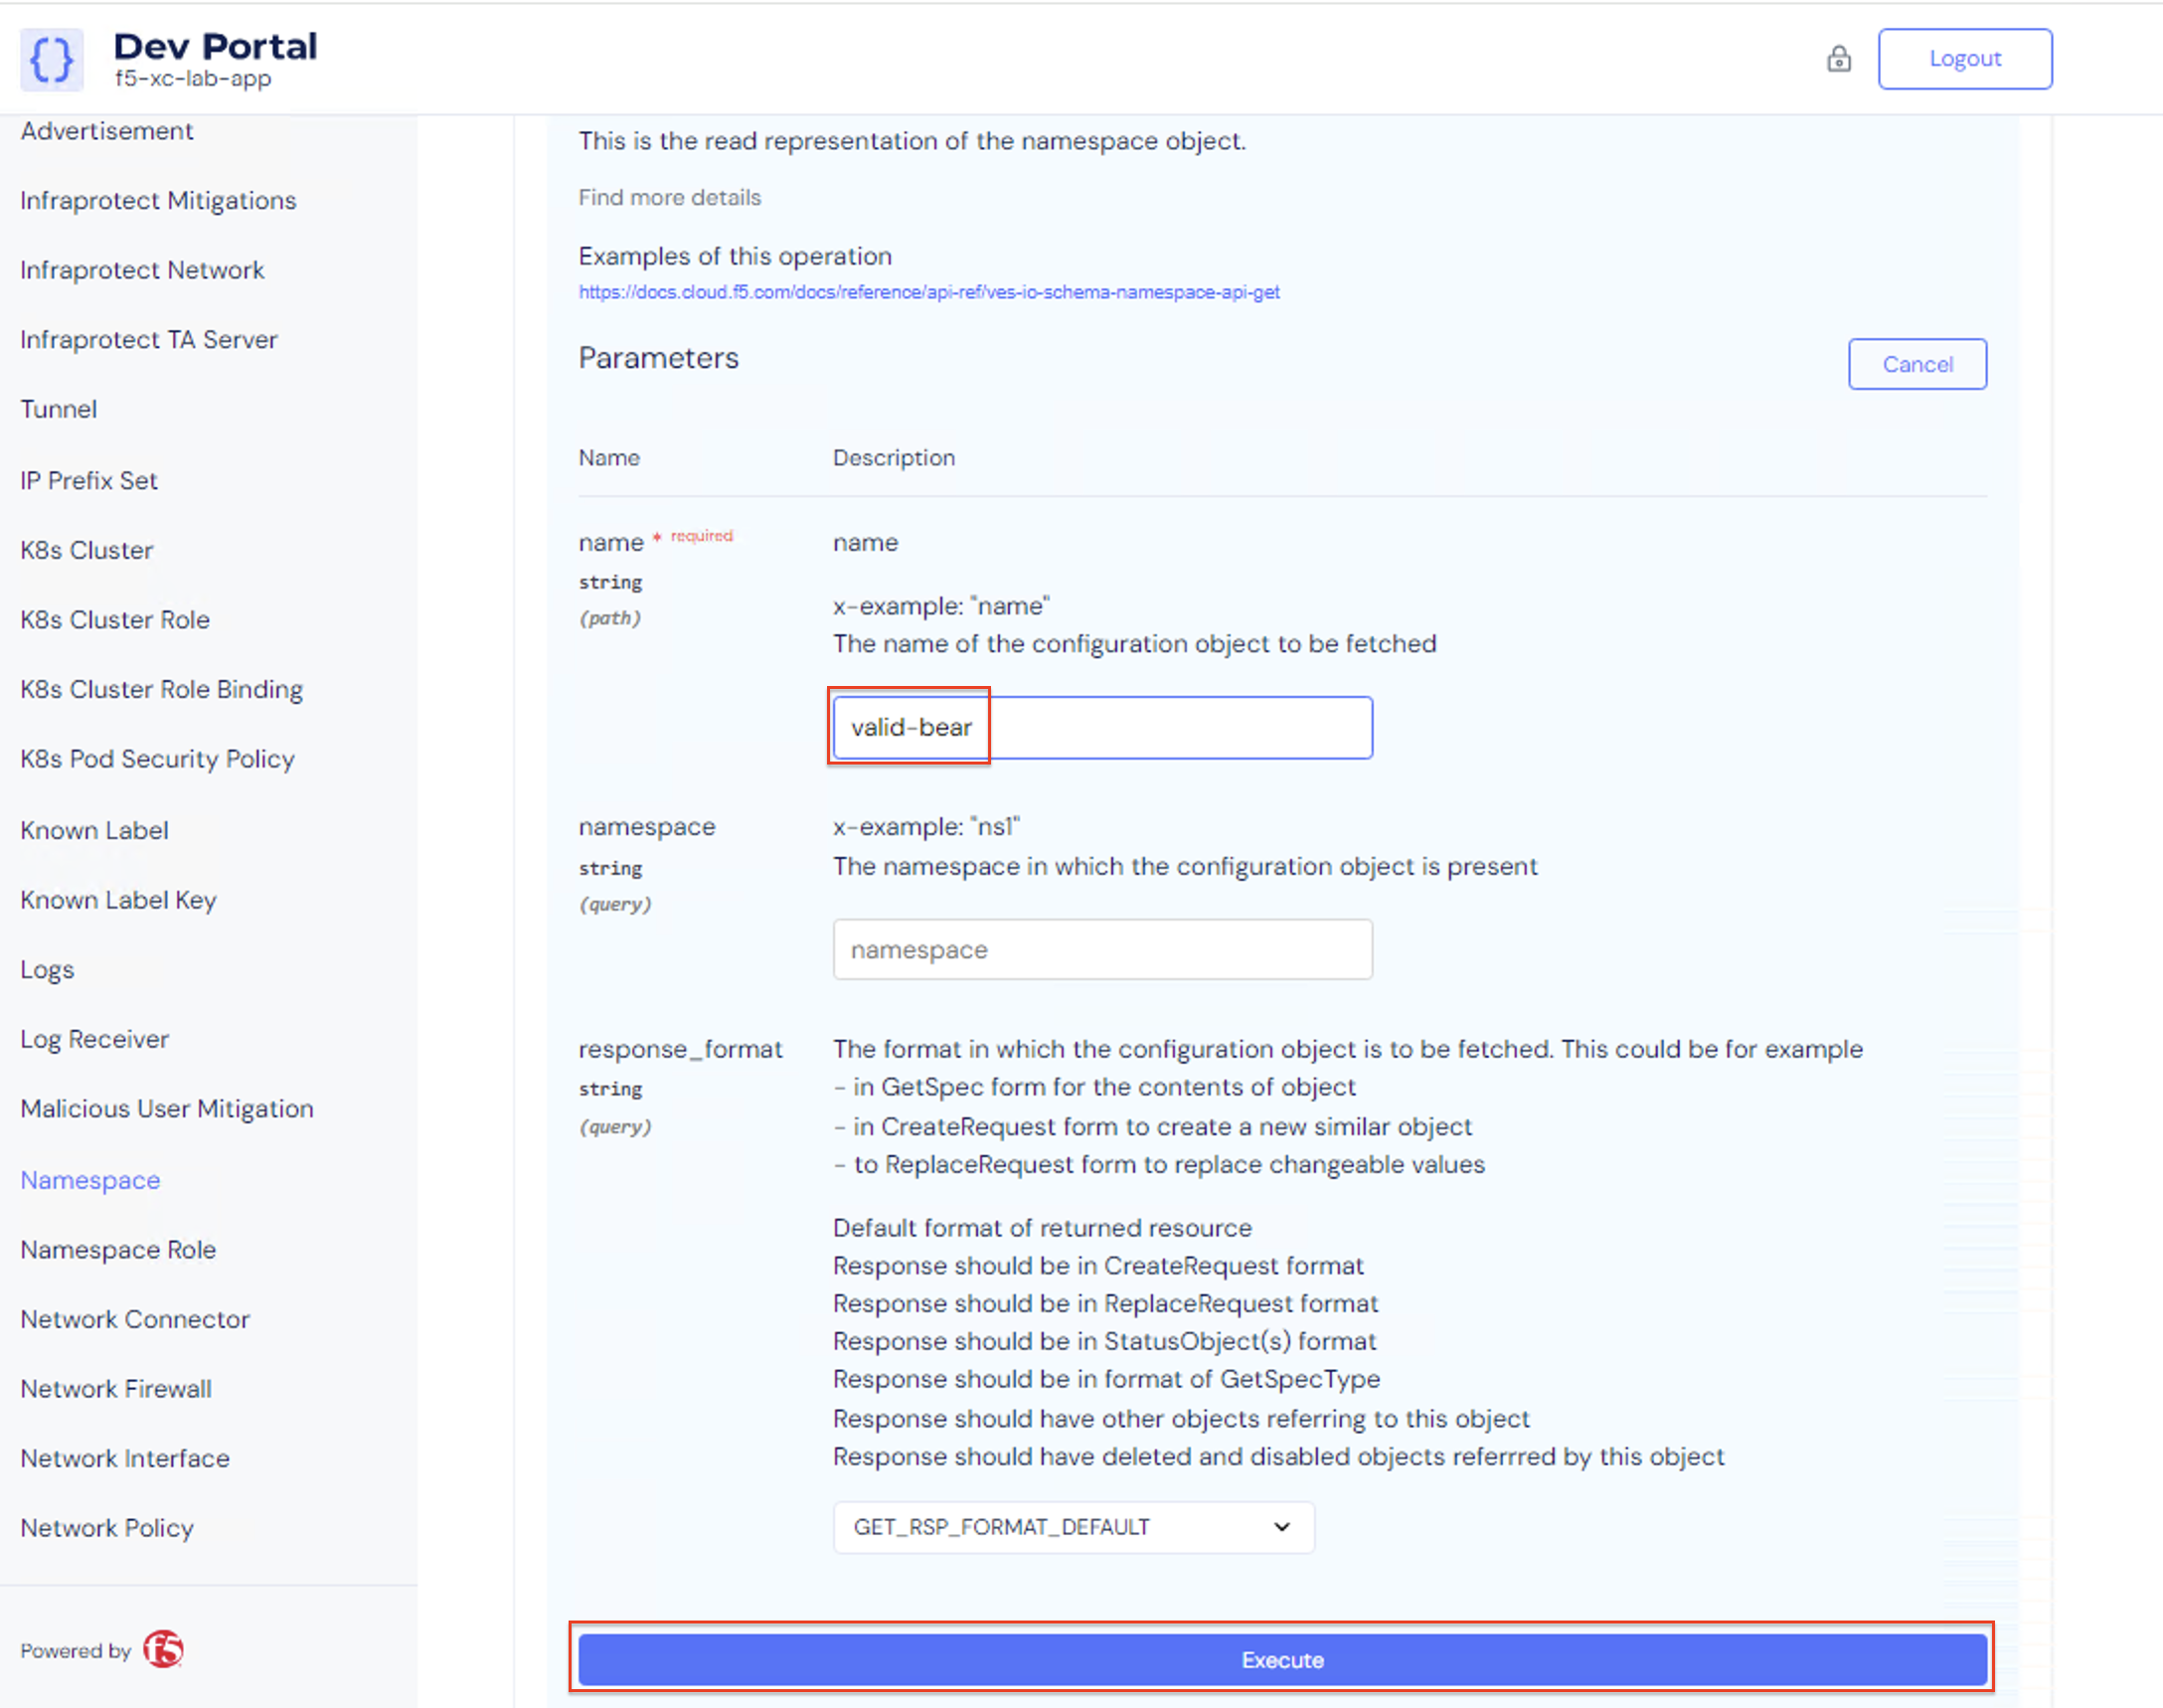
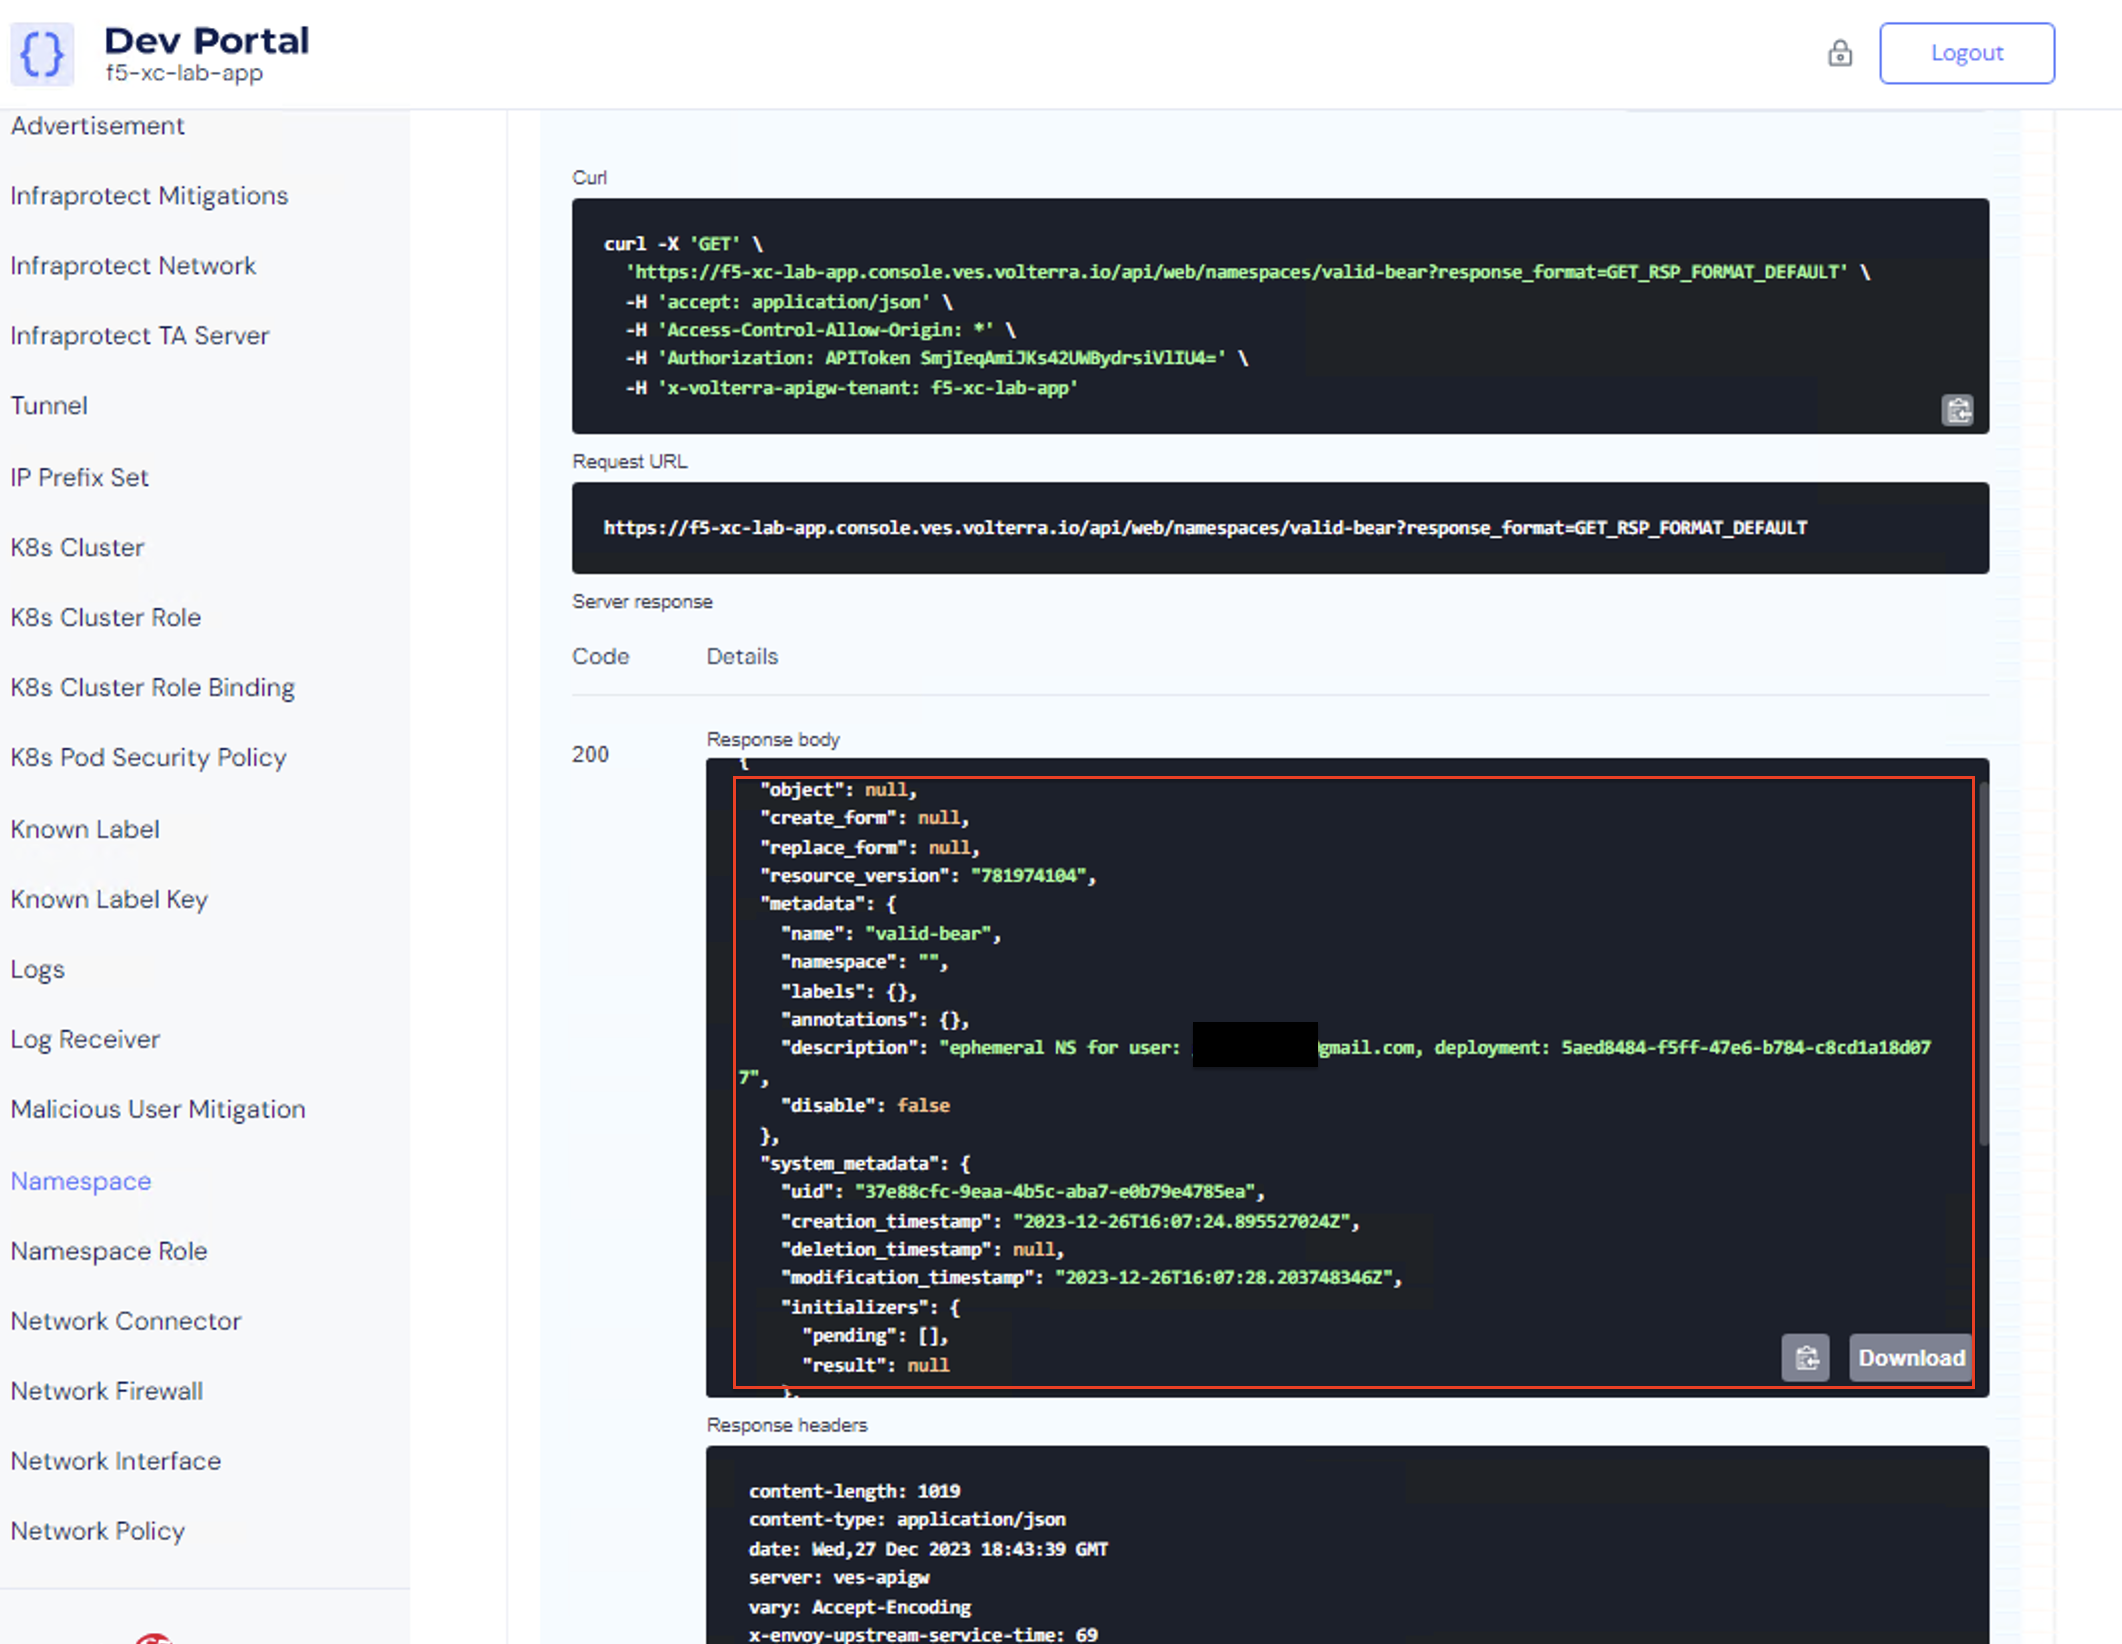
Use the Distributed Cloud Developer Portal to Query Data |
|---|
|
|
Note Your namespace name is unique to your deployment. You should have recorded your namespace name in the Introduction Lab Task 2 Step 10. If you don’t remember your namespace, please refer back to the Introduction Lab.
|
Note The parameters you entered in the name field were used to execute the API query and limit the returned values. Parameters can also be used when creating new objects. |
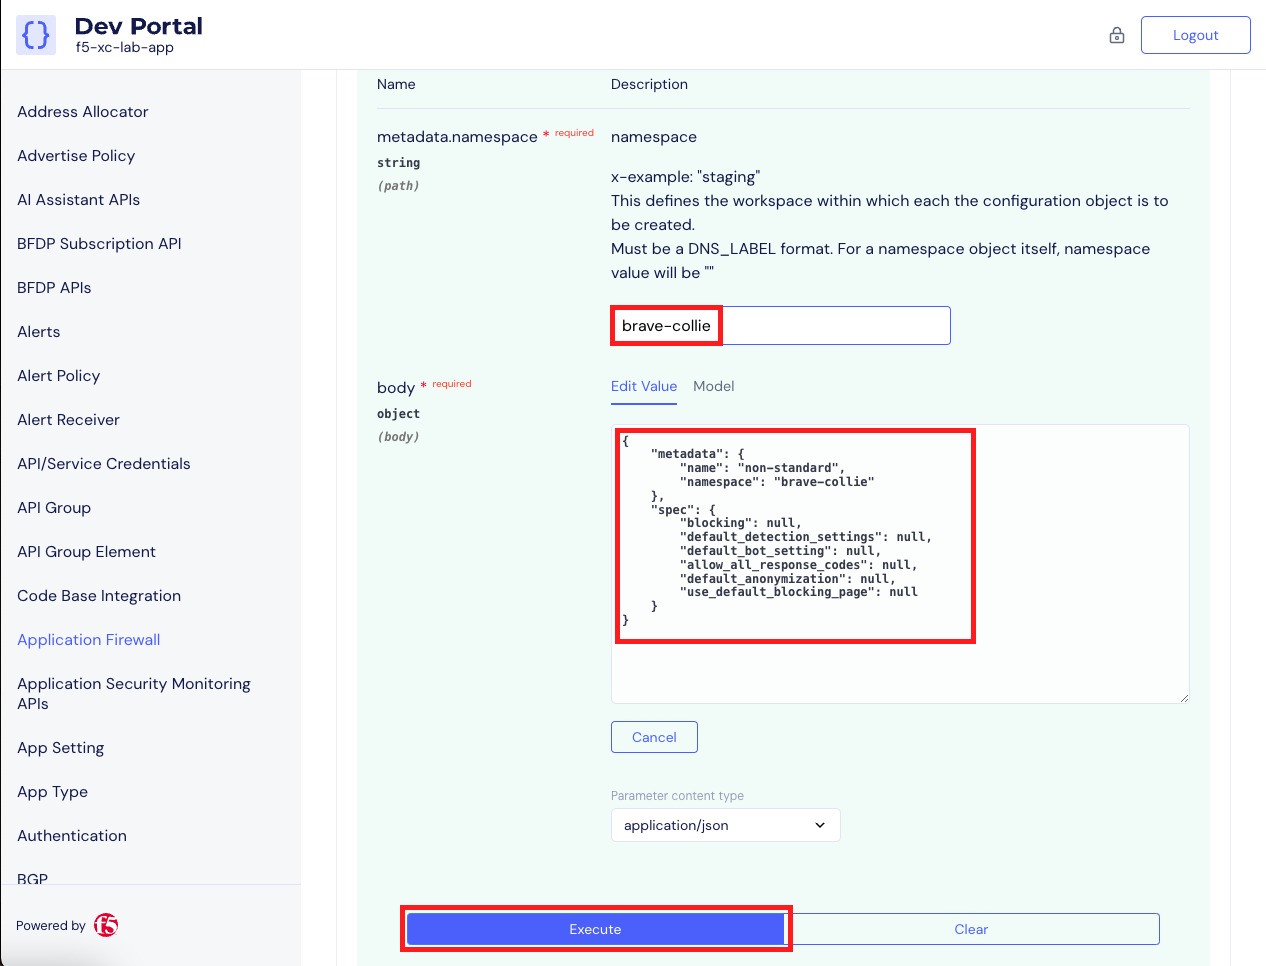
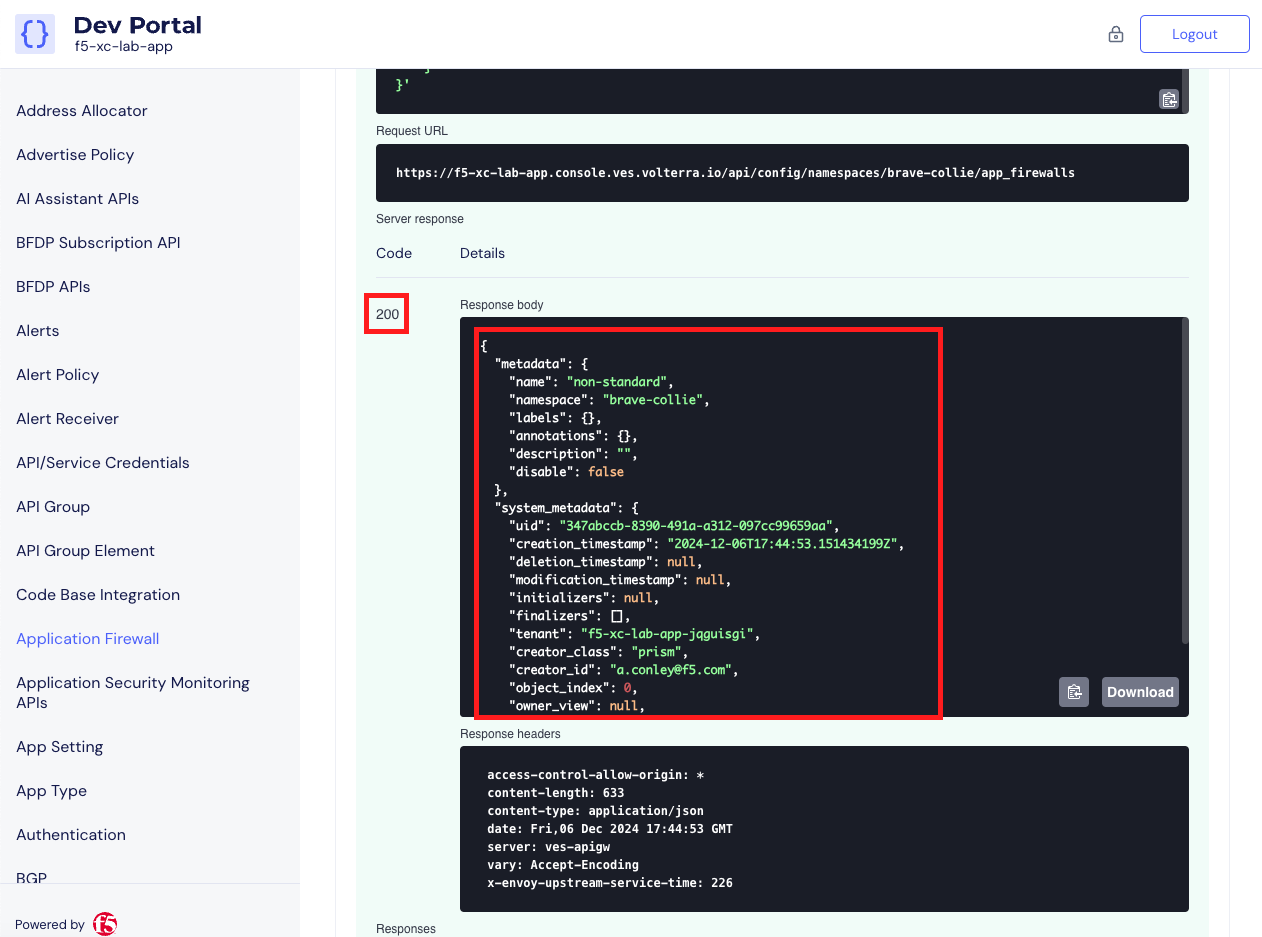
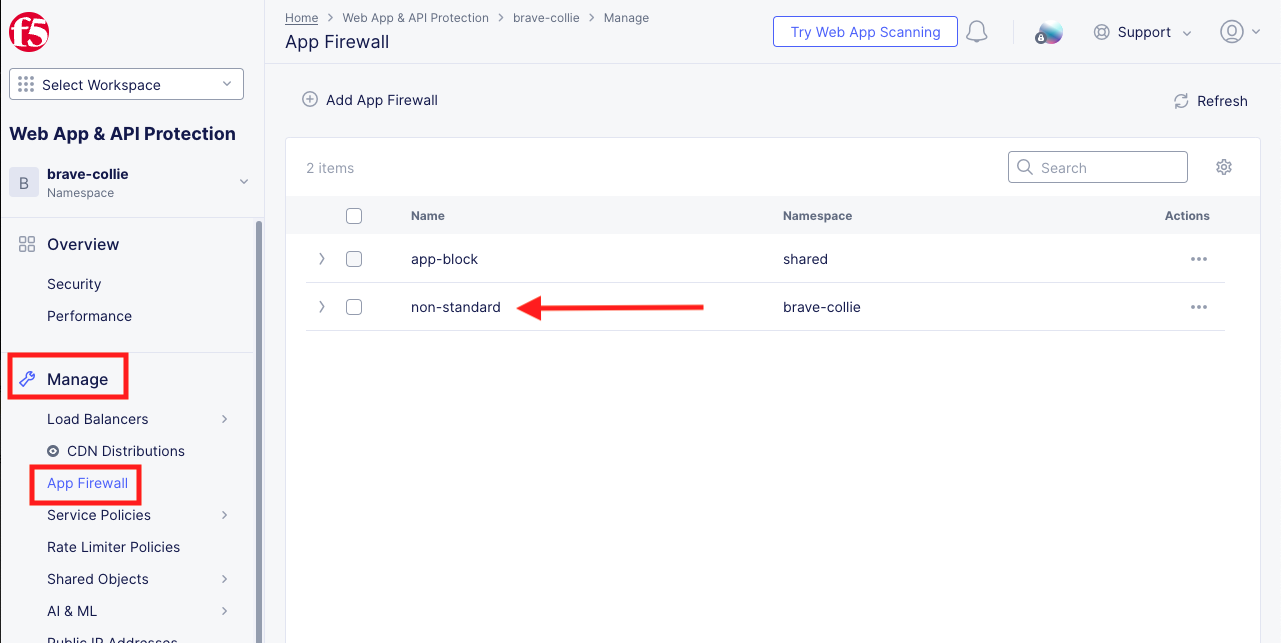
Use the Distributed Cloud Developer Portal to Create an Object |
|---|
|
|
{
    "metadata": {
       "name": "non-standard",
       "namespace": "<namespace>"
    },
    "spec": {
       "blocking": null,
       "default_detection_settings": null,
       "default_bot_setting": null,
       "allow_all_response_codes": null,
       "default_anonymization": null,
       "use_default_blocking_page": null
    }
}
Note Be sure to change the <namespace> value in the above JSON block to match your namespace.
|
|
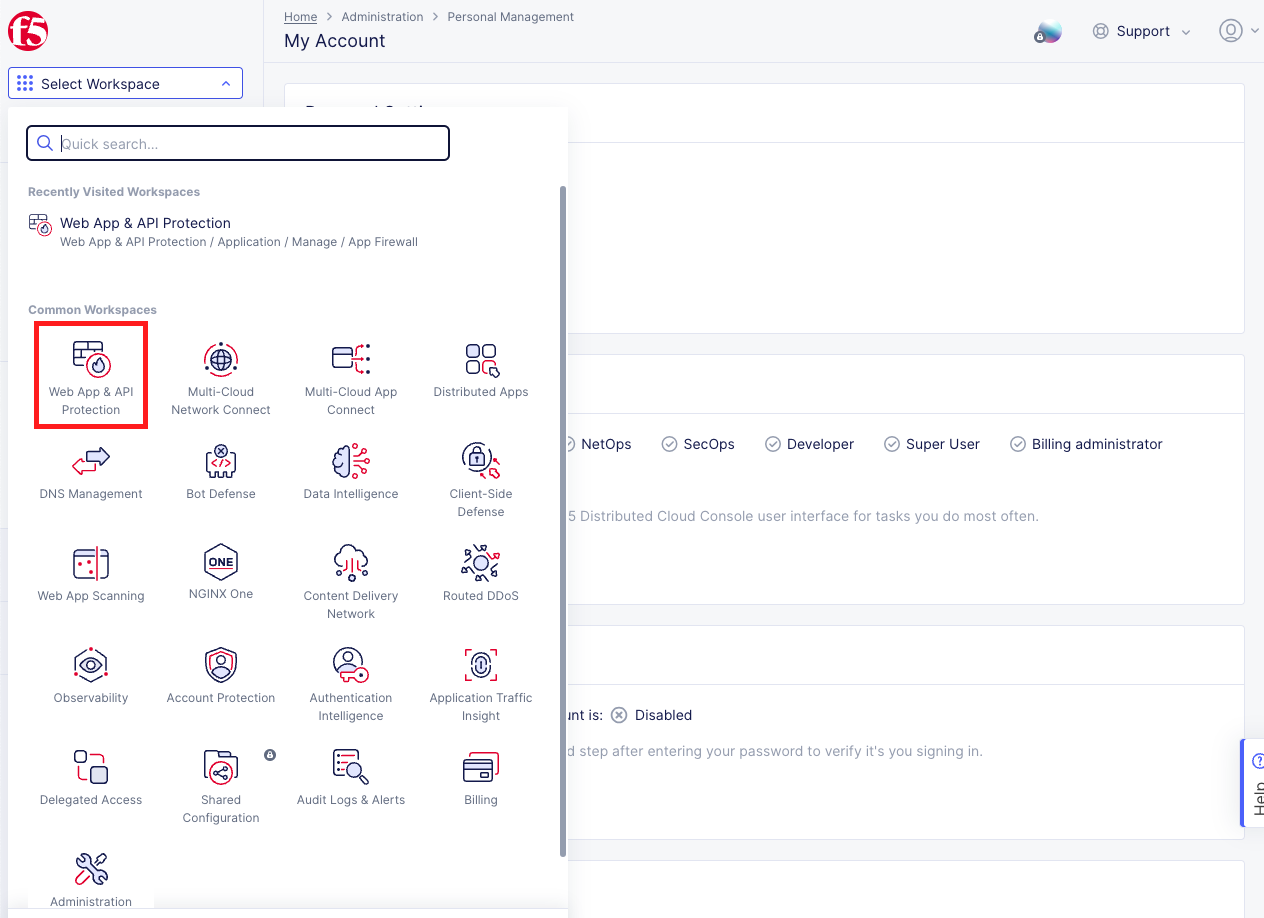
Note If you recieve a message that You cannot access this feature with your current role, select your namespace from the namespace dropdown in the top left under Web App & API Protection. |
Note The firewall you create in this section of the lab will be used in future labs. If you don’t see the App Firewall named non-standard please verify and repeat the steps in this section. If you are still not seeing the non-standard App Firewall please ask a lab assistant for help. |

End of Lab 1 |
|---|
This concludes Lab 1. In this lab, you learned about the Distributed Cloud Developer Portal and how it can help you test API calls.
|