NGINX Modern Apps > Class 1 - Intro to NGINX Plus > Module 1: Introduction to NGINX Plus Concepts Source | Edit on
NGINX Plus HTTP Load balancing
Introduction
Both NGINX Open Source and NGINX Plus can load balance HTTP, TCP, and UDP traffic. NGINX Plus extends NGINX Open Source with enterprise-grade load balancing that includes session persistence, active health checks, dynamic reconfiguration of load-balanced server groups without a server restart, and additional metrics.
Learning Objectives
By the end of the lab you will be able to:
- Enable NGINX Plus as an HTTP load balancer
- Enable NGINX Plus as an HTTPS load balancer
- TLS Best practices
Exercise 1: Inspect the NGINX configuration and rewrite logs
In the WORKSPACE folder found on the desktop, double click the NGINX-PLUS-1 workspace shortcut to open Visual Studio Code.
In the VSCode, open a terminal window by selecting View > Terminal. You will now be able to both run NGINX commands and edit NGINX Plus configuration files via the VSCode Console and terminal.

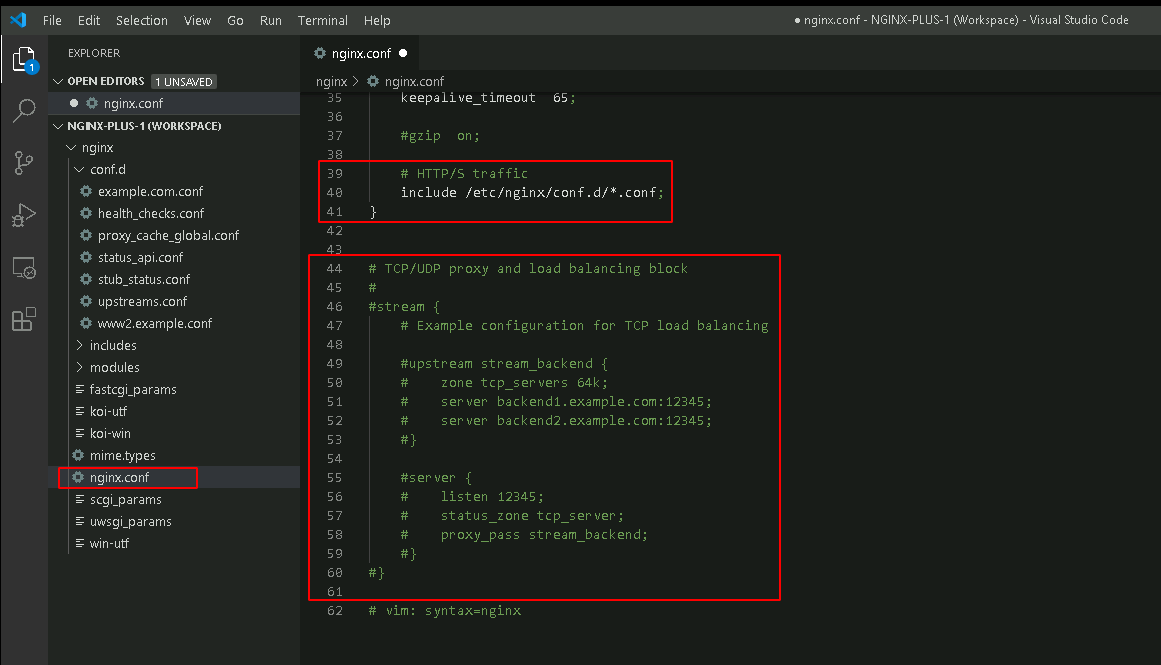
Now inspect /etc/nginx/nginx.conf.
Note
- The include /etc/nginx/conf.d/*.conf statement for inclusion of further NGINX Plus configuration files.
- The TCP/UDP proxy and load balancing block This is an example of using the “stream” context for TCP and UDP load balancing.
Select the etc/nginx/conf.d/example.com.conf file in the VSCode Explorer section.
Note
See the following entries in the server block:
- server_name www.example.com “”, that will match www.example.com
- location /, that will match all or any uri
- proxy_pass http://nginx_hello, to proxy request to the upstream group labeled nginx_hello (defined in upstreams.conf)
- rewrite_log on directive, and the “301 MOVED PERMANENTLY” line. This allows for logging all rewrites to the error log.
# www.example.com HTTP
server {
   listen 80 default_server;
   server_name www.example.com "";

   # Server specific logging
   access_log  /var/log/nginx/www.example.com.log  main_cache;
   error_log   /var/log/nginx/www.example.com_error.log notice;

   location / {

      proxy_pass http://nginx_hello;
   }

   # Enabling rewrite logging is bonus points
   # Enables logging of ngx_http_rewrite_module module directives
   # processing results into the error_log at the notice level
   rewrite_log on;

   # 301 MOVED PERMANENTLY
   location = /old-url { return 301 new-url; }

   # etc..

}

Open another Terminal in VSCode by selecting the split terminal icon on the right.

In the terminal shell, run the following commands:
On one terminal shell,
tailthe error logs for www.example.com:cd /var/log/nginx tail -f www.example.com_error.log
In the other terminal shell, run the following curl command:
curl -I -L http://localhost/old-url
Note
the entry in the www.example.com_error.log printed in the first terminal
Exercise 2: HTTP Load Balancing
In the VS code Explorer select the upstreams.conf file. Observe the following configuration entries to the upstream nginx_hello block:
# nginx-hello servers
upstream nginx_hello {

   least_time header; #header|last_byte

   zone nginx_hello 64k;
   server 10.1.1.5:80;
   server 10.1.1.6:80;
   server 10.1.1.7:80;

   # keep alive connections
   keepalive 32;

}
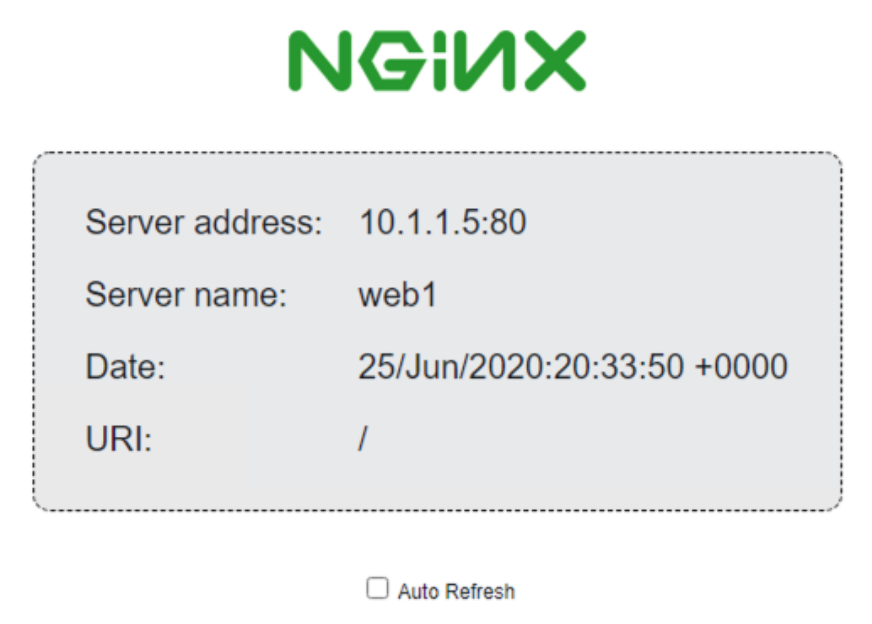
In a Web Browser, open http://www.example.com
You should see something similar to the web page below Reload the page several times and ensure that the Server Name: changes from web1, to web2 and web3 in a load balancing fashion.
Exercise 3: HTTPS Load Balancing
In VSCode Explorer open
www2.example.confand observe the following configuration entries:- server_name www2.example.com, to listen on all www2.example.com requests
- return 301 https://$host$request_uri, to perform a HTTP 301 redirect to HTTPS service
- ssl_certificate and ssl_certificate_key directives that specific the PEM files used for TLS
# www2.example.com HTTP Redirect to HTTPS
server {
   listen 80;
   server_name www2.example.com;
   return 301 https://$host$request_uri;
}
# www2.example.com HTTPS
server {
   listen 443 ssl default_server;
   server_name www2.example.com;

   # Minimum SSL Configuration
   ssl_certificate /etc/ssl/example.com.crt;
   ssl_certificate_key /etc/ssl/example.com.key;

   # etc...

}
In your lab browser, open https://www2.example.com
Attention
If you receive the Your connection is not private warning page, click Advanced then click the link Proceed to www2.example.com (unsafe).
You should see something similar to the web page below. Reload the page several times and ensure that the Server Name: changes from web1, to web2 and web3 in a load balancing fashion.