NGINX Modern Apps > Class 1 - Intro to NGINX Plus > Module 1: Introduction to NGINX Plus Concepts Source | Edit on
Cache Proxy
Introduction
One of the most popular use cases for NGINX Plus is acting as a content cache. The NGINX content cache sits in between a client and an “Origin server.” NGINX Plus is commonly deployed as a reverse proxy or load balancer in an application stack to both accelerate local origin servers and to create edge servers for content delivery networks (CDNs). Caching can reduce the load on your origin servers by a huge factor, depending on the cacheability of your content and the profile of user traffic.
References:
Learning Objectives
By the end of the lab you will be able to:
- Configure a basic Proxy Cache
- Visualize cache status on the live activity monitoring dashboard
- Add a custom HTTP header to upstream cache status
- Purge cached objects using the Cache Purge API
Exercise 1: Cache proxy for web content
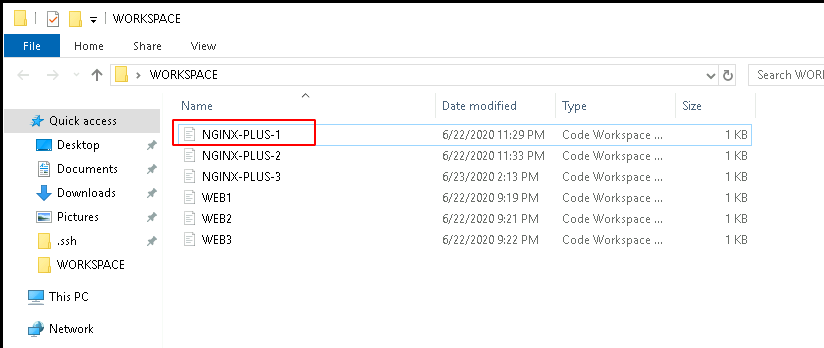
In the WORKSPACE folder found on the desktop, double click the NGINX-PLUS-1 workspace shortcut to open Visual Studio Code.
In VSCode, open a terminal window by selecting View > Terminal. You will now be able to both run NGINX commands and edit NGINX Plus configuration files via the VSCode Console and terminal.

Inspect /etc/nginx/conf.d/proxy_cache_global.conf and inspect the proxy caches configured on NGINX.
# /etc/nginx/conf.d/proxy_cache_global.conf

#
# Cache proxies
#
proxy_cache_path /var/cache/nginx
                levels=1:2
                keys_zone=image_cache:10m
                max_size=100m
                inactive=60m
                use_temp_path=off;

Now, inspect /etc/nginx/conf.d/example.com.conf and note the following:
- The location block matching image file extentions where we have enabled our cache proxy image_cache
- We have put all specific cache settings for image files in its own configuration file called image_cache.conf
# /etc/nginx/conf.d/example.com.conf

    # Cache Proxy example for images only
    # Match common Image files
    location ~* \.(?:jpg|jpeg|gif|png|ico|cur|gz|svg|svgz|mp4|ogg|ogv|webp|webm|htc)$ {

      ## Proxy cache settings
      include includes/proxy_cache/image_cache.conf;

      # etc

    }
Now, inspect /etc/nginx/includes/proxy_cache/image_cache.conf and note the following:
# /etc/nginx/includes/proxy_cache/image_cache.conf

#
# Required
#
proxy_cache image_cache;

#
# Extra
#
# Set caching time for different response codes
proxy_cache_valid 200 1h;
proxy_cache_valid 301 302 10m;
proxy_cache_valid 404 1m;
proxy_cache_valid any 10s;

# Override cache headers
proxy_ignore_headers X-Accel-Expires Expires Cache-Control Set-Cookie;
expires 365d;
add_header Cache-Control "public";

# Cache status
add_header X-Cache-Status $upstream_cache_status;

# Enable Cache Purge API here
proxy_cache_purge $purge_method;

# etc...
Lets see our cache proxy in action. In the Terminal window, request smile.png using curl. We will see that the inital request is served from the origin server and is not cached by NGINX.
curl -I http://www.example.com/smile.png
HTTP/1.1 200 OK
Server: nginx/1.19.0
Date: Wed, 24 Jun 2020 17:45:16 GMT
Content-Type: image/png
Content-Length: 107753
Connection: keep-alive
Last-Modified: Wed, 24 Jun 2020 15:46:05 GMT
ETag: "5ef3753d-1a4e9"
Expires: Thu, 24 Jun 2021 17:45:16 GMT
Cache-Control: max-age=31536000 # <-- Cache-Control Override for a year
X-Cache-Status: MISS # <-- Inital hit served from Origin server
Cache-Control: public # <-- Cache-Control Override to public
Accept-Ranges: bytes
Request smile.png again, using curl. We will see that the subsequent requests are served from the NGINX cache and not the origin server.
curl -I http://www.example.com/smile.png
HTTP/1.1 200 OK
Server: nginx/1.19.0
Date: Wed, 24 Jun 20V20 17:29:43 GMT
Content-Type: image/png
Content-Length: 107753
Connection: keep-alive
Last-Modified: Wed, 24 Jun 2020 15:46:05 GMT
ETag: "5ef3753d-1a4e9"
Expires: Thu, 24 Jun 2021 17:29:43 GMT
Cache-Control: max-age=31536000 # <-- Cache-Control Override for a year
X-Cache-Status: HIT # <-- Subsequent requests served from Proxy cache
Cache-Control: public # <-- Cache-Control Override to public
Accept-Ranges: bytes
Note
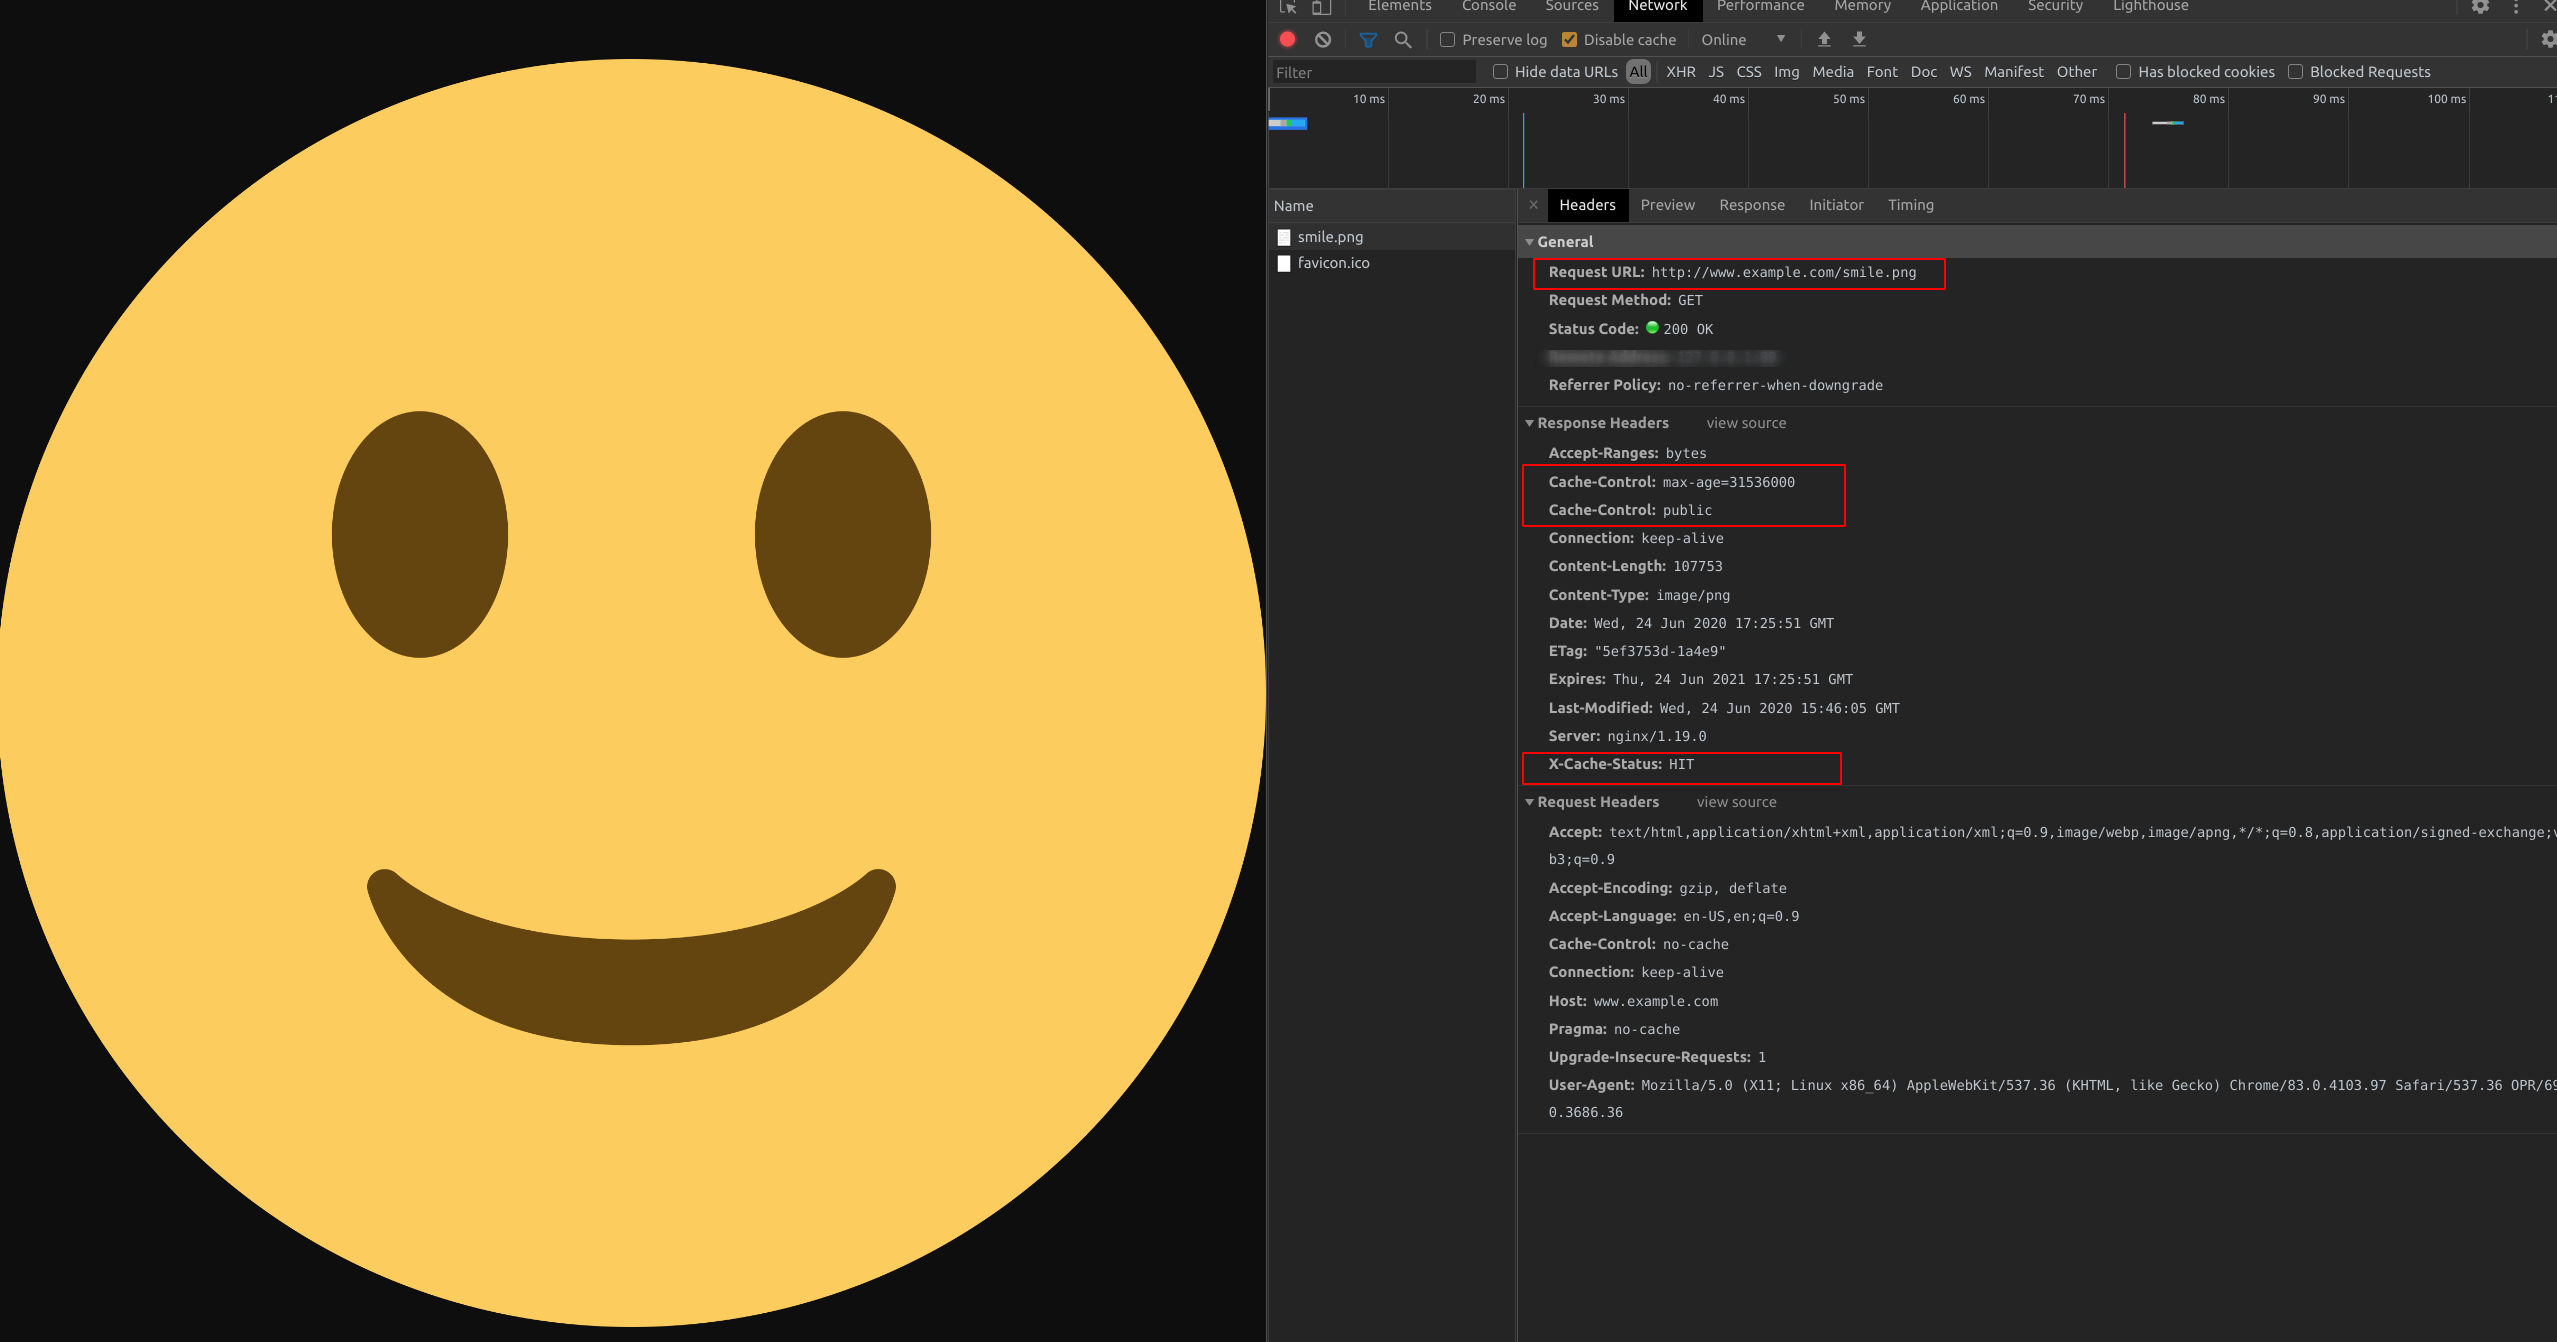
Alternatively, using Chrome developer tools, we can see those HTTP headers.
When you want to inspect web pages network activity:
- right-click on the webpage and select Inspect to open the Chrome DevTools
- Select the Network tab
- Check Disable Cache
- Reload the webpage > (the webpage and webpage content wil reload)
- Find the web content to inspect (e.g. smile.png)
- Look at the Headers tab for Reponse Headers and Request Headers
When inspecting the response headers in Chrome DevTools, you will see the HTTP headers we saw using curl
Exercise 2: Visualize cache status on the live activity monitoring dashboard
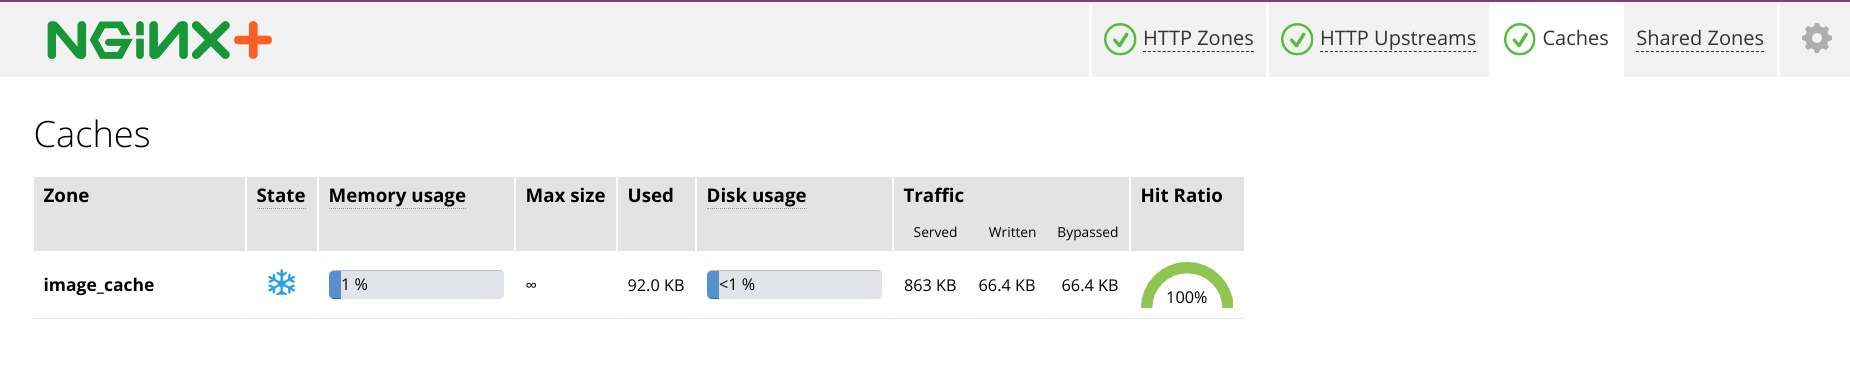
In a Web Browser, we can visualize cache status on the live activity monitoring dashboard: Navigate to NGINX Plus dashboard http://www.example.com:8080/dashboard.html#caches
The Cache Hit Ratio shown for the zone, image_cache, will increase as we repeatedly request cached content.
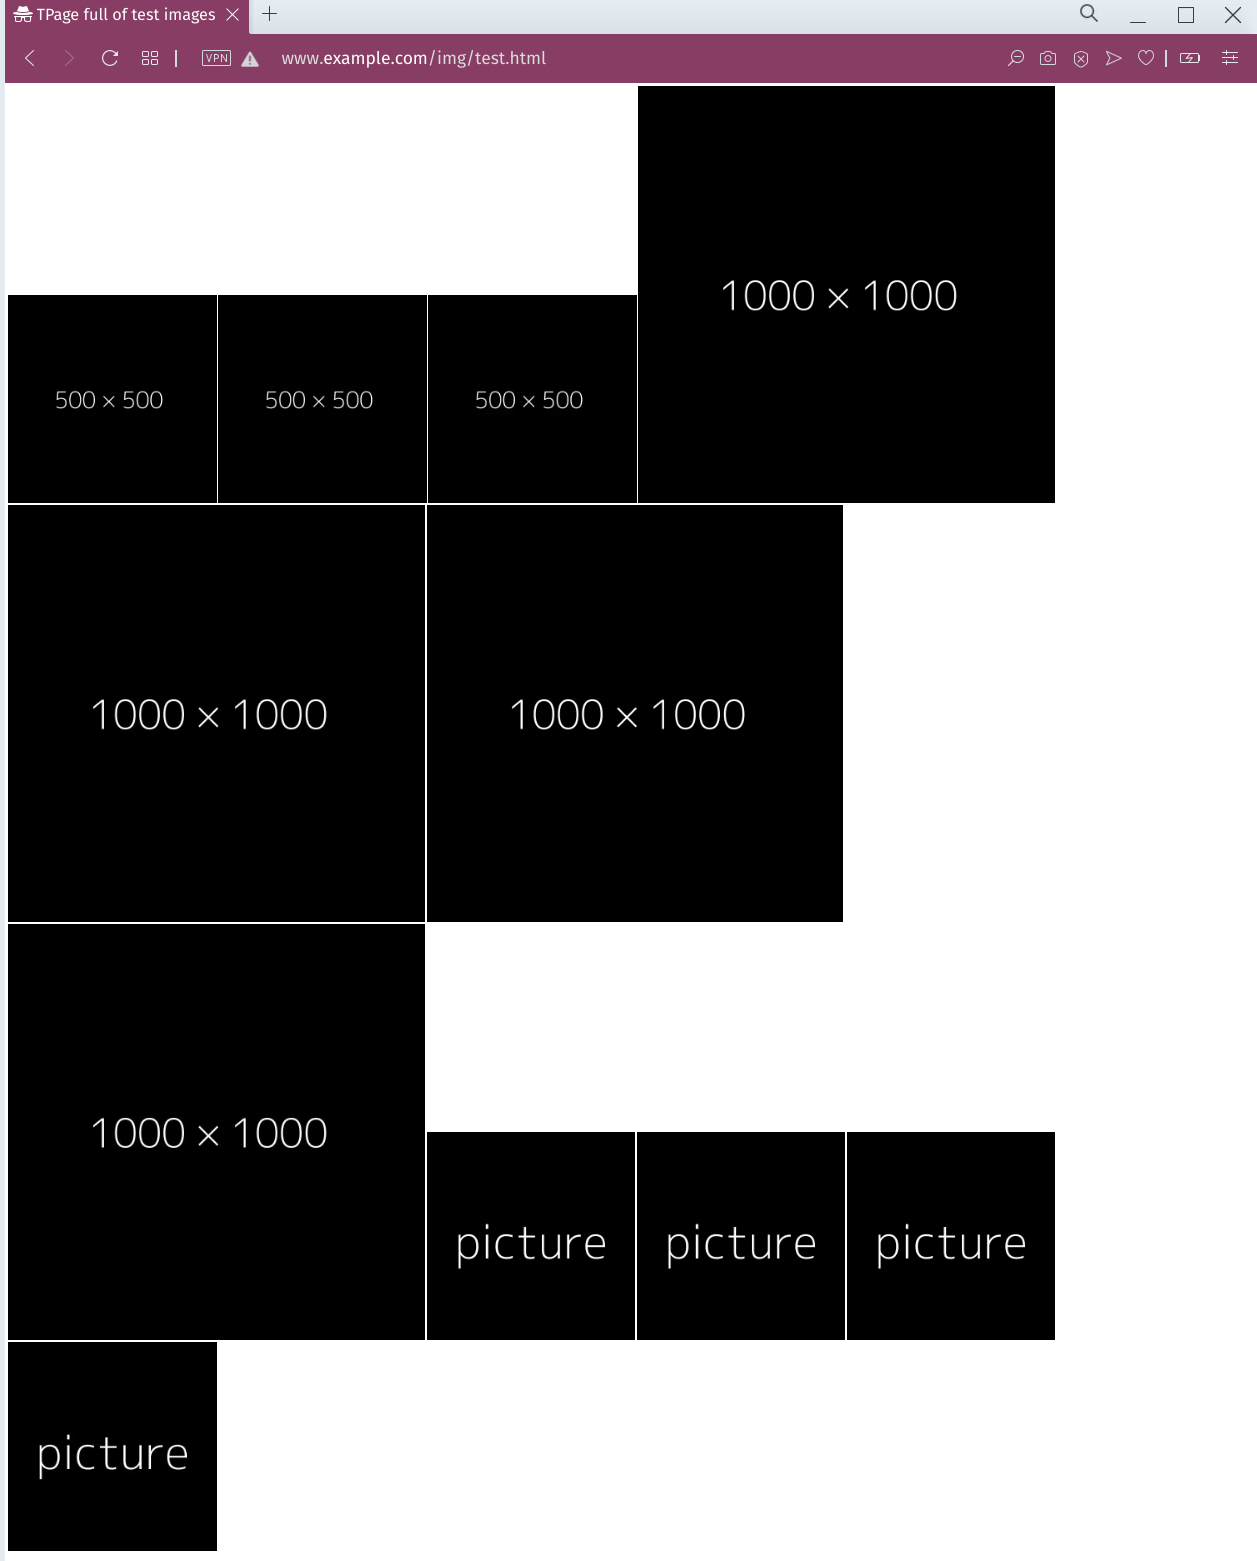
On another tab in your Web Browser, navigate to www.example.com/img/test.html to load images served from the NGINX cache. Hit the Web Browser’s refresh button multiple times to simulate multiple requests
Alternatively you can copy, paste the commands below to execute the curl commands in your terminal.
curl -s -I http://www.example.com/img/500x500.gif | grep "X-Cache-Status:"
curl -s -I http://www.example.com/img/500x500.jpg | grep "X-Cache-Status:"
curl -s -I http://www.example.com/img/500x500.webp | grep "X-Cache-Status:"
curl -s -I http://www.example.com/img/1000x1000.gif | grep "X-Cache-Status:"
curl -s -I http://www.example.com/img/1000x1000.jpg | grep "X-Cache-Status:"
curl -s -I http://www.example.com/img/1000x1000.png | grep "X-Cache-Status:"
curl -s -I http://www.example.com/img/1000x1000.webp | grep "X-Cache-Status:"
curl -s -I http://www.example.com/img/picture.gif | grep "X-Cache-Status:"
curl -s -I http://www.example.com/img/picture.jpg | grep "X-Cache-Status:"
curl -s -I http://www.example.com/img/picture.png | grep "X-Cache-Status:"
curl -s -I http://www.example.com/img/picture.webp | grep "X-Cache-Status:"
Note
You should receive output similar to the following:
X-Cache-Status: HIT
X-Cache-Status: HIT
X-Cache-Status: HIT
X-Cache-Status: HIT
X-Cache-Status: HIT
X-Cache-Status: HIT
X-Cache-Status: HIT
X-Cache-Status: HIT
X-Cache-Status: HIT
X-Cache-Status: HIT
X-Cache-Status: HIT
Go back to the previous tab where you opened the dashboard. If you closed it, navigate to http://www.example.com:8080/dashboard.html#caches. You will see the Cache Hit Ratio increase as most of your requests are now served from the NGINX cache, eliminating the the need for requests to your Origin Servers
Exercise 3: Restricting Access to the Purge Command and using Cache purge API
Inspect /etc/nginx/conf.d/proxy_cache_global.conf again, and find the geo and map blocks that identifies requests that use the HTTP PURGE method and deletes objects in the cache matching those URLs.
- The geo block sets a custom variable, $purge_allowed, to 1 only on select client IP addresses
- The map block sets another custom variable, $purge_method to the value of $purge_allowed (0 or 1)
In this example, NGINX checks if the PURGE method is used in a request, and, if so, analyzes the client IP address. If the IP address is whitelisted, then the $purge_method is set to $purge_allowed: 1, which permits purging. Alternatively, purge_allowed: 0 denies purging.
# /etc/nginx/conf.d/proxy_cache_global.conf

# Trimmed...

# Use geo to allow specific subnets to access purge API.
# $purge_allowed is set 1 when request is made from allowed-listed IP
   geo $purge_allowed {
      127.0.0.1     1; # allow from localhost
      172.19.0.0/24 1; # allow a private subnet
      10.1.1.9      1; # allow from selected IP i.e jumphost
      default       0; # deny from other
   }

# $request_method is set to the value of $purge_allowed (0 or 1)
# depending if the Client iP is on the allowed-list or deny-list

map $request_method $purge_method {
   PURGE $purge_allowed;
   default 0;
}
Inspect example.com.conf, and find in the main location block /. We have enabled cache purge calls here when $purge_method exists (1)
# /etc/nginx/conf.d/example.conf

location / {

    # Enable Cache Purge API here
    # Note: No cache rules, just allow purge on all other '/' URLs
    proxy_cache image_cache;
    proxy_cache_purge $purge_method;

    # etc..
}
Lets see our cache purge API in action. In the Terminal window, make a curl request to purge a single object, smile.png, using the HTTP method PURGE. Note that the expected reponse code for a successful purge is a HTTP 204
First make sure the test image is in the cache:
curl -I http://www.example.com/smile.png
Now, we can Purge that specific object from the cache
curl -I -X PURGE "http://www.example.com/smile.png"
Note
You should receive output similar to the following:
HTTP/1.1 204 No Content
Server: nginx/1.19.0
Date: Thu, 25 Jun 2020 17:09:26 GMT
Connection: keep-alive
Expires: Fri, 25 Jun 2021 17:09:26 GMT
Cache-Control: max-age=31536000
Cache-Control: public
We can also do a wild card purge using * in our URL. First, in a Web Browser, navigate to www.example.com/img/test.html and make sure our test images are in the cache
Lets confirm all the images are in the cache. Paste the below commands into your terminal.
curl -s -I http://www.example.com/img/500x500.gif | grep "X-Cache-Status:"
curl -s -I http://www.example.com/img/500x500.jpg | grep "X-Cache-Status:"
curl -s -I http://www.example.com/img/500x500.webp | grep "X-Cache-Status:"
curl -s -I http://www.example.com/img/1000x1000.gif | grep "X-Cache-Status:"
curl -s -I http://www.example.com/img/1000x1000.jpg | grep "X-Cache-Status:"
curl -s -I http://www.example.com/img/1000x1000.png | grep "X-Cache-Status:"
curl -s -I http://www.example.com/img/1000x1000.webp | grep "X-Cache-Status:"
curl -s -I http://www.example.com/img/picture.gif | grep "X-Cache-Status:"
curl -s -I http://www.example.com/img/picture.jpg | grep "X-Cache-Status:"
curl -s -I http://www.example.com/img/picture.png | grep "X-Cache-Status:"
curl -s -I http://www.example.com/img/picture.webp | grep "X-Cache-Status:"
Note
You should receive output similar to the following:
X-Cache-Status: HIT
X-Cache-Status: HIT
X-Cache-Status: HIT
X-Cache-Status: HIT
X-Cache-Status: HIT
X-Cache-Status: HIT
X-Cache-Status: HIT
X-Cache-Status: HIT
X-Cache-Status: HIT
X-Cache-Status: HIT
X-Cache-Status: HIT
Now we can do a wildcard cache purge
Wildcard Purge all objects in the URL path prefix e.g. /img/
curl -I -X PURGE "http://www.example.com/img/*"
Wildcard Purge everything i.e. all objects in the ‘/’ URL path prefix
curl -I -X PURGE "http://www.example.com/*"
Lets confirm wildcard cache purge has evicted all out cached images. The next request for these images should serve the image from the Origin Servers, as it is not available in the NGINX cache yet.
curl -s -I http://www.example.com/img/500x500.gif | grep "X-Cache-Status:"
curl -s -I http://www.example.com/img/500x500.jpg | grep "X-Cache-Status:"
curl -s -I http://www.example.com/img/500x500.webp | grep "X-Cache-Status:"
curl -s -I http://www.example.com/img/1000x1000.gif | grep "X-Cache-Status:"
curl -s -I http://www.example.com/img/1000x1000.jpg | grep "X-Cache-Status:"
curl -s -I http://www.example.com/img/1000x1000.png | grep "X-Cache-Status:"
curl -s -I http://www.example.com/img/1000x1000.webp | grep "X-Cache-Status:"
curl -s -I http://www.example.com/img/picture.gif | grep "X-Cache-Status:"
curl -s -I http://www.example.com/img/picture.jpg | grep "X-Cache-Status:"
curl -s -I http://www.example.com/img/picture.png | grep "X-Cache-Status:"
curl -s -I http://www.example.com/img/picture.webp | grep "X-Cache-Status:"
Note
You should receive output similar to the following:
X-Cache-Status: MISS
X-Cache-Status: MISS
X-Cache-Status: MISS
X-Cache-Status: MISS
X-Cache-Status: MISS
X-Cache-Status: MISS
X-Cache-Status: MISS
X-Cache-Status: MISS
X-Cache-Status: MISS
X-Cache-Status: MISS
X-Cache-Status: MISS