CIS Installation
Overview
CIS can be configured in multiple ways depending on the customer scenario. CIS can be deployed on Kubernetes and OpenShift platform. CIS installation may differ based on the resources (for example: ConfigMap, Ingress, Routes, and CRD) used by the customer to expose the Kubernetes services. CIS installation also depends on BIG-IP deployment (stand alone and HAproxy configuration) and Kubernetes cluster networking (Flannel/Calico).
Prerequisites
These are the mandatory requirements for deploying CIS:
OpenShift/Kubernetes Cluster must be up and running
AS3: 3.18+
BIG-IP partition to create OpenShift/Kubernetes cluster objects which can be created on the BIG-IP using the following tmos command:
create auth partition <cis_managed_partition>
You need a user with administrative access to this partition
If you need to pull the k8s-bigip-ctlr image from a private Doc.ker registry, store your Docker login credentials as a Secret.
Additionally, if you are deploying the CIS in Cluster Mode you need to have following prerequisites. For more information, see Deployment Options.
- You must have a fully active/licensed BIG-IP. SDN must be licensed. For more information, see BIG-IP VE license support for SDN services.
- VXLAN tunnel should be configured from OpenShift/Kubernetes Cluster to BIG-IP. For more information see, Creating VXLAN Tunnels.
Installing CIS Using Helm Charts
This is the simplest way to install the CIS on OpenShift/Kubernetes cluster. Helm is a package manager for Kubernetes. Helm is Kubernetes version of yum or apt. Helm deploys something called charts, which you can think of as a packaged application. It is a collection of all your versioned, pre-configured application resources which can be deployed as one unit.
Add BIG-IP credentials as K8S secrets.
For Kubernetes, use the following command:
kubectl create secret generic bigip-login -n kube-system --from-literal=username=admin --from-literal=password=<password>
For Openshift, use the following command:
oc create secret generic bigip-login -n kube-system --from-literal=username=admin --from-literal=password=<password>
Add the CIS chart repository in Helm using following command:
helm repo add f5-stable https://f5networks.github.io/charts/stable
Create values.yaml as shown below:
1 2 3 4 5 6 7 8 9 10 11 12 13 14 15 16 17 18 19 20 21 22 23 24 25 26 27 28 29 30 31 32 33 34 35 36 37 38 39 40 41 42 43 44 45 46 47 48 49 50 51 52 53 54 55 56 57 | # To create a secret using kubectl see
# http://clouddocs.f5.com/containers/latest/kubernetes/kctlr-secrets.html#secret-bigip-login
bigip_login_secret: bigip-login
rbac:
create: true
serviceAccount:
# Specifies whether a service account should be created
create: true
# The name of the service account to use.
# If not set and create is true, a name is generated using the fullname template
name: k8s-bigip-ctlr
# This namespace is where the Controller lives;
namespace: kube-system
args:
# See http://clouddocs.f5.com/products/connectors/k8s-bigip-ctlr/latest/#controller-configuration-parameters
# NOTE: helm has difficulty with values using `-`; `_` are used for naming
# and are replaced with `-` during rendering.
# REQUIRED Params
bigip_url: <ip_address-or-hostname>
bigip_partition: <name_of_partition>
# OPTIONAL PARAMS -- uncomment and provide values for those you wish to use.
# verify_interval:
# node-poll_interval:
# log_level:
# python_basedir: ~
# VXLAN
# openshift_sdn_name:
# flannel_name:
# KUBERNETES
# default_ingress_ip:
# kubeconfig:
# namespace:
# namespace_label:
# node_label_selector:
pool_member_type: nodeport
insecure: true
# resolve_ingress_names:
# running_in_cluster:
# use_node_internal:
# use_secrets:
# custom-resource-mode: true
# log-as3-response: true
image:
# Use the tag to target a specific version of the Controller
user: f5networks
repo: k8s-bigip-ctlr
pullPolicy: Always
resources: {}
# If you want to specify resources, uncomment the following
# lines, adjust them as necessary, and remove the curly braces after 'resources:'.
# limits:
# cpu: 100m
# memory: 128Mi
# requests:
# cpu: 100m
# memory: 128Mi
version: latest
|
Install the Helm chart using the following command:
helm install -f values.yaml <new-chart> f5-stable/f5-bigip-ctlr
Uninstalling Helm Chart
Run the following command to uninstall the chart.
helm uninstall <new-chart>
Installing CIS Manually
Add BIG-IP credentials as K8S secrets.
For Kubernetes, use the following command:
kubectl create secret generic bigip-login -n kube-system --from-literal=username=admin --from-literal=password=<password>
For Openshift, use the following command:
oc create secret generic bigip-login -n kube-system --from-literal=username=admin --from-literal=password=<password>
Create a service account for deploying CIS.
For Kubernetes, use the following command:
kubectl create serviceaccount bigip-ctlr -n kube-system
For Openshift, use the following command:
oc create serviceaccount bigip-ctlr -n kube-system
Create a Cluster Role and Cluster Role Binding on the Kubernetes/Openshift Cluster using the examples below.
For Kubernetes, use the following command:
kubectl apply -f k8s_rbac.yaml
The example below shows the broadest supported permission set. You can narrow the permissions down to specific resources, namespaces, etc. to suit your needs. See the Kubernetes RBAC documentation for more information.
k8s_rbac.yaml¶1 2 3 4 5 6 7 8 9 10 11 12 13 14 15 16 17 18 19 20 21 22 23 24 25 26 27 28 29 30 31 32 33 34 35 36
# for use in k8s clusters only kind: ClusterRole apiVersion: rbac.authorization.k8s.io/v1 metadata: name: bigip-ctlr-clusterrole rules: - apiGroups: ["", "extensions"] resources: ["nodes", "services", "endpoints", "namespaces", "ingresses", "pods"] verbs: ["get", "list", "watch"] - apiGroups: ["", "extensions"] resources: ["configmaps", "events", "ingresses/status"] verbs: ["get", "list", "watch", "update", "create", "patch"] - apiGroups: ["", "extensions"] resources: ["secrets"] resourceNames: ["<secret-containing-bigip-login>"] verbs: ["get", "list", "watch"] - apiGroups: ["cis.f5.com"] resources: ["virtualservers", "tlsprofiles", "transportservers", "externaldnss"] verbs: ["get", "list", "watch", "update"] --- kind: ClusterRoleBinding apiVersion: rbac.authorization.k8s.io/v1 metadata: name: bigip-ctlr-clusterrole-binding namespace: kube-system roleRef: apiGroup: rbac.authorization.k8s.io kind: ClusterRole name: bigip-ctlr-clusterrole subjects: - apiGroup: "" kind: ServiceAccount name: bigip-ctlr namespace: kube-system
For Openshift, use the following command:
oc apply -f openshift_rbac.yaml
openshift_rbac.yaml¶1 2 3 4 5 6 7 8 9 10 11 12 13 14 15 16 17 18 19 20 21 22 23 24 25 26 27 28 29 30 31 32 33 34 35 36 37 38 39 40 41 42 43 44 45 46 47 48 49 50 51 52 53 54 55 56 57 58 59 60 61 62 63 64
# For use in OpenShift clusters only apiVersion: v1 kind: ClusterRole metadata: annotations: authorization.openshift.io/system-only: "true" name: system:bigip-ctlr rules: - apiGroups: - "" - "extensions" resources: - nodes - services - endpoints - namespaces - ingresses - routes - secrets verbs: - get - list - watch - apiGroups: - "" - "extensions" resources: - configmaps - events - ingresses/status verbs: - get - list - watch - update - create - patch - apiGroups: - cis.f5.com resources: - virtualservers - tlsprofiles - transportservers - externaldnss verbs: - get - list - watch - update --- apiVersion: v1 kind: ClusterRoleBinding metadata: name: bigip-ctlr-role userNames: - system:serviceaccount:kube-system:bigip-ctlr subjects: - kind: ServiceAccount namespace: kube-system name: bigip-ctlr roleRef: name: system:bigip-ctlr
Important
You can substitute a Role and RoleBinding if your Controller does not need access to the entire Cluster.
For Openshift, you need to create the Cluster admin privileges for the BIG-IP service account user with the following command:
oc adm policy add-cluster-role-to-user cluster-admin -z bigip-ctlr -n kube-system
Create a CIS deployment using cis_deploy.yaml as shown below:
For Kubernetes, use the following command:
kubectl apply -f cis_deploy.yaml
For Openshift, use the following command:
oc apply -f cis_deploy.yaml
1 2 3 4 5 6 7 8 9 10 11 12 13 14 15 16 17 18 19 20 21 22 23 24 25 26 27 28 29 30 31 32 33 34 35 36 37 38 39 40 41 42 43 44 45 46 47 48 49 50 51 52 53 54 55 56 57 | apiVersion: apps/v1
kind: Deployment
metadata:
name: k8s-bigip-ctlr-deployment
namespace: kube-system
spec:
# DO NOT INCREASE REPLICA COUNT
replicas: 1
selector:
matchLabels:
app: k8s-bigip-ctlr-deployment
template:
metadata:
labels:
app: k8s-bigip-ctlr-deployment
spec:
# Name of the Service Account bound to a Cluster Role with the required
# permissions
containers:
- name: k8s-bigip-ctlr
image: "f5networks/k8s-bigip-ctlr"
env:
- name: BIGIP_USERNAME
valueFrom:
secretKeyRef:
# Replace with the name of the Secret containing your login
# credentials
name: bigip-login
key: username
- name: BIGIP_PASSWORD
valueFrom:
secretKeyRef:
# Replace with the name of the Secret containing your login
# credentials
name: bigip-login
key: password
command: ["/app/bin/k8s-bigip-ctlr"]
args: [
# See the k8s-bigip-ctlr documentation for information about
# all config options
# https://clouddocs.f5.com/products/connectors/k8s-bigip-ctlr/latest
"--bigip-username=$(BIGIP_USERNAME)",
"--bigip-password=$(BIGIP_PASSWORD)",
"--bigip-url=<ip_address-or-hostname>",
"--bigip-partition=<name_of_partition>",
"--pool-member-type=nodeport",
"--insecure",
# for secure communication provide the internal ca certificates using config-map with below option and remove insecure parameter
#"--trusted-certs-cfgmap=<namespace/configmap>",
]
serviceAccount: bigip-ctlr
serviceAccountName: bigip-ctlr
imagePullSecrets:
# Secret that gives access to a private docker registry
#- name: f5-docker-images
# Secret containing the BIG-IP system login credentials
- name: bigip-login
|
Installing CIS using Operators on OpenShift Cluster
An Operator is a method of packaging, deploying, and managing a Kubernetes application. A Kubernetes application is an application that is both deployed on Kubernetes and managed using the Kubernetes APIs and kubectl/oc tooling. You can think of Operators as the runtime that manages this type of application on Kubernetes. Conceptually, an Operator takes human operational knowledge and encodes it into software that is more easily packaged and shared with consumers.
The F5 BIG-IP CIS (k8s-bigip-ctlr) is a cloud-native connector that can use either Kubernetes or OpenShift as a BIG-IP orchestration platform. F5 BIG-IP CIS Operator is a Service Operator which installs F5 BIG-IP CIS on OpenShift platforms 4.x.
Before you install CIS using Operators on OpenShift, you must create BIG-IP login credentials to use with Operator Helm Charts:
oc create secret generic <SECRET-NAME> -n kube-system
--from-literal=username=<USERNAME> --from-literal=password=<PASSWORD>
Access the OCP web console: From CLI, login as admin using CRC given credentials. In the example below, the username is
kubeadminand the password isdb9Dr-J2csc-8oP78-9sbmf.$ eval $(crc oc-env) $ oc login -u kubeadmin -p db9Dr-J2csc-8oP78-9sbmf https://api.crc.testing:6443
Within the OCP web console, in the left Menu bar, click Operator Hub and search for “f5” to see the Certified F5 BIG-IP CIS Operator.
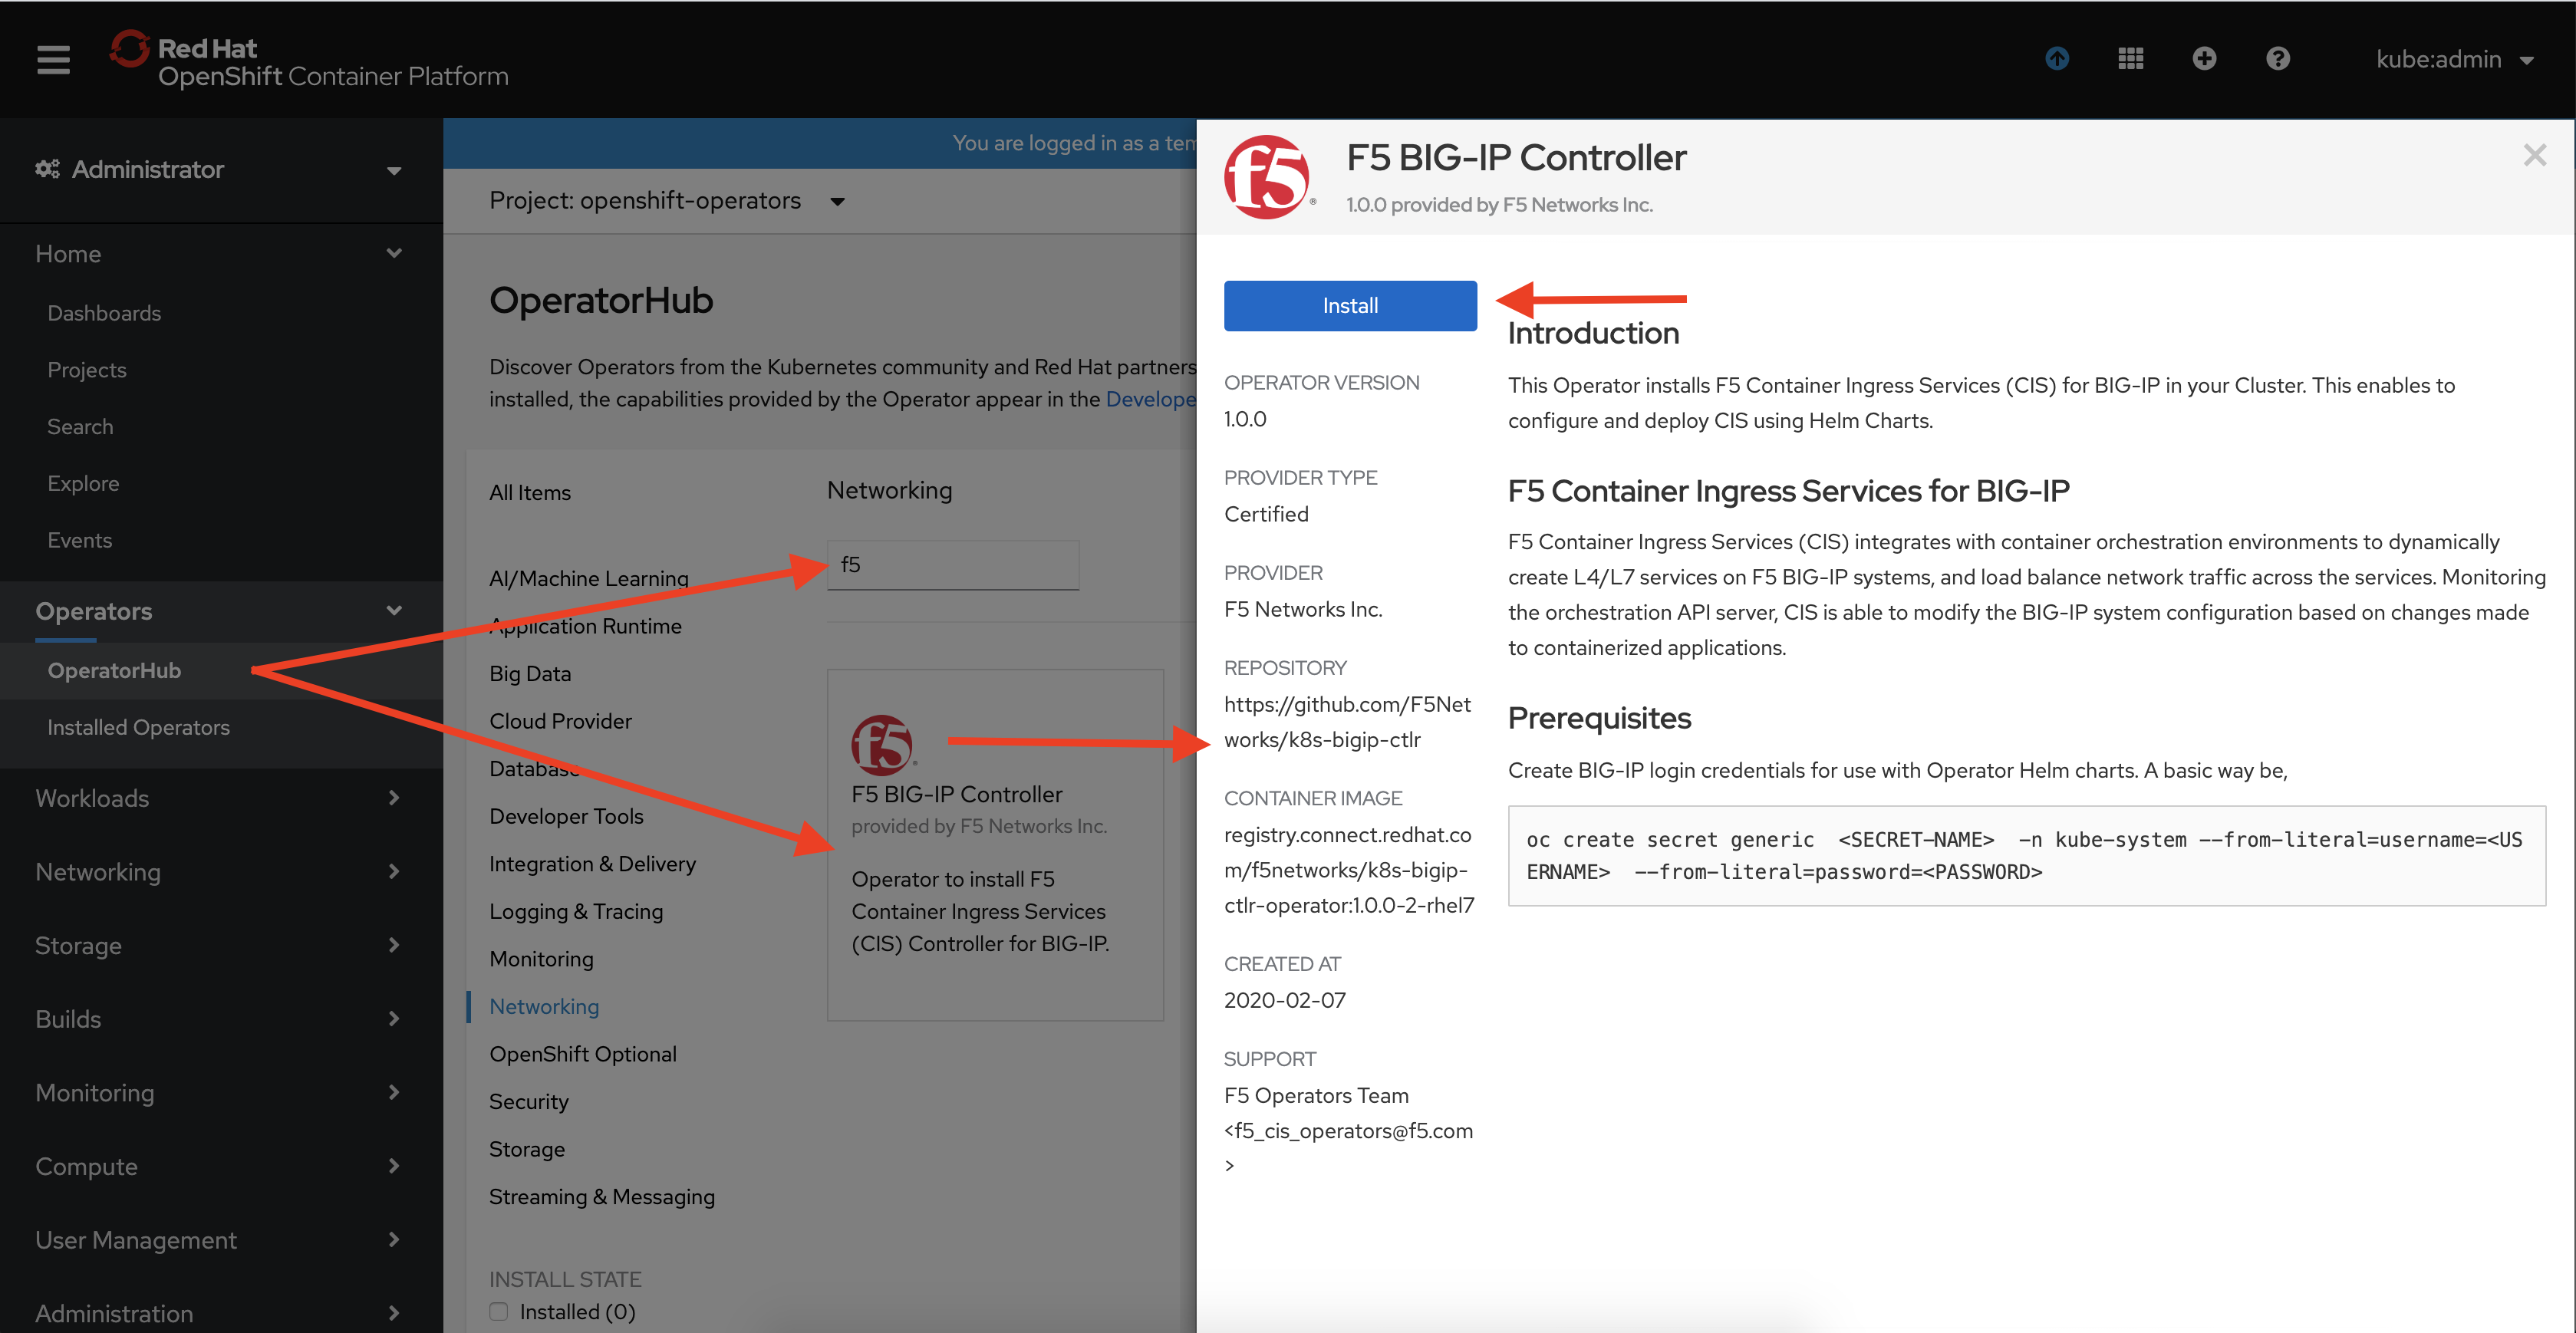
Click Install to go through the guided installation process.
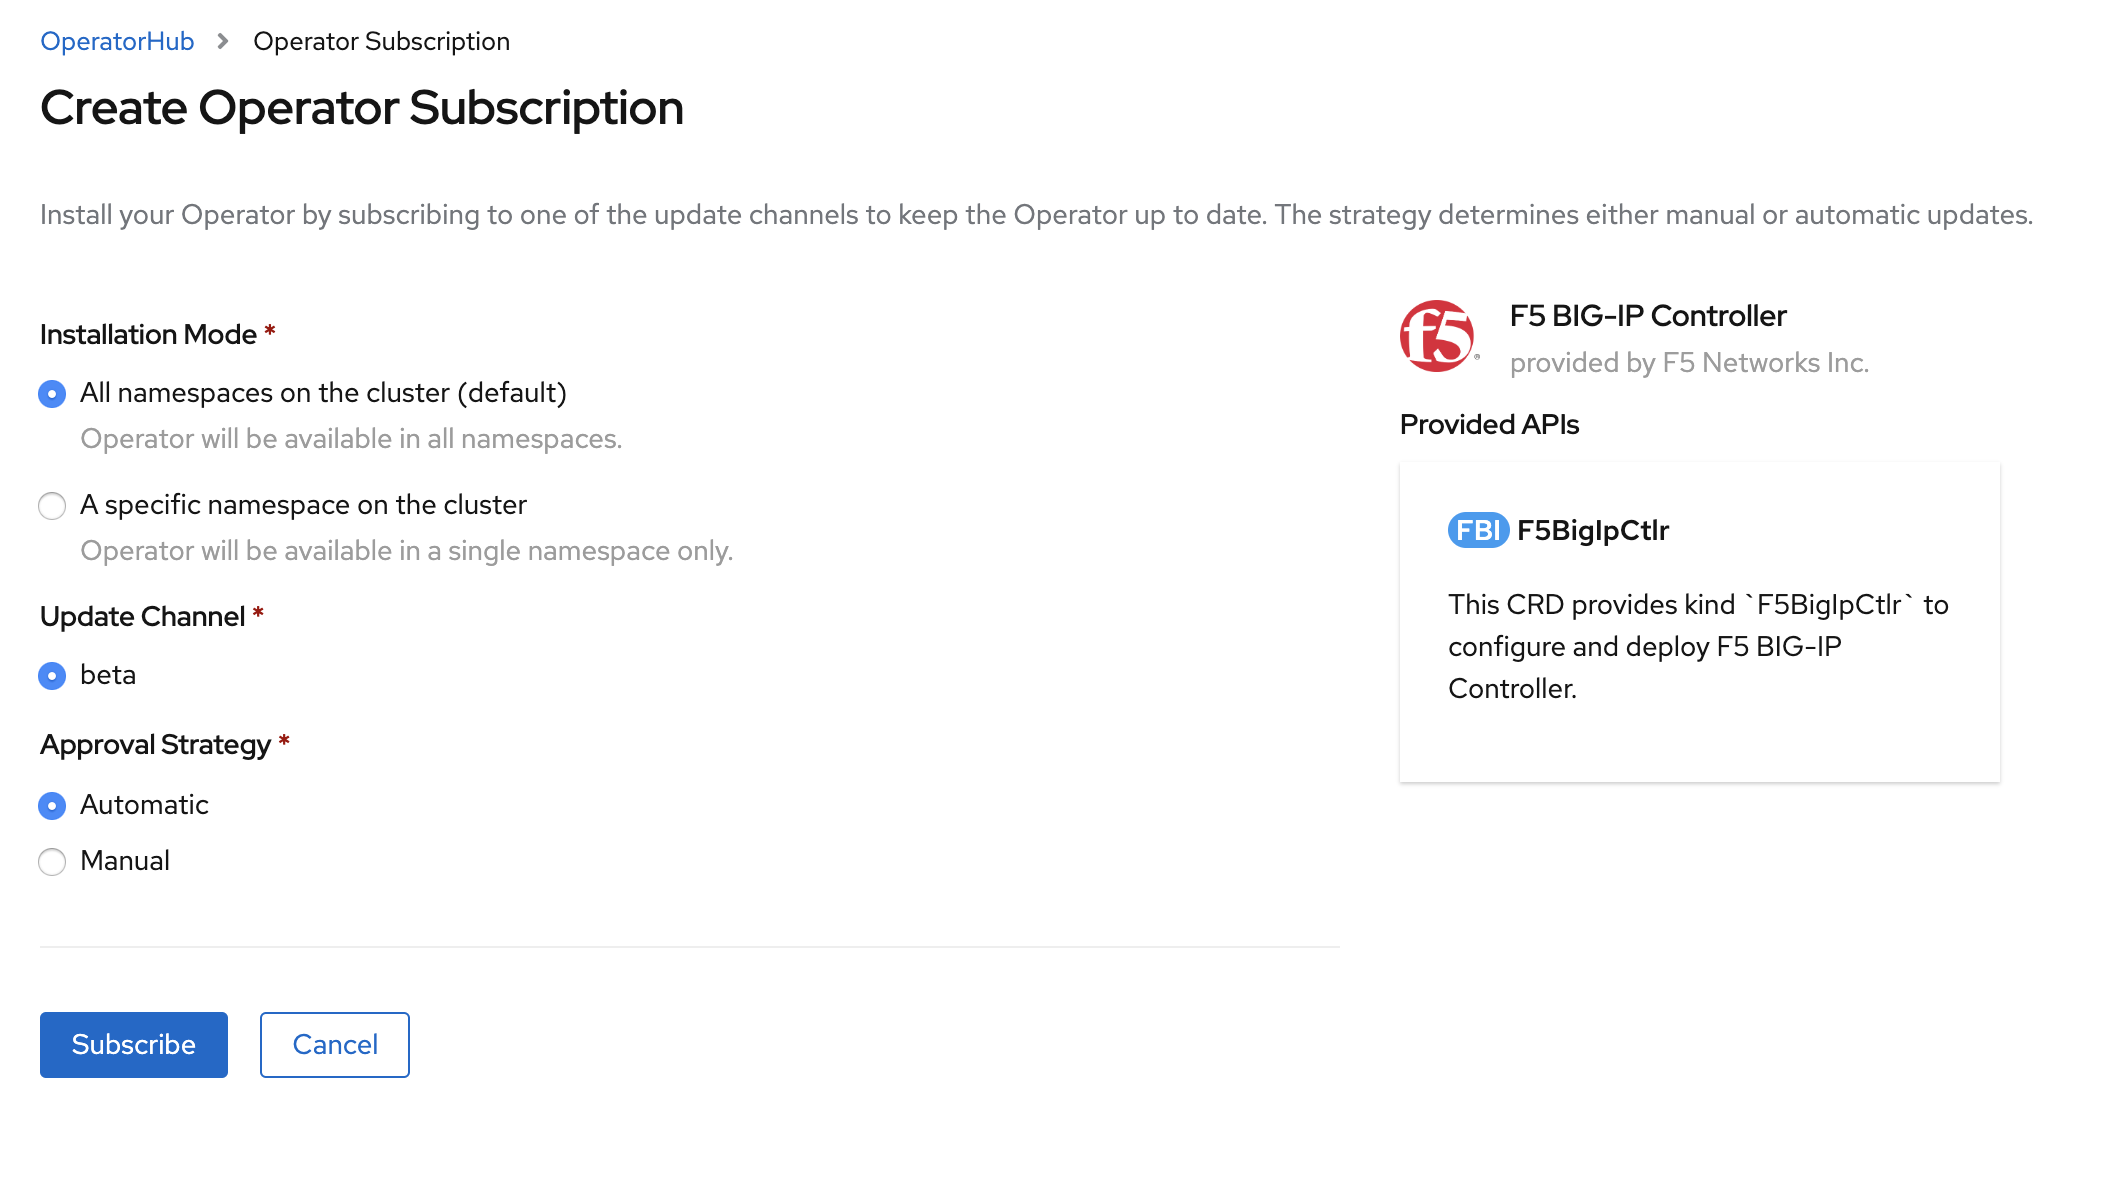
When Operator is Subscribed, Operator is installed based on approval strategy. The default approval strategy is Automatic.
- Manual: Requires administrator approval to install new updates.
- Automatic: When a new release is available, updated automatic.
Creating VXLAN Tunnels
Creating VXLAN Tunnels on Kubernetes Cluster
Login to BIG-IP and create a VXLAN tunnel profile.
tmsh create auth partition kubernetes
Create a VXLAN tunnel.
tmsh create net tunnels tunnel k8s-tunnel { app-service none key 1 local-address 10.1.1.4 profile k8s-vxlan }
Create the VXLAN tunnel self-IP.
tmsh create net self k8s-vxlan-selfip { address 10.244.20.1/16 vlan k8s-tunnel allow-service all }
Save the configuration.
tmsh save sys config
Before deploying CIS in ClusterIP mode, you need to configure BIG-IP as a node in the Kubernetes cluster. To do so you will need to modify
bigip-node.yamlwith the MAC address auto-created from the previous steps. From the jumpbox terminal, run the following command atbigip1. Copy the displayed MAC Address.tmsh show net tunnels tunnel k8s-tunnel all-properties
Update the MAC address obtained in the previous step to following yaml file:
bigip-node.yaml¶1 2 3 4 5 6 7 8 9 10 11 12 13 14
apiVersion: v1 kind: Node metadata: name: bigip1 annotations: #Replace IP with Self-IP for your deployment flannel.alpha.coreos.com/public-ip: "10.1.1.4" #Replace MAC with your BIG-IP Flannel VXLAN Tunnel MAC flannel.alpha.coreos.com/backend-data: '{"VtepMAC":"2c:c2:60:23:0c:58"}' flannel.alpha.coreos.com/backend-type: "vxlan" flannel.alpha.coreos.com/kube-subnet-manager: "true" spec: #Replace Subnet with your BIG-IP Flannel Subnet podCIDR: "10.244.20.0/24"
Create the BIG-IP node:
kubectl create -f bigip-node.yaml
Verify “bigip1” node is created:
kubectl get nodes
Creating VXLAN Tunnels on Openshift Cluster
Log in to the BIG-IP and create net tunnels vxlan vxlan-mp flooding-type multipoint on BIG-IP.
create net tunnels vxlan vxlan-mp flooding-type multipoint
create net tunnels tunnel openshift_vxlan key 0 profile vxlan-mp local-address 192.168.200.83
Add the BIG-IP device to the OpenShift overlay network.
create net self 10.131.0.83/14 allow-service all vlan openshift_vxlan
Create a new HostSubnet for BIG-IP on the OpenShift/Kubernetes cluster. This will provide the subnet for creating the tunnel self-IP.
oc create -f openshift-hostsubnet.yaml
1 2 3 4 5 6 7 8 9 10 11 12 13 14 | apiVersion: v1
kind: HostSubnet
metadata:
name: openshfit-f5-node
annotations:
pod.network.openshift.io/fixed-vnid-host: "0"
pod.network.openshift.io/assign-subnet: "true"
# provide a name for the node that will serve as BIG-IP's entry into the cluster
host: openshfit-f5-node
# The hostIP address will be the BIG-IP interface address routable to the
# OpenShift Origin nodes.
# This address is the BIG-IP VTEP in the SDN's VXLAN.
hostIP: 10.1.1.4
subnet: "10.131.0.0/23"
|
