Automation, Orchestration & DevOps > Class 3: Deploy apps with AS3, FAST, and ACC Source | Edit on
Lab 2 - Using AS3 to Create a HTTPS and HTTP applications
In this portion of the lab, you will be creating an application via AS3 using the extension for VS CODE.
The focus in this lab is creating two applications - one that is doing SSL offload and one that is just HTTP. You will configure one virtual server to terminate the SSL connection and send the connection as HTTP to the application server. Then you will add to that a HTTP virtual server using the same backend pool.
HTTPS application with SSL Offload
In this section we will start by using AS3 to build out a basic HTTPS application with SSL Offload.
Click
New fileunder theStartoption forVS CODE: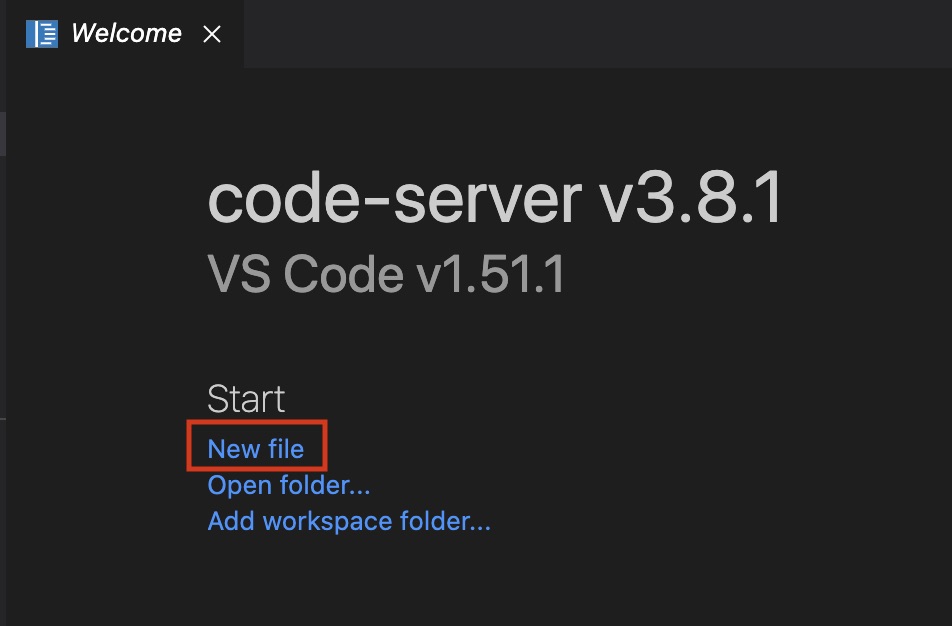
Copy and paste the AS3 declaration below into the new file window.
{
   "class": "AS3",
   "action": "deploy",
   "persist": true,
   "declaration": {
     "class": "ADC",
     "schemaVersion": "3.0.0",
     "id": "123abc",
     "label": "HTTPS Example",
     "remark": "HTTPS with round-robin pool",

     "Tenant_Acme": {
       "class": "Tenant",

       "acme_https_app": {
         "class": "Application",

         "acme_https_vs": {
           "class": "Service_HTTPS",
           "virtualAddresses": [
             "10.1.20.12"
           ],
           "pool": "acme_http_pool",
           "serverTLS": "acmeTLS"
         },

         "acme_http_pool": {
           "class": "Pool",
           "loadBalancingMode": "round-robin",
           "monitors": [
            "http"
           ],

           "members": [{
             "servicePort": 8080,
             "shareNodes": true,
             "serverAddresses": [
               "10.1.10.5"
             ]
           }]
         },

         "acmeTLS": {
           "class": "TLS_Server",
           "certificates": [{
             "certificate": "acmeCert"
           }]
         },

         "acmeCert": {
           "class": "Certificate",
           "remark": "In practice we recommend using a passphrase",
 "certificate": "-----BEGIN CERTIFICATE-----\nMIIDSDCCAjCgAwIBAgIEFPdzHjANBgkqhkiG9w0BAQsFADBmMQswCQYDVQQGEwJVUzETMBEGA1UECBMKV2FzaGluZ3RvbjEQMA4GA1UEBxMHU2VhdHRsZTESMBAGA1UEAxMJQWNtZSBDb3JwMRwwGgYJKoZIhvcNAQkBFg10ZXN0QGFjbWUuY29tMB4XDTIxMDIyMzE1MjYyMloXDTIyMDIyMzE1MjYyMlowZjELMAkGA1UEBhMCVVMxEzARBgNVBAgTCldhc2hpbmd0b24xEDAOBgNVBAcTB1NlYXR0bGUxEjAQBgNVBAMTCUFjbWUgQ29ycDEcMBoGCSqGSIb3DQEJARYNdGVzdEBhY21lLmNvbTCCASIwDQYJKoZIhvcNAQEBBQADggEPADCCAQoCggEBAMlj0IAPjyzSJzJZXzPPKnWWu6ErkfUhujBk1nQdp++K8YrvocLY5rbY/DZ9ipEz1TxIyZAGl9aBPoLGU4r2XNVMJZA5Zo/QMedEZFal14eOHn3JMMvCDjGrFaWR+cZ2TR9D9Jdxytq9QKUS/JdCKYz/Qxbx2Q4o0nZDqmPAipw//E24y4lLya/Qrwb537QoCGnxgMoUVNi9ruYrnGtS4uPth3+jYmbbivb8G1B8x93Peeu1QHBlOaXr6DndSwKcULIUt2RxcyYcjzeVQ5yrcrVHwvF8eb03Llm10zX0UI68vdjQuMpeUZ7K0RlmO59v0u6XdeoK1s82SJ8ufscqIrcCAwEAATANBgkqhkiG9w0BAQsFAAOCAQEAN78Mxd1ZE9nUNefCxmqdJYbQUzO6baHgqWxNLRuIu/EtJsjBAuuMmpWOd+pWBQS42aDOrUc33zpcNJcquBvtKt6QaKnSzJwCyfk88ACNrb7yFyeKB3YhVALfLkJMal032pvV8U0n4FBlqRTUDrSY2MHaJ/Uar7iJ7t3RBoZ9LbTyikW188hW6h9s238oLOW89FIJluov18uyLJaj8sBP5tInZmnO3EEywzNop0vpqMe0XmTo9Dyq9SFRdcDnptSdoNLLWTXmpXacj/u/f9r7zQqneFbj2b0KqetYLb7Xs5BVi0DfC81FYOEwqiq+kYvEkBubNCP1C8fXzB/65kFXtg==\n-----END CERTIFICATE-----",
 "privateKey": "-----BEGIN PRIVATE KEY-----\nMIIEvAIBADANBgkqhkiG9w0BAQEFAASCBKYwggSiAgEAAoIBAQDJY9CAD48s0icyWV8zzyp1lruhK5H1IbowZNZ0HafvivGK76HC2Oa22Pw2fYqRM9U8SMmQBpfWgT6CxlOK9lzVTCWQOWaP0DHnRGRWpdeHjh59yTDLwg4xqxWlkfnGdk0fQ/SXccravUClEvyXQimM/0MW8dkOKNJ2Q6pjwIqcP/xNuMuJS8mv0K8G+d+0KAhp8YDKFFTYva7mK5xrUuLj7Yd/o2Jm24r2/BtQfMfdz3nrtUBwZTml6+g53UsCnFCyFLdkcXMmHI83lUOcq3K1R8LxfHm9Ny5ZtdM19FCOvL3Y0LjKXlGeytEZZjufb9Lul3XqCtbPNkifLn7HKiK3AgMBAAECggEAHrvaWmjFd1gc/jyQYFY5yxc1TCvbivbaNL920OKjudVQ9lyKqbMzRm1H1EMFbhJkdN5A0HeJHYW81fVRU5A0a6LCysdPxRvHOd2AmI6XnUrNkXGuPjI/u0m6NHnaDfUI4QAcaC5IAGjIYEjM/oJs1+UuxmYjM1t8furlqnJ8VMrTtfumTSzEoq3OSwK6JlxAtRwBkrYr+pZCI82Ao/ouZcktyO+LjLMCYd/7HpskA0G3Pp/SIjhfbNHsTm4Kvzar0XdxBVMu4M0a6xXvX+I/L8UFa7EuDumwQVdttMnG33+xbCX3yIrndxVk0rOCryYqeItOxSG+aZJ6ZN+r0crgvQKBgQDlolxVh3NQCqa9XS+TCXSGfcZENolAIEu+n6CkZKMqQrmz7KPrblHgMbc54x0jH/GhtkY4wMjV1stqqHWTBV9UqVcb+OXPt8Zwa0JvXEM3b0i9GTp2hQfKGbWTEz7PIUZbZPGrIijHrc4wX2rgq7K5GeUfteh7bZij0cQ5ubFXBQKBgQDgg0SzUIN87D7yRPqvVnd7l0yii740UztWDp/YDpml0T6WfG0rlXqnIEebUS+BxGNDt3ksG7dTfJIE34C/SlYBAlJ5hiJ4rErW7pm+ibLa96qnLAGEQpiwnYmV49Uc2mxxRuBFWqKal4tuY6MxNqaf2NLCT4JKTPMffRR0Iz/HiwKBgFN659hMCpaxmJZE1zO7/zmZZceMj+7ZDtA41byNvWdypHINeDXxgCBh0ntf3krTpRMl4XdmVlyu3npizYNqM5LikQFhRaJy69gYlilHwEPZ1/auwjst93v4RrM2DuJb9WjqVJTjMTIONGQPfBo7MRjrmgkiJ2cfm5sKeiyGHjtFAoGAOvwB1qJ2iSGAQCJDQkGTTpMnfST9qb2cPzXEZP0g/OGGcf7qp6K0AKiIZ5PiyVMRST8wxJfbiEGYE1Os/ZTIF6fGh0roT4/kcadqGRcQOFsNKLJ1C4x7lRsuhITA/r2b8/7M+SugwMDDzxK6UzmqeSB77rT45BBnZ4RzFTgVj5UCgYBasm6nh2v8PzE8aXzYM6YWsM5R0l3Xr2YvycLc6HfI5Sen+yqIyE9qDNFFk8qa3RZVKl83ZTk7wtAL8nMupmdVodNrx4pUgFW4U4WPPSvVXRZRTZdLHwGKw5Fa3u48qFxdYqpZmnBMB2RHEKcRB8T1+RkcByghNnCBwJMJSRHIWA==\n-----END PRIVATE KEY-----"
         }
       }
     }
   }
}
In the editing window, right click and select
Post as AS3 declaration.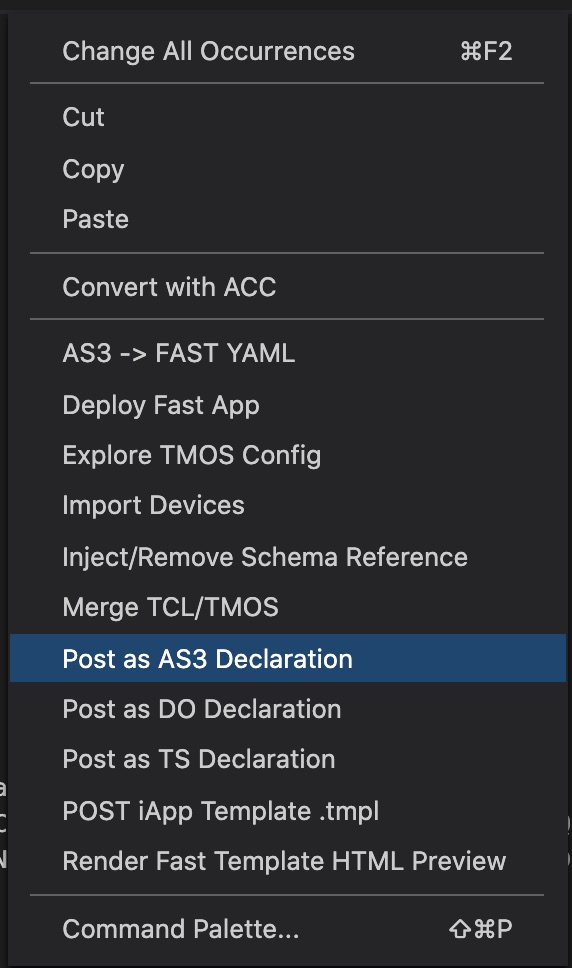
You will see a status window of the
AS3declaration being sent to theBIG-IP.
Once the declaration has been processed by the BIG-IP, a status window will appear. You will see a
"code": 200,and"message": "success",. If you do not see that, ask lab assistant for help.Login to the BIG-IP to confirm our changes. Go back to UDF deployment screen, and choose the component
bigip1. Then choose theAccess MethodofTMUI. This will allow you to login to theBIG-IPGUI.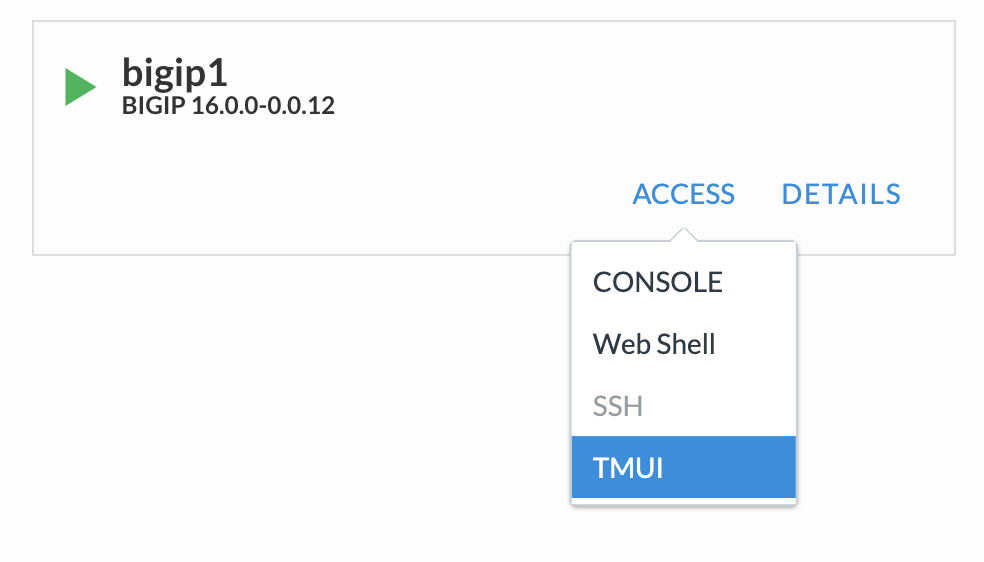
Login with the following credentials: username = admin , password = admin.
Expand
Local Trafficand thenVirtual Servers. In the Partition pull-down menu, selectTenant_Acme.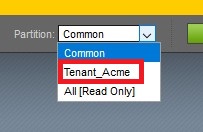
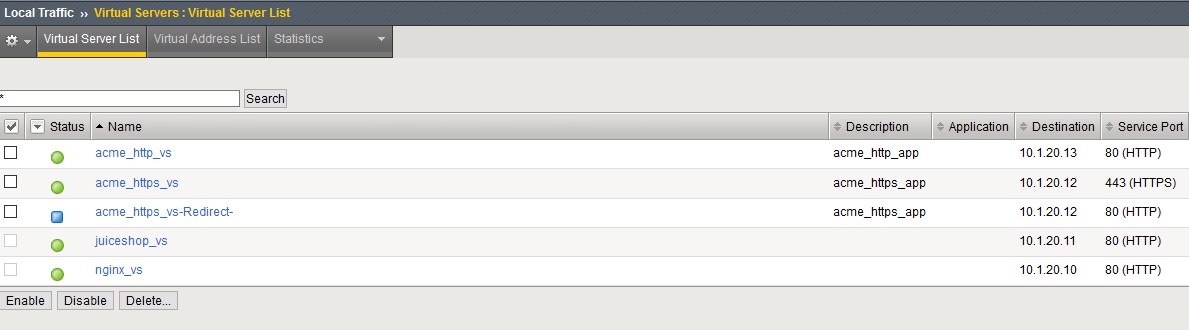
You should see the following virtal servers:
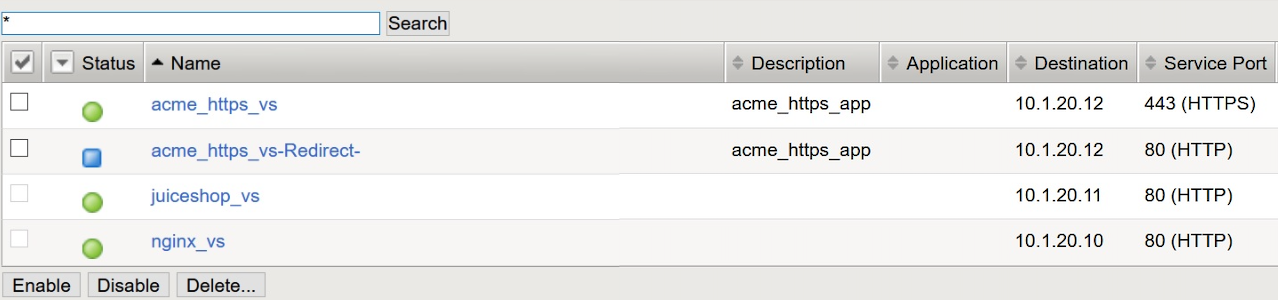
acme_https_vsis the name of the virtual server. You can see thatAS3automatically created the HTTP-to-HTTPS redirect virtual server also. That was done because the declaration specified"class": "Service_HTTPS". When usingAS3, it will take care of some things for you.In order to see all the options for the
AS3declaration, go page to theVS CODEwindow, and look for the list ofTenantsunder theAS3section of the left window pane: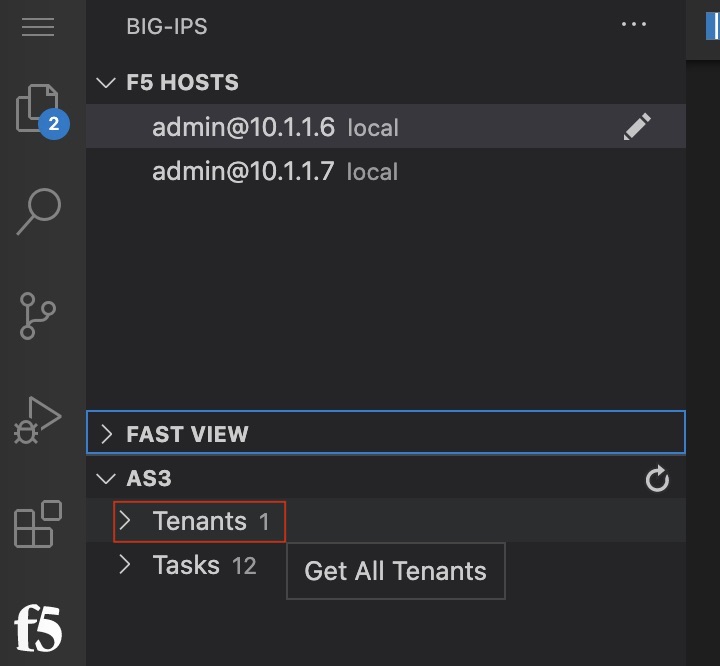
Click on the down arrow next to
Tenants, and you will see theTenant_Acmein the list.Right click on the
Tenant_Acme, and right click. Choose the optionExpanded Tenant.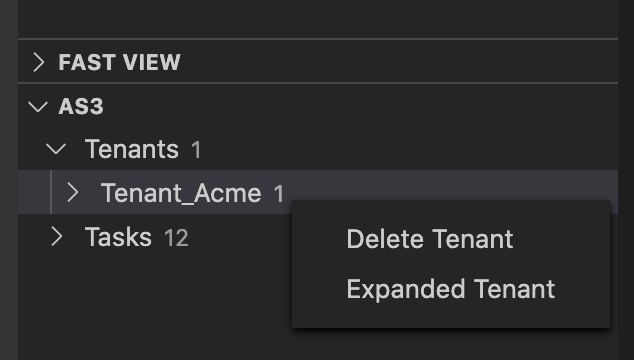
In the results of query, you will see the full AS3 declaration with all the options. Scroll down the data and look at the options. As you can see, there are many aspects of the configuration that
AS3took care of for you. You always have the option to specify all the options, but that is not required.
HTTP application
In this section of the lab, it is assumed that you have already created the first exercise, creating at HTTPS virtual server with SSL offload. Please complete that section before continuing.
You should already be connected to the
VS CODEwindow. If not, please go toExercise 1.Go to the AS3 HTTPS declaration that you sent to
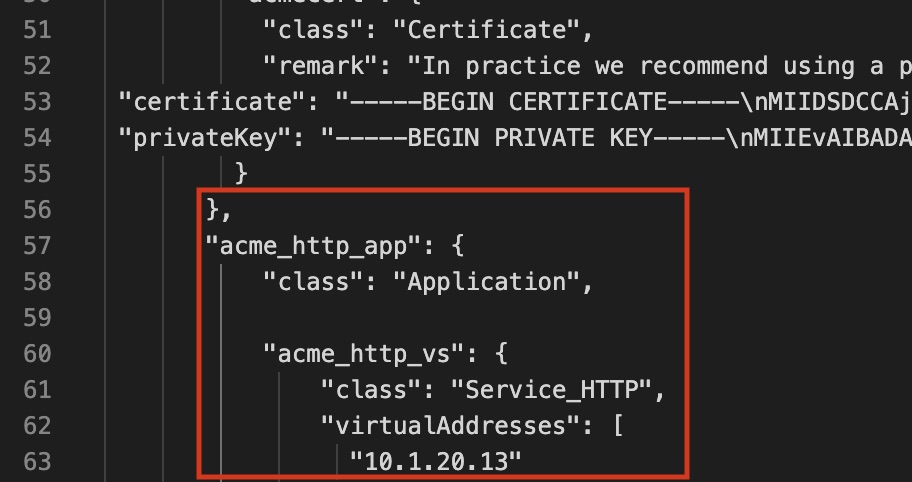
BIG-IP01in the last exercise. You are going to modify that declaration to add a second application to the tenant. Keep in mind thatAS3is a declarative interface - what you send in the declaration is what will be done on theBIG-IP. If you need multiple applications, then you must send multiple applications in the declaration. If you only send one application declaration, it will remove all of the others.Add the following declaration to the
HTTPSdeclaration. You must make sure the declaration is syntacially correct, so follow the instructions exactly. You will add this declaration starting at line 57 - you must also add a,on line 56 to add the second application."acme_http_app": { "class": "Application", "acme_http_vs": { "class": "Service_HTTP", "virtualAddresses": [ "10.1.20.13" ], "pool": "acme_http_pool" }, "acme_http_pool": { "class": "Pool", "loadBalancingMode": "round-robin", "monitors": [ "http" ], "members": [{ "servicePort": 8080, "shareNodes": true, "serverAddresses": [ "10.1.10.5" ] }] } }
In the editing window, right click and select
Post as AS3 declaration.
You will see a status window of the
AS3declaration being sent to theBIG-IP.
Once the declaration has been processed by the BIG-IP, a status window will appear. You will see a
"code": 200,and"message": "success",. If you do not see that, check the syntax of yourAS3declaration. If you need help, ask a lab attendant.If you have problems with the syntax, here is the full declaration for both
HTTPSandHTTP:{ "class": "AS3", "action": "deploy", "persist": true, "declaration": { "class": "ADC", "schemaVersion": "3.0.0", "id": "123abc", "label": "HTTPS Example", "remark": "HTTPS with round-robin pool", "Tenant_Acme": { "class": "Tenant", "acme_https_app": { "class": "Application", "acme_https_vs": { "class": "Service_HTTPS", "virtualAddresses": [ "10.1.20.12" ], "pool": "acme_http_pool", "serverTLS": "acmeTLS" }, "acme_http_pool": { "class": "Pool", "loadBalancingMode": "round-robin", "monitors": [ "http" ], "members": [{ "servicePort": 8080, "shareNodes": true, "serverAddresses": [ "10.1.10.5" ] }] }, "acmeTLS": { "class": "TLS_Server", "certificates": [{ "certificate": "acmeCert" }] }, "acmeCert": { "class": "Certificate", "remark": "In practice we recommend using a passphrase", "certificate": "-----BEGIN CERTIFICATE-----\nMIIDSDCCAjCgAwIBAgIEFPdzHjANBgkqhkiG9w0BAQsFADBmMQswCQYDVQQGEwJVUzETMBEGA1UECBMKV2FzaGluZ3RvbjEQMA4GA1UEBxMHU2VhdHRsZTESMBAGA1UEAxMJQWNtZSBDb3JwMRwwGgYJKoZIhvcNAQkBFg10ZXN0QGFjbWUuY29tMB4XDTIxMDIyMzE1MjYyMloXDTIyMDIyMzE1MjYyMlowZjELMAkGA1UEBhMCVVMxEzARBgNVBAgTCldhc2hpbmd0b24xEDAOBgNVBAcTB1NlYXR0bGUxEjAQBgNVBAMTCUFjbWUgQ29ycDEcMBoGCSqGSIb3DQEJARYNdGVzdEBhY21lLmNvbTCCASIwDQYJKoZIhvcNAQEBBQADggEPADCCAQoCggEBAMlj0IAPjyzSJzJZXzPPKnWWu6ErkfUhujBk1nQdp++K8YrvocLY5rbY/DZ9ipEz1TxIyZAGl9aBPoLGU4r2XNVMJZA5Zo/QMedEZFal14eOHn3JMMvCDjGrFaWR+cZ2TR9D9Jdxytq9QKUS/JdCKYz/Qxbx2Q4o0nZDqmPAipw//E24y4lLya/Qrwb537QoCGnxgMoUVNi9ruYrnGtS4uPth3+jYmbbivb8G1B8x93Peeu1QHBlOaXr6DndSwKcULIUt2RxcyYcjzeVQ5yrcrVHwvF8eb03Llm10zX0UI68vdjQuMpeUZ7K0RlmO59v0u6XdeoK1s82SJ8ufscqIrcCAwEAATANBgkqhkiG9w0BAQsFAAOCAQEAN78Mxd1ZE9nUNefCxmqdJYbQUzO6baHgqWxNLRuIu/EtJsjBAuuMmpWOd+pWBQS42aDOrUc33zpcNJcquBvtKt6QaKnSzJwCyfk88ACNrb7yFyeKB3YhVALfLkJMal032pvV8U0n4FBlqRTUDrSY2MHaJ/Uar7iJ7t3RBoZ9LbTyikW188hW6h9s238oLOW89FIJluov18uyLJaj8sBP5tInZmnO3EEywzNop0vpqMe0XmTo9Dyq9SFRdcDnptSdoNLLWTXmpXacj/u/f9r7zQqneFbj2b0KqetYLb7Xs5BVi0DfC81FYOEwqiq+kYvEkBubNCP1C8fXzB/65kFXtg==\n-----END CERTIFICATE-----", "privateKey": "-----BEGIN PRIVATE KEY-----\nMIIEvAIBADANBgkqhkiG9w0BAQEFAASCBKYwggSiAgEAAoIBAQDJY9CAD48s0icyWV8zzyp1lruhK5H1IbowZNZ0HafvivGK76HC2Oa22Pw2fYqRM9U8SMmQBpfWgT6CxlOK9lzVTCWQOWaP0DHnRGRWpdeHjh59yTDLwg4xqxWlkfnGdk0fQ/SXccravUClEvyXQimM/0MW8dkOKNJ2Q6pjwIqcP/xNuMuJS8mv0K8G+d+0KAhp8YDKFFTYva7mK5xrUuLj7Yd/o2Jm24r2/BtQfMfdz3nrtUBwZTml6+g53UsCnFCyFLdkcXMmHI83lUOcq3K1R8LxfHm9Ny5ZtdM19FCOvL3Y0LjKXlGeytEZZjufb9Lul3XqCtbPNkifLn7HKiK3AgMBAAECggEAHrvaWmjFd1gc/jyQYFY5yxc1TCvbivbaNL920OKjudVQ9lyKqbMzRm1H1EMFbhJkdN5A0HeJHYW81fVRU5A0a6LCysdPxRvHOd2AmI6XnUrNkXGuPjI/u0m6NHnaDfUI4QAcaC5IAGjIYEjM/oJs1+UuxmYjM1t8furlqnJ8VMrTtfumTSzEoq3OSwK6JlxAtRwBkrYr+pZCI82Ao/ouZcktyO+LjLMCYd/7HpskA0G3Pp/SIjhfbNHsTm4Kvzar0XdxBVMu4M0a6xXvX+I/L8UFa7EuDumwQVdttMnG33+xbCX3yIrndxVk0rOCryYqeItOxSG+aZJ6ZN+r0crgvQKBgQDlolxVh3NQCqa9XS+TCXSGfcZENolAIEu+n6CkZKMqQrmz7KPrblHgMbc54x0jH/GhtkY4wMjV1stqqHWTBV9UqVcb+OXPt8Zwa0JvXEM3b0i9GTp2hQfKGbWTEz7PIUZbZPGrIijHrc4wX2rgq7K5GeUfteh7bZij0cQ5ubFXBQKBgQDgg0SzUIN87D7yRPqvVnd7l0yii740UztWDp/YDpml0T6WfG0rlXqnIEebUS+BxGNDt3ksG7dTfJIE34C/SlYBAlJ5hiJ4rErW7pm+ibLa96qnLAGEQpiwnYmV49Uc2mxxRuBFWqKal4tuY6MxNqaf2NLCT4JKTPMffRR0Iz/HiwKBgFN659hMCpaxmJZE1zO7/zmZZceMj+7ZDtA41byNvWdypHINeDXxgCBh0ntf3krTpRMl4XdmVlyu3npizYNqM5LikQFhRaJy69gYlilHwEPZ1/auwjst93v4RrM2DuJb9WjqVJTjMTIONGQPfBo7MRjrmgkiJ2cfm5sKeiyGHjtFAoGAOvwB1qJ2iSGAQCJDQkGTTpMnfST9qb2cPzXEZP0g/OGGcf7qp6K0AKiIZ5PiyVMRST8wxJfbiEGYE1Os/ZTIF6fGh0roT4/kcadqGRcQOFsNKLJ1C4x7lRsuhITA/r2b8/7M+SugwMDDzxK6UzmqeSB77rT45BBnZ4RzFTgVj5UCgYBasm6nh2v8PzE8aXzYM6YWsM5R0l3Xr2YvycLc6HfI5Sen+yqIyE9qDNFFk8qa3RZVKl83ZTk7wtAL8nMupmdVodNrx4pUgFW4U4WPPSvVXRZRTZdLHwGKw5Fa3u48qFxdYqpZmnBMB2RHEKcRB8T1+RkcByghNnCBwJMJSRHIWA==\n-----END PRIVATE KEY-----" } }, "acme_http_app": { "class": "Application", "acme_http_vs": { "class": "Service_HTTP", "virtualAddresses": [ "10.1.20.13" ], "pool": "acme_http_pool" }, "acme_http_pool": { "class": "Pool", "loadBalancingMode": "round-robin", "monitors": [ "http" ], "members": [{ "servicePort": 8080, "shareNodes": true, "serverAddresses": [ "10.1.10.5" ] }] } } } } }
Login to the BIG-IP to confirm our changes. Go back to UDF deployment screen, and choose the component
bigip1. Then choose theAccess MethodofTMUI. This will allow you to login to theBIG-IPGUI.
Login with the following credentials: username = admin , password = admin.
Expand
Local Trafficand thenVirtual Servers. In the Partition pull-down menu, selectTenant_Acme.
You should see the following virtal servers:
Delete Tenant
Now that you have completed this section of the lab, let's clean-up by deleting the tenant named Tenant_Acme.
In the
VS CODEwindow, select the tenantTenant_Acme, then right click and selectDelete Tenant.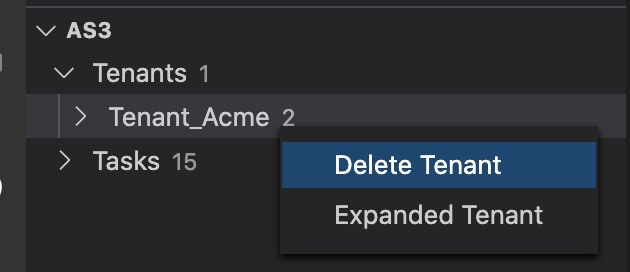
The tenant
Tenant_Acmeshould now be deleted.