Automation, Orchestration & DevOps > Class 3: Deploy apps with AS3, FAST, and ACC Source | Edit on
Lab 4 - Creating FAST Template for future app deployments
Install FAST template on BIG-IP
Connect to admin@10.1.1.6 by clicking the device in the F5 HOSTS view
You should see that FAST is already installed.

If you do not see FAST installed you can do the following:
Navigate to
FASTunder theBIG-IPmenu by choosingBIG-IP>>ATC>>FAST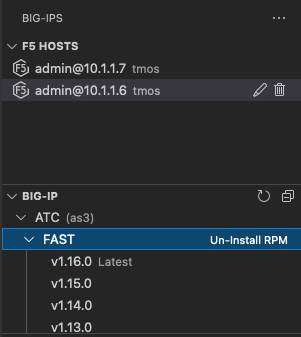
Under the
FASTdropdown, you should see a list of version options for the FAST extension. Select the Latest version. This will automatically install the rpm file to the connected BIG-IP. After a minute or so, you should see messages in your output indicating that it is installed:[INFO]: installing atc rpm job complete, waiting for services to restart (~30 seconds)
After seeing the above message, please wait another a minute for your connected device to update in VSCode. If it has not refreshed automatically after a minute, try clicking on the
10.1.1.6host again to refresh manually.
Render Simple FAST YML template to AS3
This lab will focus on rendering a FAST yml template using VScode template HTML Preview and generating AS3 declaration which can posted to BIG-IP in VScode istself.
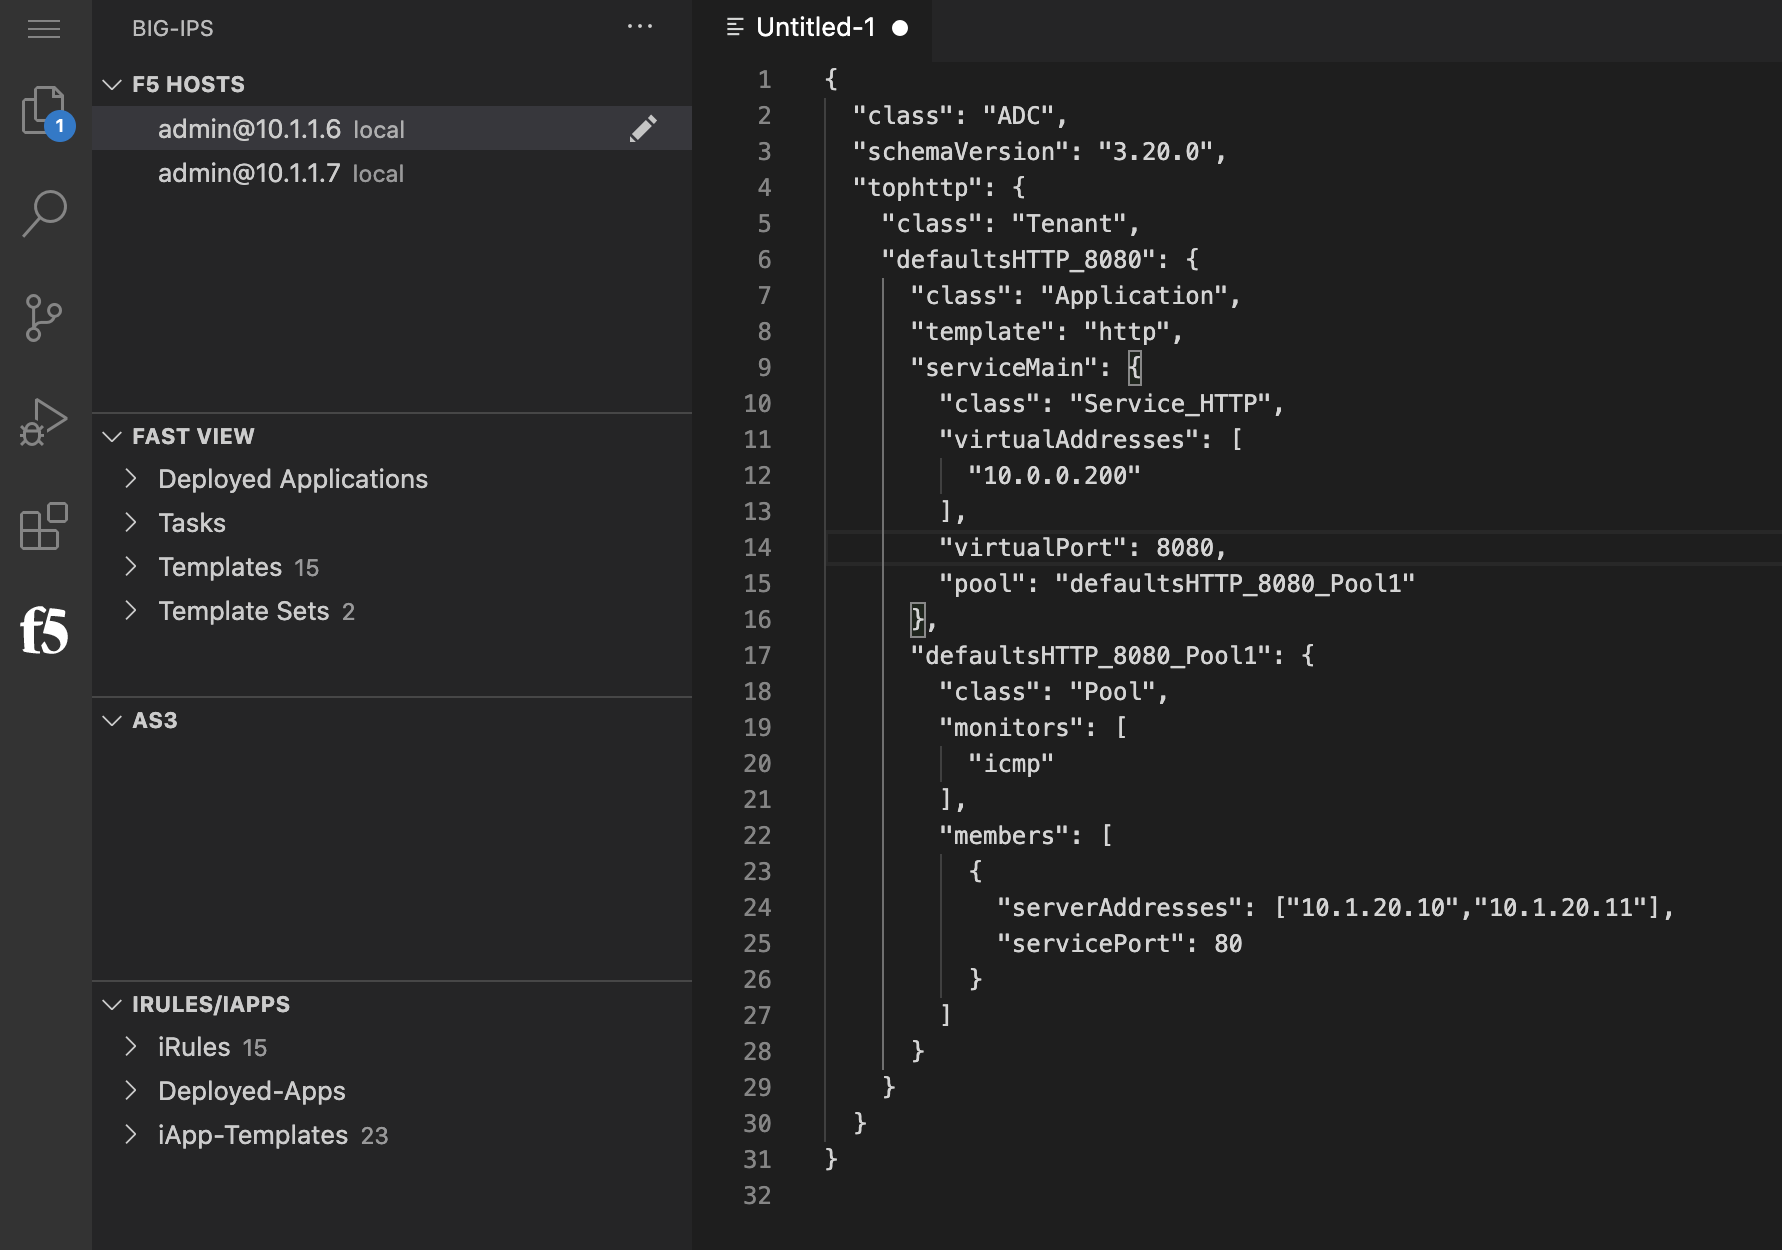
Copy the below YML file into the
VScodebrowser. The below yml shows the values already populated for tenant name, virtual address, virtual port, server addresses and server port. The template portion has those variables already templatize with double curly braces.title: Simple HTTP Application description: Simple HTTP load balancer using the same port on client and server side. parameters: tenant_name: tophttp application_name: defaultsHTTP_8080 virtual_address: 10.0.0.200 virtual_port: 8080 server_addresses: - 10.1.20.10 - 10.1.20.11 service_port: 80 template: | { "class": "ADC", "schemaVersion": "3.20.0", "{{tenant_name}}": { "class": "Tenant", "{{application_name}}": { "class": "Application", "template": "http", "serviceMain": { "class": "Service_HTTP", "virtualAddresses": [ "{{virtual_address}}" ], "virtualPort": {{virtual_port}}, "pool": "{{application_name}}_Pool1" }, "{{application_name}}_Pool1": { "class": "Pool", "monitors": [ "icmp" ], "members": [ { "serverAddresses": {{server_addresses::array}}, "servicePort": {{service_port}} } ] } } } }Remaining on the VScode, select
Render FAST template HTML Preview.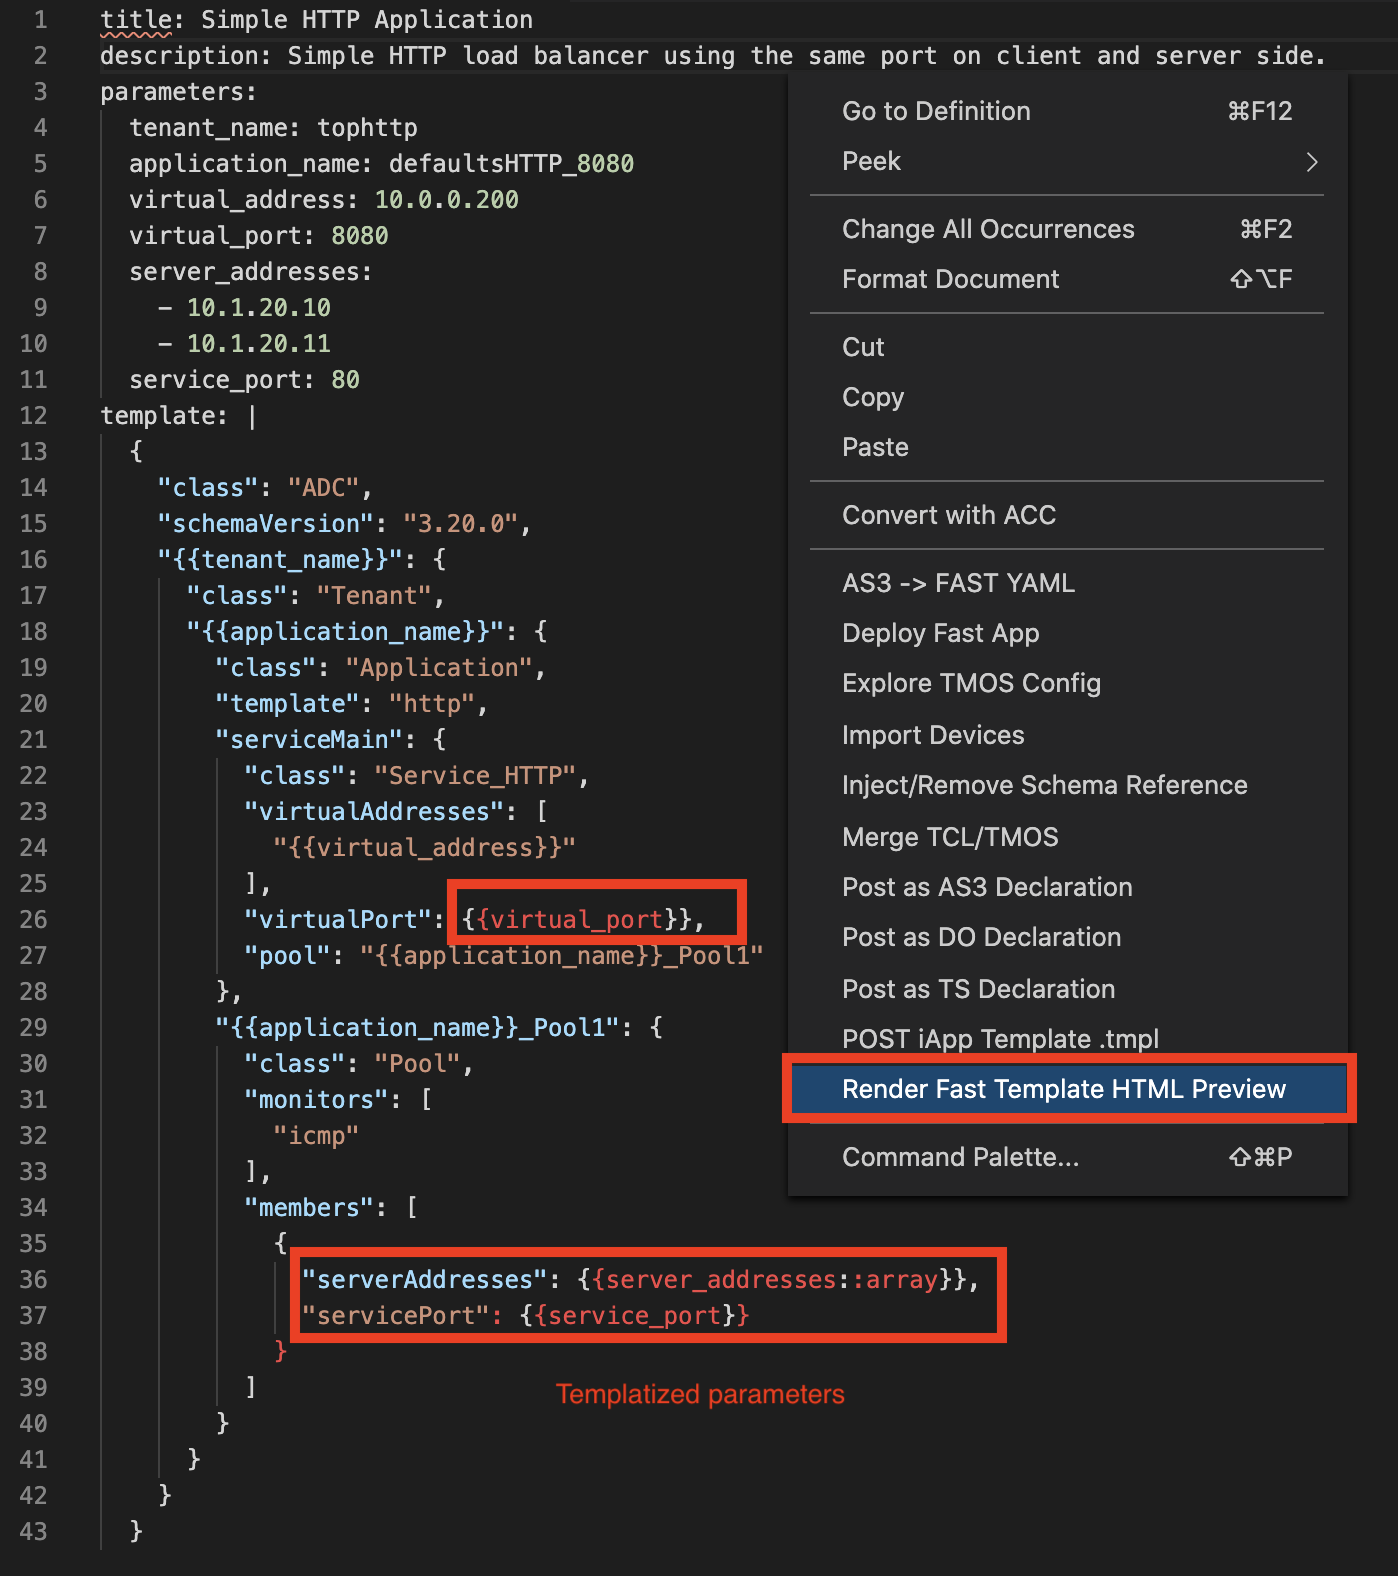
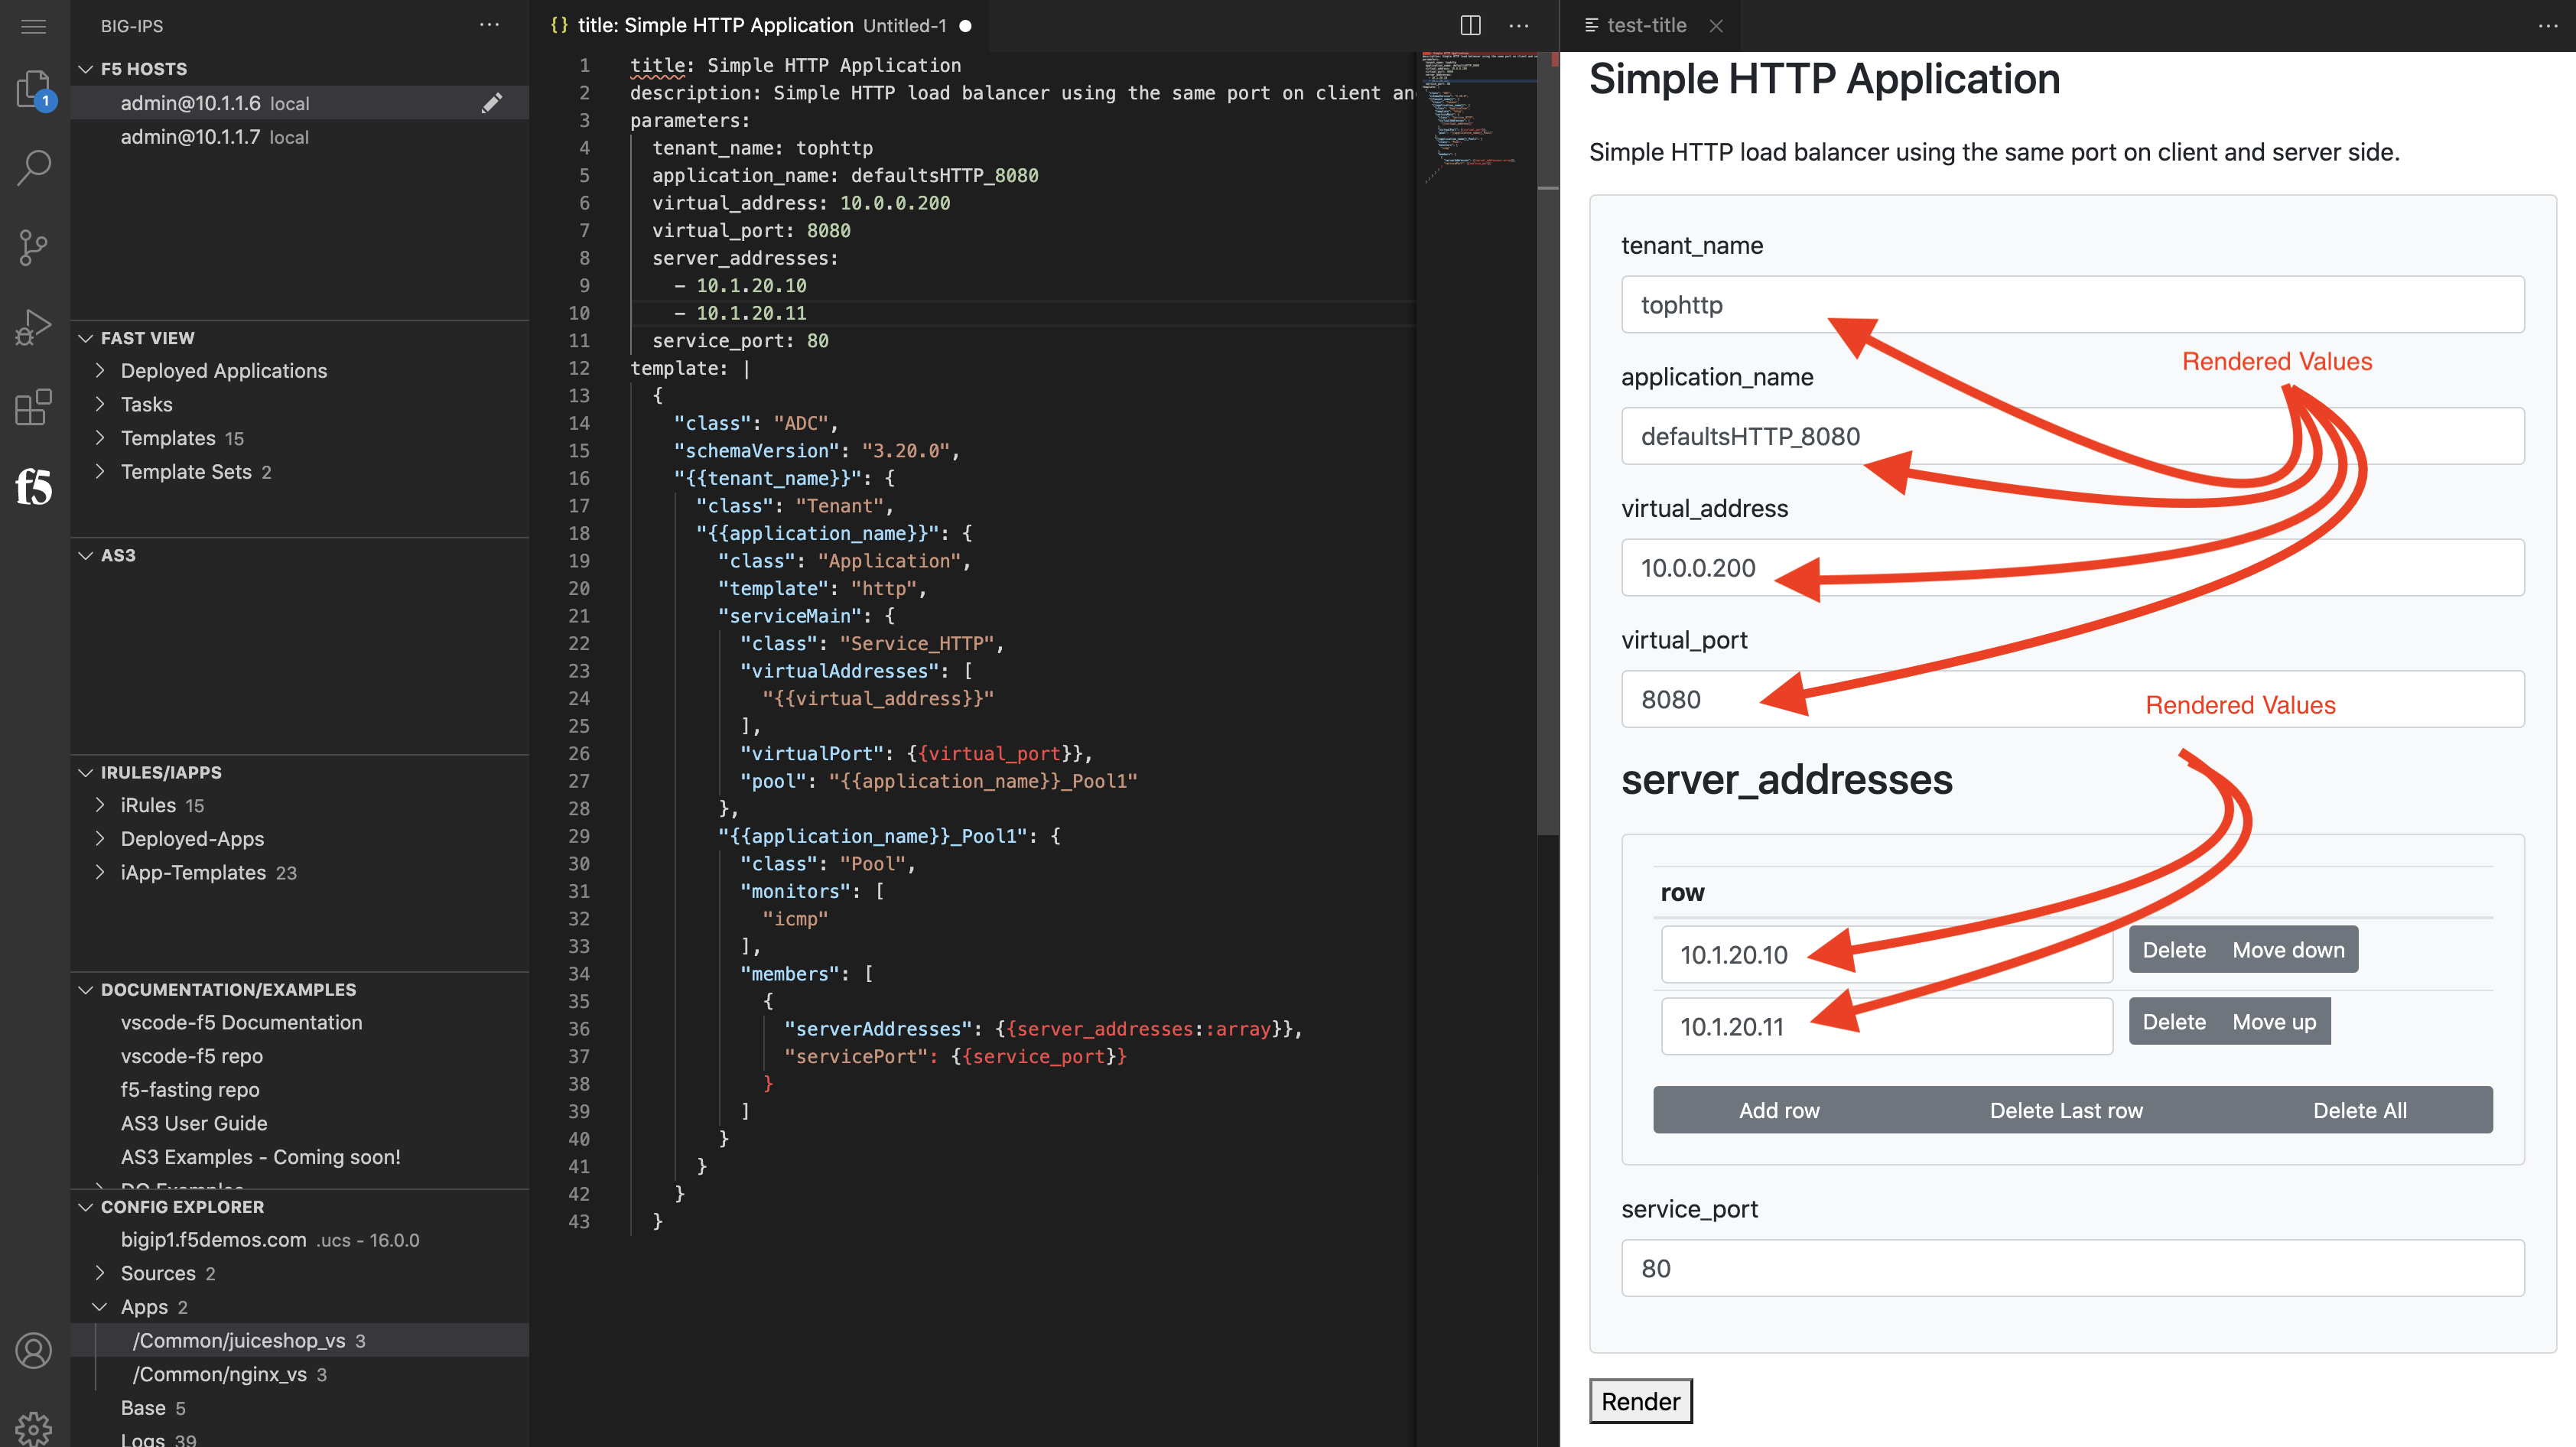
Review the Simple HTTP Application details.
Click on the
Renderbutton at the bottom of screen to see the generated AS3 declaration.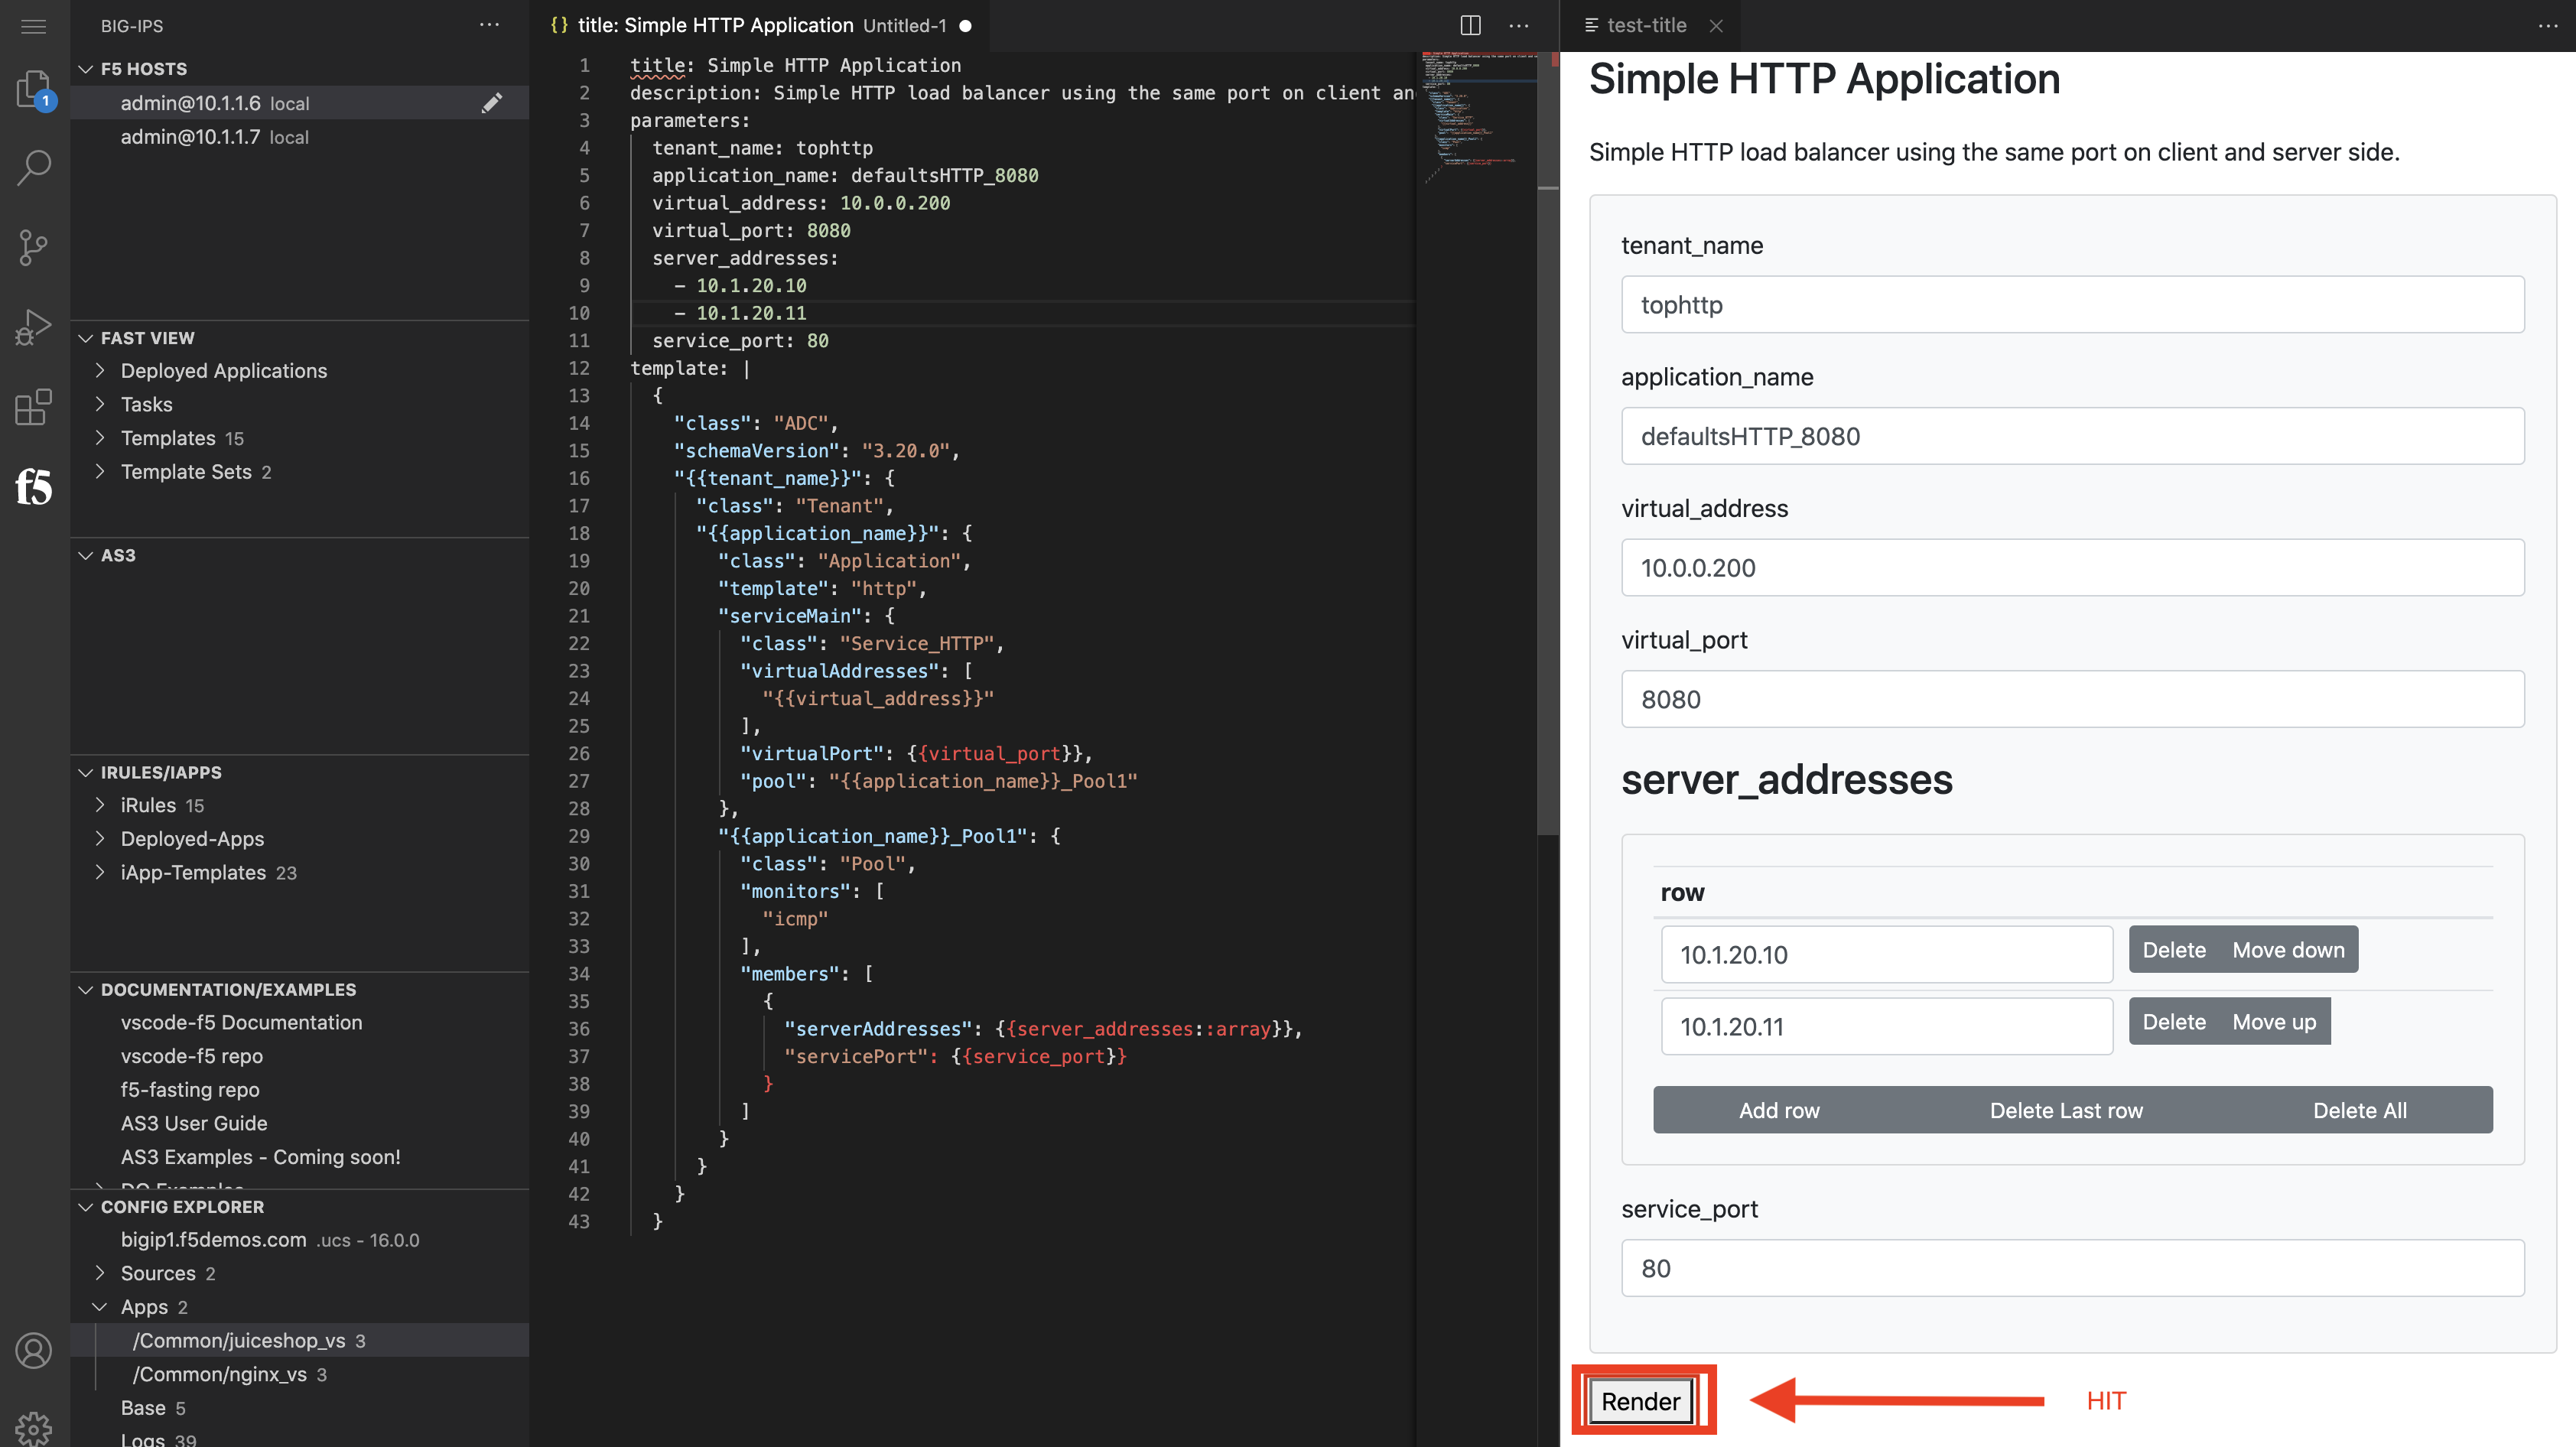
Review the generated AS3 declaration.
Remaining on
VScoderight click toPOST as AS3 Declaration.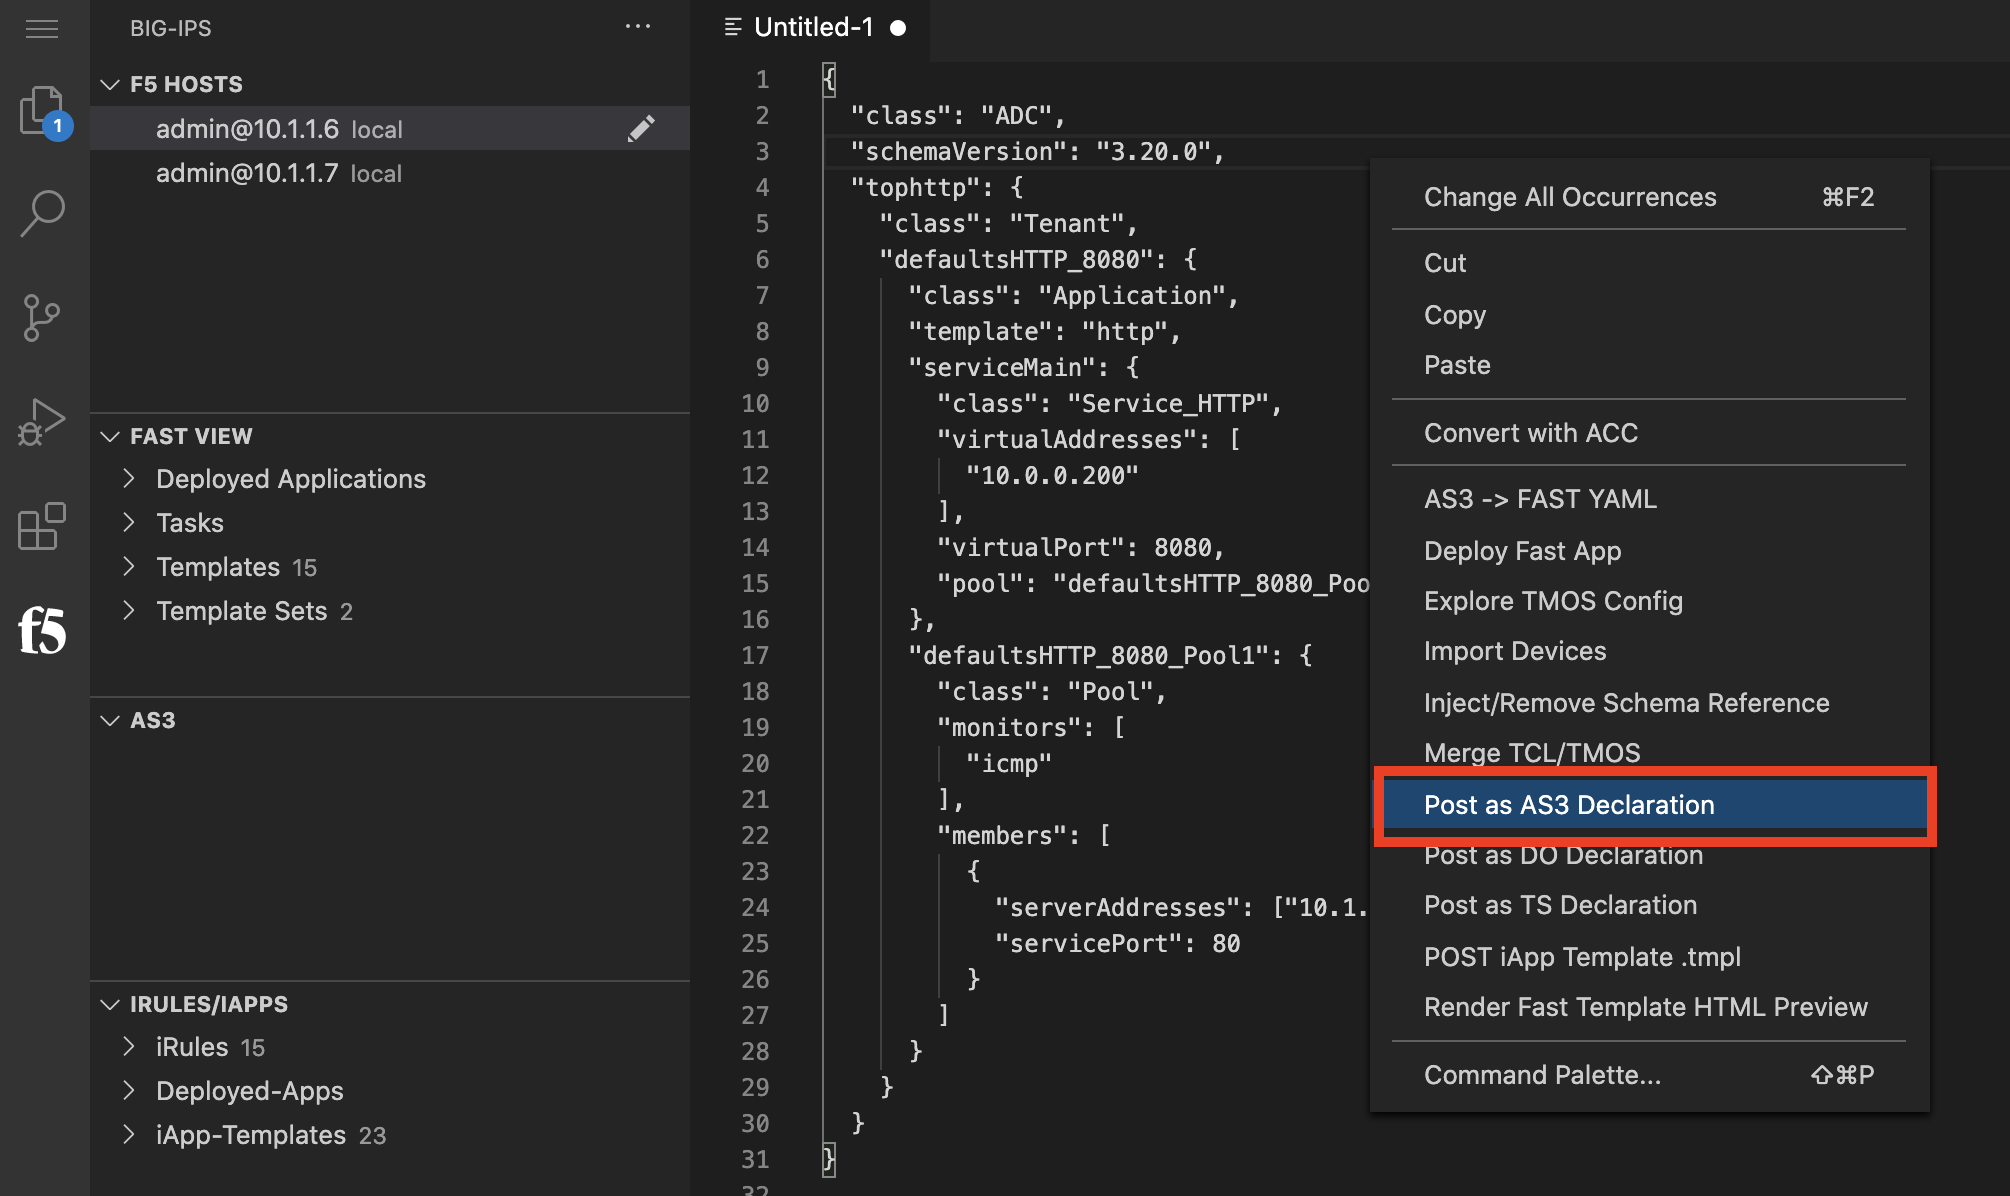
Remaining on
VScodeclick on the AS3 tab -->Tenant, and you can see your tophttp application.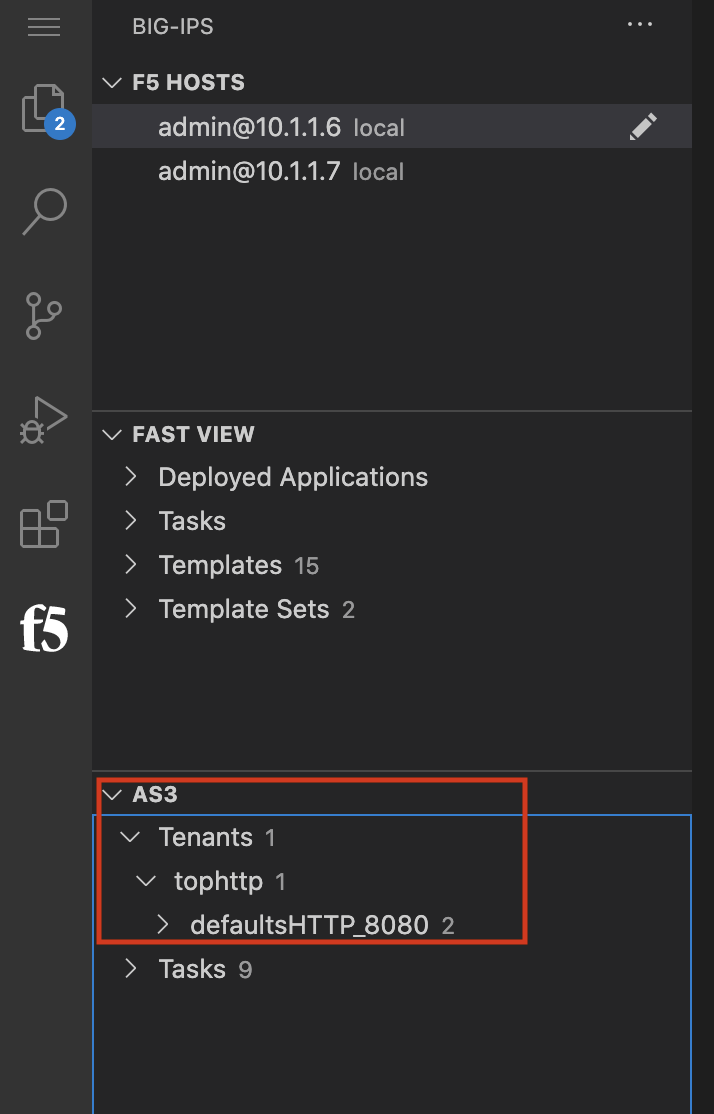
Go to UDF
bigip1Access, and click on TMUI to accessbigip1.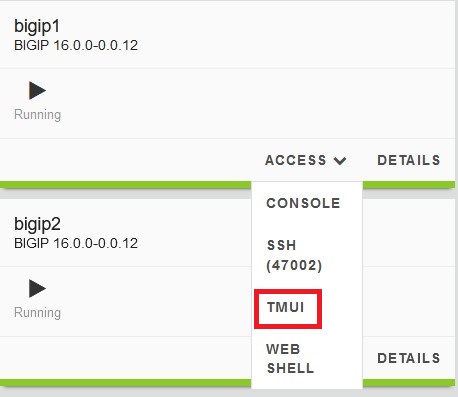
Access
bigip1by logging into the GUI to review the configuration, Select partition astophttpto see the details.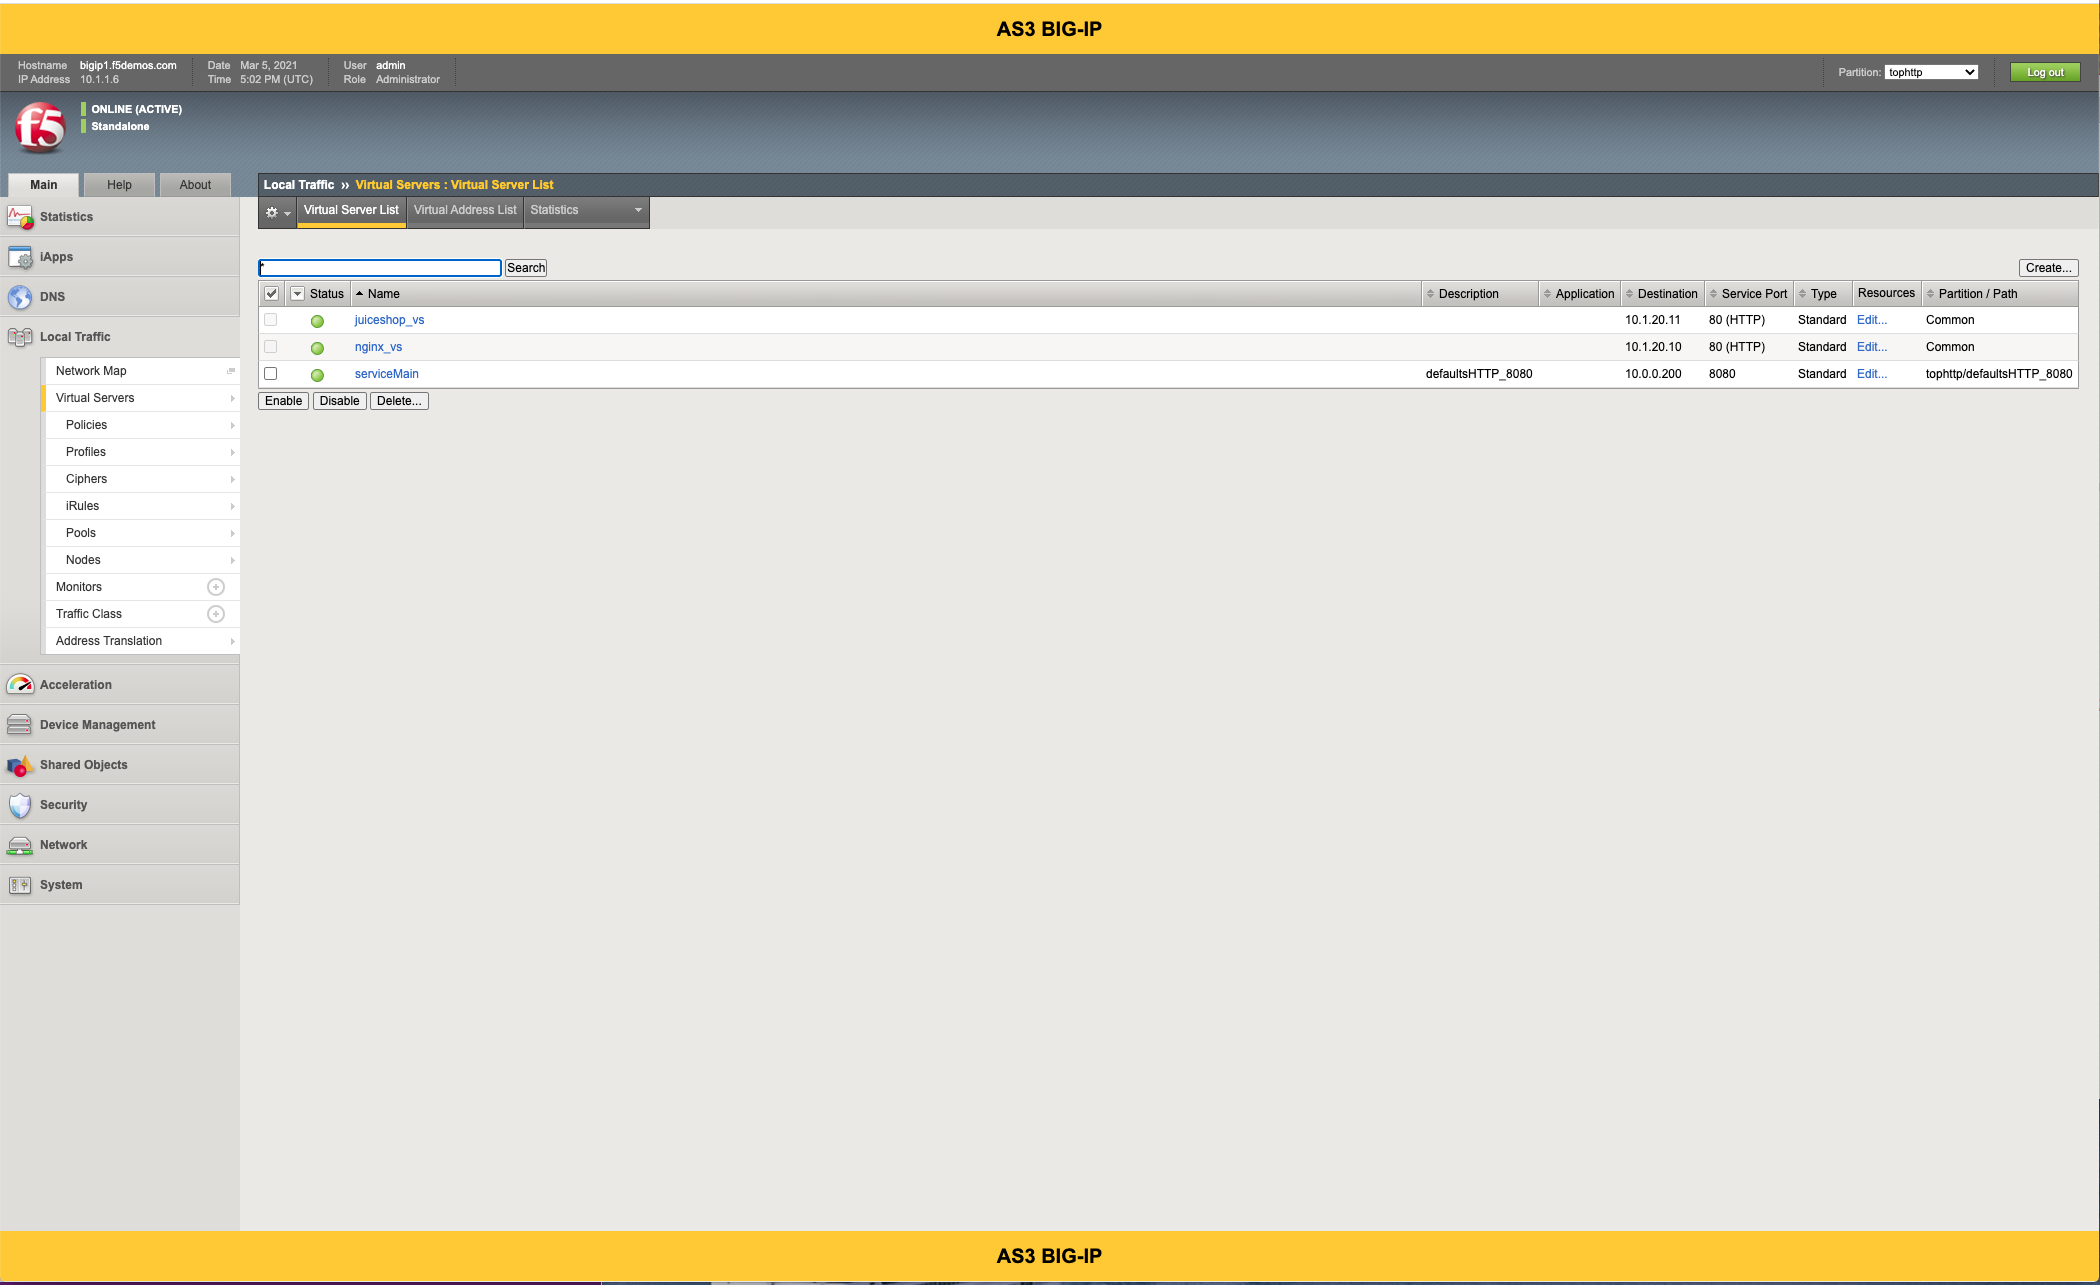
Clean up the tenant after use. In
VScodewindow, right click on the tophttp tenant and selectDelete Tenant.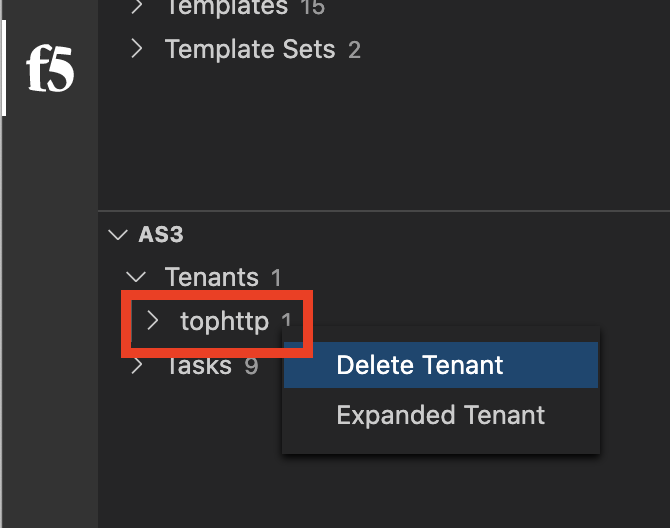
Use VScode for Posting FAST Template Set
This lab will focus on converting an AS3 declaration into FAST YML and then packaging into FAST Template Set. The template set can be pushed to the BIG-IP. The FAST App can be deployed using the recently pushed template set.
Go to
VScodeand select the explorer icon (files). Right click onfast>>templatesfolder and click onNew Folderas shown below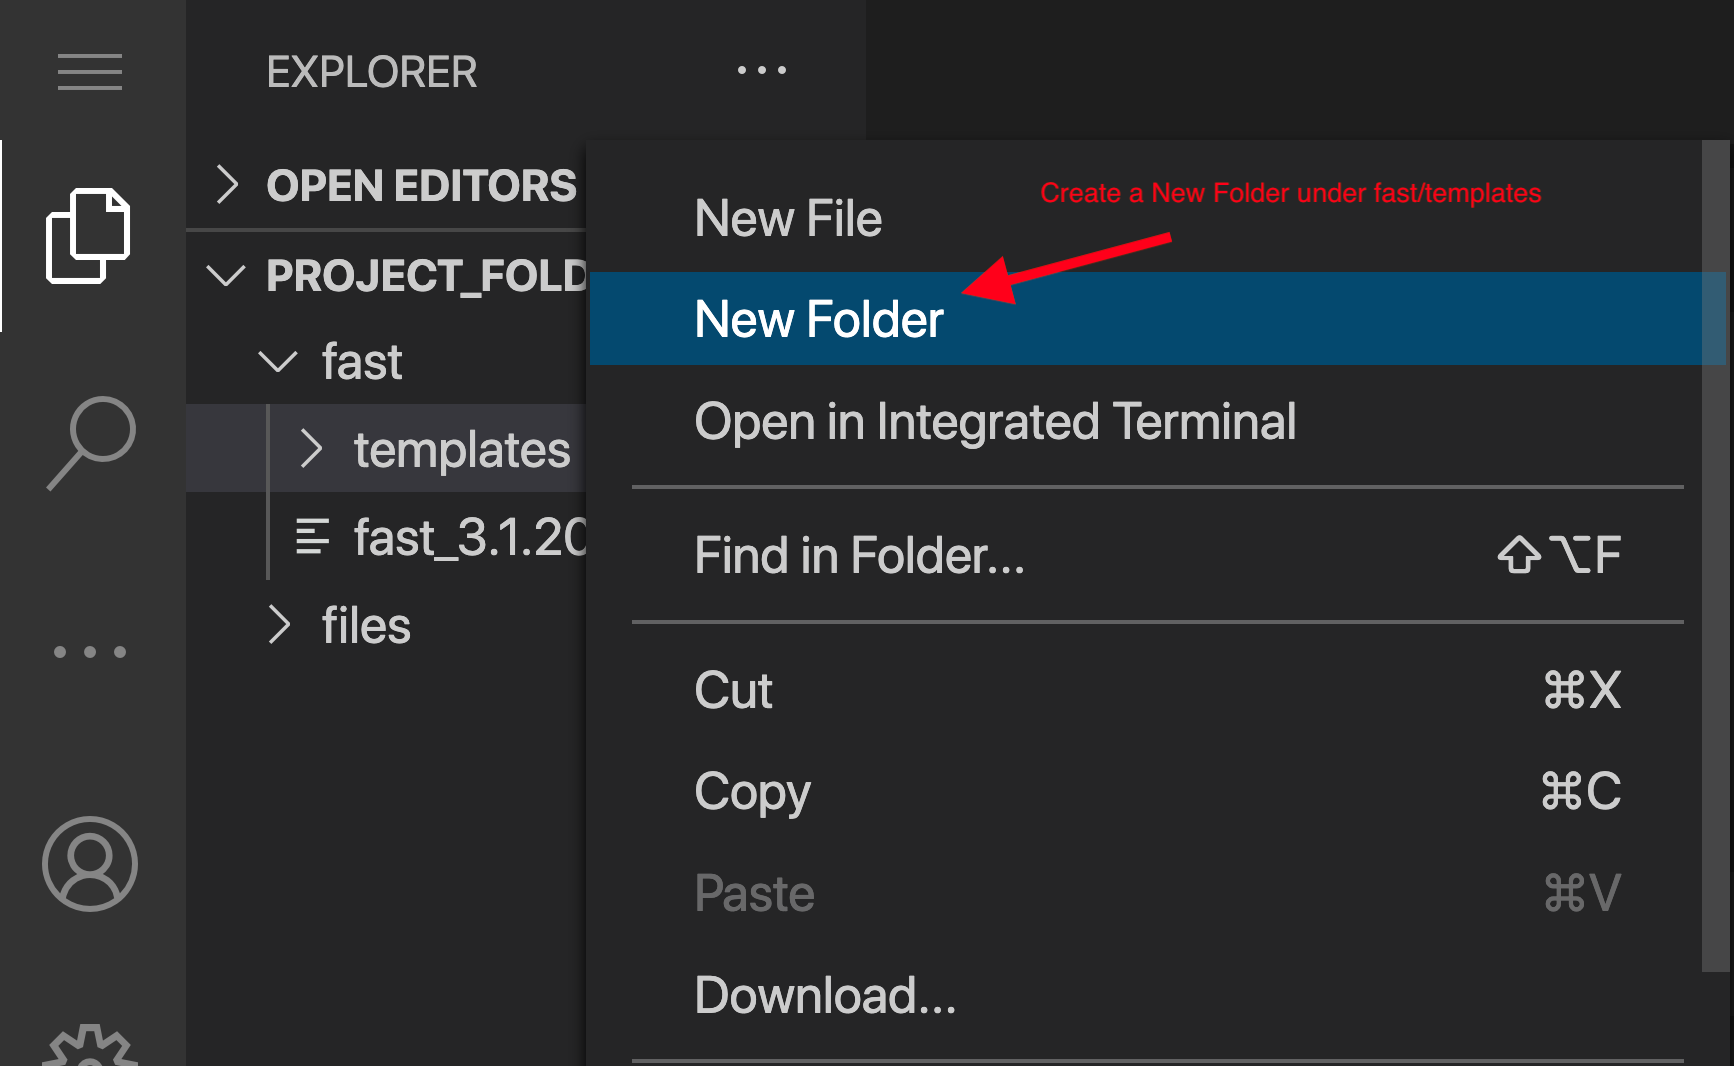
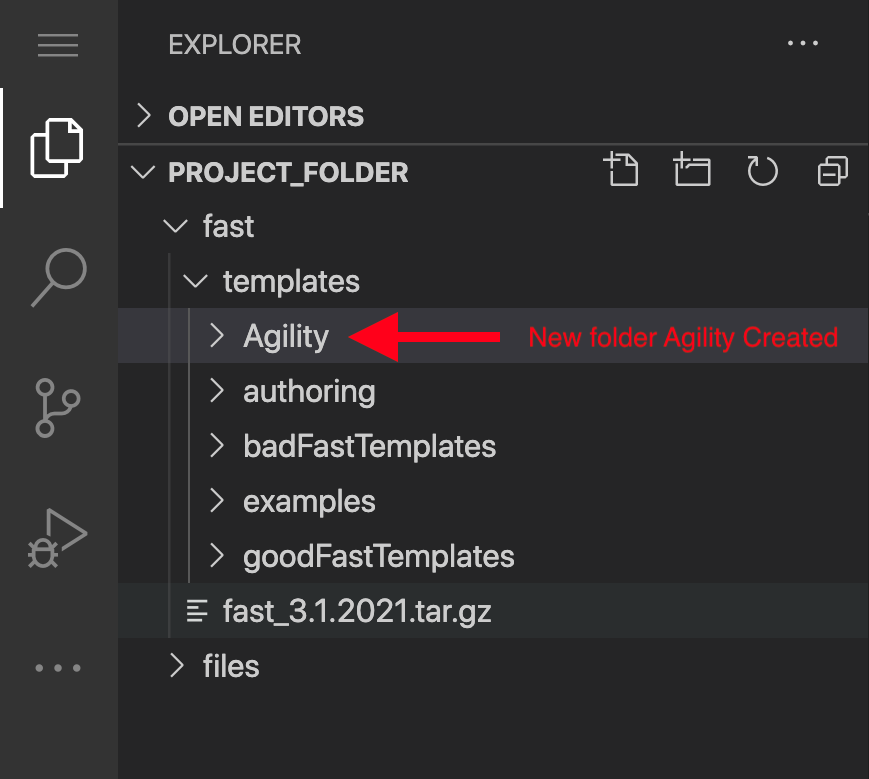
Type name of the folder as Agility and hit return
Ensure that you have the
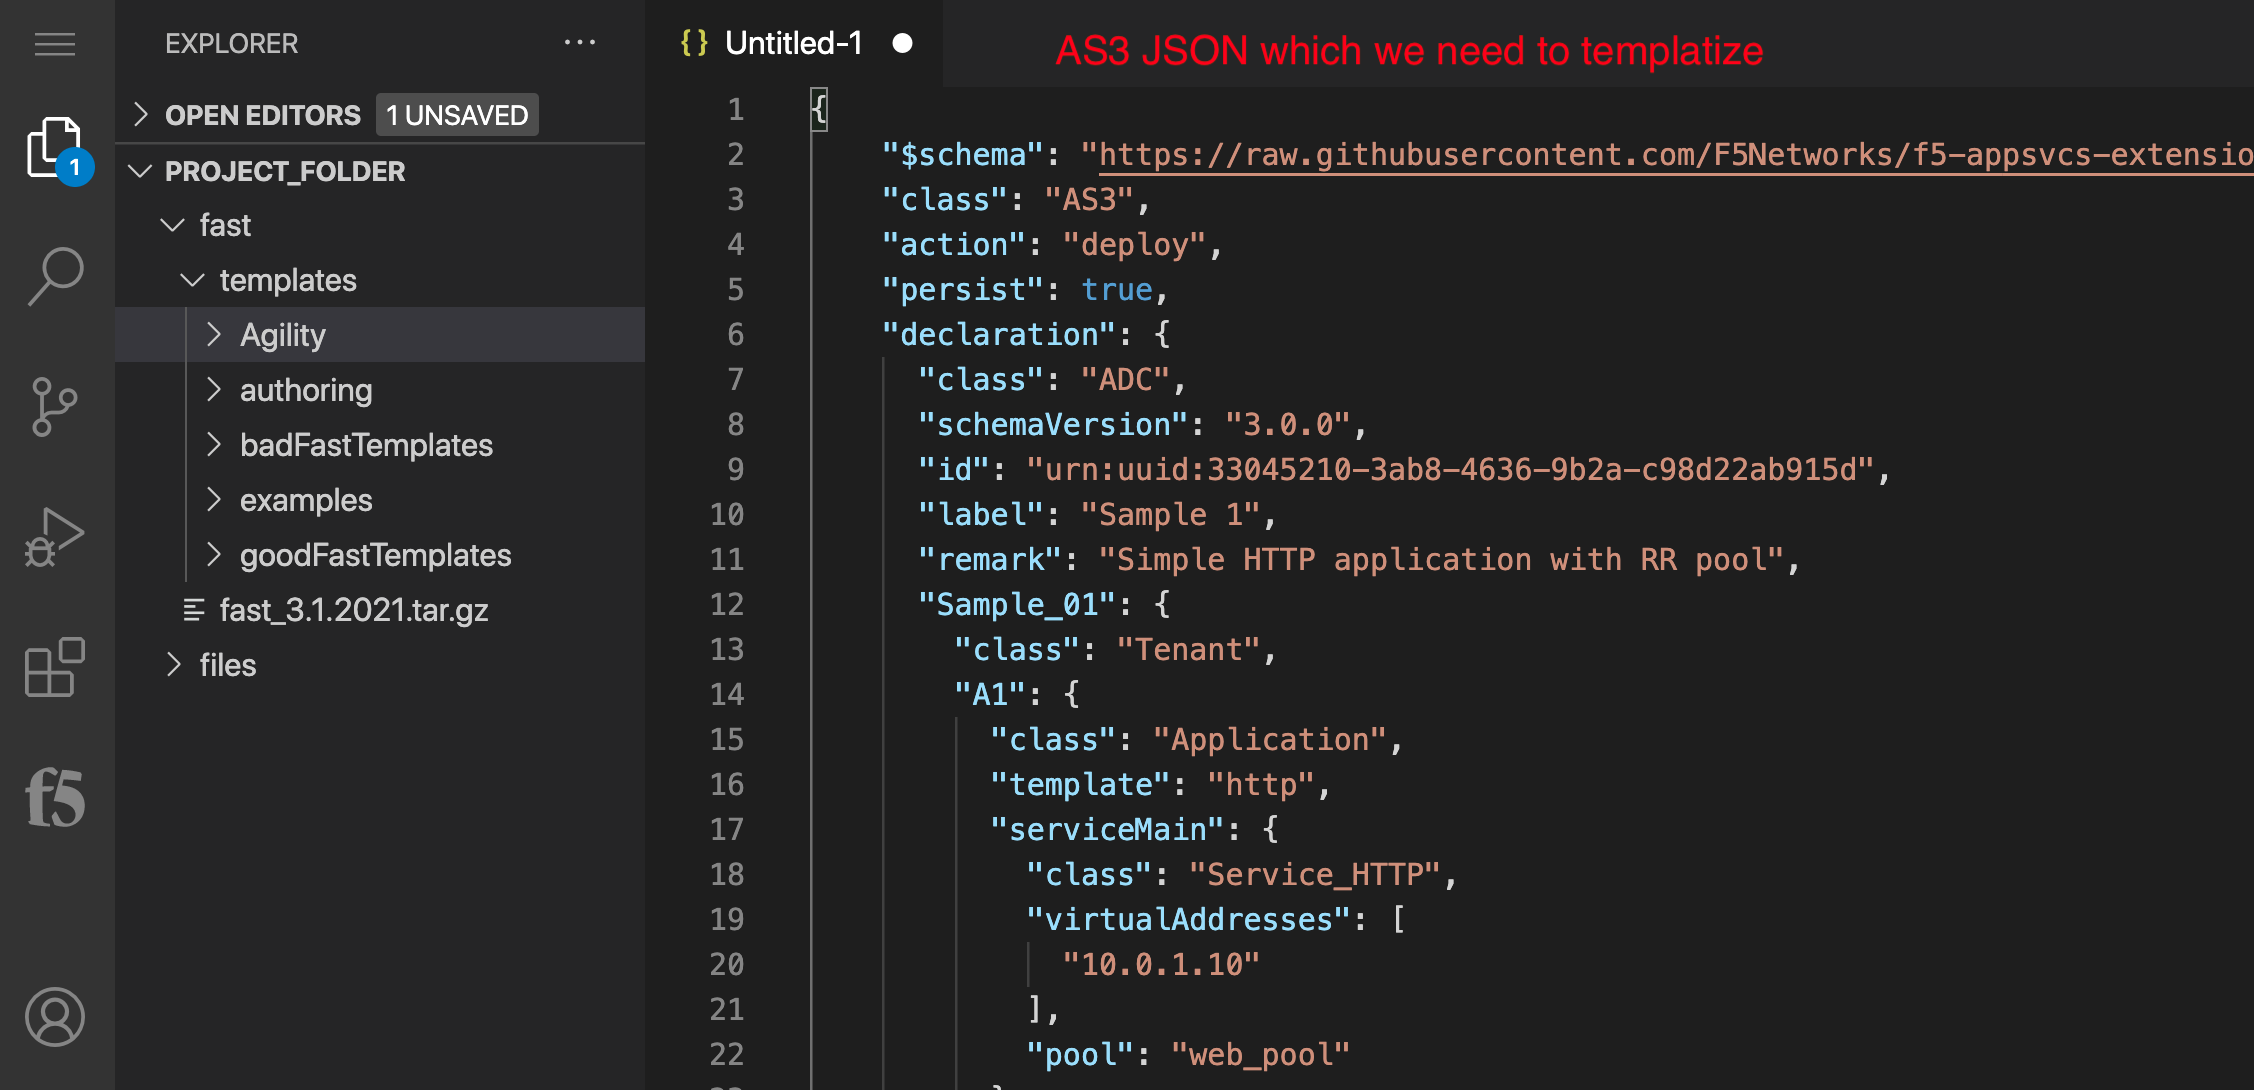
10.1.1.6host selected in the F5 Extension.Create a new file in VSCode and copy/paste the AS3 declaration below
{
  "$schema": "https://raw.githubusercontent.com/F5Networks/f5-appsvcs-extension/master/schema/latest/as3-schema.json",
  "class": "AS3",
  "action": "deploy",
  "persist": true,
  "declaration": {
    "class": "ADC",
    "schemaVersion": "3.0.0",
    "id": "urn:uuid:33045210-3ab8-4636-9b2a-c98d22ab915d",
    "label": "Sample 1",
    "remark": "Simple HTTP application with RR pool",
    "Sample_01": {
      "class": "Tenant",
      "A1": {
        "class": "Application",
        "template": "http",
        "serviceMain": {
          "class": "Service_HTTP",
          "virtualAddresses": [
            "10.0.1.10"
          ],
          "pool": "web_pool"
        },
        "web_pool": {
          "class": "Pool",
          "monitors": [
            "http"
          ],
          "members": [
            {
              "servicePort": 80,
              "serverAddresses": [
                "192.0.1.10",
                "192.0.1.11"
              ]
            }
          ]
        }
      }
    }
  }
}
We need to convert from AS3 JSON to YML FAST template
While in the
VScoderight click to see the AS3-->FAST YAML option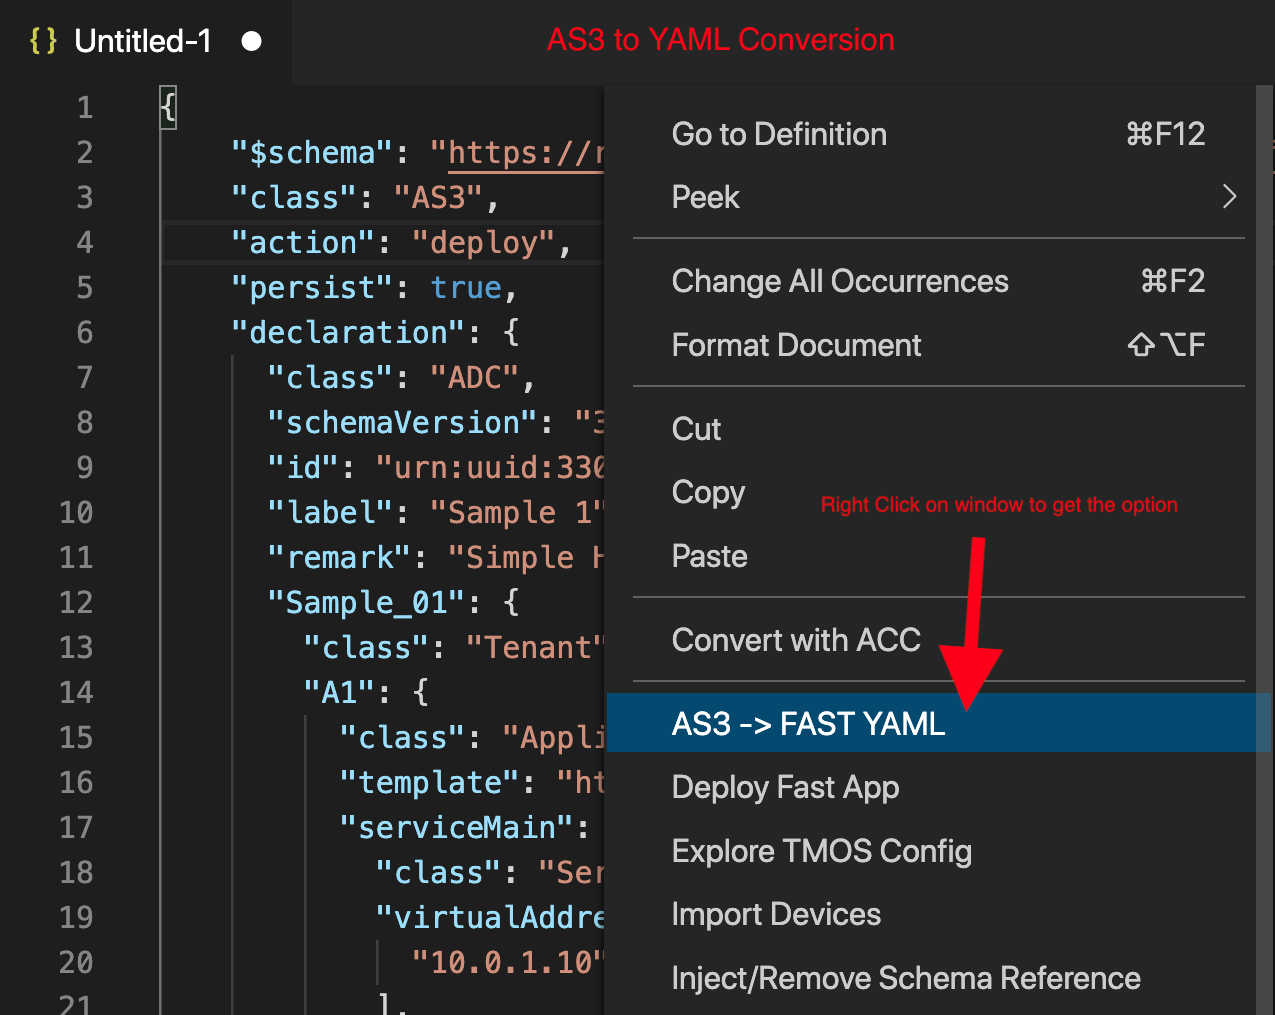
Review the converted YML file.
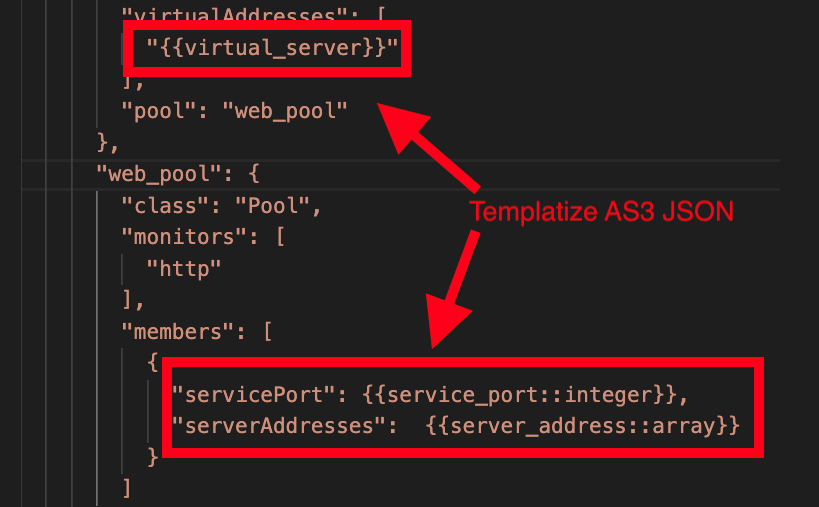
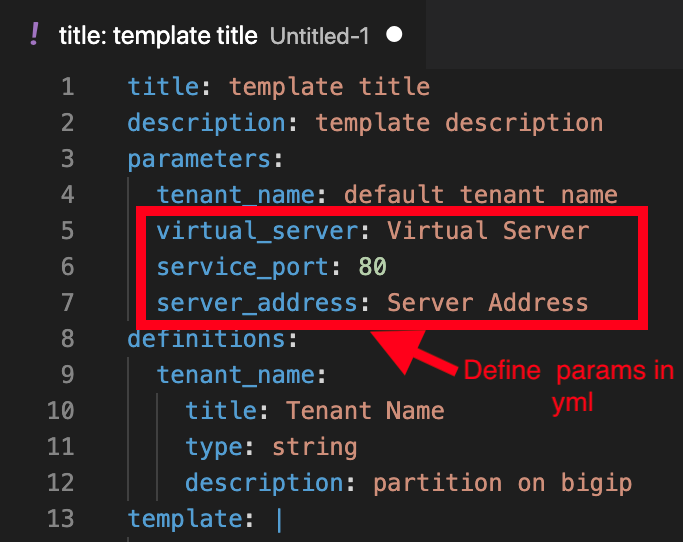
Replace the Virtual Server IP address "10.0.1.10" with "{{virtual_server}}".
Replace ["192.0.1.10", "192.0.1.11"] with {{server_address::array}}.
Replace 80 with {{service_port::integer}}.
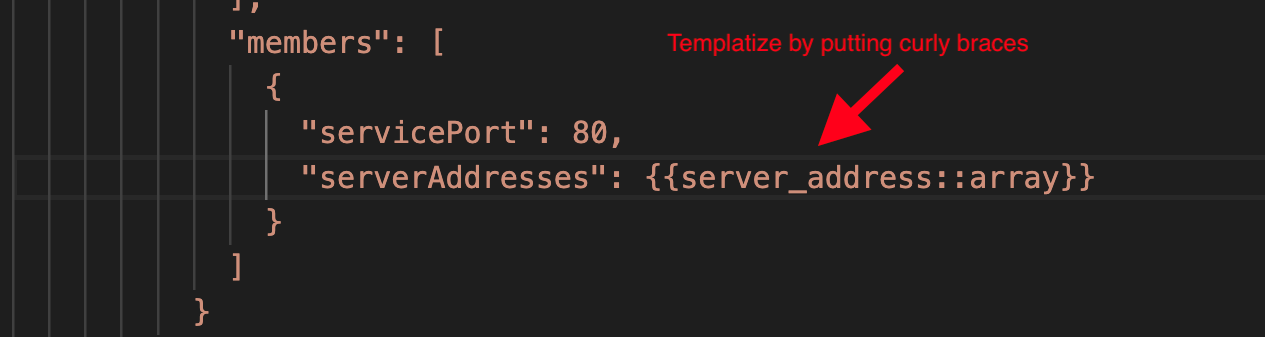
Below shows the replacement or templatized parameters.
Now add the server_address, service_port and virtual_server to the parameters section along with description as shown below.
virtual_server: Virtual Server
service_port: 80
server_addres: Server Address
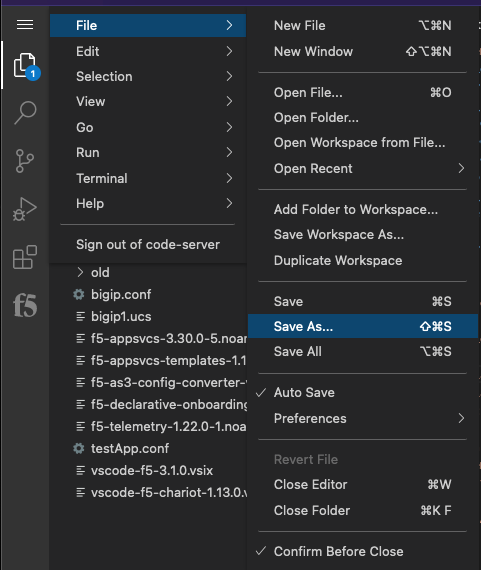
Save the file as http.yml in the Agility folder.
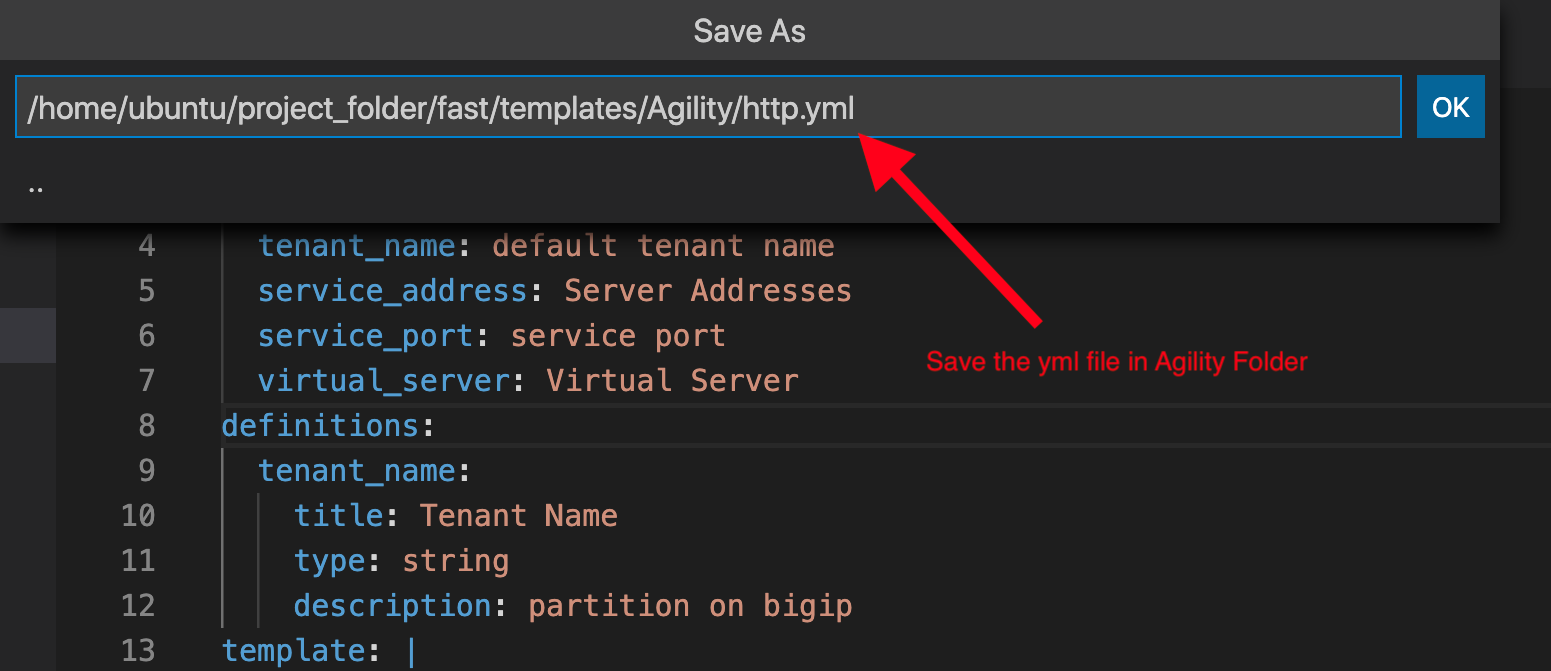
Review the YML template file which was just created.
title: template title description: template description parameters: tenant_name: default tenant name service_address: Server Addresses service_port: 80 virtual_server: Virtual Server definitions: tenant_name: title: Tenant Name type: string description: partition on bigip template: | { "$schema": "https://raw.githubusercontent.com/F5Networks/f5-appsvcs-extension/master/schema/latest/as3-schema.json", "class": "AS3", "action": "deploy", "persist": true, "declaration": { "class": "ADC", "schemaVersion": "3.0.0", "id": "urn:uuid:33045210-3ab8-4636-9b2a-c98d22ab915d", "label": "Sample 1", "remark": "Simple HTTP application with RR pool", "{{tenant_name}}": { "class": "Tenant", "A1": { "class": "Application", "template": "http", "serviceMain": { "class": "Service_HTTP", "virtualAddresses": [ "{{virtual_server}}" ], "pool": "web_pool" }, "web_pool": { "class": "Pool", "monitors": [ "http" ], "members": [ { "servicePort": {{service_port::integer}}, "serverAddresses": {{server_address::array}} } ] } } } } }While you are in the
VScodewindow highlight the folder Agility. Right click and select Post Template Set to post the new template to BIG-IP.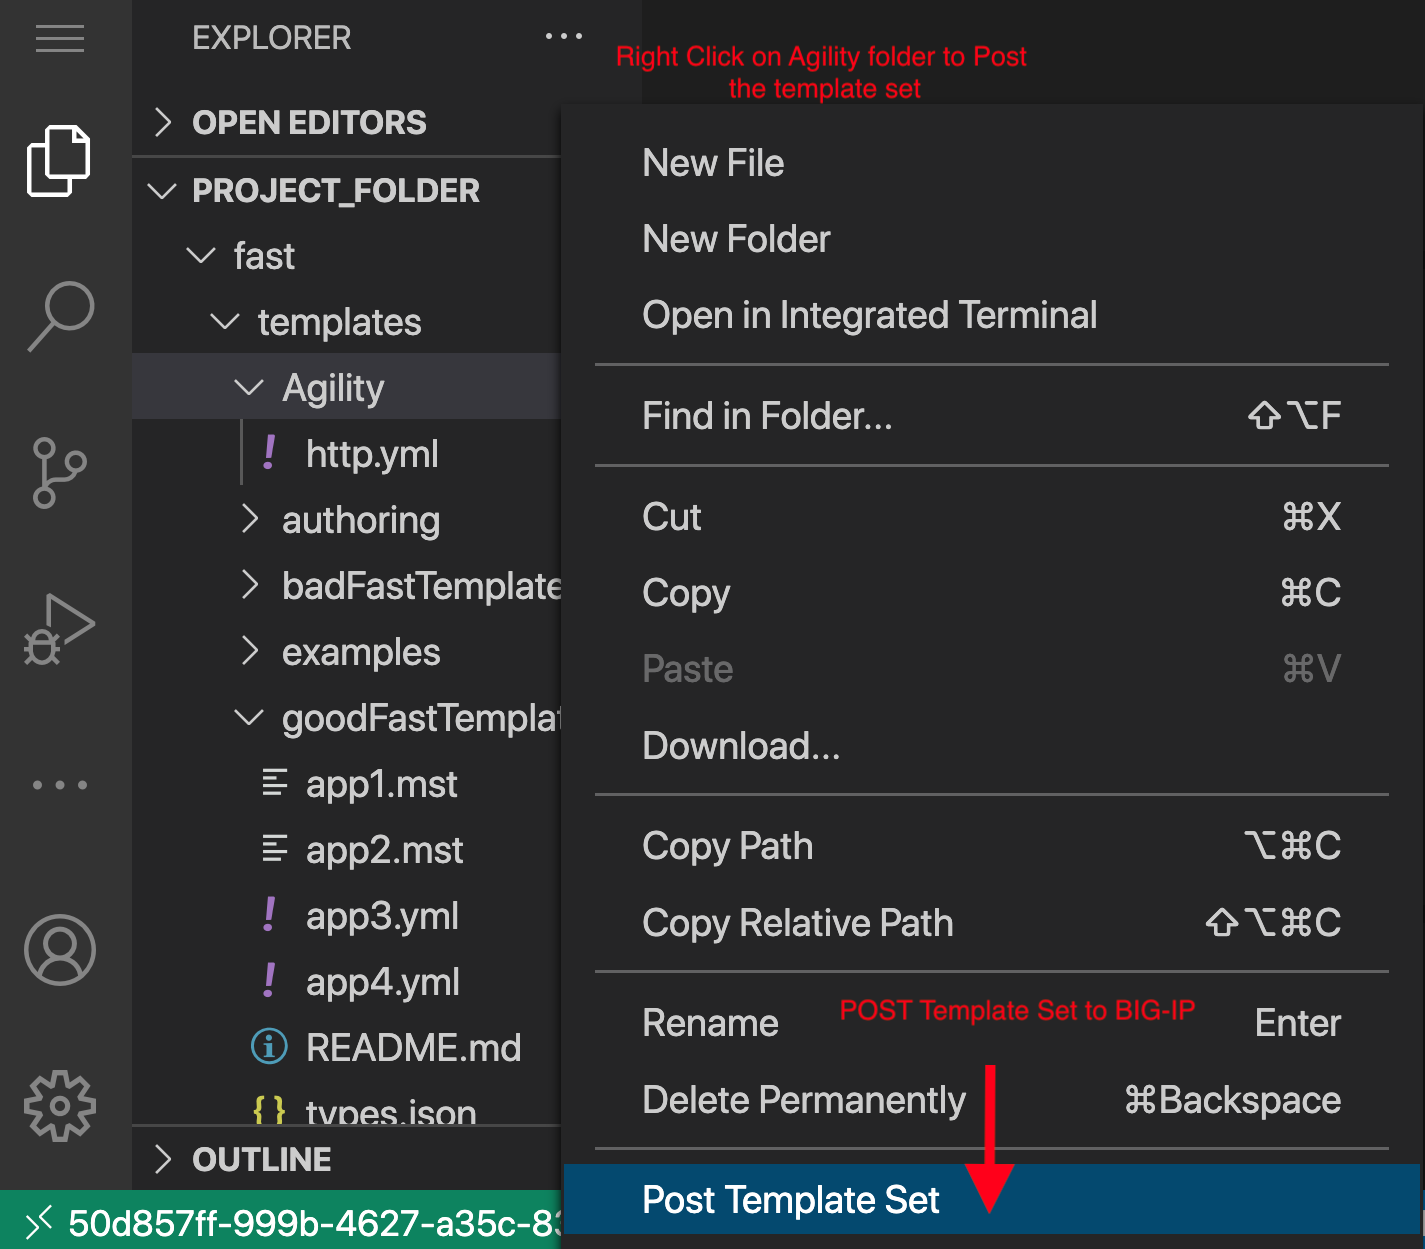
Go to UDF and Click on the
bigip1TMUI and login into the BIG-IP, Click on the iApps --> Application Services --> Application LX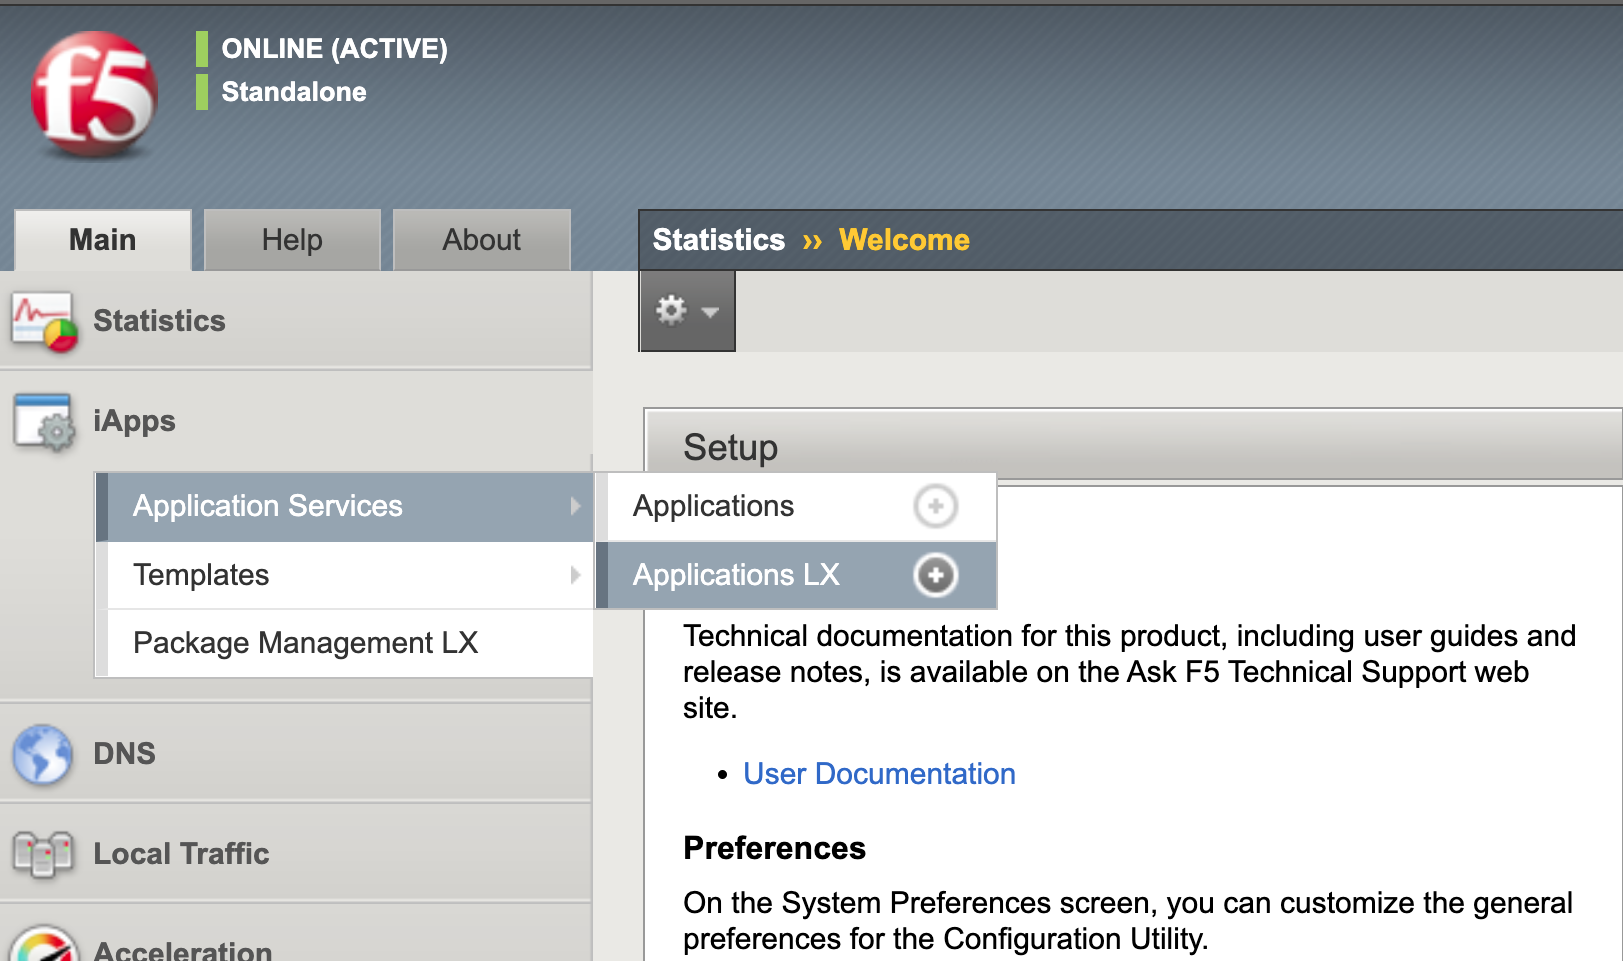
Go to
FAST Templatesand scroll to the bottom to see the new Agility Template Set
Under the Agility Template set, Click on the
template titleOnce you click on the
template title, the template with default values will appear. you will see the template is rendered and is ready to take different values: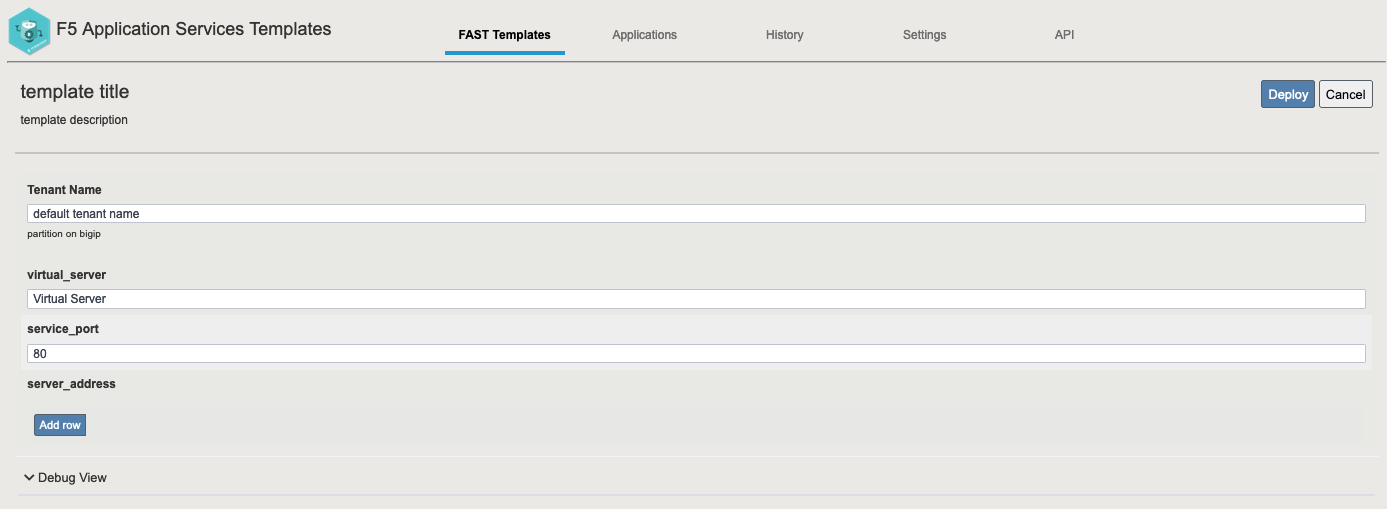
Enter the following values
Tenant Name: Agility1
service_port: 80
virtual_server: 10.0.0.200
Next, click
Add rowunder server_addresses to expand. Enter the server addresses 10.1.20.10 and 10.1.20.11.Once finished, select
Deployin the top right corner of the screen.After deploying, you will be brought to the
Historytab with the status of your deployment:
Click on
Partitionon the top right select Agility1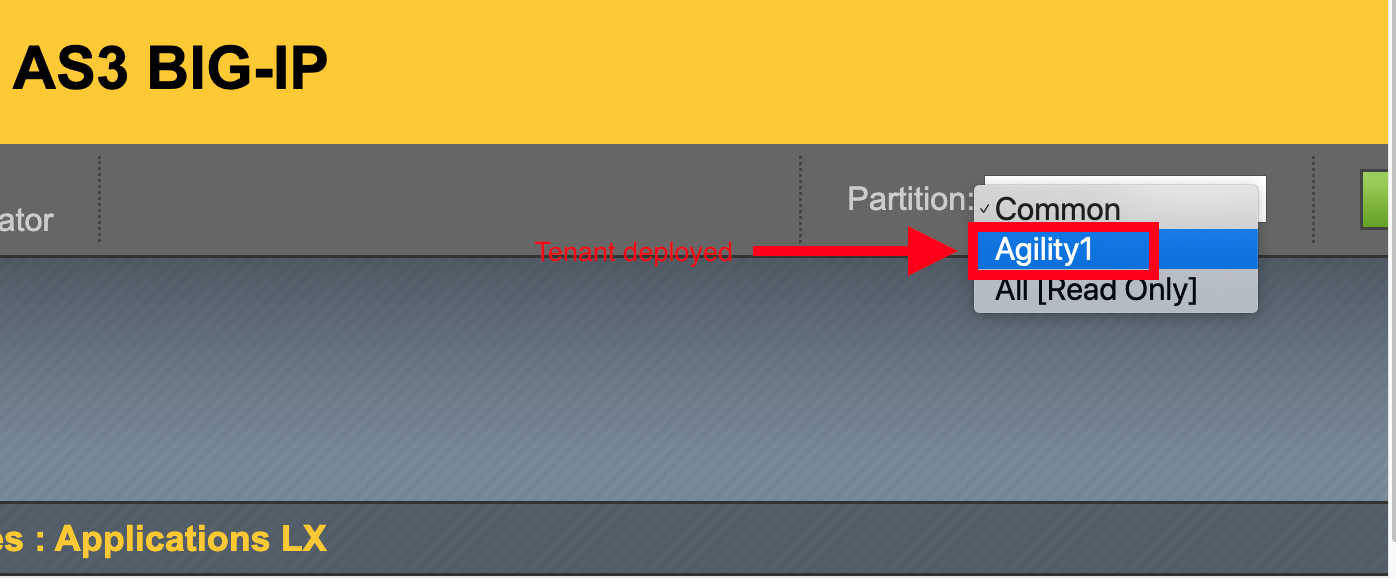
Now go to
Local Trafficand SelectVirtual Serversto see the new Virtual Server created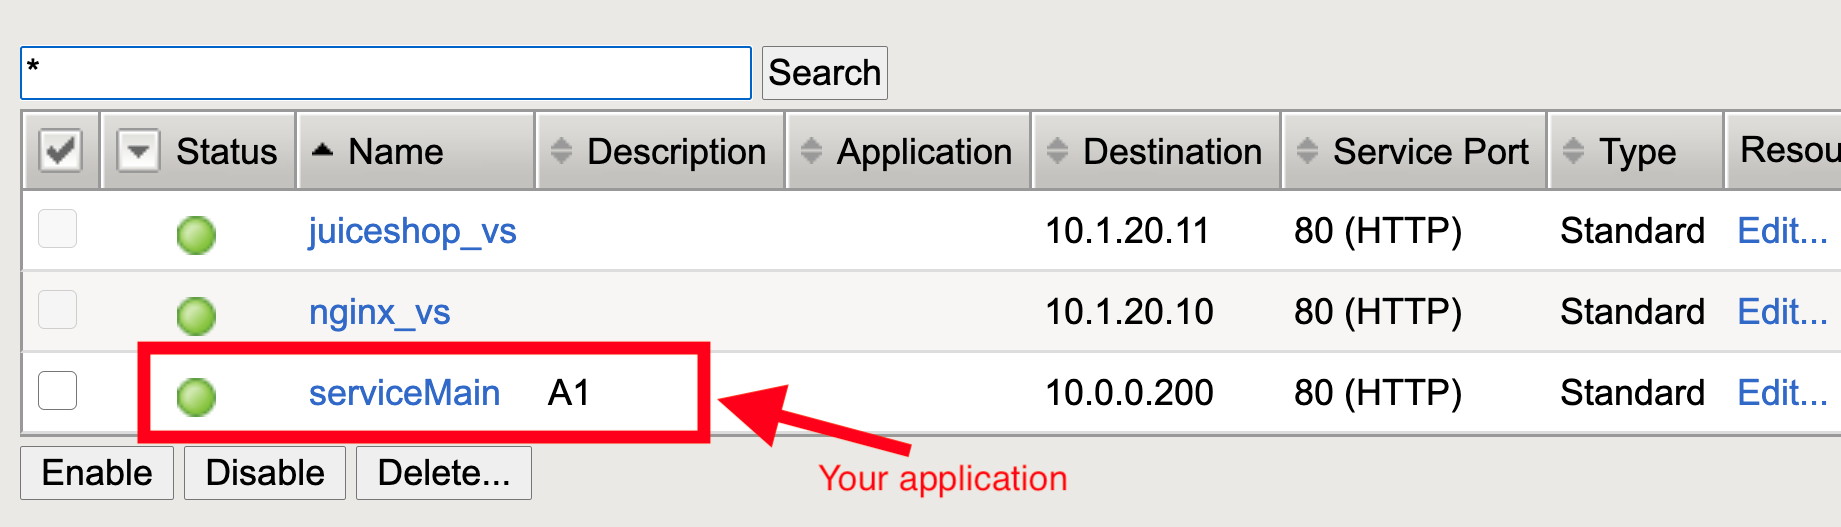
Go back to VScode and click on your
10.1.1.6BIG-IP under F5 Hosts. Then click onFAST VIEW>>Deployed Applicationsto see yournew Agility1/A1 application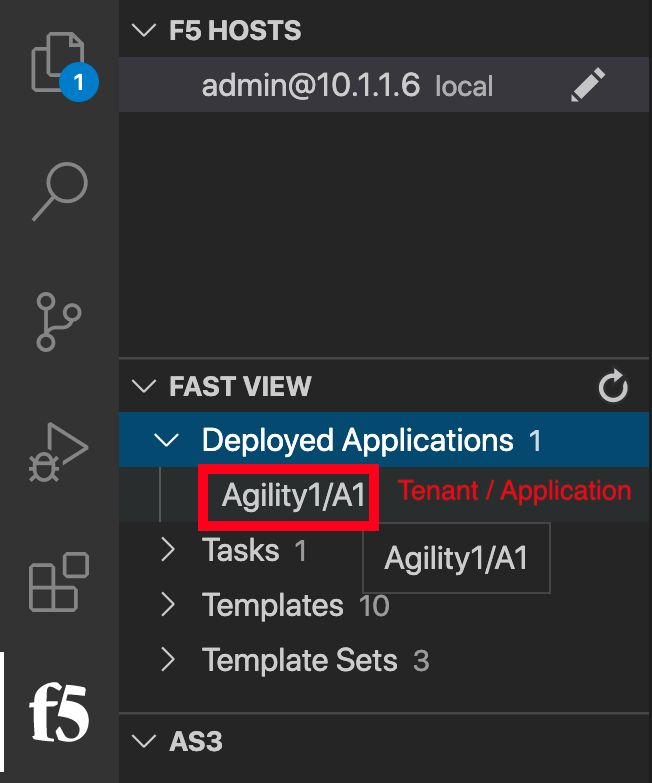
Remianing on the Agility/A1 Right Click and Select
Delete FAST Appto remove the application frm BIG-IP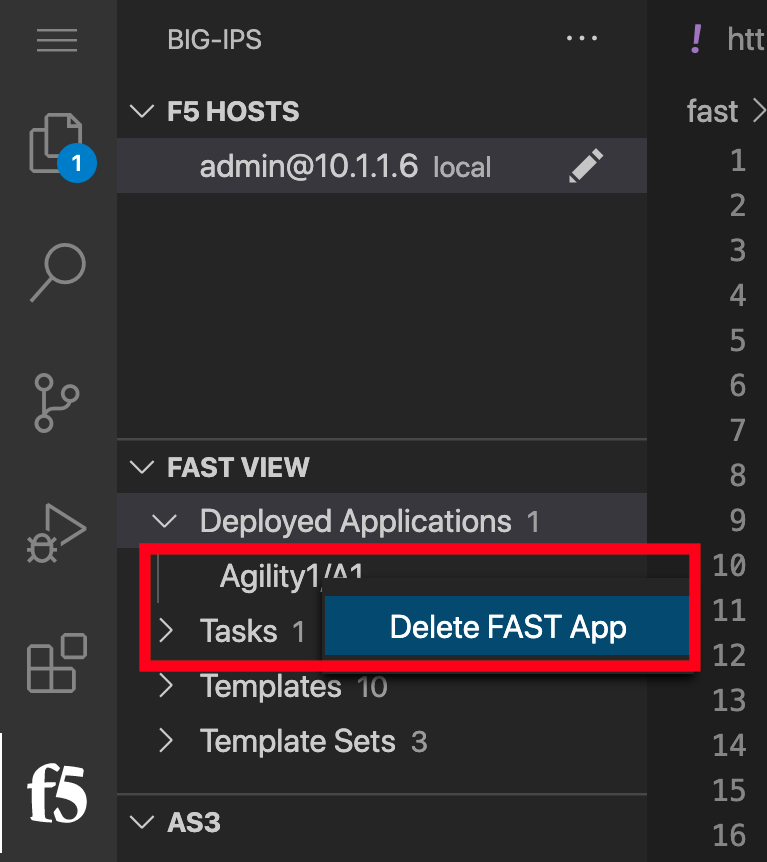
You can go back to BIG-IP GUI and check the application / Tenant is deleted.
This completes the lab.