F5 iRules Data Plane Programmability > 4. Introduction to iRules LX > 4.4. iRules LX Streaming Source | Edit on
4.4.1. Lab 1 - iRules LX Streaming
4.4.1.1. Creating and Implementing a Streaming LX Plugin
In this lab we will be loading an LX plugin in streaming mode. To keep the lab simple, we will only be loading a plugin that will print the client data to hexdump format in the log files.
4.4.1.1.1. Review the LX Workspace and Install NPM package
The first thing we need to do is view the LX Workspace. On the desktop, navigate over to the LX workspaces menu in the tab located at Local Traffic > iRules > LX Workspaces. Then click the workspace named ilxlab4_stream. You should see an extension named hexdump, then click on the index.js file. Also, we should note that you will not see a TCL rule in the workspace.
Just for reference, here is the Node.js code below:
1 2 3 4 5 6 7 8 9 10 11 12 13 14 15 16 17 18 19 20 21 22 23 24 25 26 27 28 29 30 | 'use strict';
// Hexdump all client data to stdout on L4 virtual server
var f5 = require('f5-nodejs');
var plugin = new f5.ILXPlugin();
var hexy = require('hexy');
// Register a listener for the client ILXPlugin "connect" event
plugin.on('connect', function(flow) {
// Register a listener for the ILXStream "data" event
flow.client.on('data', function (data) {
console.log(hexy.hexy(data)); //Print the client data to STDOUT
flow.server.write(data); //Pass the client data to the server stream
})
// Create event listeners for error events
flow.client.on('error', function(errorText) {
console.log('client error event: ' + errorText);
});
flow.server.on('error', function(errorText) {
console.log('server error event: ' + errorText);
});
flow.on('error', function(errorText) {
console.log('flow error event: ' + errorText);
});
});
// Tell TMM not to send data from server to Node
var options = new f5.ILXPluginOptions();
options.handleServerData = false;
plugin.start(options); //Start the plugin in streaming mode

|
As you can see from the code above we are loading the hexy package for doing the hexdumps of the buffer chunk. Therefore, we need to install this package into the workspace. To do this you will need to SSH to the BIG-IP and execute the following commands from the BASH prompt:
# cd /var/ilx/workspaces/Common/ilxlab4_stream/extensions/hexdump/
# npm install --save hexy
4.4.1.1.2. Create the LX Plugin
With our code already in a workspace, you will need to navigate over to the LX Plugins menu in the tab located at Local Traffic > iRules > LX Plugins. Click the Create button, name the plugin ilxlab4_stream_pl, select the ilxlab4_stream workspace and click finish to save the changes.
We still need to configure a few more things so once you are back to the LX Plugin list, click on the ilxlab4_stream_pl plugin and then click on the hexdump extension. Change the following settings:
| Setting | New Value | Reason |
|---|---|---|
| Concurrency Mode | Single | Keep logs for all connections in a single file. |
| iRules LX Logging | Checked | Will make extension send logs to dedicated file. |
4.4.1.1.3. Create the iRules LX Profile
Since iRules LX Streaming does not require the use of TCL iRules, we need a method to associate an LX Plugin to a virtual server. That is done with an iRules LX profile. To create a new iRules LX profile, navigate to the menu Local Traffic > Profiles > Other > iRules LX and click the + sign.
Name the new profile ilxlab4_stream_profile, select the ilxlab4_stream_pl LX Plugin and click finish to save the changes.
4.4.1.1.4. Assign the iRules LX Profile to Virtual Servers
Now we need to attach our profile to a virtual server. Go into the virtual server ilxlab4_stream_vs main configuration “properties” window (not the resources tab), then expand the Configuration menu to the advanced setting and you will see the iRules LX Profile setting as shown here:
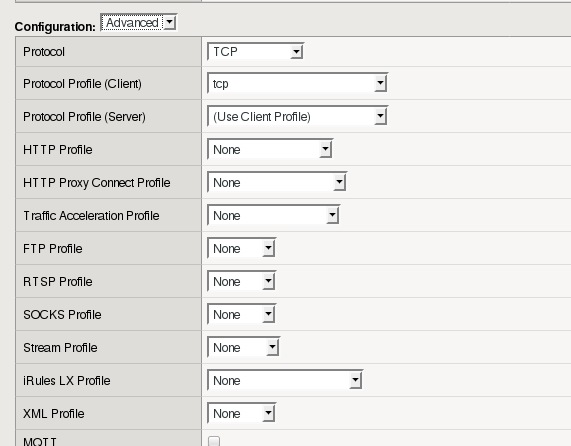
Select the ilxlab4_stream _profile then click update at the bottom to save the changes.
4.4.1.1.5. Test the ILX Streaming Plugin
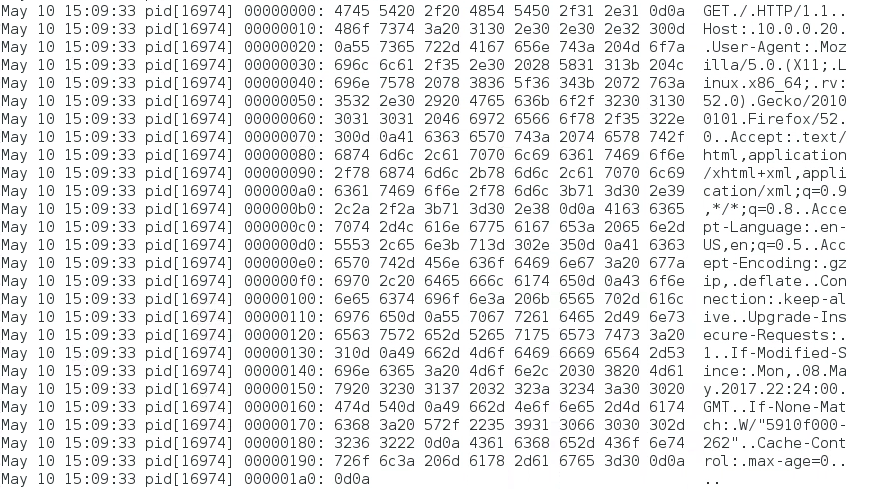
Now we should be able to see the hexdumps in the log file. First, in an SSH session with the BIG-IP, tail the log file of the plugin with the following command:
# tail -f /var/log/ilx/Common/ilxlab4_stream_pl.hexdump
Then refresh the page in the browser (URL http://10.0.0.23/ilxlab4stream) and you should see output like this in the SSH terminal:
4.4.1.2. Create and Implement an HTTP server LX Plugin
In this lab exercise, we will use the LX plugin as an HTTP server. The virtual server that we will use this LX Plugin is the ilxlab4_http_vs (10.0.0.24) virtual server which does not have a pool attached to it. This VS does not have an HTTP profile associated with it as use of the iRules LX HTTP server requires this configuration.
4.4.1.2.1. Review the LX Workspace
Go to the LX workspace named ilxlab4_http, click on the extension folder named http_server and click on the index.js file. You should see code that looks like this:
'use strict';
// Use iRules LX as simple HTTP server
var f5 = require('f5-nodejs');

// Create the HTTP request callback function
function httpRequestCallback(req, res) {
  var msg =  '<html><body><h1>ILX HTTP Server</h1>';
  msg += '<p>Welcome client "' + req.client.remoteAddress + '". ';
  msg += 'Your HTTP method is ' + req.method + '.</p>';
  msg += '</body></html>';
  // Set HTTP respond, send reply and close connection.
  res.writeHead(200, {'Content-Type': 'text/html'});
  res.end(msg);
}

var plugin = new f5.ILXPlugin();
plugin.startHttpServer(httpRequestCallback);
4.4.1.2.2. Create the LX Plugin, Profile and Attach to Virtual Server
With our code already in a workspace, all we need to do is create our LX Plugin and iRules LX profile, and attach the profile to the virtual server. Name your LX Plugin ilxlab4_http_pl. Create the iRules LX profile with the name of ilxlab4_http_profile and attach it to the ilxlab4_http_vs virtual server.
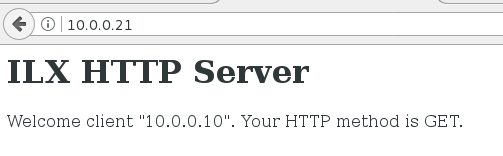
4.4.1.2.3. Test the ILX HTTP Plugin
In your web browser’s 2nd tab type in the URL http://10.0.0.24. You should see a web page like this –