NGINX Modern Apps > Class 14 – Operationalize NGINX One Configuration and Enable Self-Service through Templates > Introduction Source | Edit on
Import Rate Limiting Augment Template
We are now going to log in as Paul Platops so that we can import and grant persons in the secops role access to rate limiting augment template.
Click the person icon in the top right corner, then click the Logout link.
Click Sign In. You will be redirected to KeyCloak. When prompted for credentials, enter paulplatops as the user, NIM123!@# as the password.
In the left navigation, click Templates.
Click the green + Create button in the upper right corner.
Select Import.
Click Browse to browse the JumpHost’s file system for the template we wish to import.
Select the rate_limit_augment.tar.gz file, and click Open.
This augment template was designed to be used with the base template we used earlier in the lab. It adds the capability to attach a rate limiting policy to an HTTP Server.
Click the green Parse button in the lower right to scan and analyze the contents of this template bundle.
As you did earlier in the lab, check the Allow Signature Bypass checkbox to override the import dialog.
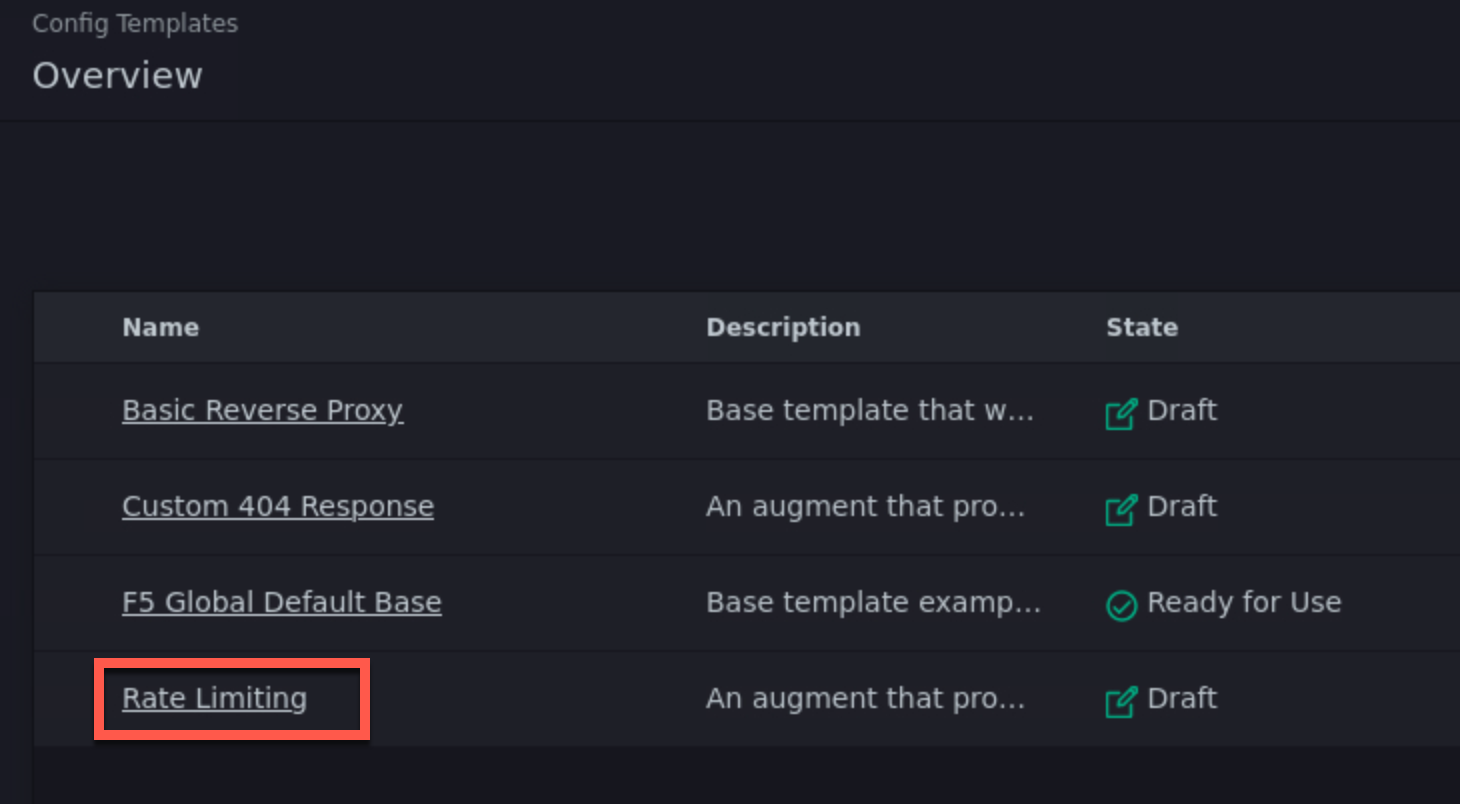
Below the checkbox, you should note that there was one template detected in a bundle, named Rate Limiting.
Click the Import button.
You will see the Config Template Created message, and see the newly imported augment template on the Templates page.
Apply the Rate Limiting Augment Template
Sally Secops has noticed that the PyGoat application’s login API has been overused by actors with questionable intent, also resulting in degraded application performance. Sally would like to attach rate limiting to the NGINX configuration or the PyGoat application’s NGINX HTTP Server. We (as Sally Secops) will use the augment template that Paul just imported to accomplish this.
Click the person icon in the top right corner, then click the Logout link.
Click Sign In. You will be redirected to KeyCloak. When prompted for credentials, enter sallysecops as the user, NIM123!@# as the password.
Click the Instance Manager tile.
Click Template Submissions in the left navigation.
Click on the Basic Reverse Proxy row. Details of the template submission appear.
At the right side of the nginx.f5demos.com row, there will be a … menu in the Actions column. Click that, then select Edit Submission.
You should see the familiar template filled with values similar to what you saw earlier.
Click Next to transition to the Choose Augments view. Note the Custom 404 Response augment template that Jane used on this template submission is still selected.
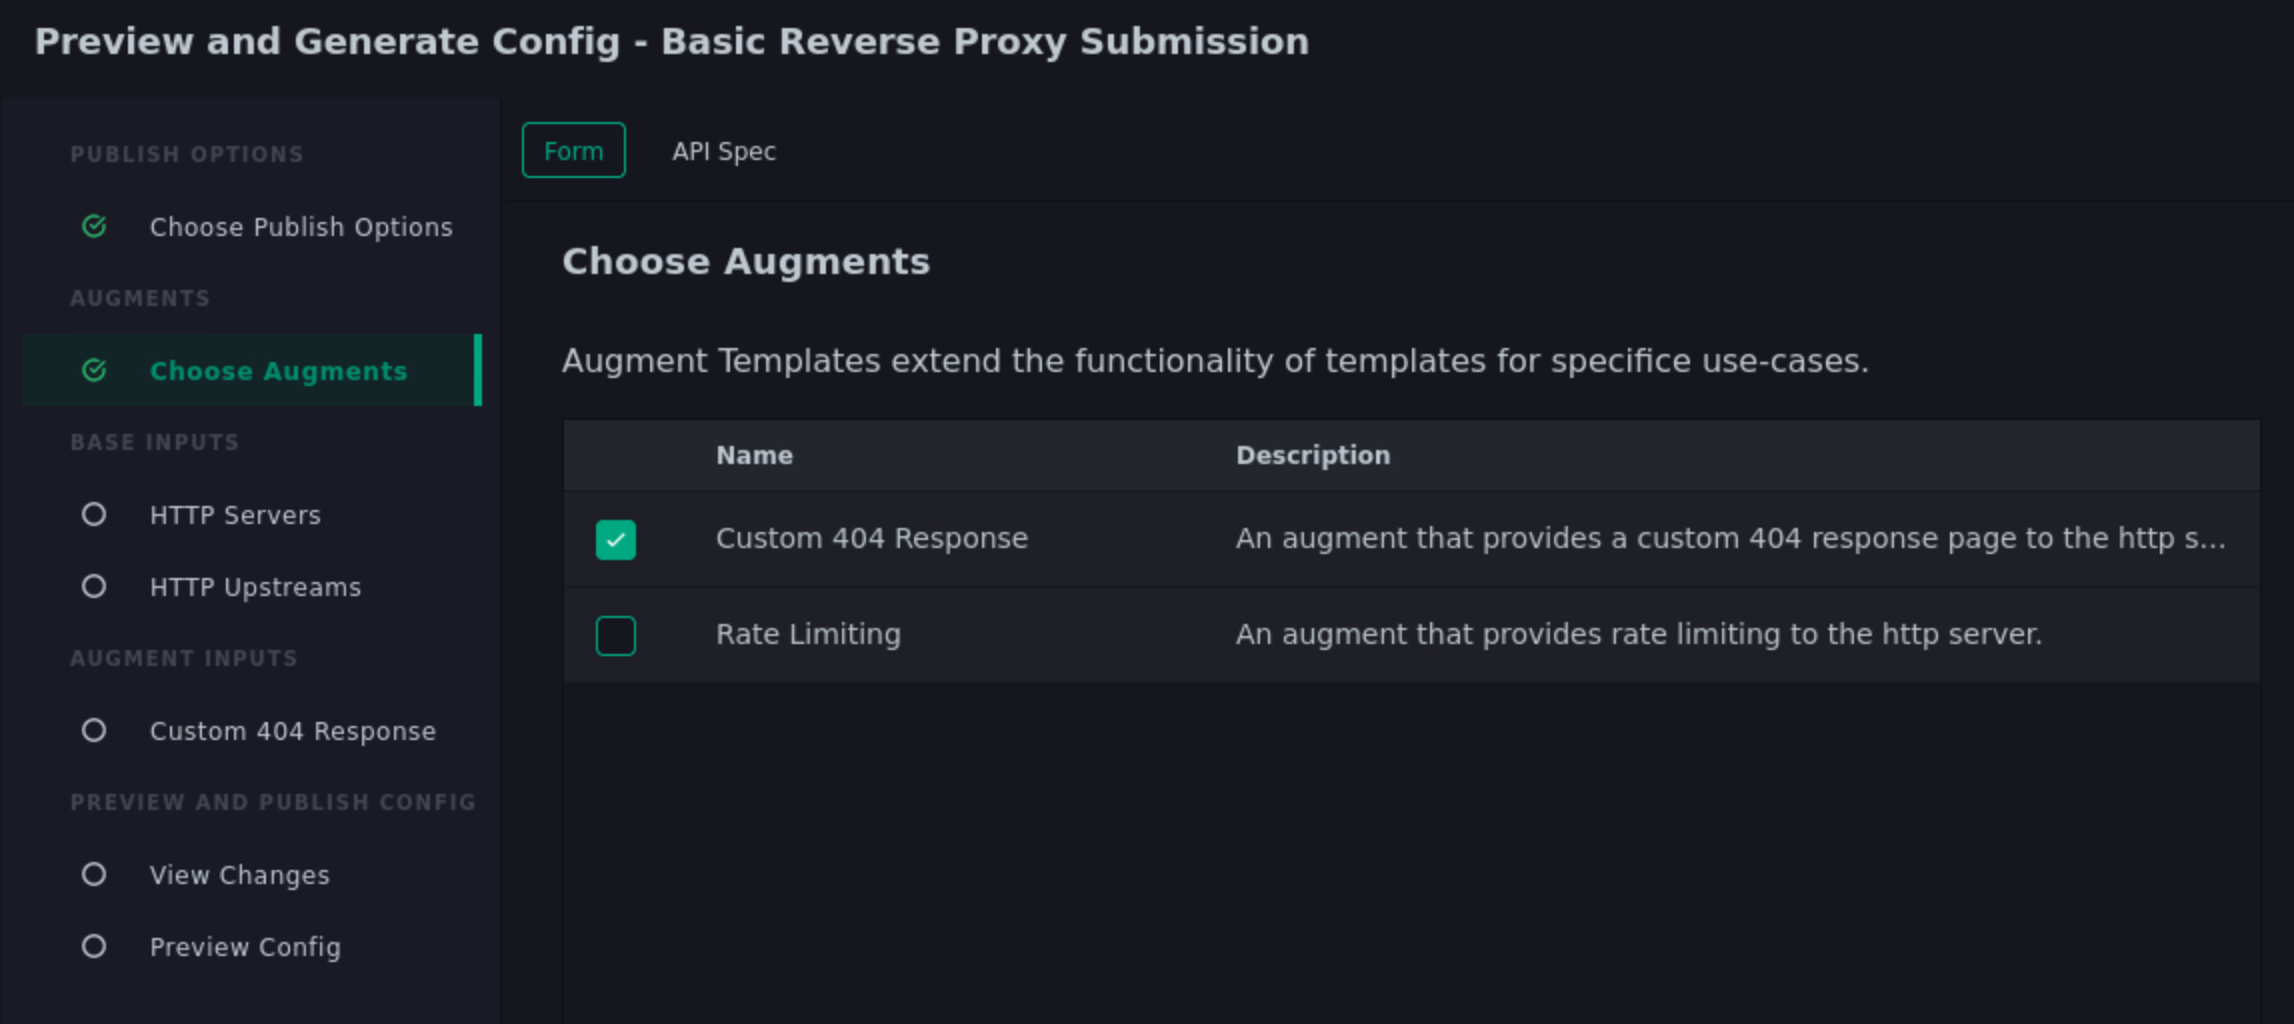
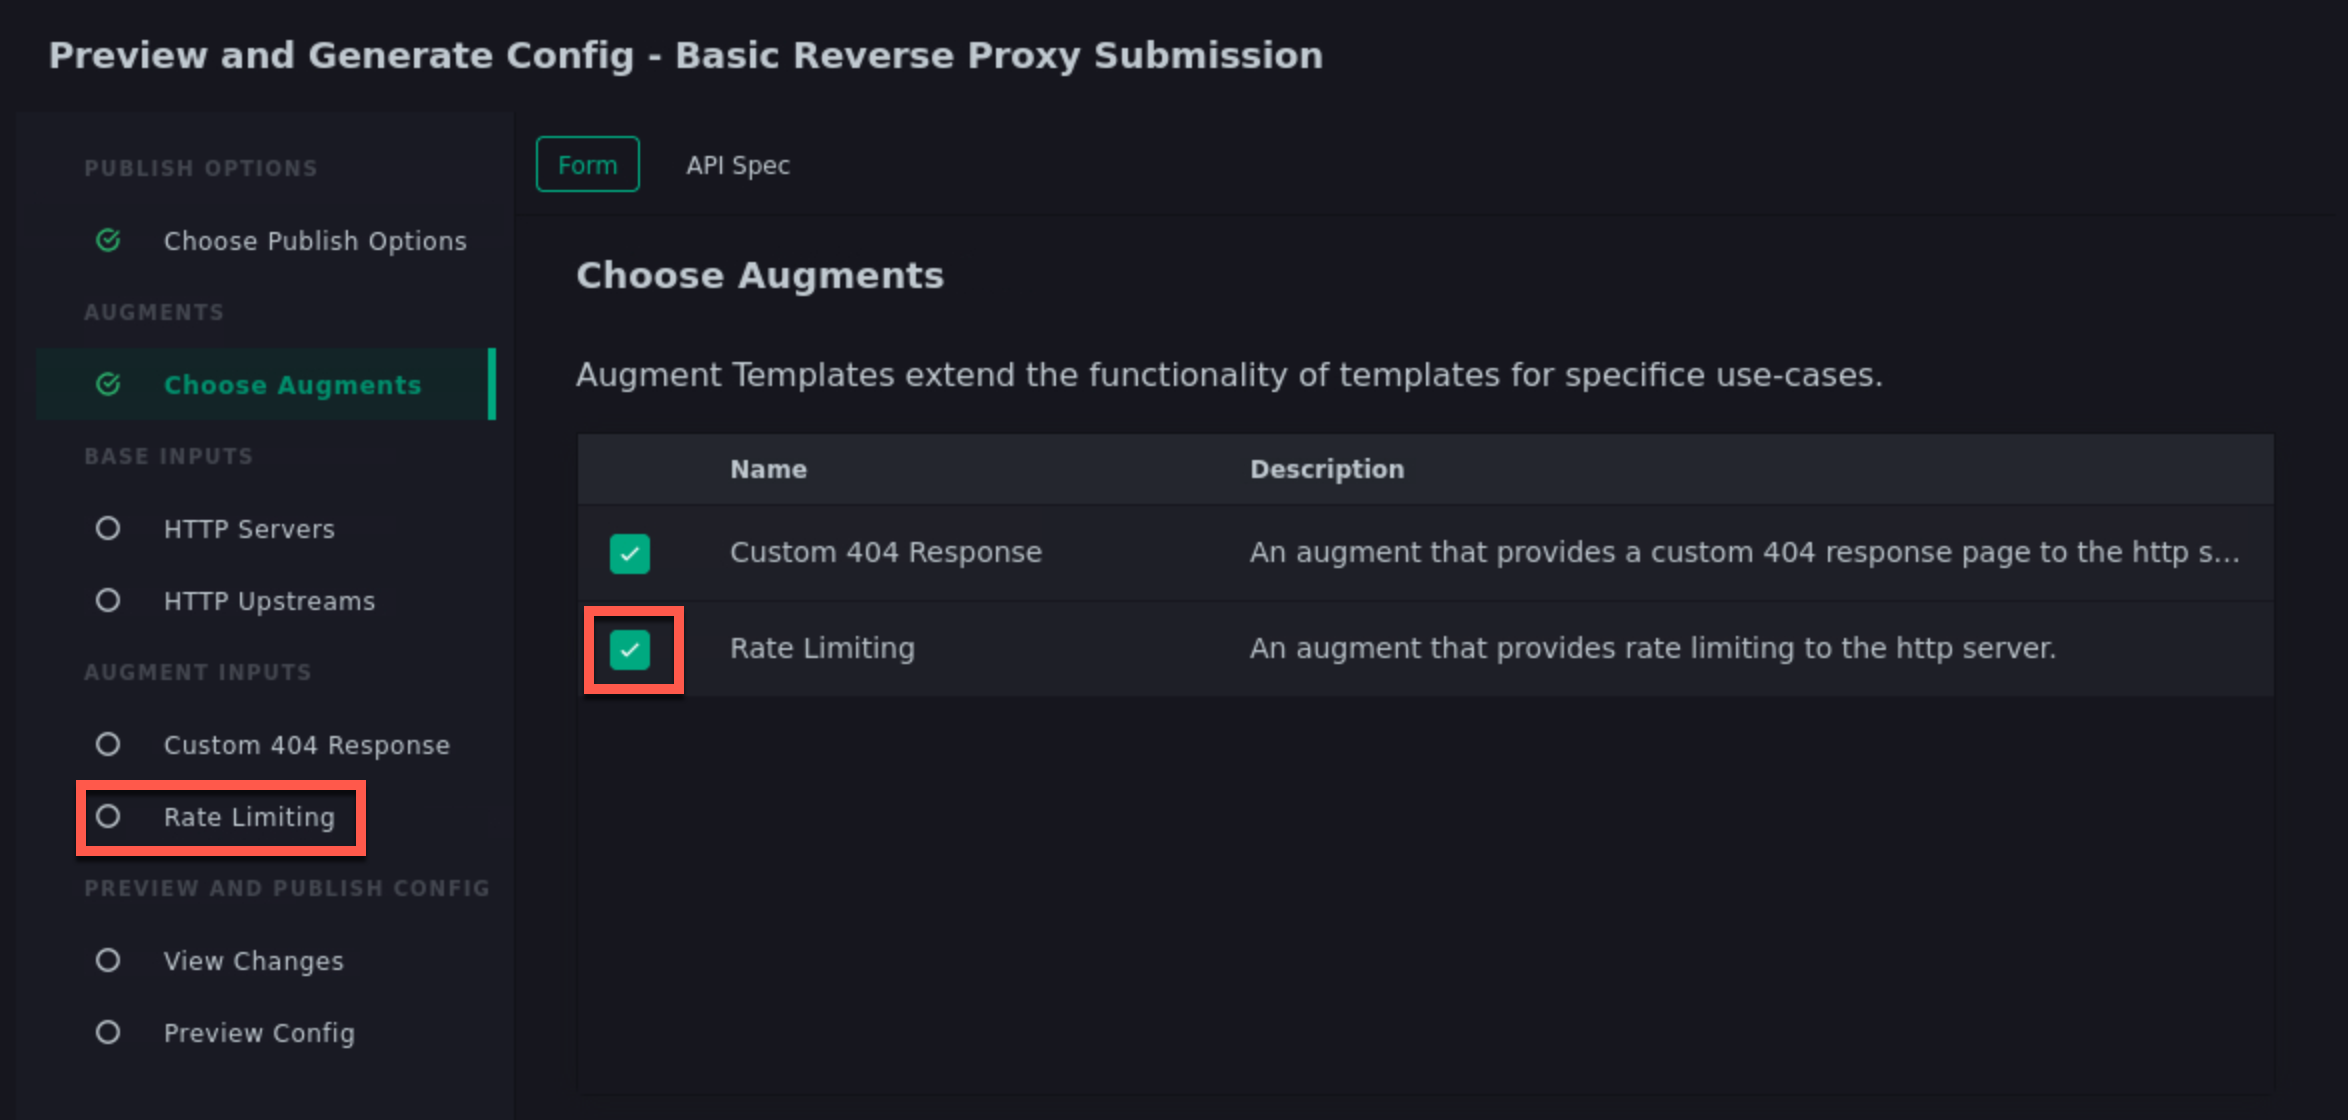
Click the checkbox on the Rate Limiting row. When you do, the template form builder will add a new step indicating there is an additional form needed to capture inputs for this new augment template.
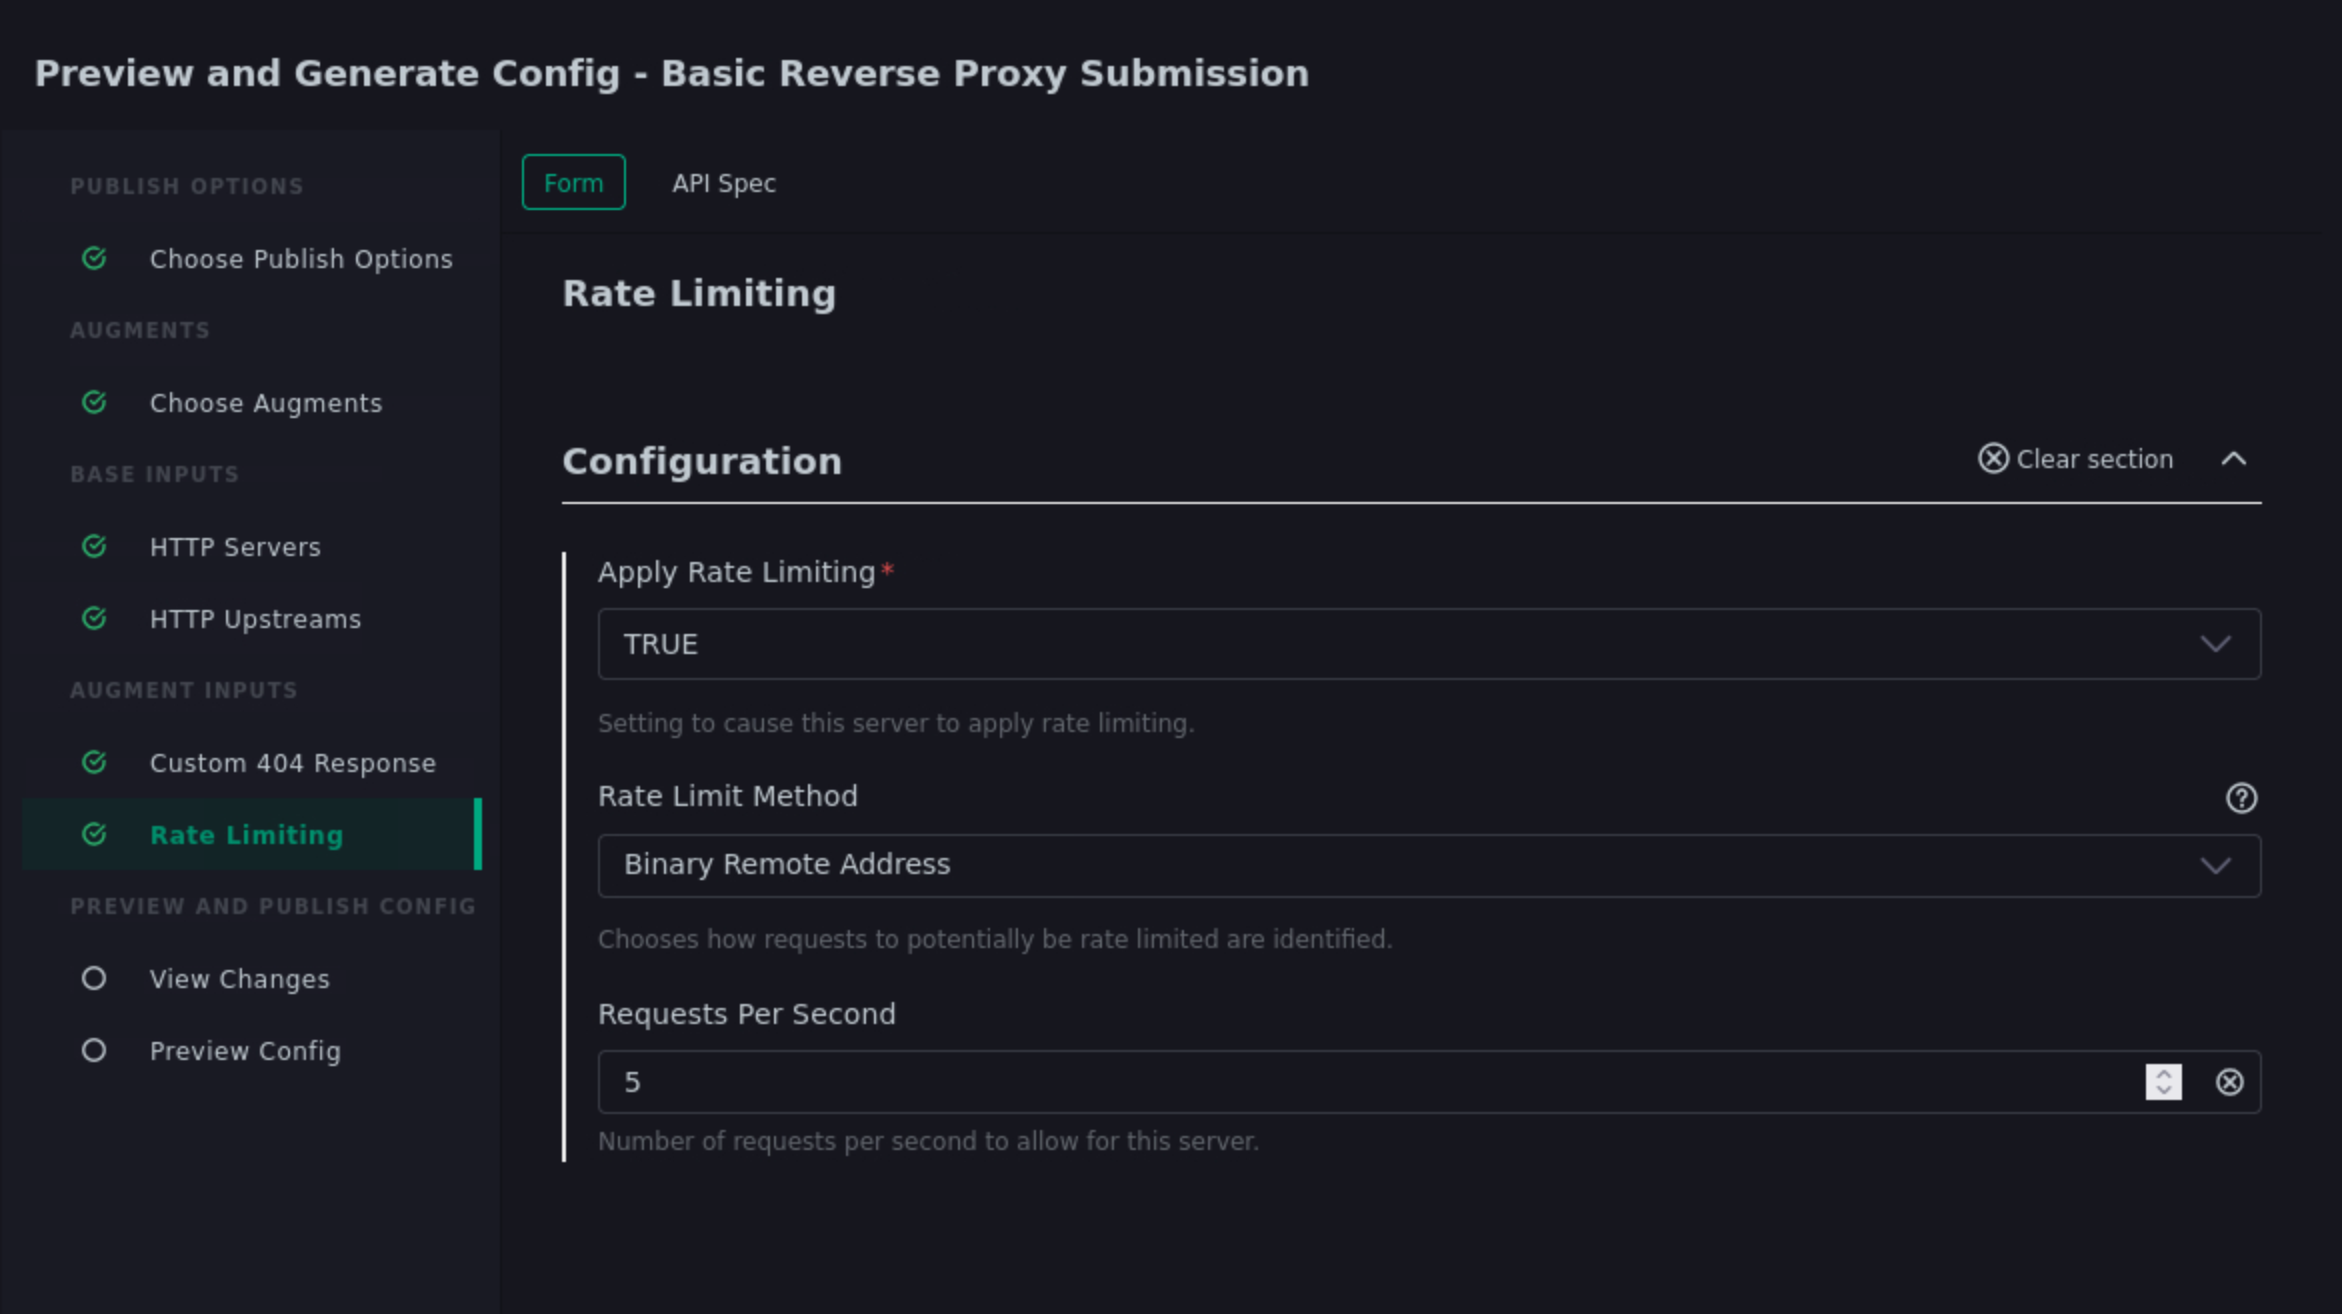
Click the Next button until you reach the Rate Limiting input step.
This step has 3 options. Enter the values from the following table:
Item Value Apply Rate Limiting TRUE Rate Limit Method Binary Remote Address Requests Per Second 5 Note: Realistically, 5 requests per second per client is extremely low. We are just using this value for illustrative purposes.
Click Next. You will be presented with the diff view showing the changes that would happen to the nginx.conf file if the changes were to be published.
Notice that there are two changes in the diff editor: one in the http context, and one in the server context. Since the Rate Limiting template needs to insert directives into both contexts, this template emits two different include statements as pictured below.
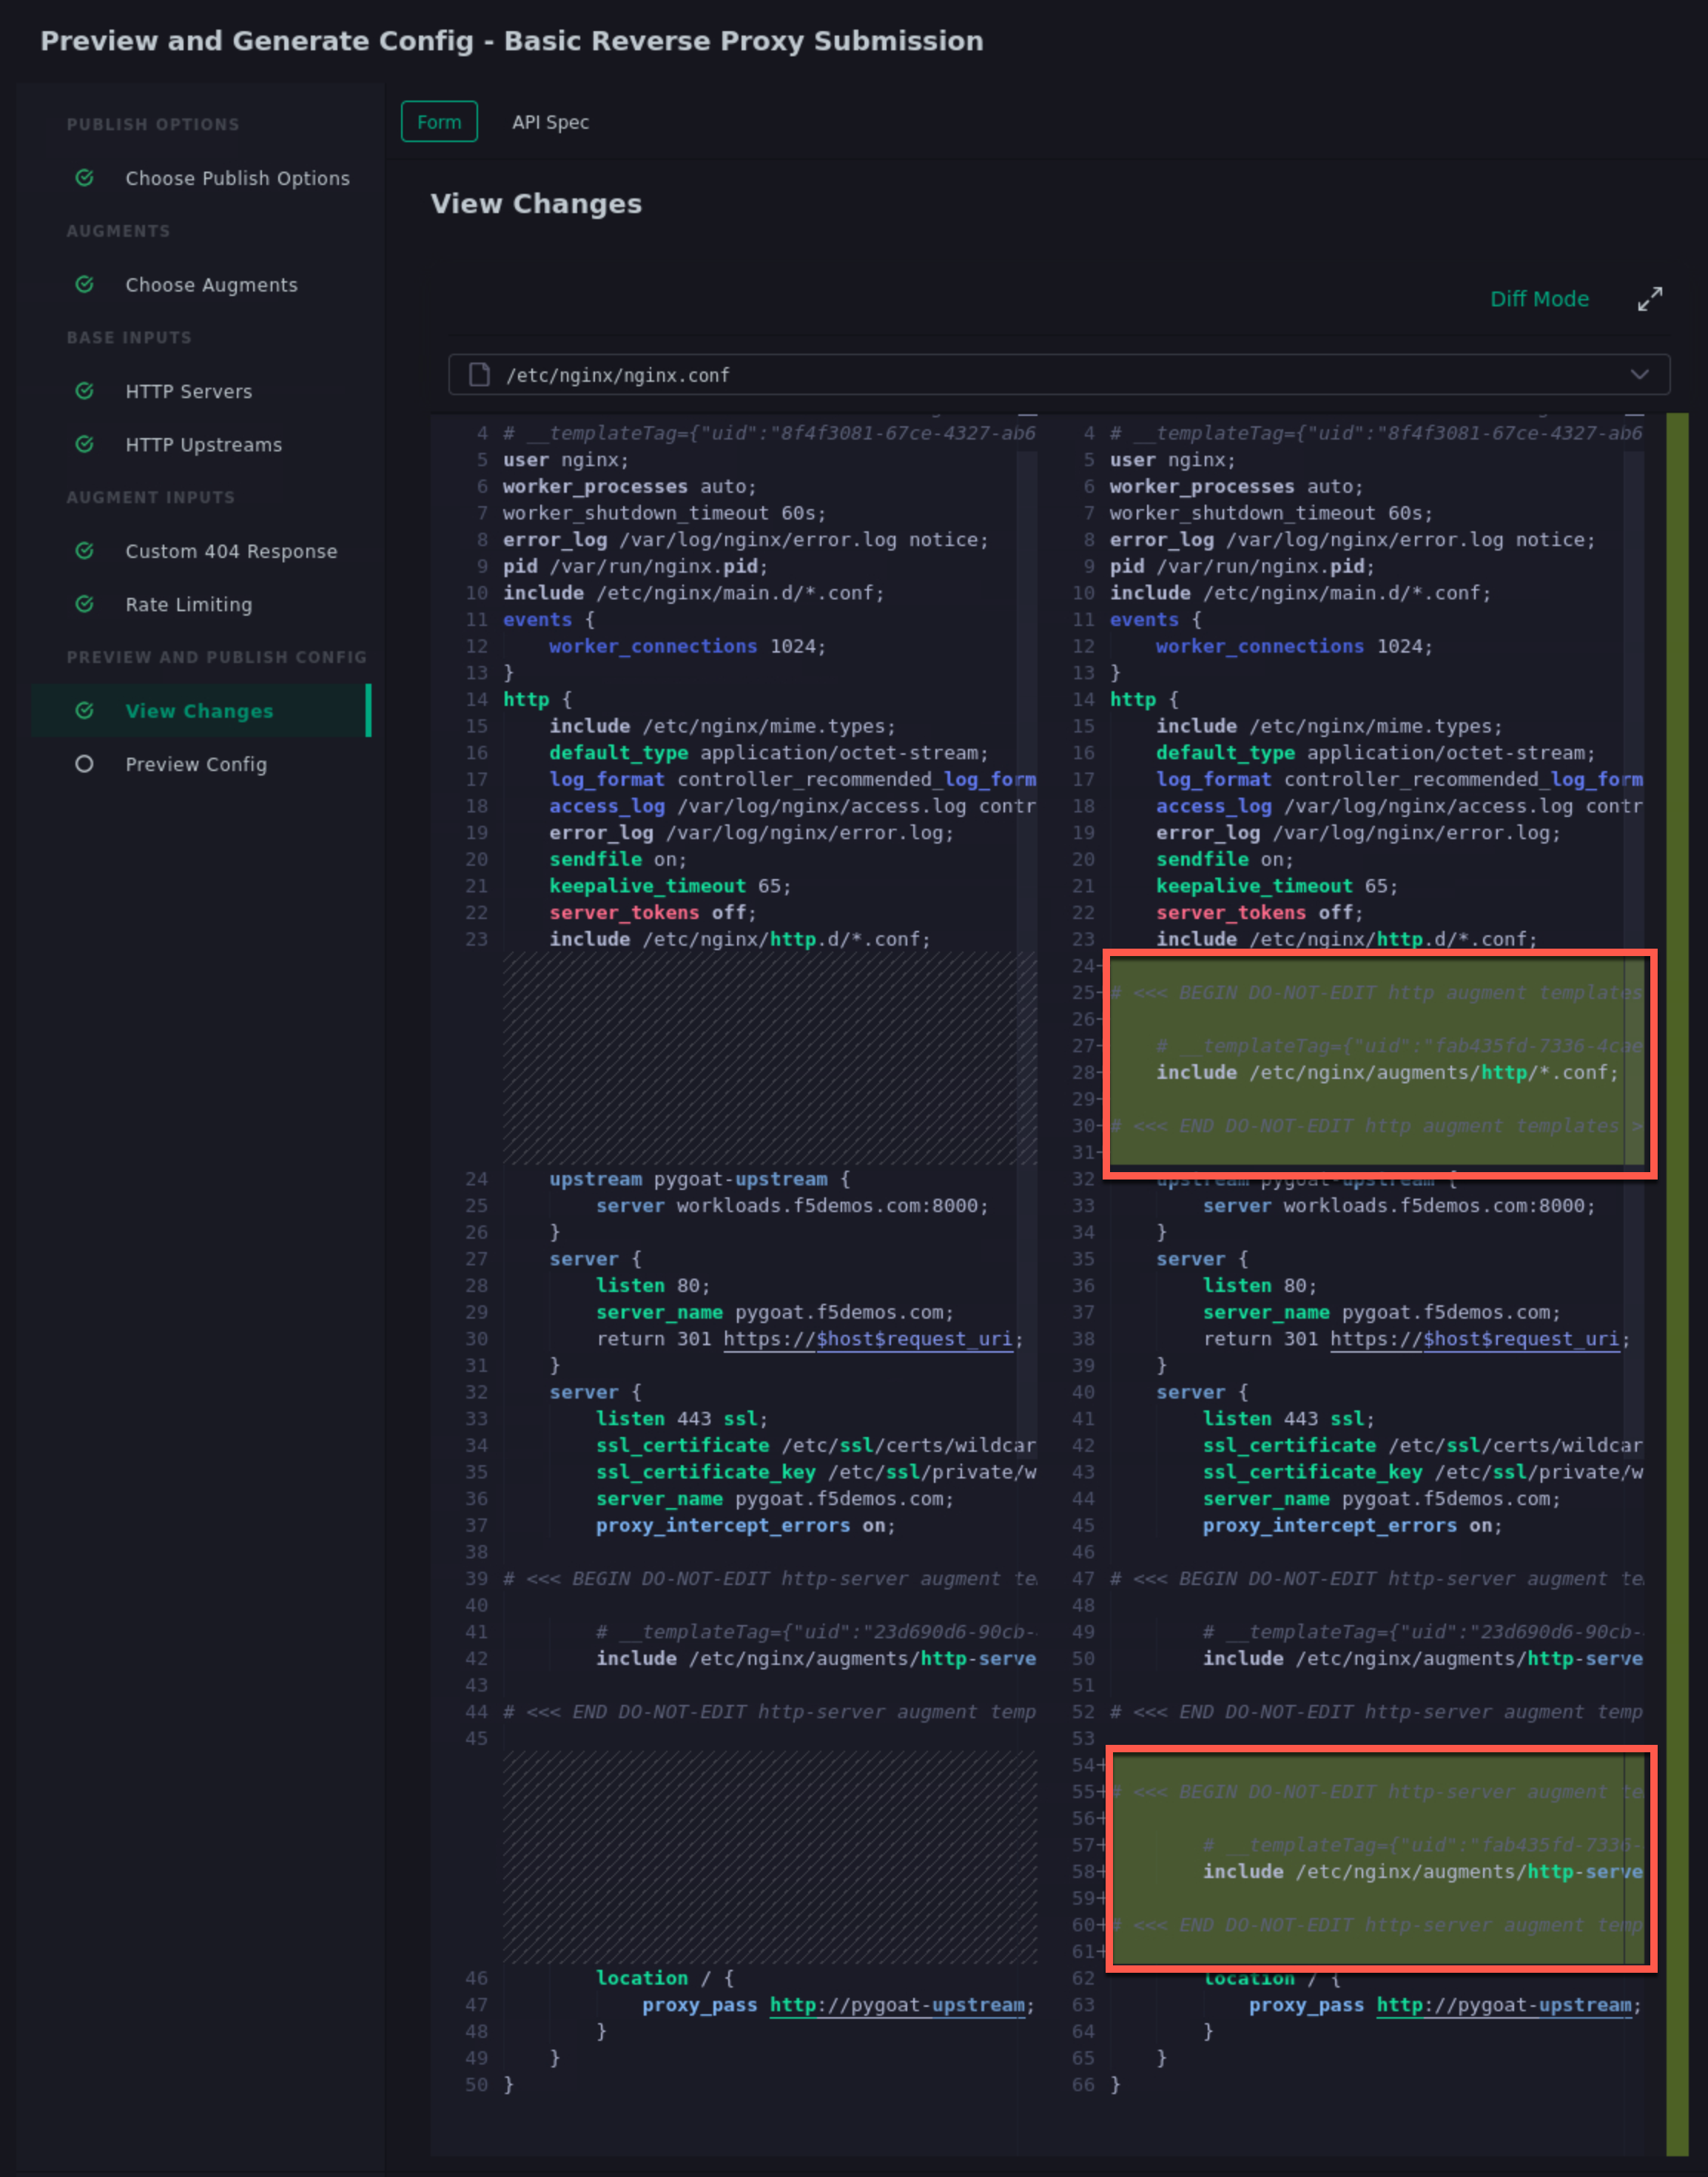
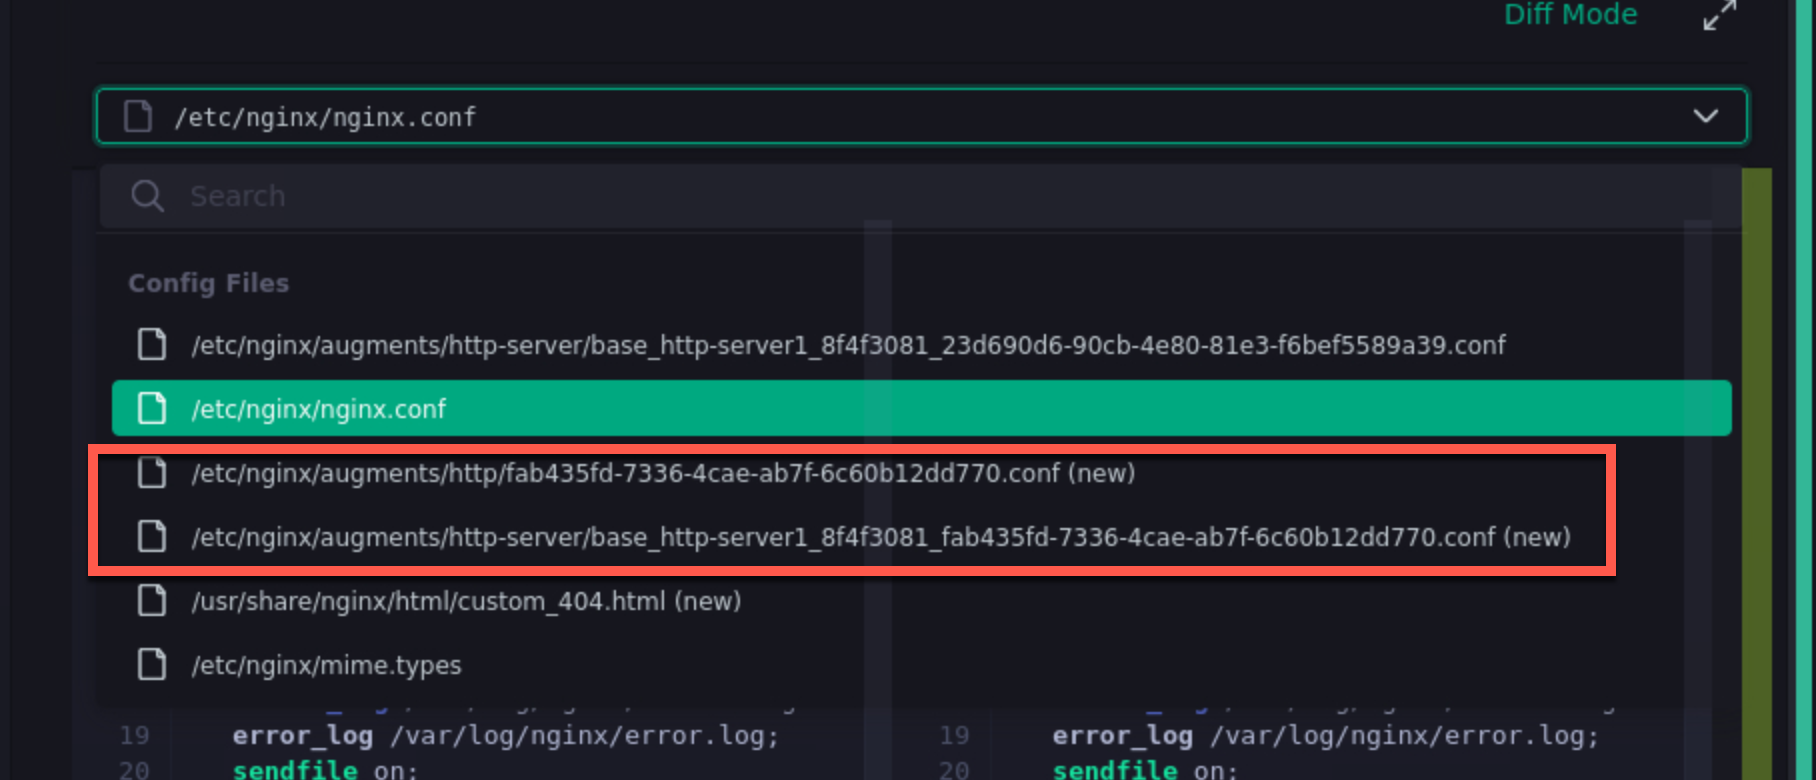
In addition to the changes to nginx.conf, there are 2 new files in the generated configuration:
- /etc/nginx/augments/http-server/base_http-server1_*<unique identifier>*.conf
- /etc/nginx/augments/http/<unique identifier>.conf
Click on each of these new files. They are files that will be included in the main nginx.conf file at the http and server contexts.
Click the Publish button. If successful, you should see a message indicating so.
Test the Rate Limiting Augment Template
In this final section of the lab, we will use the hey utility to test the efficacy of the rate limiting augment template that you just deployed.
In the UDF deployment, select the Web Shell access method of the JumpHost component.
In the Web Shell, run the following:
hey -n 10 -c 1 -q 2 https://pygoat.f5demos.com/login/
This will execute a total of 10 requests using 1 concurrent worker at a rate of 2 requests per second against the https://pygoat.f5demos.com/login/ URL. You should see output similar to the following:
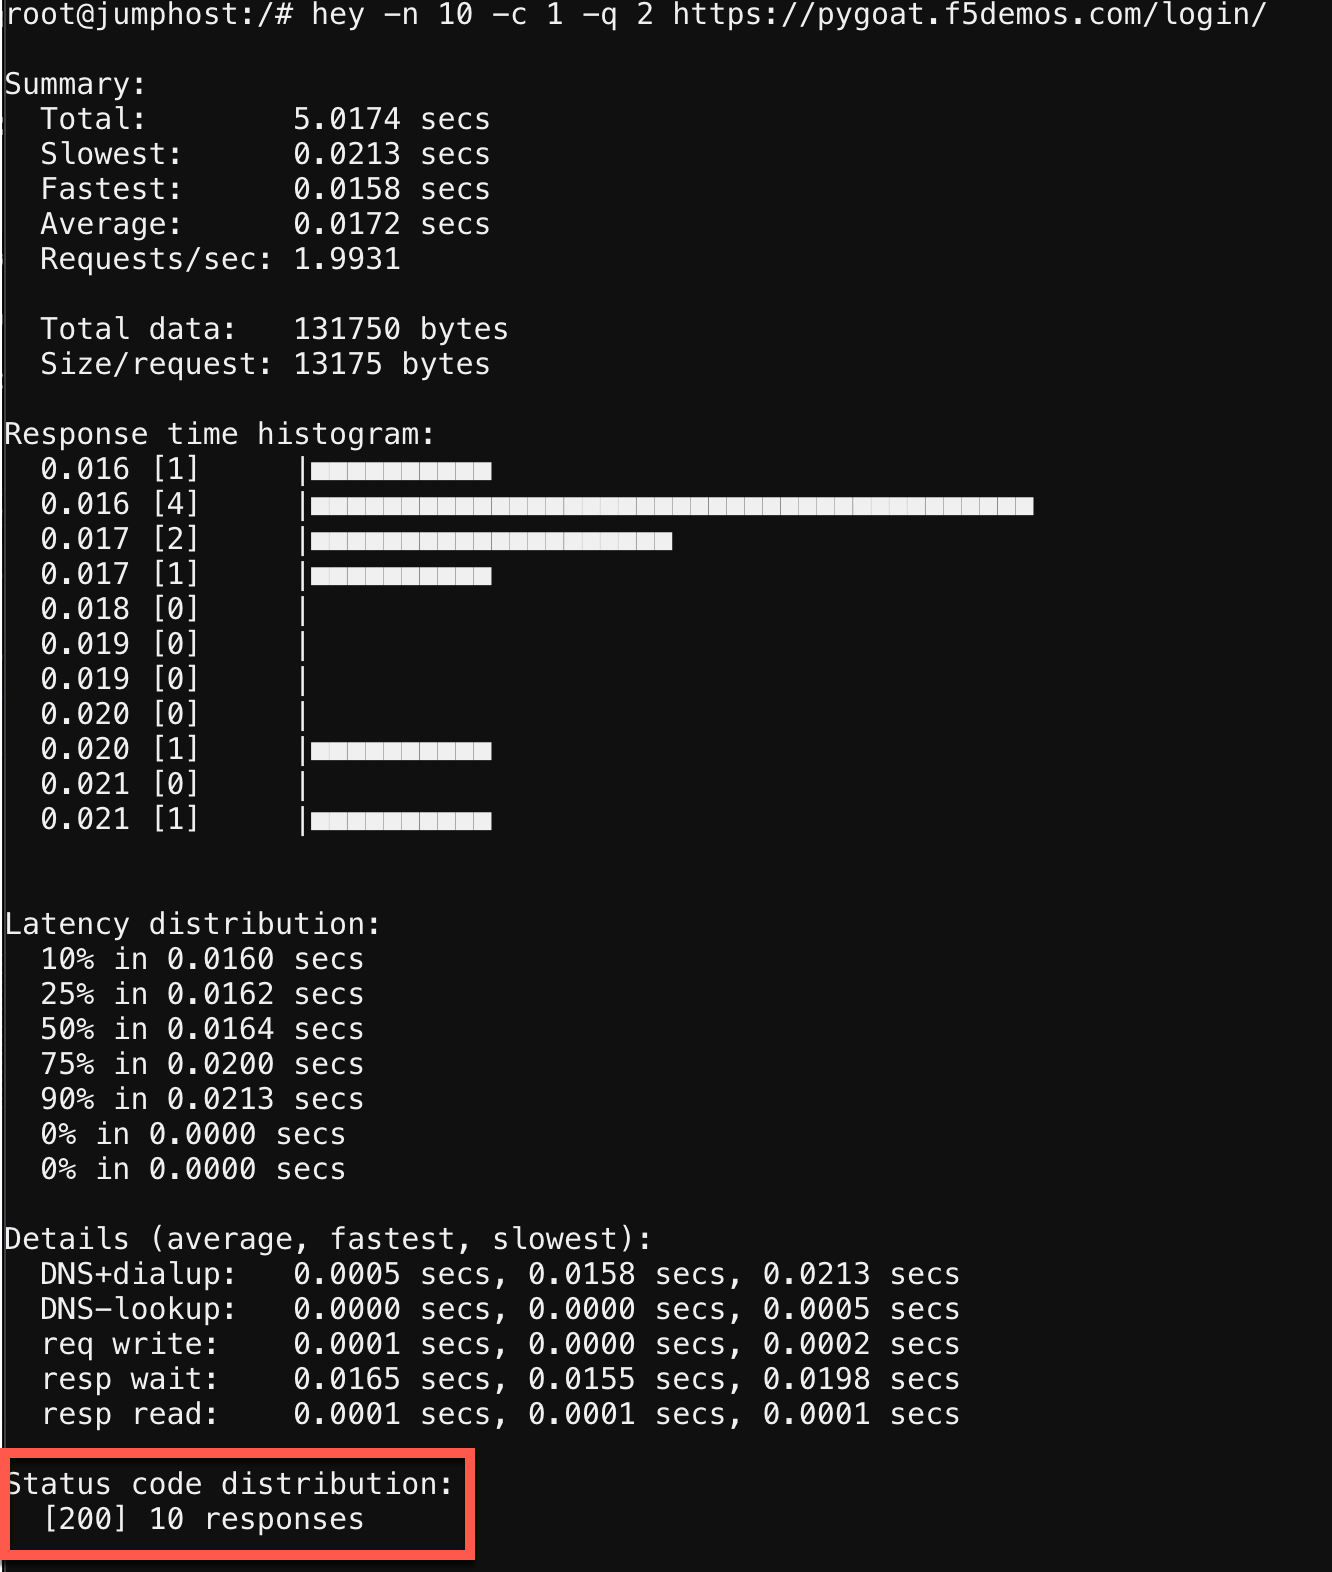
Notice that all 10 requests were successful with a status code of 200 observed. Let’s try increasing the rate to see what happens…
In the Web Shell, run the following:
hey -n 10 -c 1 -q 6 https://pygoat.f5demos.com/login/
This will execute a total of 10 requests using 1 concurrent worker at a rate of 6 requests per second against the https://pygoat.f5demos.com/login/ URL. If you recall, this rate is above the rate limiting threshold you set in the augment template. You should see output similar to the following:
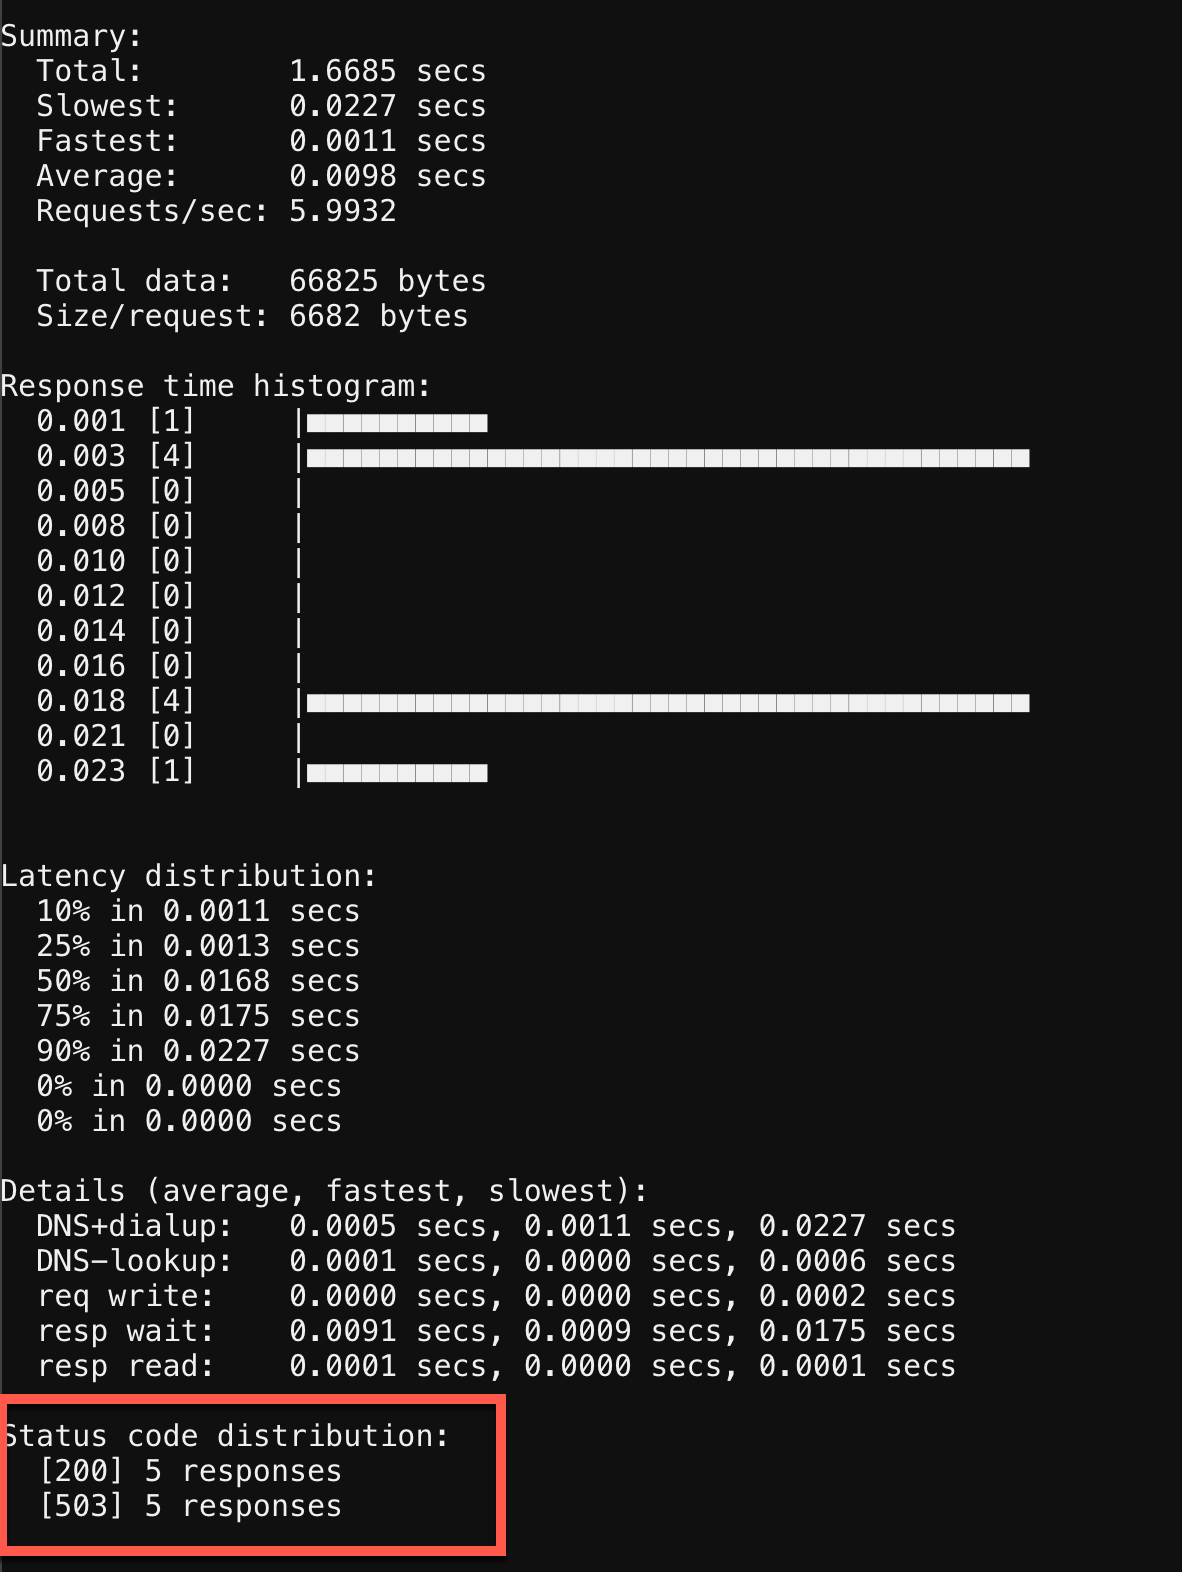
Notice that the first requests were successful with a status code of 200 observed. Then, they started to receive status code 503 (Service Unavailable), indicating that this client has been rate limited for exceeding the threshold you set.
Examine additional Custom Templates
Finally, to conclude this lab, we will log in as Paul Platops and import additional template examples developed by the NGINX community. Some are simple, such as a basic location block, while others are more advanced, like health checks and OIDC. These examples will demonstrate the flexibility of this feature and the wide variety of use cases it supports. Many of these templates can be customized to suit your needs, depending on your specific NGINX use cases.
Click the person icon in the top right corner, then click the Logout link.
Click Sign In. You will be redirected to KeyCloak. When prompted for credentials, enter the following:
User: paulplatopsPassword: NIM123!@#Click the Instance Manager tile.
In the left navigation, click Templates.
Click the green + Create button in the upper right corner.
Click Browse to select a template to import from the JumpHost’s file system.
Select the n1_templates_http_examples.tar.gz file, and click Open.
There is a wide selection of templates here for common NGINX use-cases.
Click the green Parse button in the lower right to scan and analyze the contents of this template bundle.
As you did earlier in the lab, check the Allow Signature Bypass checkbox to override the import dialog.
Below the checkbox, you should note that there are multiple Templates detected in the bundle.
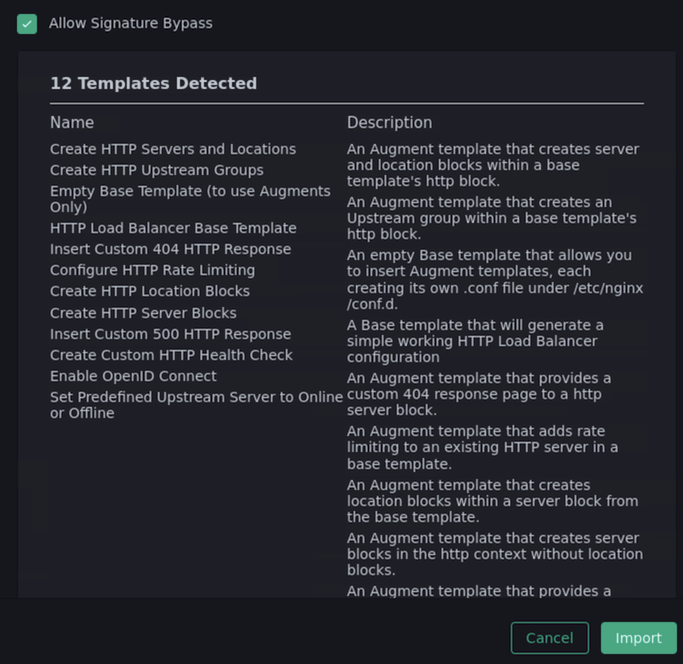
Click the Import button at the bottom right.
Conclusion
As you have witnessed, NIM’s Templating framework gives organizations the control they need to empower users of their NGINX platform. Via templates, these users can apply use cases to their application delivery tier without requiring they be NGINX configuration experts. Additionally, the framework allows organizations to provide this capability to users in a “least-privileged” manner - only granting them permissions to execute templates on the instances they have been assigned. This ensures compliance, and significantly narrows the “blast radius” in the event an outage occurs due to human error while configuring.