F5 BIG-IP SSL Orchestrator Training Lab > All SSL Orchestrator Lab Guides > SSLO 101: Introduction to SSL Visibility with SSL Orchestrator (AppWorld 2026 | 2 hours) > 3. Lab 1: Deploy an Outbound Transparent Forward Proxy Source | Edit on
3.4. Deploying a Basic L3 Outbound Proxy Topology
You will now create a simple L3 Outbound topology. This topology type deploys a transparent forward proxy configuration. When you route the Client's outbound Internet traffic to the BIG-IP SSL Orchestrator's listening interface, the transparent forward proxy will process it. An SSL Orchestrator Security Policy will determine: (1) whether to allow or block the traffic, (2) whether to decrypt or bypass decryption, and (3) whether to forward the traffic to inspection services.
The SSL Orchestrator Guided Configuration wizard presents a step-by-step workflow map at the top of the page. The current step will be indicated in the map, with configuration options displayed below it. Note that you are currently at the Topology step.

To define topology properties:
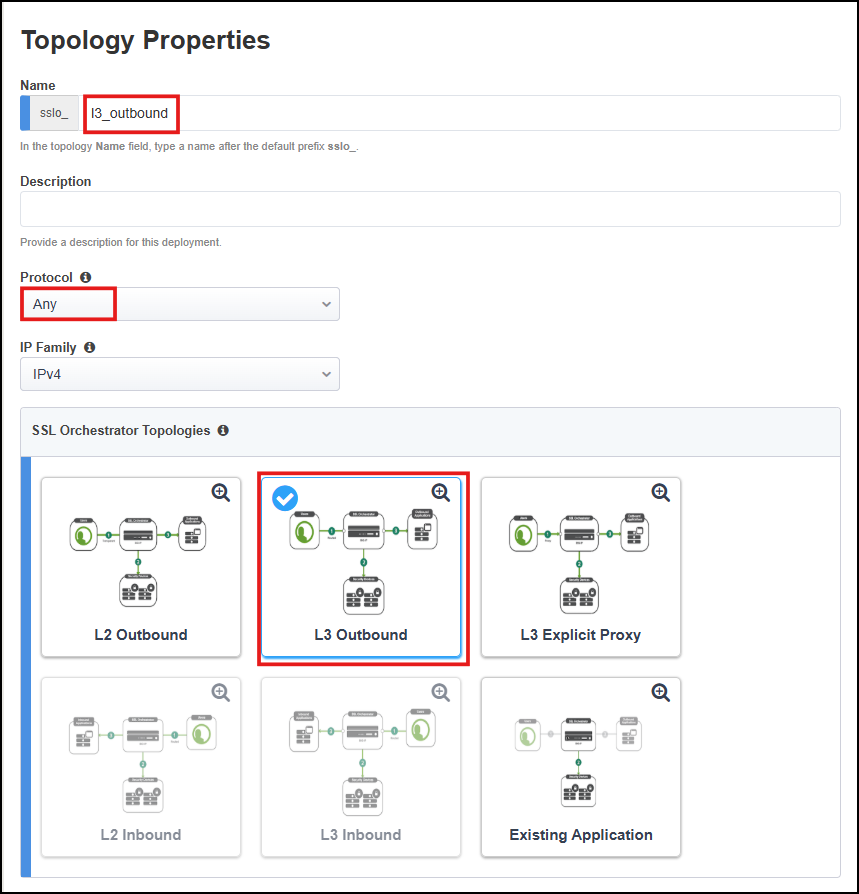
Enter
l3_outboundas the topology name.Tip
As a general rule, avoid using dashes (e.g.,
sslo-demo-1) when naming objects in SSL Orchestrator. Underscores (e.g.,sslo_demo_1) and camel-case (e.g.,ssloDemo1) are preferred.Enter a description for your topology.
Select Any from the Protocol drop-down list. This will allow the SSL Orchestrator to accept TCP, UDP, and non-TCP/non-UDP traffic.
Attention
Double-check that you selected Any. If you do not, your Ping tests later in this lab exercise will fail. You cannot edit this setting after you have deployed the Topology. To change it, you will have to rebuild the Topology.
Leave the default IP Family setting (IPv4).
Select the L3 Outbound topology type.
Scroll down to the bottom of the page and click on the Save & Next button to proceed to the next step in the configuration workflow.