F5 BIG-IP SSL Orchestrator Training Lab > All SSL Orchestrator Lab Guides > SSLO 101: Introduction to SSL Visibility with SSL Orchestrator (AppWorld 2026 | 2 hours) > 3. Lab 1: Deploy an Outbound Transparent Forward Proxy Source | Edit on
3.5. Create SSL Configurations

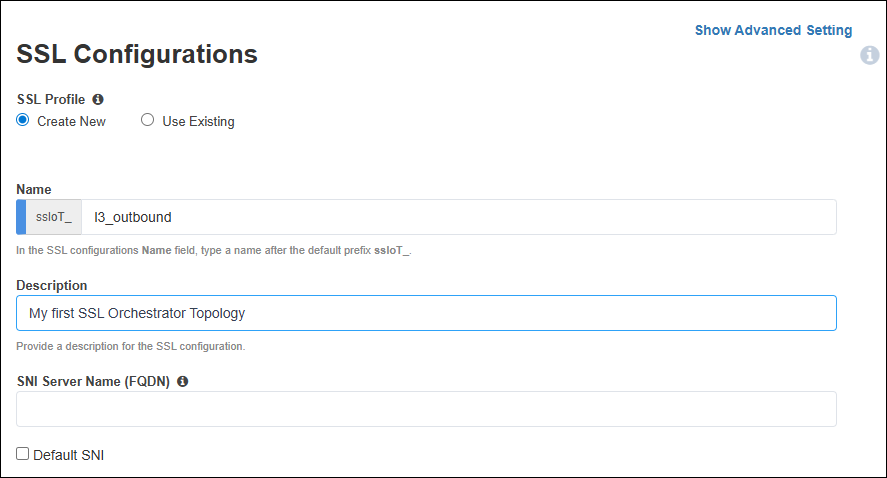
On the SSL Configurations page, create the Client-side SSL profile for the L3 Outbound forward proxy.
In the Name field, leave the default value as
l3_outbound.Enter a description for the SSL configuration.
Leave the SNI Server Name (FQDN) field empty and do not select the Default SNI checkbox. These settings are not applicable to the current scenario.
Client-side SSL Settings
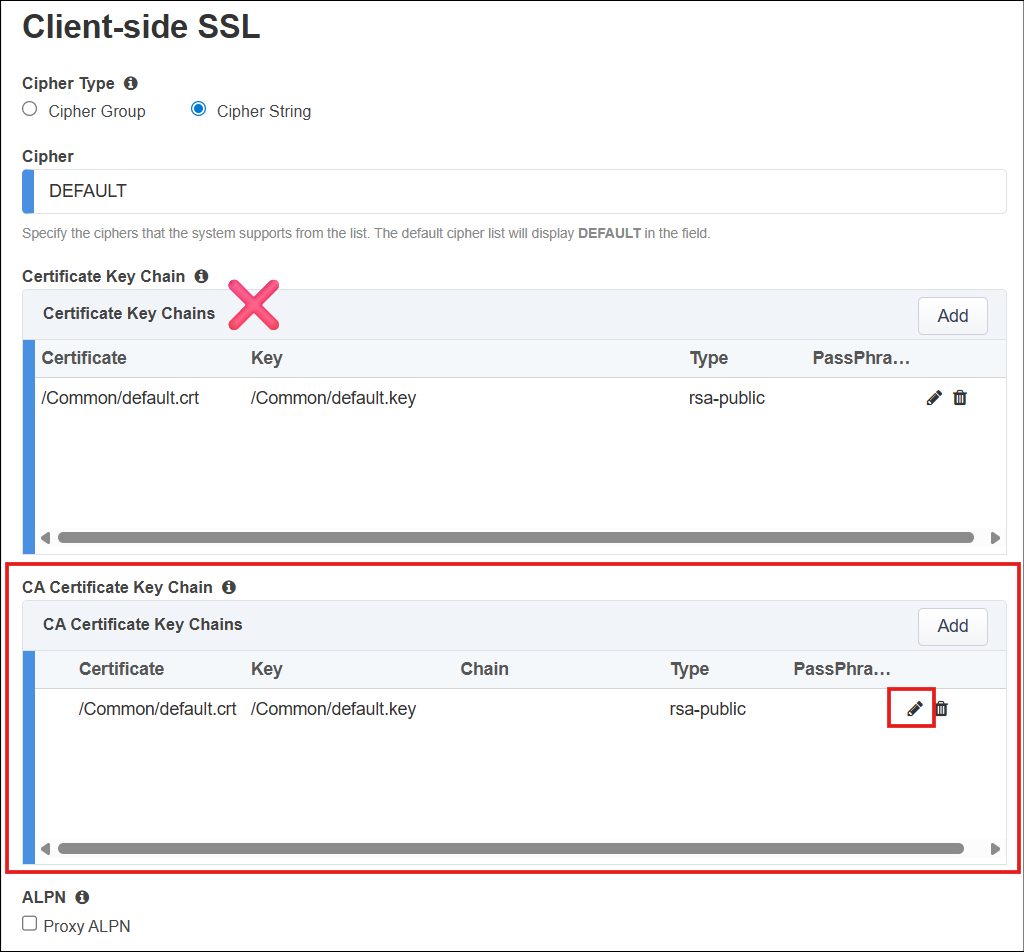
In the Client-side SSL > Certificate Key Chain section, leave the default settings as is (default certificate and key).
Important
Since this is an outbound forward proxy deployment, the SSL Orchestrator will be using a subordinate (intermediate) CA certificate and private key to sign the re-issued (forged) certificates delivered to clients. This is configured in the CA Certificate Key Chains section, not the Certificate Key Chains section.
In the CA Certificate Key Chain section, click on the Edit (pencil) icon.
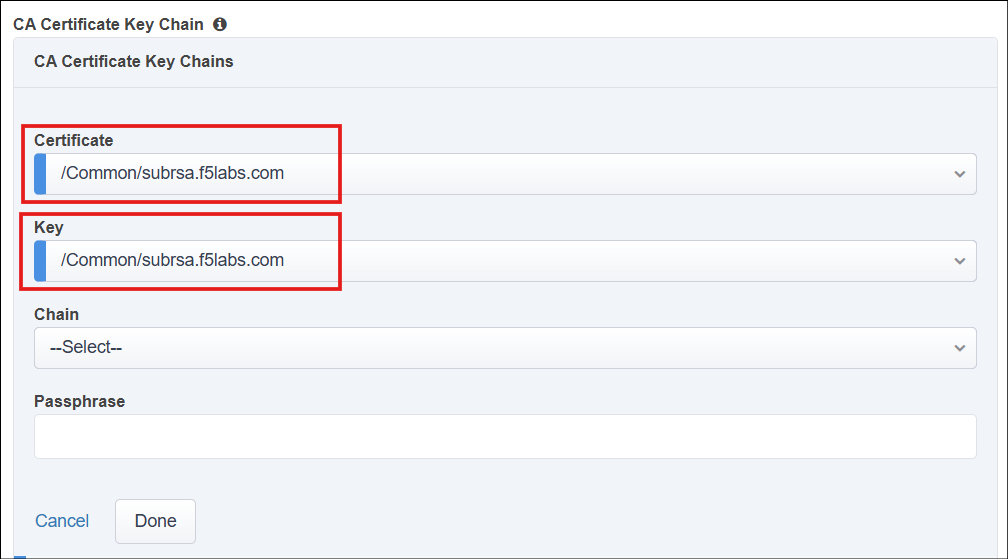
In the Certificate drop-down list, select subrsa.f5labs.com to replace the default value.
In the Key drop-down list, select subrsa.f5labs.com to replace the default value.
Ensure that the Passphrase field is empty (clear it if not empty).
Click the Done button to continue.

Note
When using subordinate (intermediate) CA certificates, both the subordinate and root CA certificates must be imported into the client browser's trusted certificates store. The Ubuntu-Client machine in the lab environment already has these installed.
Server-side SSL Settings
These settings define the ciphers that SSL Orchestrator can use when initiating TLS connections to remote servers, as well as the Certificate Authorities that are trusted.
The default Server-side SSL settings are sufficient for outbound Internet forward proxy use-cases.

Click on the Save & Next button to proceed to the next step in the configuration workflow.