F5 BIG-IP Next Access Labs > User Authentication > Lab 2 - SAML Azure authentication with Kerberos SSO Source | Edit on
Lab 2.2 - Create an Access Security Policy
Creating a security policy with authentication to Azure and Kerberos Single Sign-On
- Access BIG-IP Next Central Manager if you’re not already logged in.
- Click on the Workspace icon and select Security
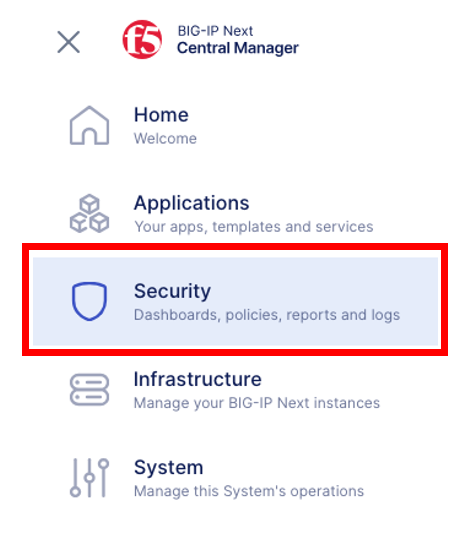
Click on the Access from the Security menu.
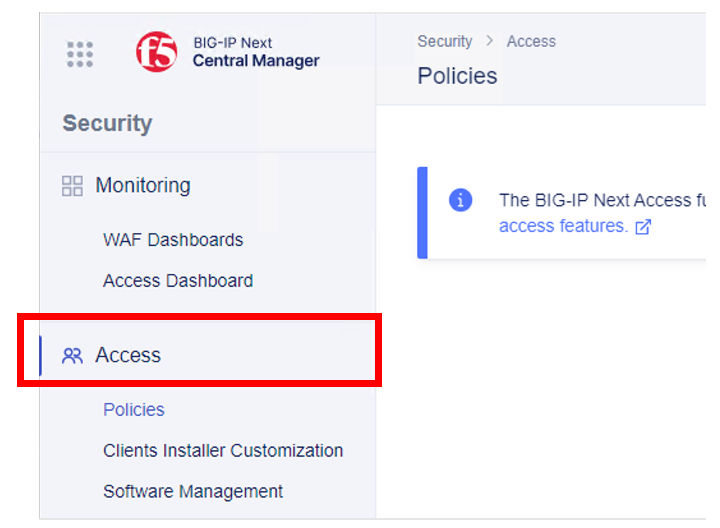
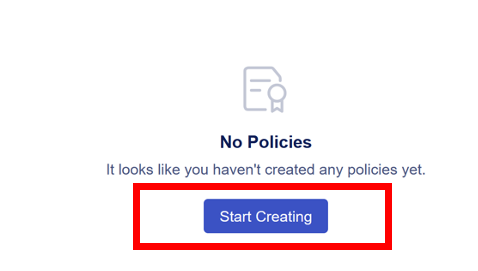
- Click the Start Creating button to create a new Access policy, or the create button on top right corner.
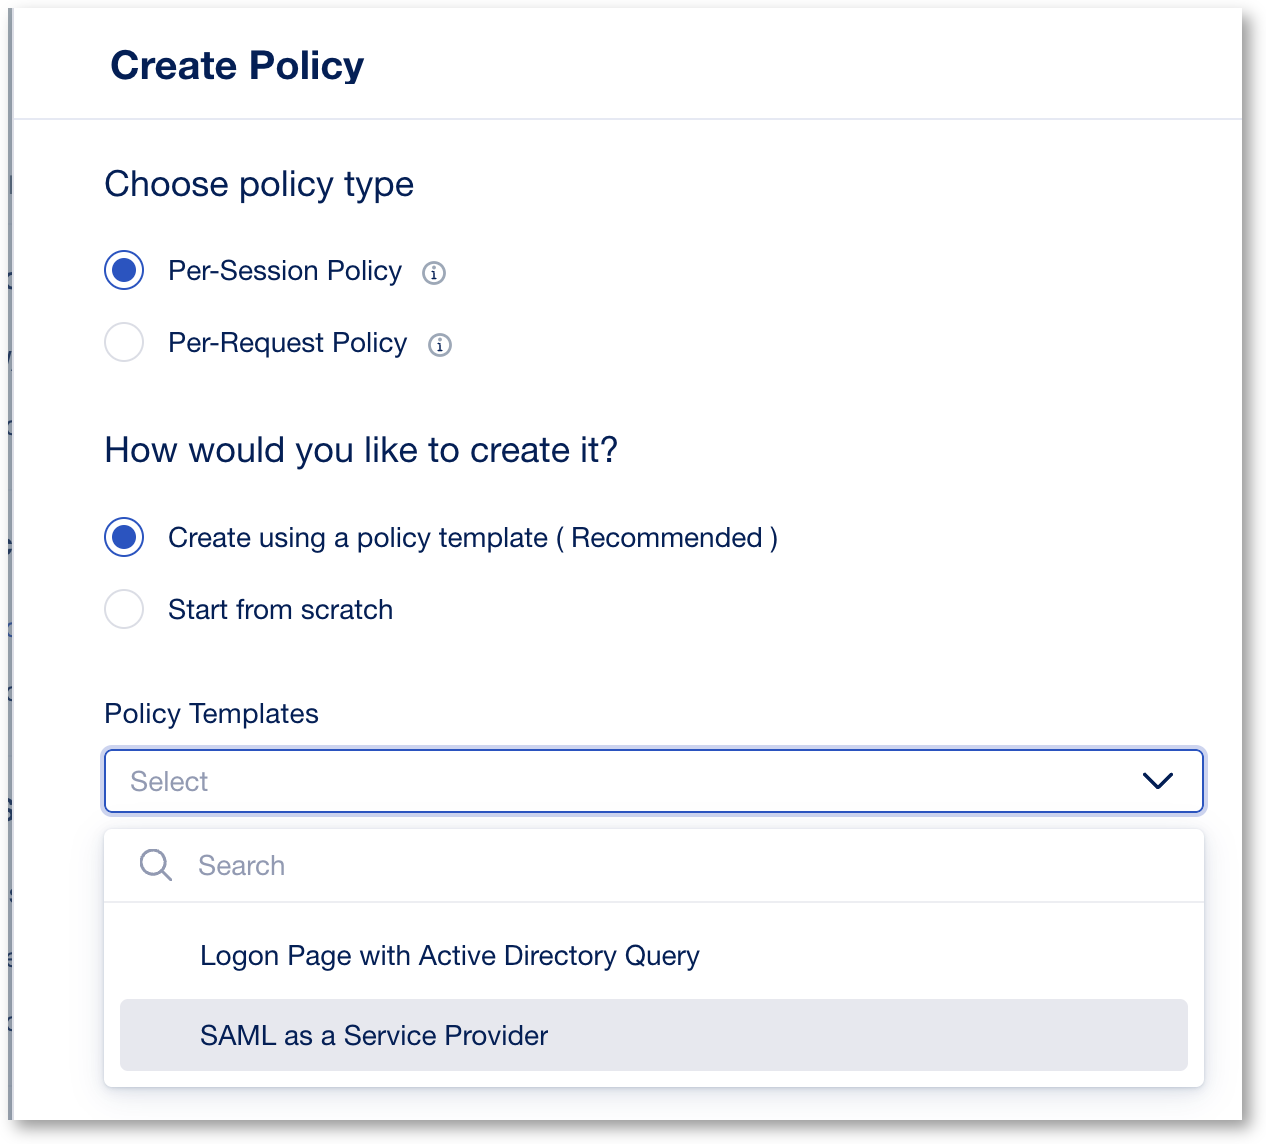
- This will open Access Visual Policy Design screen. Select Per-Session and using a policy template. Select template SAML as Service Provider
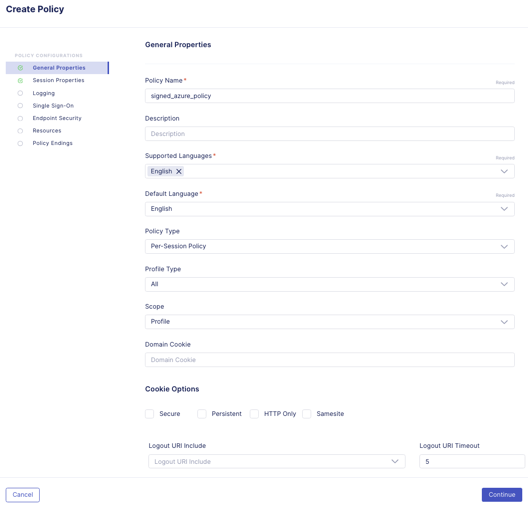
- In the Create Per-Session Policy screen, this is where you set the different properties of the policy, such as, logging, language, Single Sign On, etc… Let’s start configuring the policy by setting a policy name and policy parameters.
In the General Properties screen set the following parameters, for the rest of the settings you may leave it as default.
- Policy Name: signed_azure_policy
- Click Continue
Note
As you continue the rest of the policy creation process, see the screen shot in each section for a visual example of the configuration.
- In Session Properties, keep the default settings, click Continue

- In the Logging screen, you may want to adjust the logging to debug for troubleshooting proposes. For this lab we will keep all the default settings.

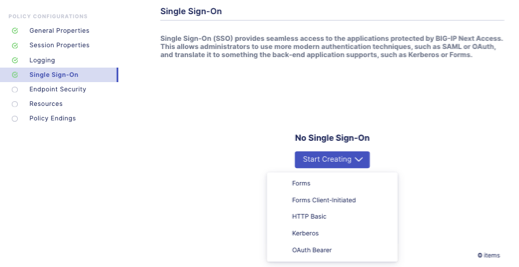
- In the Single Sign-On screen, is where you can configure Single Sign-On to your applications. In this lab we will setup Single Sign-On for Kerberos.
Click on the drop-down arrow on the Start Creating button and select Kerberos.
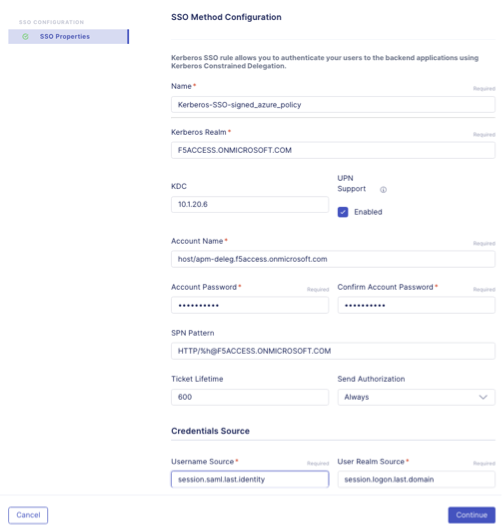
- This will open the SSO Method Configuration screen. In this screen set the parameters as follow.
- Name: remove the trailing number and replace with signed_azure_policy. See image below as reference.
- Kerberos Realm: F5ACCESS.ONMICROSOFT.COM
- KDC: 10.1.20.6
- Account Name: host/apm-deleg.f5access.onmicrosoft.com
- Account Password: F5twister$
- SPN Pattern: HTTP/%h@F5ACCESS.ONMICROSOFT.COM
- Username Source: session.saml.last.identity
- User Realm Source: session.logon.last.domain
- Click Continue, this will take you back to the Policy Configurations screen. Click Continue on the next screen.
- Endpoint Security screen, you can setup Endpoint Security such as ensuring the firewall is enabled on a client workstation before access is granted. In this lab, we will not use this feature. Click Continue.
- Resources screen, you can set additional capabilities and features such as Network Access, and Webtops in this screen. In this lab we will not use these capabilities. Click Continue.
- Connectivity you can set the SSL VPN (Network Access) connectivity settings. Keep as default and click Continue
- Policy Endings, you can define addition policy ending logic as needed for your use case here. In this lab we will accept the default. Click Finish.
- After clicking on Finish it should bring you back to the Create Policy screen. Now, we will use the Visual Policy Designer (VPD) to continue building the policy.
In Next Access we have two terms in the Visual Policy Designer (VPD); Flows and Rules. We set the Flows in the Visual Policy Designer (VPD) and within each Flow we can define multiple Rules.
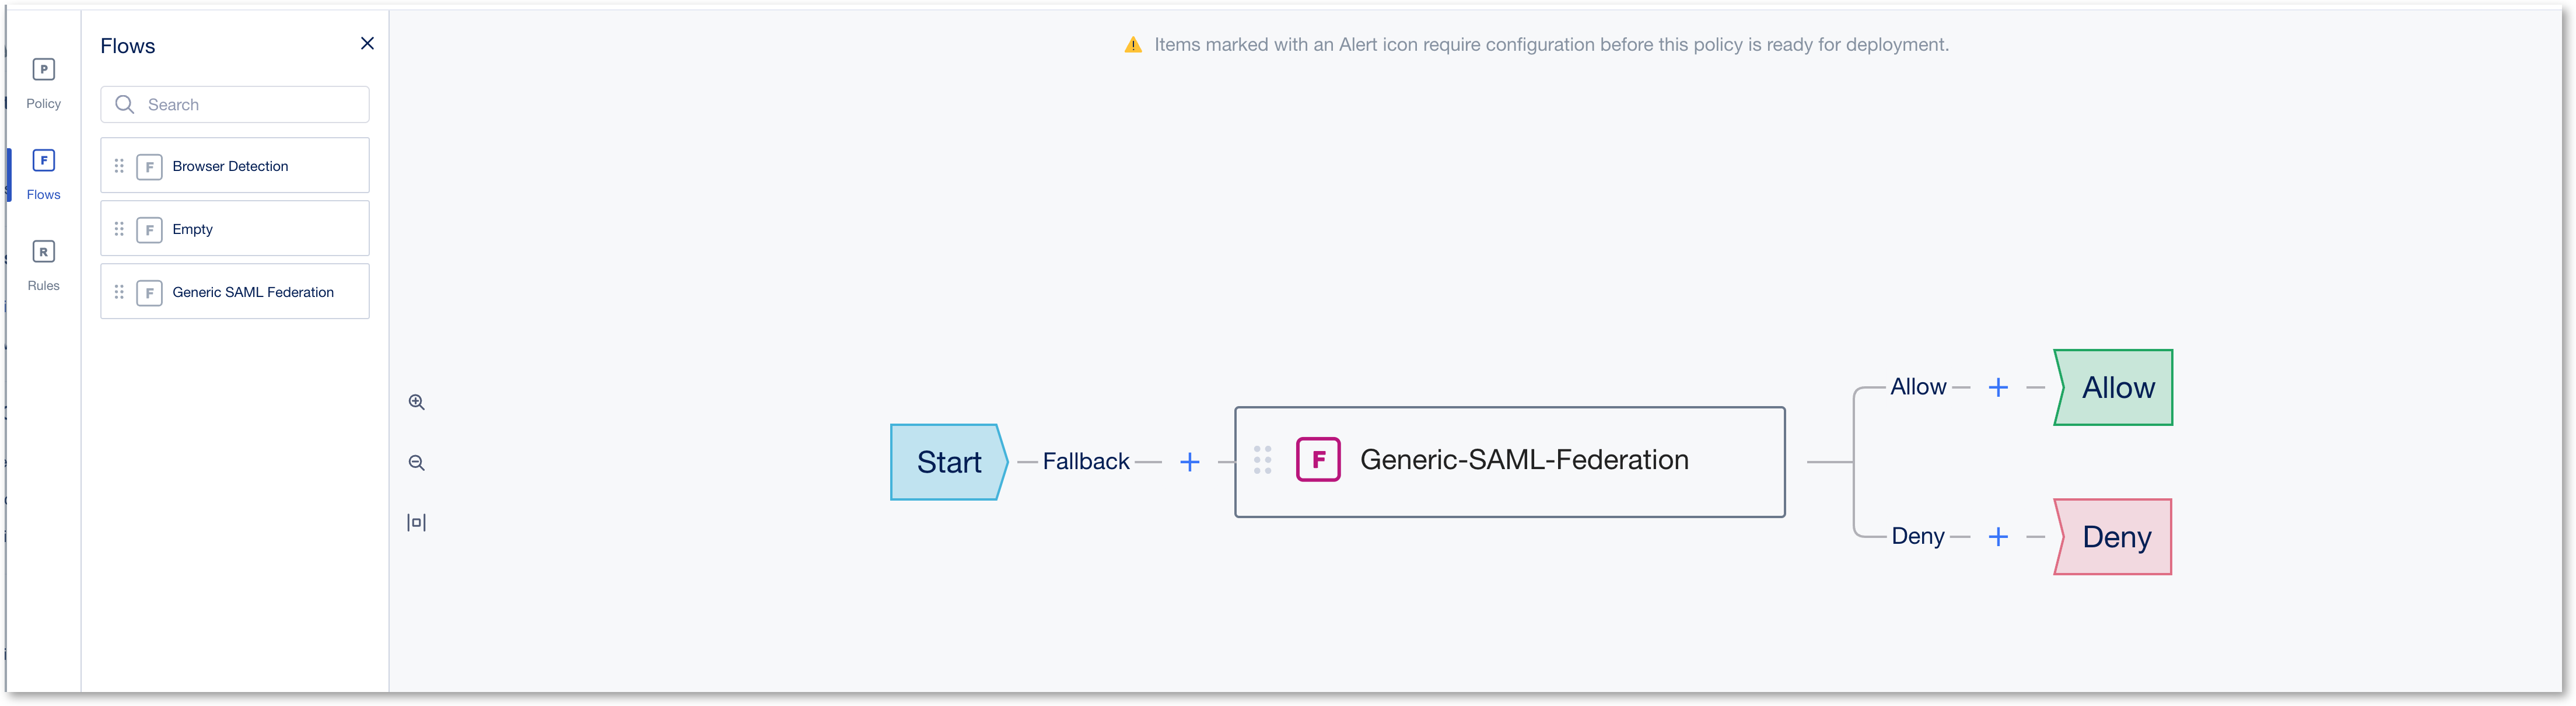
- As we use a template, the flow is already there. We must configure it now.
- Click on the Collapse button to see the content of the flow. You can see 2 rules.
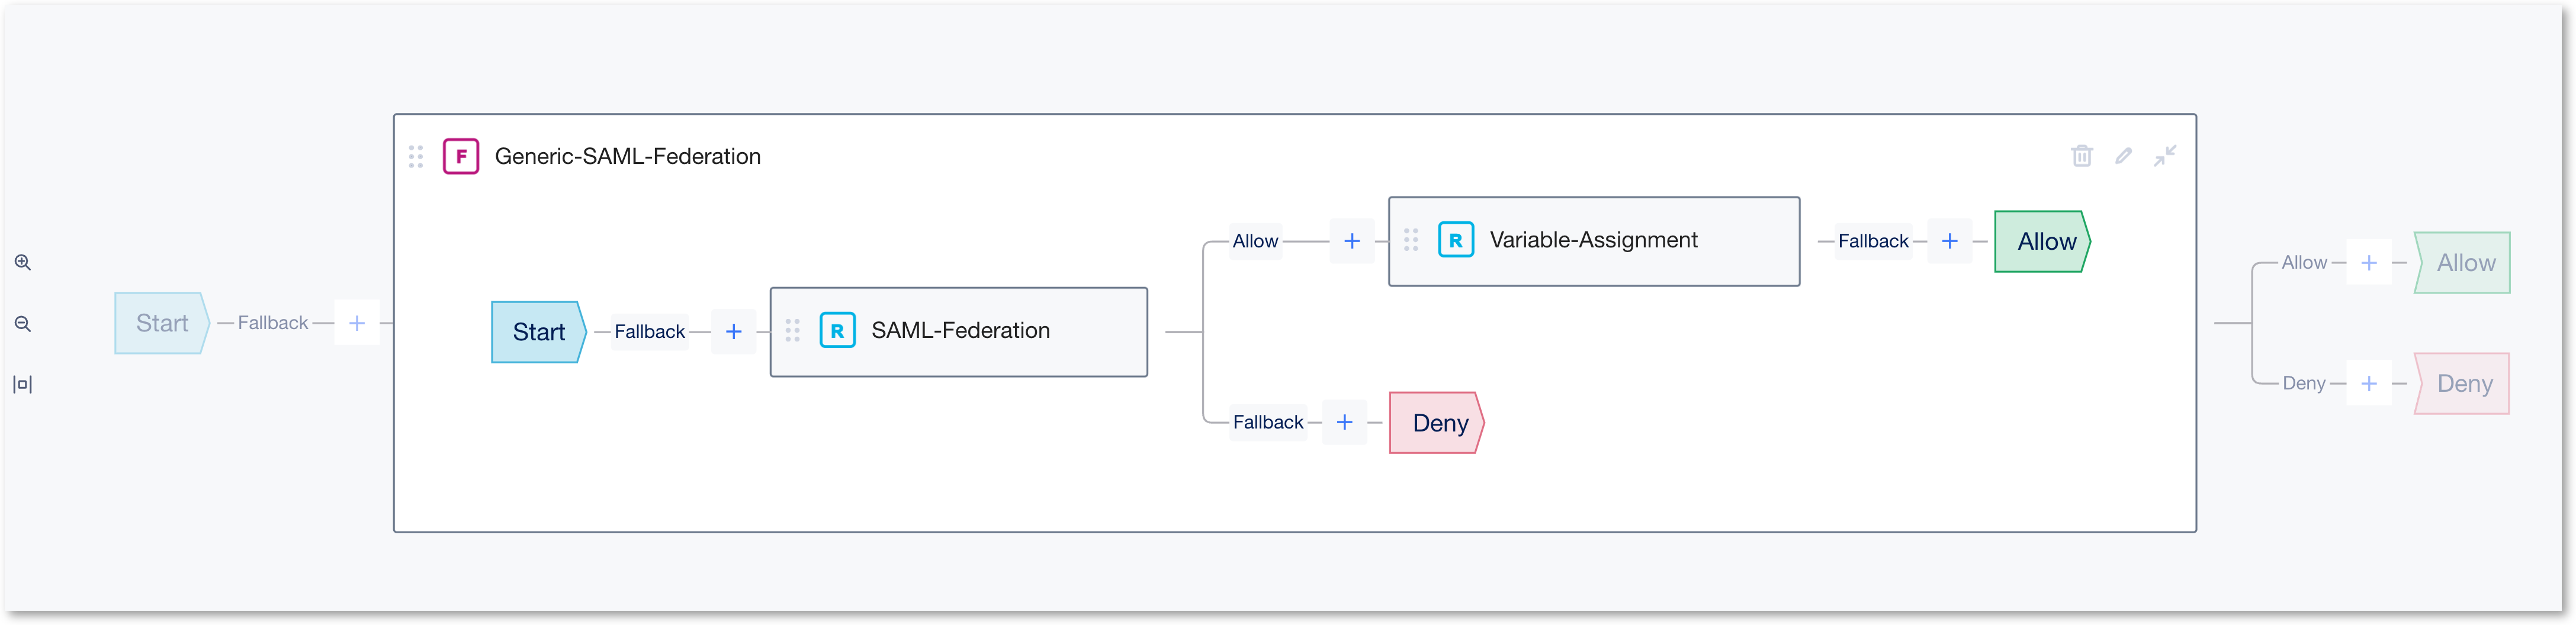
- Edit inside the SAML-Federation Rule box
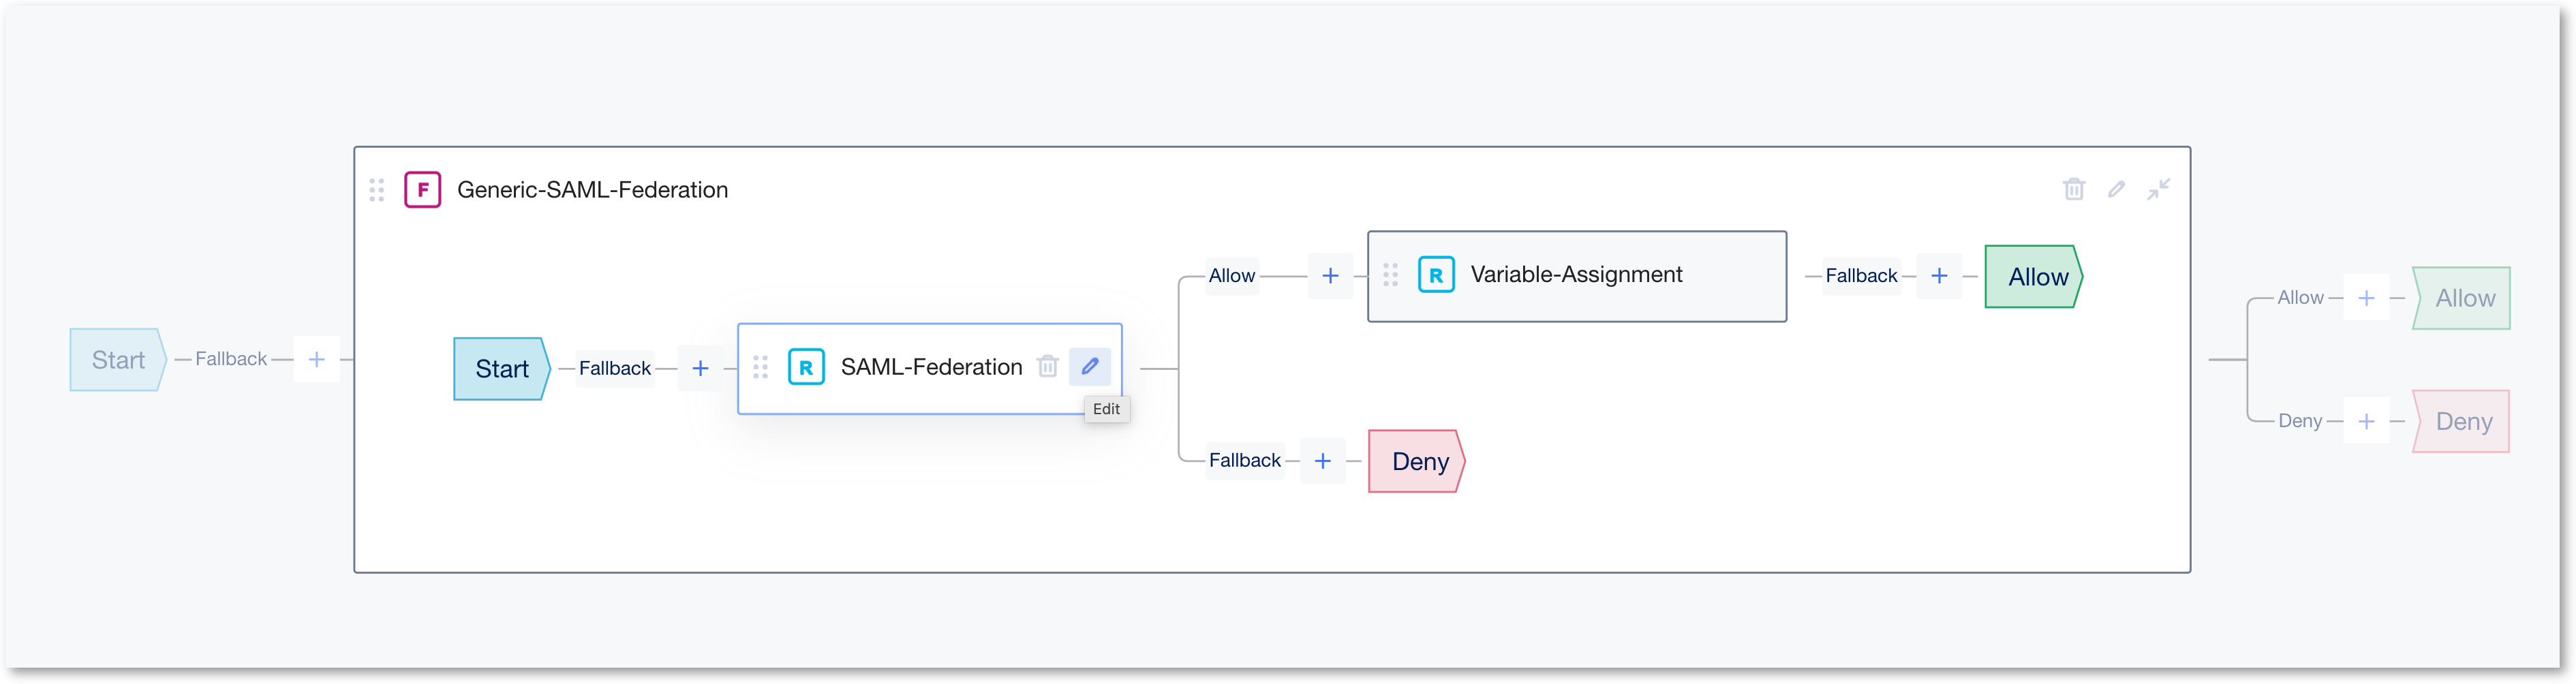
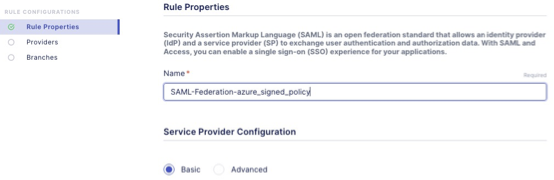
This will open the SAML Federation Rule properties screen. Please follow the images below for each section.
- In the SAML Rule Properties configuration, replace the trailing number in the Name field to azure_signed_policy. Leave the Provider Configuration as Basic. Click Continue.
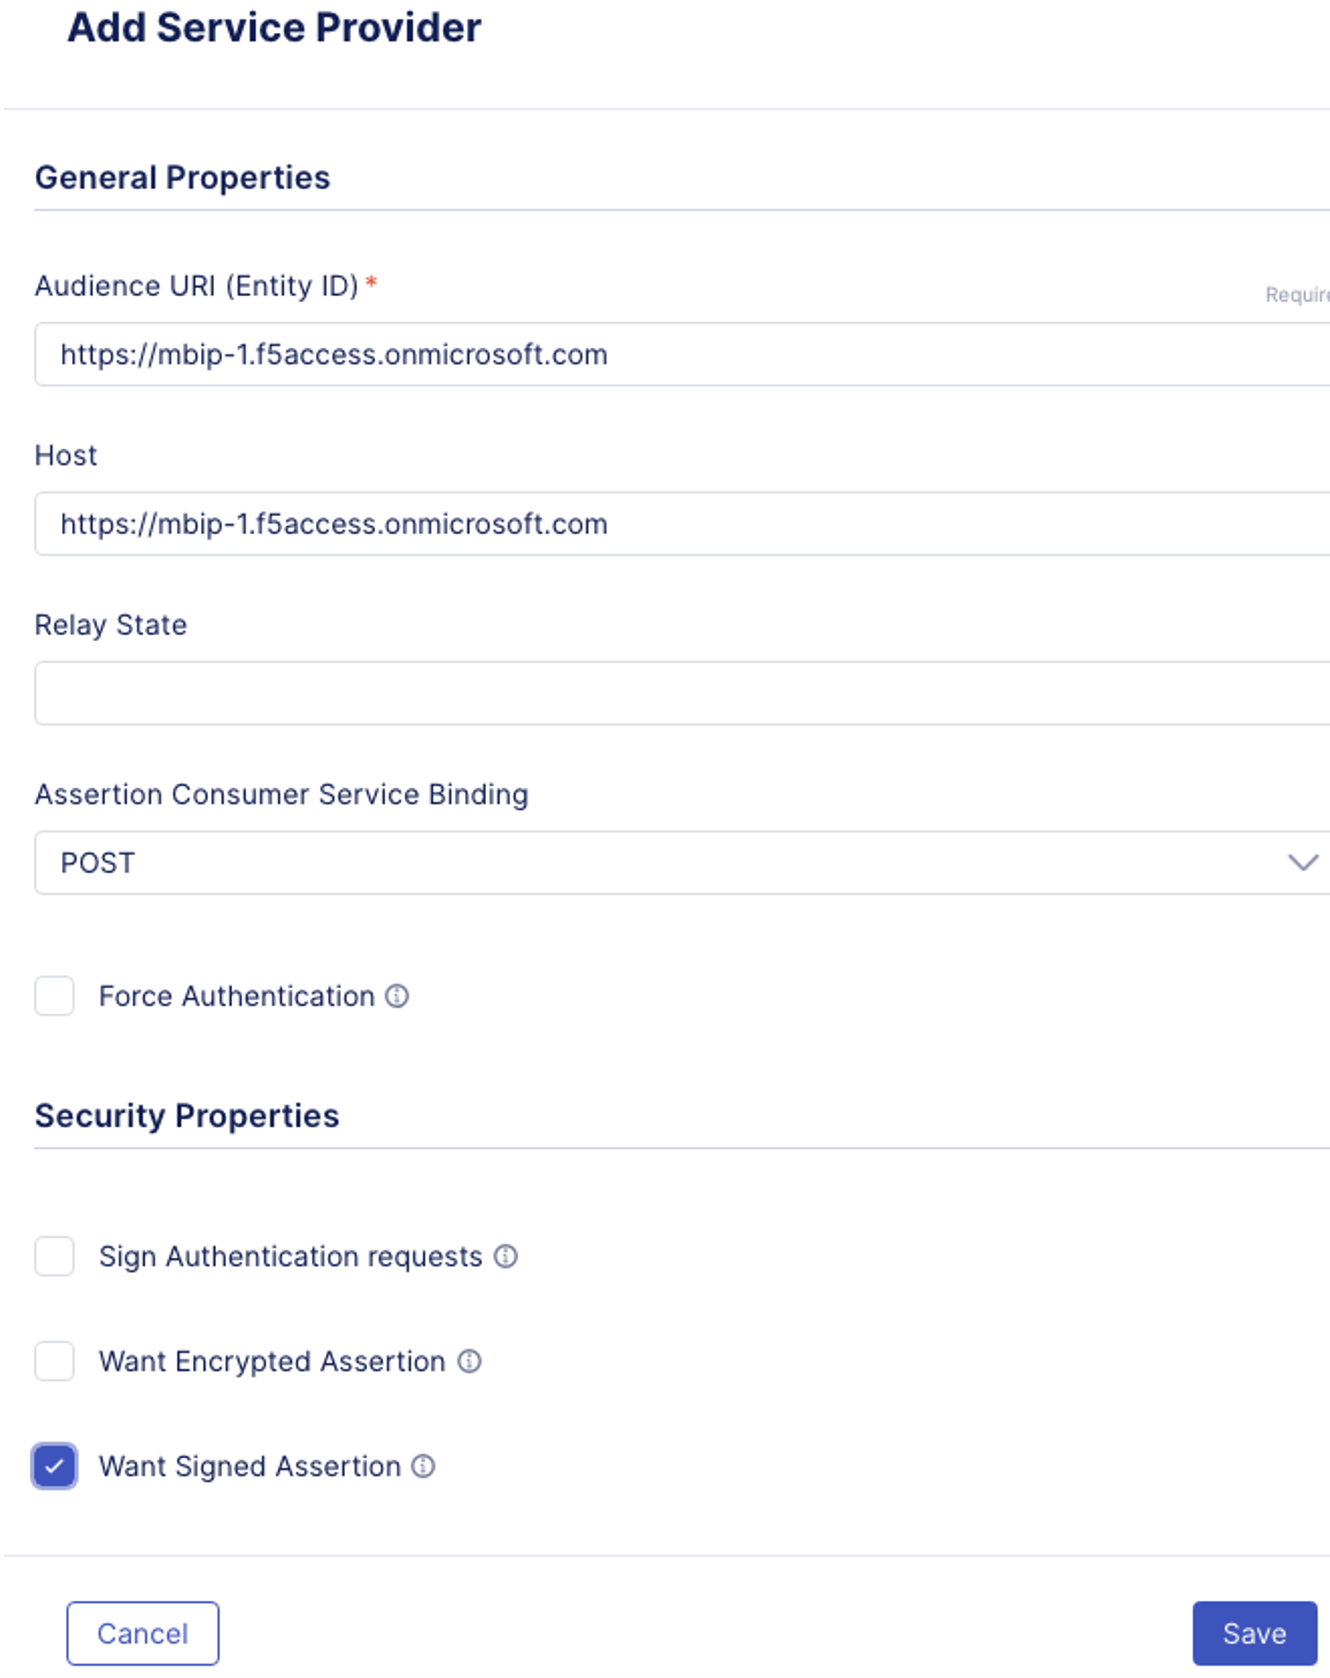
- In the Rule Configuration, Providers screen, this is where you can configure Service Provider and Identity Provider. A generic SP is already set. Edit it
- EntityID: https://mbip-1.f5access.onmicrosoft.com
- Host: https://mbip-1.f5access.onmicrosoft.com
- Security Properties: check the box for Want Signed Assertion
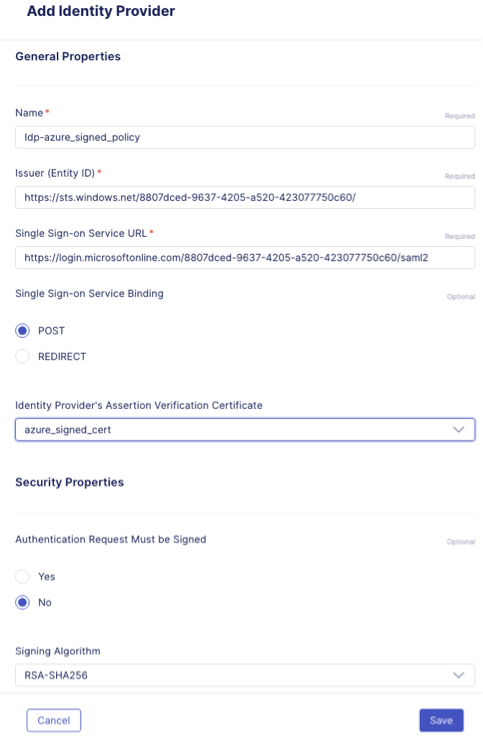
- Click on Start Creating under Identity Provider. In the Add Identity Provider screen input the following information, and then click Save.
- Name: remove the trailing number, and replace with azure_signed_policy
- EntityID: https://sts.windows.net/8807dced-9637-4205-a520-423077750c60/
- SSO URL: https://login.microsoftonline.com/8807dced-9637-4205-a520-423077750c60/saml2
- Identity Provider’s Assertion Verification Certificate: click the drop down arrow, and select the azure_signed_cert
- After you click Save this should take you back to the Rule Configuration Screen, click Continue.
- In the Branches screen, keep the default. Click Finish.
- Save the policy and close the VPD by clicking on Exit.
You have completed creating an security policy!