BIG-IQ Centralized Management > F5 Agility 2022: ADC Automation with BIG-IQ 8.1 Source | Edit on
Lab 2: Working with custom AS3 Templates in BIG-IQ
Lab environment access
Once you connect to the UDF course portal, you will land on the Documentation tab where you can find the link to the lab guide.
Once you have the lab guide open, click on the Deployment tab to access the various systems in the lab.
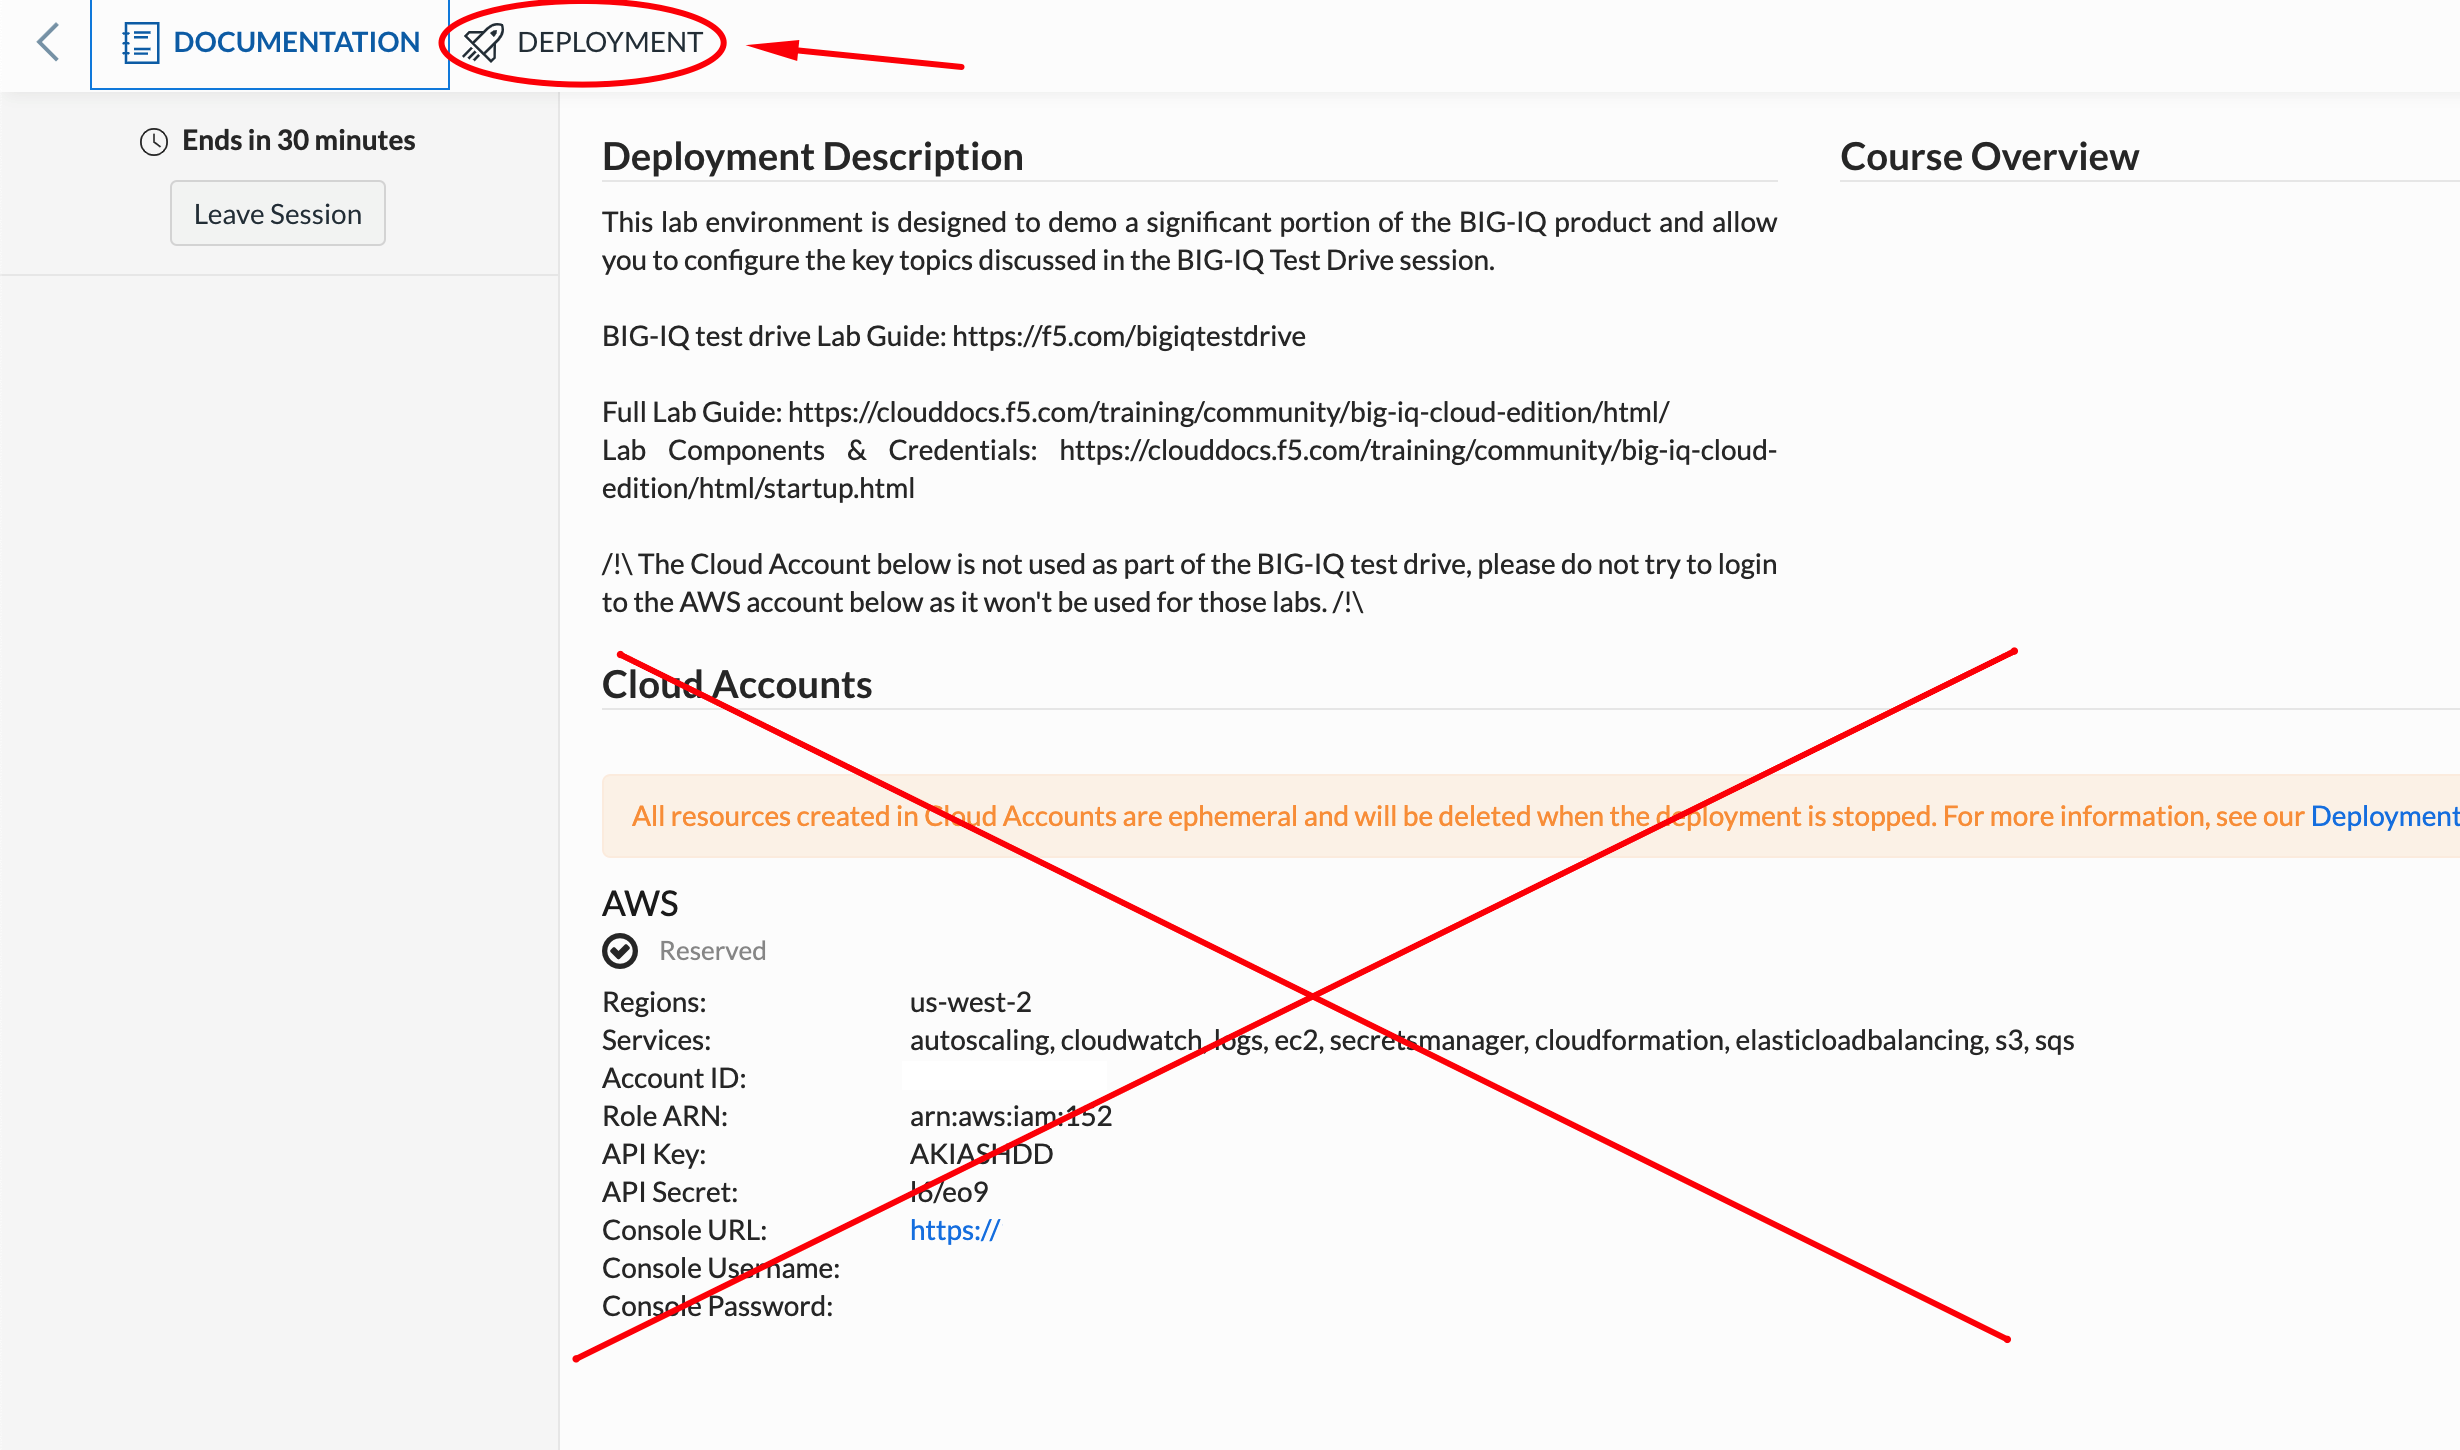
In order to complete this lab, you will find 2 ways to access the different systems in this lab.
Going directly to the BIG-IQ CM or BIG-IP TMUI or WEB SHELL/SSH (RECOMMENDED).
To access the BIG-IQ directly, click on the ACCESS button under BIG-IQ CM and select TMUI. The credentials to access the BIG-IQ TMUI are
david/davidandpaula/paulaas directed in the labs.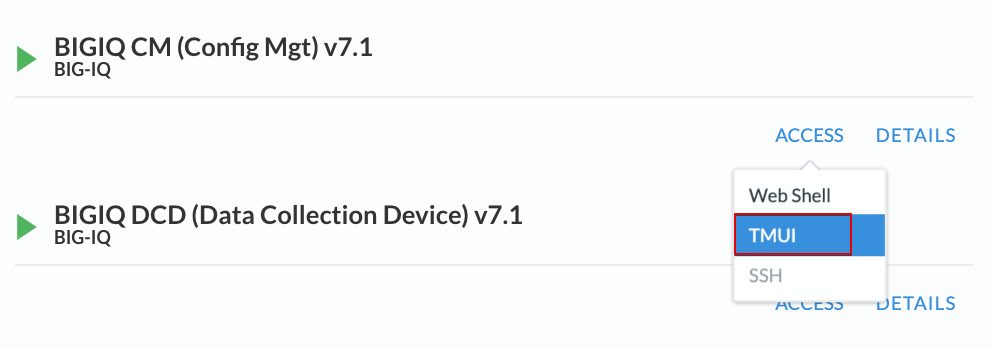
To ssh into a system, you can click on WEB SHELL or SSH (you will need your ssh keys setup in the lab environment for SSH).
You can also click on DETAILS on each component to see the credentials (login/password).
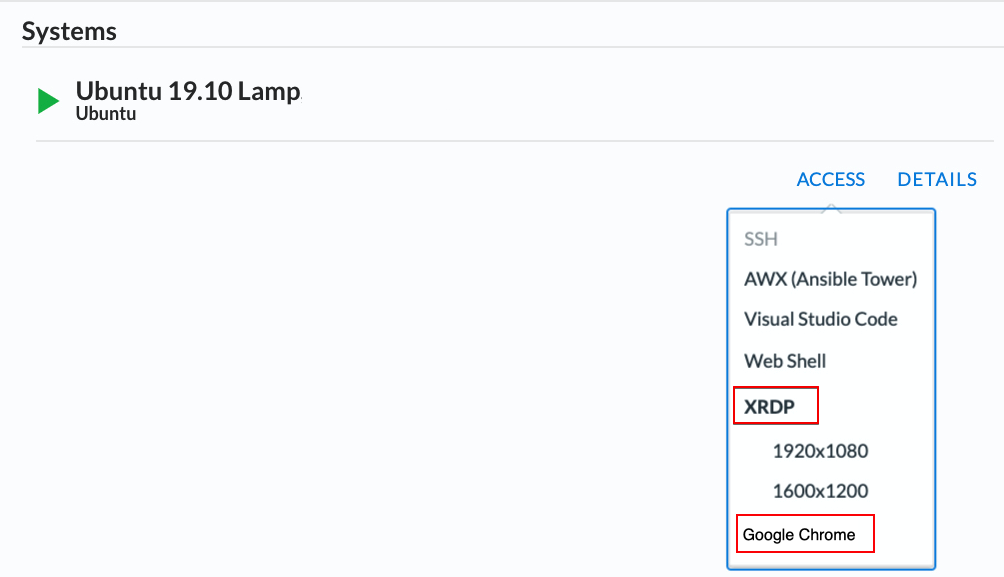
From the lab embeded Google Chrome browser.
In your lab deployment, click on the ACCESS button of the Ubuntu Lamp Server system and click on Google Chrome.
You can also use XRDP as an alternative, click on the resolution that works for your laptop. When the RDP session launches showing Session: Xorg, simply click OK, no credentials are needed. Modern laptops with higher resolutions you might want to use 1440x900 and once XRDP is launched Zoom to 200%.
Exercise 2.1 – Create Custom AS3 template via BIG-IQ GUI
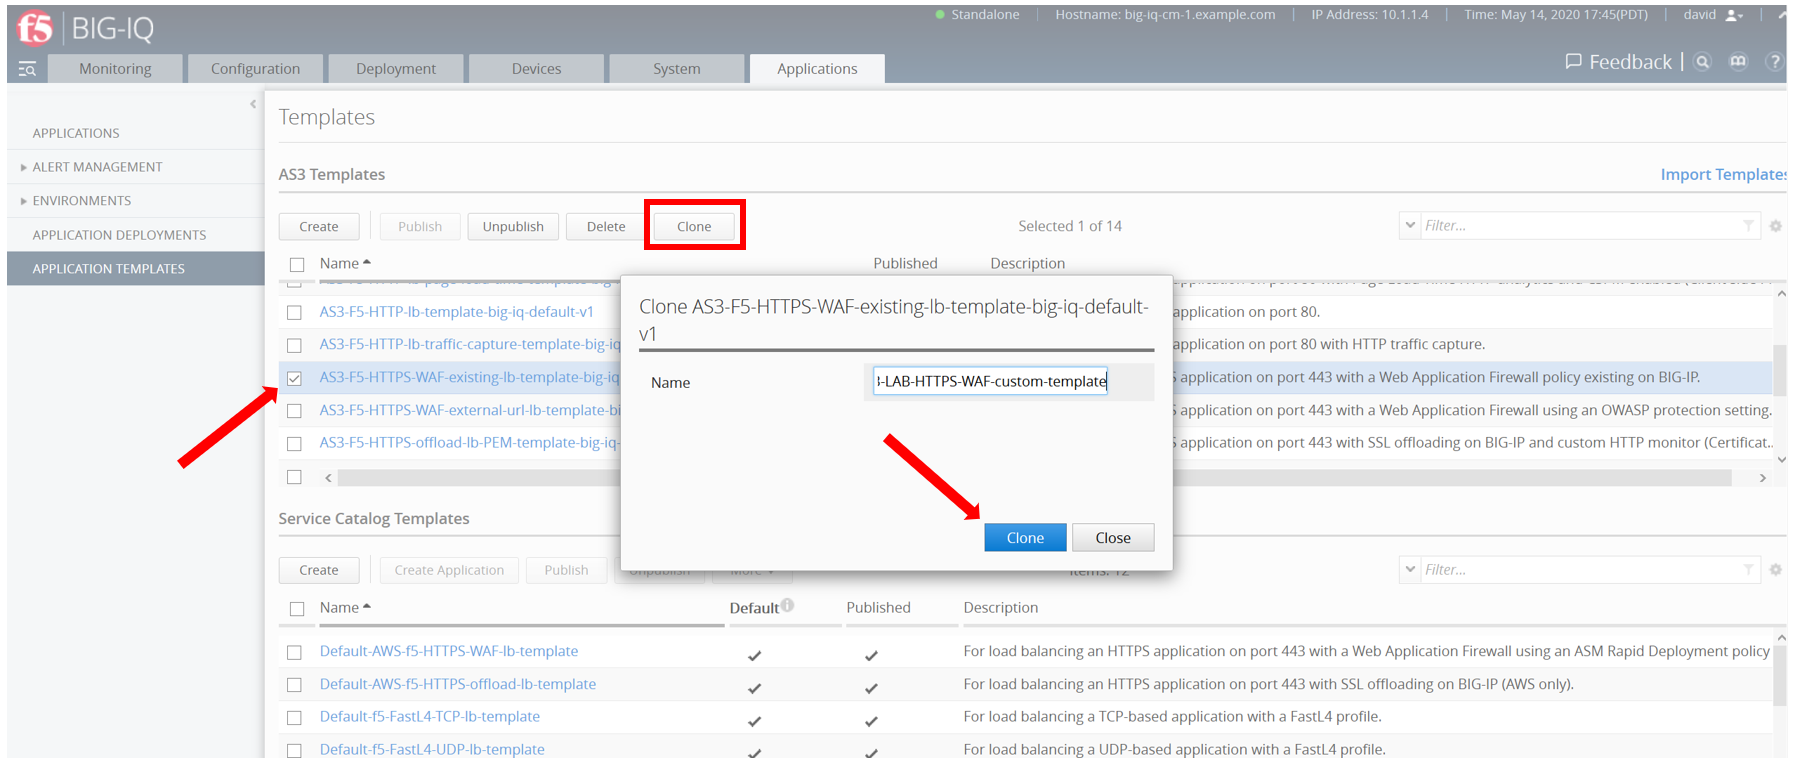
We imported the default “out-of-the-box” AS3 templates (available on https://github.com/f5devcentral/f5-big-iq) that can be used for deploying an application service. However, it is a good practice to clone the default AS3 templates and use them for your custom needs.
- From within the LAMP server RDP/noVNC session, logon on BIG-IQ as david (david\david)
- by opening a browser and go to:
https://10.1.1.4or directly via the TMUI as shown above. Go to the Applications > Application Templates and select AS3-F5-HTTPS-WAF-existing-lb-template-big-iq-default-v1 and click on Clone.
- Name the cloned template: AS3-LAB-HTTPS-WAF-custom-template and click Clone.
- Open the template called AS3-LAB-HTTPS-WAF-custom-template and select the Analytics_Profile. Change to Override the Properties for Collect Client-Side Statistics, as well as Collect URL and Collect User Agent. Ensure the Enable checkbox is selected for these.
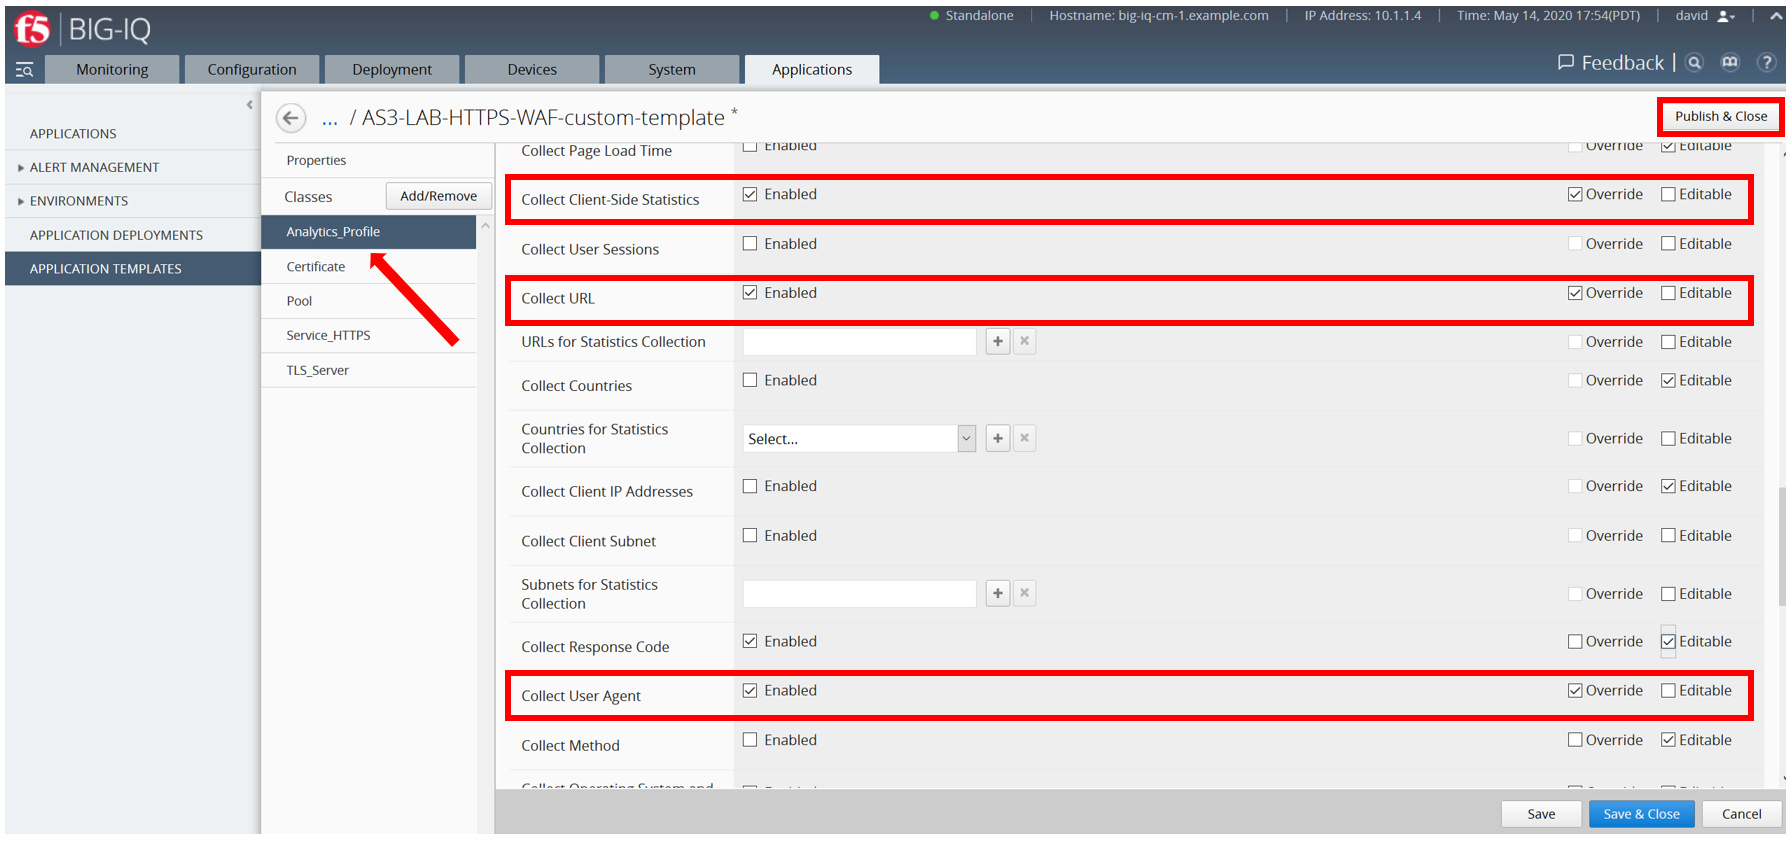
Note
Collect Response Code is already enabled by default in the AS3 schema.
- Click Save & Close.
- Select AS3-LAB-HTTPS-WAF-custom-template and click Publish.
Exercise 2.2 – Deploy application via BIG-IQ using a customized AS3 template
- In this exercise Paula is going to create an application service that includes a Web Application Firewall (WAF) profile to secure the application. You should be familiar with the other configuration components from the prior lab. The WAF policy was previously created and installed on the BIG-IP by the Security Admin.
- Before Paula can use this AS3 template, David needs to update her role. Use the previous steps in lab 1.2 to add AS3 Template AS3-LAB-HTTPS-WAF-custom-template to Application Creator VMware custom role assigned to Paula.
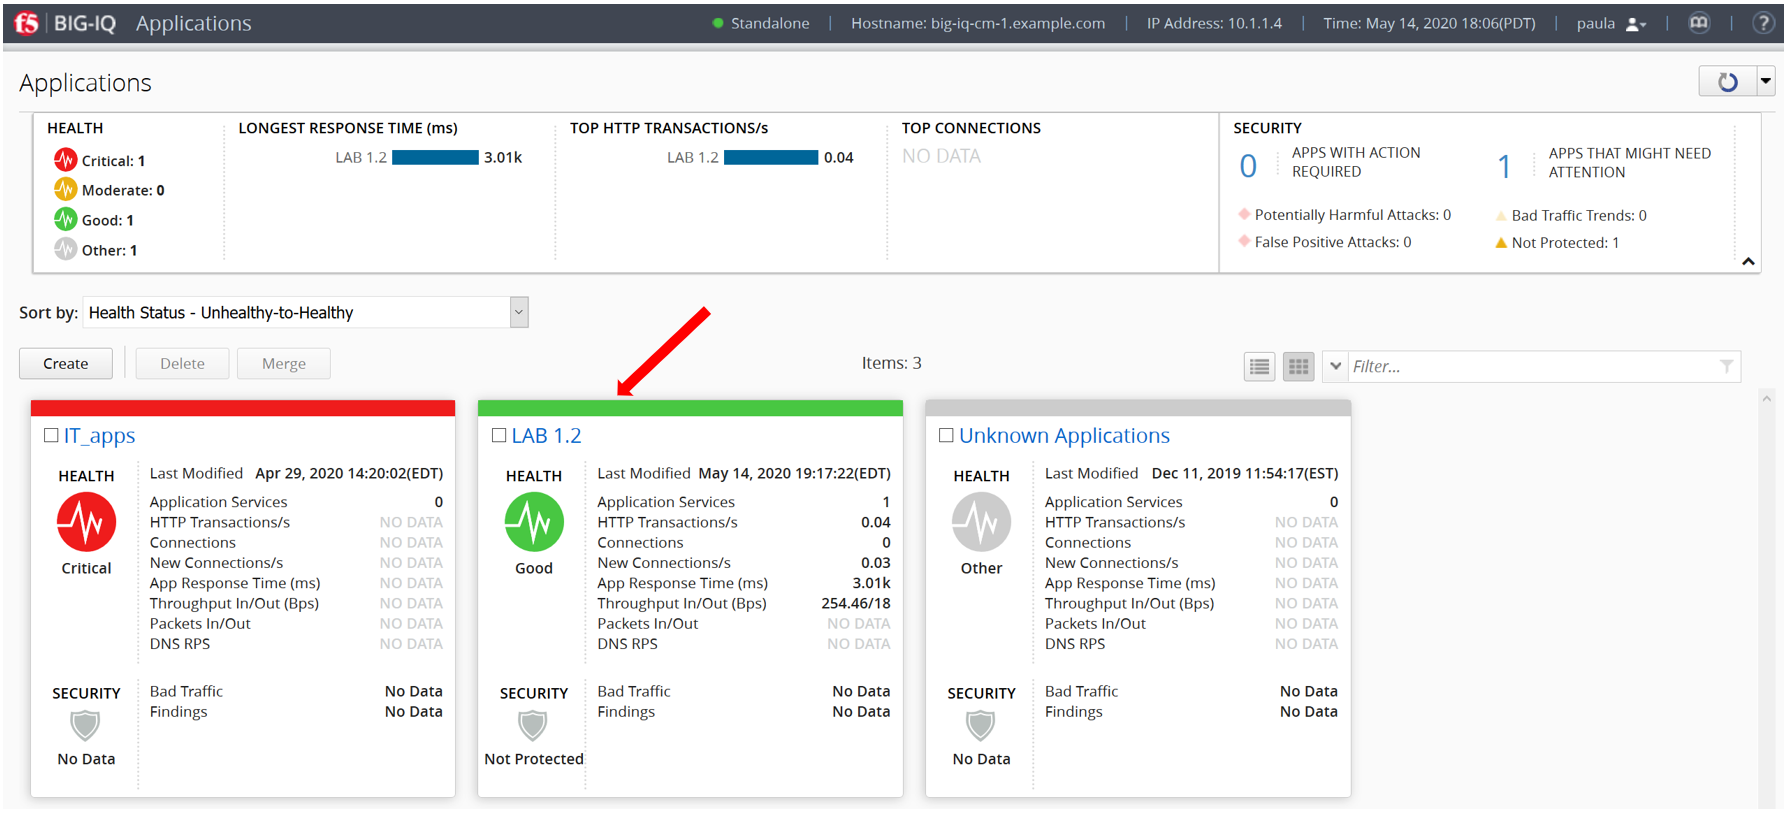
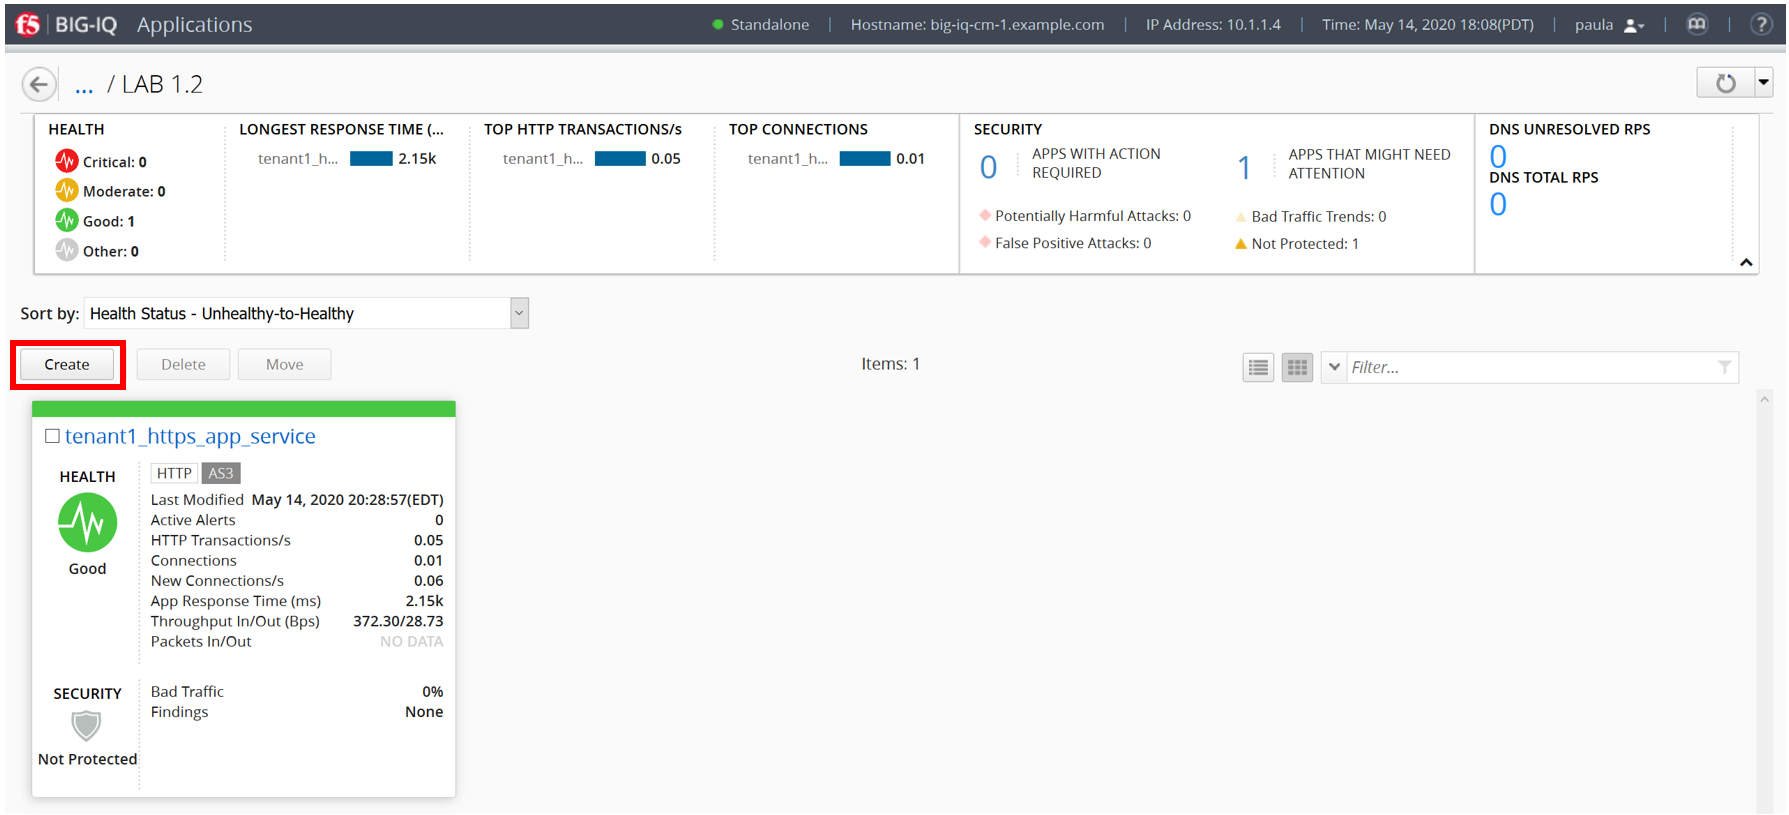
- Login as Paula and select previously created LAB 1.2 Application and click Create.
- Select Create to create an Application Service:
| Application properties: |
|---|
|
| Select an Application Service Template: |
|
| General Properties: |
|
| Pool |
|
| TLS_Server: Keep defaults |
| Certificate: Keep defaults |
| Service_HTTPS |
|
| Analytics_Profile. Keep default |
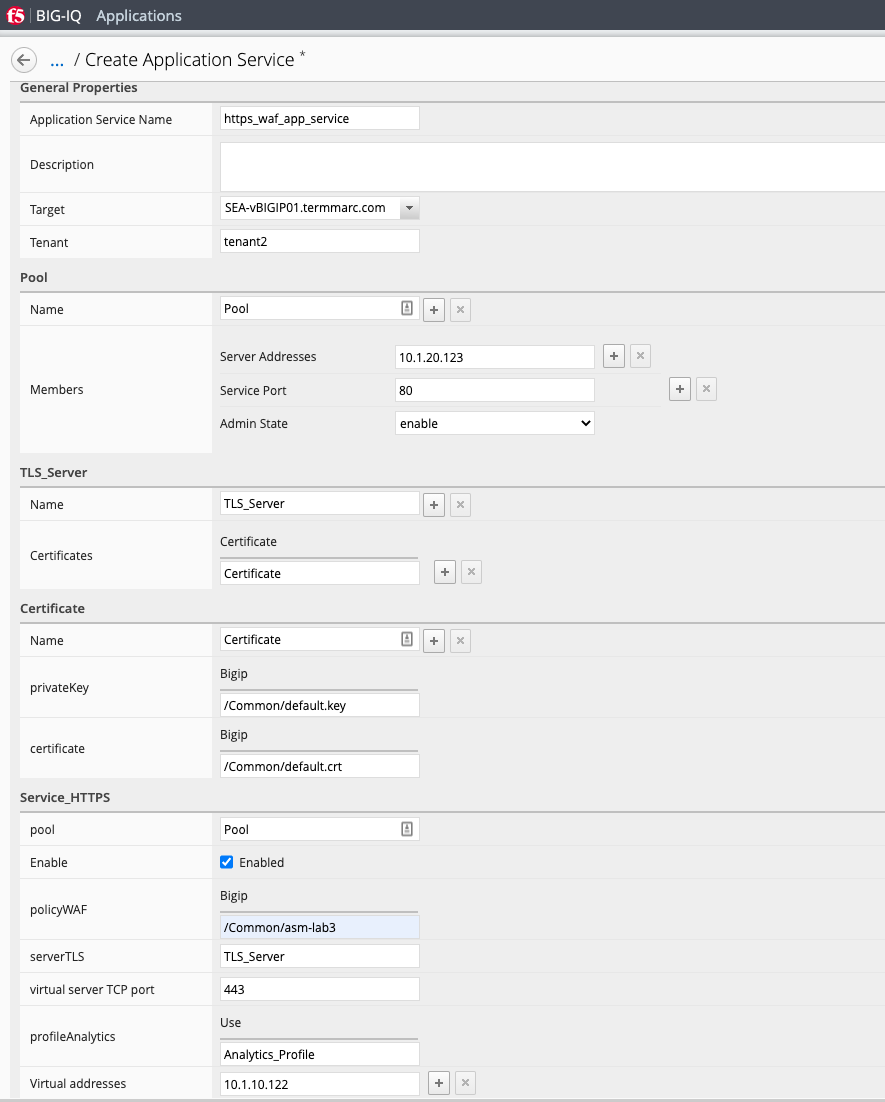
- Click Create.
- Check the application service https_waf_app_service has been created under Application LAB 1.2.
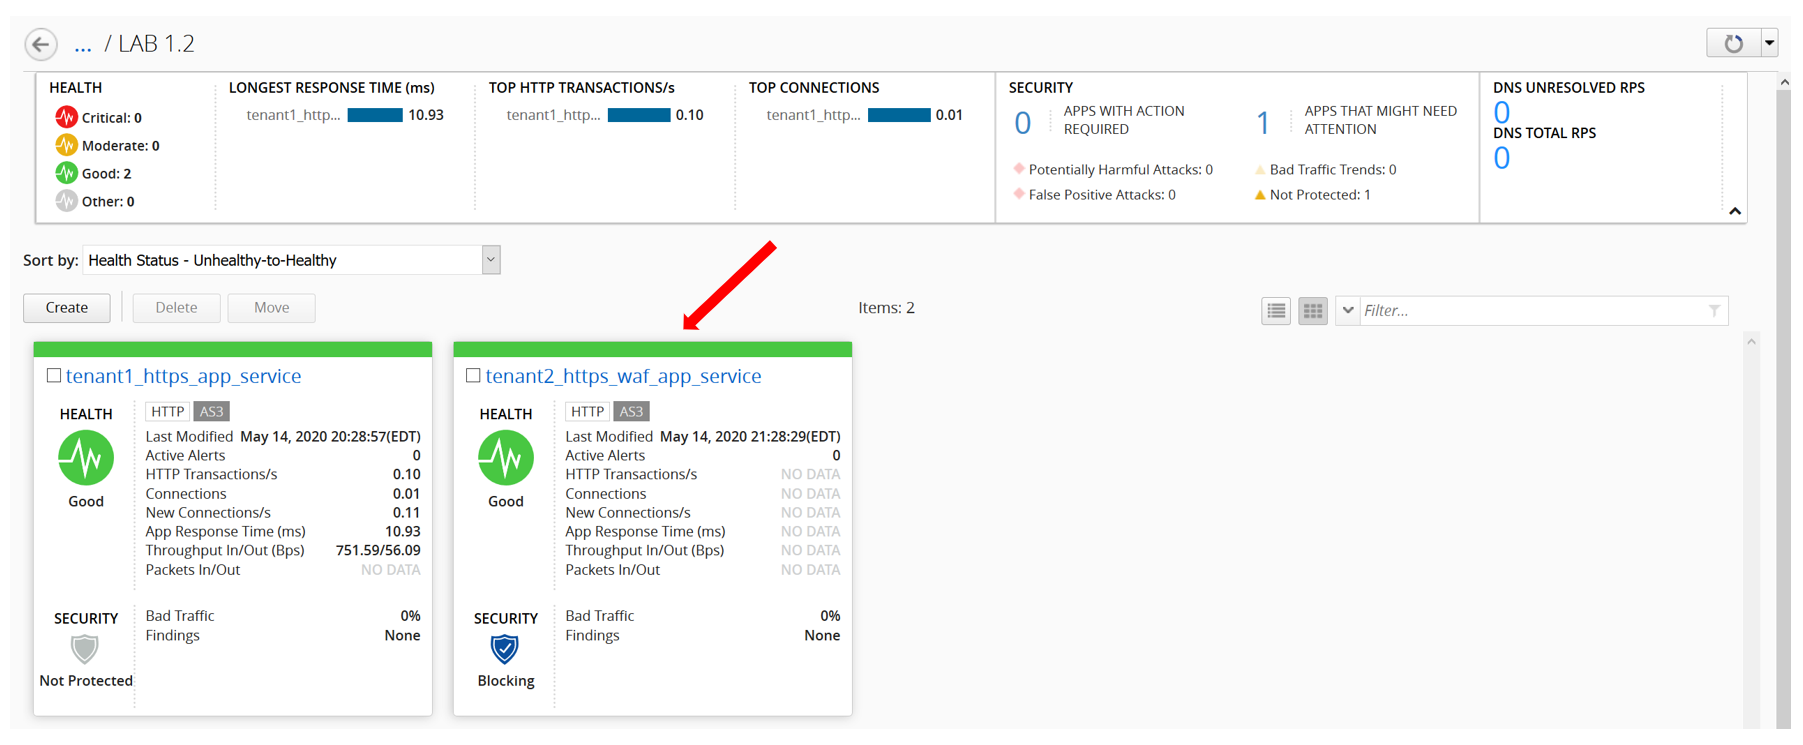
- Now, let’s look on the BIG-IP and verify the Application is correctly deployed in partition tenant2.
Logon to SEA-vBIGIP01.termmarc.com BIG-IP from the lab environment. Select the partition tenant2 and look at the objects created on the BIG-IP.
Navigate to the virtual server in the tenant2 partition and under Security and note that the WAF policy is attached to it.
Navigate to the WAF policy under Security >> Policies and review the protections enabled.
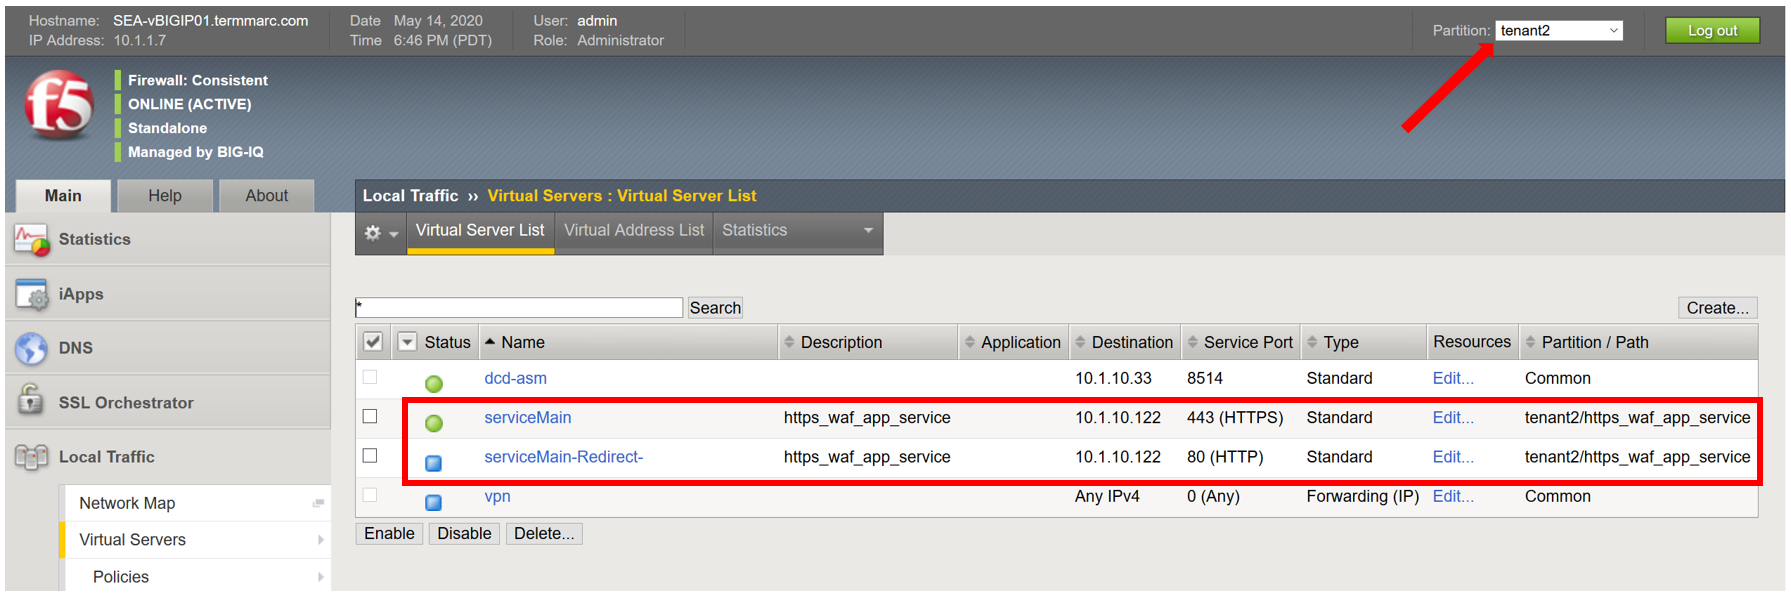
- Notice that new https_waf_app_service comes with a redirect.
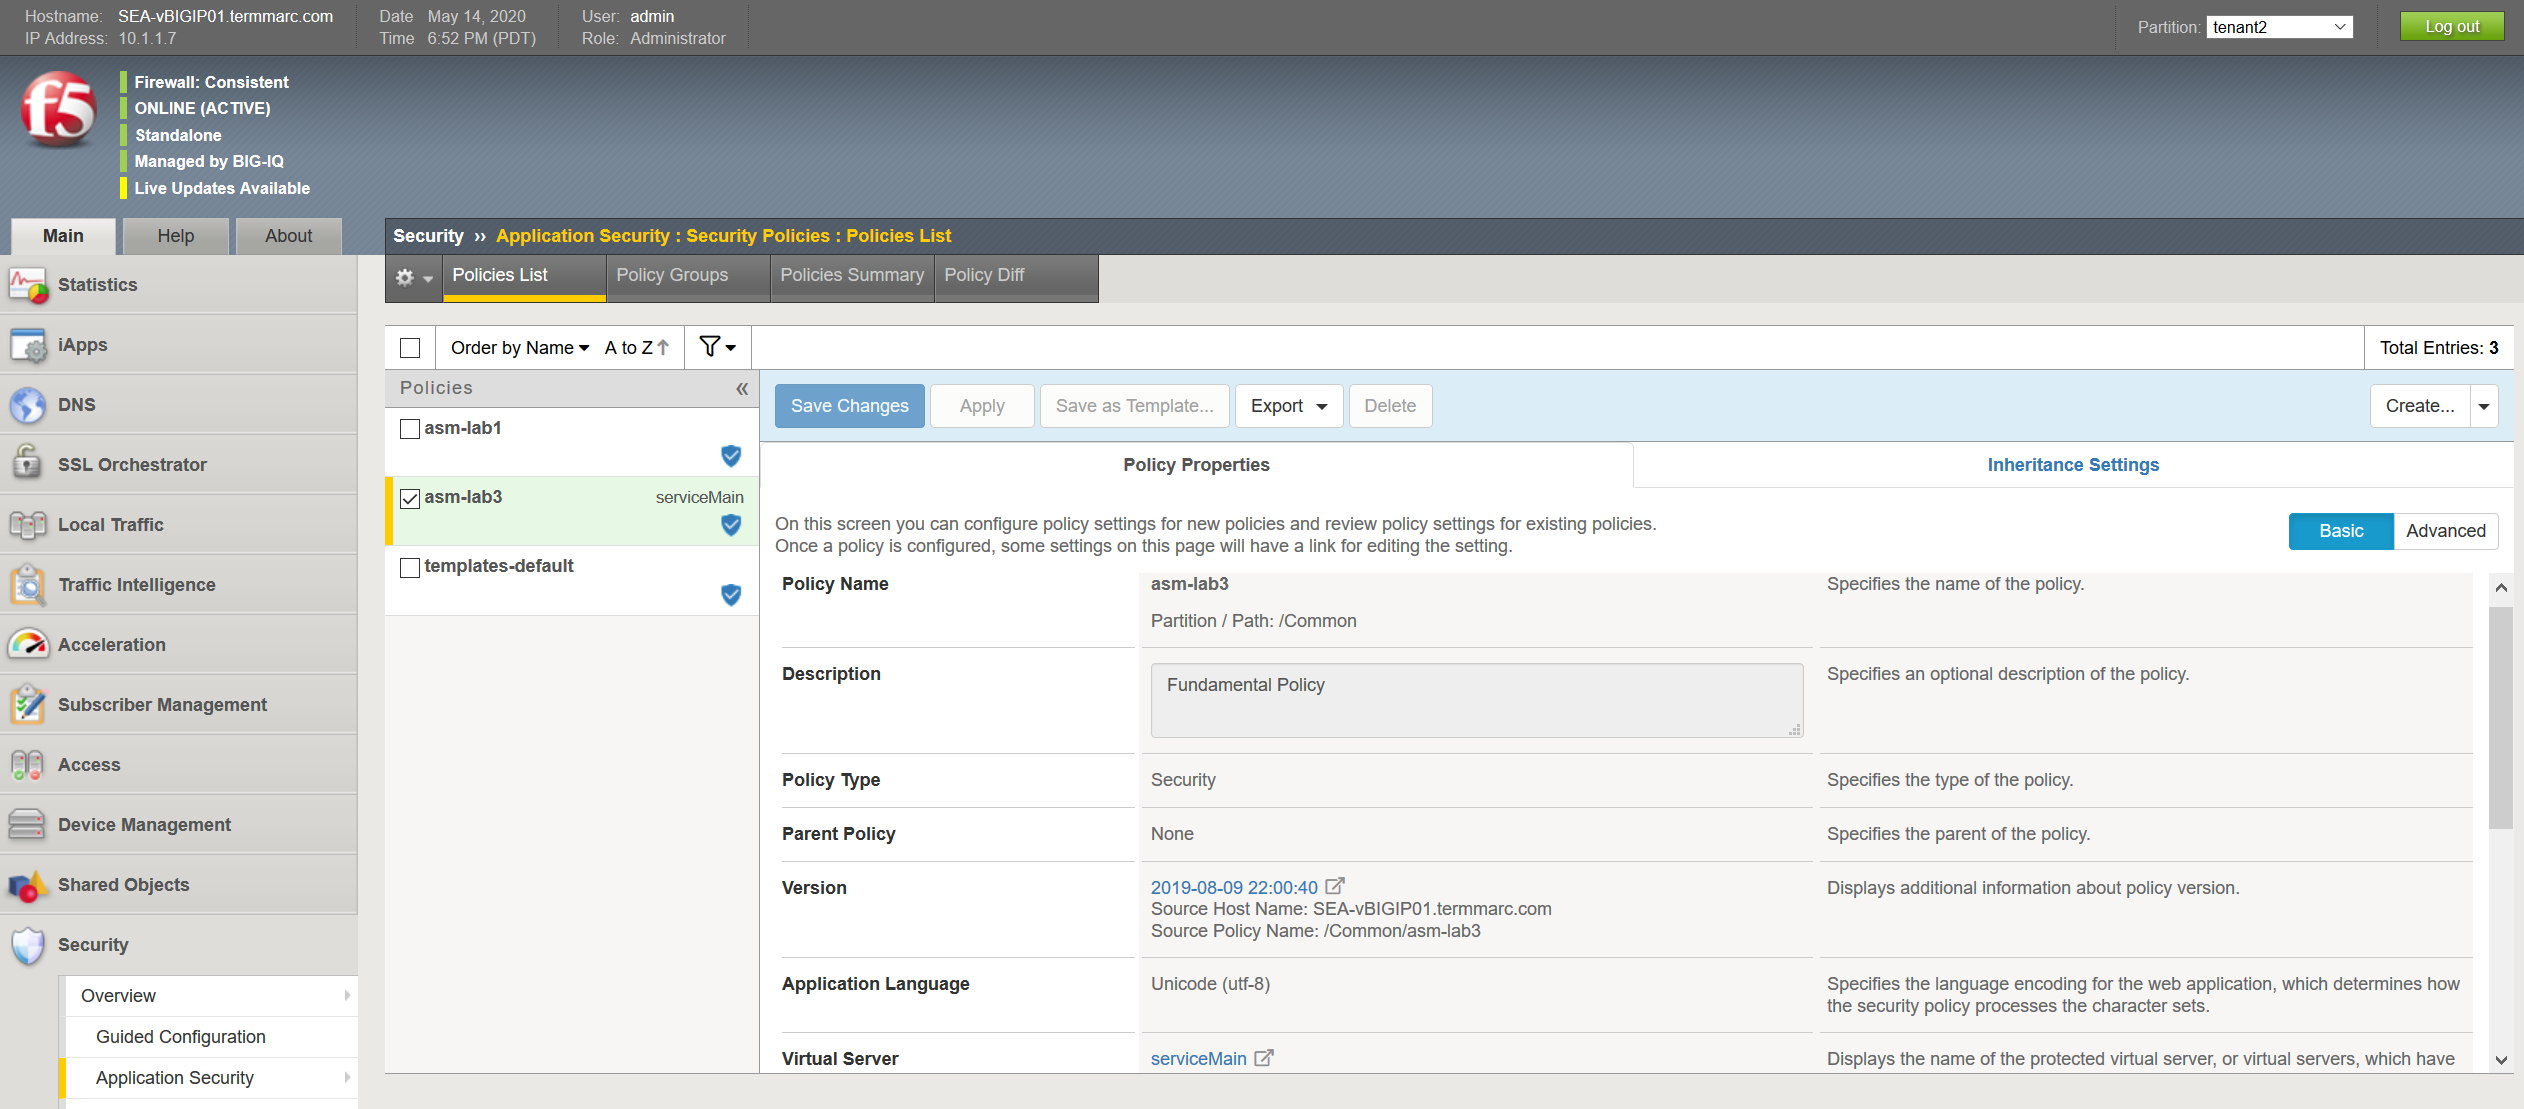
- Select the serviceMain virtual server, Select Security and hit Policies. The asm-lab3 Application Security Policy is Enabled and the Log Profile has a Log Profile selected.
- Go to Security > Application Security > Security Policies and select the asm-lab3 policy to get more detail of the deployed application security policy.
- The enforced WAF policy is taken from a Github repository which contains F5 WAF ready templates: https://github.com/f5devcentral/f5-asm-policy-templates, please use the URL to get yourself familiar with other available WAF ready templates.
- Back to the BIG-IQ and logged in as Paula, select tenant2_https_waf_app_service. What is the enforced Protection Mode?