Advanced Multi-layer Firewall Protection > Advanced Multi-Layer Firewall Protection > Module 1: F5 Multi-layer Firewall Source | Edit on
Lab 2: Permitting traffic to pass to virtual servers
Create an ACL to allow web traffic and SSH
The rules created in this section allow basic connectivity to the resources. We will add enforcement rules at the virtual server level to demonstrate functionality.
On the BIG-IP, we’ll create a rule list to allow traffic. A logical container will be created before the individual rules can be added. You will create a list with rule to allow port 80 (HTTP), 443 (HTTPS), and 22 to servers 10.1.20.11 through 10.1.20.17. We will also create a rules which allows HTTP and HTTPS traffic to access 10.1.10.30.
- On the BIG-IP UI, navigate to Security > Network Firewall > Rule Lists.
- Click Create and use the following parameters to create a rule list.
- Name: web_rule_list.
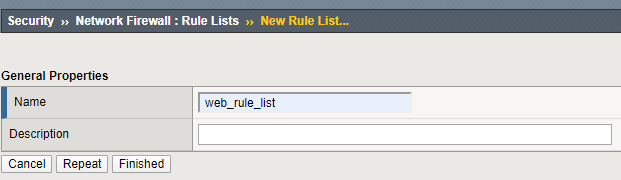
- Click Finished.
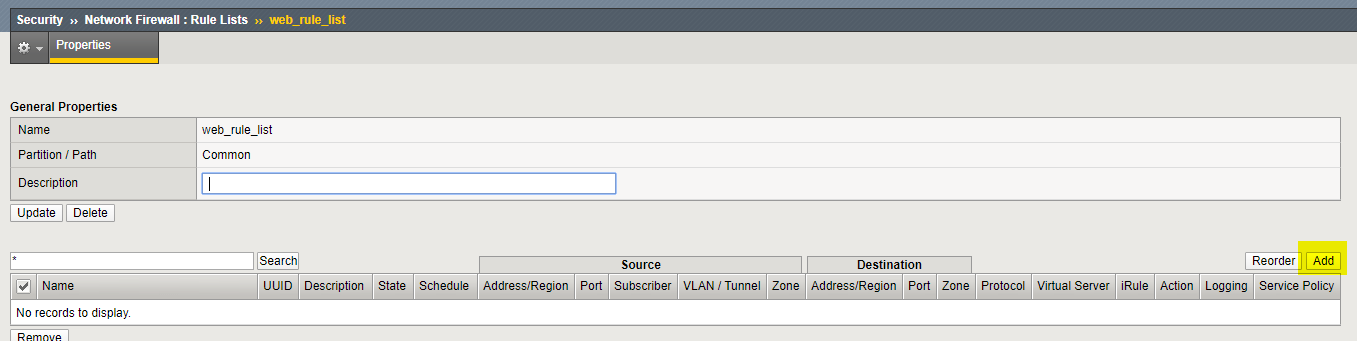
Your list of rule lists should appear similar to below.

Next, we’ll add rules to the rule list we just created.
Select the web_rule_list by clicking on it in the Rule Lists table.
Click the Add button in the Rules section.
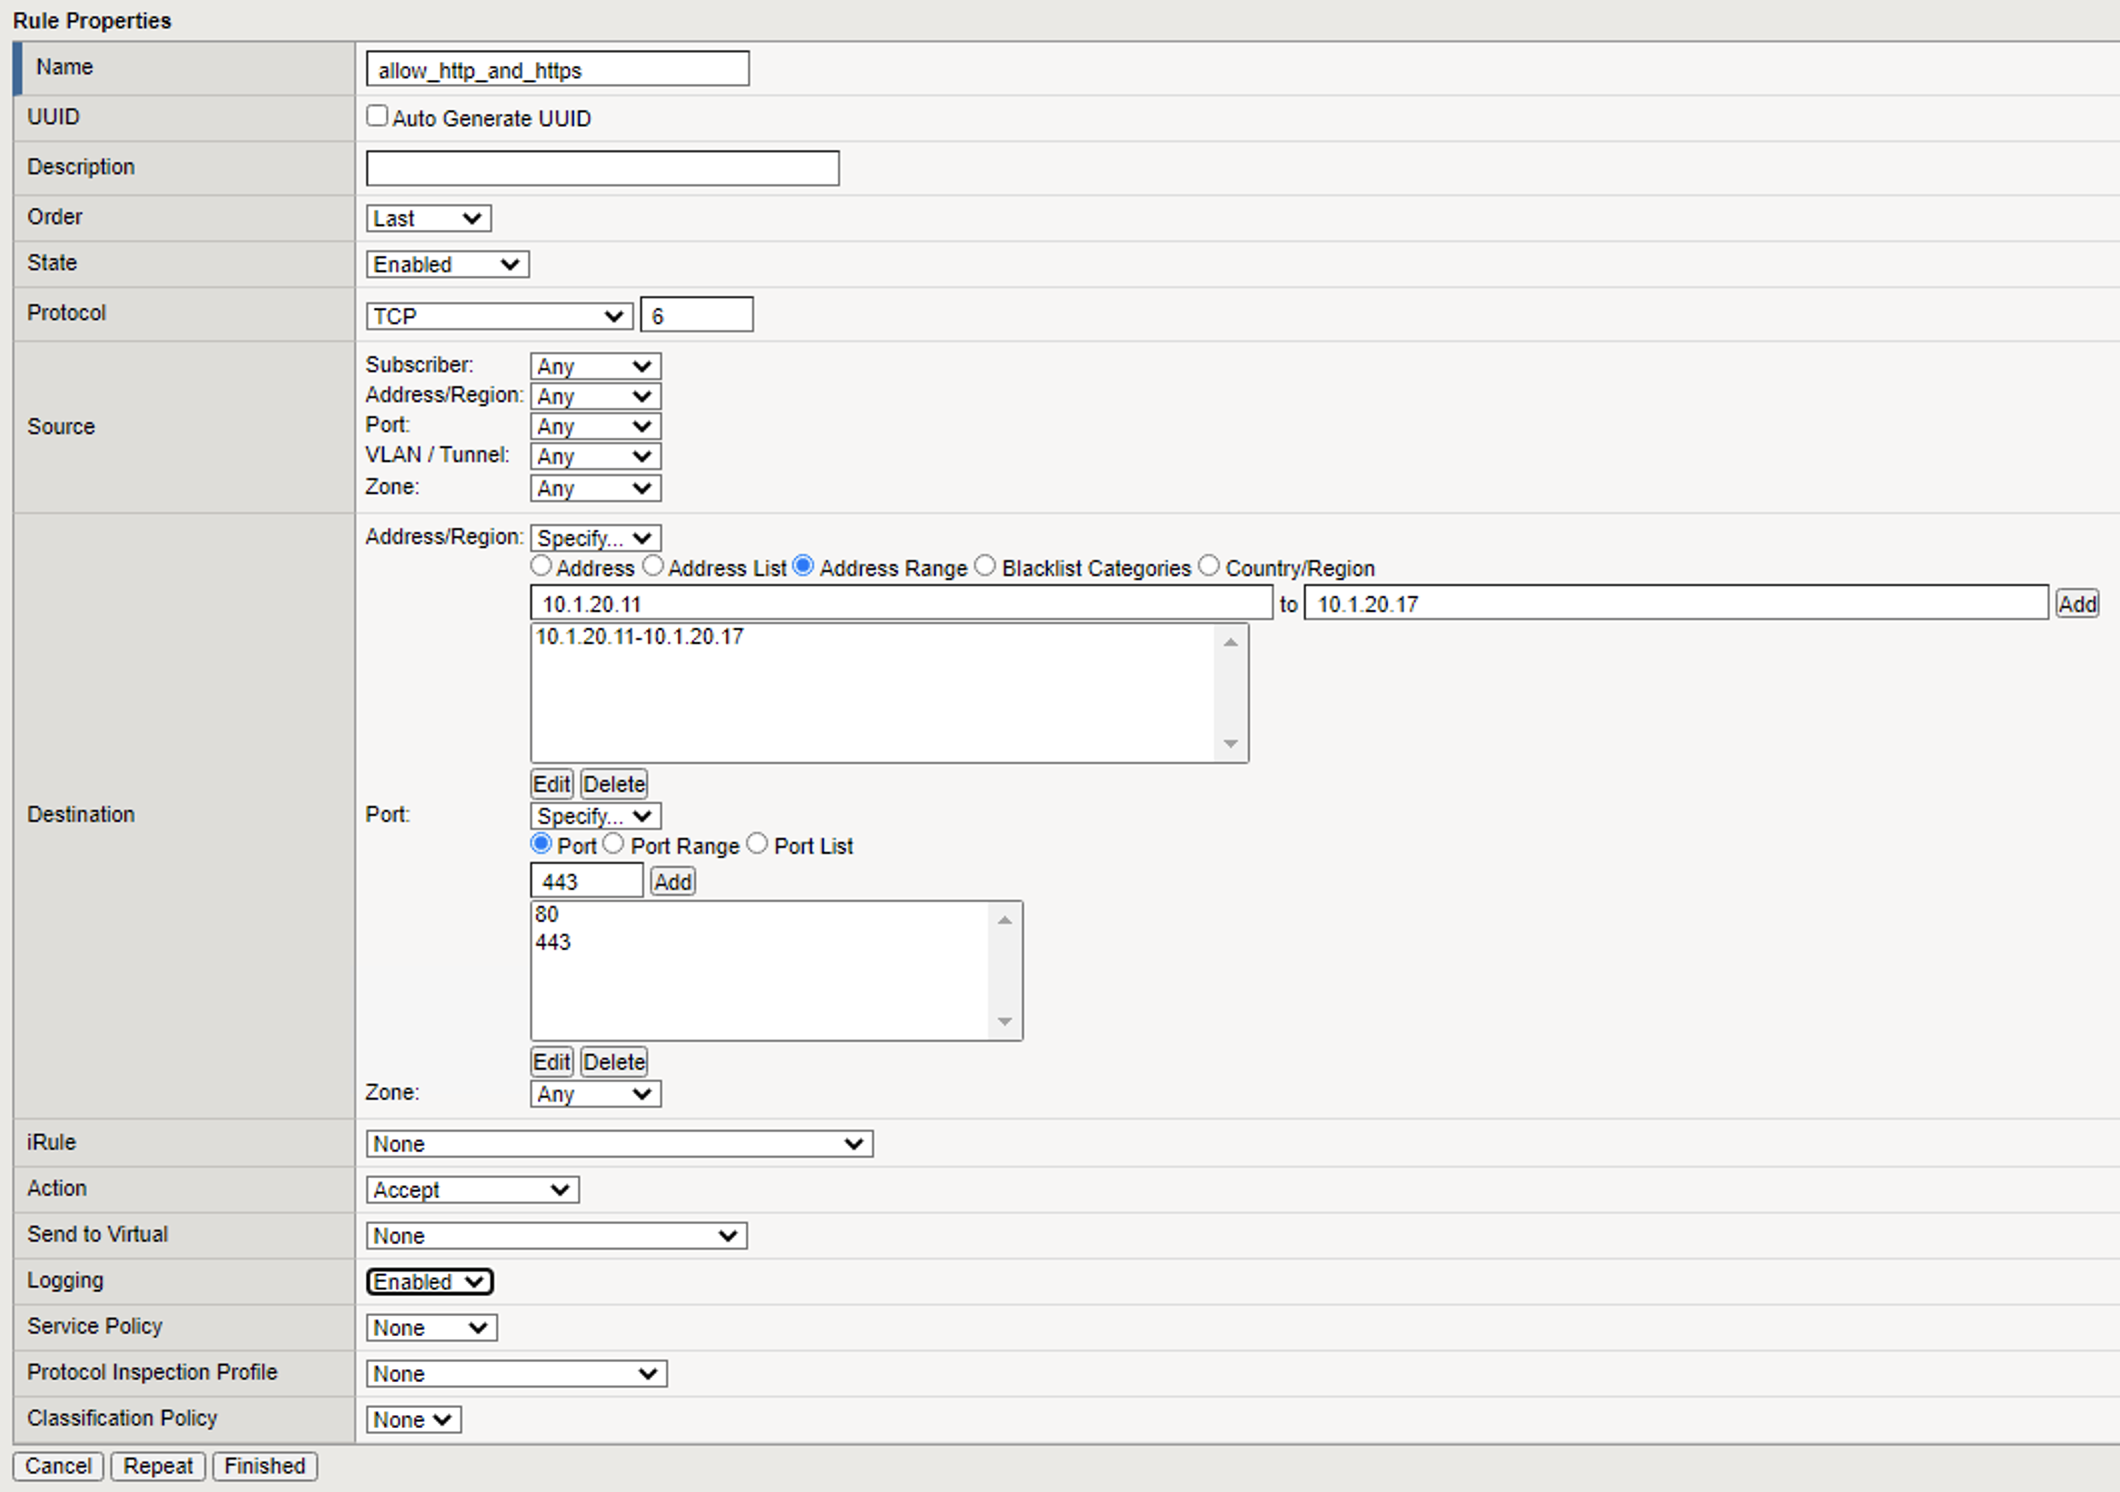
Add a rules into the list to allow HTTP and HTTPS traffic as described in the next steps.
| Name | allow_http_and_https |
|---|---|
| Protocol | TCP |
| Source | Leave at Default of Any |
| Destination Address | Pulldown Specify Address Range 10.1.20.11 to 10.1.20.17, then click Add |
| Destination Port | Pulldown Specify… Port 80, click Add, Specify… Port 443, click Add |
| Action | Accept |
| Logging | Enabled |
Your screen should appear as such:
- Click Finished, then add another rule by clicking Add again.
| Name | allow_any_10_1_10_30 |
|---|---|
| Order | Last |
| Protocol | TCP |
| Source | Leave at Default of Any |
| Destination Address | Pulldown Specify…10.1.10.30 then click Add |
| Destination Port | Leave at Default of Any |
| Action | Accept |
| Logging | Enabled |
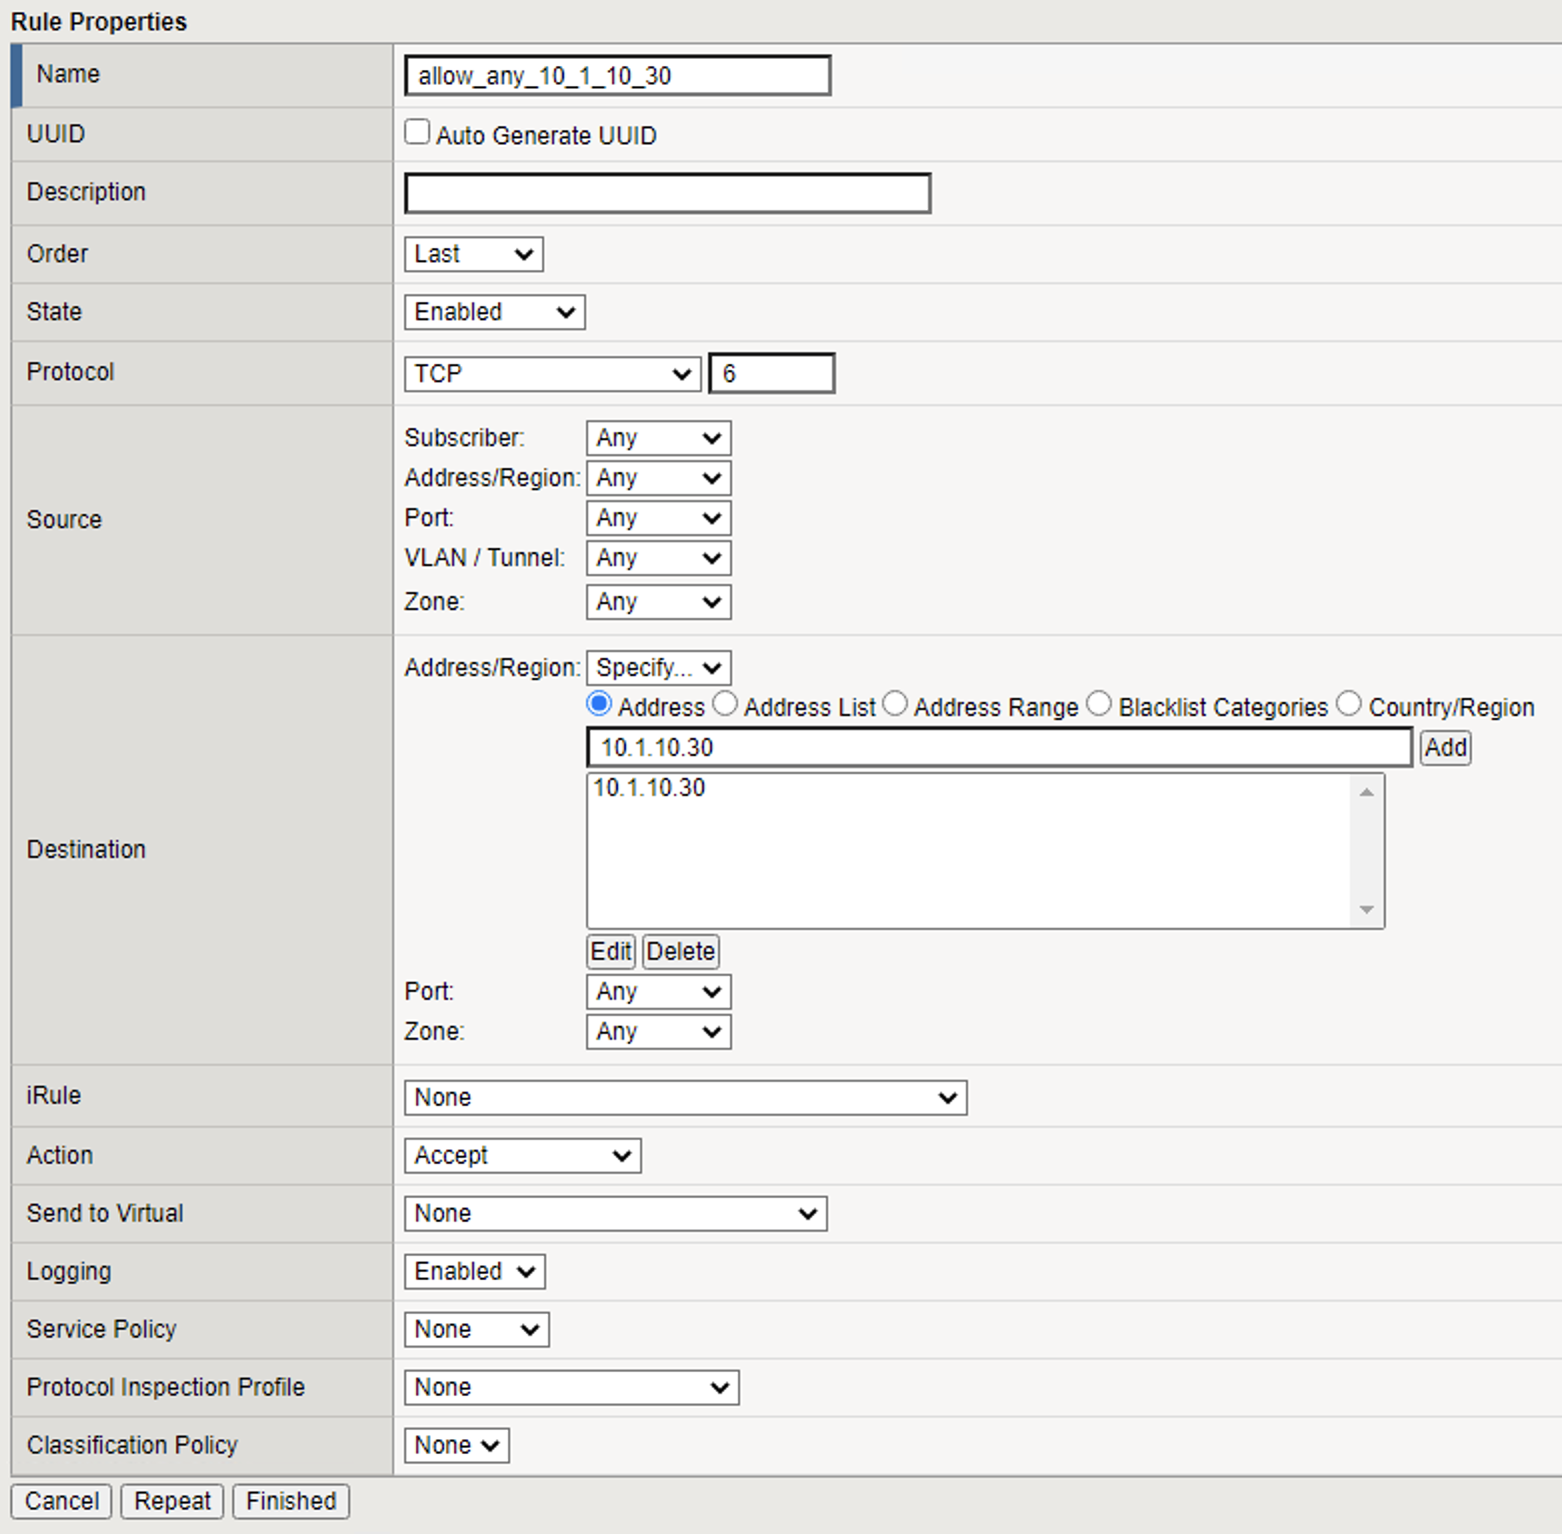
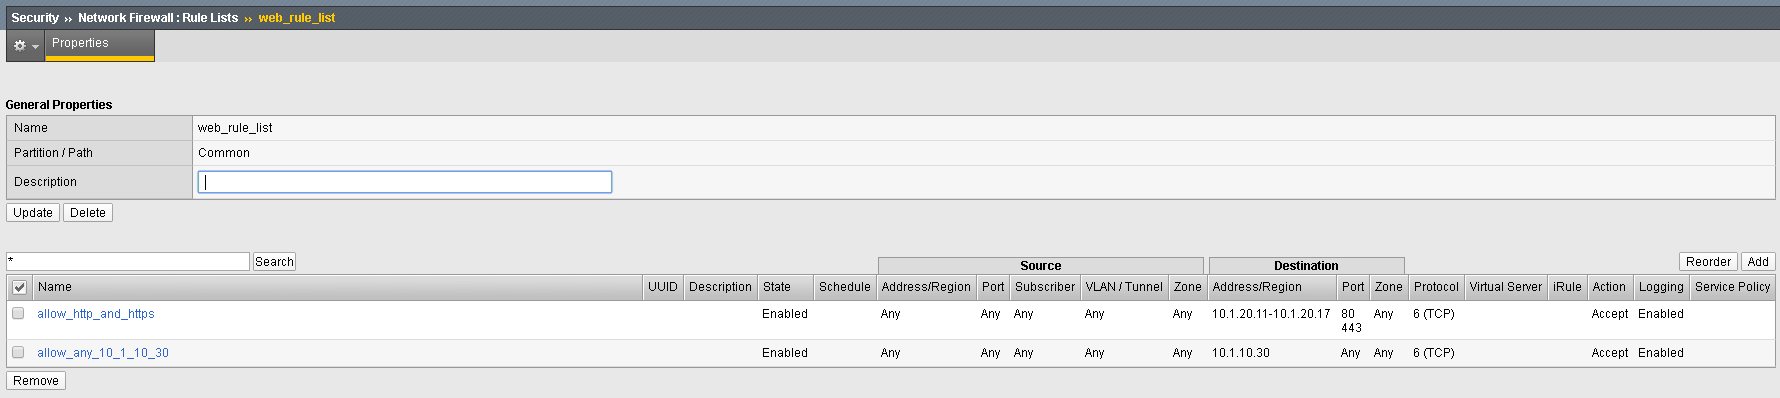
- Click Finished. Your rules list should appear as shown below:
Assign the Rule List to a Policy
Now we will assign this rule list to a policy.
- Navigate to Security > Network Firewall > Policies.
- Click Create.
- For the Name enter rd_0_policy.
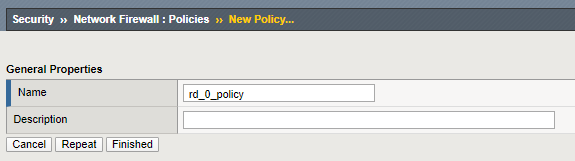
4.Click Finished.
Note
We commonly use “RD” in our rules to help reference the “Route Domain”, default is 0.
- Edit the rd_0_policy by clicking on it in the Policy Lists table.
- Click the Add Rule List button.
- For the Name, start typing web_rule_list. You will notice the name will auto complete, making it easy to reference the existing object.
- Select the rule list /Common/web_rule_list. Ensure that enabled is selected under State.

- Click Done Editing. You will notice the changes are unsaved and need to be committed to the system. This is a nice feature to have enabled to verify you want to commit the changes you’ve just made without a change automatically being implemented.
- Click Commit Changes to System to commit your changes.
Assign the rd_0_policy to Route Domain 0
- Navigate to Network > Route Domains.
- Click on the 0 to select route domain 0. A route domain is similar to selecting a default VRF on an IP router, and 0 is the default.
- Select the Security tab. Set Enforcement to Enable and select the rd_0_policy.
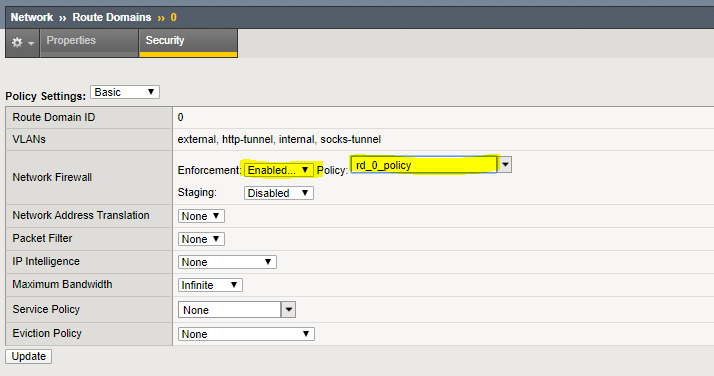
- Finally, click Update.
Configure BIG-IP Firewall in ADC Mode
By default, the Network Firewall is configured in ADC mode, a default allow configuration, in which all traffic is allowed through the firewall, and any traffic you want to block must be explicitly specified.
The system is configured in this mode by default so all traffic on your system continues to pass after you provision the Advanced Firewall Manager. You should create appropriate firewall rules to allow necessary traffic to pass before you switch the Advanced Firewall Manager to Firewall mode. In Firewall mode, a default deny configuration, all traffic is blocked through the firewall, and any traffic you want to allow through the firewall must be explicitly specified.
In existing deployments with a large number of VIP’s, adding AFM in Firewall mode would require significant preperation. Firewall functionality is easier to introduce in ADC mode.
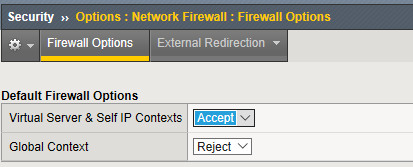
- Navigate to Security > Options > Network Firewall > Firewall Options.
- Change the Virtual Server & Self IP Contexts context setting to Accept.
Your screen should appear similar to below:
- Click Update if you changed this setting.
Validate Lab 2 Configuration
In Chrome, refresh the web sites in tabs 2-7. A web page should pull up for each tab.
Note
You may need to accept the certificate to proceed to the application sites.
- URL: https://site1.com
- URL: https://site2.com
- URL: https://site3.com
- URL: https://site4.com
- URL: https://site5.com
- URL: https://dvwa.com Username: admin Password: password
Minimize all windows so that the desktop is shown. Open a terminal window by launching Cygwin from the shortcut. Use the curl utility to test connectivity.
Tip
The -k argument ignores certificate warnings.
curl -k https://10.1.10.30 -H Host:site1.com

curl -k https://10.1.10.30 -H Host:site2.com

curl -k https://10.1.10.30 -H Host:site3.com

curl -k https://10.1.10.30 -H Host:site4.com

curl -k https://10.1.10.30 -H Host:site5.com

You should see a response containing the HTML of the web page.

This completes Module 1 - Lab 2. Click Next to continue.