Advanced Multi-layer Firewall Protection > Advanced Multi-Layer Firewall Protection > Module 1: F5 Multi-layer Firewall Source | Edit on
Lab 3: Configure Local Logging For Firewall Events
Security logging needs to be configured separately from LTM logging.
High Speed Logging for modules such as the firewall module requires three componenets.
- A Log Publisher
- A Log Destination (local-db for this lab)
- A Log Profile
For more detailed information on logging, please consult the BIG-IP documentation: https://techdocs.f5.com/en-us/bigip-15-0-0/external-monitoring-of-big-ip-systems-implementations.html
In this lab, we will configure a local log publisher and log profile. The log profile will then be applied to the virtual server and tested.
Warning
Logging locally on a BIG-IP increases resource utilization and overall load. In production, it is a best practice to log to an external syslog server to reduce load on the device.
Create A Log Publisher
A log publisher defines an end point for logging.
Return to Chrome and the BIG-IP TMUI in the first tab.
Navigate to System > Logs > Configuration > Log Publishers.
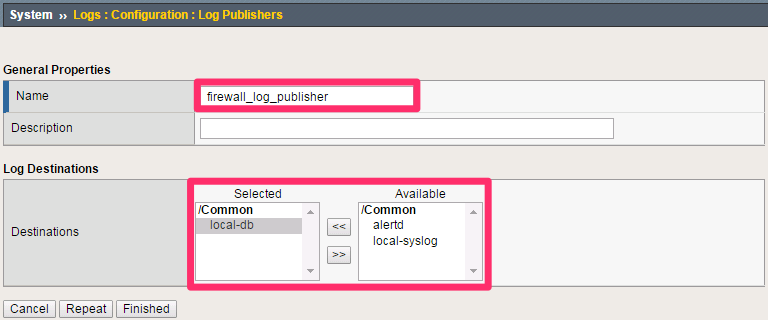
Click Create. Use the values below to create a log publisher.
Name: firewall_log_publisher
Destinations (Selected): local-db
Note
Leave all other fields to their default values.
Click Finished.
Create A Log Profile
Logging profiles specify which data/events should be logged and how that data should be formatted.
Navigate to Security > Event Logs > Logging Profiles.
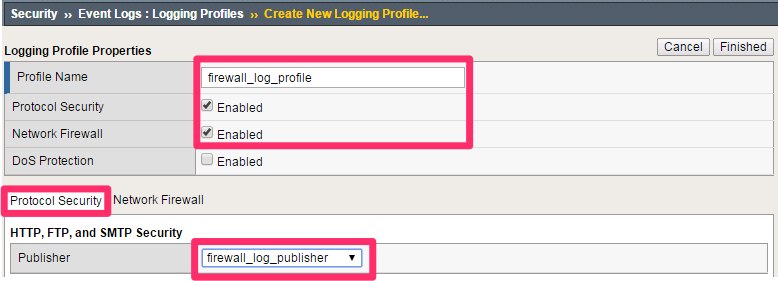
Click Create. Use the values below to create the logging profile.
Name: firewall_log_profile
Protocol Security: Checked
Network Firewall: Checked
Click on the Protocol Security tab.
Set the HTTP, FTP, SMTP Security log publisher to firewall_log_publisher. Leave all other fields using the default values.
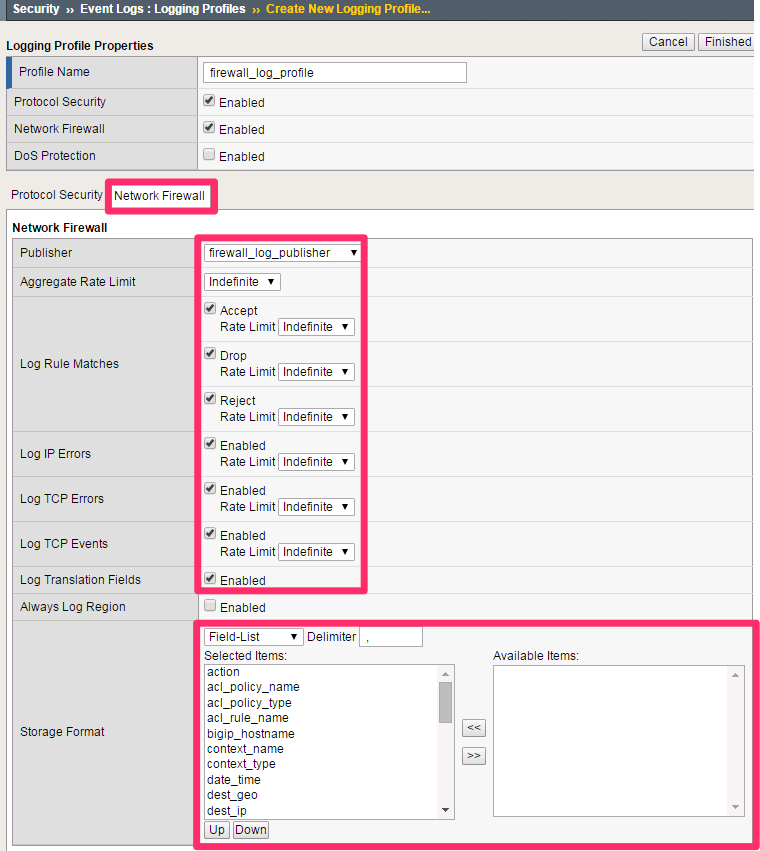
Click on the log profile Network Firewall tab and configure using the following information:
Network Firewall Publisher: firewall_log_profile
Log Rule Matches: Check Accept, Drop and Reject
Log IP Errors: Checked
Log TCP Errors: Checked
Log TCP Events: Checked
Log Translation Fields: Checked
Storage Format: Field-List (Move all to Selected Items)
Note
Leave all other fields using the default values.
Scroll to the bottom of the screen and click Create.
Apply The Logging Configuration
Apply the newly created log profile to the external virtual server created in the previous lab.
- Navigate to Local Traffic > Virtual Servers > Virtual Server List.
- Click on EXT_VIP_10_1_10_30 virtual server.
- Click on the Security down-drop from the top menu bar and select Policies.
- Change the Log Profiles field to Enabled and select the firewall_log_profile profile.
- Leave all other fields using the default values. Your screen should appear as below:

- Click Update.
Validate Lab 3 Configuration
Refresh the app sites’ browser tabs to access the virtual server or repeat the curl statements from the previous sections.
curl -k https://10.1.10.30 -H Host:site1.com

curl -k https://10.1.10.30 -H Host:site2.com

curl -k https://10.1.10.30 -H Host:site3.com

curl -k https://10.1.10.30 -H Host:site4.com

curl -k https://10.1.10.30 -H Host:site5.com

Note
This test generates traffic that creates network firewall log entries.
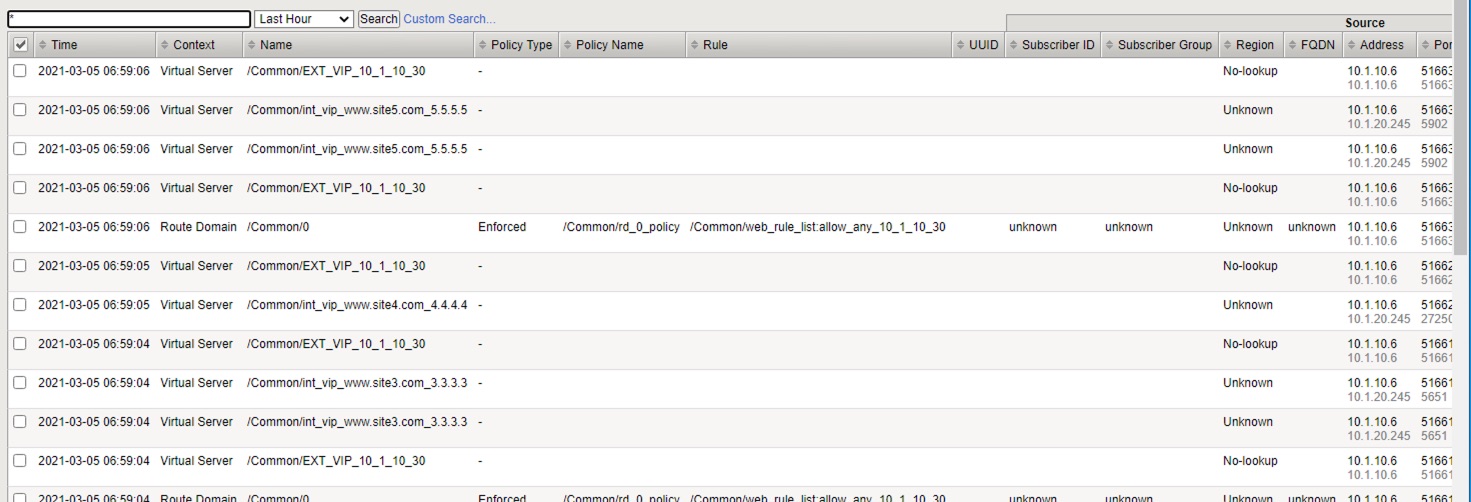
In the Security > Event Logs > Network > Firewall screen, click the Search button to refresh the event list. Newest events will appear at the top, as shown below:
This completes Module 1 - Lab 3. Click Next to continue.