F5 Identity and Access Management Solutions > Archived Identity & Access Management Labs > 500 Series: Troubleshooting Source | Edit on
Lab 1: The Message Box
Task 1 - Setup Lab Environment
To access your dedicated student lab environment, you will need a web browser and Remote Desktop Protocol (RDP) client software. The web browser will be used to access the Unified Demo Framework (UDF) Training Portal. The RDP client will be used to connect to the jumphost, where you will be able to access the BIG-IP management interfaces (HTTPS, SSH).
Click DEPLOYMENT located on the top left corner to display the environment
Click ACCESS next to jumphost.f5lab.local
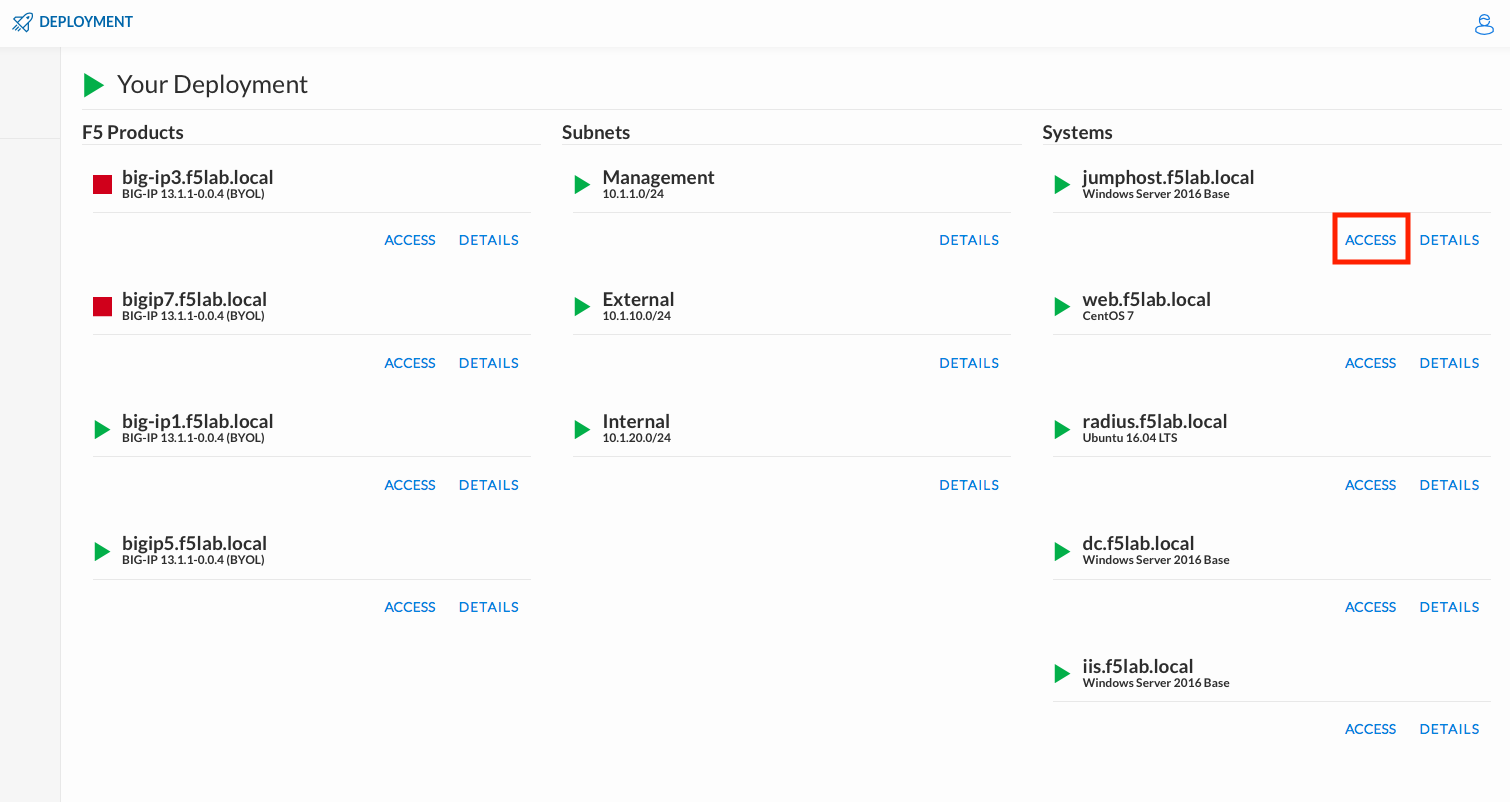
Select your RDP resolution.
The RDP client on your local host establishes a RDP connection to the Jumphost.
Login with the following credentials:
- User: f5lab\user1
- Password: user1
After successful logon the Chrome browser will auto launch opening the site https://portal.f5lab.local. This process usually takes 30 seconds after logon.
Click the Classes tab at the top of the page.
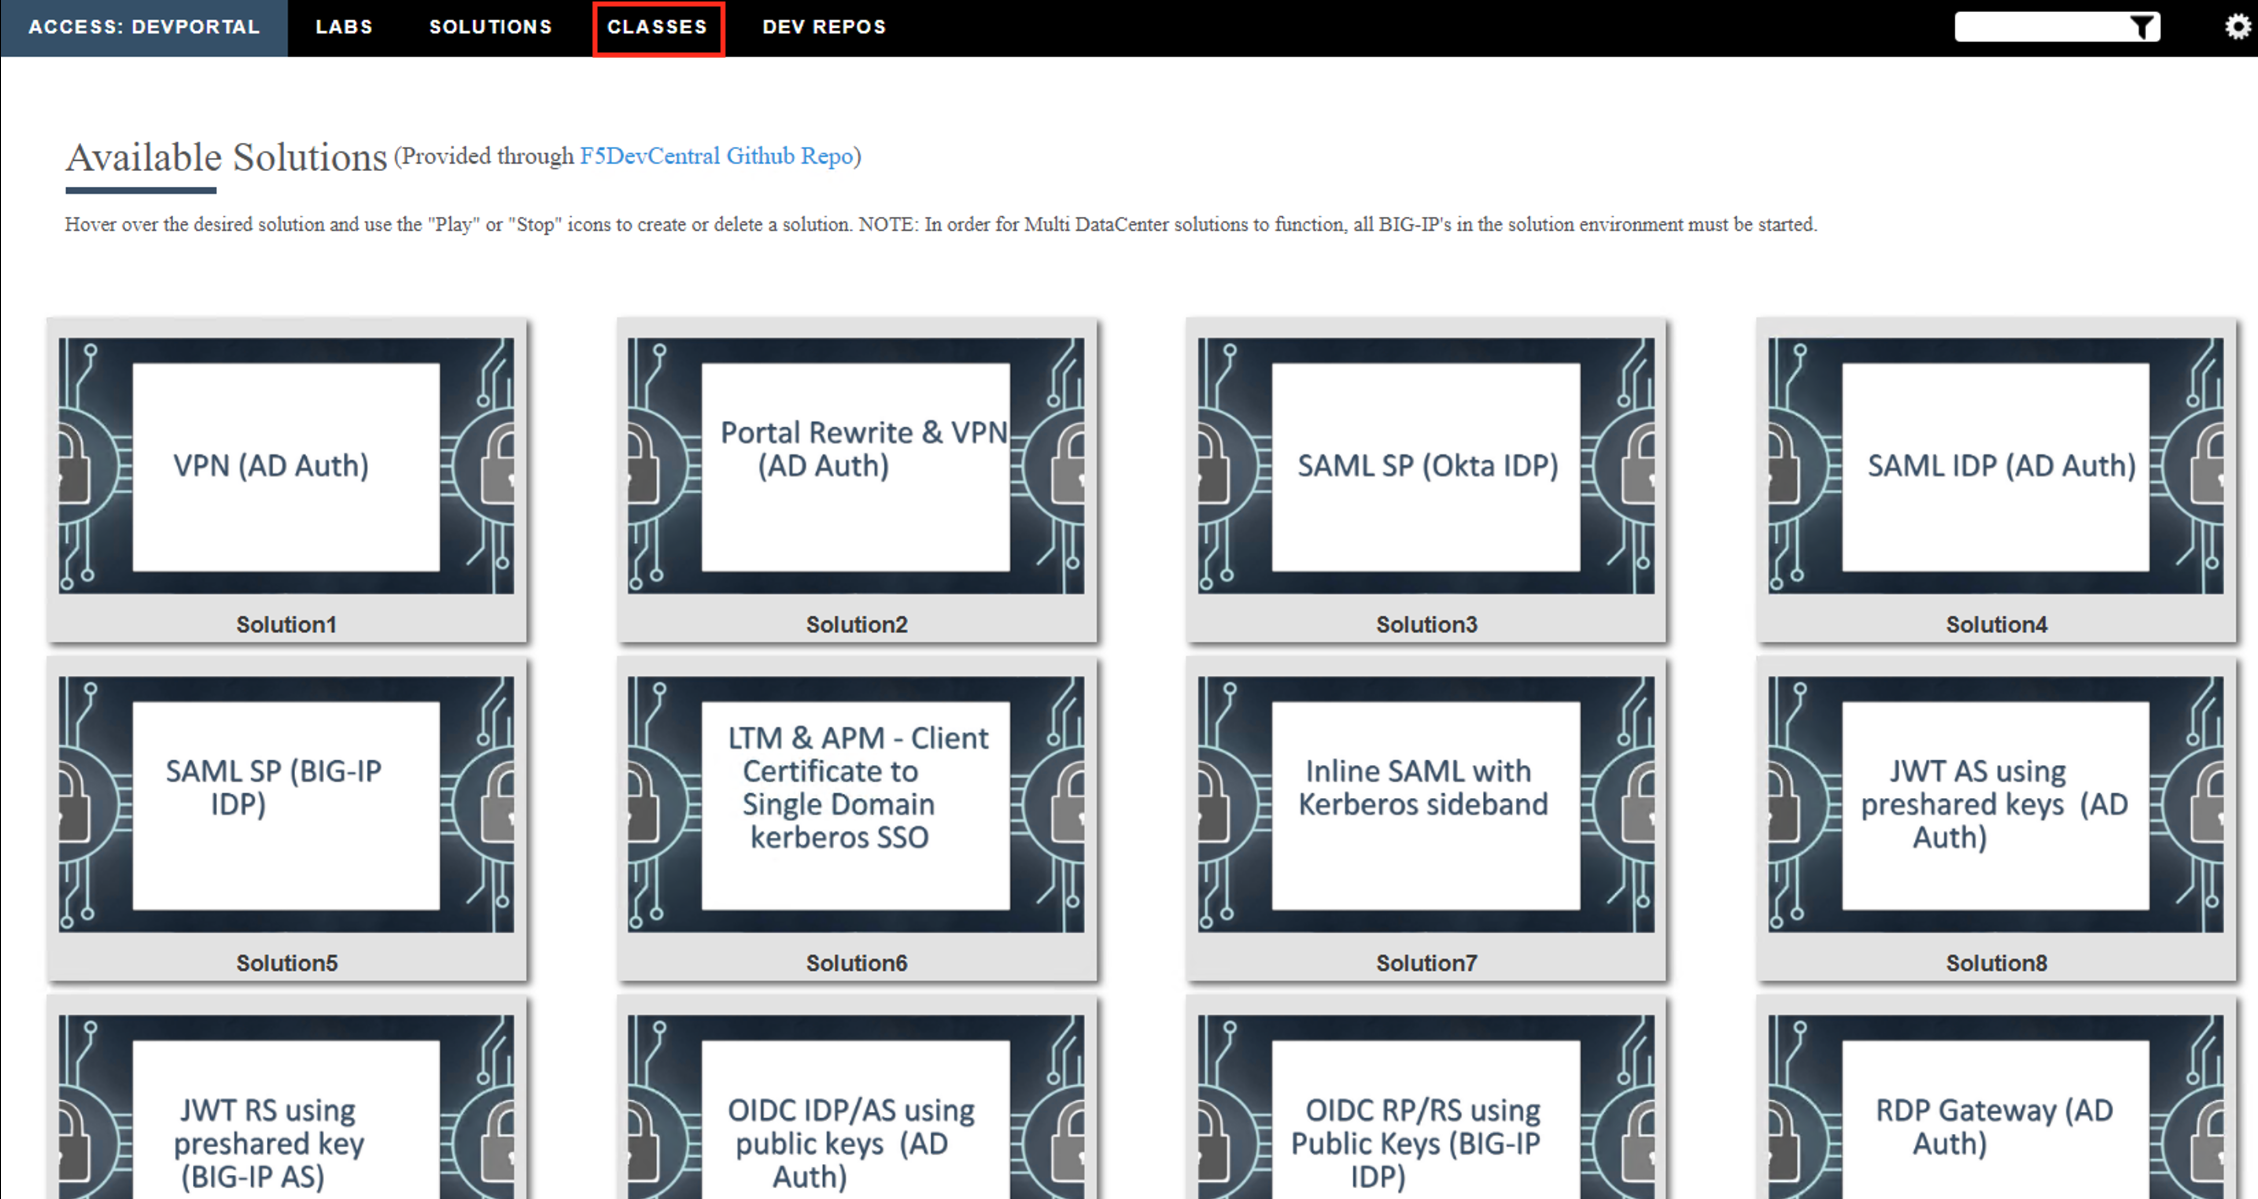
Scroll down the page until you see 501 GUI Tools on the left
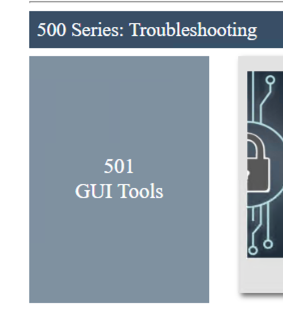
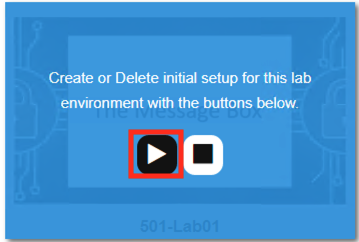
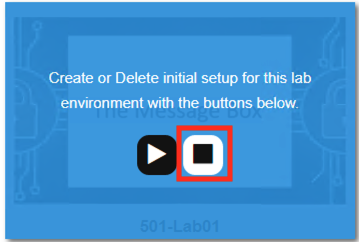
Hover over tile The Message Box. A start and stop icon should appear within the tile. Click the Play Button to start the automation to build the environment
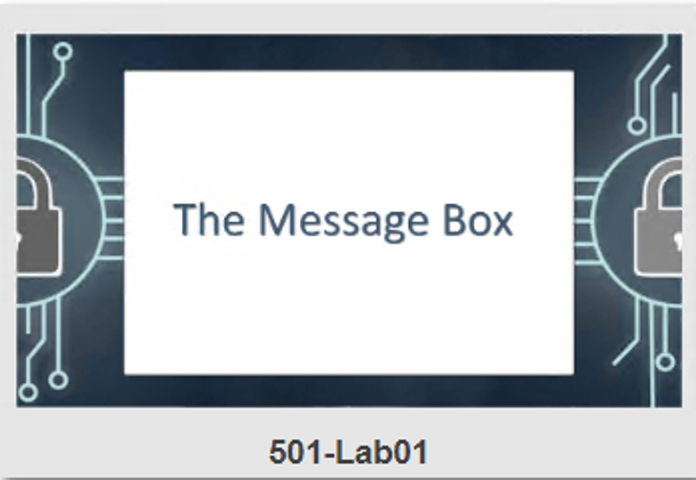
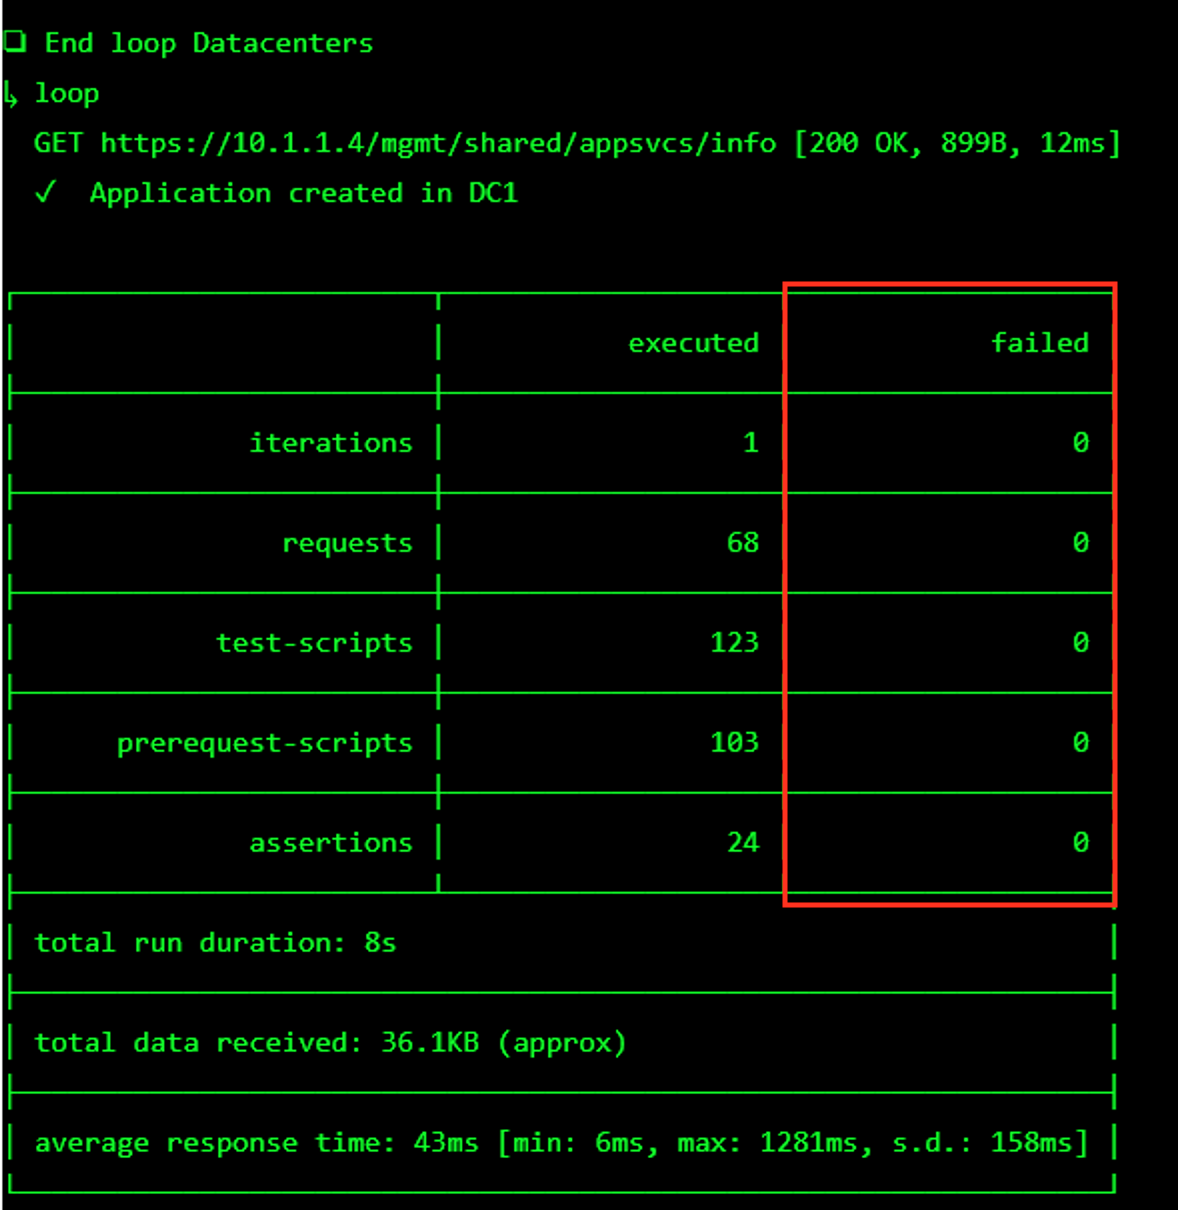
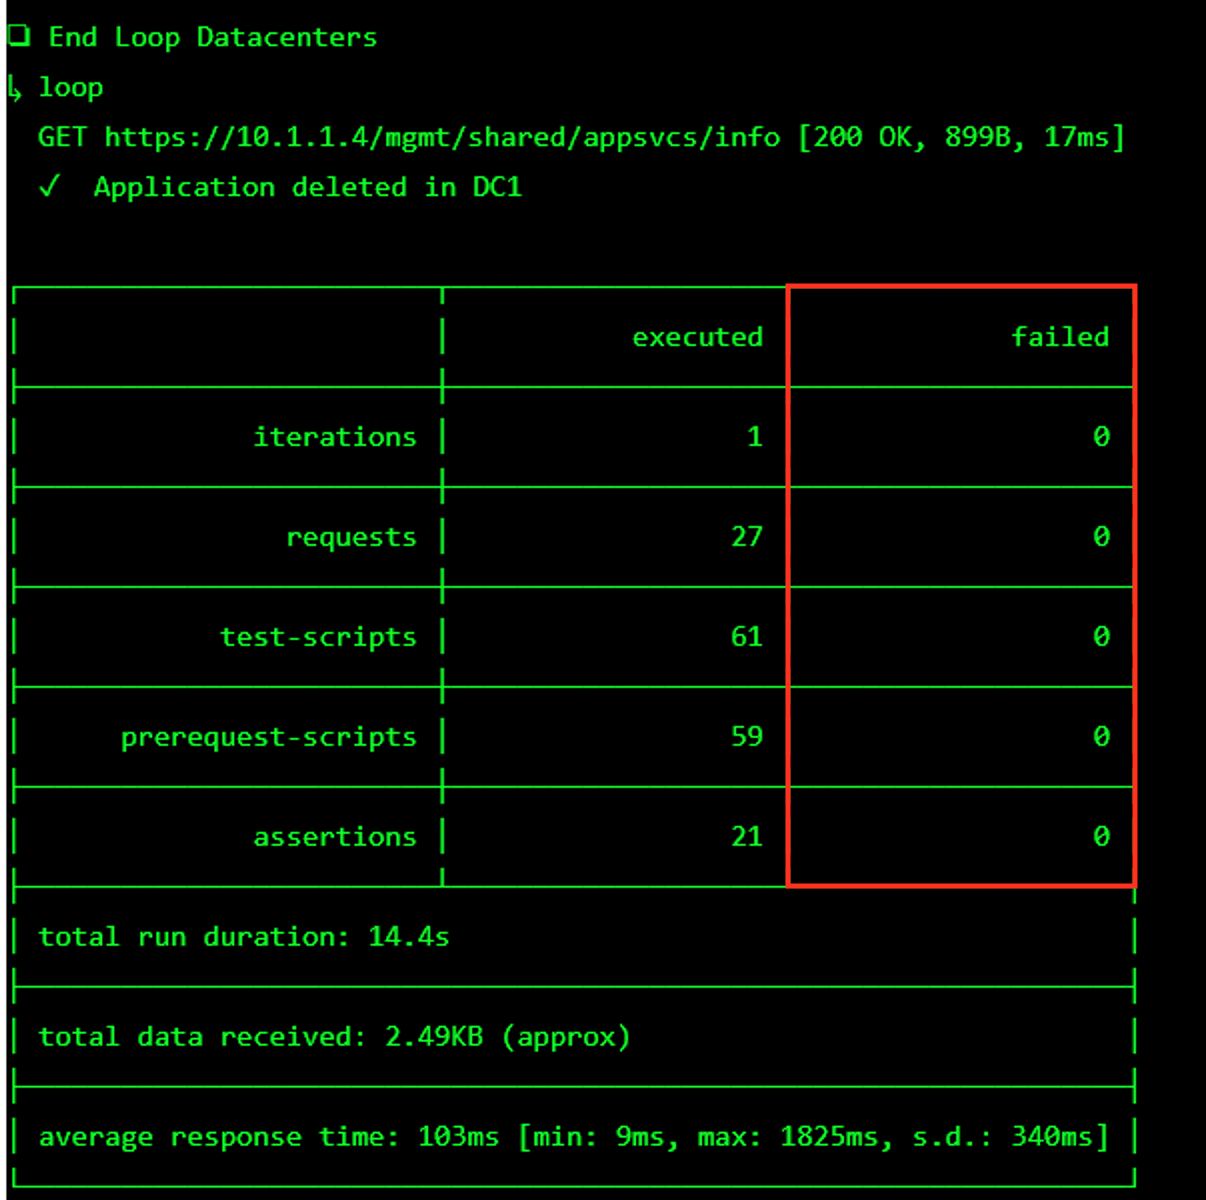
The screen should refresh displaying the progress of the automation within 30 seconds. Scroll to the bottom of the automation workflow to ensure all requests succeeded. If you you experience errors try running the automation a second time or open an issue on the Access Labs Repo.
Task 2 - Create a failed connection
The message box is a great tool for troubleshooting a policy that may have been reaching an ENDING DENY and closing the APM session too rapidly for proper inspection during the troubleshooting phase.
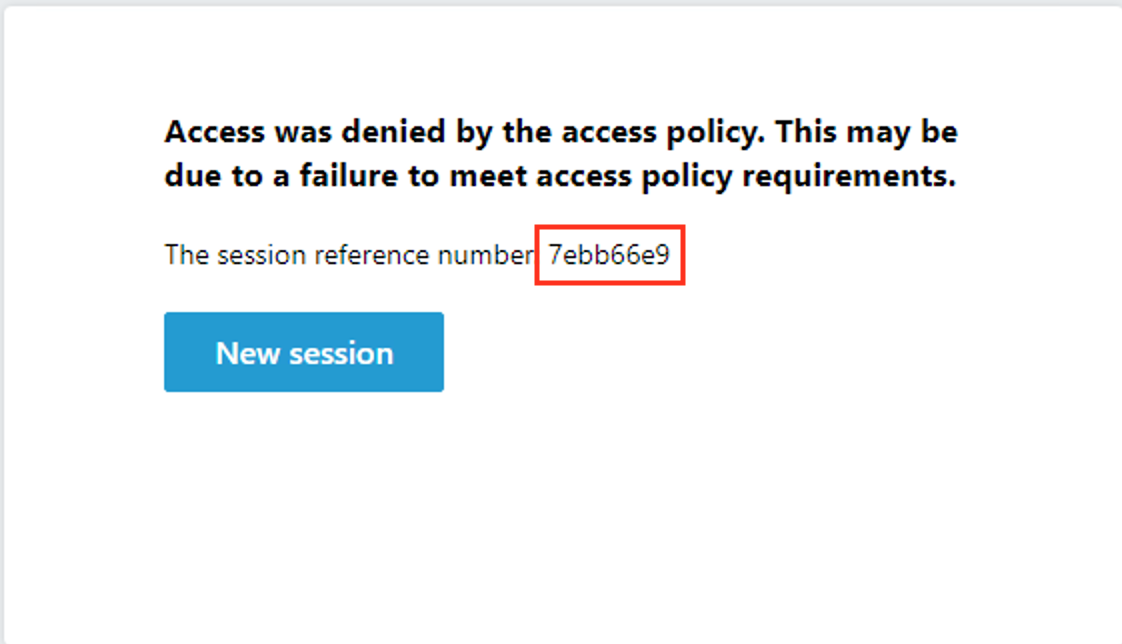
From the jumphost open new browser tab. Then navigate to https://server1.acme.com.
You instantly receive an access denied message. Let’s go look at a report to see why we failed the policy.
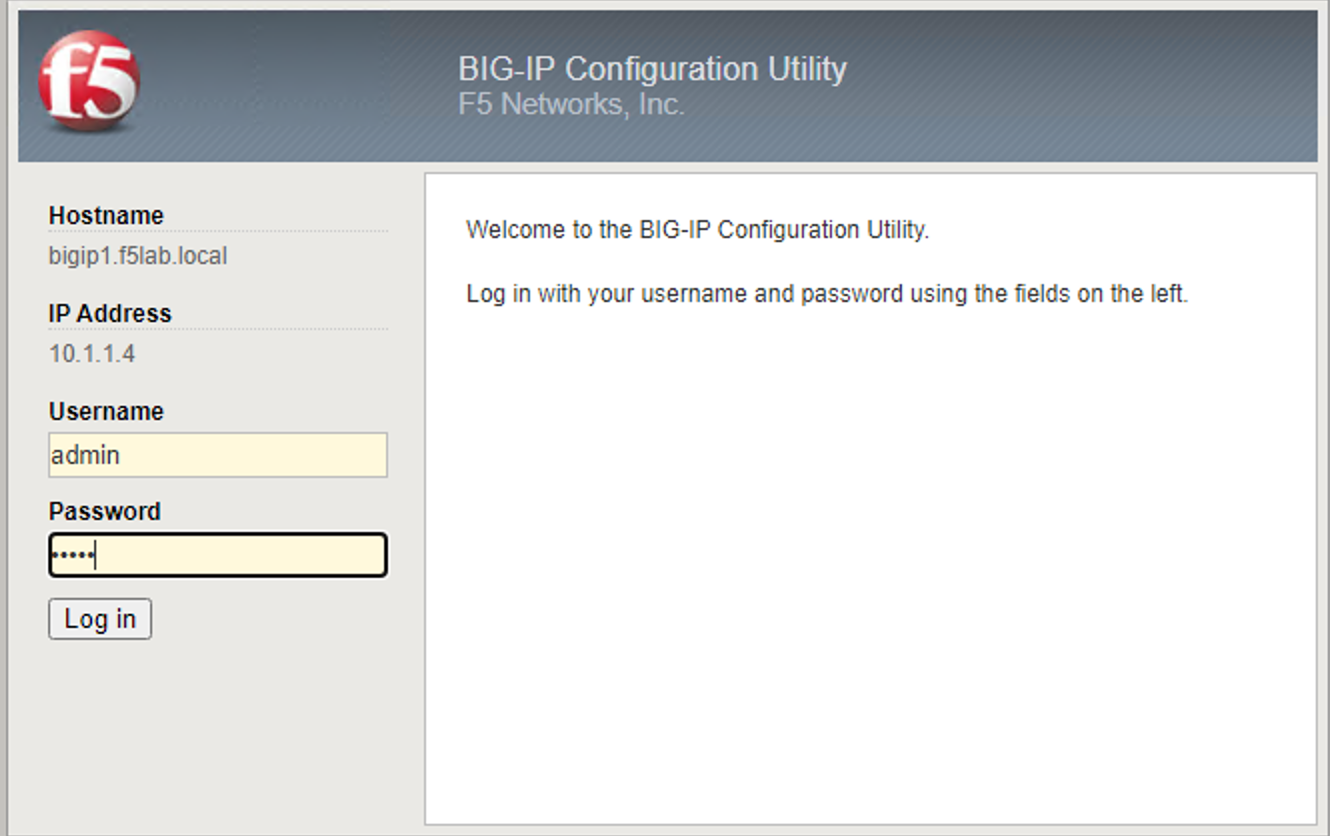
From the jumphost browser navigate to https://bigip1.f5lab.local
Login with the following credentials:
- username admin
- password admin
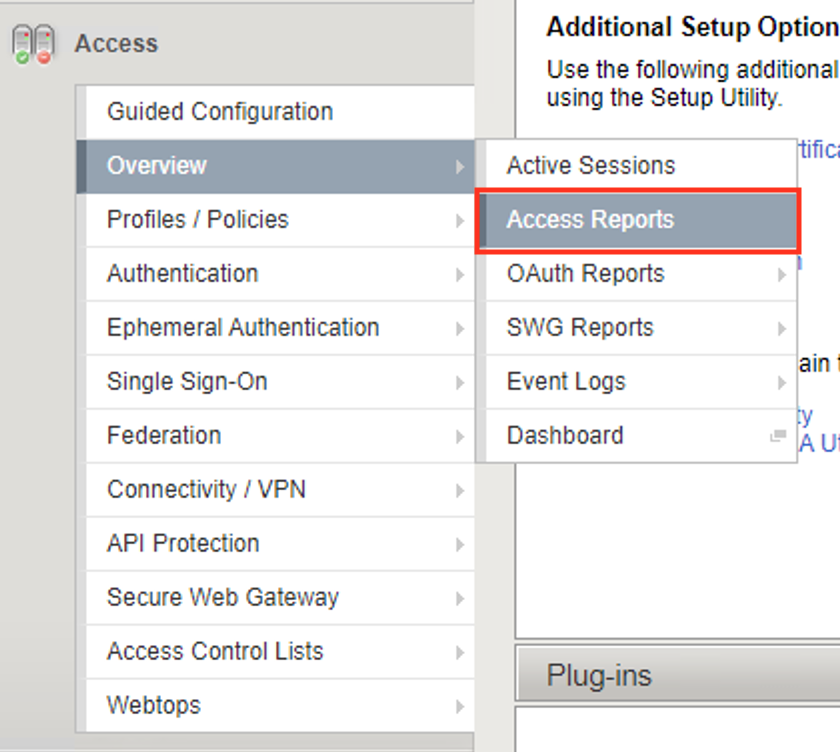
Navigate to Access >> Overview >> Access Reports.
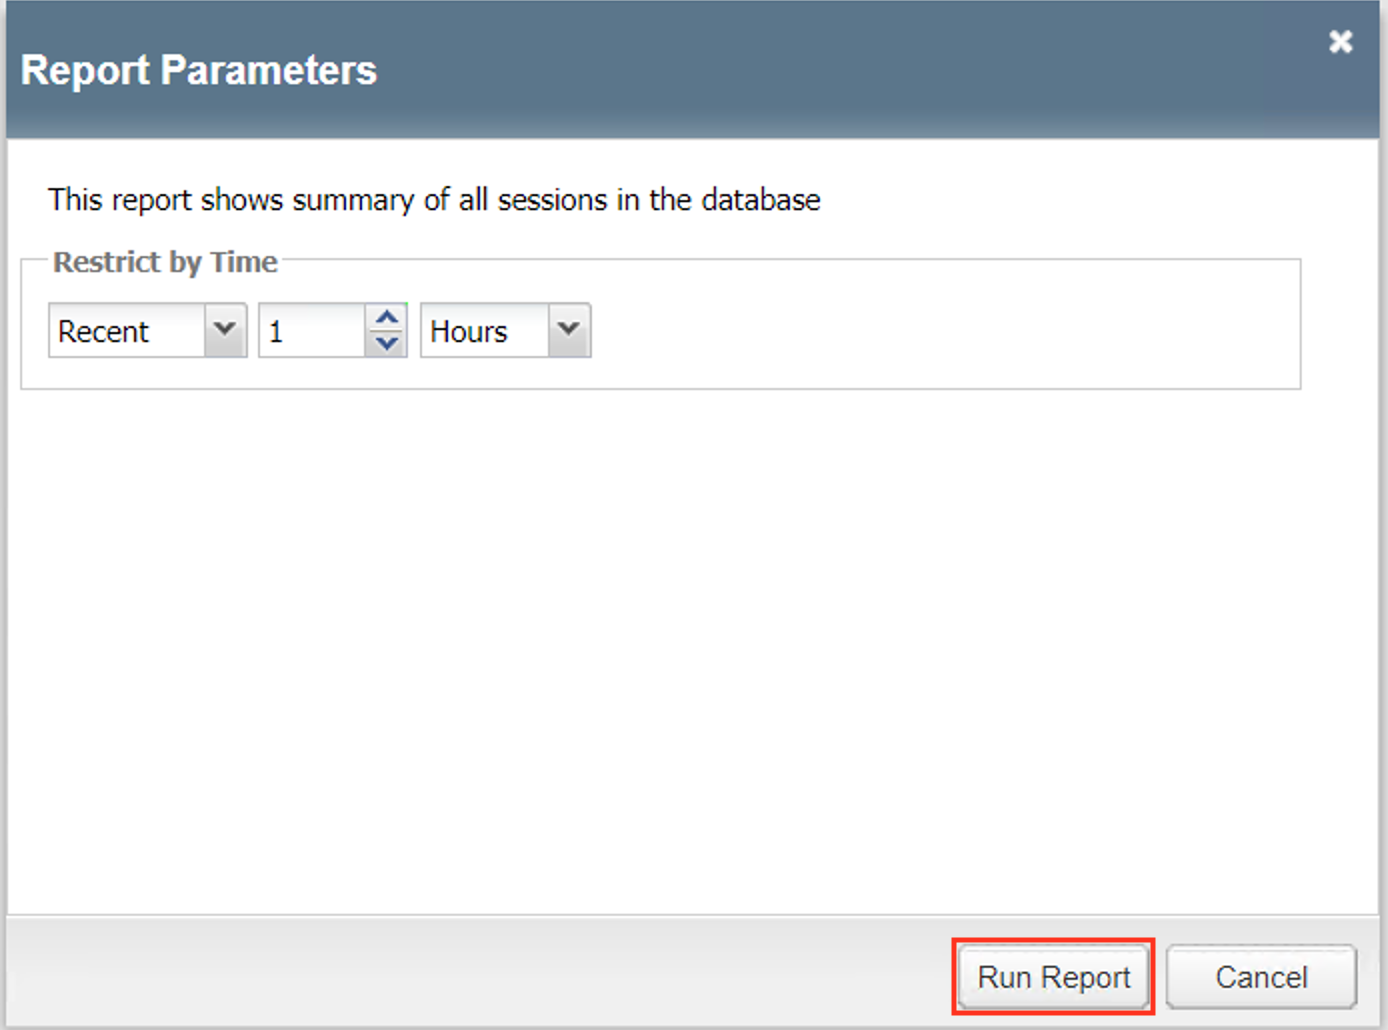
Click Run Report
Click on the Session ID that matches your failed attempt.

You can see a client with the ip address 10.1.10.10 failed the firewall posture assessment. At this point the session variables have been deleted because all session variable are cleared after a session has been terminated. So that leaves two choices. Investigate further into the logs by turning on debug or find a way to keep the session alive long enough to look at the variables real-time. For this lab we are going to pause the sessioon.

Task 3 - Create the Test Branch
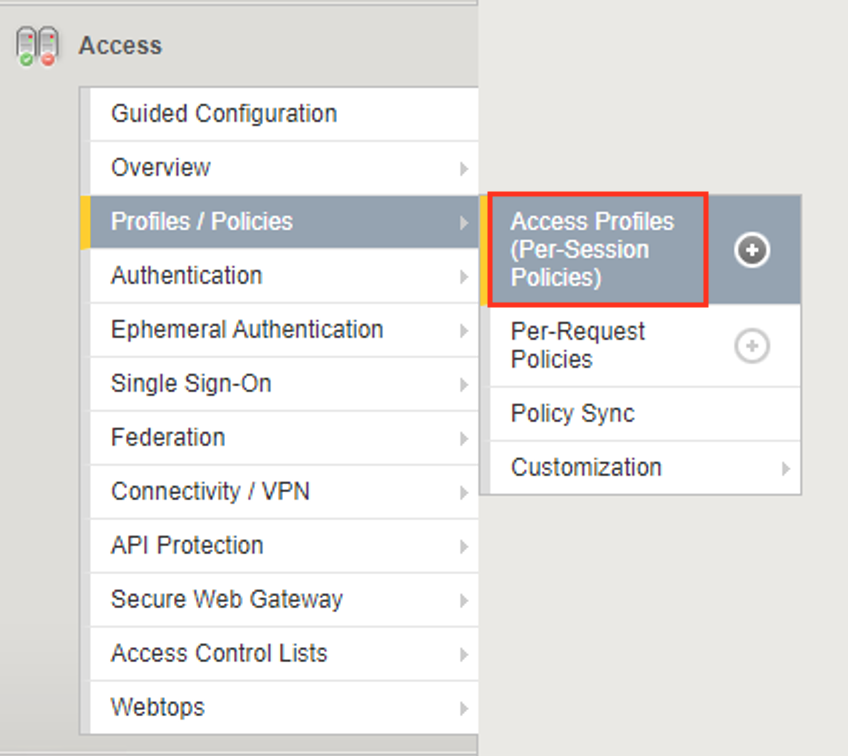
Navigate to Access >> Profiles/Policies >> Access Profiles (Per-Session Policies).
Click Edit to open Visual Policy Editor(VPE)

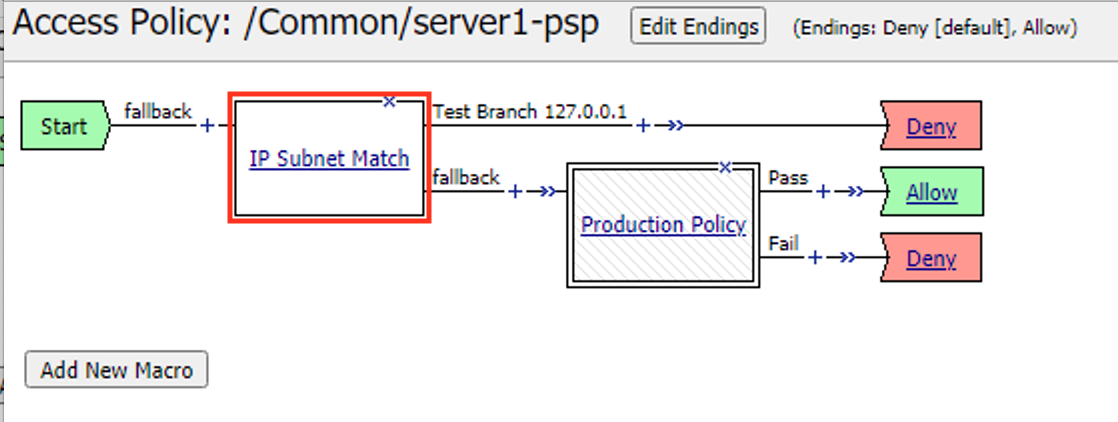
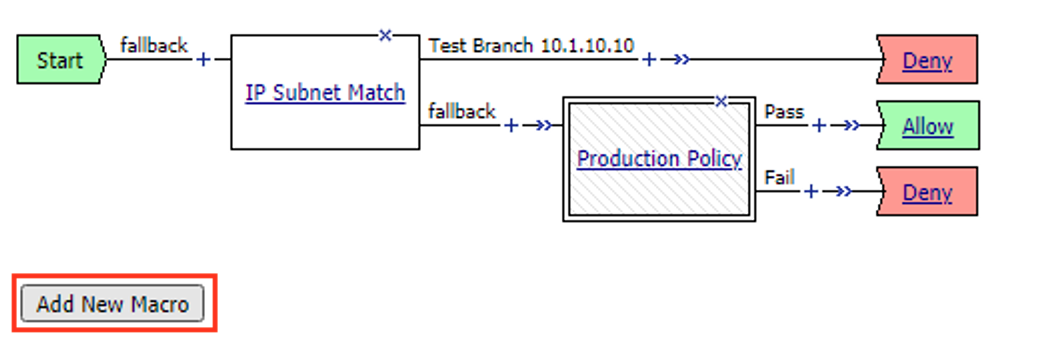
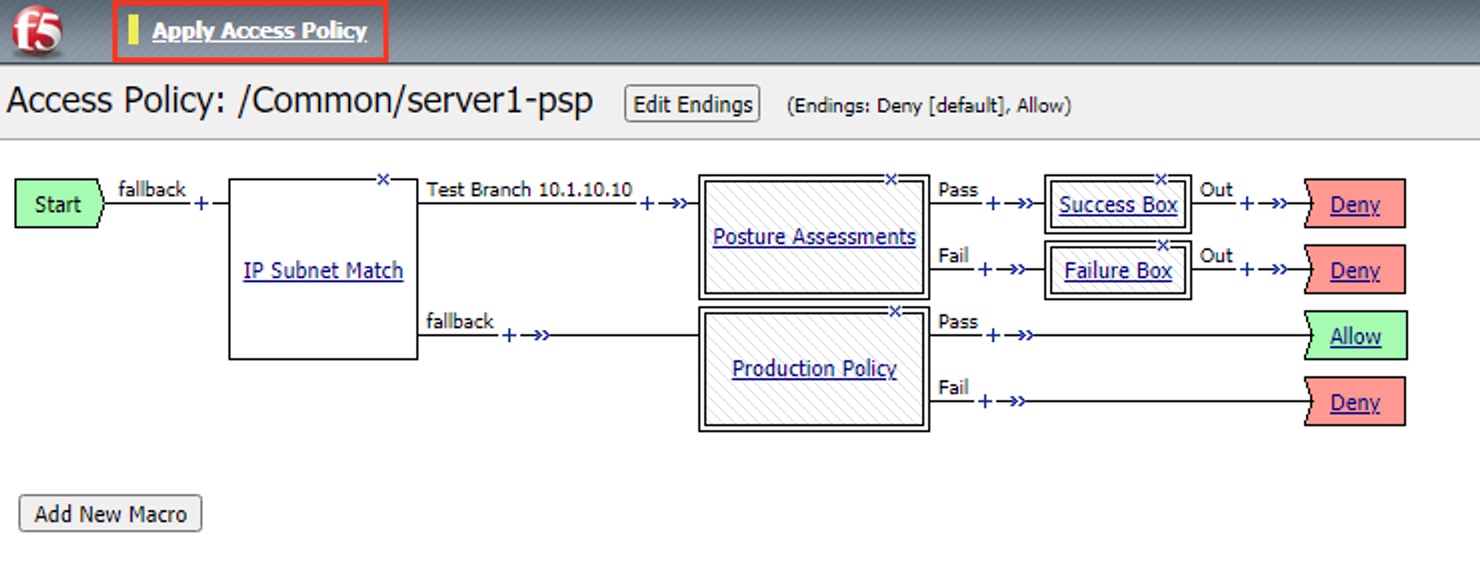
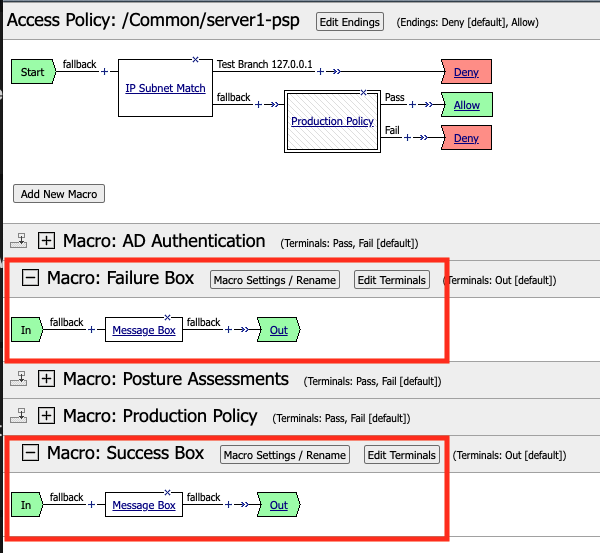
Exam the policy to understand where the failure is happening:
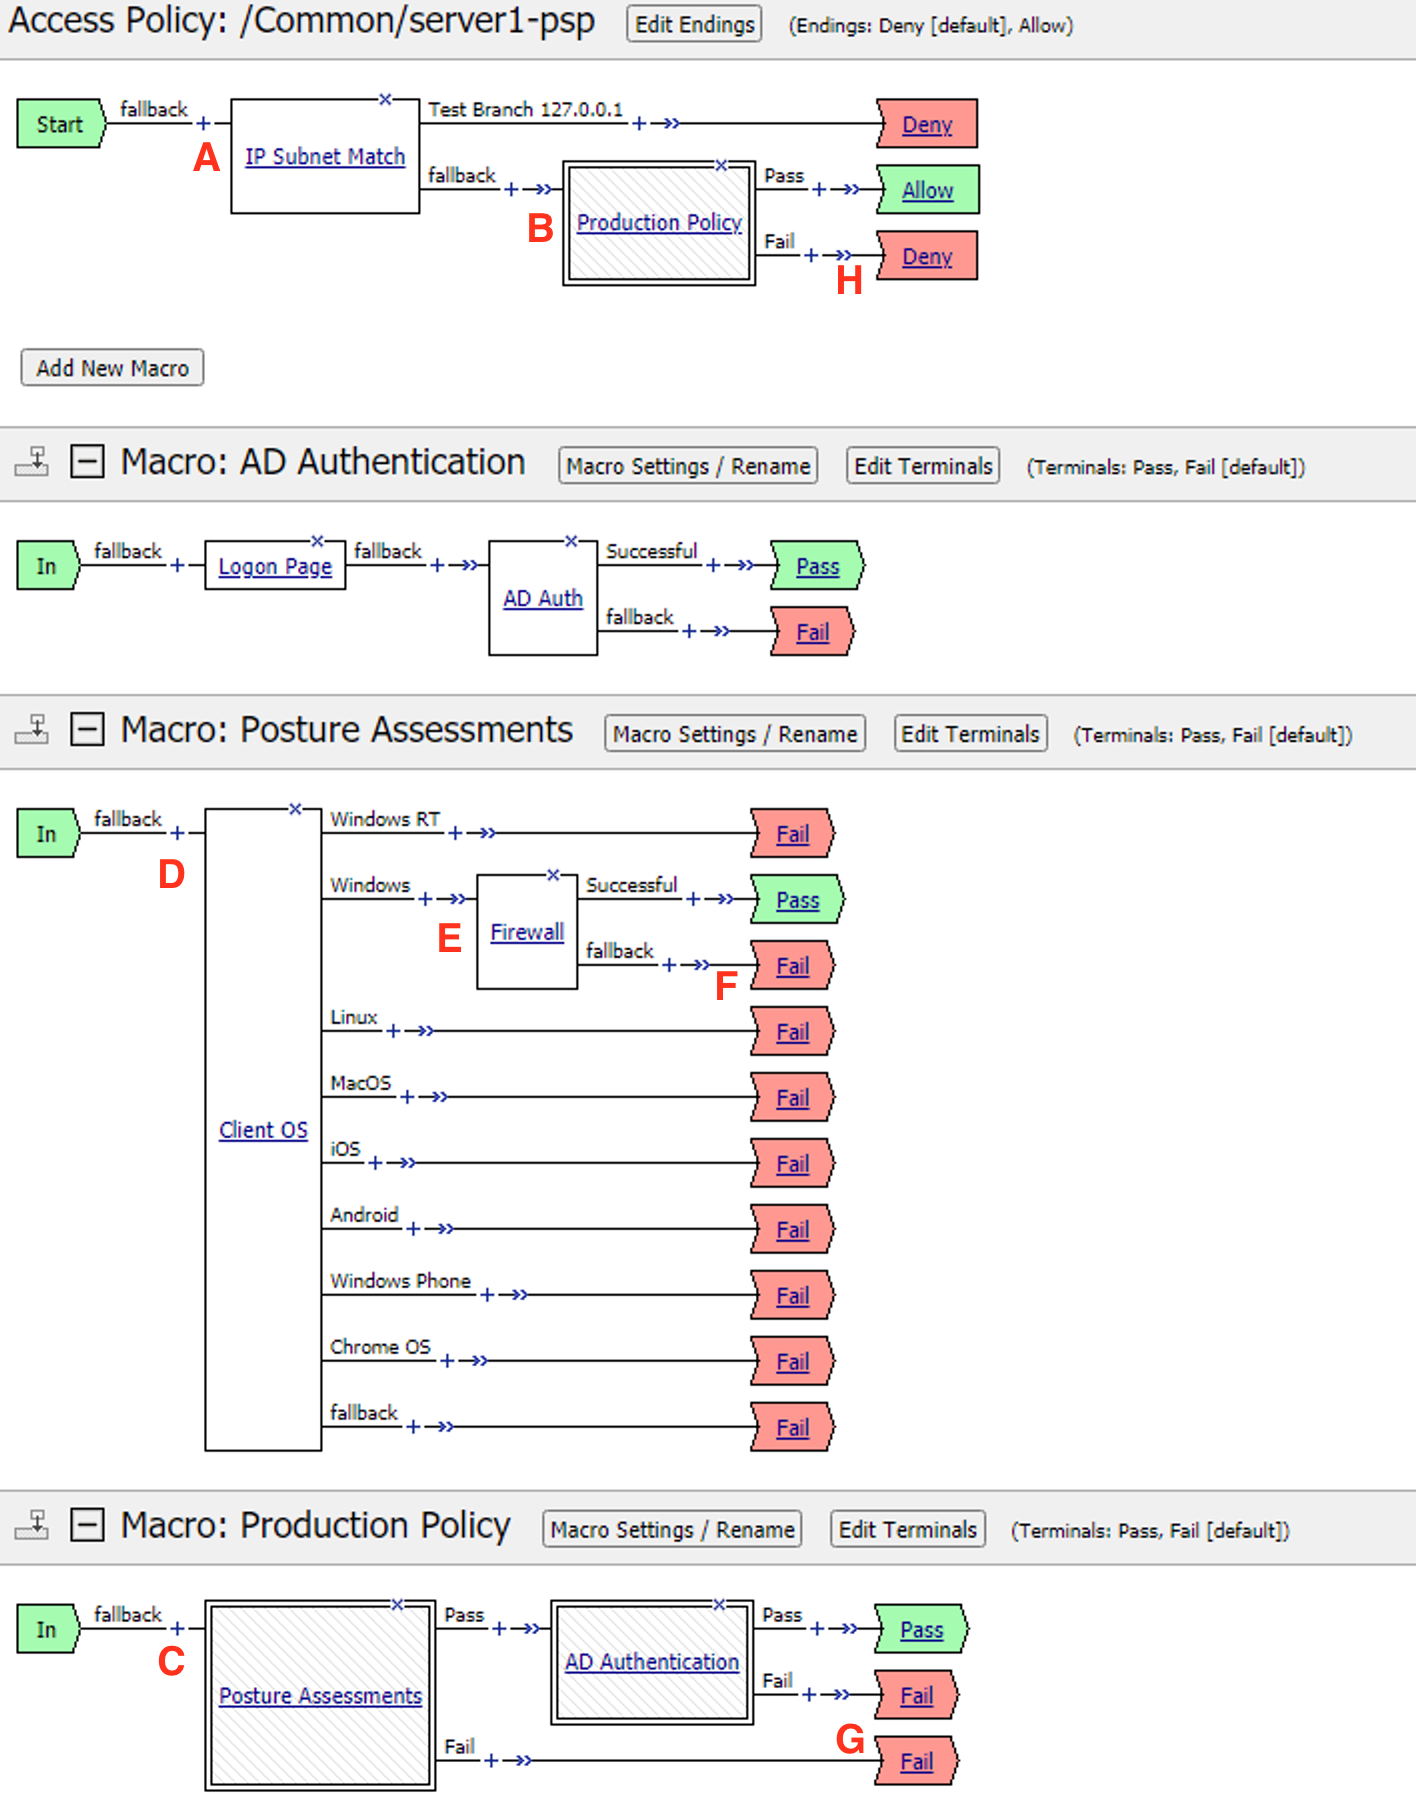
- Client enters IP Subnet Match action and proceeds to the fallback branch.
- The client enters the Production Policy Macro
- Inside the Macro the Client enters the Posture Assessment Macro
- Inside the Posture Assessments Macro the client enters the Client OS action.
- The client enters the Firewall Check action.
- The client fails the check and proceeds to the failback branch
- The client exits the Posture Assessments Macro to the fallback branch
- The client exists the Production Policy Macro to the Deny Terminal
The first step in troubleshooting this user would be separating this user from all other production users on the system. This can be done by entering the user’s IP address in the IP Subnet Match action. Click the IP Subnet Match action
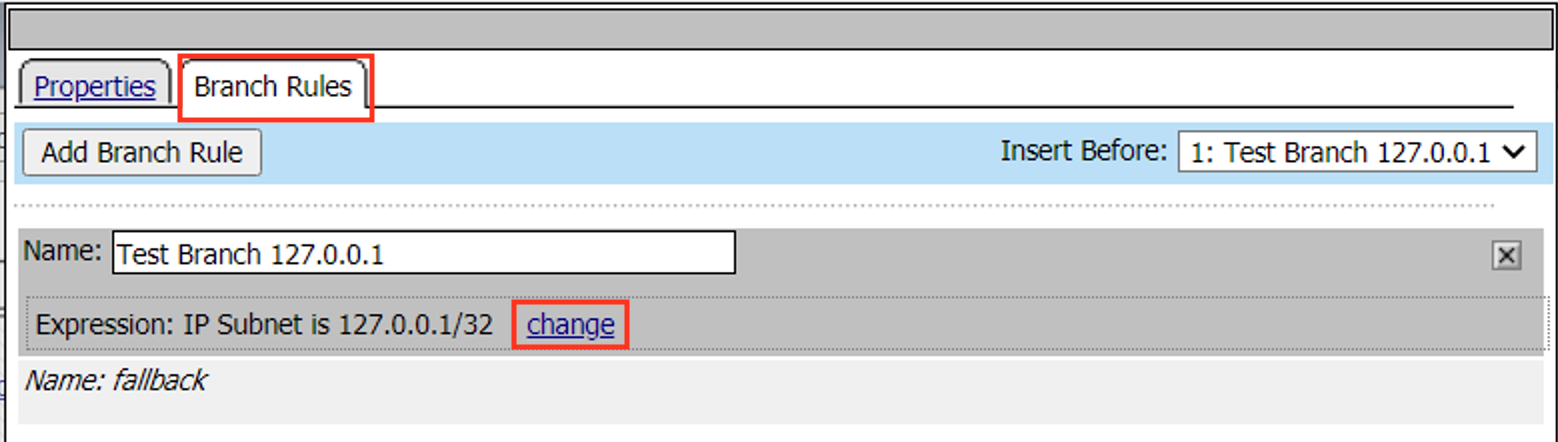
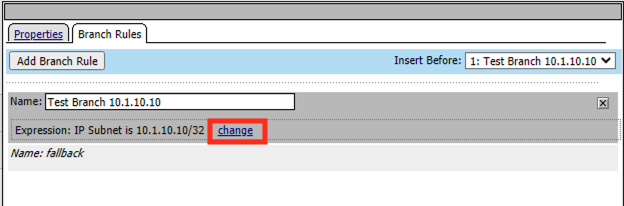
Click Branch Rules
Click Change
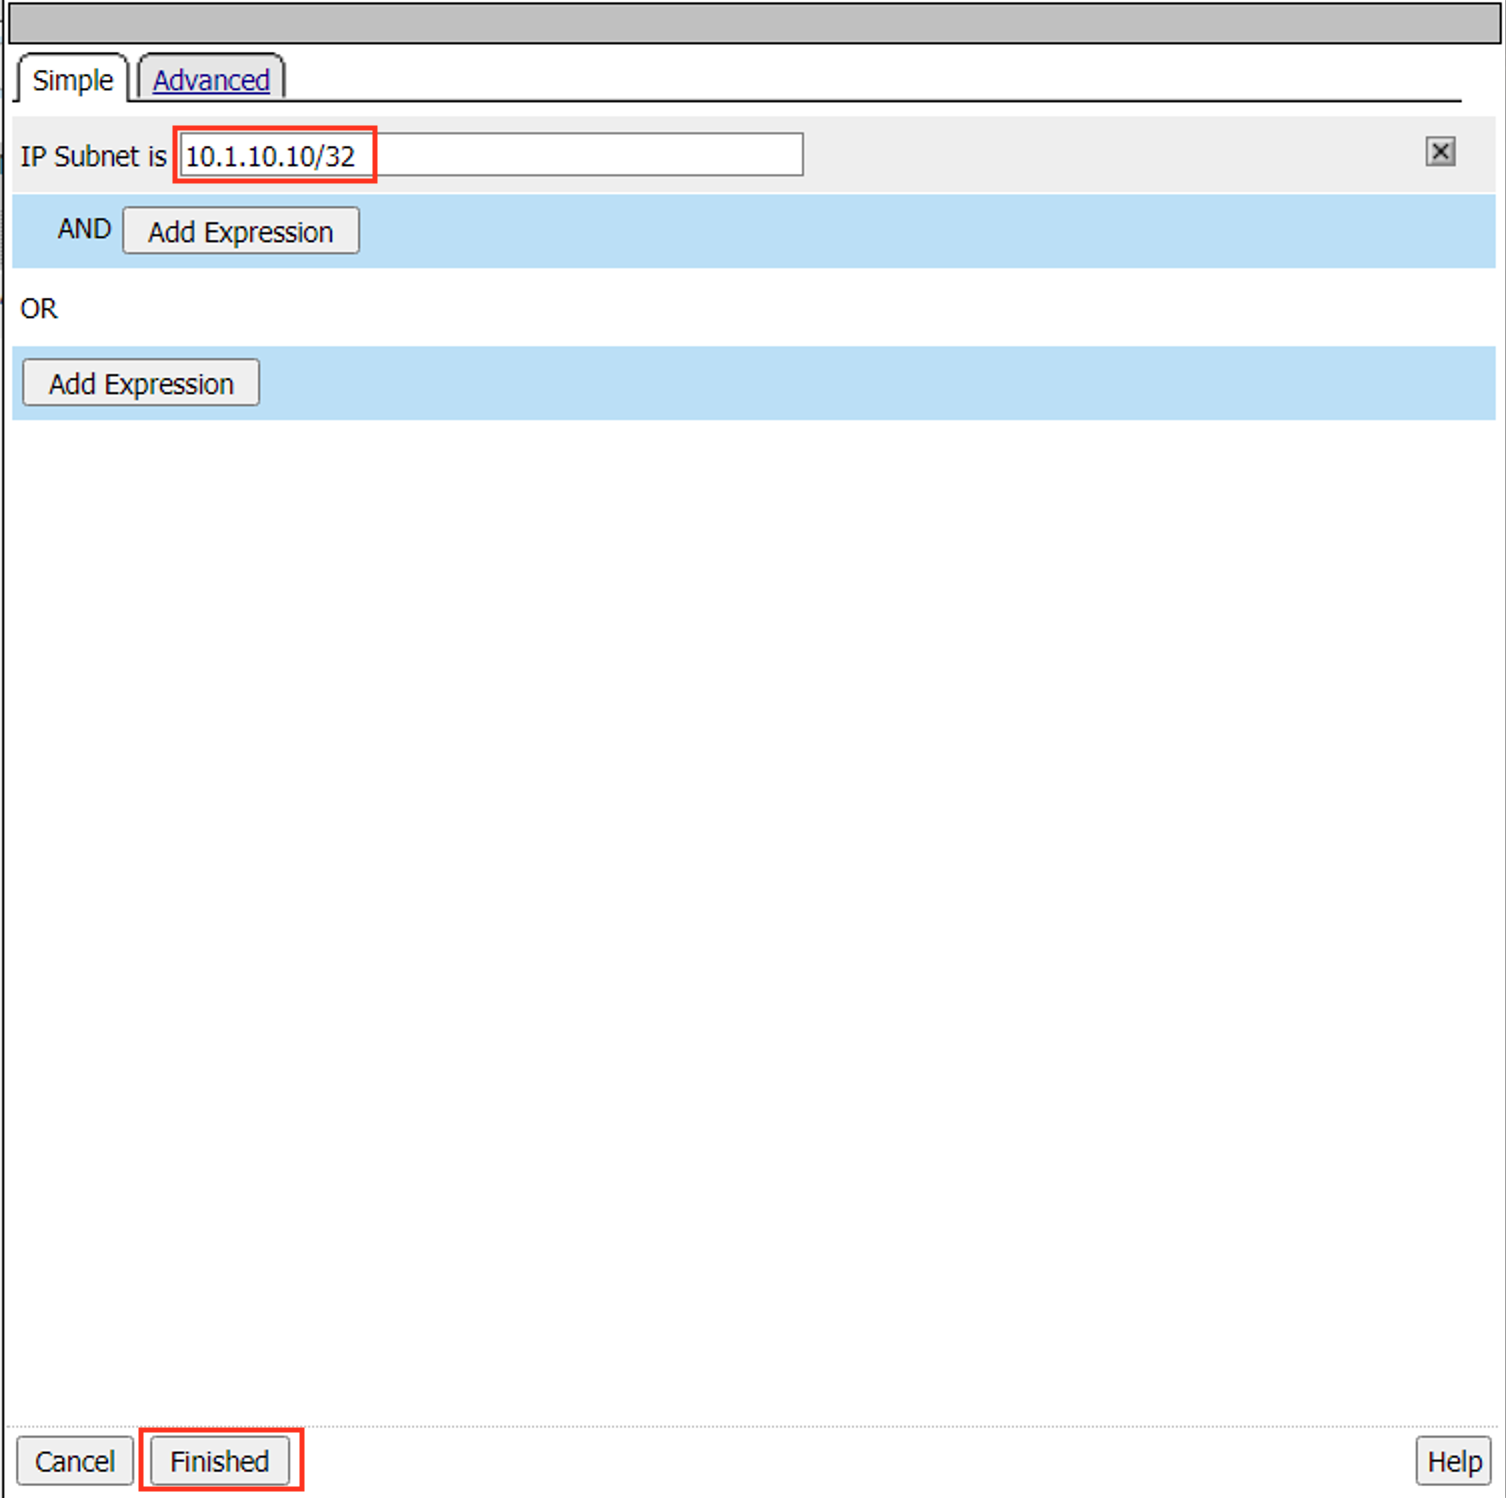
Change the IP Subnet is value to the client address 10.1.10.10/32
Click Finished
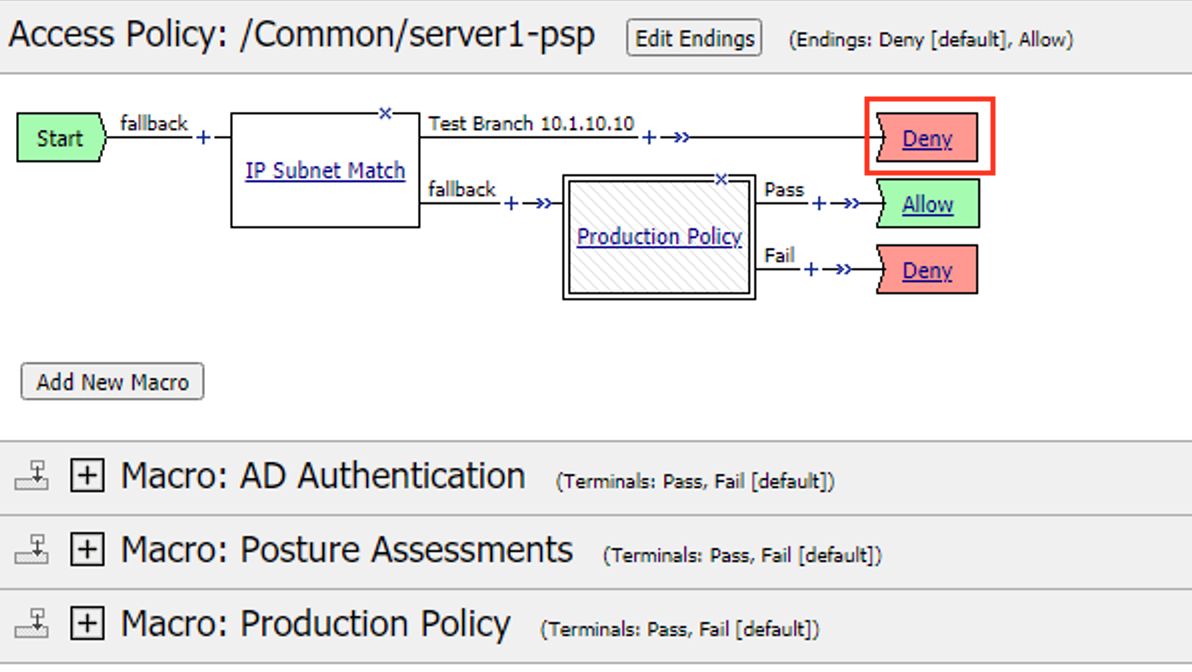
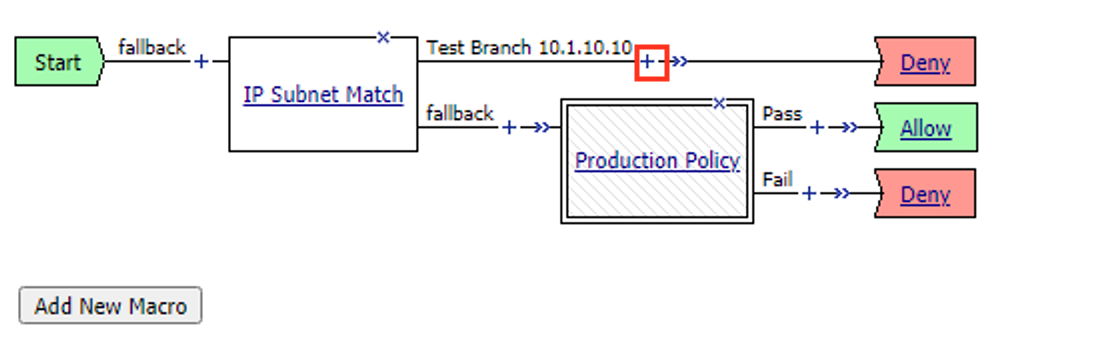
Change the name to Test Branch 10.1.10.10.
Click Save

Next time the client attempts to connect they will be sent down the test branch matching their IP address. This can safely be done in production since the branch ends in a Deny.
Task 4 - Create Message boxes
In this task you will create two Message Box Macros. One for the success branch and a second for a failure branch. Having the Message Box in a Macro allows you to customize the messages but still use them in multiple locations. Also when you are done using them you simply remove them from the flow of policy but they can still exist in the overall policy for the next time you need them.
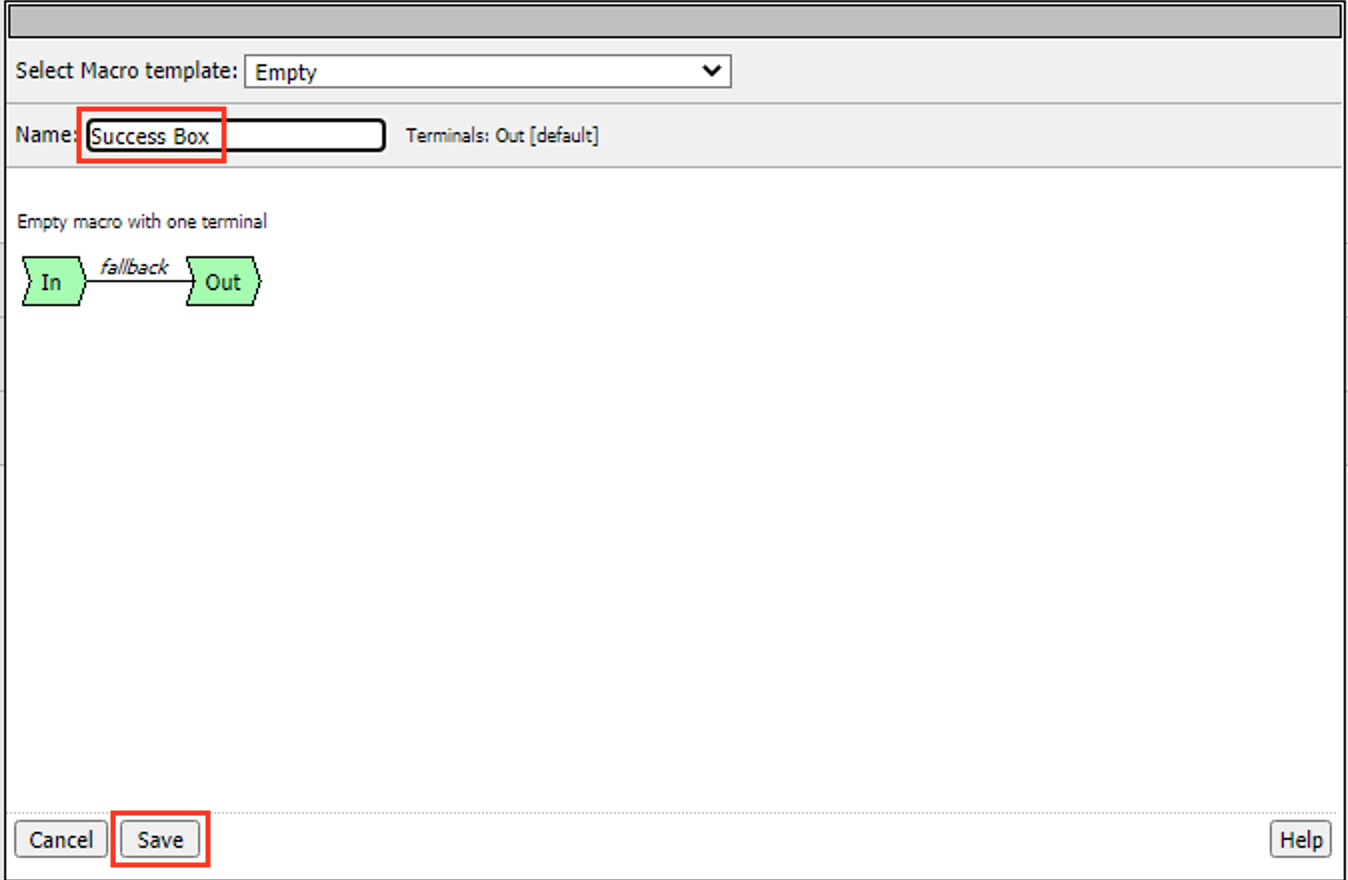
Click Add New Macro
Enter the Name Success Box
Click Save
Expand the Macro
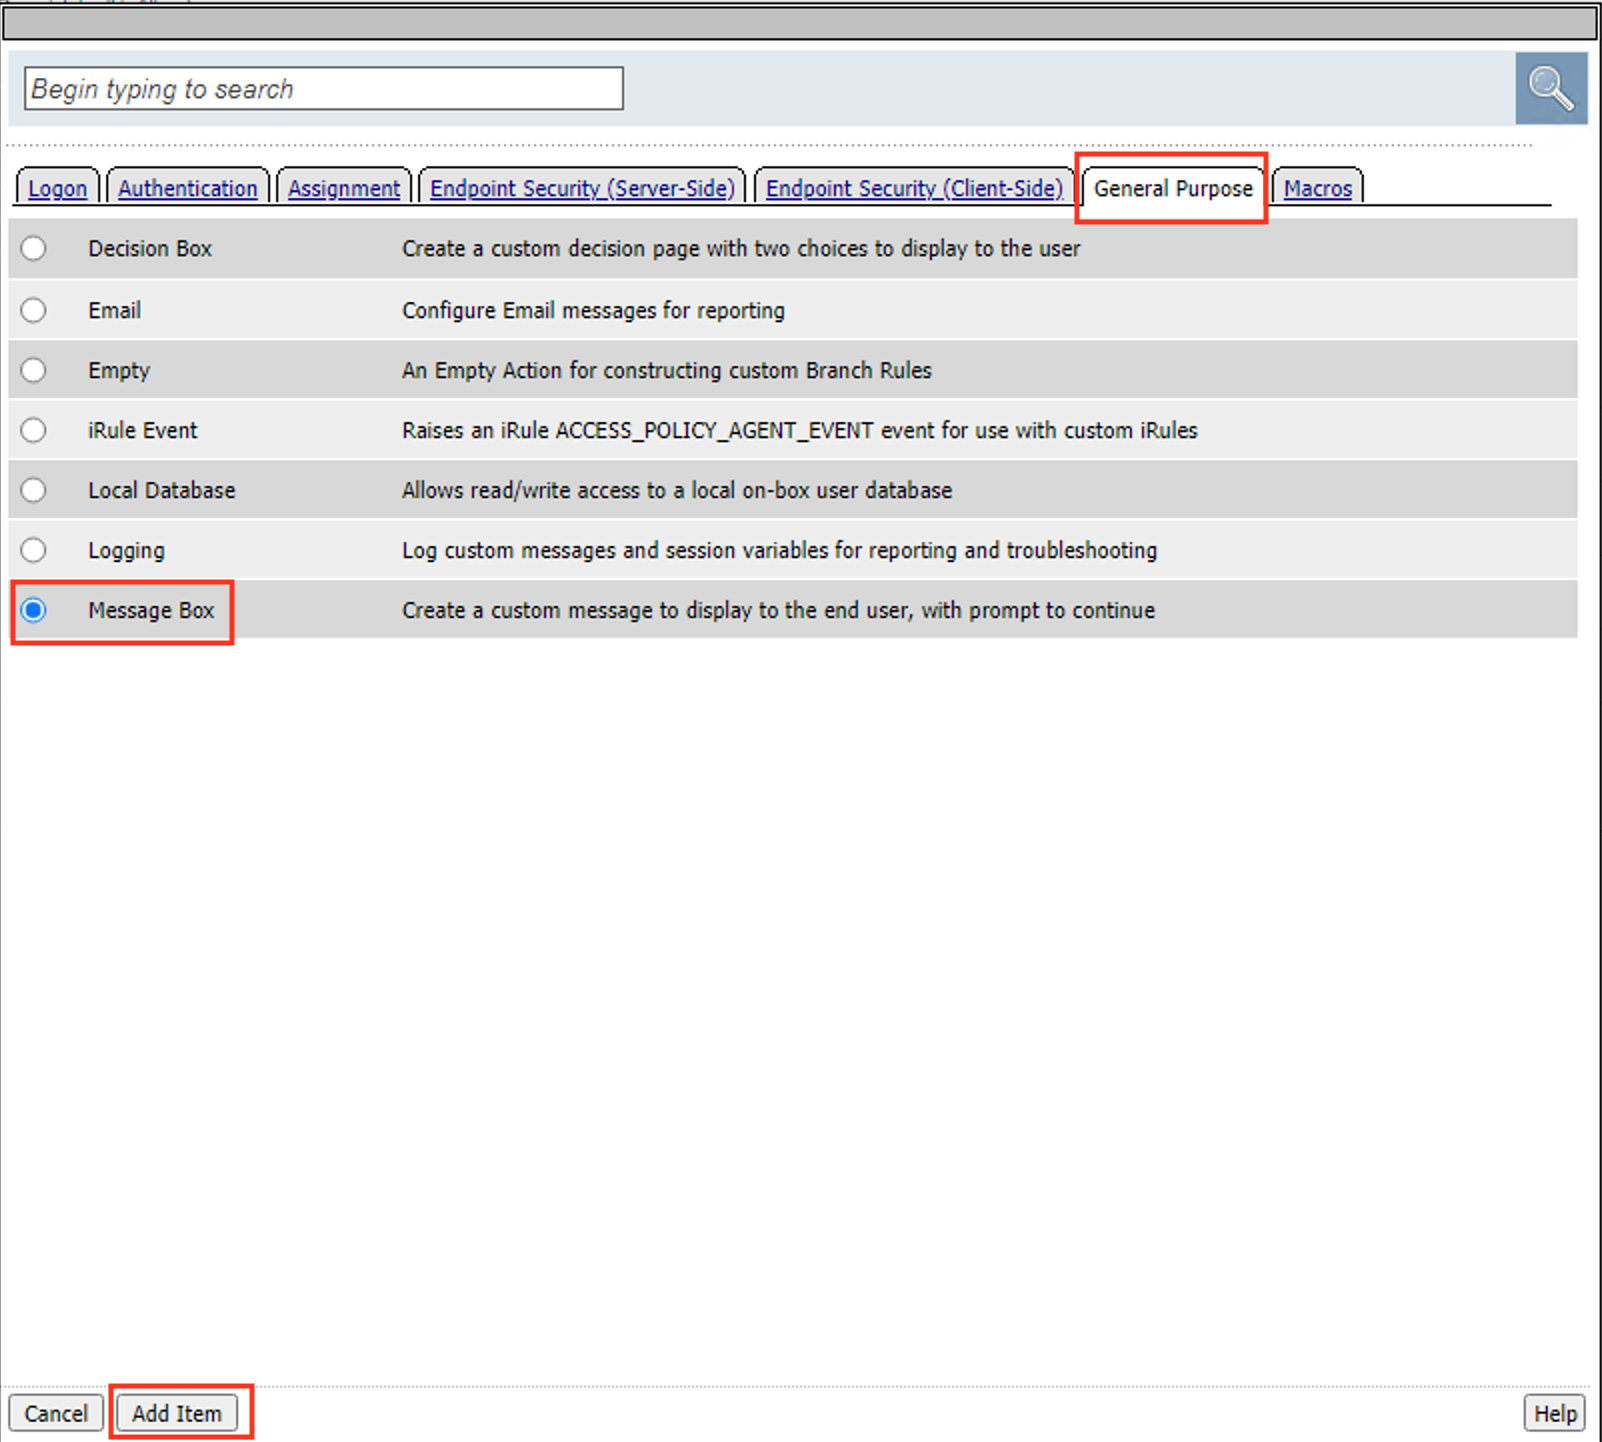
Click the + (Plus Symbol) on the fallback branch.

Click the General Purpose tab.
Select Message Box
Click Add Item
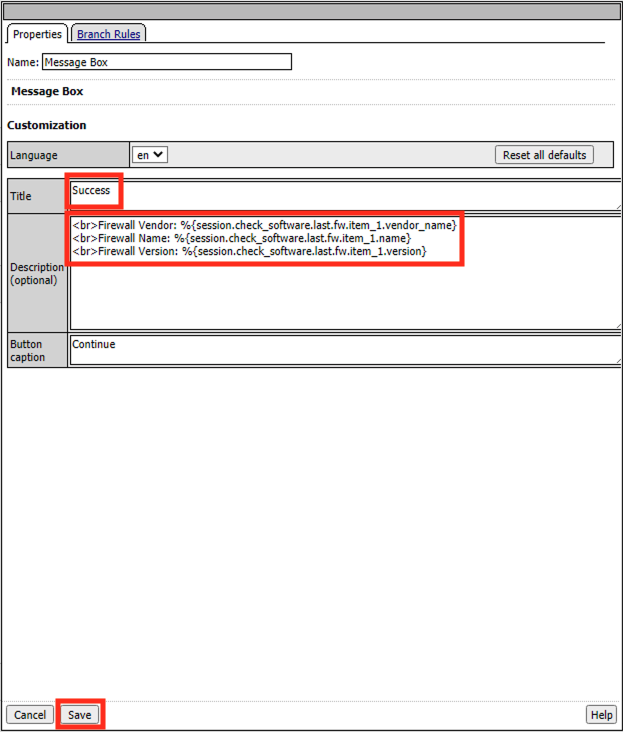
Enter the Title Success
Enter the Description below
<br>Firewall Vendor: %{session.check_software.last.fw.item_1.vendor_name}
<br>Firewall Name: %{session.check_software.last.fw.item_1.name}
<br>Firewall Version: %{session.check_software.last.fw.item_1.version}
Click Save
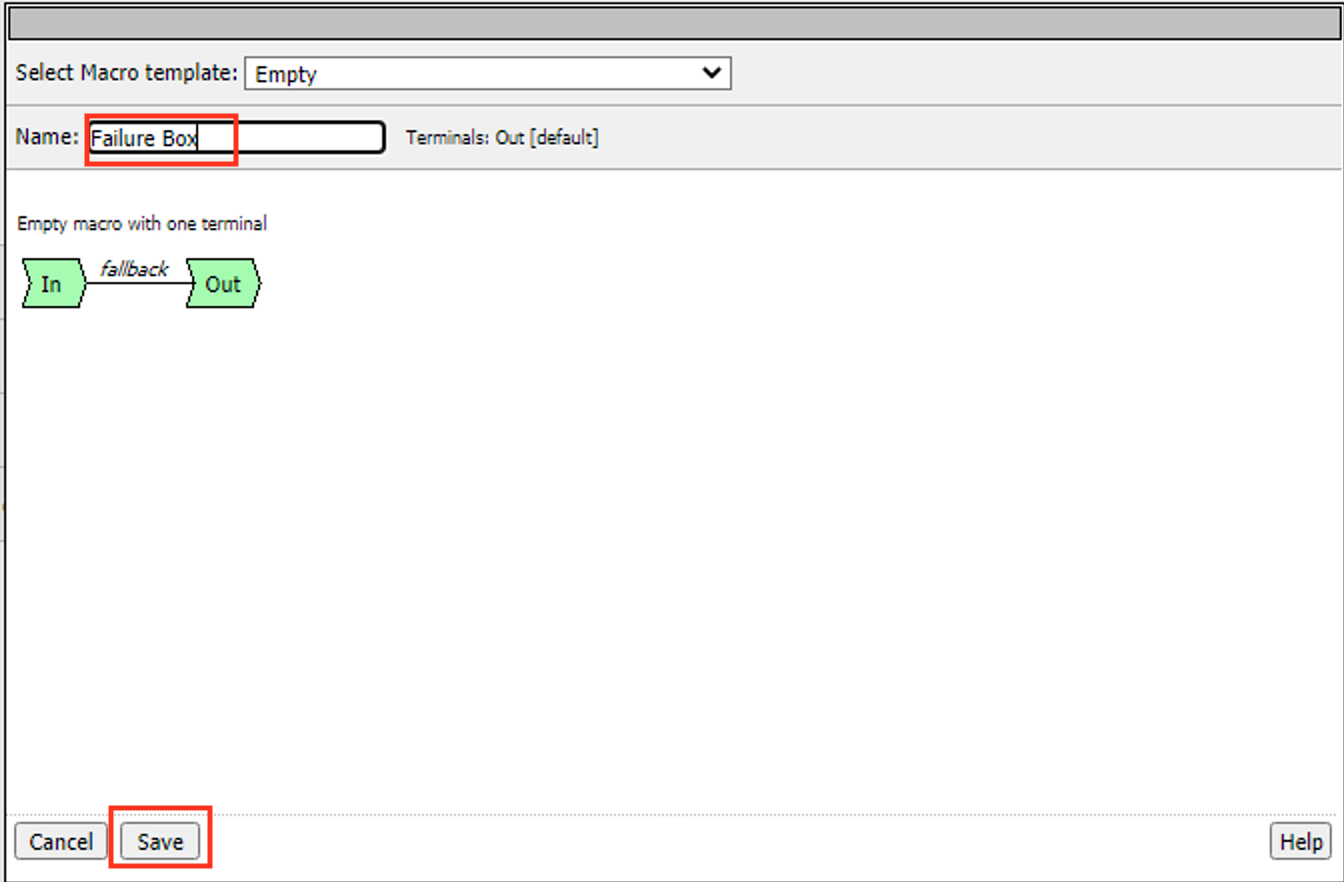
Click Add New Macro
Enter the Name Failure Box
Click Save
Expand the Macro
Click the + (Plus Symbol) on the fallback branch.

Click the General Purpose tab.
Select Message Box
Click Add Item
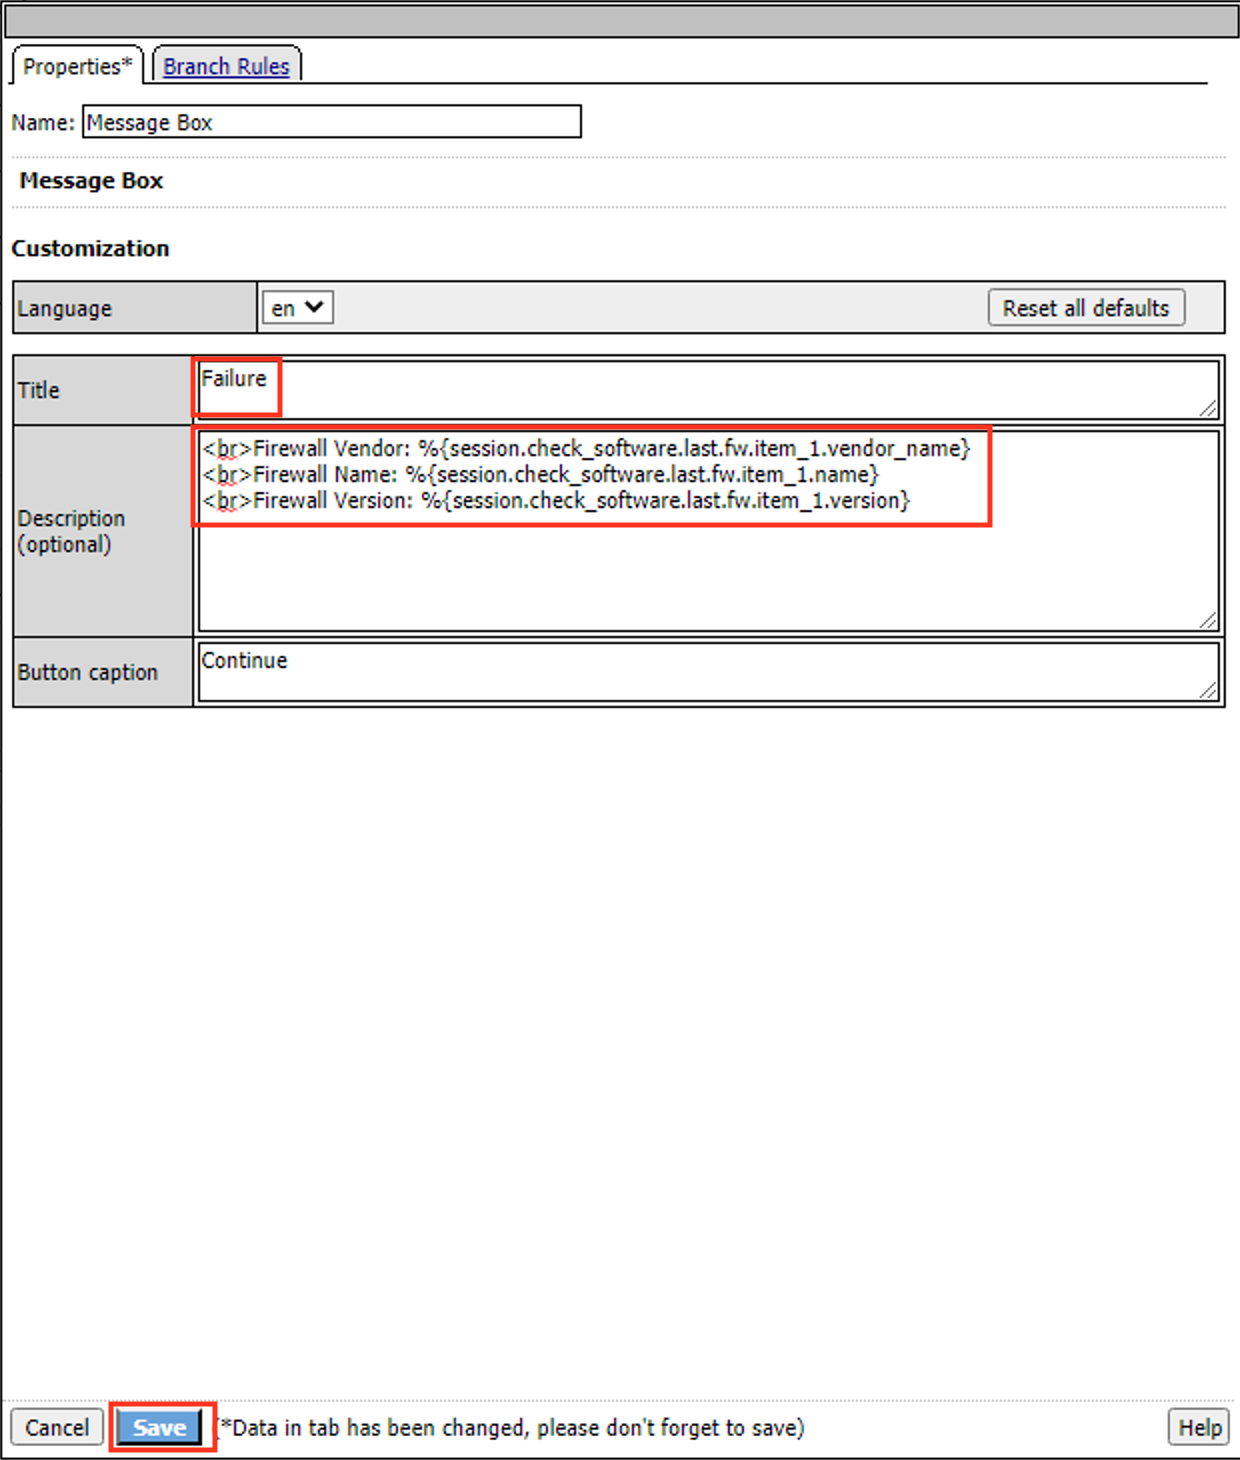
Enter the Title Failure
Enter the Description below
<br>Firewall Vendor: %{session.check_software.last.fw.item_1.vendor_name}
<br>Firewall Name: %{session.check_software.last.fw.item_1.name}
<br>Firewall Version: %{session.check_software.last.fw.item_1.version}
Click Save
Task 5 - Add the Test condition
In this section we will now add the condition we want to test against. Then use our message boxes to “pause” the session and provide us instant feedback.
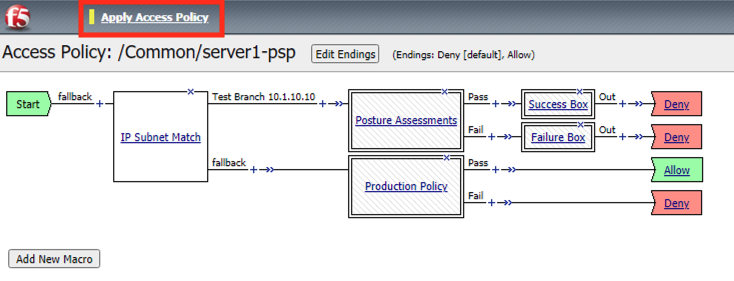
Click the + (Plus Symbol) on the test branch
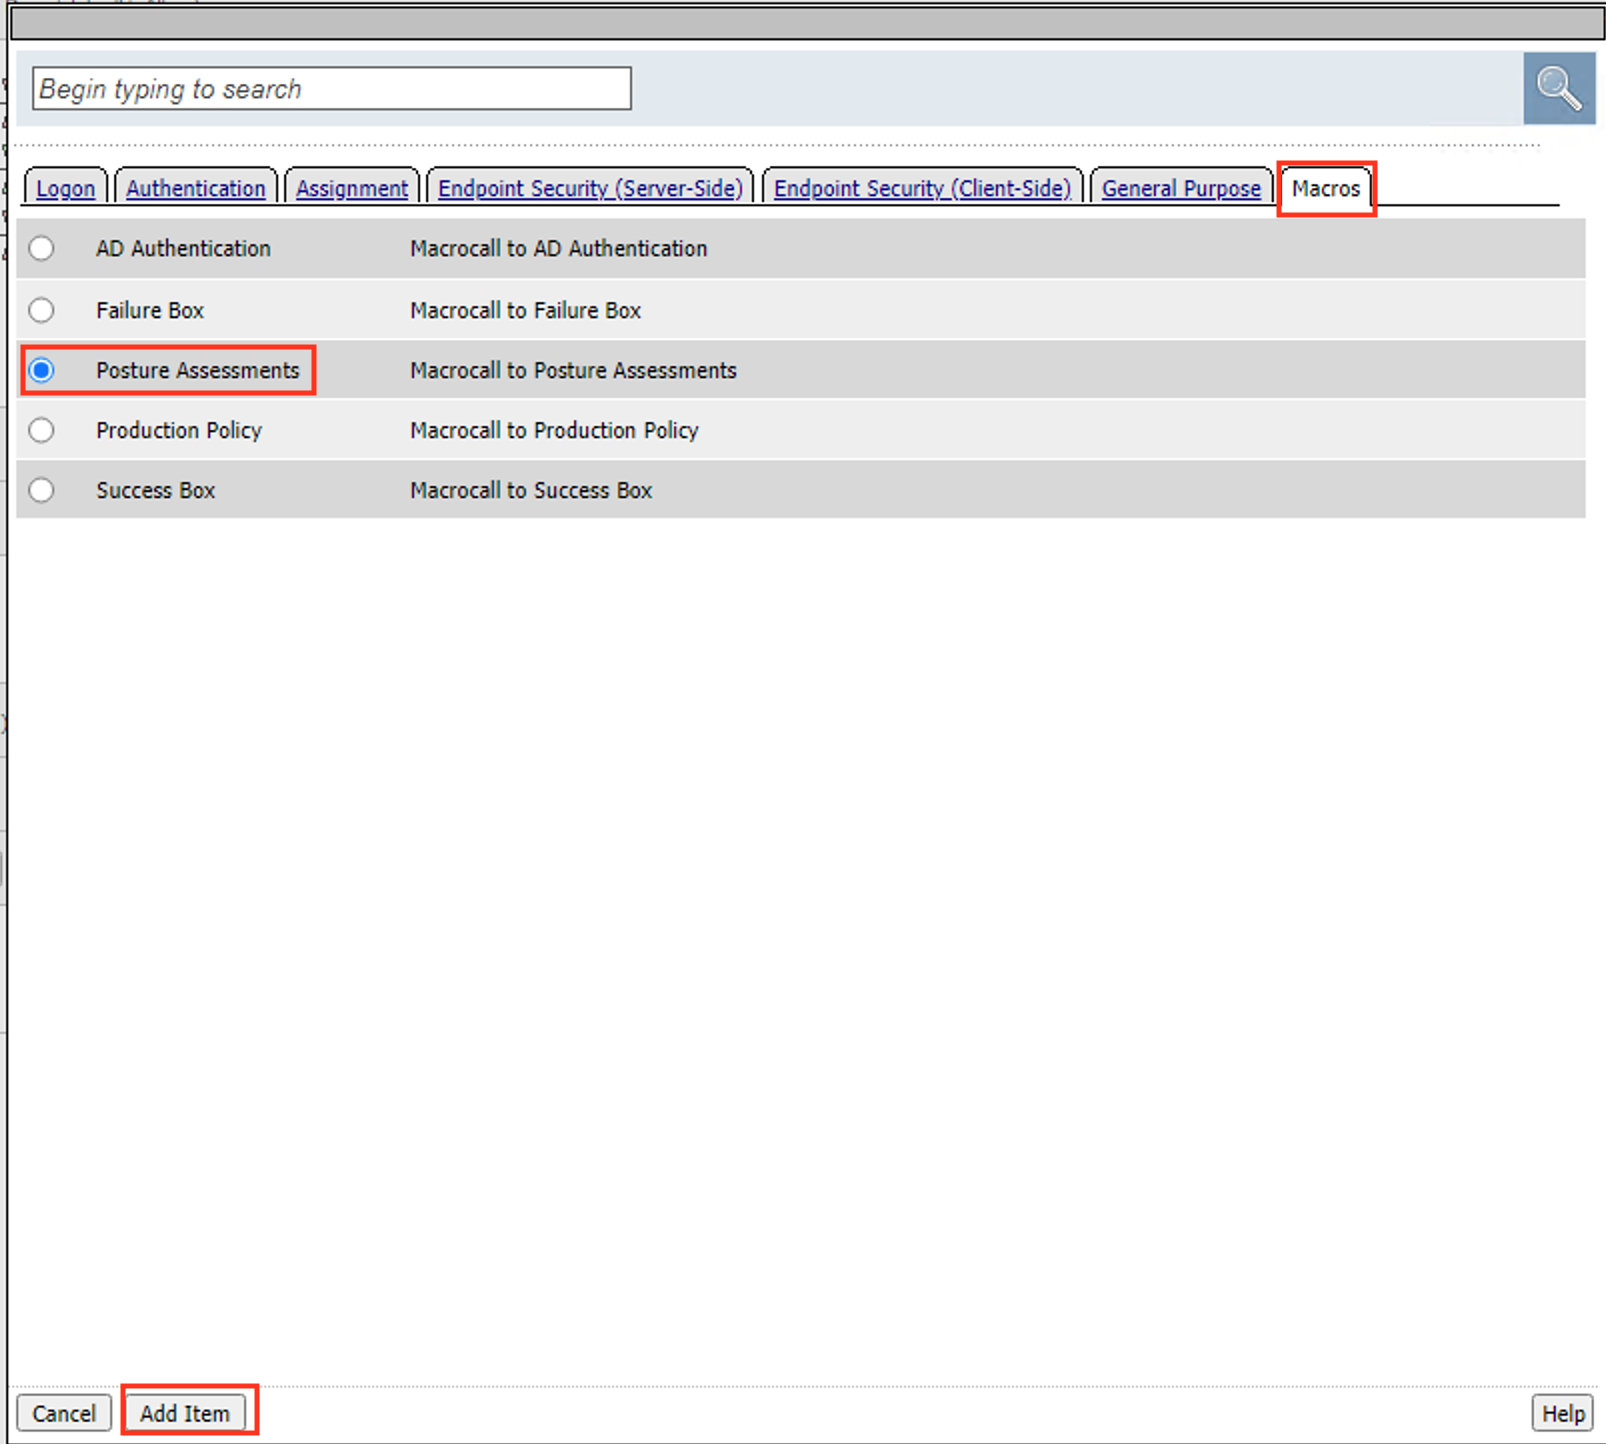
Click the Macros tab
Select Posture Assessments
Select Add Item
Click the + (Plus Symbol) on the Pass branch
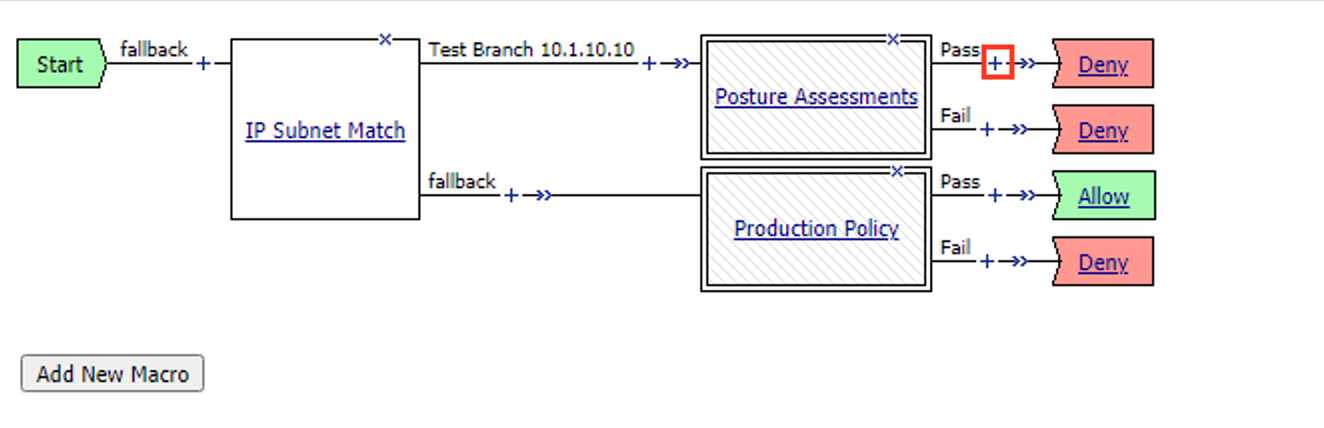
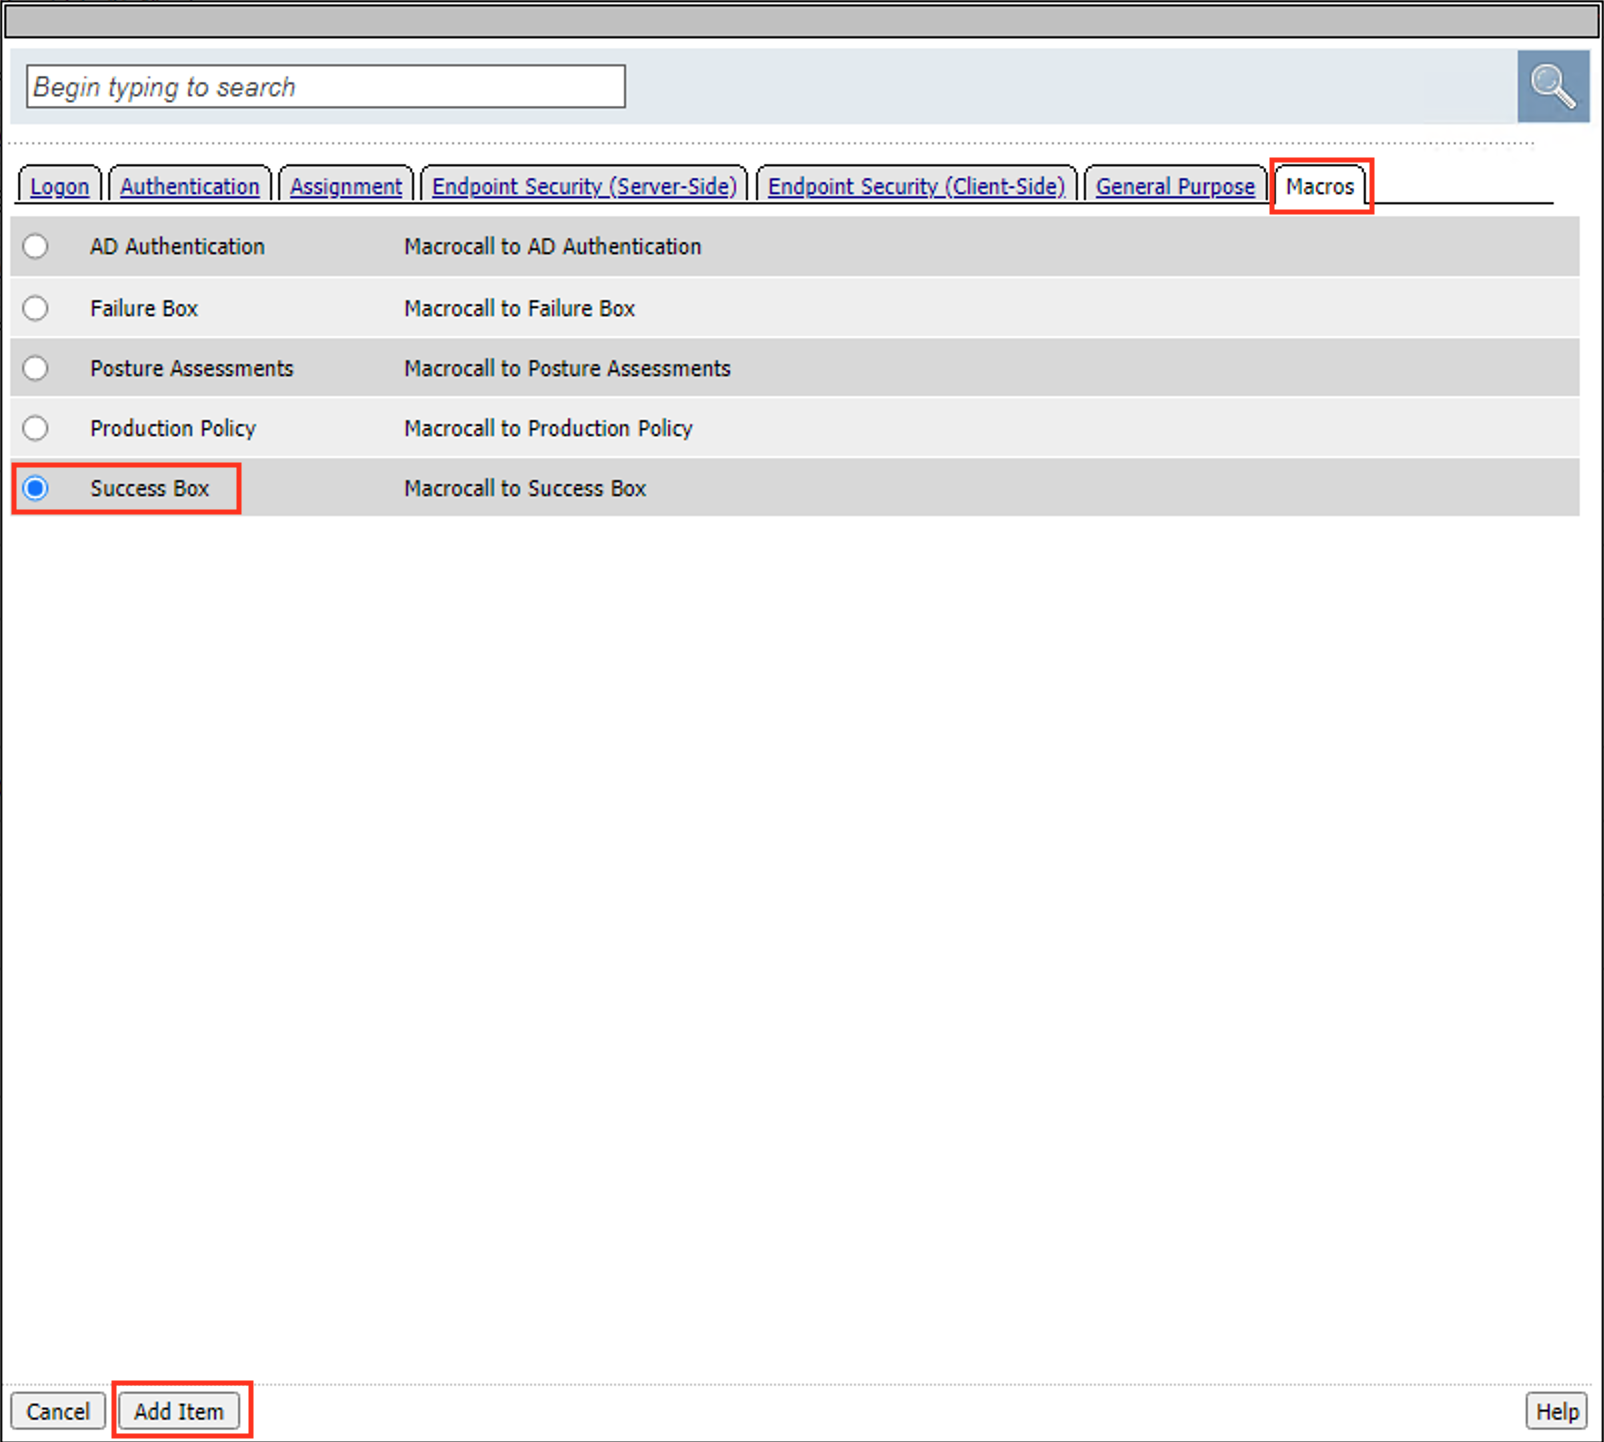
Click the Macros tab
Select Success Box
Select Add Item
Click the + (Plus Symbol) on the Pass branch
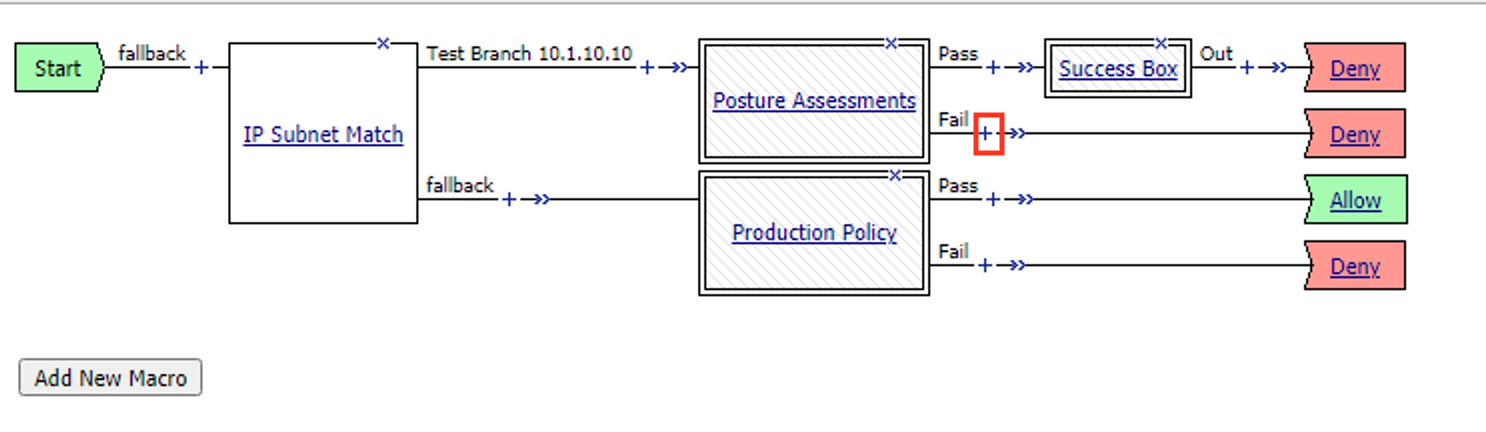
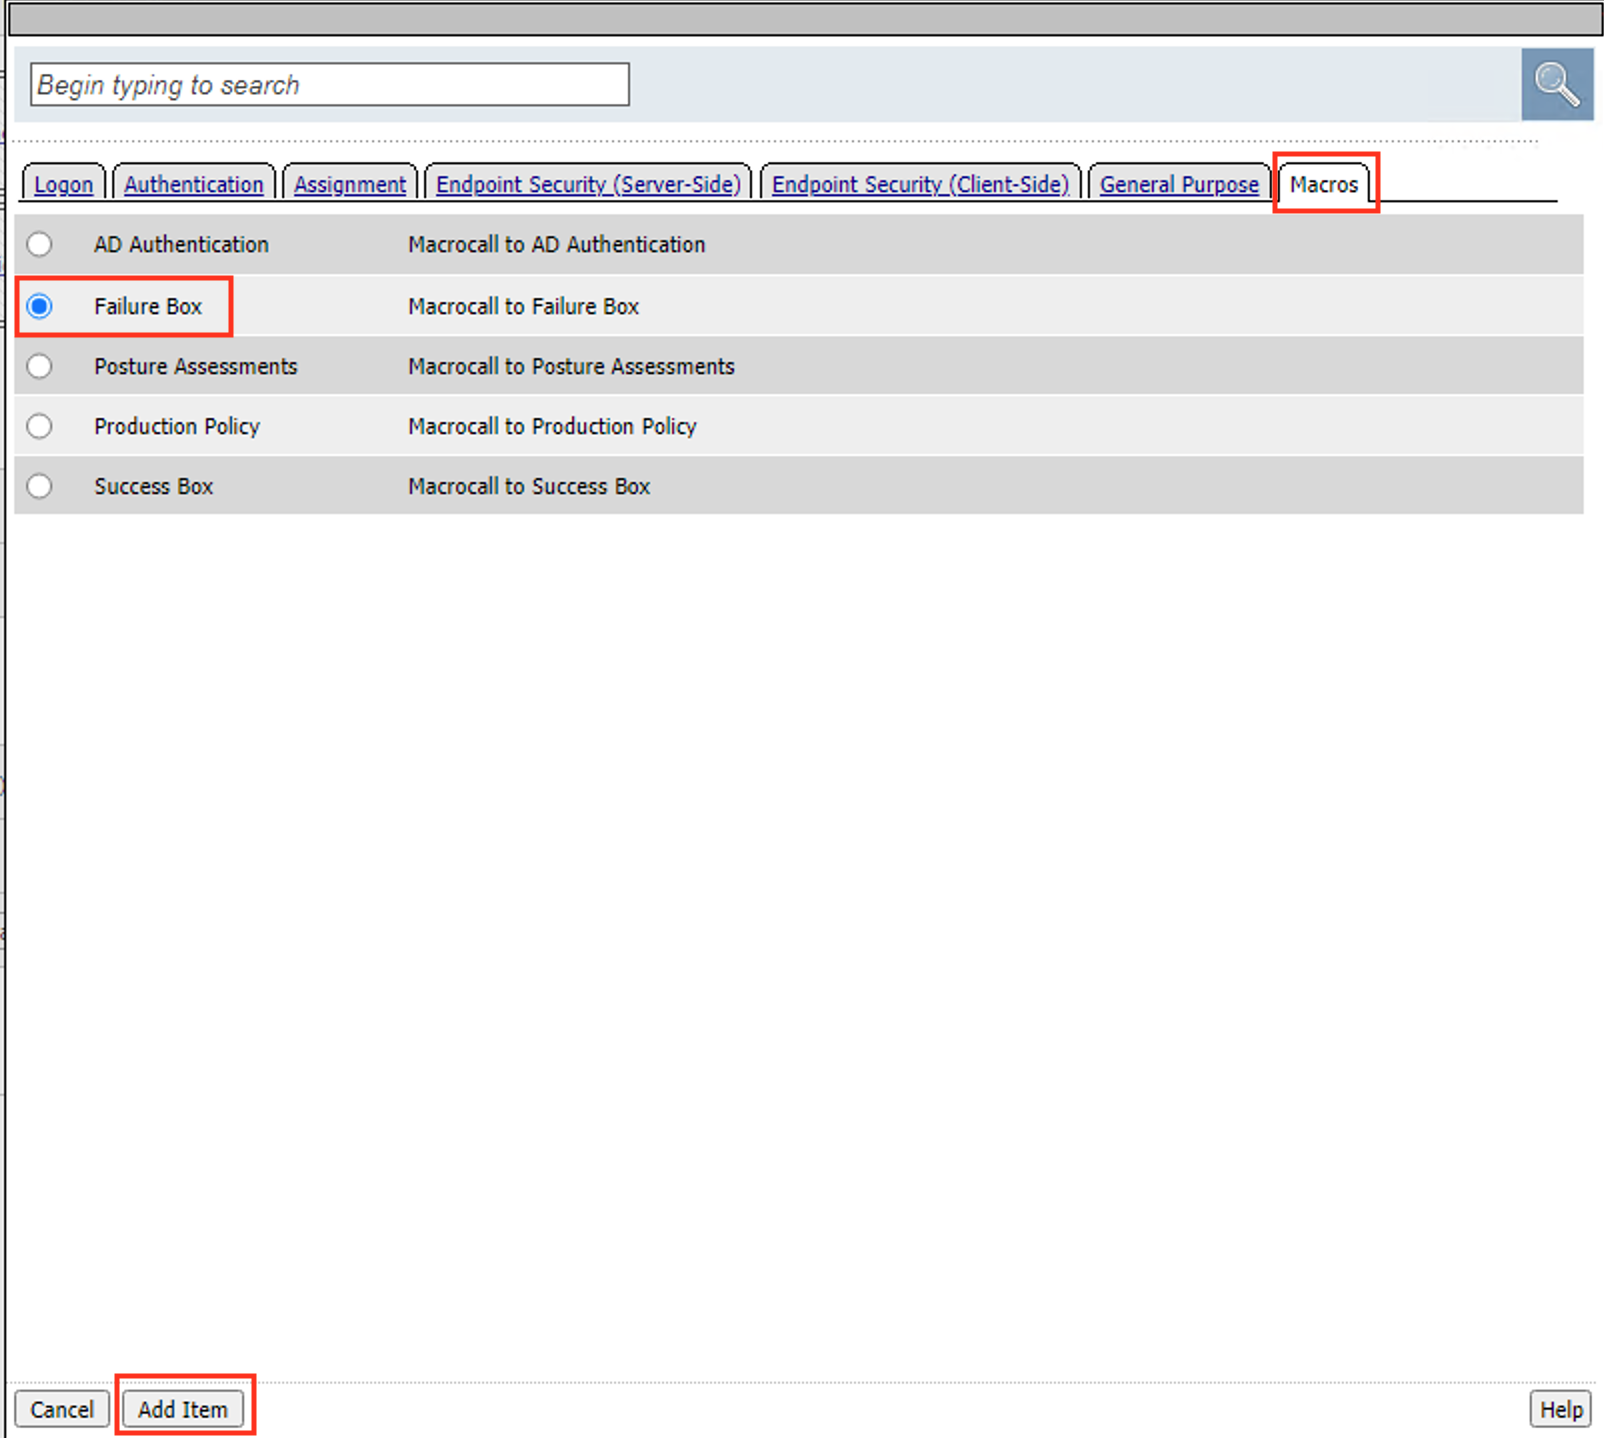
Click the Macros tab
Select Failure Box
Select Add Item
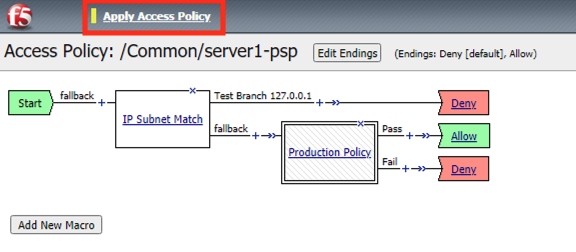
Click Apply Access Policy
Task 6 - Test failure
From the jumphost open a new browser tab. Then navigate to https://server1.acme.com.
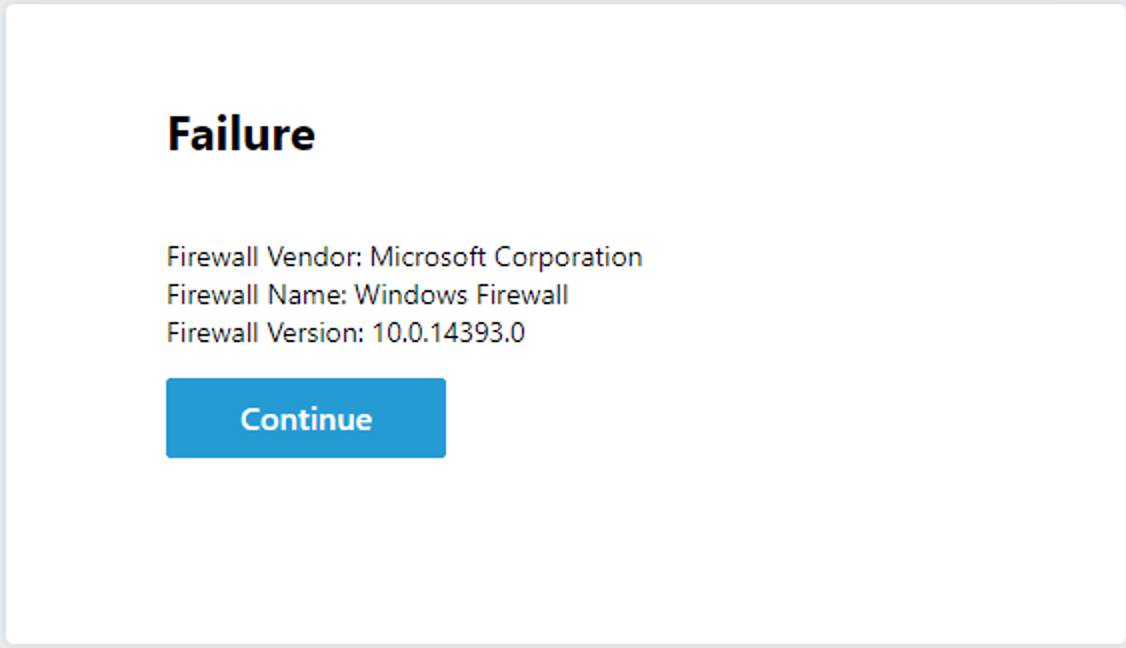
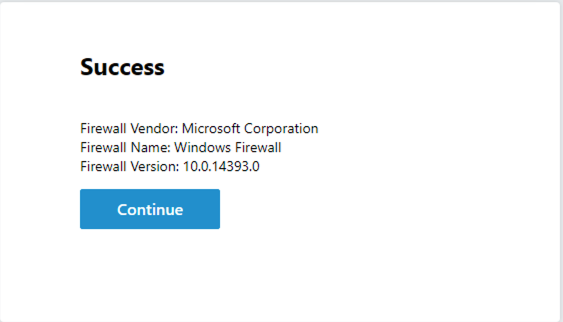
Rather than the instant deny, you are presented a message box with the below information. This has now “paused” the session for you to look at the session variables. Do NOT click Continue
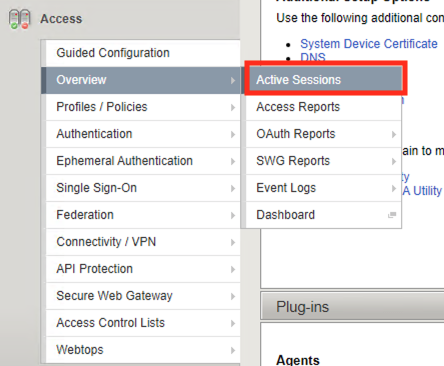
Return the BIG-IP GUI and navigate to Access >> Overview >> Active session.
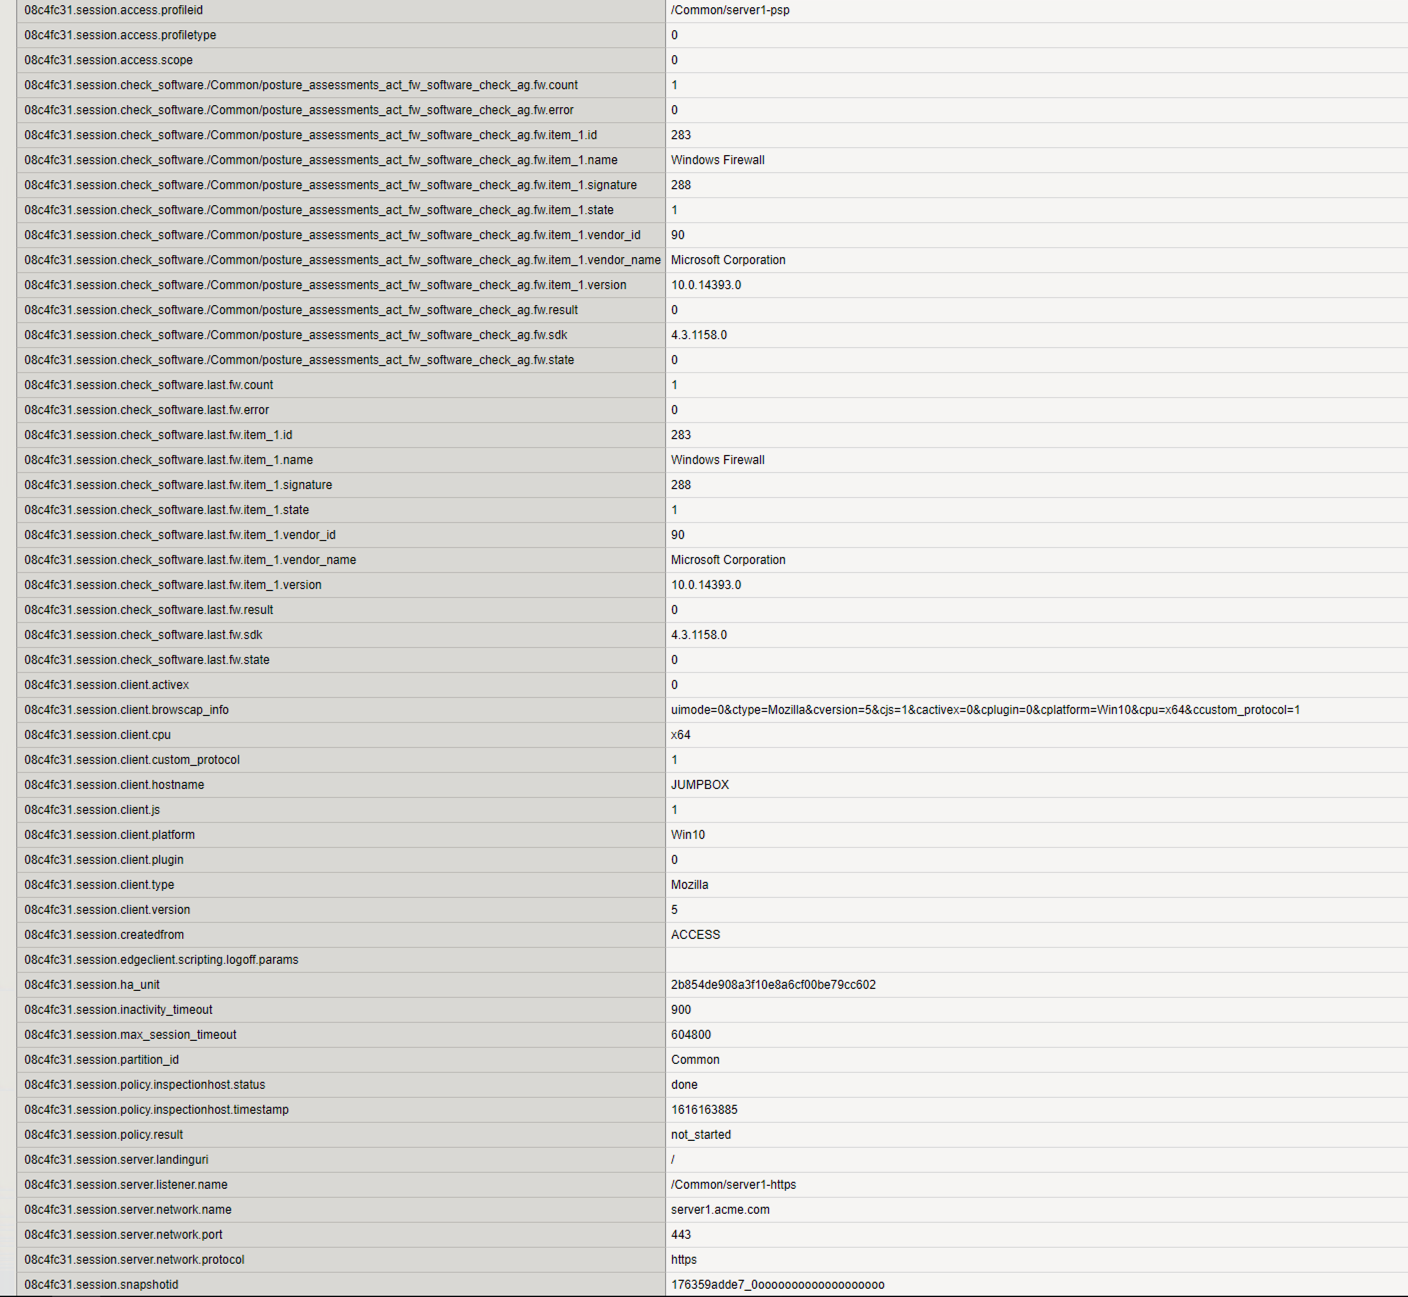
There is a current active session that has yet to be completed. Click Variables

Since the session has not yet been denied the BIG-IP and you have access to all the session variables.
Task 7 - Fix the policy
Now that we have the information about the clients Firewall settings we can return the policy to determine what is difference between the policy and what we are detecting on the client.
Navigate to Access >> Profiles/Policies >> Access Profiles (Per-Session Policies).
Click Edit to open Visual Policy Editor(VPE)
Expand the Posture Assessments Macro
Click Firewall
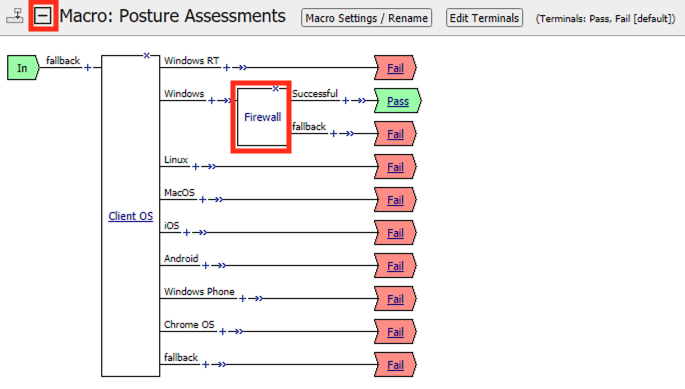
The Platform, Vendor ID, Product ID all match what was stored in the session variables. However, if you look closely at the Version number you notice a digit is missing. The Firewall Action version is configured for 10.0.1433.0. However, the message box contained the version 10.0.14393.0. Let’s make a configuration change to our Firewall action and see if it fixes the problem. Type the number 10.0.14393.0 into the version field
Click Save

Click Apply Policy
Task 8 - Test Our Fix
When testing you should now receive the Successful Message Box.
From the jumphost open a new browser tab. Then navigate to https://server1.acme.com.
You have successfully diagnosed the problem.
Task 9 - Cleanup the Test Branch
While we have successfully diagnose the problem we haven’t actually fixed the problem for the user. The client machine still goes down the test branch. We must now revert our configuration in the test branch and allow the user to test again.
Navigate to Access >> Profiles/Policies >> Access Profiles (Per-Session Policies).
Click Edit to open Visual Policy Editor(VPE)
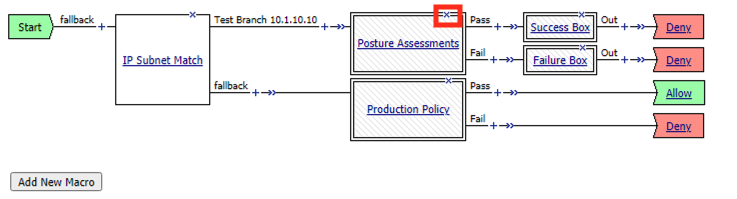
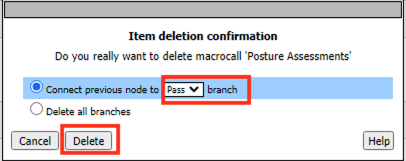
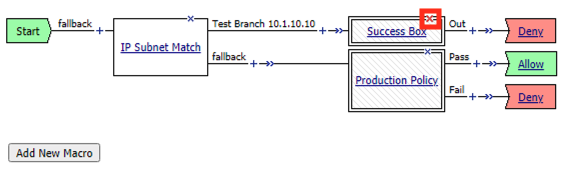
Click the X in the top right corner of the Posture Assessments Macro.
Verify the Connect Previous Node is set to Pass
Click Delete
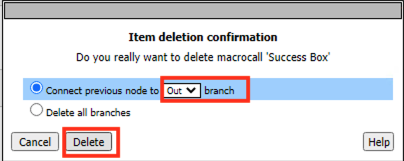
Click the X in the top right corner of the Success Box Macro.
Verify the Connect Previous Node is set to Out
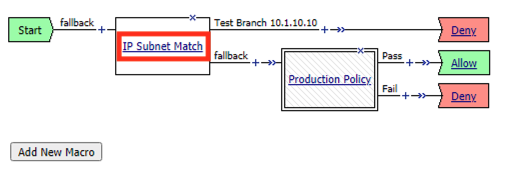
Click Delete
Click the IP Subnet match action. NOT the X
Click Branch Rules
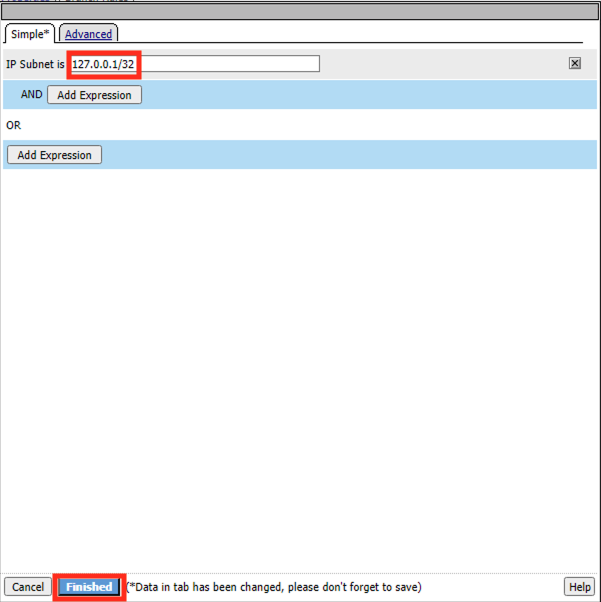
Click change
Change the IP address back to the original value of 127.0.0.1/32
Click Finished
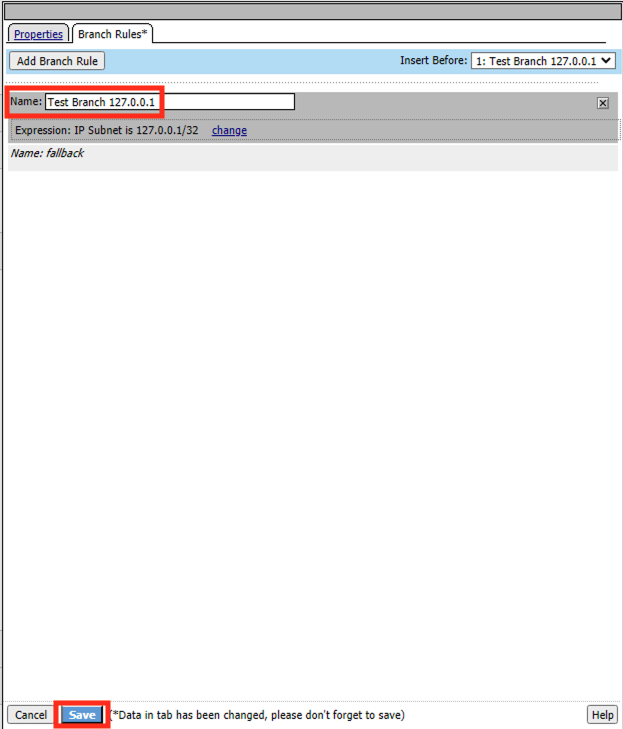
Change the Name back to the original value of Test Branch 127.0.0.1
Click Save
Click Apply Access Policy
The configuration has now been reversed. It’s important to note that while we deleted the Message Boxes from the current policy workflow the Macros are still there the next time we need them.
Task 10 - Validate user1 is working
From the jumphost open a new browser tab. Then navigate to https://server1.acme.com.
Rather than being denied you are presented a logon page.
At the logon page enter the following credentials:
- Username:user1
- Password:user1
Click Logon
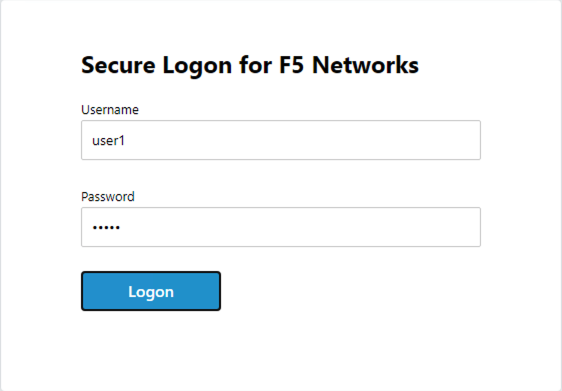
You are presented the webpage below. Congratulations you have fixed the user’s problem and they are working again.

Task 11 - Lab Cleanup
From a browser on the jumphost navigate to https://portal.f5lab.local
Click the Classes tab at the top of the page.
Scroll down the page until you see 501 GUI Tools on the left
Hover over tile The Message Box. A start and stop icon should appear within the tile. Click the Stop Button to trigger the automation to remove any prebuilt objects from the environment
The screen should refresh displaying the progress of the automation within 30 seconds. Scroll to the bottom of the automation workflow to ensure all requests succeeded. If you experience errors try running the automation a second time or open an issue on the Access Labs Repo.
This concludes the lab.
