NGINX Modern Apps > Class 11 - F5 NGINX Plus Ingress Controller as an API Gateway for Kubernetes > Task 05: Authorization - Signed JSON Web Token (JWT) Validation Source | Edit on
Task 05: Authorization - Signed JSON Web Token (JWT) Validation
The https://jobs.local/add-job API endpoint is not authorizing users and will accept changes from anyone. In this task, we restrict access to authorized users only.
The most common method to authorize API users is via an “Authorization” HTTP header in the format:
| Authorization | Bearer <base64 encoded JWT> |
The <base64 encoded JWT> is a base64 encoded string that can be decoded to reveal three parts.
| JWT Header | algorithms used for signing |
| JWT Payload | a series of claims |
| JWT Signature | signature validating the contents have not been tampered with |
A JWT is identification the API client/user will present to the API gateway to assert their identity.
Change to the task_05 directory.
cd ../task_05

Create an RSA public and private key pair and then create a signed JWT. The private key is used to sign the JWT. The public key will be used to validate the JWT signature.
create-signed-jwt.sh
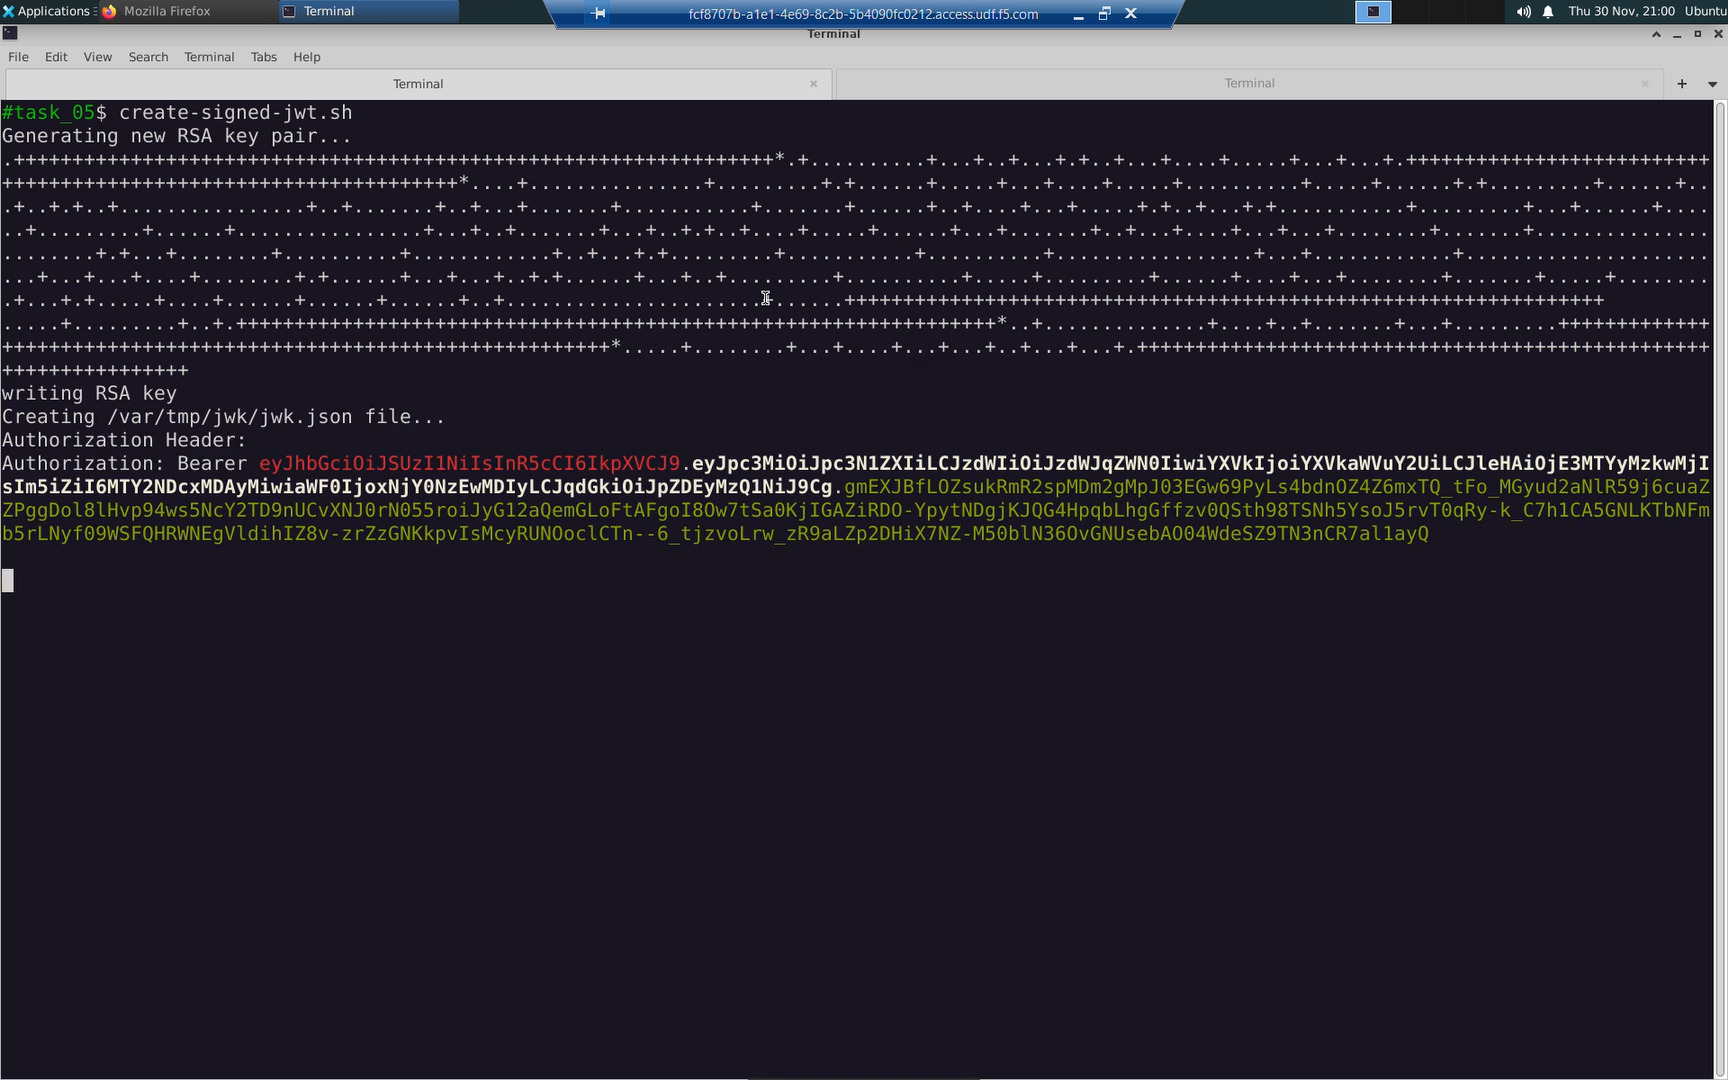
create-signed-jwt.sh
Attention
The create-signed-jwt.sh command is idempotent. You can run it as many times as you need when looking for JWT values in future tasks.
create-signed-jwt.sh
create-signed-jwt.sh
create-signed-jwt.sh
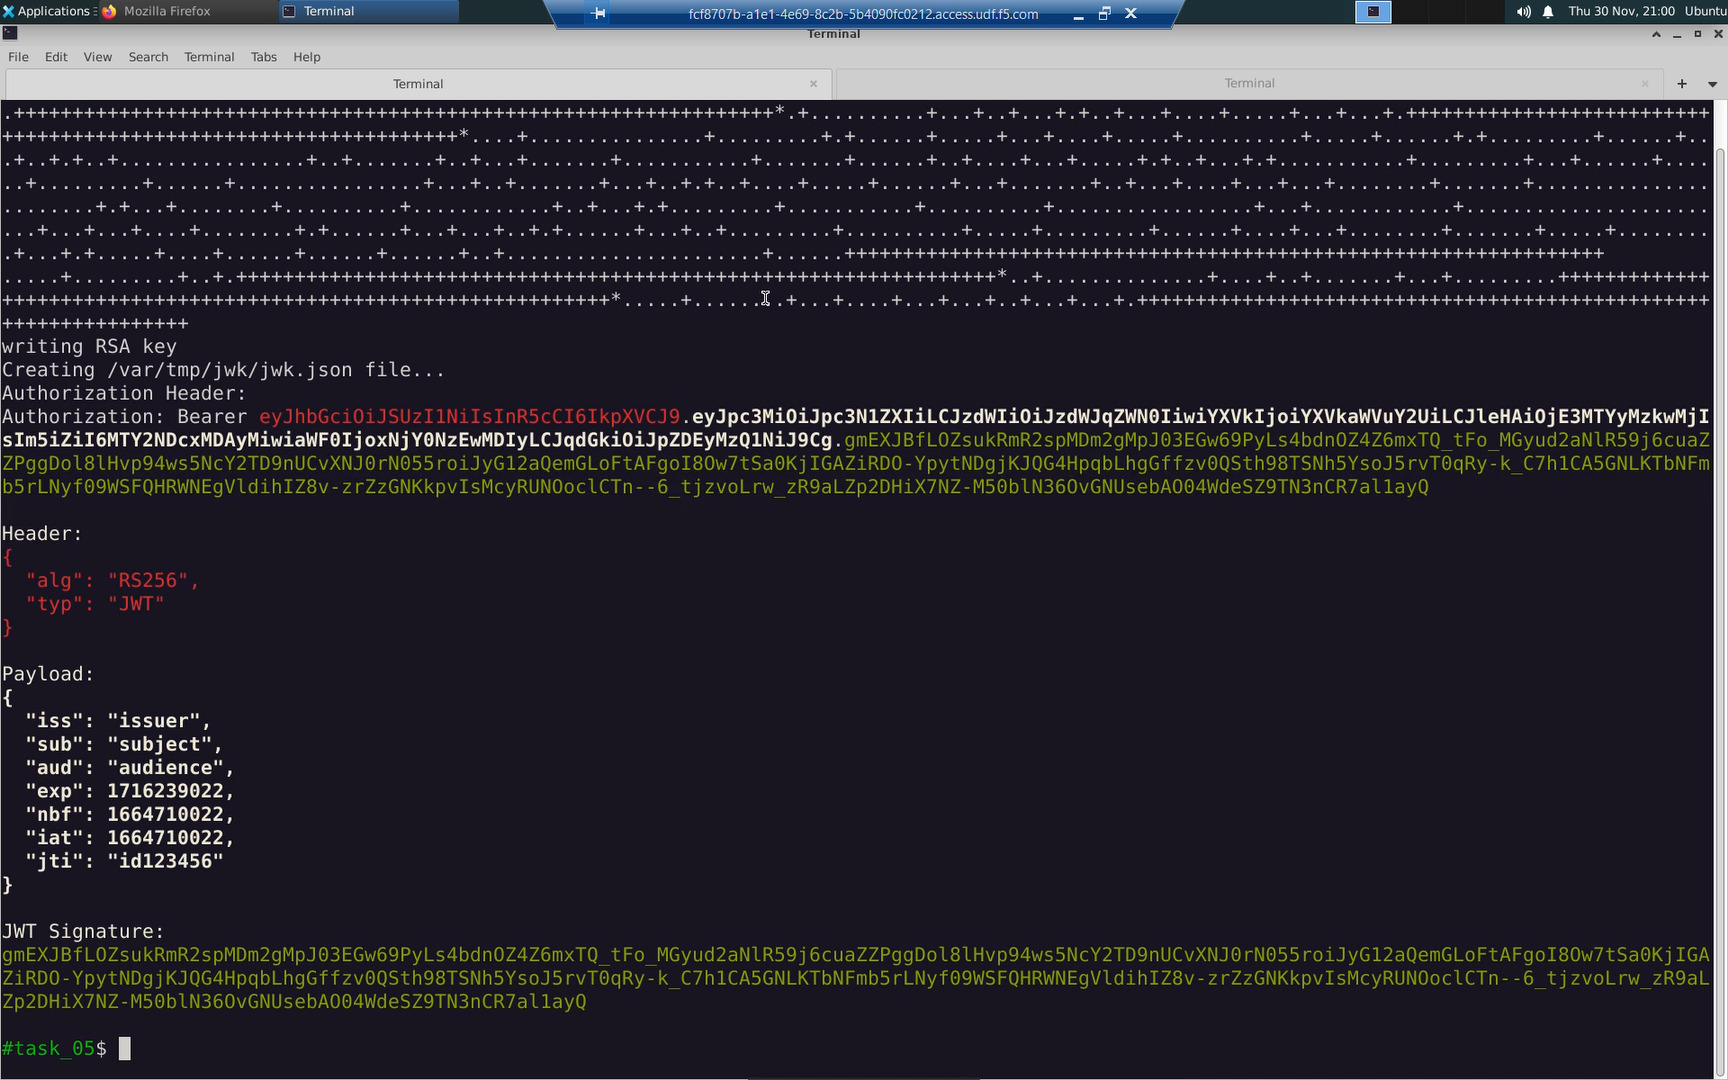
The output of create-signed-jwt-sh is presented in two formats:
- Authorization Bearer: <base64 encoded string>. This is the value expected in an HTTP “Authorization” header.
- Human redable Base64 decoded Header, Payload, and JWT Signature components.
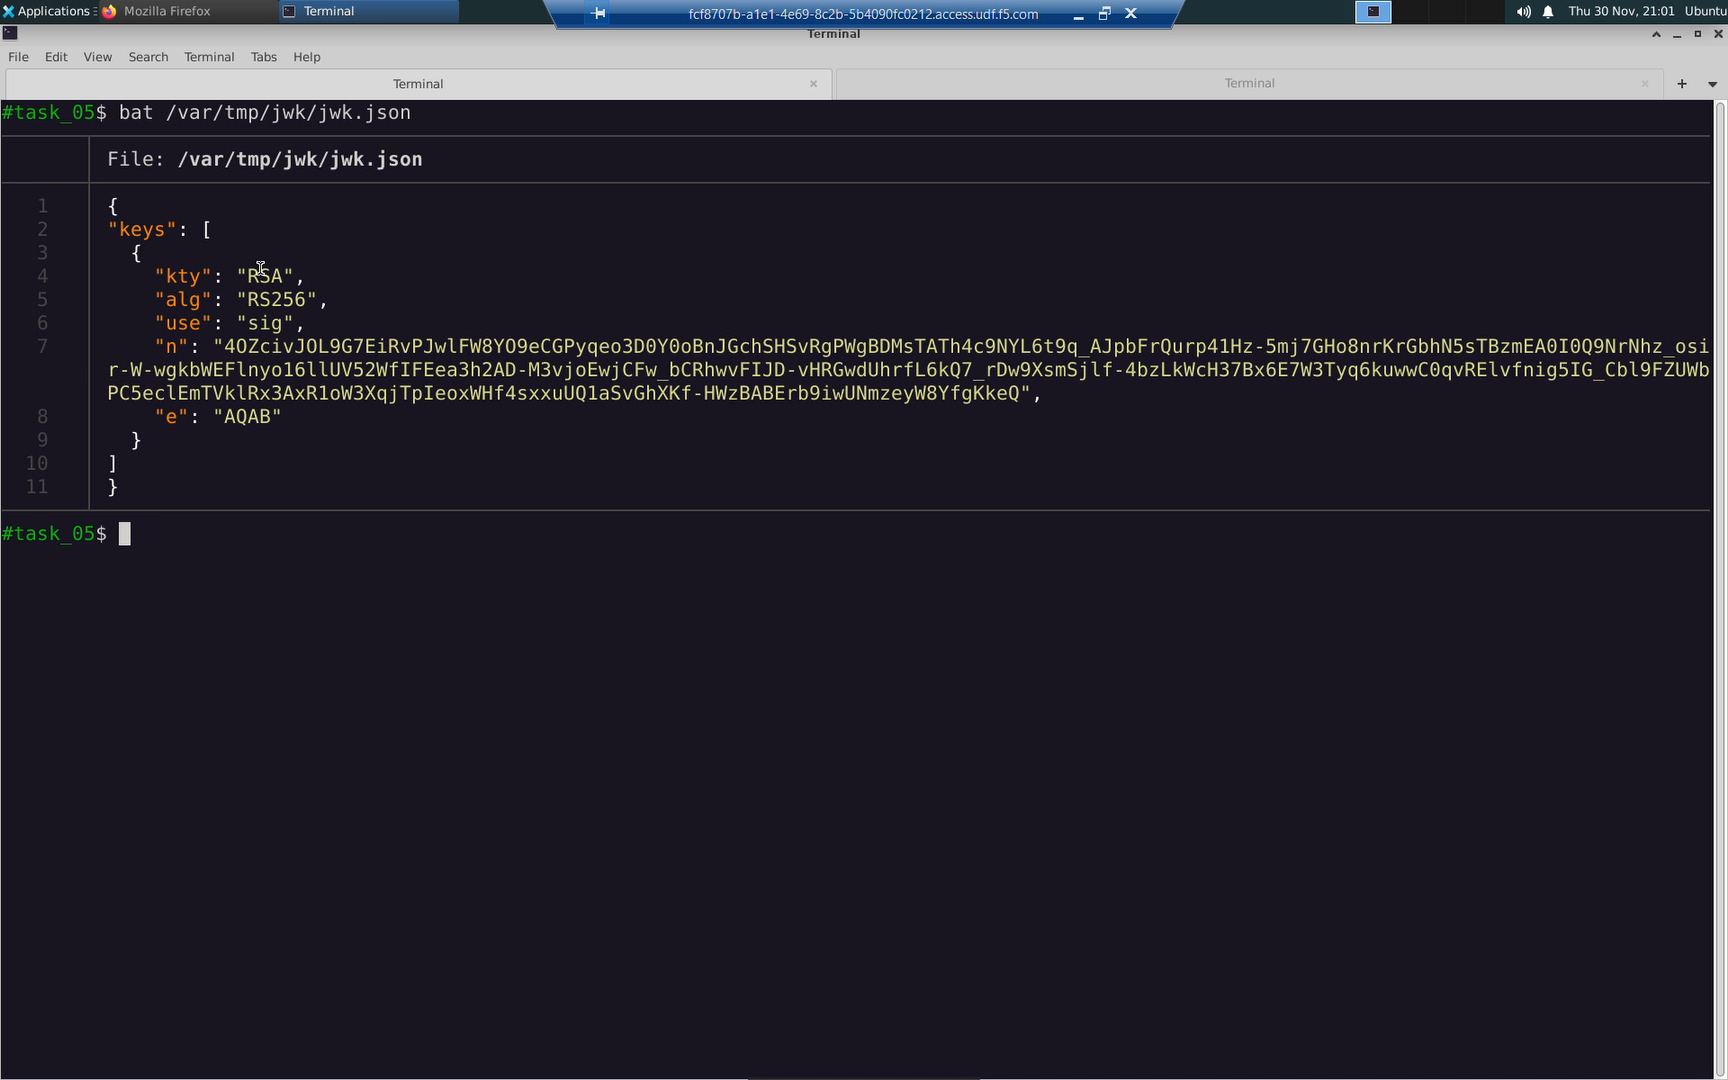
The public key used to validate the JWT must be converted to a JSON formatted array of JSON Web Keys (JWK). The create-signed-jwt.sh script has prepared this as well.
bat /var/tmp/jwk/jwk.json
Create a K8s secret to store the JSON Web Keys (JWK).
kubectl create secret generic jwk-secret --from-file=jwk=/var/tmp/jwk/jwk.json --type=nginx.org/jwk
kubectl get secret jwk-secret -o yaml

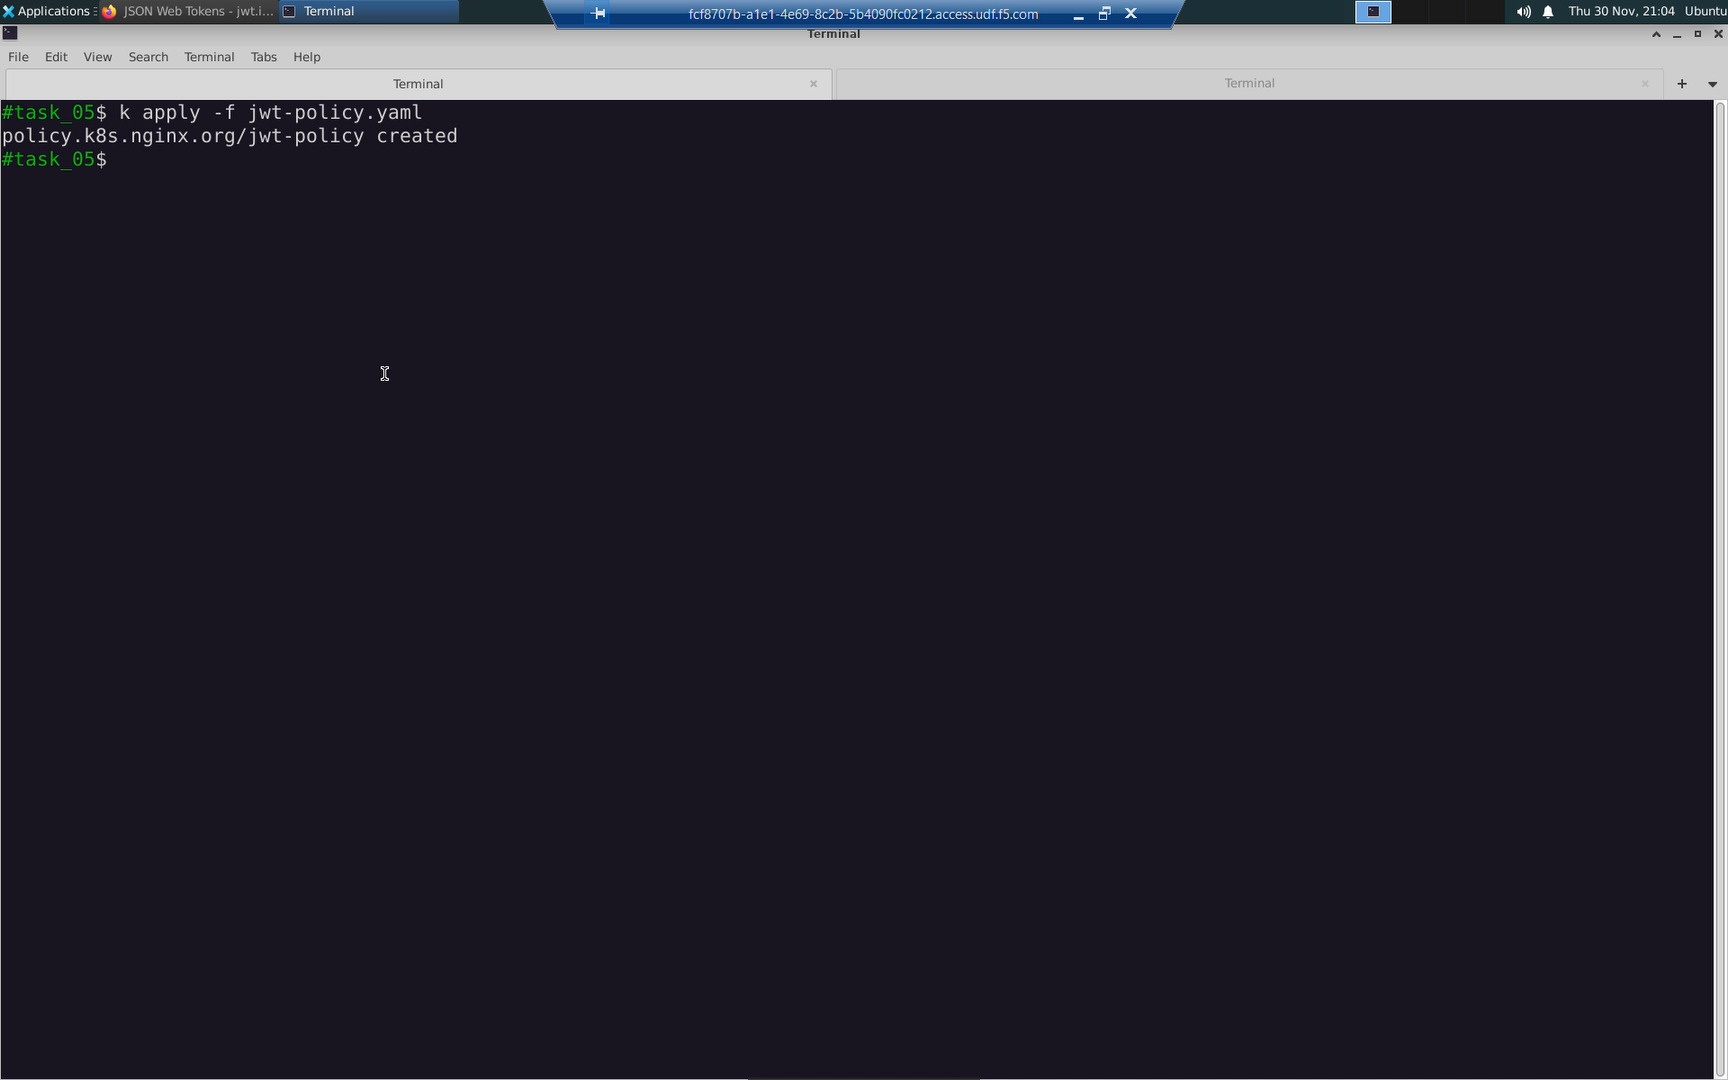
Create a Policy Custom Resource Definition (CRD) with property spec.jwt and reference the jwk-secret we just created.
bat jwt-policy.yaml

kubectl apply -f jwt-policy.yaml
The VirtualServer.yaml manifest has been modified. The /add-job path now has the jwt-policy applied to enable JWT validation.
Apply the modified VirtualServer.yaml.
bat VirtualServer.yaml
kubectl apply -f VirtualServer.yaml
Confirm the status of the virtualserver ‘my-virtualserver’ you just modified.
kubectl describe virtualserver my-virtualserver
Copy to the clipboard the value of the “Authorization” header in the output of create-signed-jwt.sh.
create-signed-jwt.sh
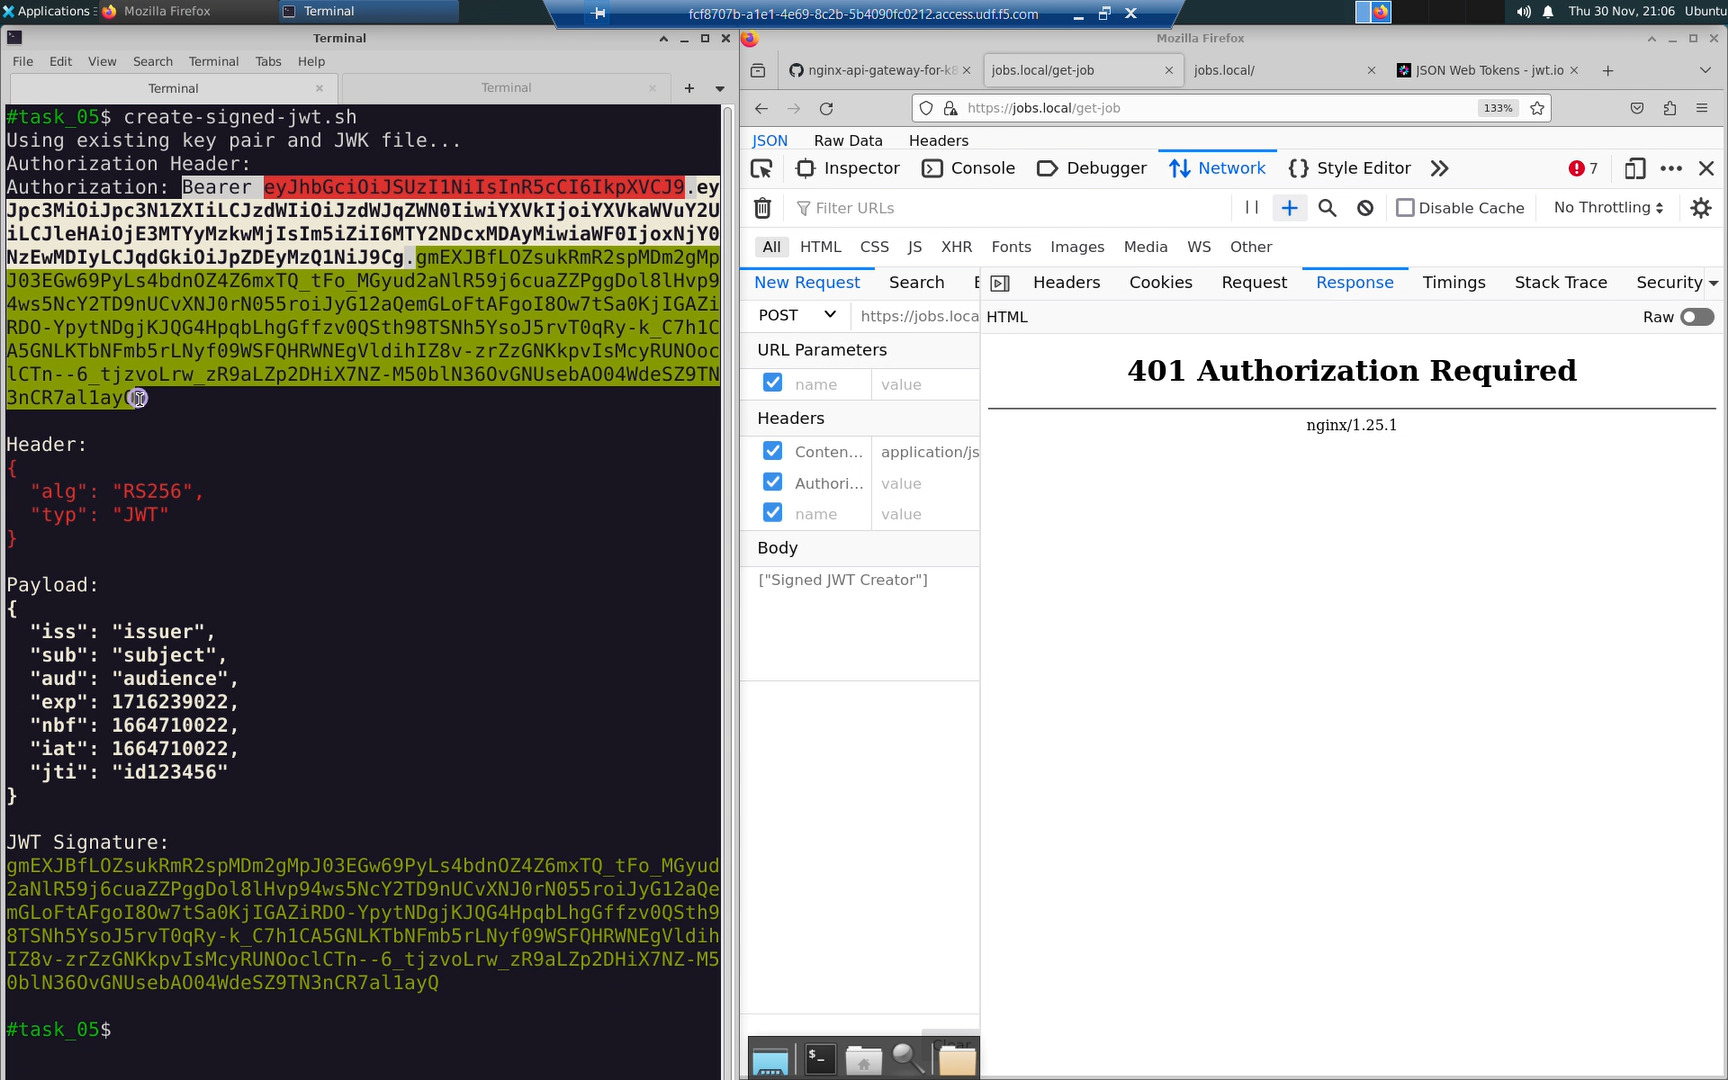
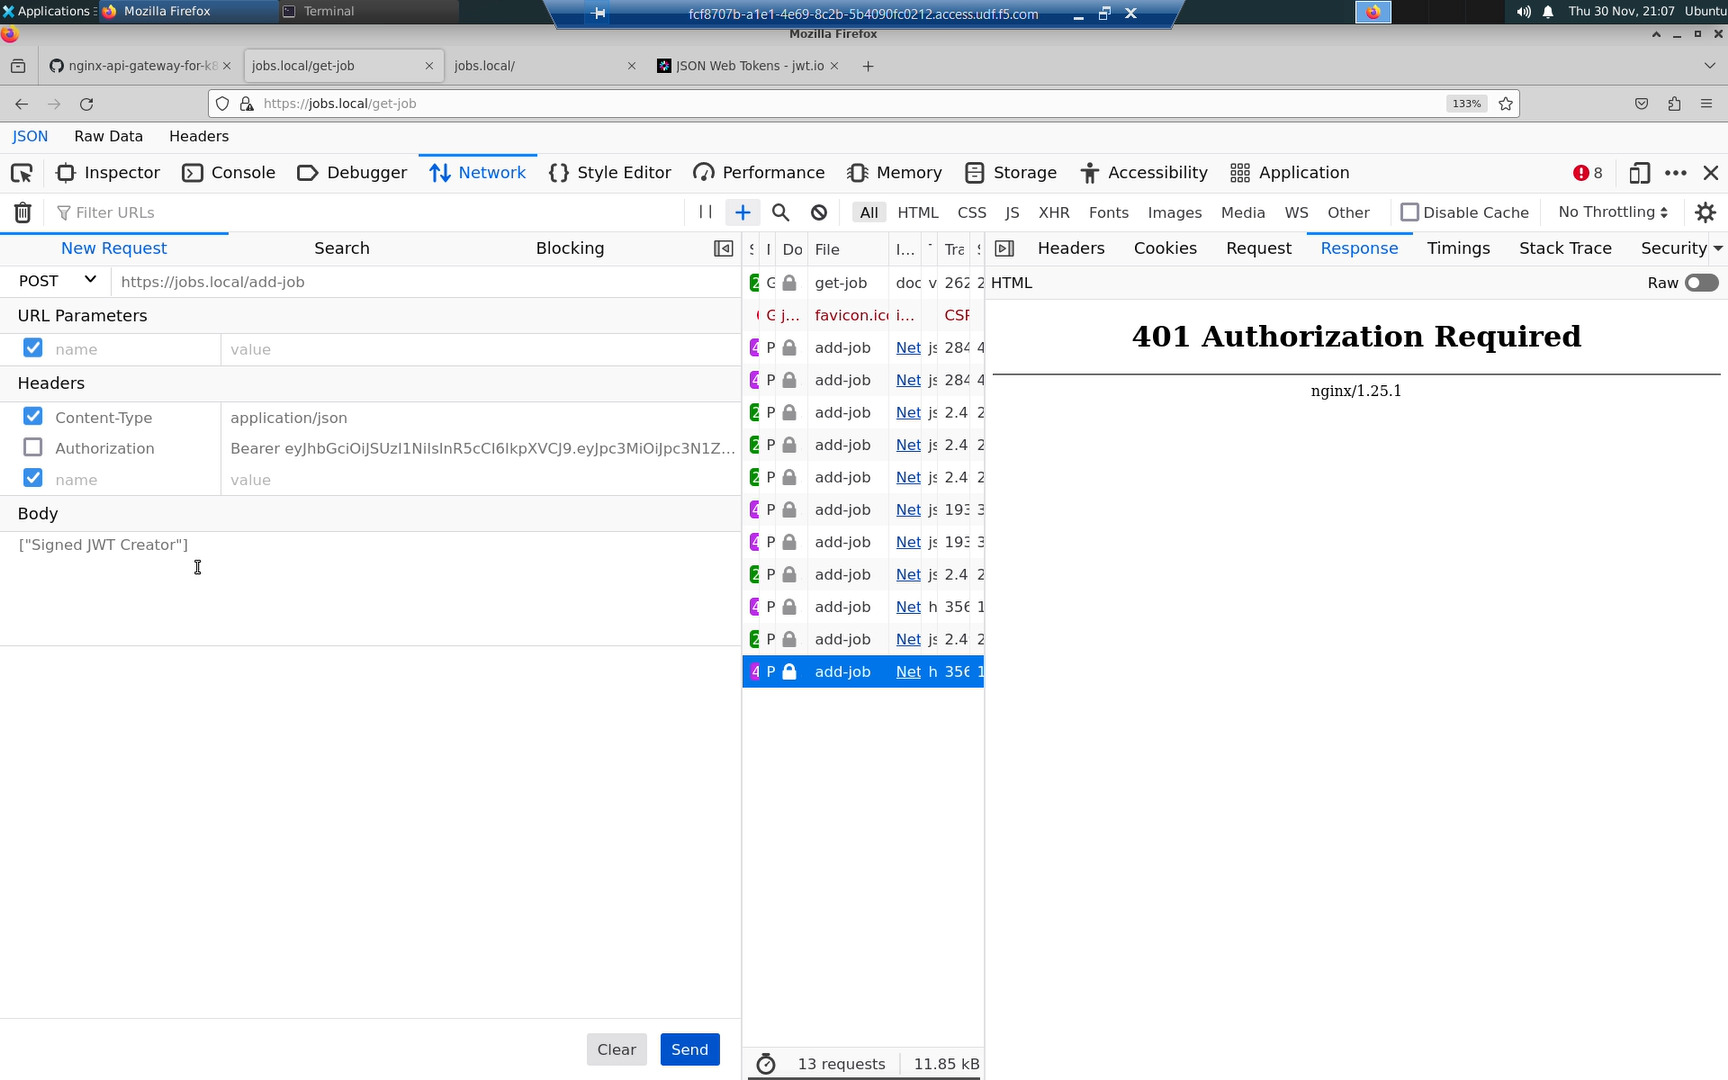
You may have already prepared this step in the previous task. If so, skip these instructions and just create the “Authorization” header as shown in the table and screenshot below.
In the URL bar of the web browser, connect to the https://jobs.local API endpoint.
- Press [F12] to reveal the Firefox Developer Tools
- Select ‘Network’ and ‘Response’ just like the screenshot below
- Press [F5] to create a new HTTP request
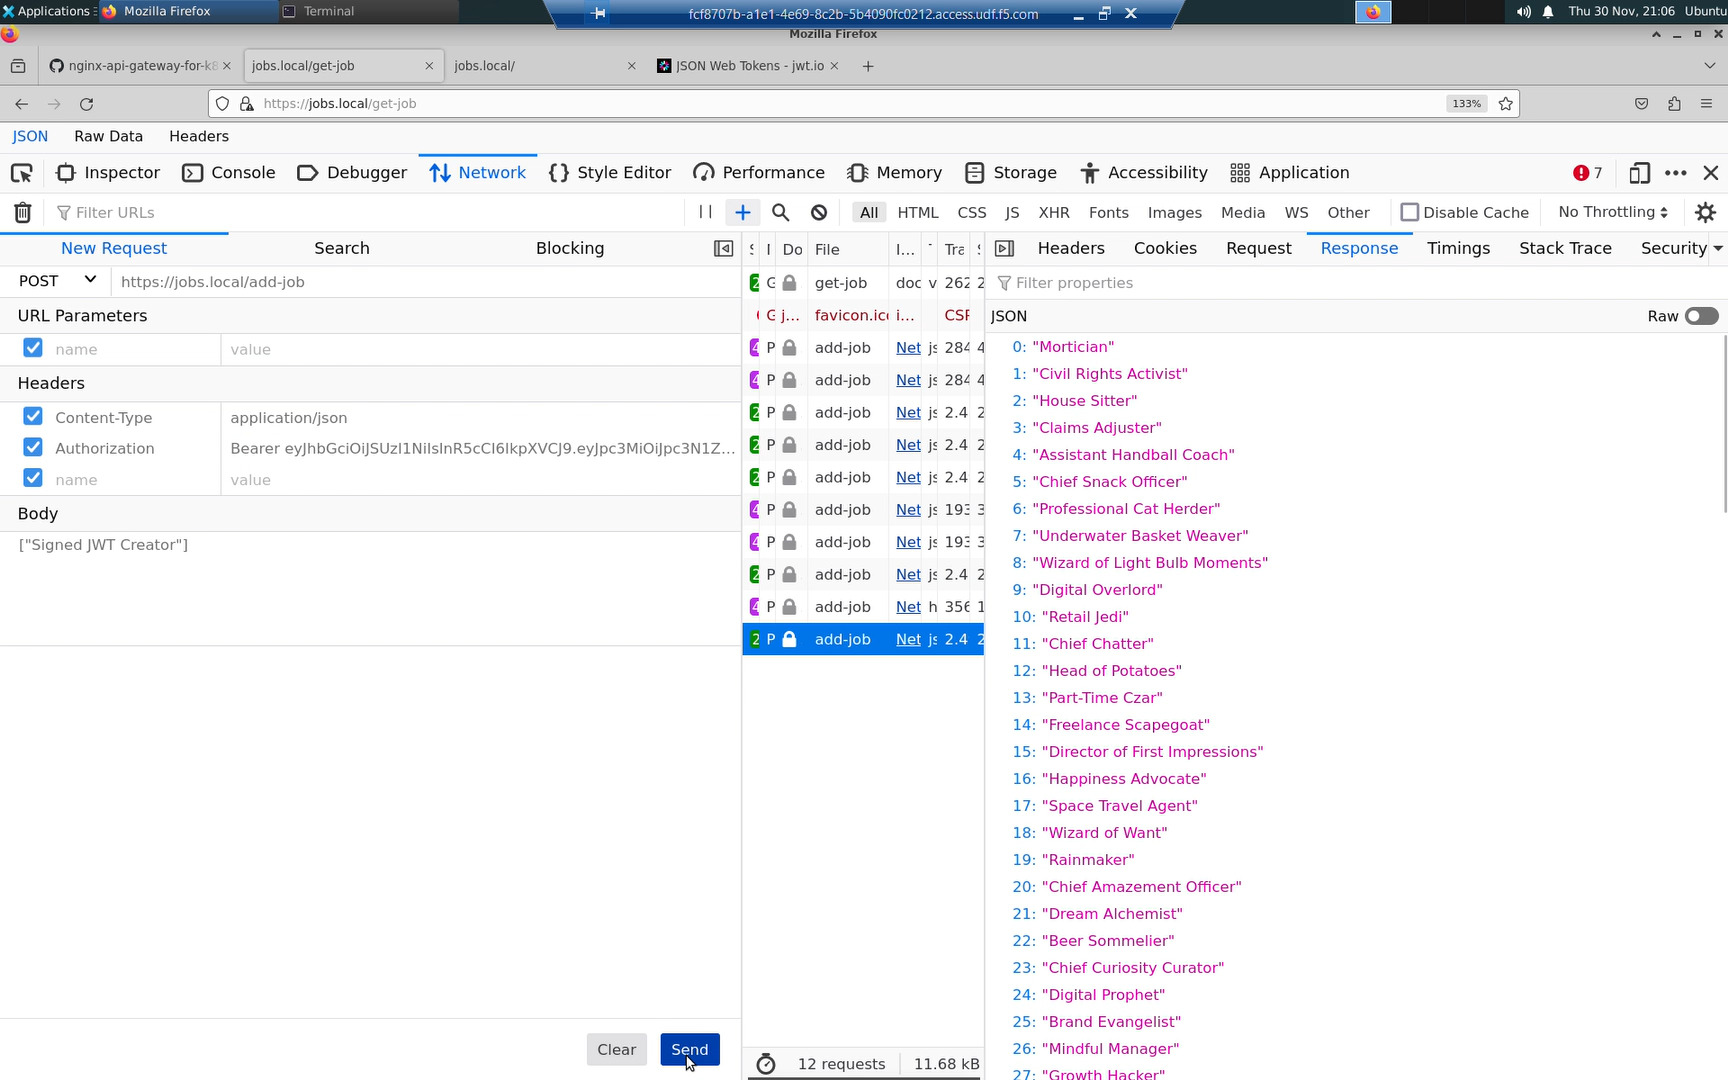
- Right-click on the ‘add-job’ request just like in the screenshot below
- Select ‘Edit and Resend’
- On the left-hand side, in the ‘New Request’ section, select [Clear]
- Fill in the values just like the table below
Copy and paste the value of the “Authorization” header just like the table and screenshots below. Replace the <base64 encoded JWT> placeholder.
| New Request | |
|---|---|
| POST | https://jobs.local/add-job |
| Headers | |
| Content-Type | application/json |
| Authorization | Bearer <base64 encoded JWT> |
| Body | |
| [“Professional Skateboarder”] | |
With the “Authorization” header on/enabled, you can POST new jobs to the https:/jobs.local/add-job API endpoint.
Toggle the “Authorization” header off/disabled, and you will be rejected with a “401 Authorization Required” HTTP error message.