NGINX Modern Apps > Class 5 - NGINX App Protect WAF & DoS Source | Edit on
Module 1 - Test Driving NGINX Plus with App Protect WAF and NGINX Instance Manager
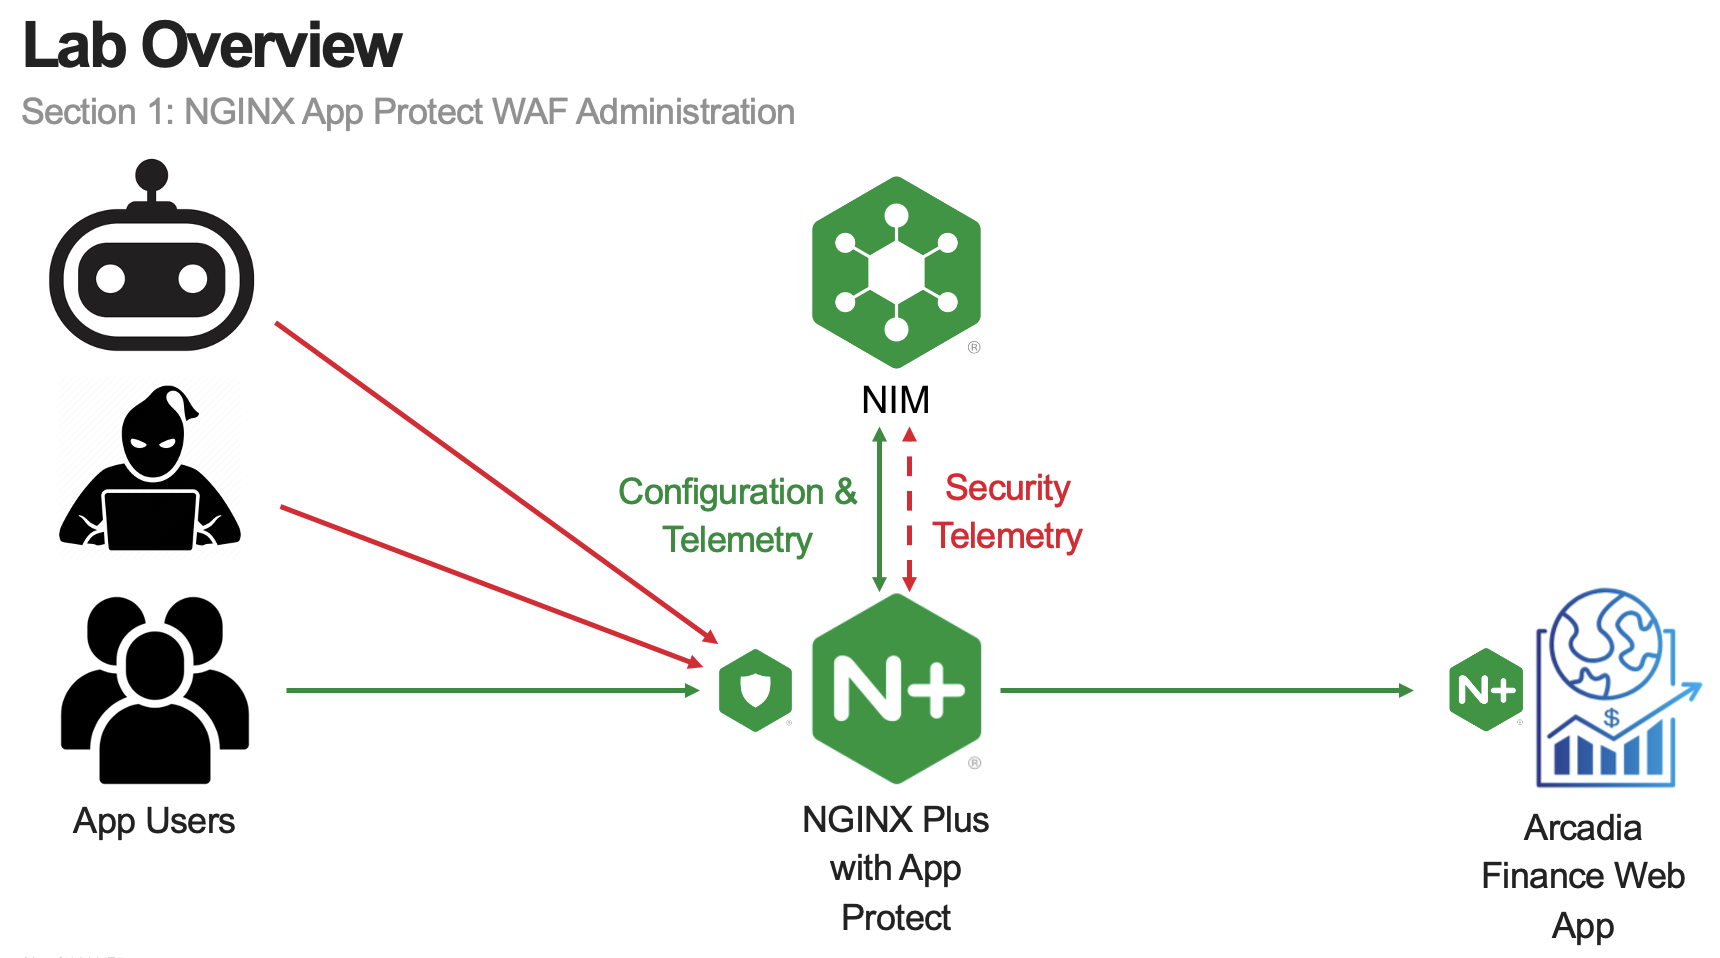
In this module, you will review an existing NGINX Plus instance running NGINX App Protect WAF protecting an deployed application.
Estimated completion time: 20 minutes
Note
The goal of this module is to provide an overview of an entire functioning solution, including features of centralized management for NAP WAF.