F5 Public Cloud Solutions > A&O Toolchain: BIG-IP HA in Public Cloud with Terraform (Agility Labs 2023) > 4. HA Failover via Cloud Failover Extension (CFE) Source | Edit on
4.5. Test HA failover
4.5.1. Verify application access
From the VS Code terminal, note the value of vip1_public_ip.
terraform output vip1_public_ip

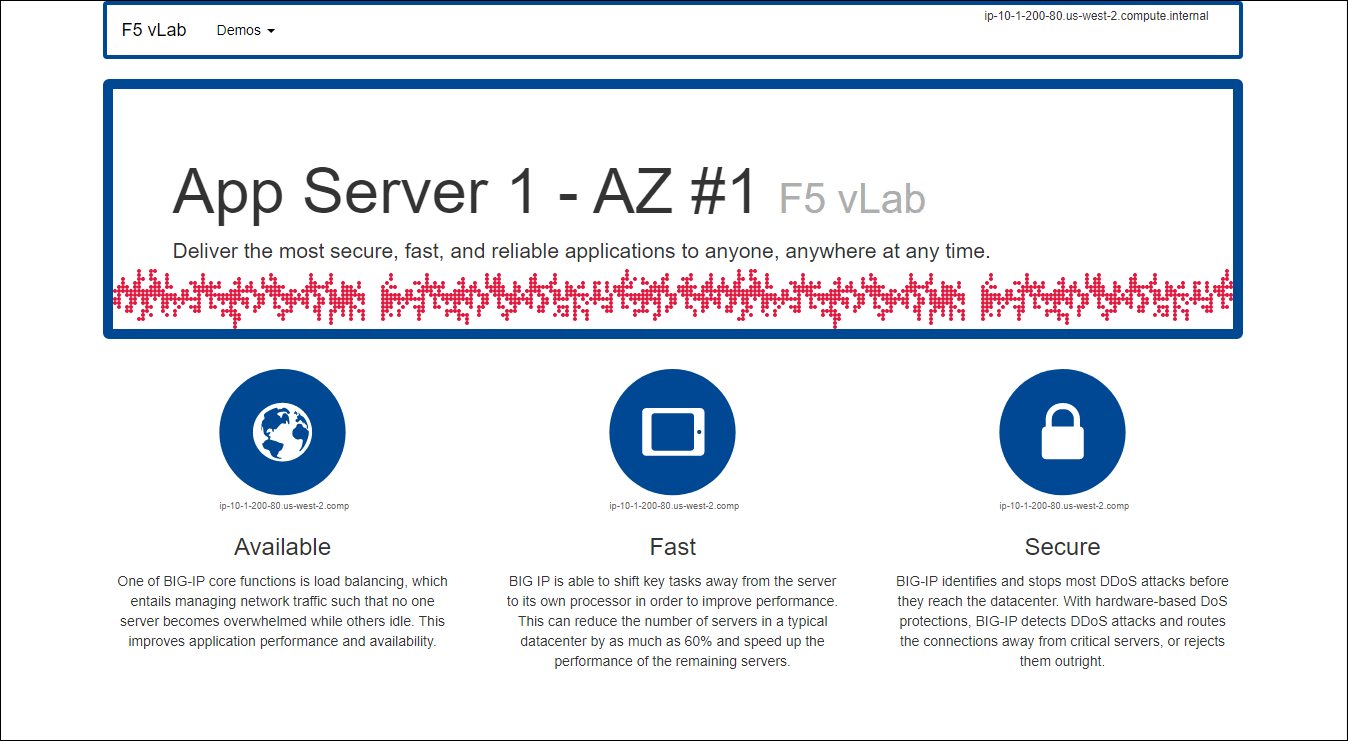
Open a new browser tab and connect https://<vip1_public_ip>. If you still have a tab open to the example application from earlier, you can use that.
4.5.2. Check CFE Configuration
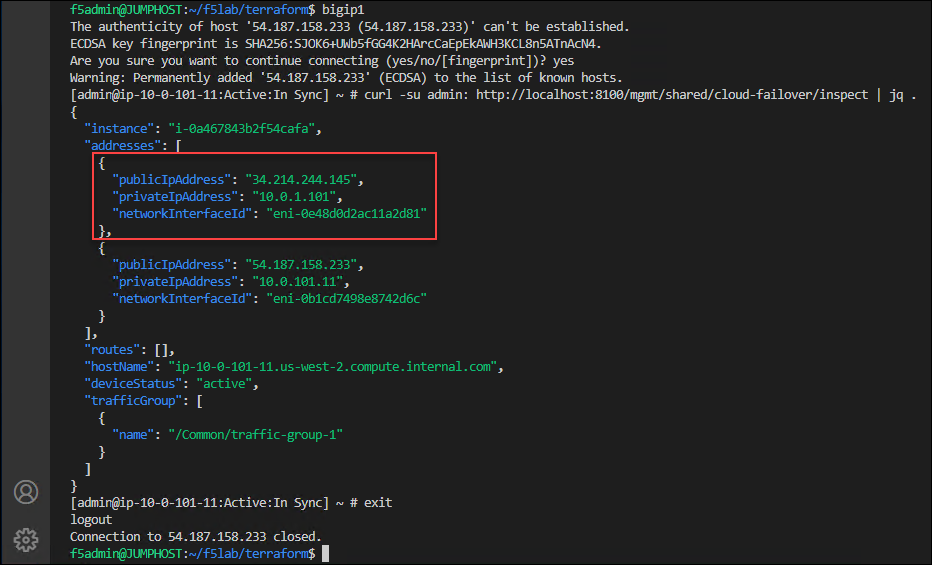
From the VS Code terminal (your first window), SSH to the active BIG-IP (#1) and confirm the interfaces that CFE is tracking. Use the
bigip1BASH alias to connect and then enteryesto trust the BIG-IP’s SSH fingerprint.At the BASH prompt, enter the following:
curl -su admin: http://localhost:8100/mgmt/shared/cloud-failover/inspect | jq .
Enter
exitto logout of the BIG-IP.You should see output similar to the following:
SSH to the standby BIG-IP (#2) and confirm the interfaces that CFE is tracking. Use the
bigip2BASH alias to connect and then enteryesto trust the BIG-IP’s SSH fingerprint.At the BASH prompt, enter the following:
curl -su admin: http://localhost:8100/mgmt/shared/cloud-failover/inspect | jq .
You should see output similar to the following:

4.5.3. Failover Dry-run Test
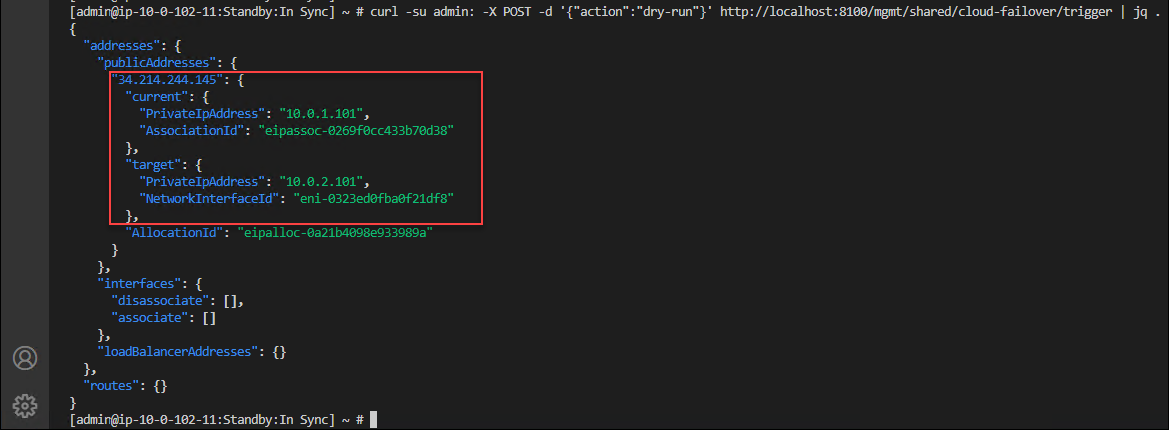
While still connected to the standby BIG-IP (#2), perform a failover dry-run to see what would happen during a failover event. Notice the current and target address mappings.
curl -su admin: -X POST -d '{"action":"dry-run"}' http://localhost:8100/mgmt/shared/cloud-failover/trigger | jq .
On the same BIG-IP (standby), watch the logs before triggering a failover event.
tail -f /var/log/restnoded/restnoded.log

4.5.4. Force Failover to BIG-IP #2
From BIG-IP #1, navigate to Device Management > Devices > ip-10-0-101-11.us-west-2.compute.internal.com (Self) and click on the Force to Standby button.
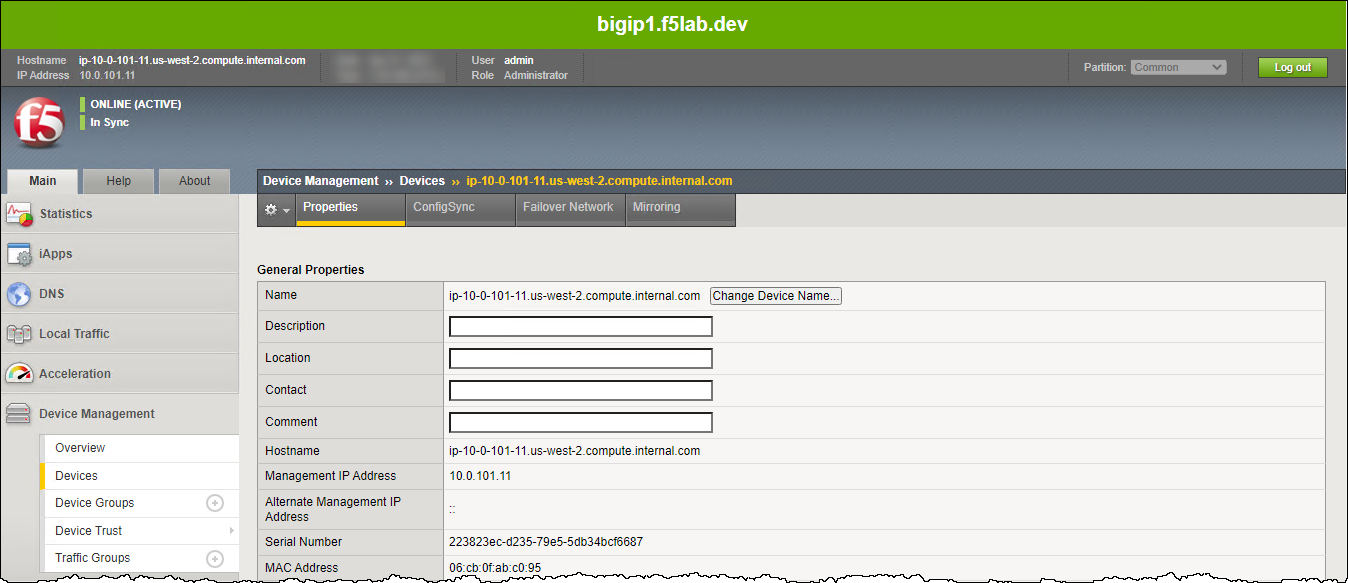

In the top left corner, verify that the status changes to ONLINE (STANDBY).

On BIG-IP #2, verify that the status has changed to ONLINE (ACTIVE). BIG-IP #2 was immediately promoted to active and BIG-IP #1 demoted to standby.

In the VS Code terminal, view the failover in the captured log messages.

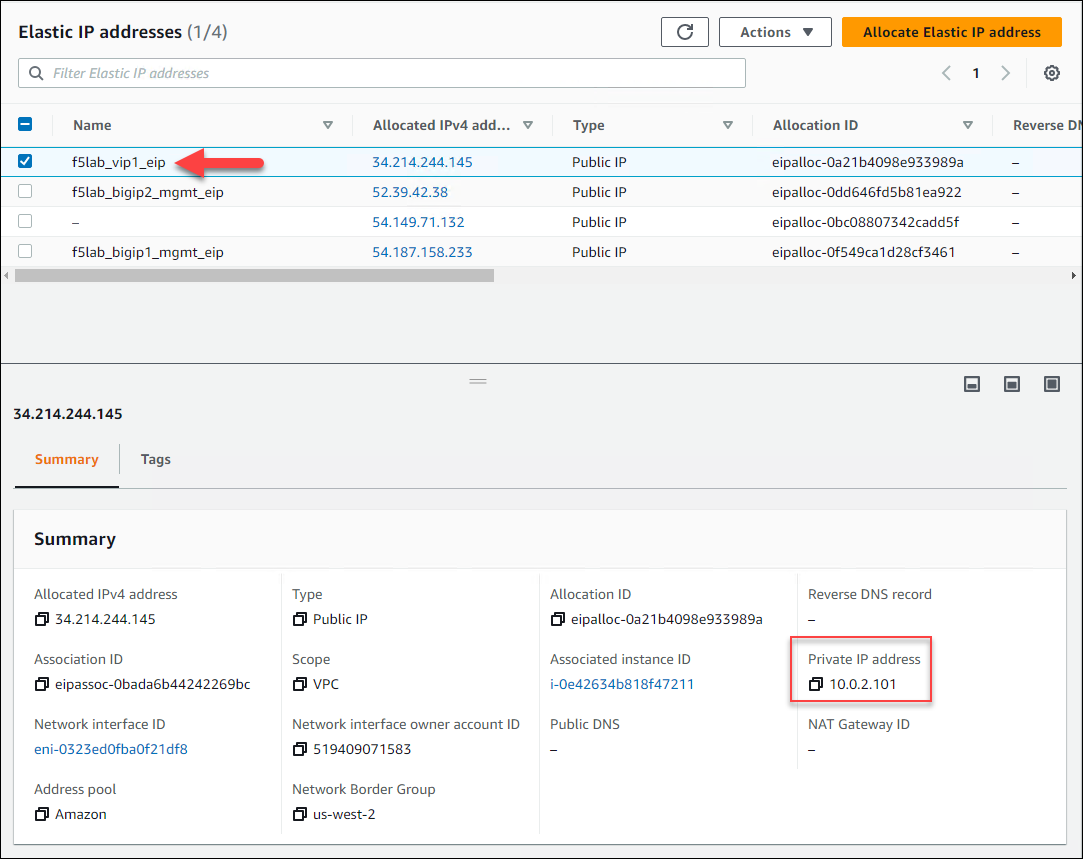
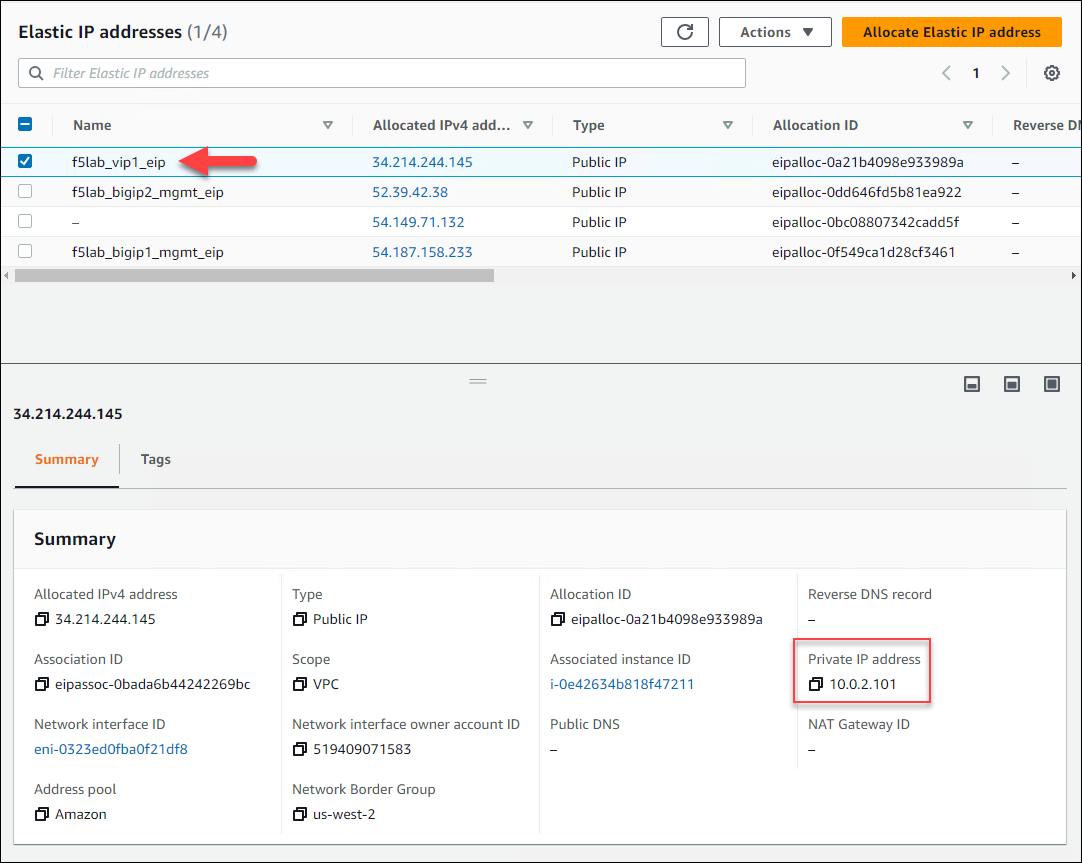
In the AWS Console, navigate to Services > Compute > EC2 > Elastic IPs and select f5lab_vip1_eip. Note that this was previously mapped to private IP address 10.0.1.101 (BIG-IP #1).
Click on the refresh button until you see the new mapping to 10.0.2.101 (BIG-IP #2).
Switch to the browser tab for the example application and press <CTRL-F5> a few times to refresh the page.
Note
We are using self-signed certificates in the lab, so you will need to accept/bypass the TLS warnings.
The example application shows the Availability Zone for the pool member that is returning the content (not the AZ which the active BIG-IP resides).
4.5.5. Force Failback to BIG-IP #1
From BIG-IP #2, navigate to Device Management > Devices > ip-10-0-102-11.us-west-2.compute.internal.com (Self).
Force the BIG-IP to standby by scrollling down to the bottom and then clicking on the Force to Standby button.
In the top left corner, verify that the status changes to ONLINE (STANDBY).
On BIG-IP #1, verify that the status has changed to ONLINE (ACTIVE). BIG-IP #1 is now back to the active state.
In the AWS Console, navigate to Services > Compute > EC2 > Elastic IPs and select f5lab_vip1_eip. Note that this was previously mapped to private IP address 10.0.2.101 (BIG-IP #2).
Click on the refresh button until you see the new mapping to 10.0.1.101 (BIG-IP #1).
In the VS Code terminal, view the failover in the captured log messages.
Press <CTRL-C> to return to the BIG-IP BASH prompt.
Enter
exitto return to the jump host BASH prompt.Switch to the browser tab with the example application and press <CTRL-F5> a few times to refresh the page.
The example application should continue to respond.