Deploy in OpenStack
PREREQUISITE: The following table lists the VNFM-required administrative OpenStack environment components and guidelines that must exist PRIOR to creating a VNFM instance in your OpenStack project.
- Once the following components exist in your environment, create and name a VNFM instance (OS v13 and OS v16), select the Availability Zone on which you want the VNFM installed, and then define the following parameters, clicking Next to complete the wizard. (Click the following component links to learn more about using the Queens (13) or Train (16) version of OpenStack.)
Note
If you do not select the Availability Zone value, then OpenStack will automatically set this value to the availability zone with the least number of associated nodes. The availability zone enables your VNF to utilize feature sets divided across multiple zones. OpenStack Admin users can find availability zones in the OpenStack dashboard, blade.
| Component | Description |
|---|---|
| Source (OS v13 or OS v16) | Expand Select Boot Source, and choose Image, under Create New Volume, click No, and then click + next to the latest VNFM image file to move it to the Allocated list. |
| Flavors (OS v13 or OS v16) | Select a flavor sized accordingly, to accommodate the VNFM component images you previously uploaded. The minimum recommended flavor requirements for deploying the F5 VNF Manager include:
|
| Networks (OS v13 or OS v16) | SKIP THIS STEP even though it’s required. The correct Management network will be assigned, when you define the Network Port in the following step. |
| Network Ports (OS v13 or OS v16) | From the list, select the Network Port you created for the Management network (see setup requirements for details). |
| Security Groups (OS v13 or OS v16) | Security groups are required for versions 1.2.1 and earlier, but are OPTIONAL for version 1.2.2 and later for ALL blueprint solutions. Select + next to the following, predefined security group to add to the Allocated list:
NOTE: To disable all security groups, including the default security group created by OpenStack for every instance, set the |
| Key Pair (OS v13 or OS v16) | Create, import, or select existing, PEM-encoded key pair for accessing VNFM instance remotely, using SSH. |
For all other Instance component definitions, use the default values provided by OpenStack, and then click Launch Instance. For details, consult the Upload and manage instances topic on docs.openstack.org.
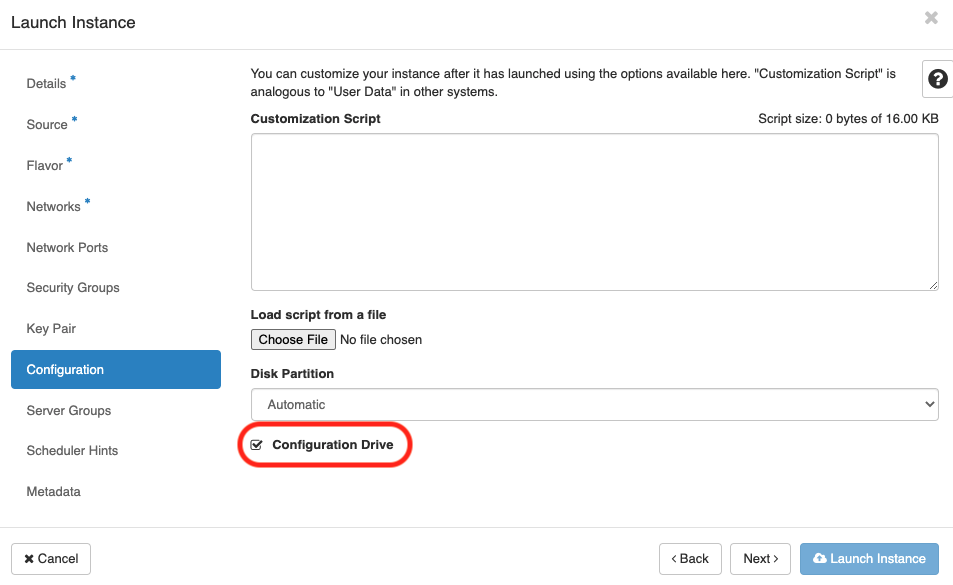
Tip
For environments NOT using DHCP, on the Configuration blade in the Launch Instance wizard, you MUST select the Configuration Drive option.
OPTIONAL: Add a floating IP.
Add a floating IP in OpenStack
This step is optional. Define a floating IP, if you want to access the VNFM externally from a browser.
Once you launch your instance in OpenStack, expand the Create Snapshot drop-down next to your instance in the table, and select Associate a Floating IP (OS v10 or OS v13) from the list.
Choose an IP address from the list. If none, click + to add one.
This allocates the floating IP on the management network. Do this to access the VNFM externally from a browser, using
https.
What’s next?