F5 Identity and Access Management Solutions > Archived Identity & Access Management Labs > Class 3: SWG - Securing Outbound Internet Access Source | Edit on
Lab 3: Explicit Proxy Authentication – NTLM
In this lab exercise, you will reconfigure authentication for seamless login of AD domain-joined client using NTLM.
Estimated completion time: 25 minutes
Objectives:
- Enable APM client-side NTLM authentication for the SWG explicit proxy
- Test web browsing behavior
Lab Requirements:
- Lab 1 previously completed successfully (working SWG iApp deployment)
Task 1 – Logout and log back in as domain user
- Logout of the windows remote desktop.
- Login as a domain user with the following credentials (Switch
User/Other User):
- Username :
F5DEMO\\user1 - Password:
AgilityRocks!
- Username :
Task 2 – Join BIG-IP to Domain
Use Firefox to access the BIG-IP GUI (https://10.1.1.10, admin/admin)
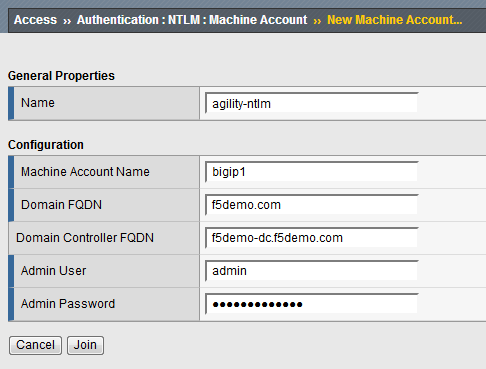
Browse to Access ›› Authentication : NTLM : Machine Account
Click Create
Fill out the fields as follows:
- Name:
agility-ntlm - Machine account:
bigip1 - Domain FQDN:
f5demo.com - Domain controller FQDN:
f5demo-dc.f5demo.com - Admin user:
admin - Admin password:
AgilityRocks!
- Name:
Click Join
Create a new NTLM Auth Configuration
Browse to Access ›› Authentication : NTLM : NTLM Auth Configuration
Click Create
Name:
agility-ntlmMachine Account Name:
agility-ntlmDomain controller FQDN:
f5demo-dc.f5demo.comClick Add
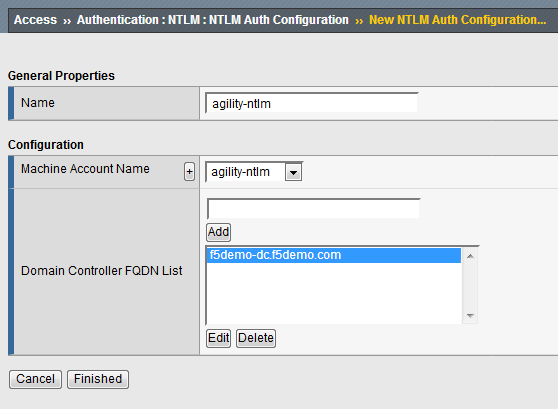
Click Finished
Task 3 – Create a new Access Policy
- Browse to Access >> Profiles / Policies >> Access Profiles (Per-Session Policies) and click Create…
- Name the profile AP_Explicit_NTLM
- Change the Profile Type to SWG-Explicit
Under Configurations:
Modify User Identification Method to Credentials
Modify NTLM Auth Configuration to agility-ntlm
Add English to Accepted Languages
Accept all other default settings and click Finished
Click on the Edit… link for the appropriate Access Policy created above
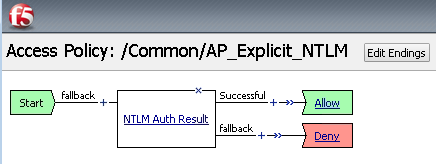
On the VPE browser tab, select the + between Start and Deny and Add a NTLM Auth Result object (from the Authentication tab)
Click Save
On the Successful branch of the NTLM Auth Result Object, click on the Deny Ending and change it to Allow
Click Save
Click Apply Access Policy
Task 4 – Reconfigure SWG iApp to apply NTLM Access Policy
- Browse to “iApps >> Application Services > Applications
- Click on SWG
- Click Reconfigure
- Find the section Which SWG-Explicit Access Policy do you want to use?
- Change the per-request policy to AP_Explicit_NTLM
- Browse to the bottom and click Finished
Task 5 – Testing
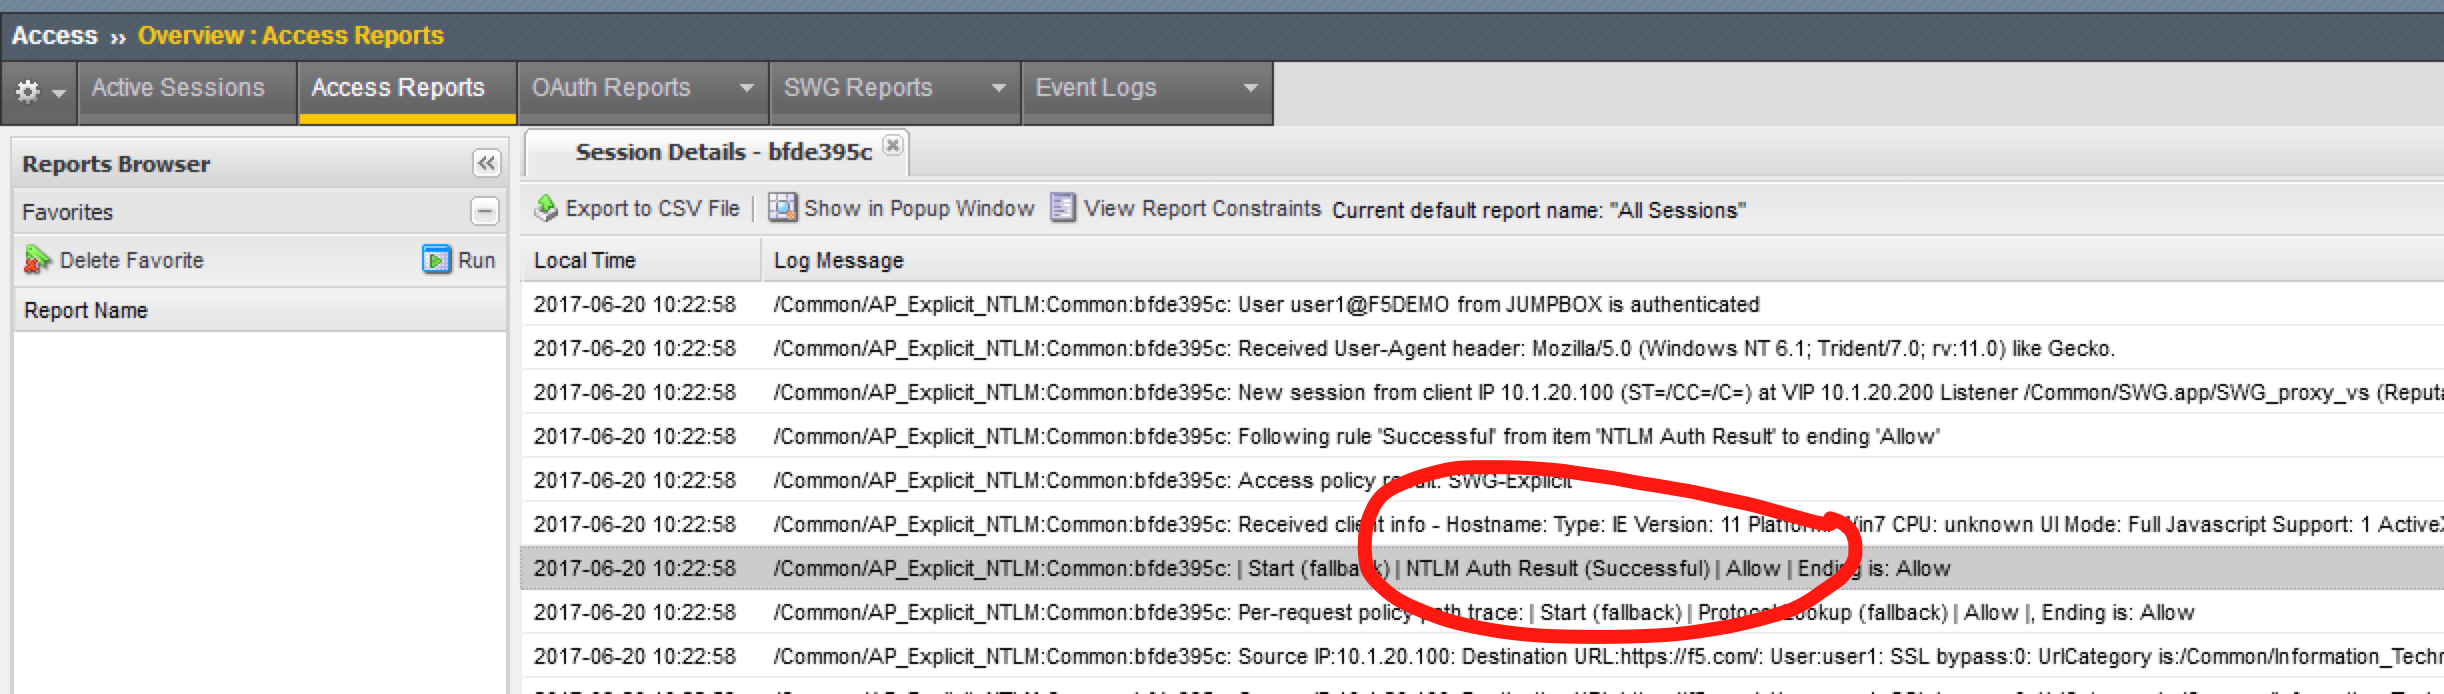
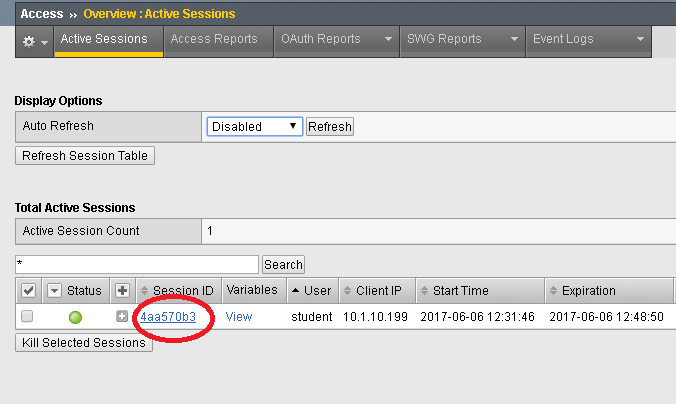
Before testing, close all browser sessions and kill all session in the GUI under Access > Overview > Active Sessions
- Open Internet Explorer on your Jump Host client machine
- Browse to https://www.f5.com. The browser should not prompt you for authentication since NTLM authentication is happening in the background (transparent to the user).
- Examine the user session details under Access > Overview > Active Sessions. Click on the session ID for details. You can see that NTLM authentication was performed.