NGINX Modern Apps > Class 2 - NGINX Plus CI/CD Lab > Module 3: Continuous Deployment for NGINX Plus Load Balancers Source | Edit on
Lab 1: Make new code commit, push changes to a live running NGINX Plus Virtual Machine
This task will walkthrough steps to configuring and pushing new NGINX features to a live running NGINX Plus Virtual Machine. In this example we will enable Rate limiting to our Appster service
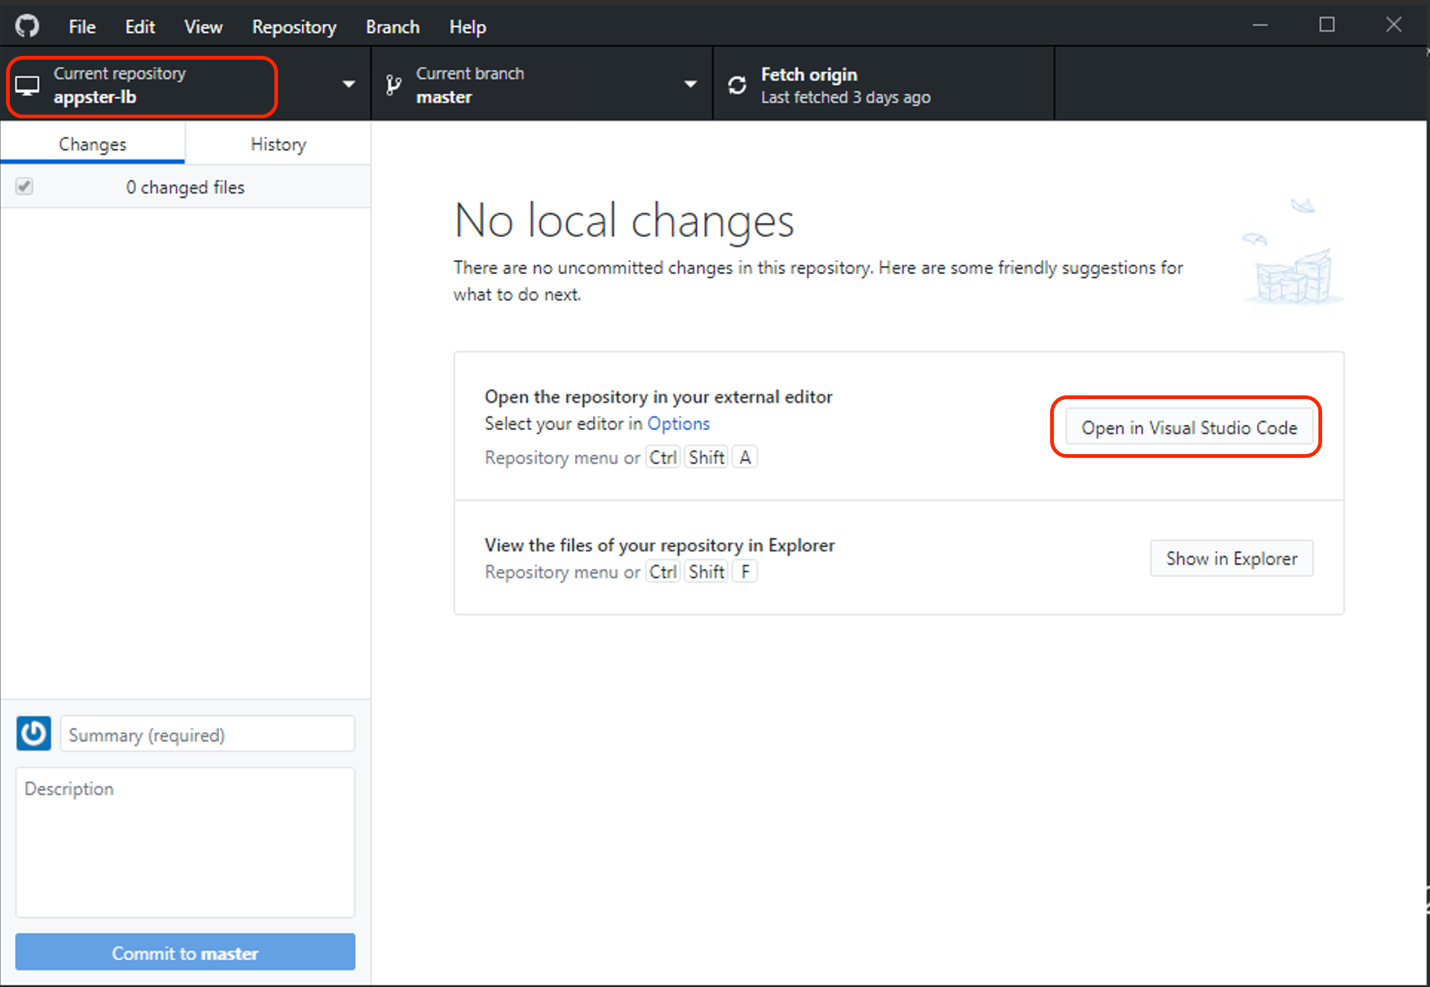
Open GitHub Desktop Client and switch to the Current repository to “appster-lb”. From here we can open the Project using the “Open in Visual Studio Code” button
Open
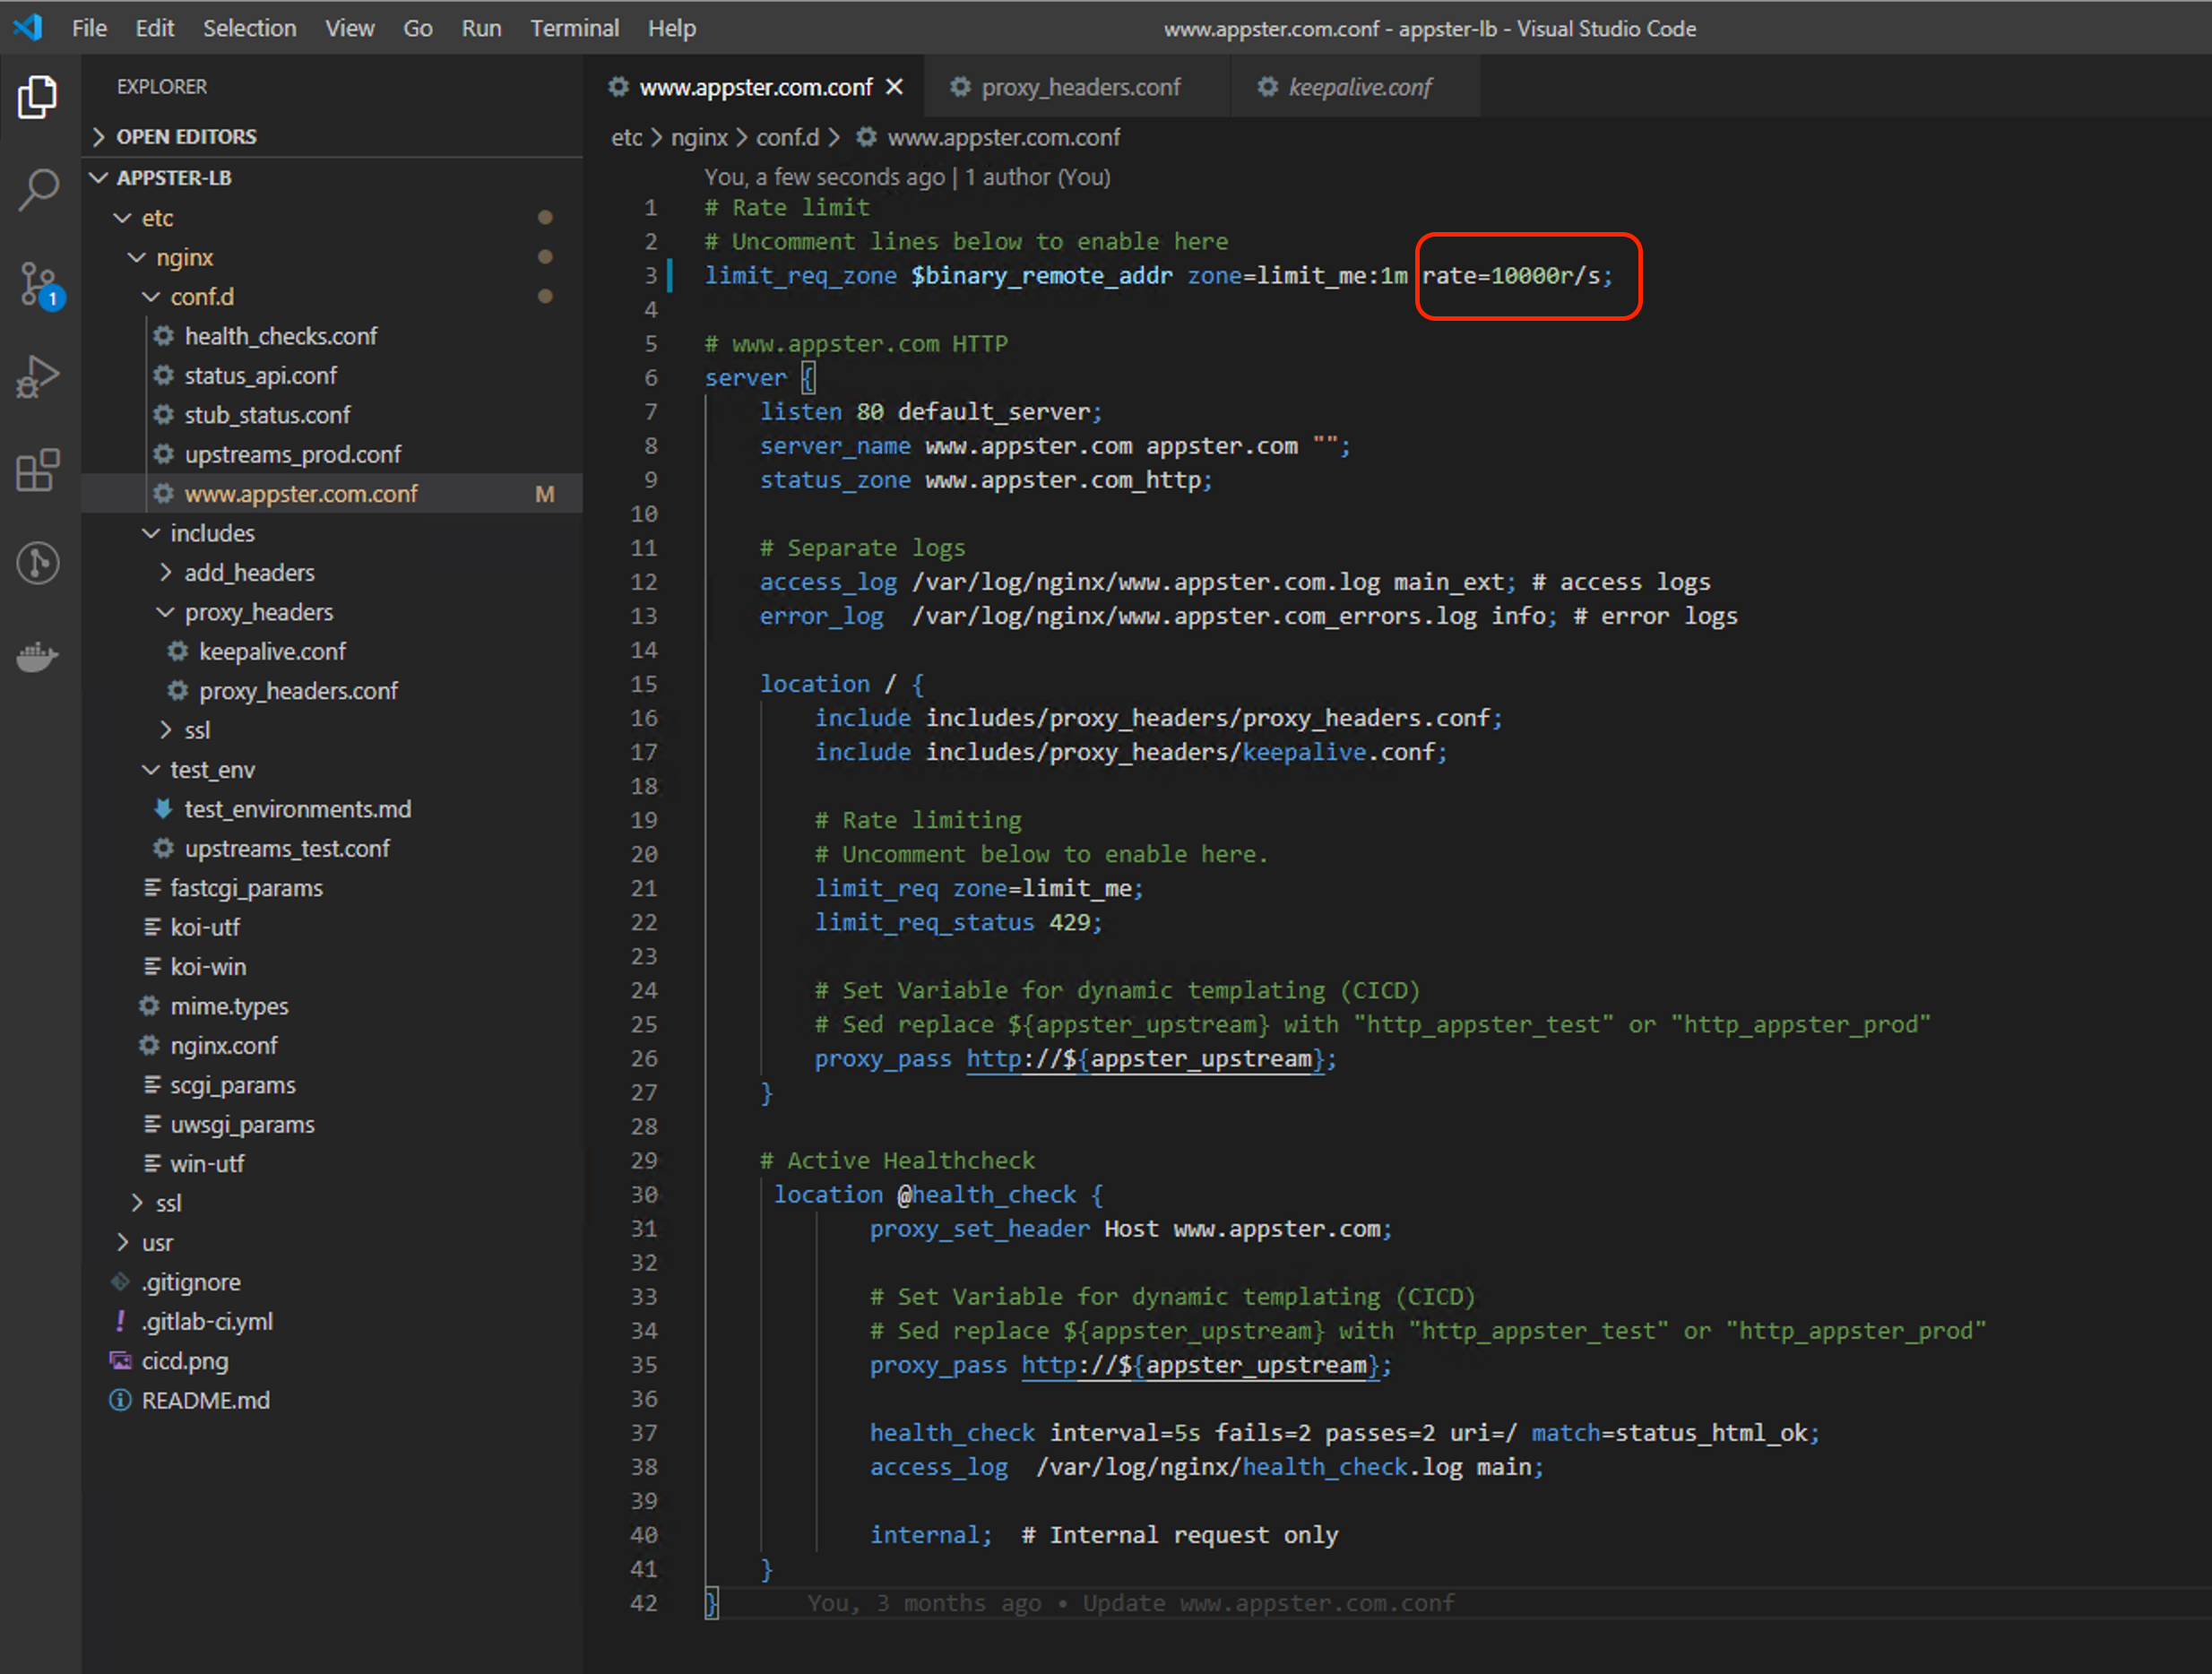
www.appster.com.confand enable the rating limiting rule:Rate-limiting has been preconfigured in this file and is commented out (disabled). To enable rate-limiting, uncomment the following lines:
Uncomment the line with the limit_req directive, found near the top of the file, this is in the
httpcontext, outside theservercontext. Be sure the rate is set to10:# Rate limit # Uncomment lines below to enable here limit_req $binary_remote_addr zone=limit_me:1m rate=10r/s;

This line defines our rate-limiting rule:
- key - A parameter used to differentiate
one client from another, typically stored as a variable. In this case we are
using the client’s IP address,
$binary_remote_addr. Note that this variable holds the binary representation of an IP address which is smaller than$remote_addr - shared memory zone - The name and size of the zone that stores the
state of each key using the “leaky
bucket”, algorithm. We have
named it
limit_mewith a size of 1 megabyte1mwhich can store about 16,000 IP addresses (4 bytes for IPv4 addresses, stored state occupies 128 bytes on 64-bit platforms.) - rate - The number of requests per second
(`**r/s`**) or requests per minute (
r/m). We set it to10r/s
- key - A parameter used to differentiate
one client from another, typically stored as a variable. In this case we are
using the client’s IP address,
Now we can enable the rate-limiting URL on the root location (
/). In the same file,www.appster.com.conf, also uncomment the lines starting withlimit_reqandlimit_req_status:# Rate limiting # Uncomment below to enable here. limit_req zone=limit_me; limit_req_status 429;
The directives above apply rate-limiting rules in this location context:
limit_req- Applies the rate limiting class as defined the zone it references, at this location. In this case we enable the rate limiting classlimit_melimit_conn_status- Sets the status code when the rate limit is exceeded.HTTP 429 "Too many requests"will be returned in response to rejected requests.Note: For more info on Limiting Access to Proxied HTTP Resources see: Limiting the Number of Connections
After changes made to
www.appster.com.conf, the configuration file will look the following: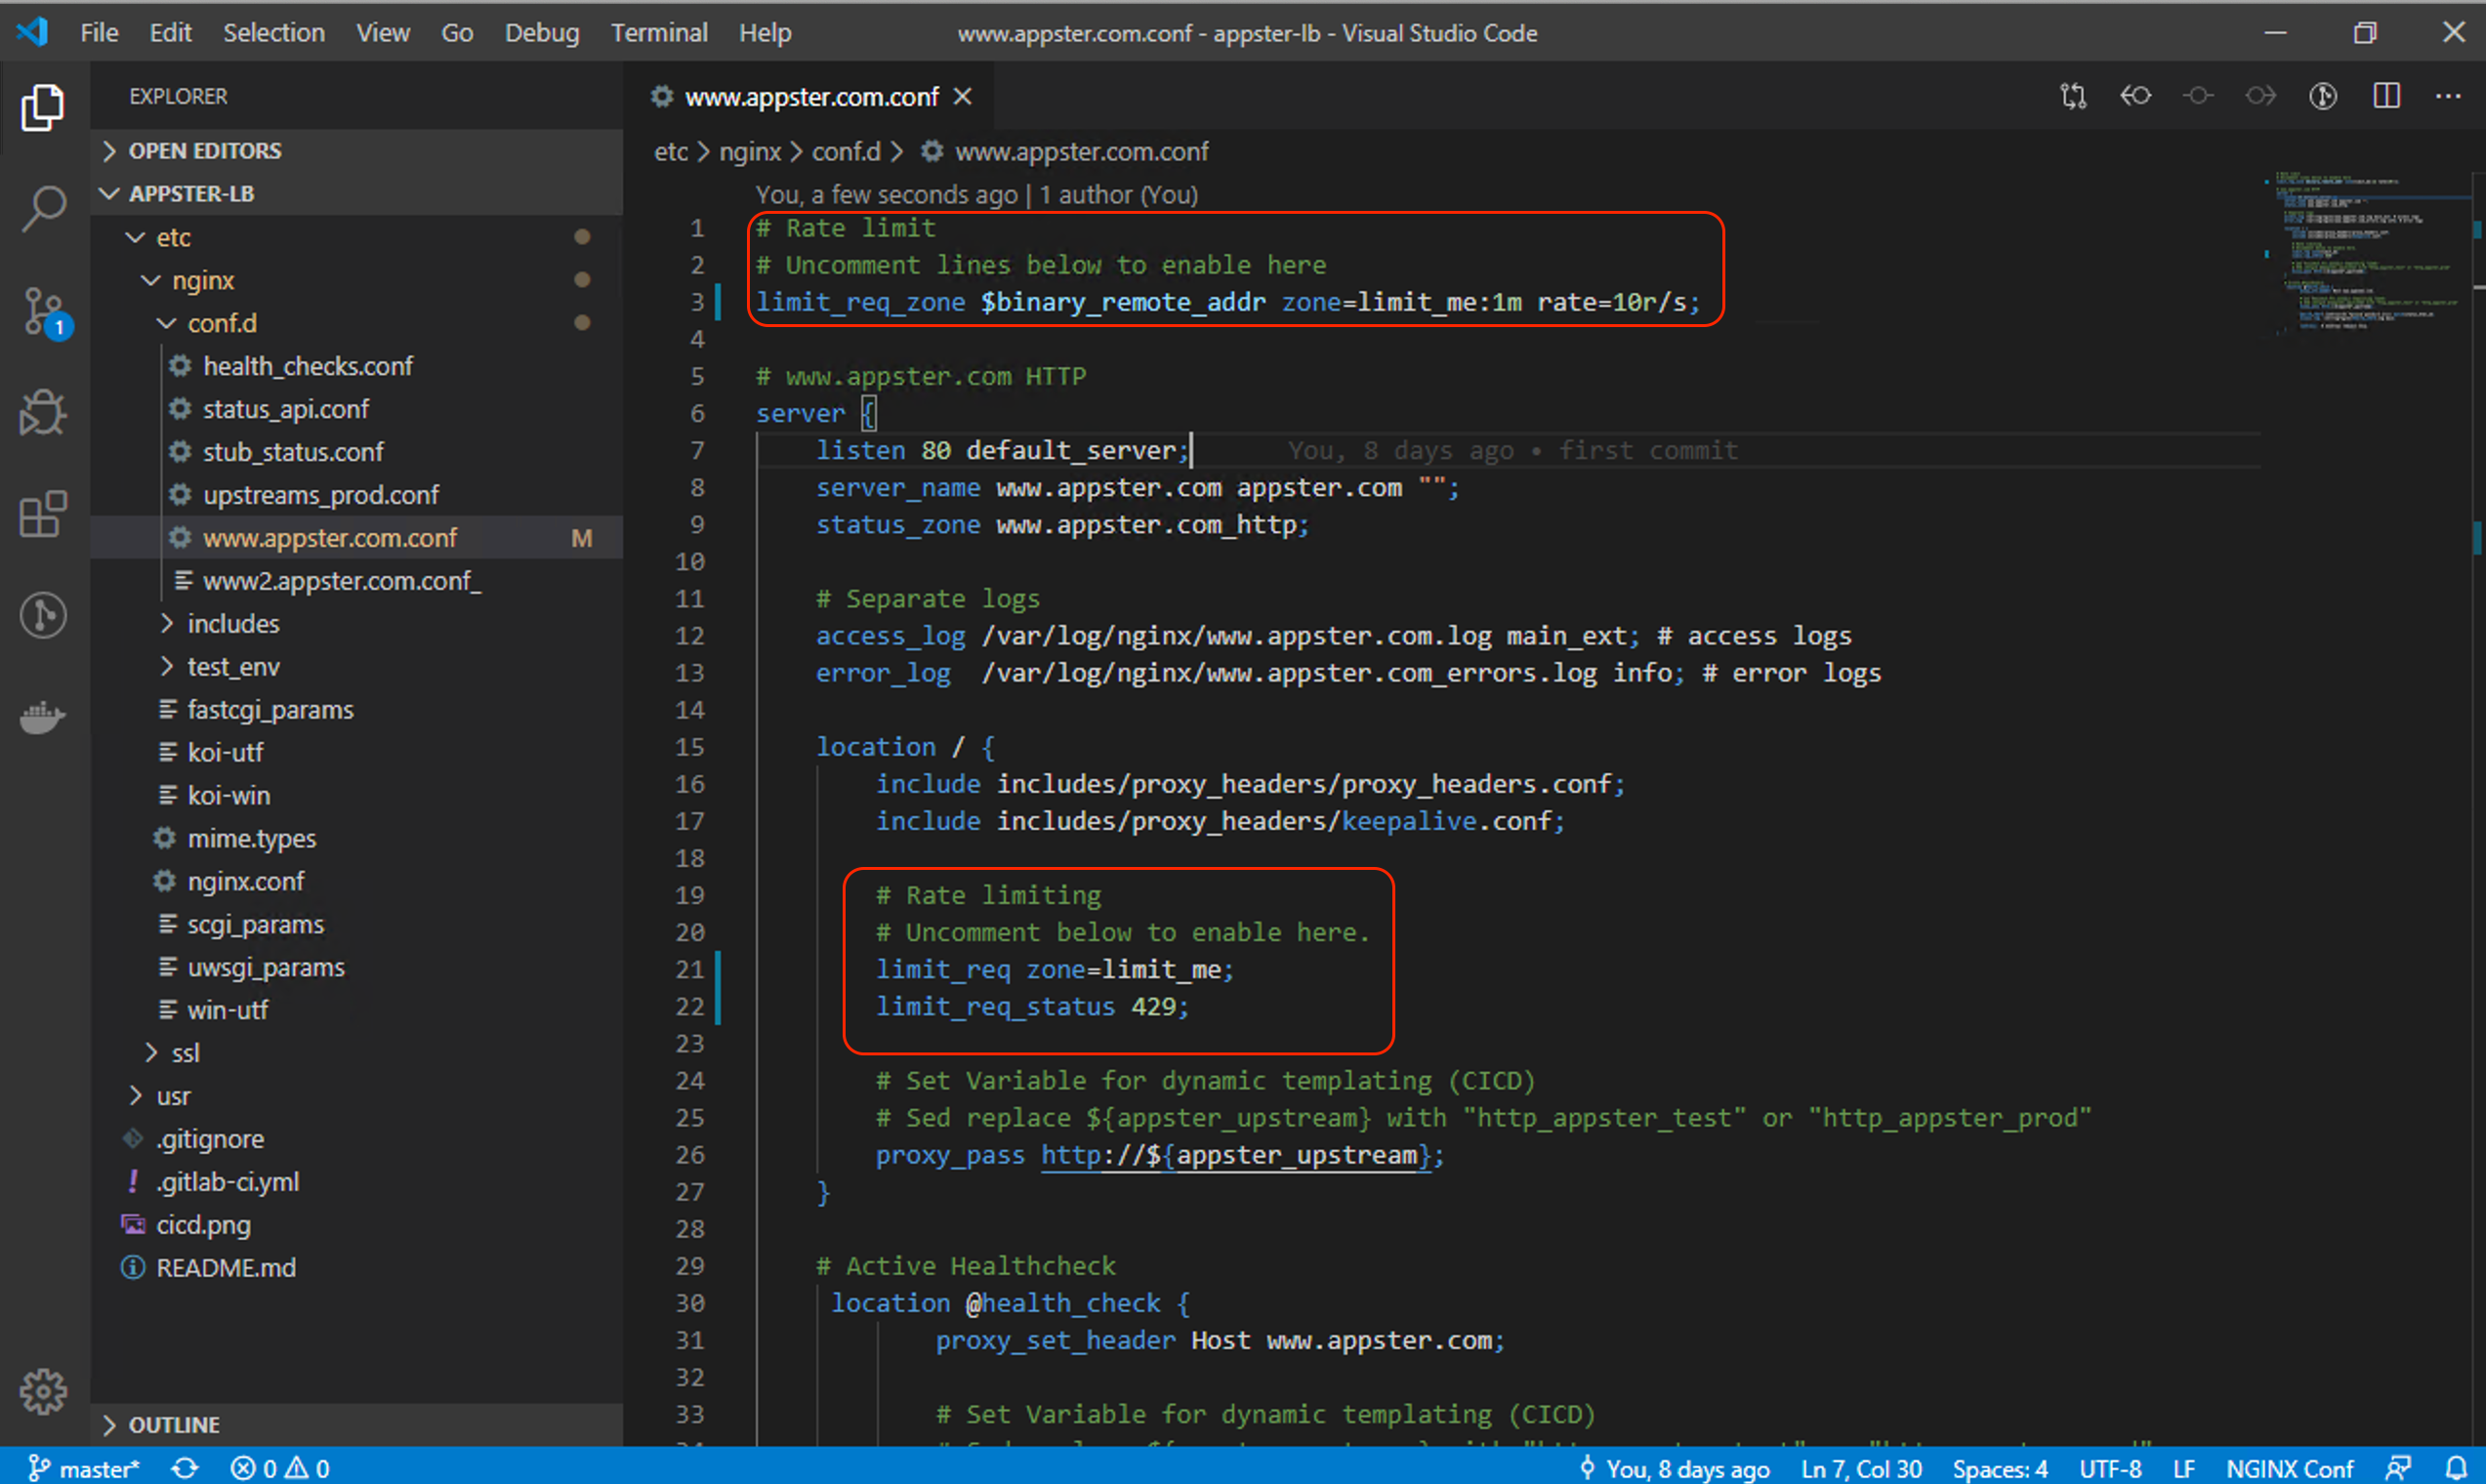
Once you have edited
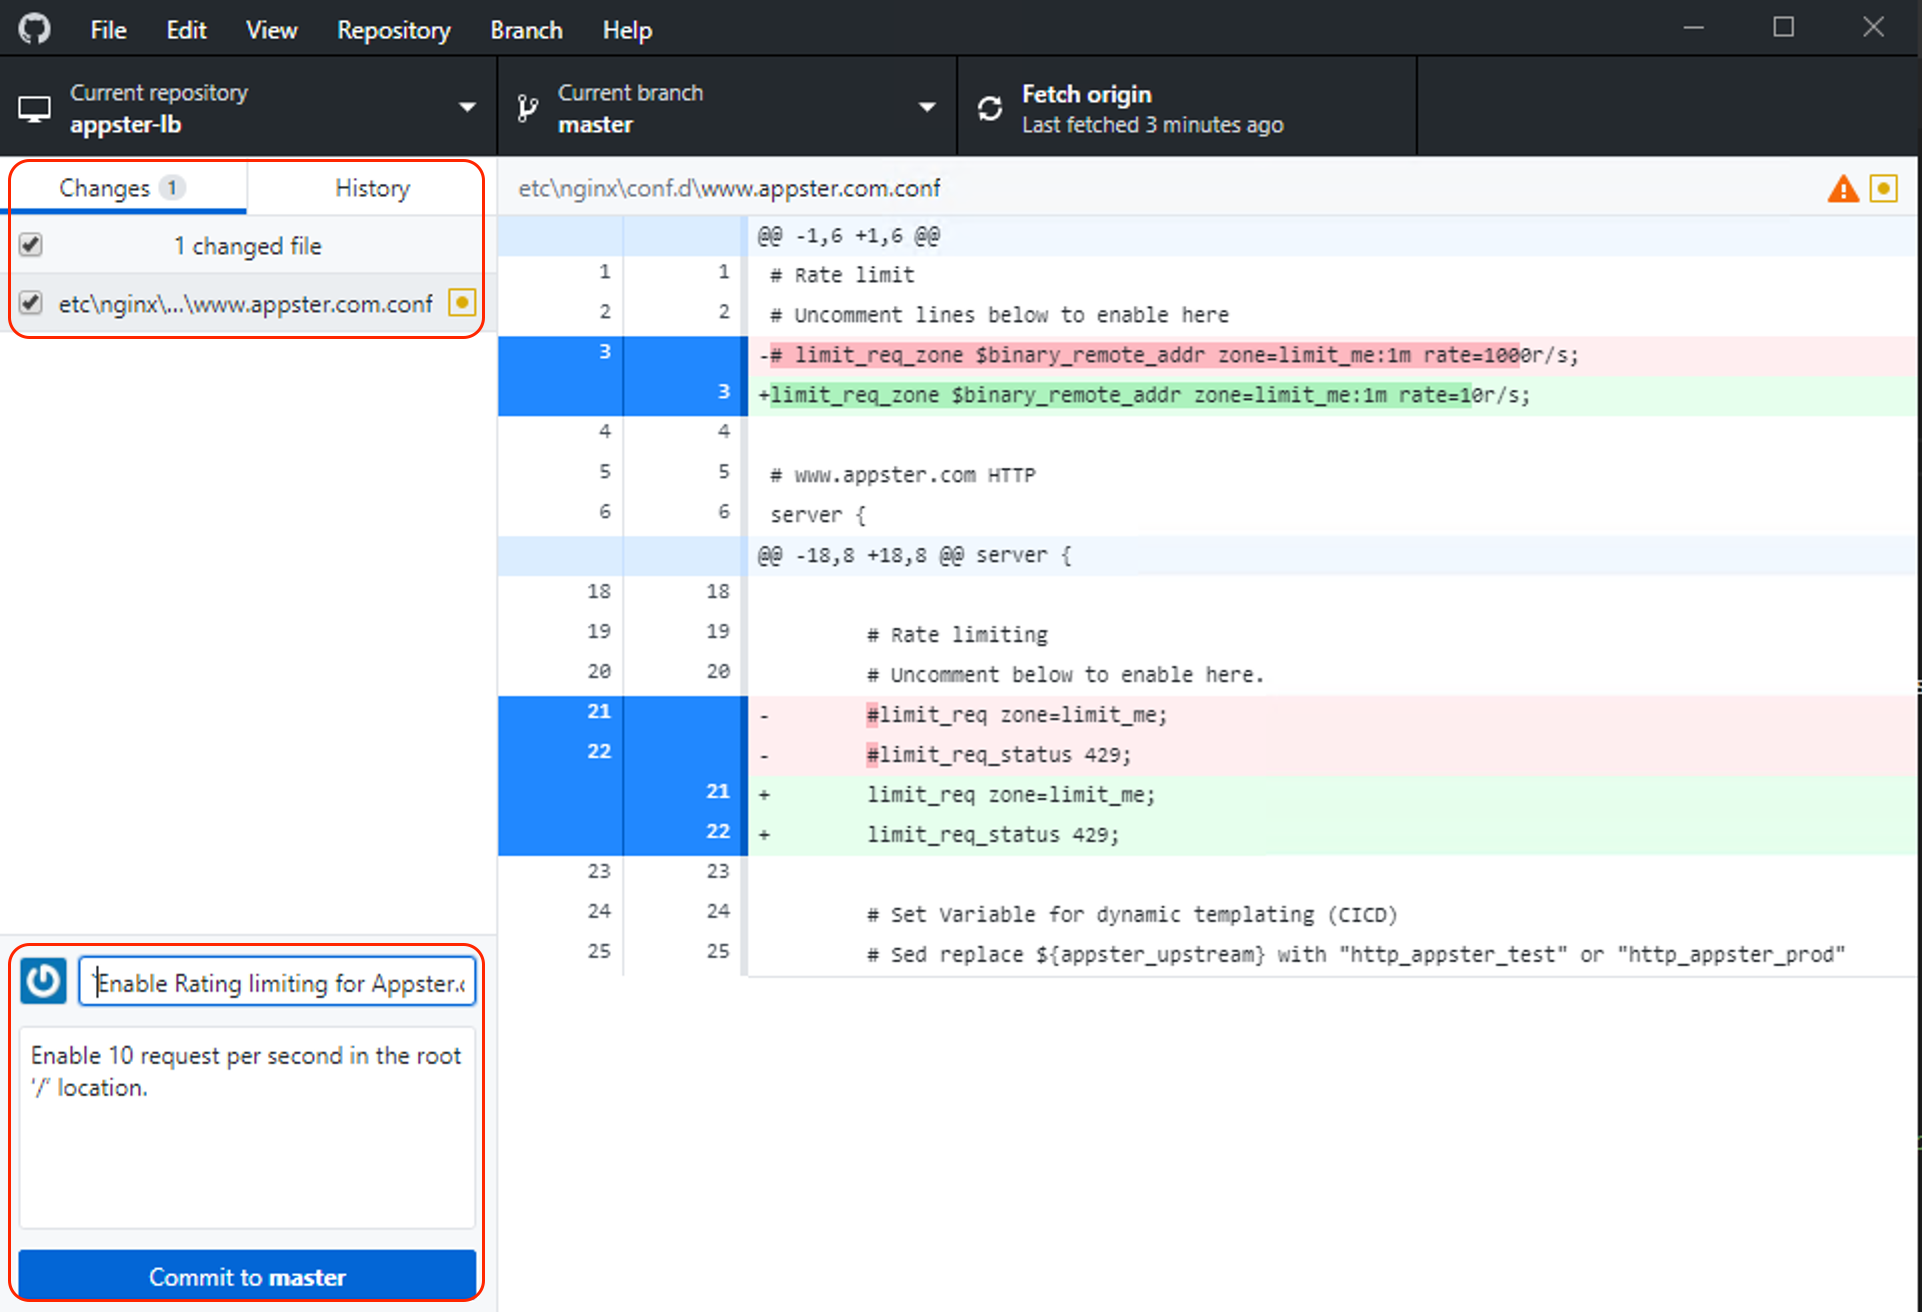
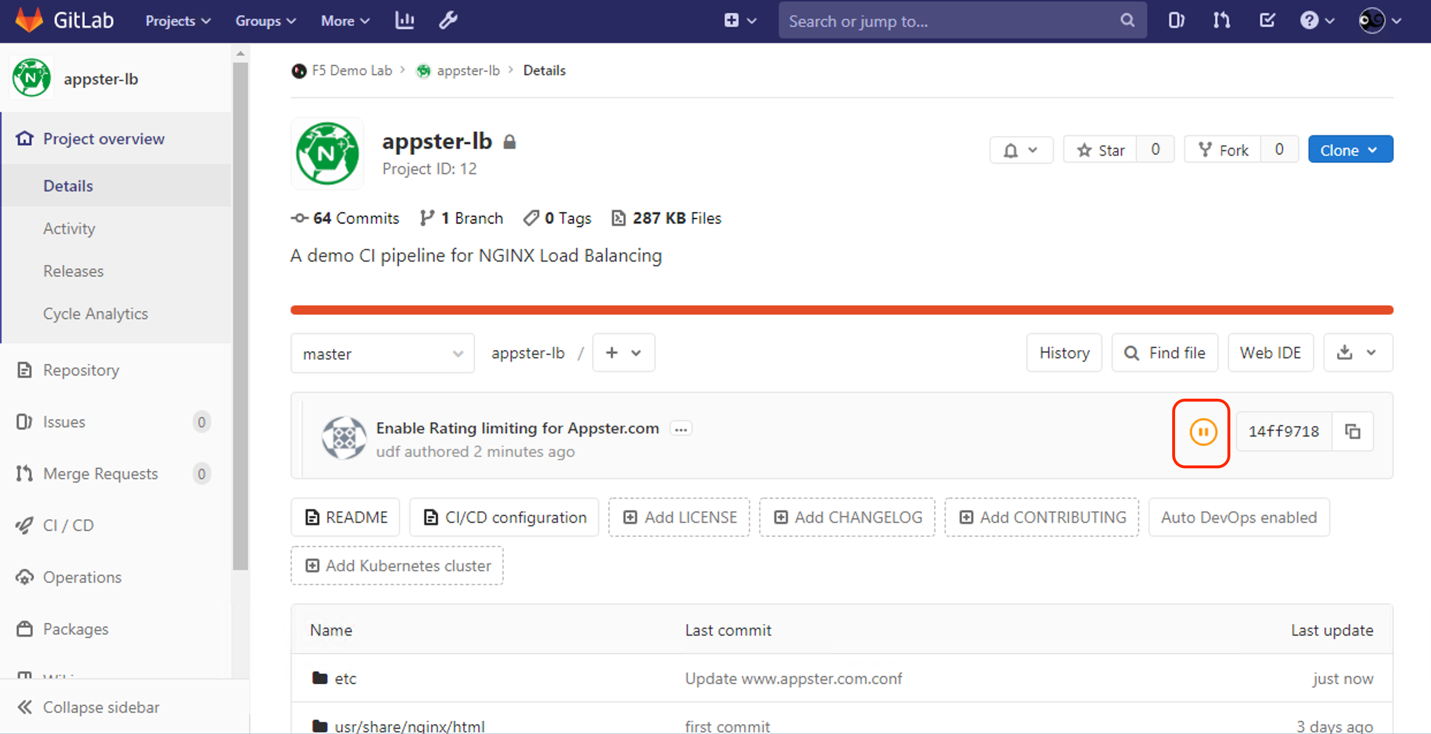
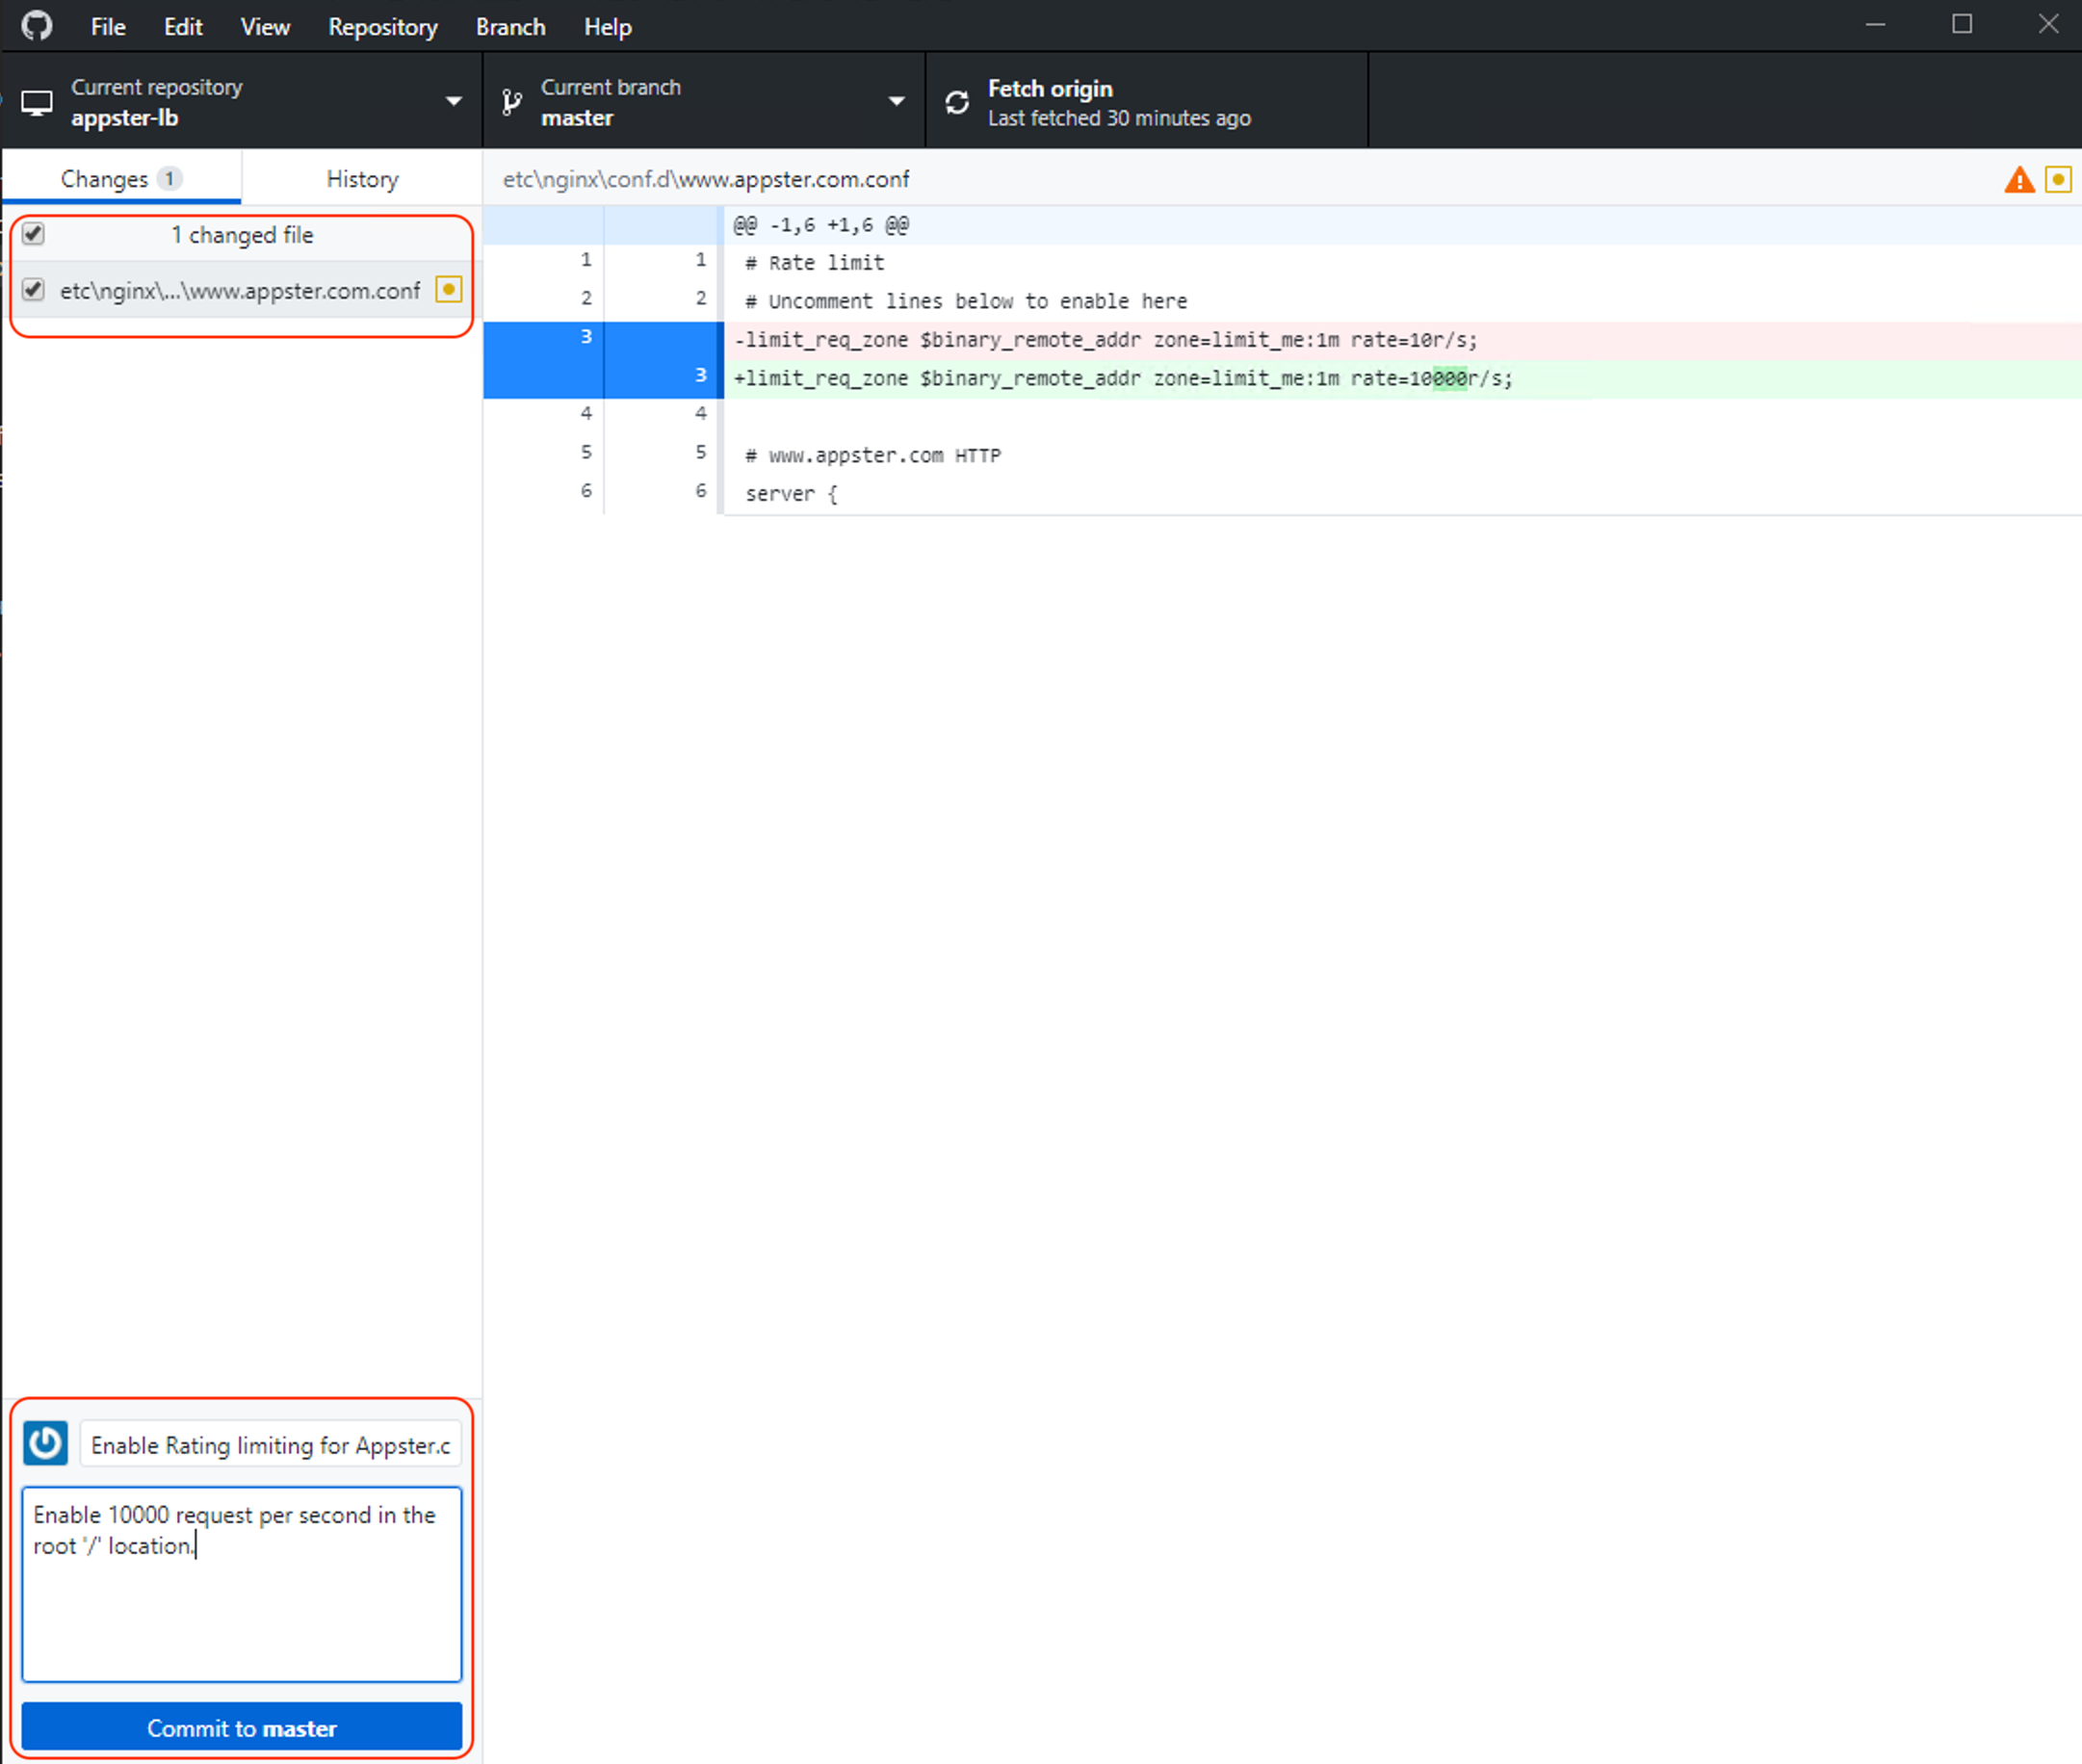
www.appster.com.confand uncommented the rate limiting directives, go ahead and save the file. You can navigate tofile->saveor you can use the shortcut, CTRL+S.We will see the tracked changes back on the GitHub Desktop Client. In the lower-left of the GitHub, Desktop Client provide a Commit title and note before we can commit to master.
You can see two boxes. Go ahead and type in the title field:
"Enable Rating limiting for Appster.com".Additionally, you can provide notes as well, type in the notes field:
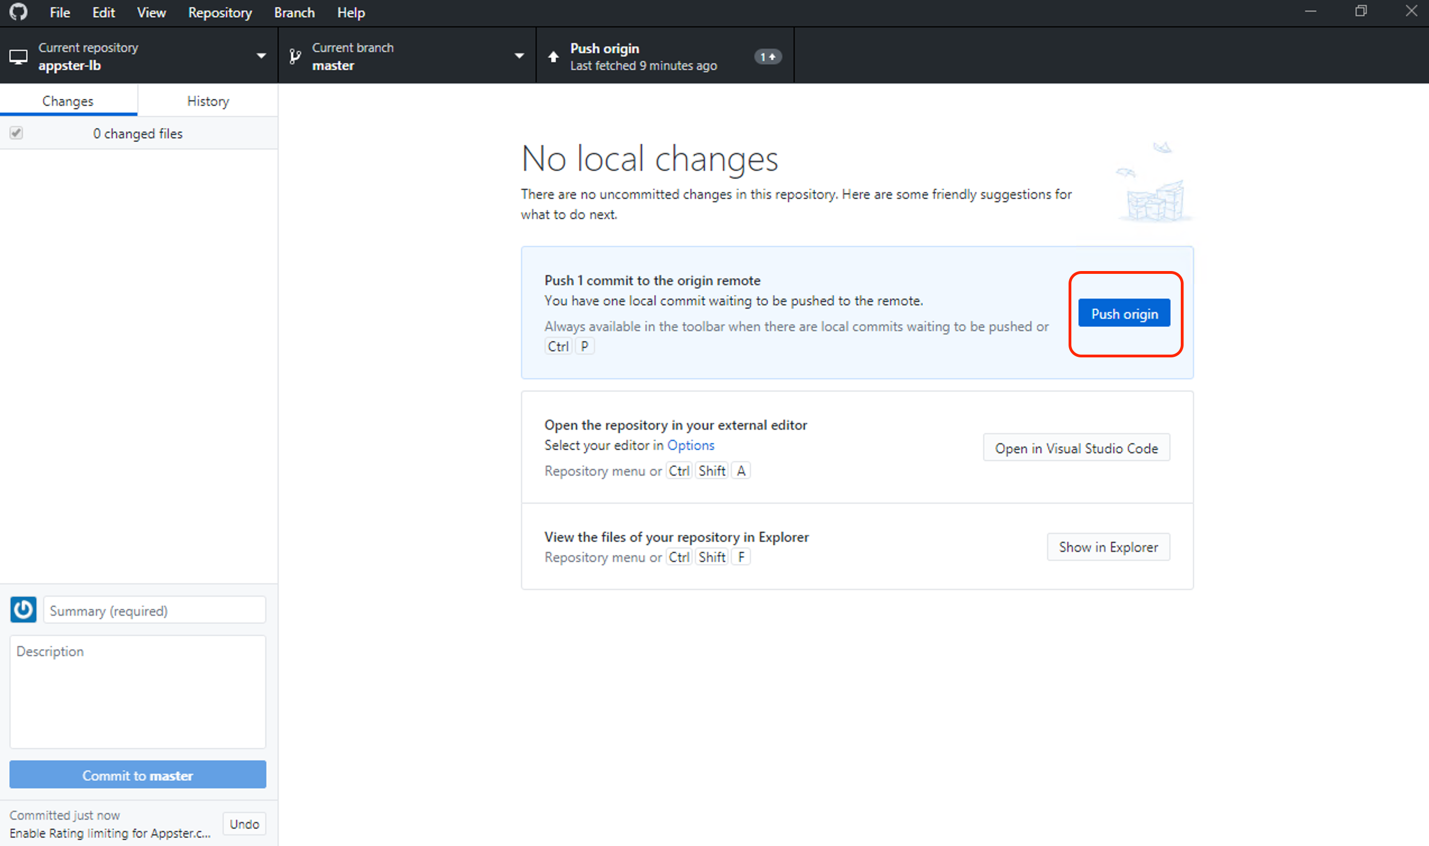
"Enable 10 request per second in the root '/' location."Once you fill in both boxes, click on Commit to Master and on the next screen, press “Push Origin” to push the new code commit to our git repository on Gitlab.
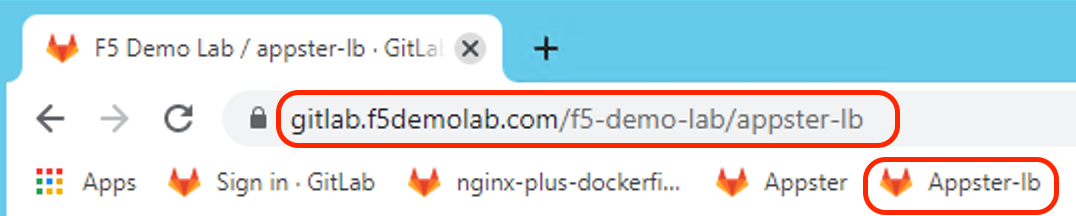
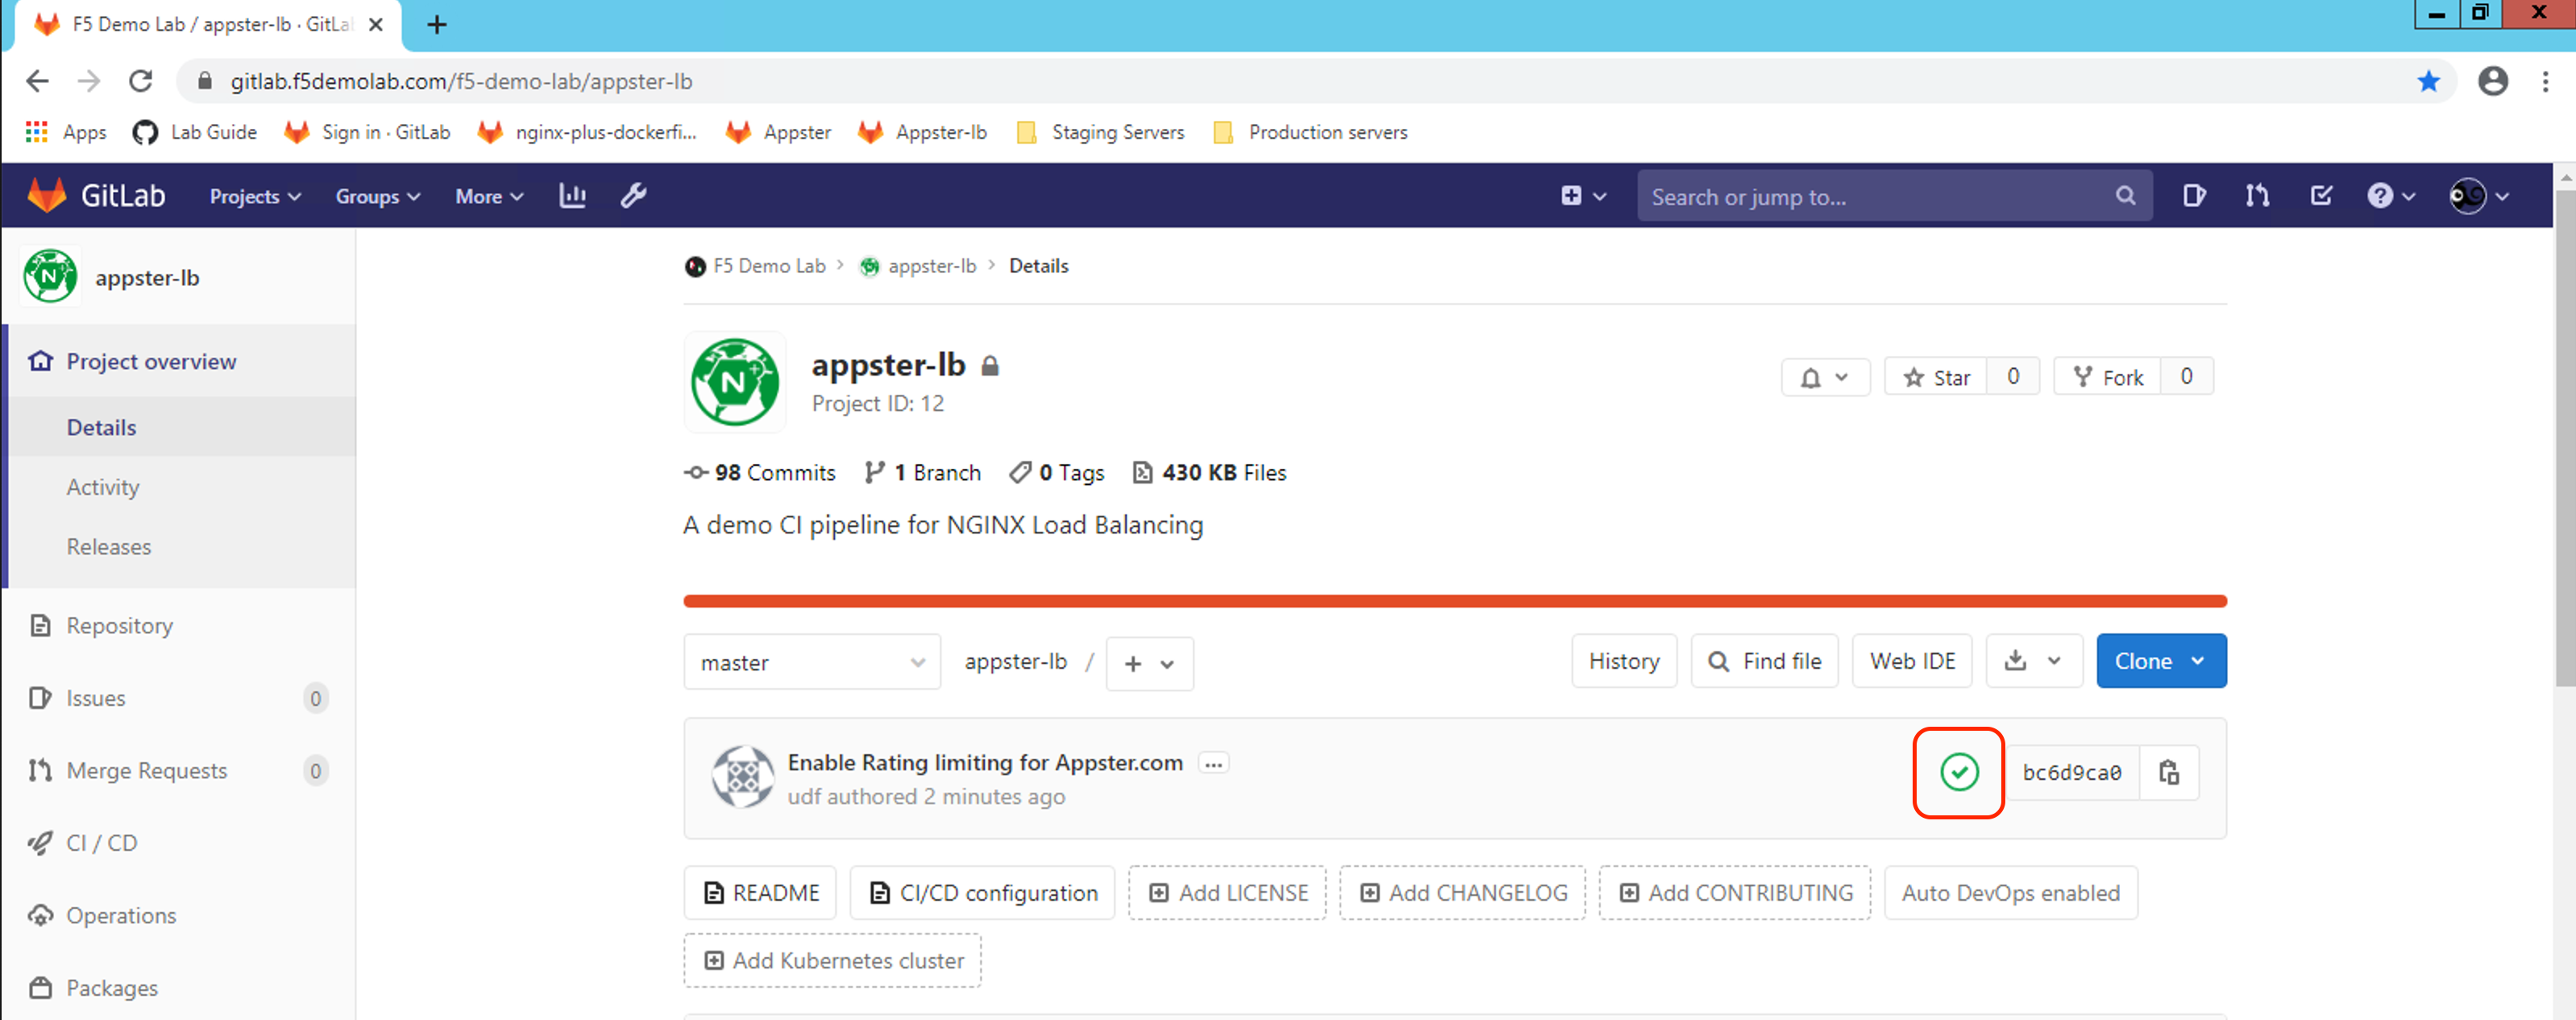
Open up the appster-lb repository on Gitlab by the URI, https://gitlab.f5demolab.com/f5-demo-lab/appster-lb or using the Appster-lb shortcut provided so we can view the pipeline in progress. (udf/P@ssw0rd20)
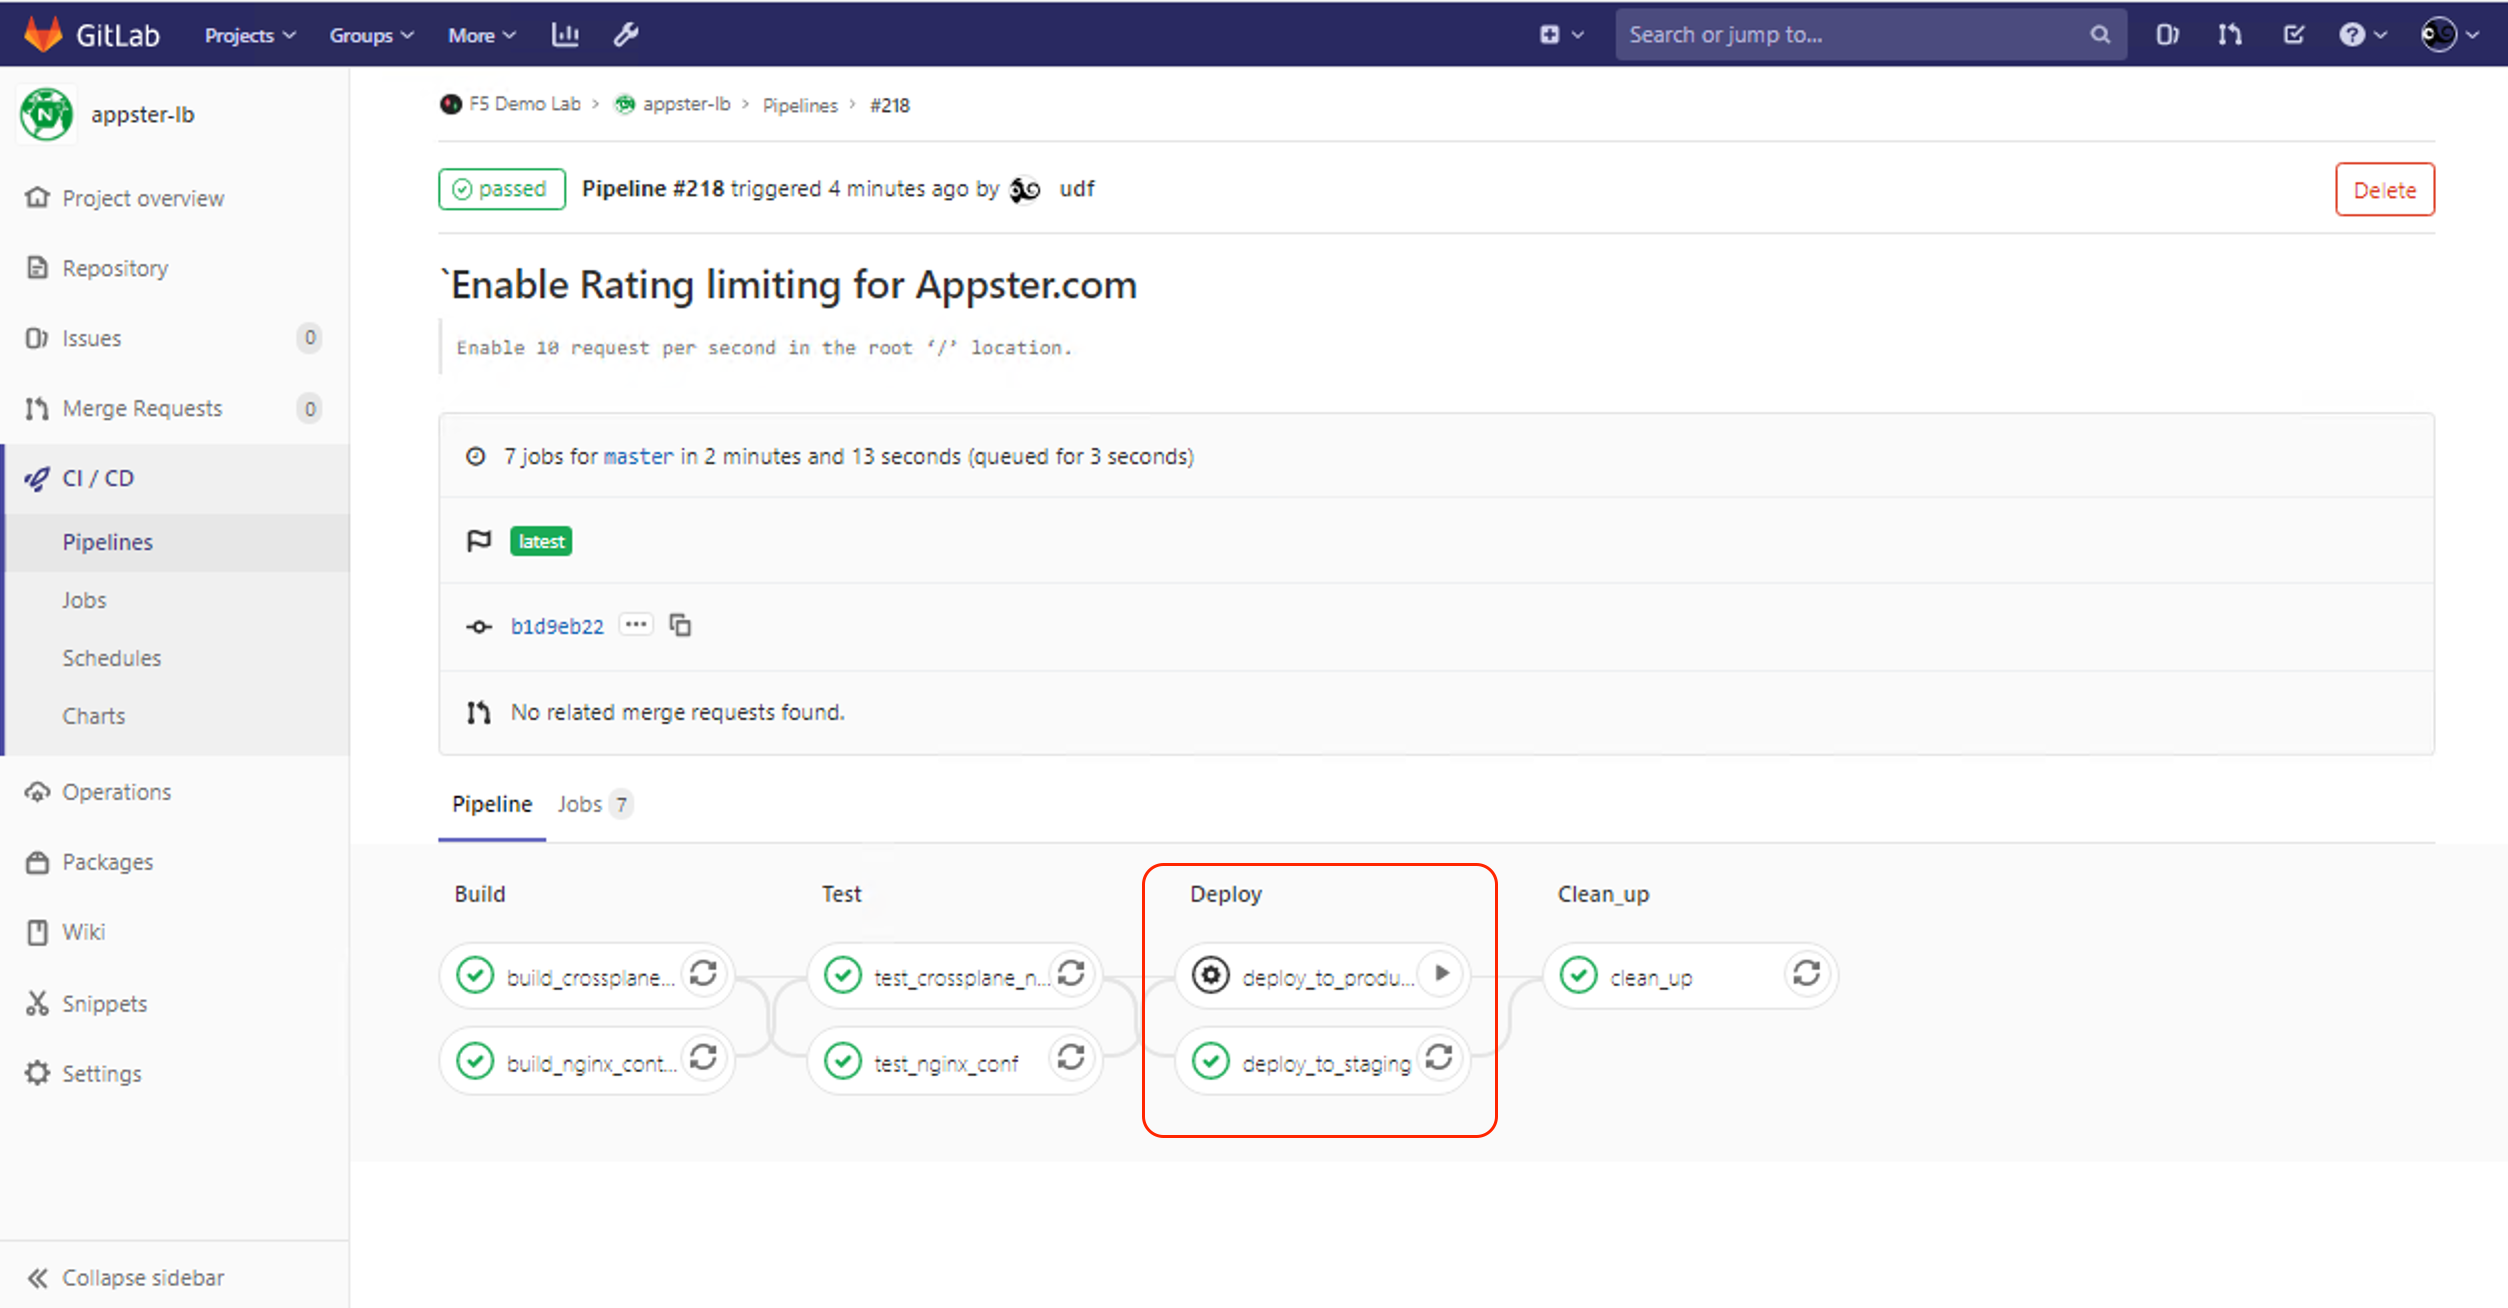
The pipeline is automatically triggered, and we can follow its progress by clicking the pipeline status icon on the main repo homepage and then pipeline status icon on the commit screen.
The next screen shows a high-level view of the pipeline triggered for this commit. We can click on the pipeline status icon on this screen to view the pipeline progress in greater detail.
Attention
Stop: This is a good time to inspect the GitLab CI/CD pipeline file, .gitlab-ci.yml, while waiting for the pipeline to complete.
- Look at stage,
test_nginx_conf, and see the first two step with thesedandfindcommand that starts with. These command uncomments this lineinclude /etc/nginx/test_env/*.confin ournginx.conffile and replaces the placeholder${appster_upstream}withhttp_appster_testin our configurations files to enables a test localhost/loopback upstream to test against. - Look at stage,
deploy_to_staging, and compare to the stage,deploy_to_production, Do you seewhen: manual? This enforces a manual trigger to deploy to production! - In stages,
deploy_to_staging:anddeploy_to_productionyou can see:apk add rsyncandrsync -avrzI ...which allow us install the remote sync tool and then later deploy the files to the remote servers
Eventually, we will see the pipeline complete. At this stage, the build and tests have passed, and we are ready to test on our Staging server. After QA testing on our Staging environment, we can decide to deploy to Production or proceed to fix issues discovered and iterate on another code commit
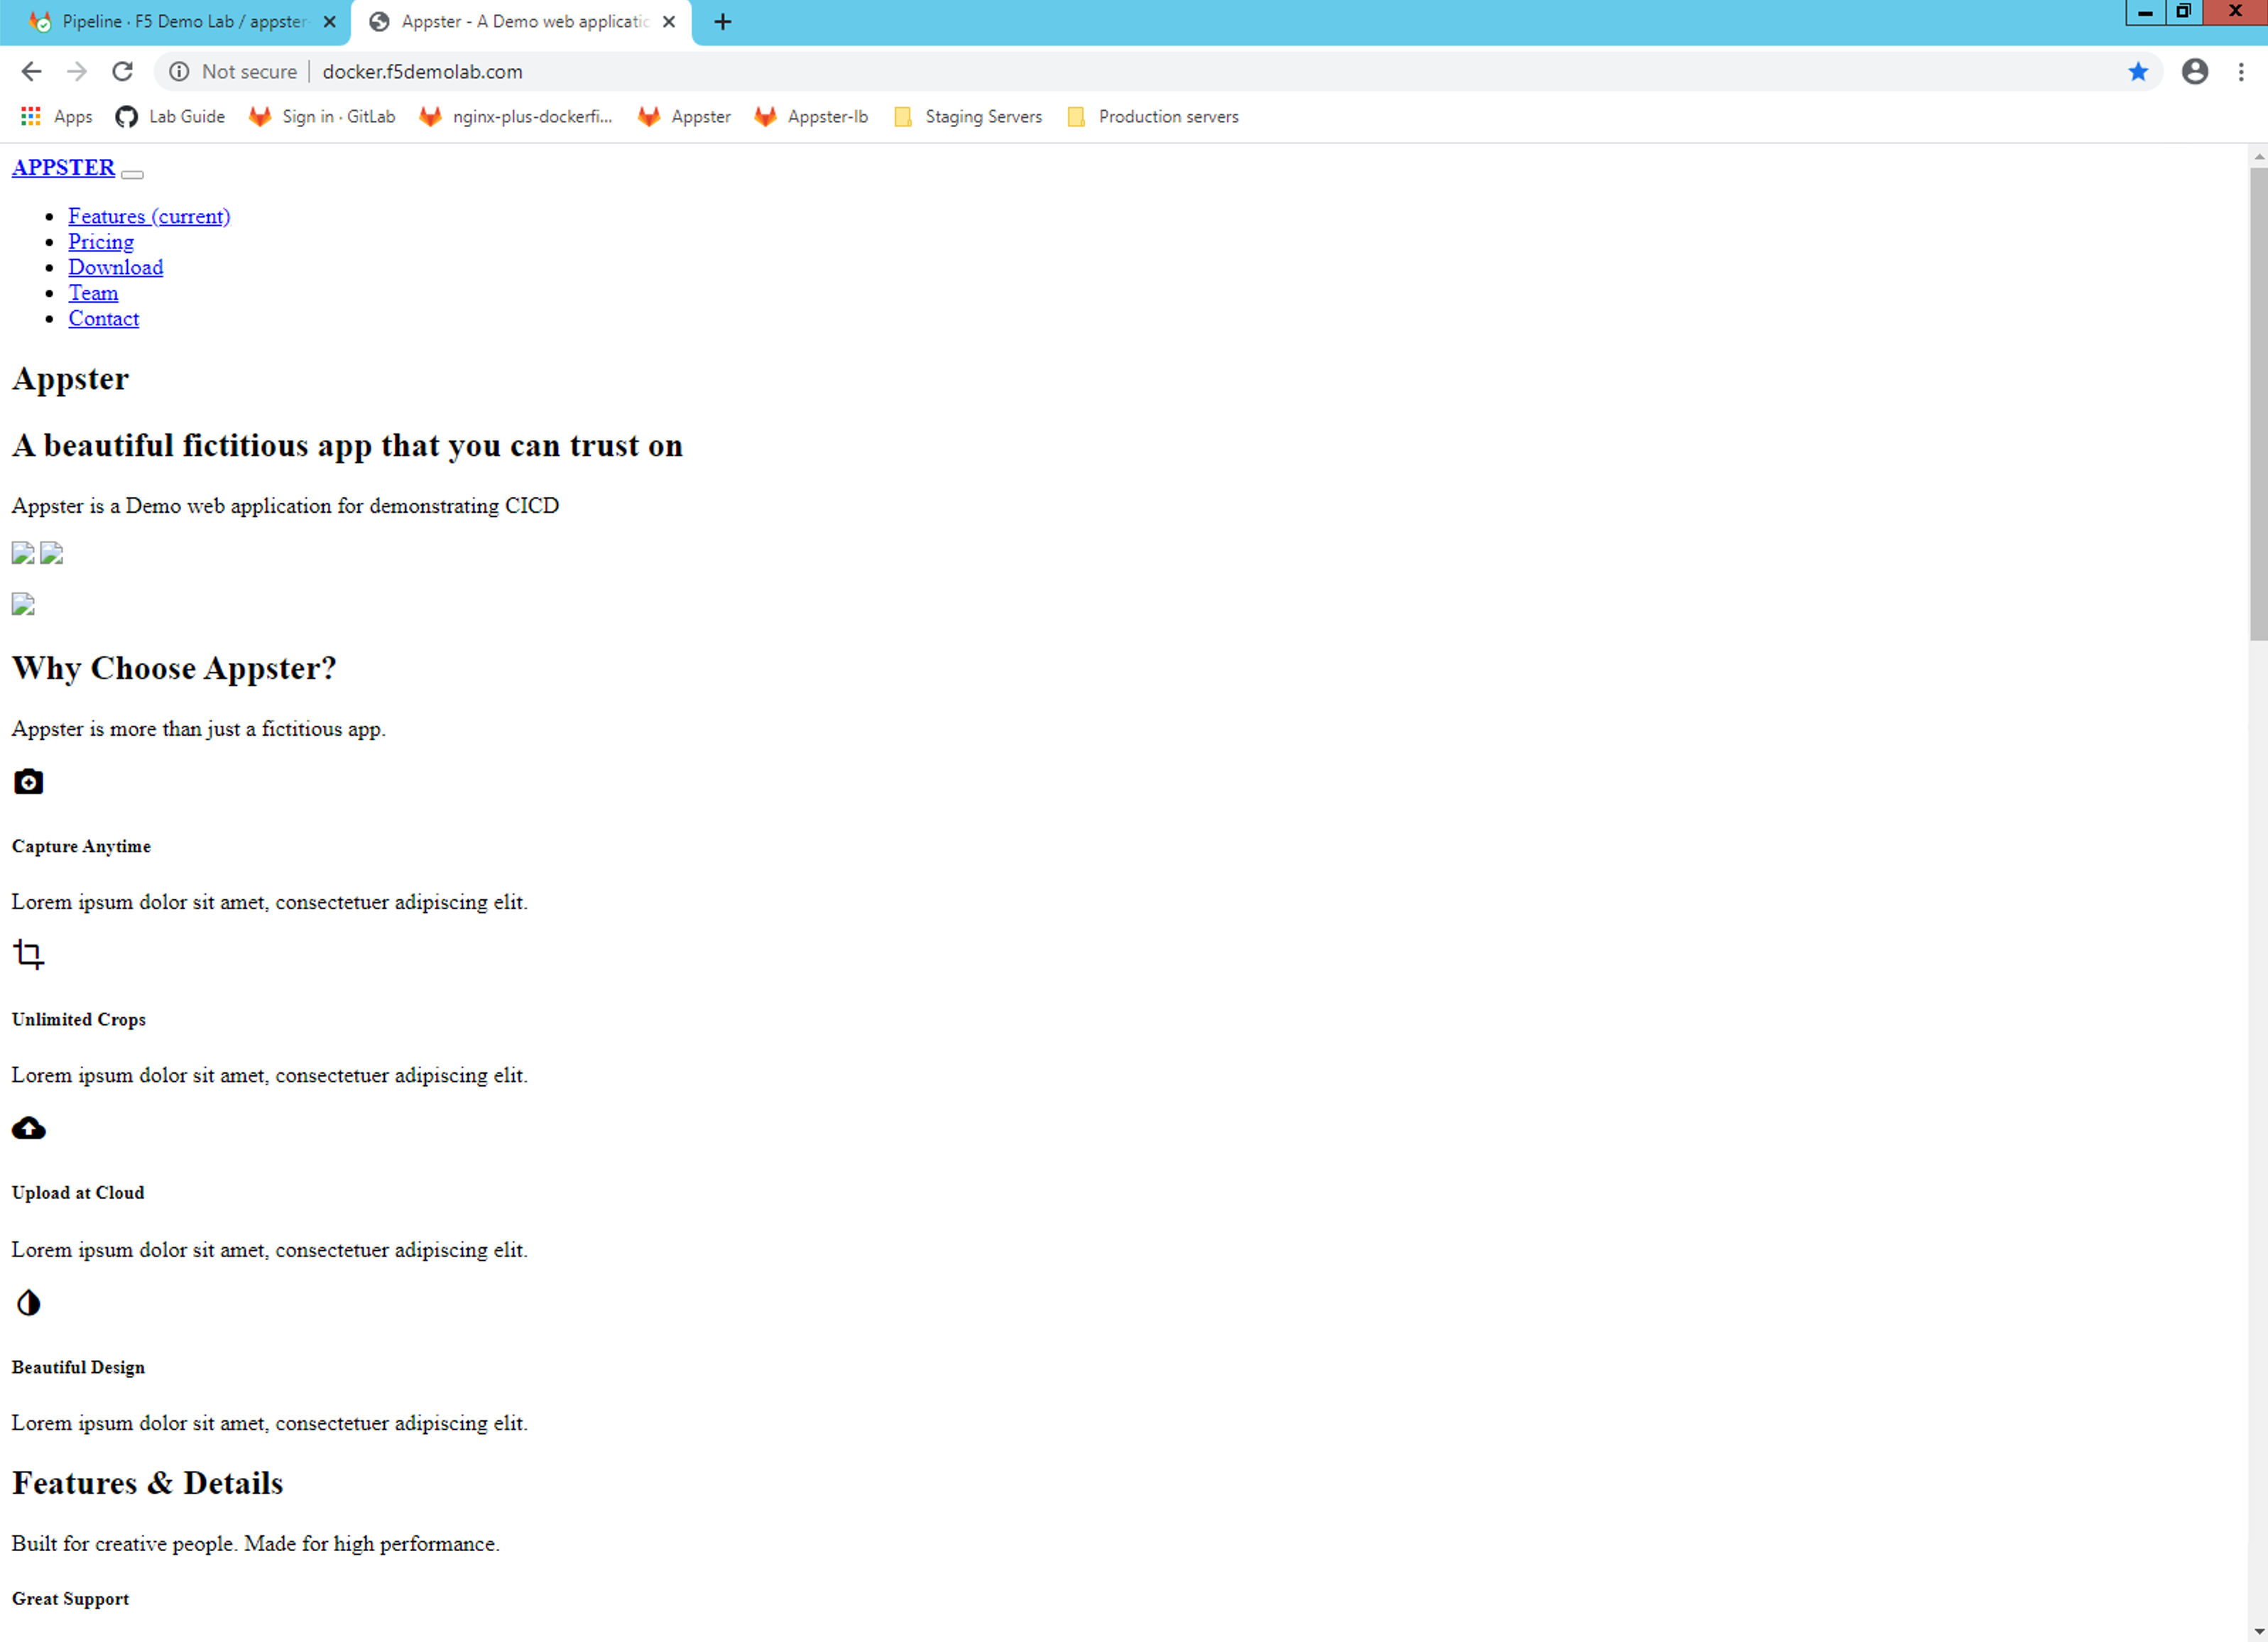
Let’s play QA Engineering and do some testing on our Staging environment. View our Staging NGINX Plus service in a browser on the URI, http://docker.f5.local, or use the shortcut, STAGING LB - Appster

You will see that rate limiting ten request per second results in missing web page content and broken UI, worst you may even get a
HTTP 429 Error page! Not a something we would like to do in production obviously!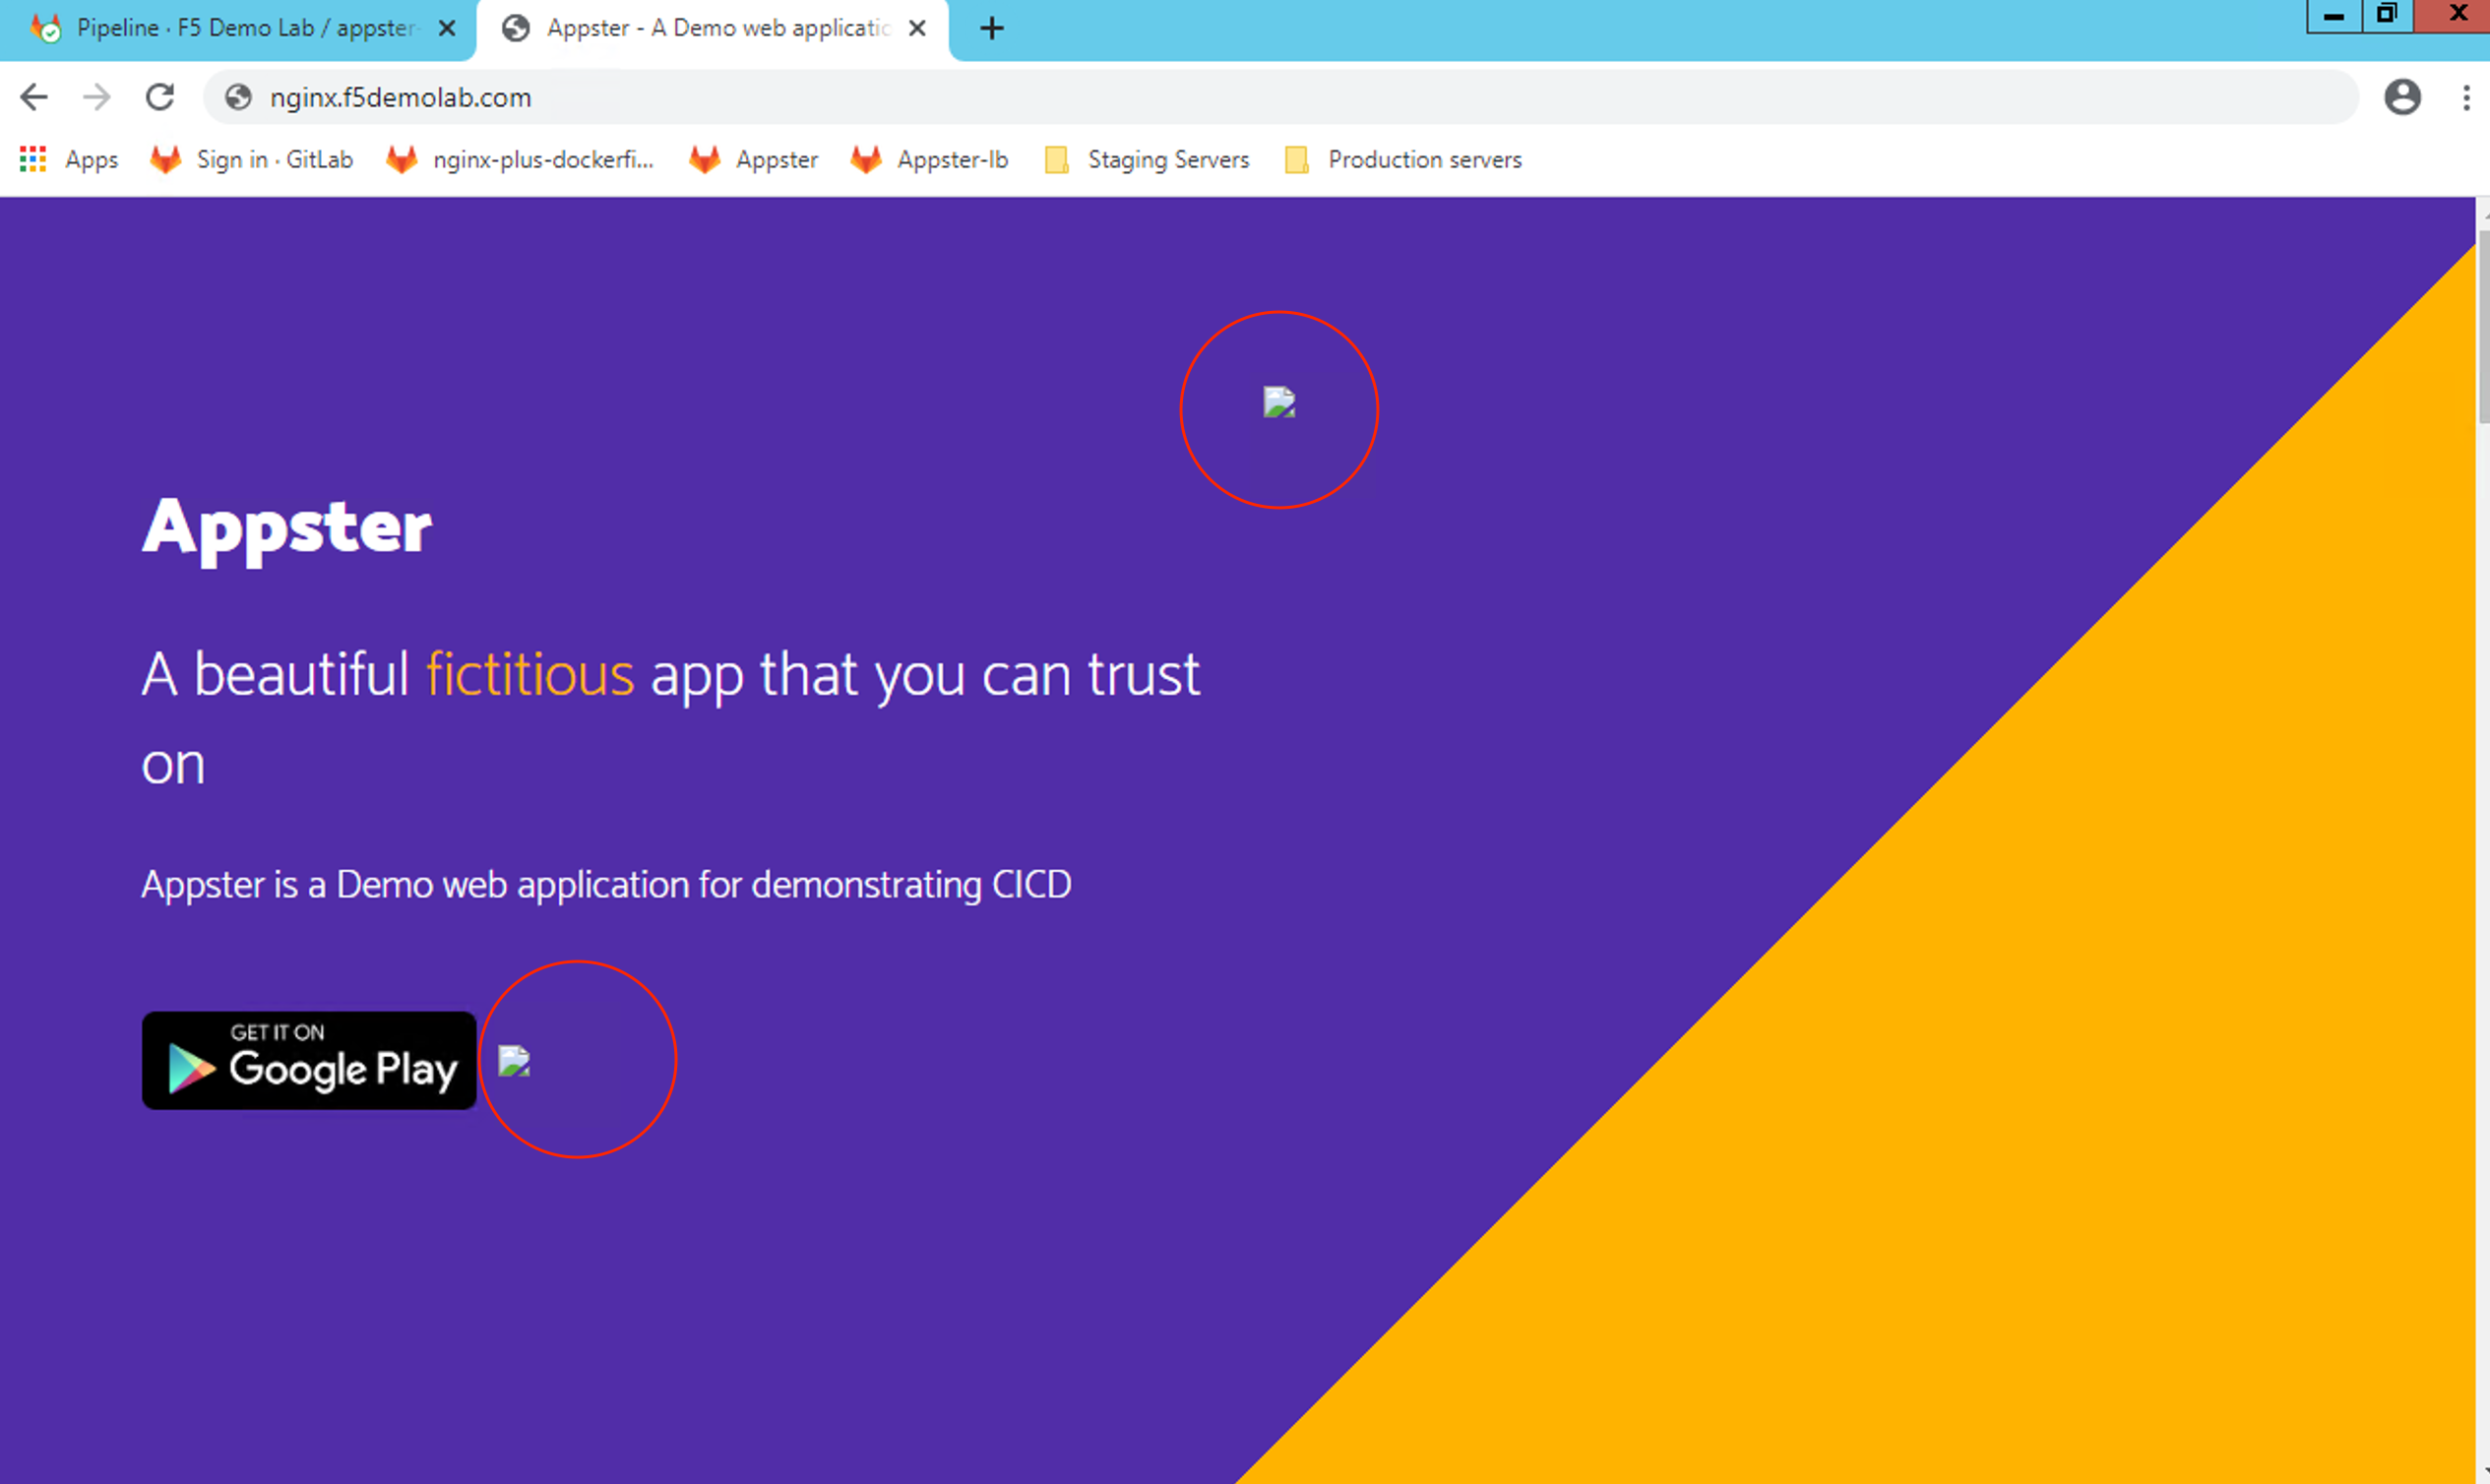
Or perhaps the errors look more severe!
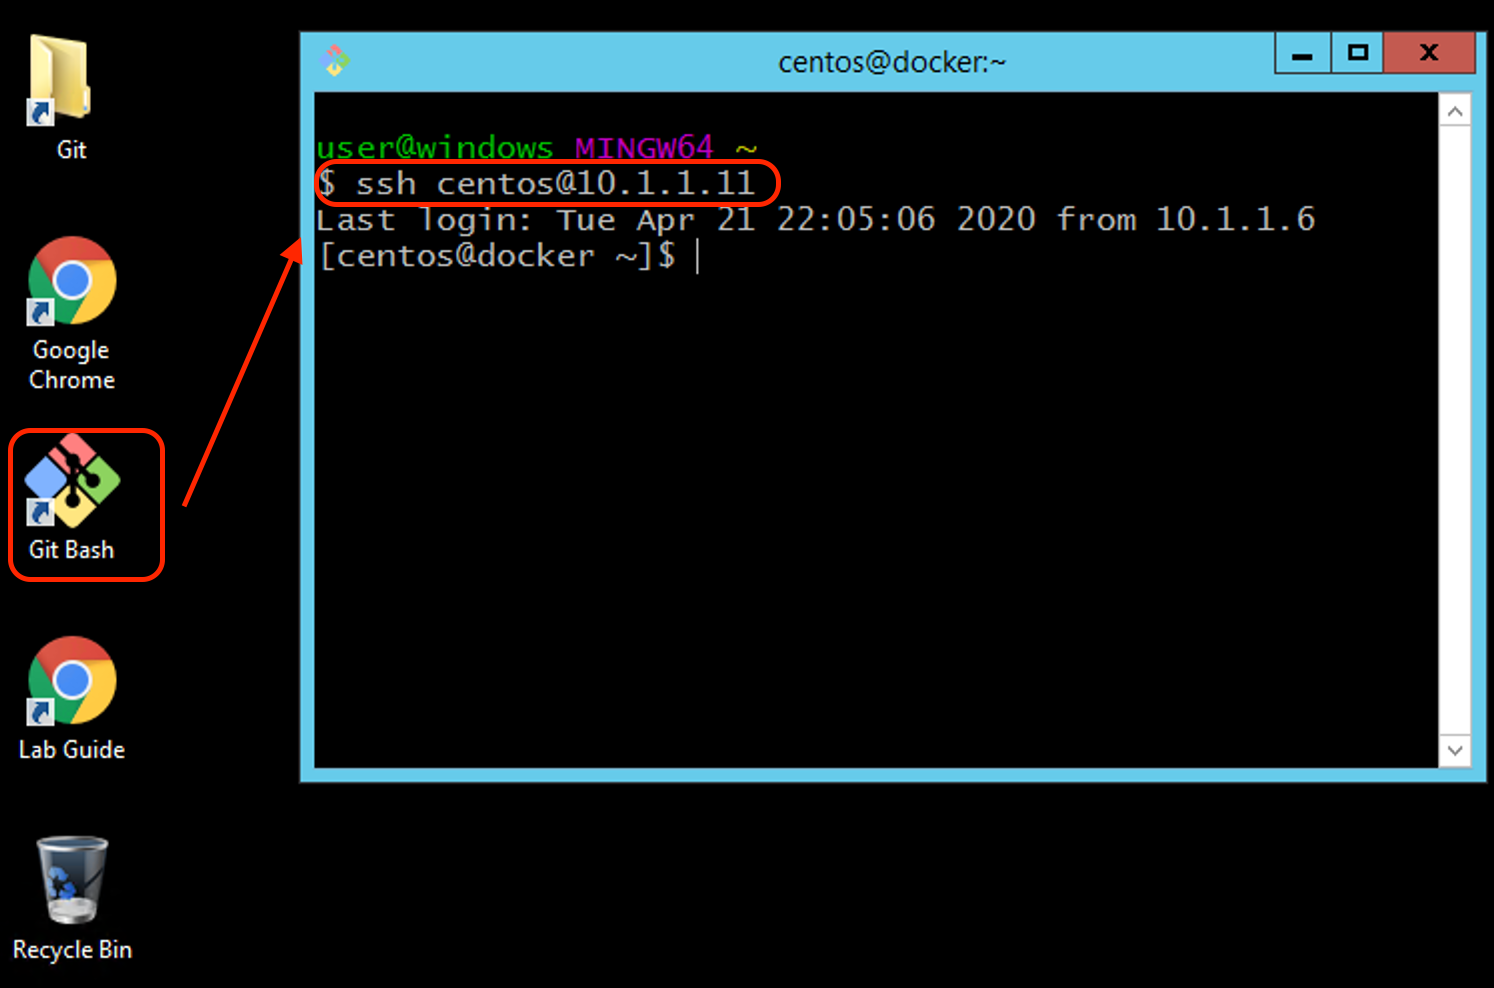
If you would like to see the rate limiting rule applied against a load test, Open an SSH session using git bash for windows to our Staging server and run vegeta load tester running the following command.
To open git bash for windows again open the Git Bash icon on the Windows desktop. Git Bash is a bash shell emulator, similar to what you see natively on Linux and Unix machines. If the git console font is too small to read, use Ctrl+ “+” to increase the font
Once git bash for windows is open, run the following command to SSH into the Staging server:
ssh centos@10.1.1.11
On the Staging Server go ahead and run the following command to test 1000 requests per second against the staging NGINX Plus instance servicing our Appster web application:
$ echo "GET http://10.1.1.11" | vegeta attack -rate=1000/s -duration=1s | vegeta report

Requests [total, rate, throughput] 1000, 1001.47, 10.01
Duration [total, attack, wait] 998.672ms, 998.536ms, 135.683µs
Latencies [min, mean, 50, 90, 95, 99, max] 124.393µs, 166.802µs,
144.693µs, 167.041µs, 179.706µs, 1.133ms, 2.023ms
Bytes In [total, mean] 349960, 349.96
Bytes Out [total, mean] 0, 0.00

Success [ratio] 1.00%
Status Codes [code:count] 200:10 429:990

Error Set:
429 Too Many Requests
We should see around ten
HTTP200requests and the remainder of the requestHTTP429"Too many requests"Play around with the rate-limiting settings until you feel comfortable pushing new rate-limiting settings to Production:
You can edit
etc/nginx/conf.d/www.appster.com.conflive on the Staging server terminal, change therateparameter to a higher number i.e.- To edit using
vimrun:
sudo vim /etc/nginx/conf.d/www.appster.com.conf
- Or
nano:
sudo nano /etc/nginx/conf.d/www.appster.com.conf
- We can change the rate to something much higher,
- i.e.
10000/rs
limit_req $binary_remote_addr zone=limit_me:1m rate=10000r/s;
Remember to save changes to our file
- In
vimtype:wq!to save and quit - In
nanotypeCTRL+Xand accept to save changes and quit
- In
If you did make changes, remember to check the nginx configuration syntax then reload NGINX with the new config:
$ sudo nginx -t && sudo nginx -s reload

nginx: the configuration file /etc/nginx/nginx.conf syntax is ok
nginx: configuration file /etc/nginx/nginx.conf test is successful
- To edit using
We can now rerun the
vegetaload generator test using the same command run in the previous step and view the user experience through the web browserIf you are happy with your testing, we need to commit the new code to our git repository, so changes are tracked!
Note
This Staging and Production servers in this lab can handle limited load Do not expect more that 800 request per second through the load balancer
Open
www.appster.com.confand increase the 10 requests per second to 10000 requests per second on our rating limiting rule:# Rate limit # Uncomment lines below to enable here limit_req $binary_remote_addr zone=limit_me:1m rate=10000r/s;
Once you have edited
www.appster.com.confand increased the rate limit, go ahead and save the file. You can navigate tofile->saveor you can use the shortcut, CTRL+S.We will see the tracked changes back on the GitHub Desktop Client. In the lower-left of the GitHub, Desktop Client provide a Commit title and note before we can commit to master.
You can see two boxes. Go ahead and type in the title field:
"Enable Rating limiting for Appster.com".Additionally, you can provide notes as well, type in the notes field:
"Enable 10000 request per second in the root '/' location."Once you fill in both boxes, click on Commit to Master and on the next screen, press “Push Origin” to push the new code commit to our git repository on Gitlab.
Open up the appster-lb repository on Gitlab by the URI, https://gitlab.f5demolab.com/f5-demo-lab/appster-lb or using the Appster-lb shortcut provided so we can view the pipeline in progress
The pipeline is automatically triggered, and we can follow its progress by clicking the pipeline status icon on the main repo homepage and then pipeline status icon on the commit screen.
Once our pipeline has completed, our new rate limiting configuration is automatically deployed to our Staging server.
Once again have a quick check on staging or use the load test tool,
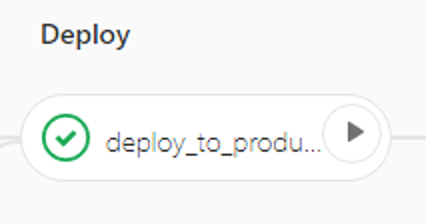
vegetaonce again. Once you have validated the changes we can push to production!Remember we have purposely left deployment to Production to a human trigger, press the Play button to deploy the new code to Production. We can click on the title to the progress of the deployment stage in realtime.
A green tick on this stage indicates a successful deployment and we are now live in Production!
Attention
Congratulations on completing the lab!
Thank you for your interest in the NGINX CI/CD lab. We hope you have found this lab to be valuable. For more information on NGINX Plus, please visit https://www.nginx.com