Deploy F5 BIG-IP Virtual Edition in IBM Cloud VPC Gen 2
Create an F5® BIG-IP® VE instance using an IBM Cloud catalog image. The IBM Catalog deployment uses IBM Schematics, IBM’s cloud-deployed Terraform. Schematics automatically create a workspace for deployments, where it saves the current state of the instance. Therefore, F5 recommends that when you want to destroy the virtual instance created in the catalog, delete the workspace you used.
Recommended Compute Profiles
F5 recommends that you use one of the listed Compute-based Profiles that match your particular BIG-IP VE requirements listed in this K14810: BIG-IP VE license and throughput limits article.
As an example, to support a 1Gb BEST license, F5 recommends using the cx2-8x16 (8 vCPU, 16GB RAM) IBM instance type.
Note
Currently, IBM Cloud network bandwidth for the entire instance is distributed equally across all network interfaces as described here.
Recommended image naming convention
The Terraform code looks for the first unique image name referenced by the defined image string. Therefore, when
launching F5 BIG-IP VE images, either from the IBM Catalog or the GitHub repository, use the following naming conventions for tmos_image_name:
bigip-major-minor-maintenance-port(if any maintenance port exists)For example, to launch the 15.1.7-0.0.6 TMOS image, use
bigip-15-1-7as thetmos_image_name. To launch 14.1.4.6-0.0.8, usebigip-14-1-4-6.When launching the latest version of a major TMOS release, specify the first two parameters ONLY (
bigip-major).For example, to use the latest TMOS 15.1 release, for the
tmos_image_name, usebigip-15-1.
Prerequisites
- Account access to IBM VPC Gen 2.
- Your VPC must have at least one subnet with one IP address unassigned (supports a maximum of 5 subnets)
- The BIG-IP™ image name can reference the name of a custom image in your supported region or the following public TMOS images available on IBM cloud. For a complete list of supported BIG-IP VE releases, consult the VE Support Matrix.
- Supported regions include:
- us-south
- us-east
- eu-de
- eu-gb
- jp-tok
- jp-osa
- au-syd
- ca-tor
- br-sao
- Template uses F5 Automation and Orchestration declaration URL downloads. This is a new feature in tmos-cloudinit. You must use custom VPC images that are patched with the latest version of tmos-cloudinit modules. The globally available images in the IBM catalog already support this requirement.
Deploy VE image from the IBM VPC catalog
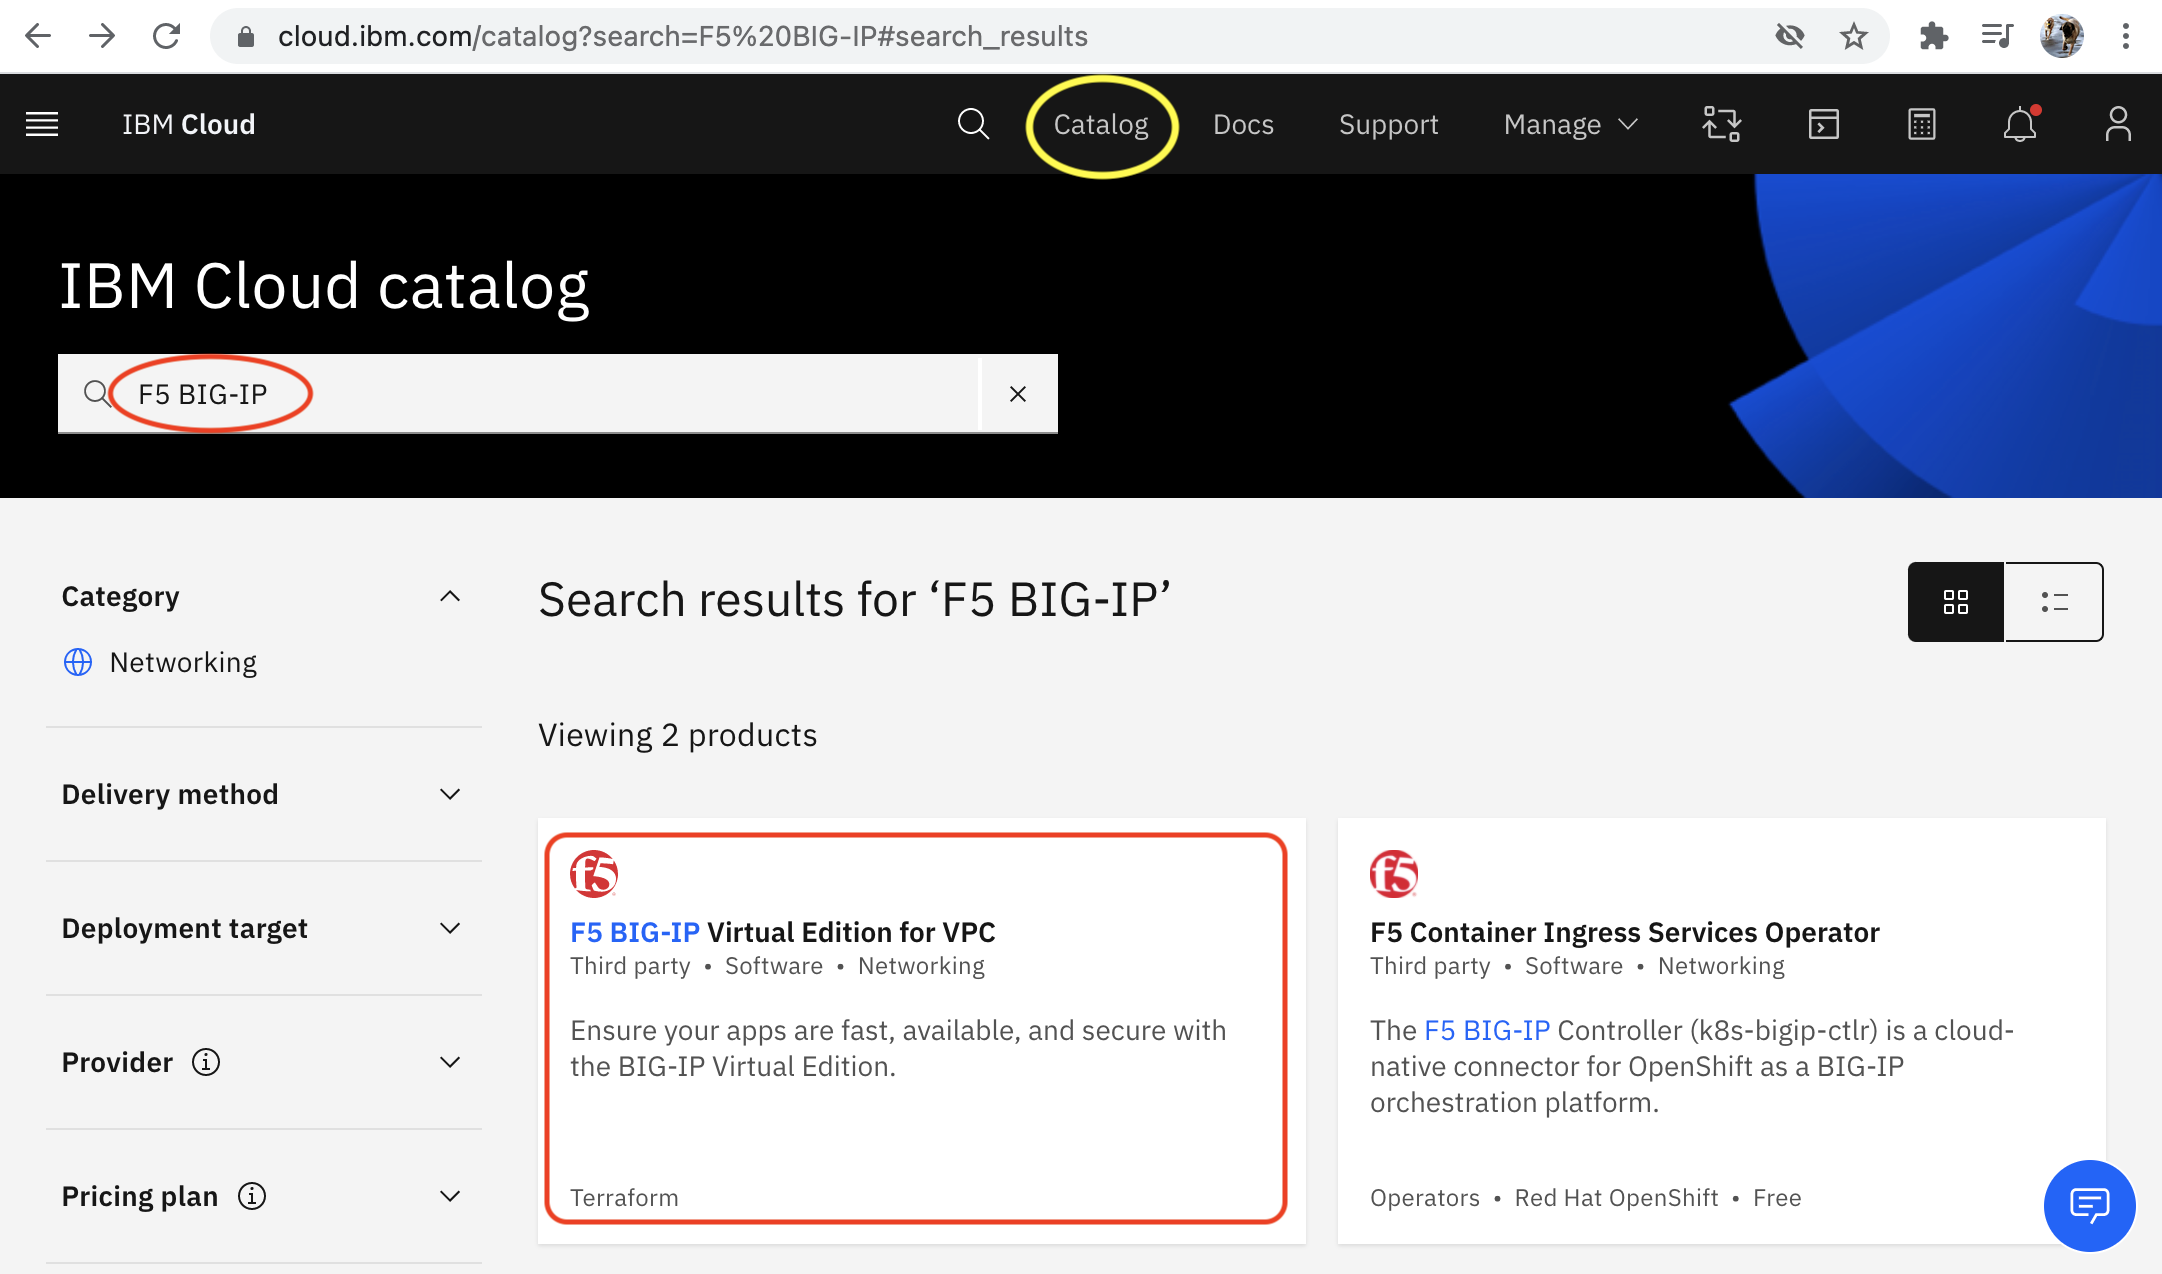
Log into your IBM VPC Gen 2 account.
On the top menu, click Catalog, search for F5 BIG-IP, and then select the F5 BIG-IP Virtual Edition for VPC option.
In the text box, enter your resource group (consult the IBM documentation for complete details).
Change any default values, as needed for your environment.
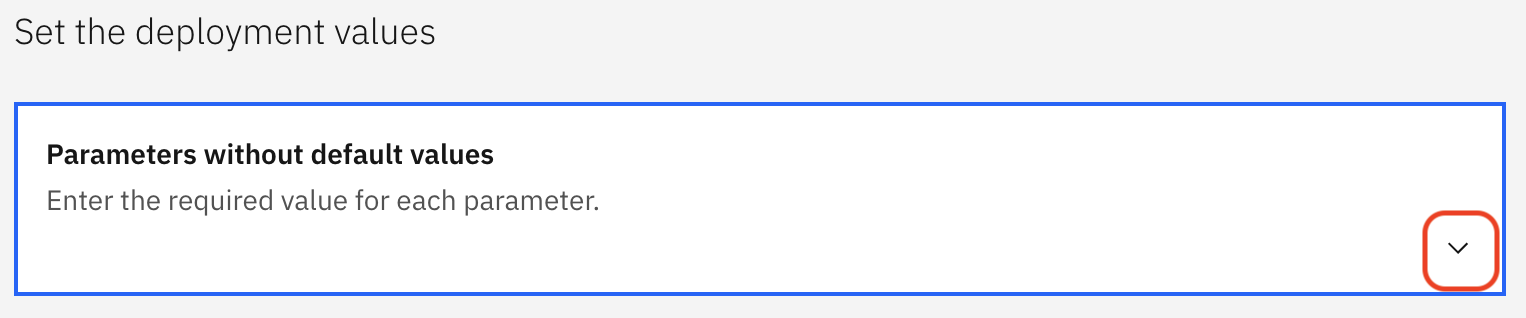
Expand the section:
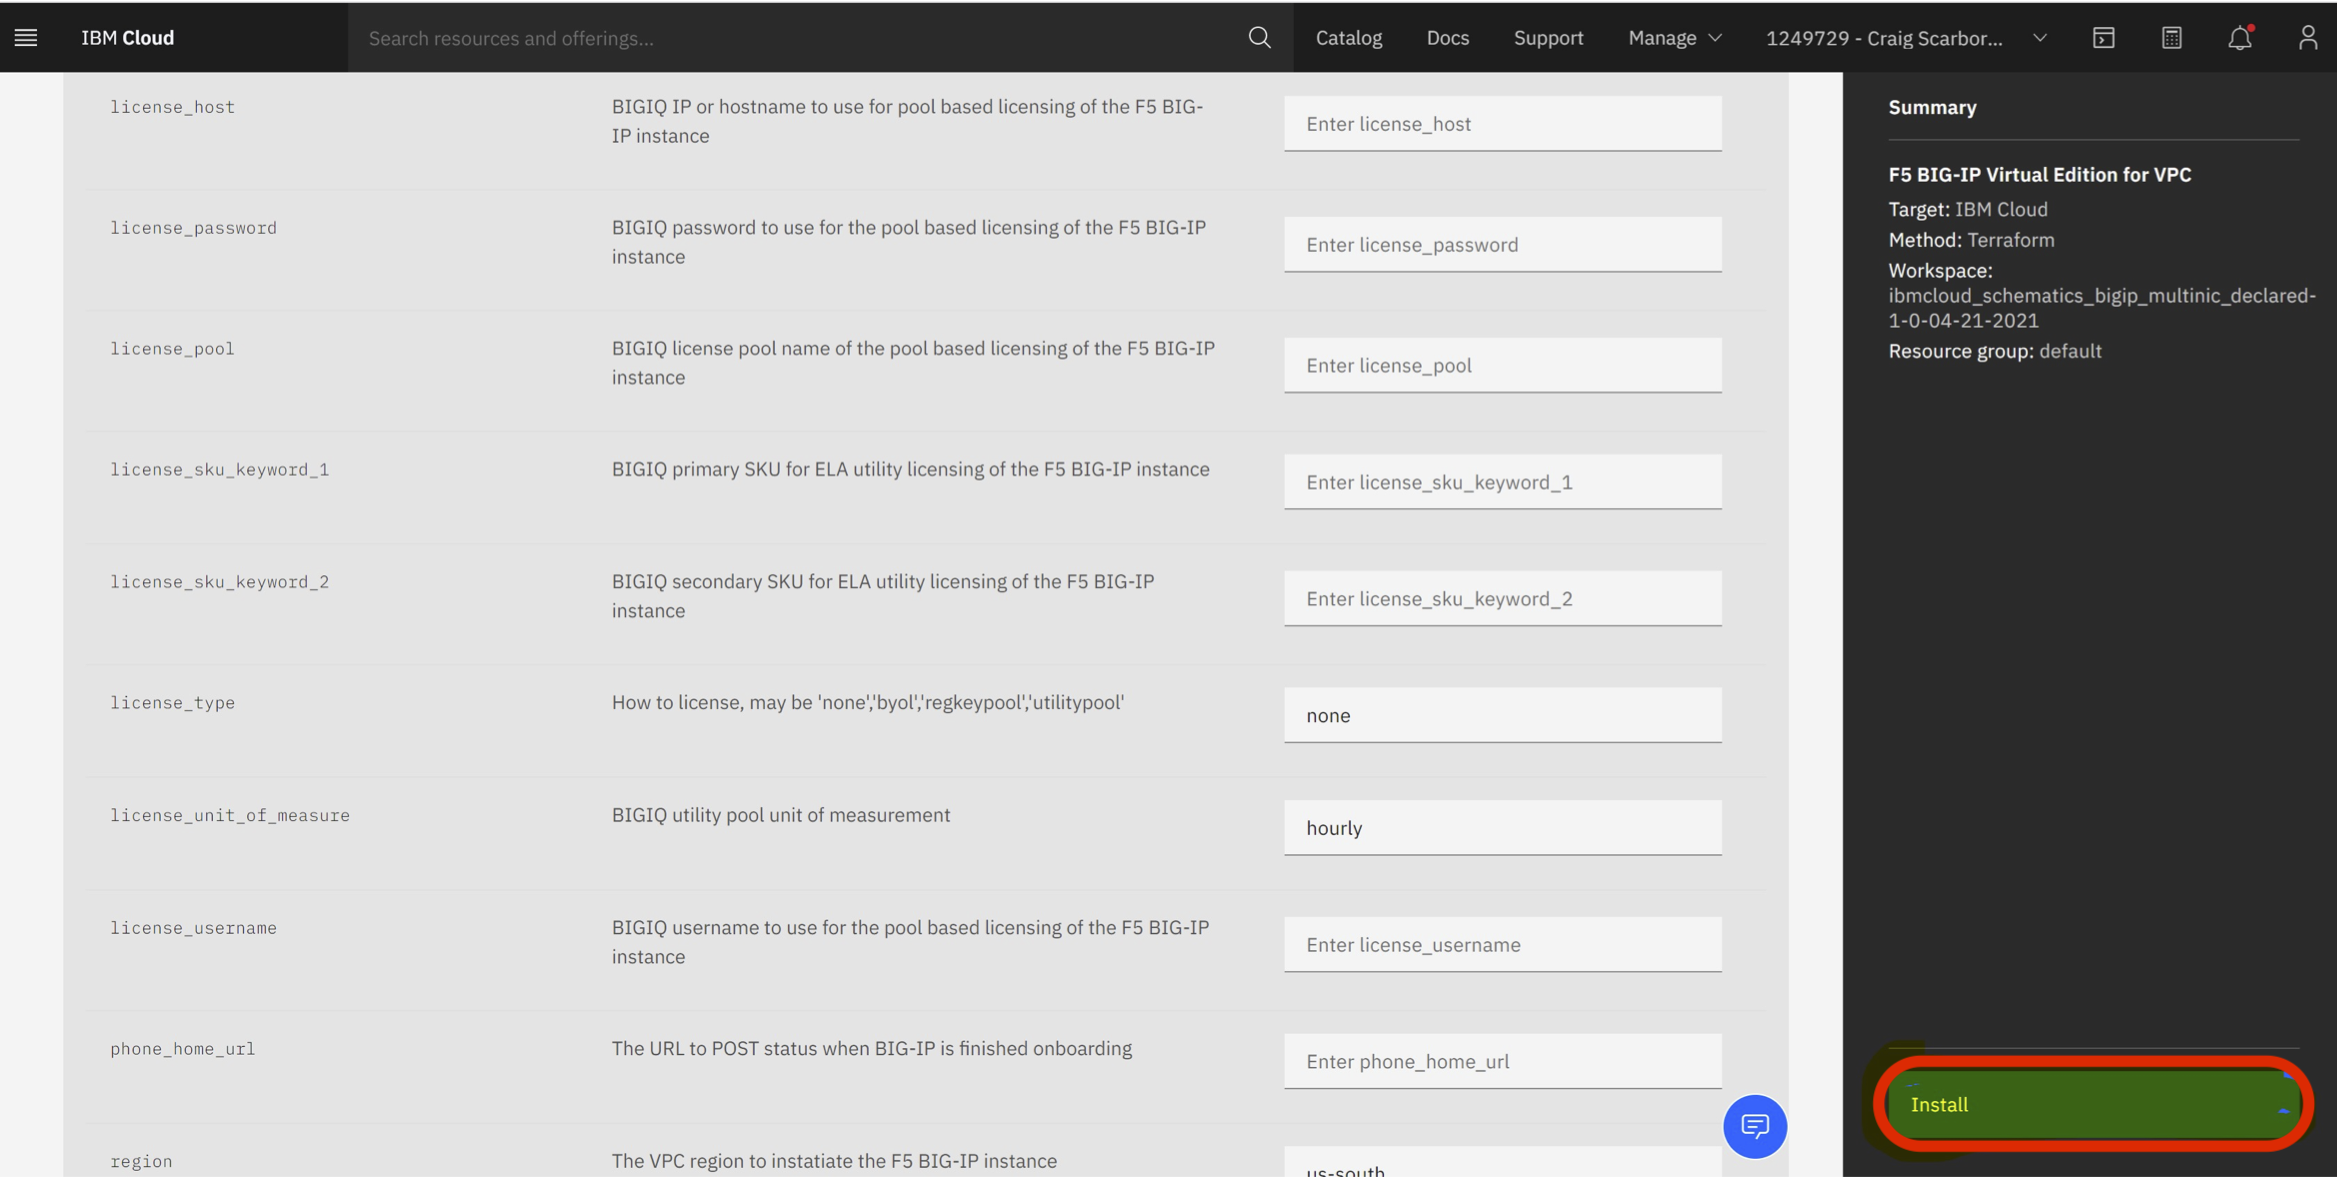
Complete the following required parameters accordingly and all other parameters required for your deployment:
- management_subnet_id - ID of the management subnet where you will deploy the instance.
- external_subnet_id - ID of the external subnet where the instance listens for virtual services.
- ssh_key_name - name of your public SSH used. Consult the Before you begin topic for creating and managing SSH keys.
Expand the Parameters with default values section and verify the values will work for your environment.
The following table provides all related instance parameter descriptions:
Parameter Description Example region VPC region in which you are provisioning BIG-IP™ VE. us-south instance_name Name of the VNF instance you are provisioning. f5-ve-01 hostname Hostname for your the BIG-IP™ VE you are provisioning. f5-ve-01 domain Domain for your BIG-IP™ VE you are provisioning. local tmos_image_name Name of the VNF image. bigip-15-1-2-0-0-9-all-1slot ssh_key_name Name of your public SSH used. Consult the Before you begin topic for creating and managing SSH keys. linux-ssh-key management_subnet_id ID of the management subnet where you will deploy the instance. To determine this value, in the VPC Subnet Listing, click the subnet details. 0717-xxxxxx-xxxx-xxxxx-8fae-xxxxx external_subnet_id ID of the external subnet where the instance listens for virtual services. To determine this value, in the VPC Subnet Listing, click the subnet details. 0717-xxxxxx-xxxx-xxxxx-8110-xxxxx instance_profile Profile of compute CPU and memory resources used when provisioning the BIG-IP™ VE instance. Use ibmcloud is instance-profilesto list available profiles.cx2-4x8 tmos_admin_password Password used to set for the BIG-IP VE admin user. Valid TMOS password cluster_subnet_id ID of the management dedicated to configsyncoperations. To determine this value, in the VPC Subnet Listing, click the subnet details.0717-xxxxxx-xxxx-xxxxx-8fae-xxxxx internal_subnet_id ID of the internal subnet where the instance will communicate to internal resources. To determine this value, in the VPC Subnet Listing, click the subnet details. 0717-xxxxxx-xxxx-xxxxx-8fae-xxxxx do_declaration_url URL used to retrieve the F5® BIG-IP® Declarative Onboarding JSON declaration. https://declarations.s3.us-east.cloud-object-storage.appdomain.cloud/do_declaration.jsonas3_declaration_url URL used to retrieve the F5® BIG-IP® Application Services 3 Extension JSON declaration. https://declarations.s3.us-east.cloud-object-storage.appdomain.cloud/as3_declaration.jsonts_declaration_url URL used to retrieve the F5® BIG-IP® Telemetry Streaming JSON declaration. https://declarations.s3.us-east.cloud-object-storage.appdomain.cloud/ts_declaration.jsonphone_home_url URL used for post onboarding Web hook. https://webhook.site/#!/8c71ed42-da62-48ea-a2a5-265caf420a3b tgactive_url URL used to POST L3 device configurations, when TMOS tgactivescript is executed.tgstandby_url URL used to POST L3 device configurations when TMOS tgstandbyscript is executed.tgrefresh_url URL used to POST L3 device configurations when TMOS tgrefreshscript is executedapp_id Application ID used for CI integration. a044b708-66c4-4f50-a5c8-2b54eff5f9b5 Click Install.
The IBM Schematics page displays your workspace and deployment progress:

Then the workspace displays the Workspace created status.

Click View logs for important information about your instance.
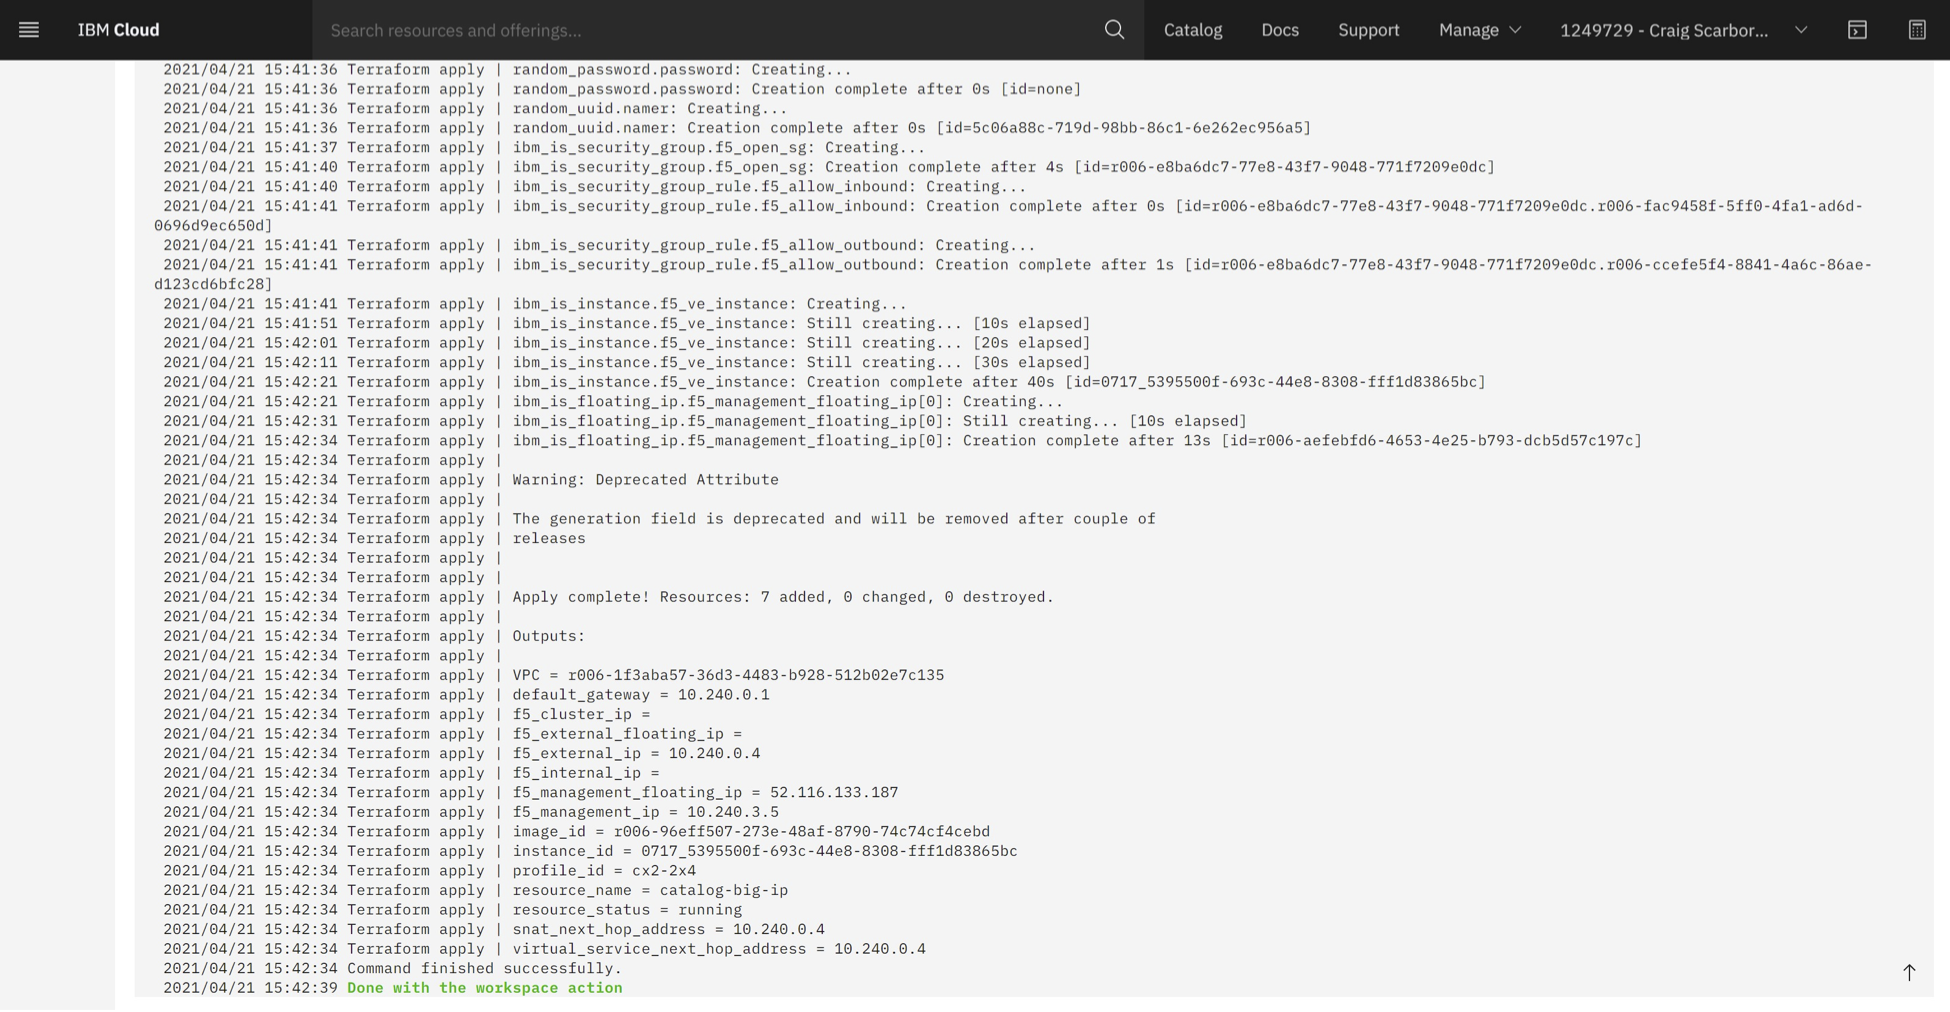
Notice at the bottom of the log the instance displays all IP addressing and the instance’s floating IP (if you created one). If you chose a floating IP for the management interface, then you can now login either using the GUI or ssh. While the instance becomes available, the BIG-IP VE may be further automating the deployment using Declarative Onboarding and/or AS3, so the instance may still be in the boot-up phase.
Log into the F5 BIG-IP Configuration Utility.
Once the BIG-IP VE completes the boot-up phase, you will have a BIG-IP running in IBM VPC:

Important
If you encounter failures while creating VPC instances, you must destroy the created resources before attempting to instantiate again. To destroy all associated resources, click .
Delete a workspace
Schematics automatically create a workspace for deployments, where it saves the current state of the instance. Therefore, F5 recommends that when you want to destroy the virtual instance created in the catalog, delete the workspace you used.
Related links