F5 BIG-IQ Centralized Management Lab > BIG-IQ Solo Use Cases Source | Edit on
Lab 1.7: Upgrade Managed Devices to New Versions of TMOS with BIG-IQ
Note
Estimated time to complete: 20 minutes
Warning
If you run a series of labs, this one should be the last one to run.
A key feature of BIG-IQ is the ability to manage software images for multiple remote devices from one location. You can deploy software without having to log in to each individual BIG-IP device.
There are three steps to managing software images for devices:
- Download the software image from F5, Inc.
- Upload the software image to BIG-IQ.
- Install the software image on a device in the BIG-IP Device inventory in one of the following two ways:
- Managed Device Upgrade - use this process for installing a software image on managed BIG-IP devices running version 11.5.0 or later.
- Legacy Device Upgrade - use this process for installing a software image on BIG-IP devices running versions 10.2.4 to 11.4.1.
Official documentation about BIG-IP Software Upgrades can be found on the F5 Knowledge Center and also K14812626.
Lab environment access
If you have not yet visited the page Getting Started, please do so.
Tasks
- Login to BIG-IQ as david.
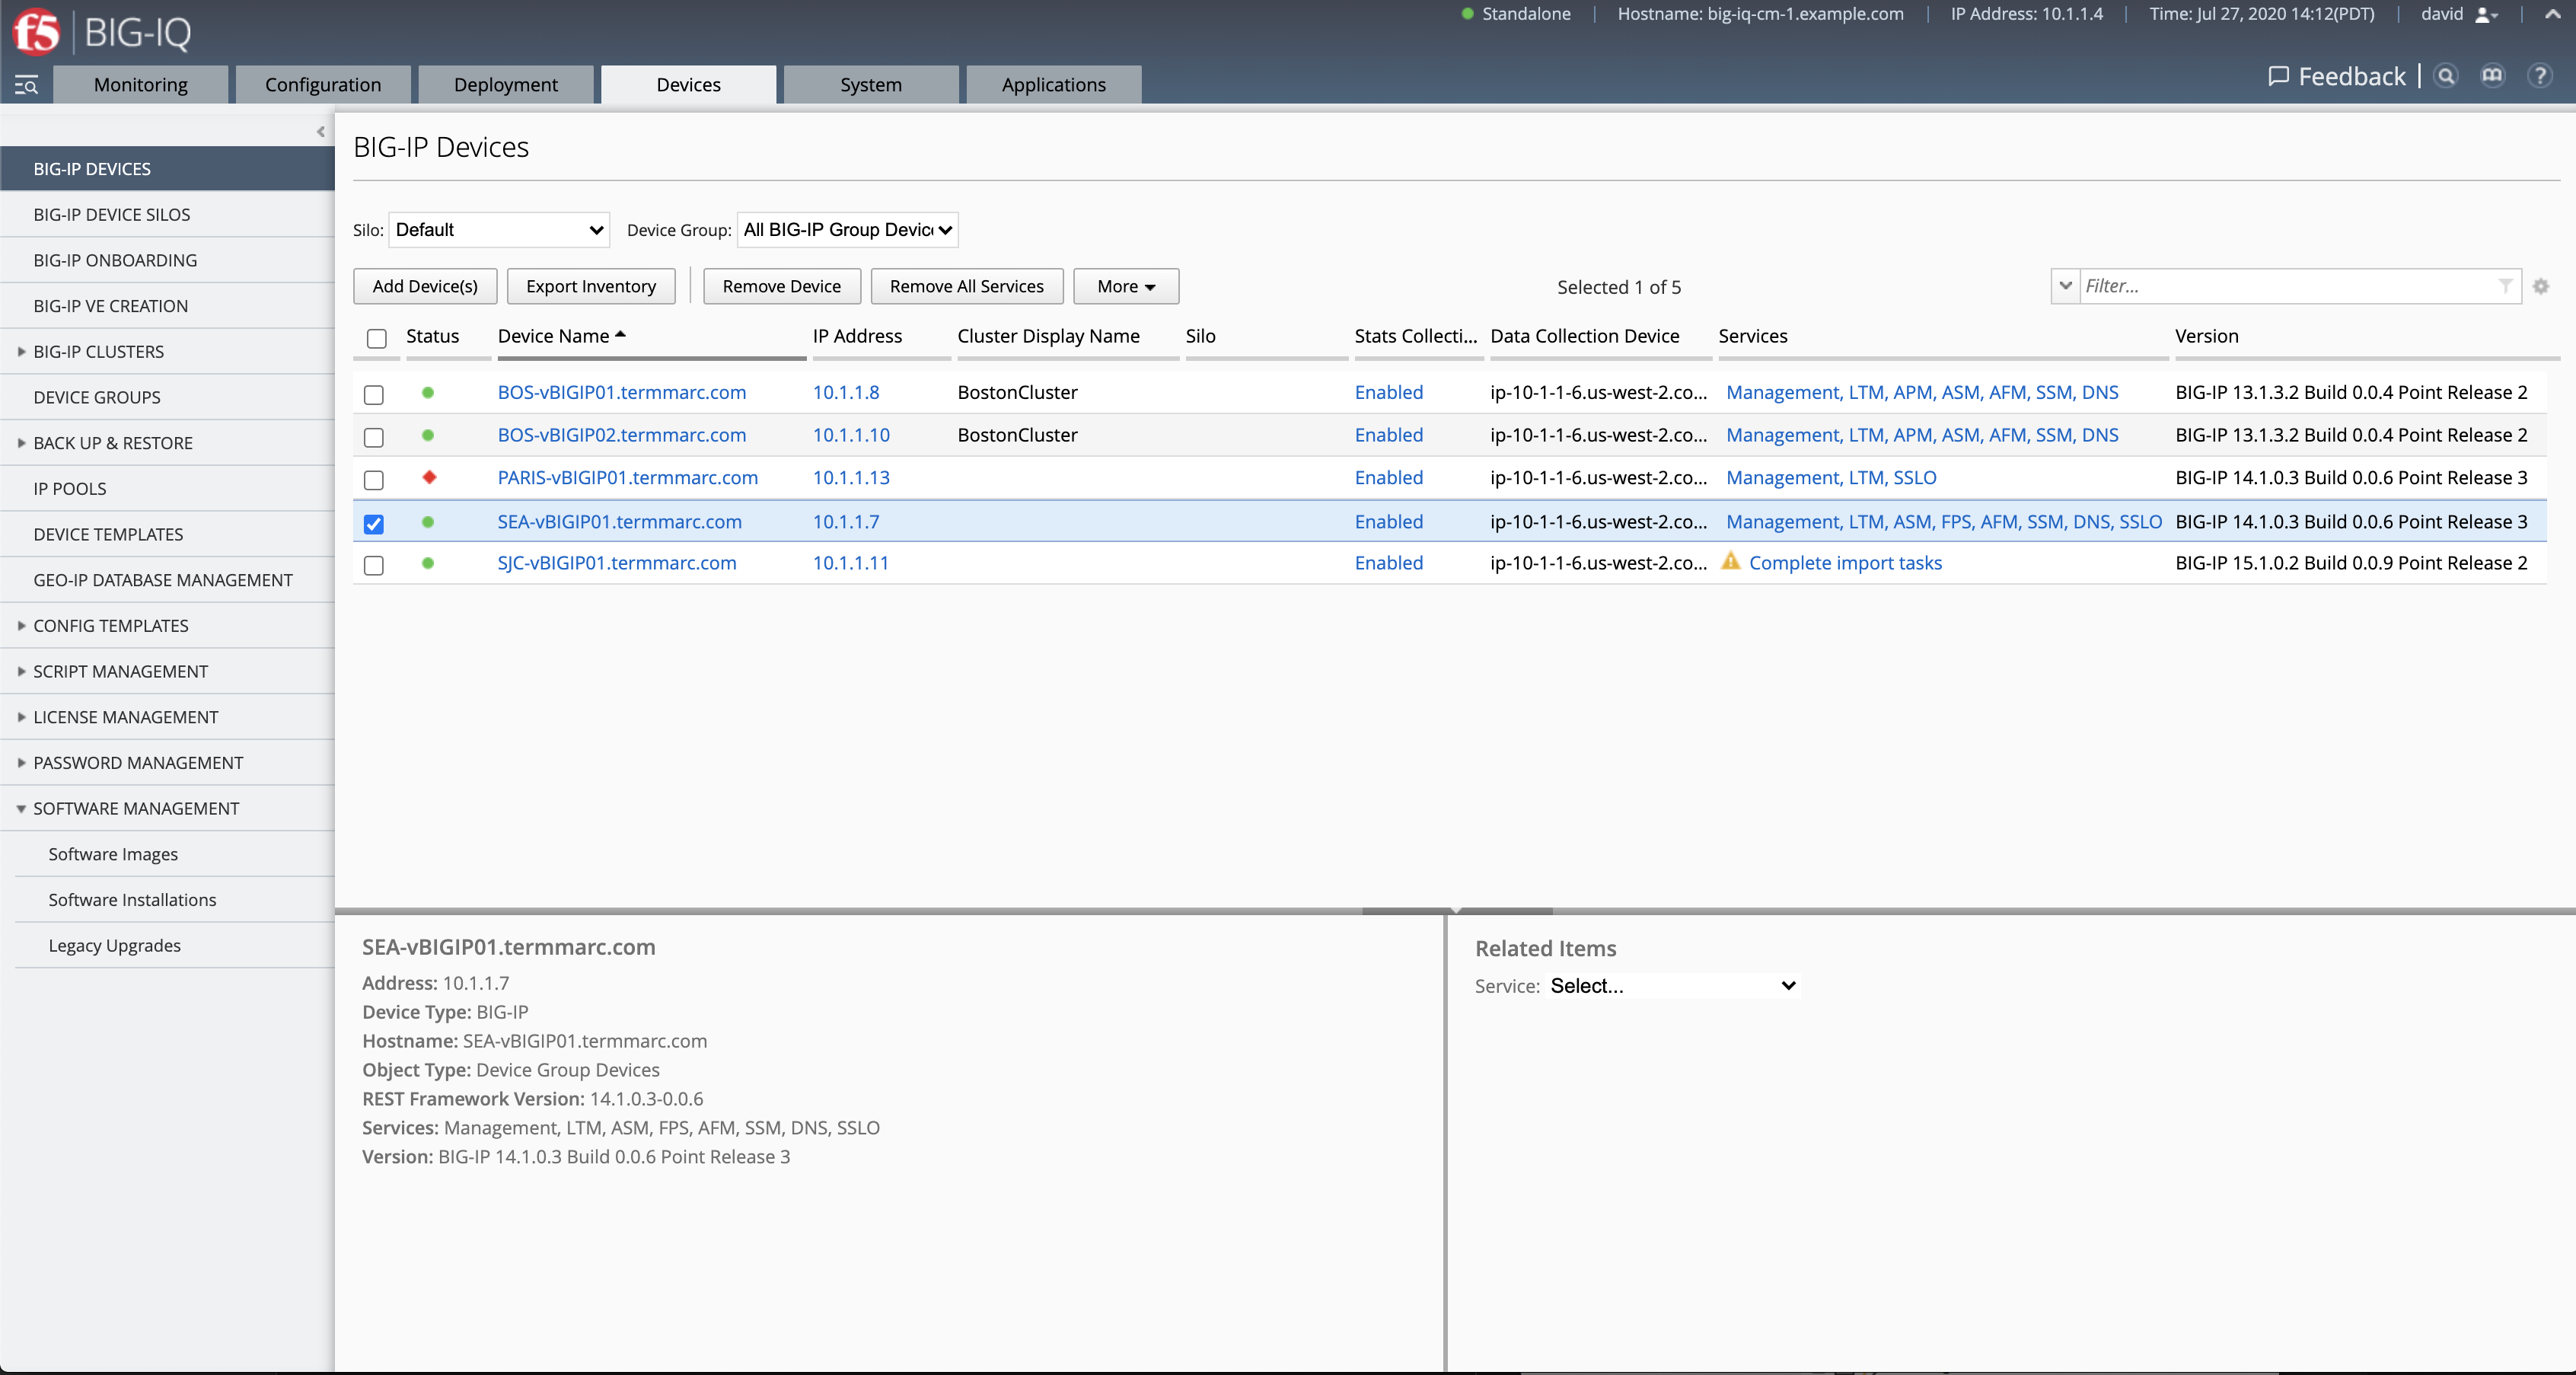
- Navigate to the Device tab. Look at the device list, specifically at the BIG-IP versions. In this lab, we are going to upgrade the SEA-vBIGIP01.termmarc.com BIG-IP to the latest 15.1 version.
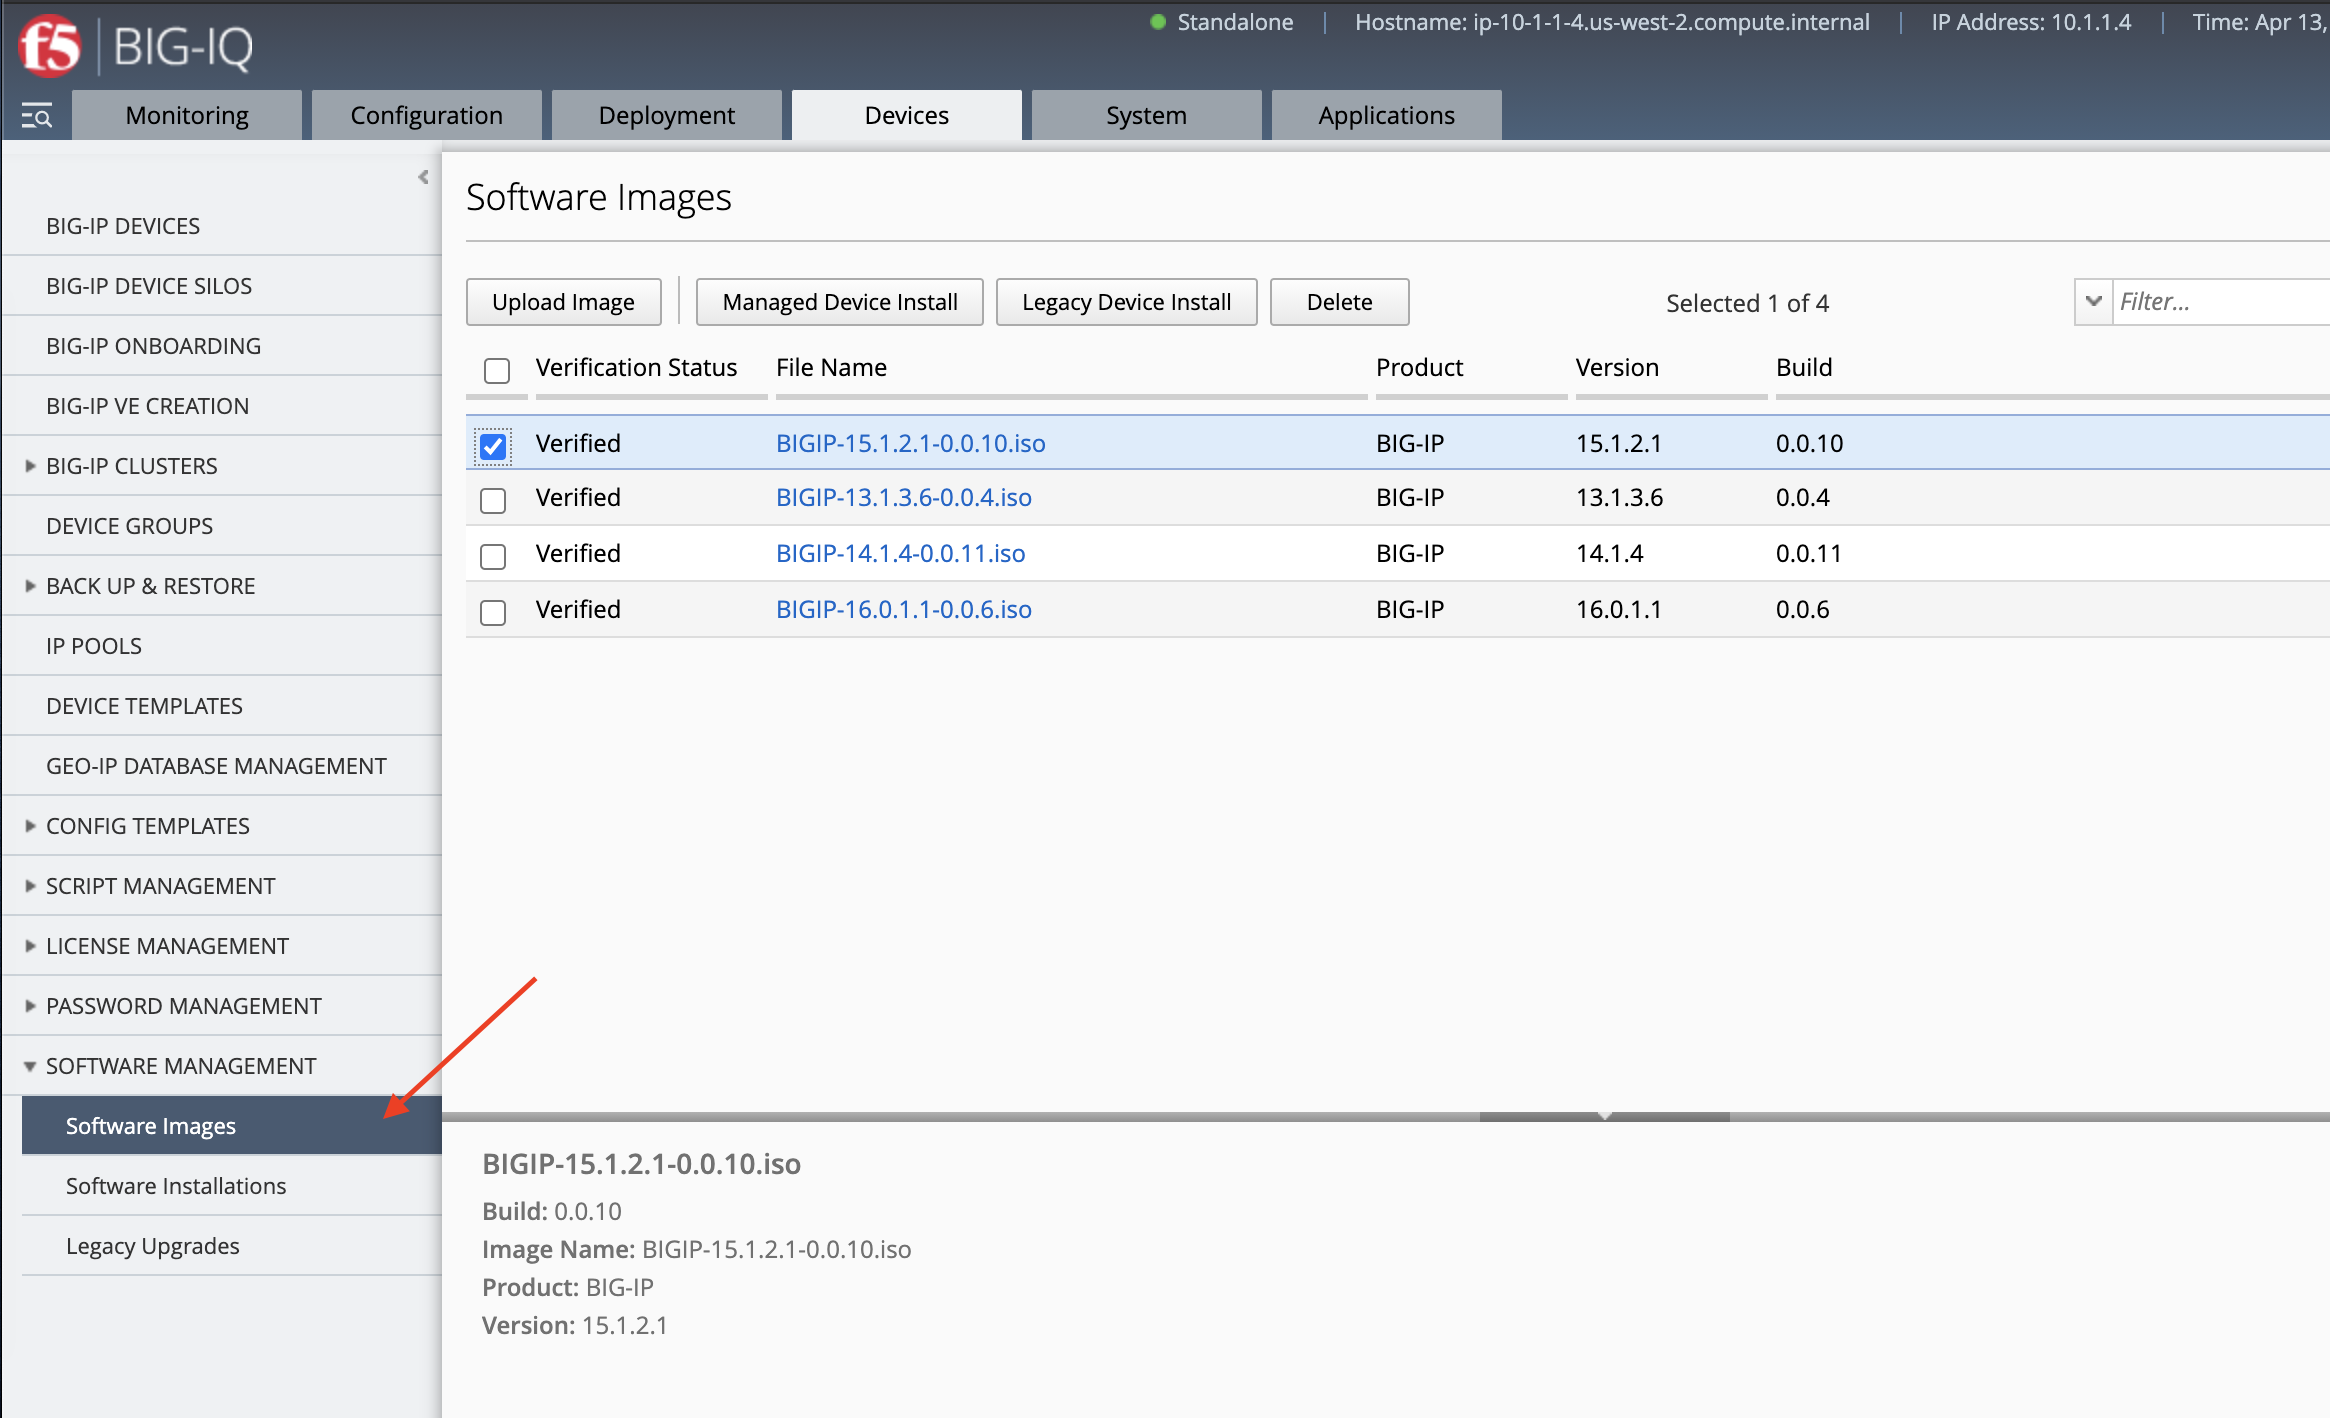
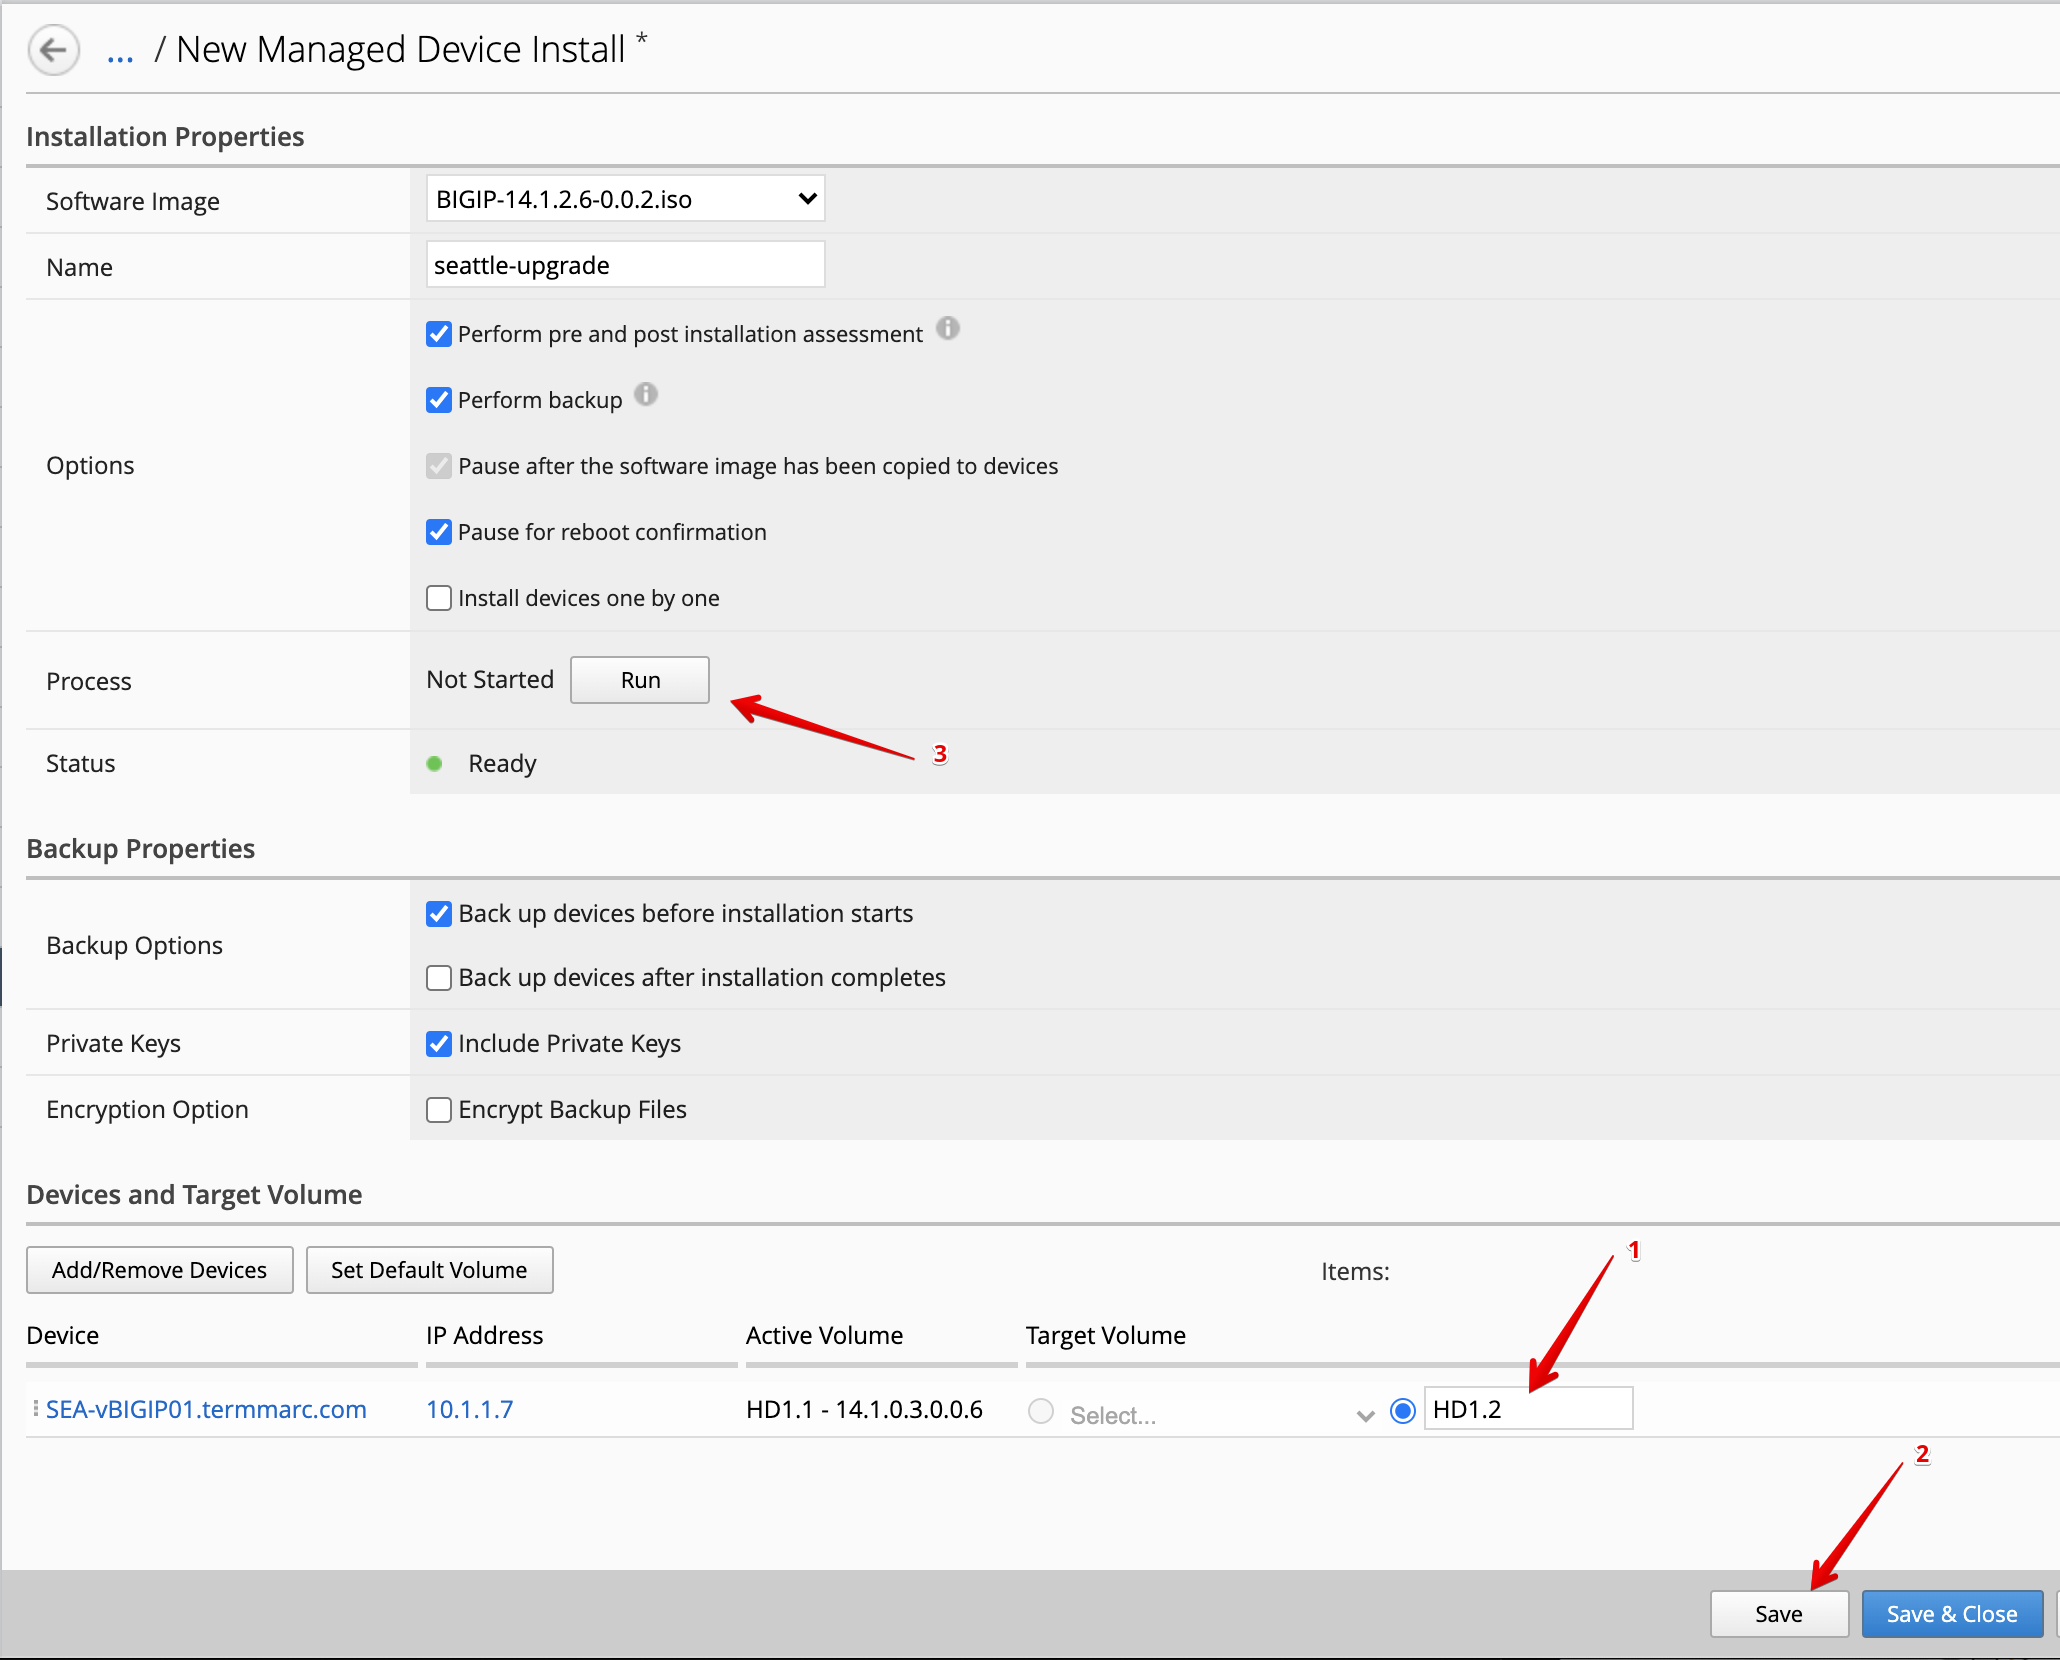
- Navigate under Software Management > Software Images. Select the BIG-IP 15.1 image and click on Manage Device Install.
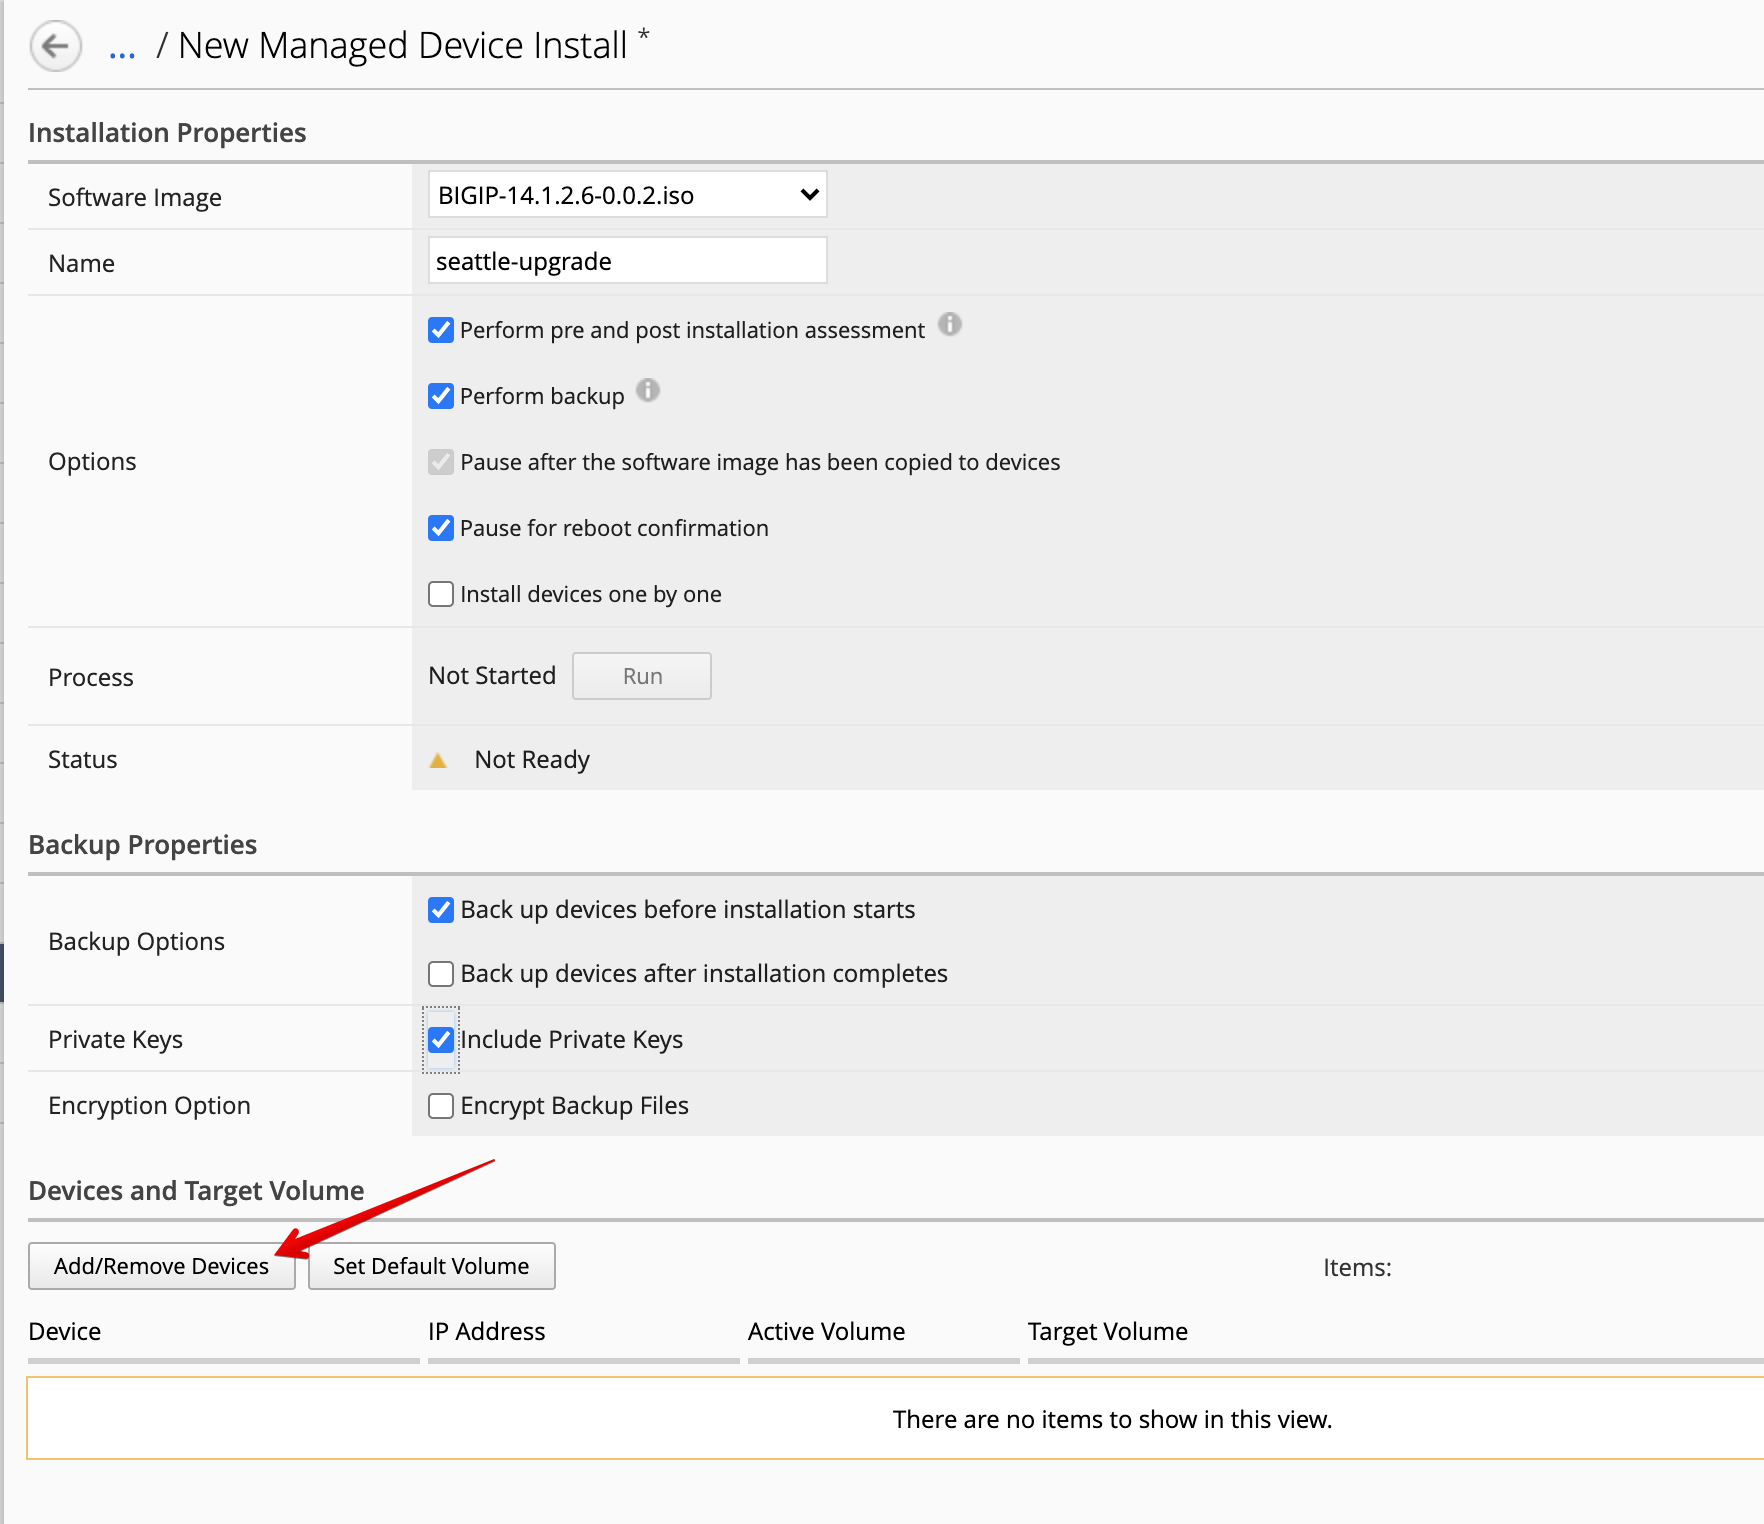
- Type a name for the task (e.g.
seattle-upgrade) and select the desired option for the BIG-IP upgrade (e.g. check the Perform backup box).
Click on Add/Remove Devices.
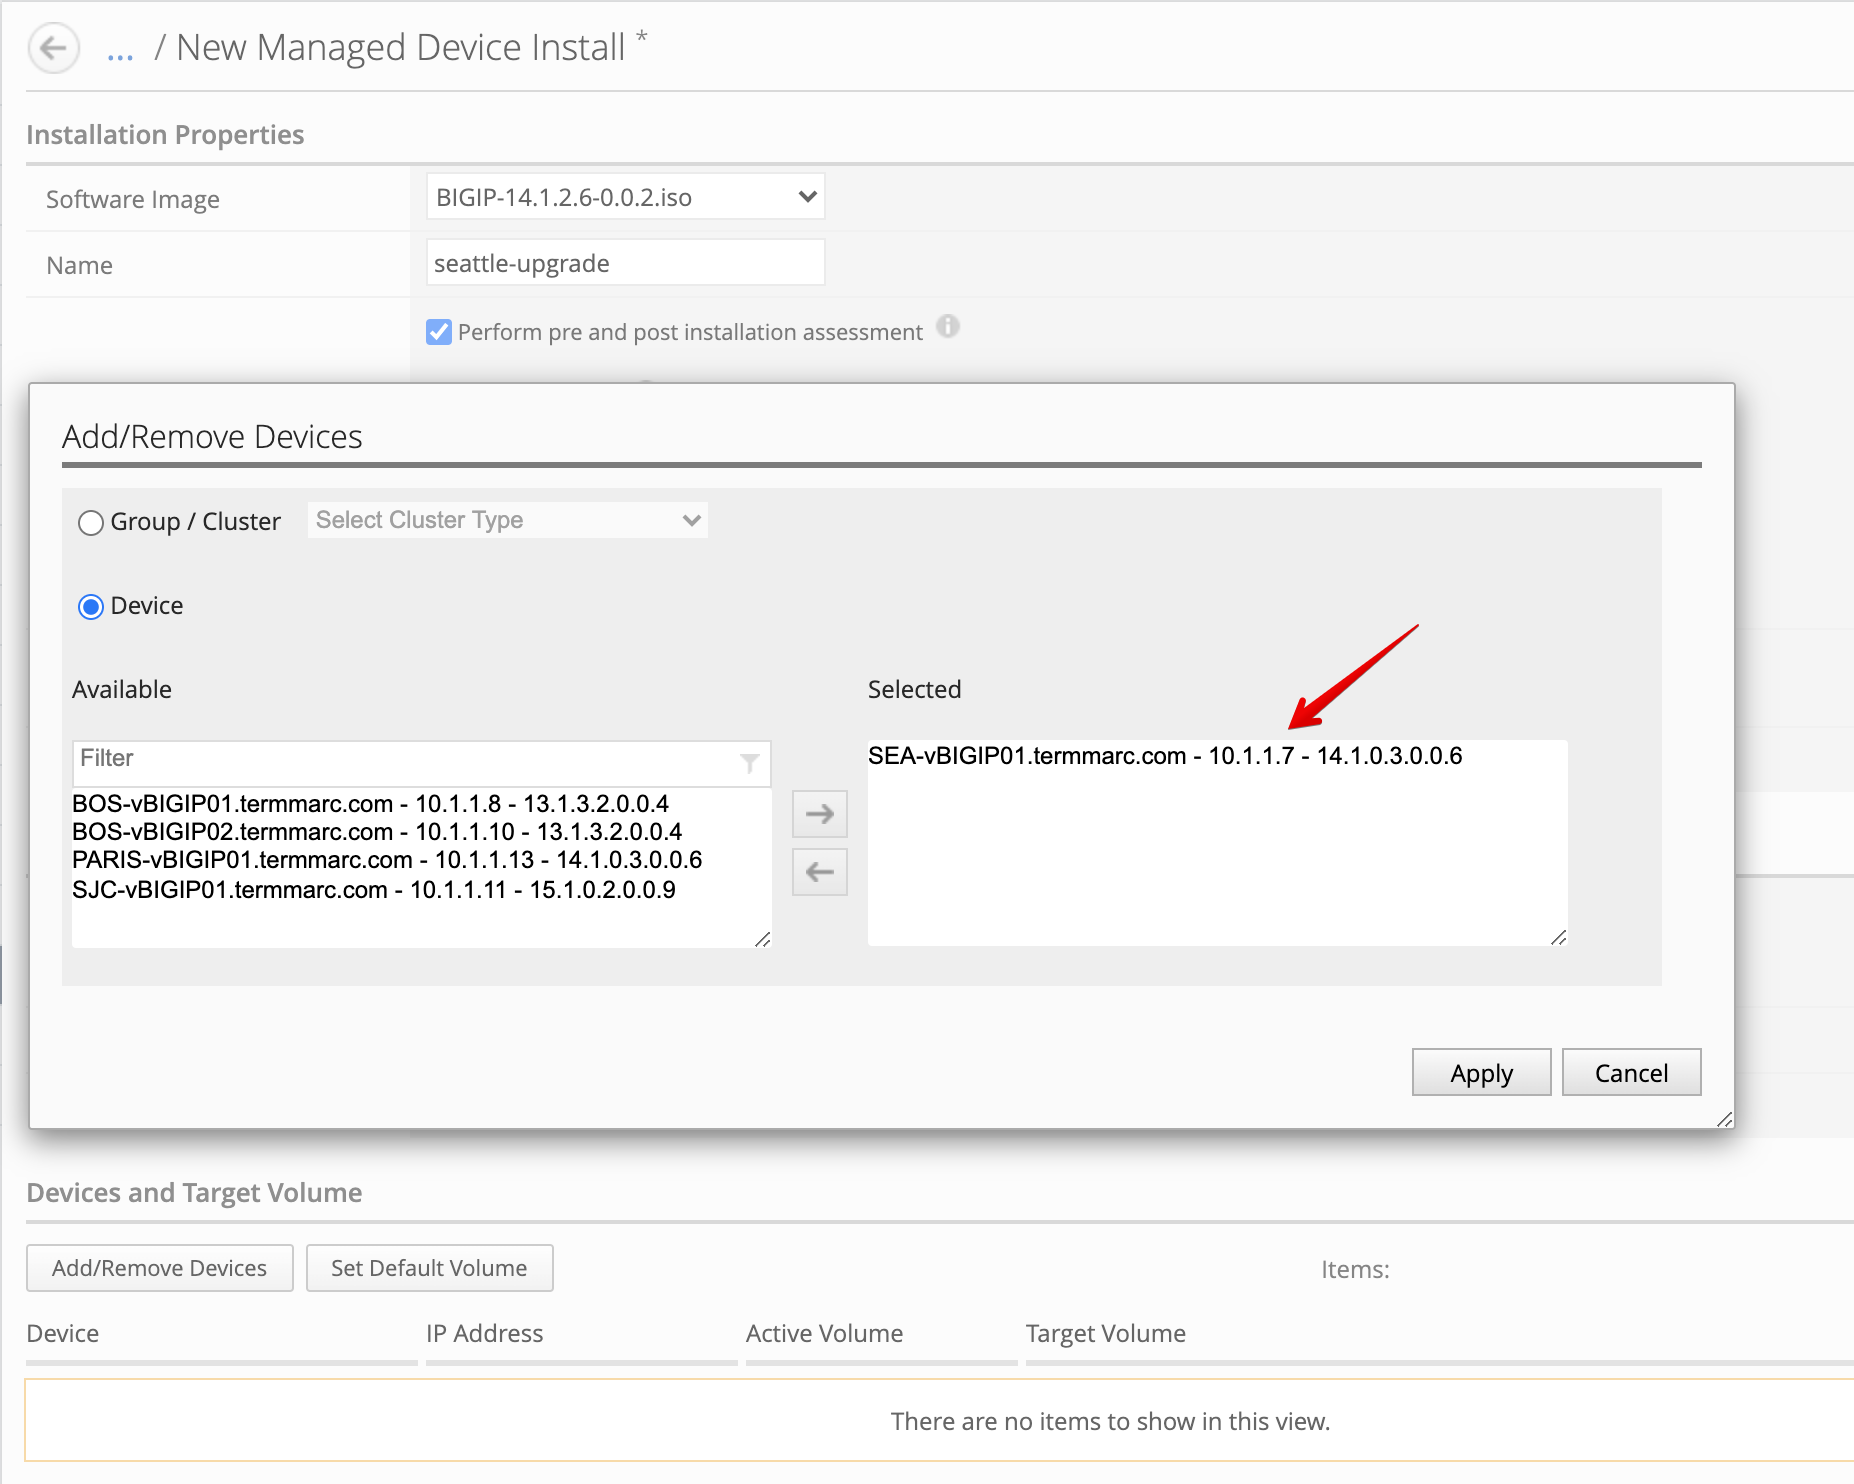
- The device list shows up. Select SEA-vBIGIP01.termmarc.com.
- Set the Target Volume name to
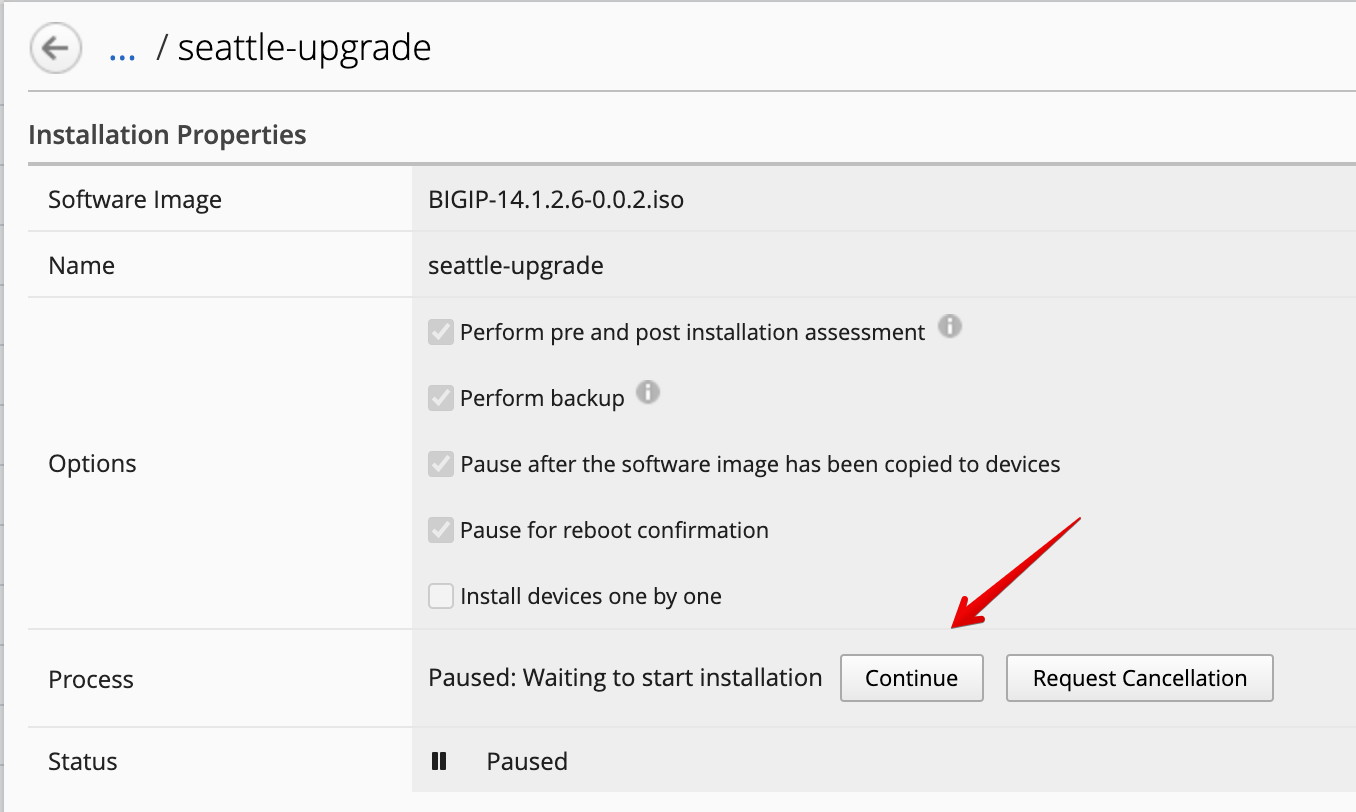
HD1.2, click on Save, then Run.
- The first step is to initiate the transfer of the iso file on the BIG-IP.
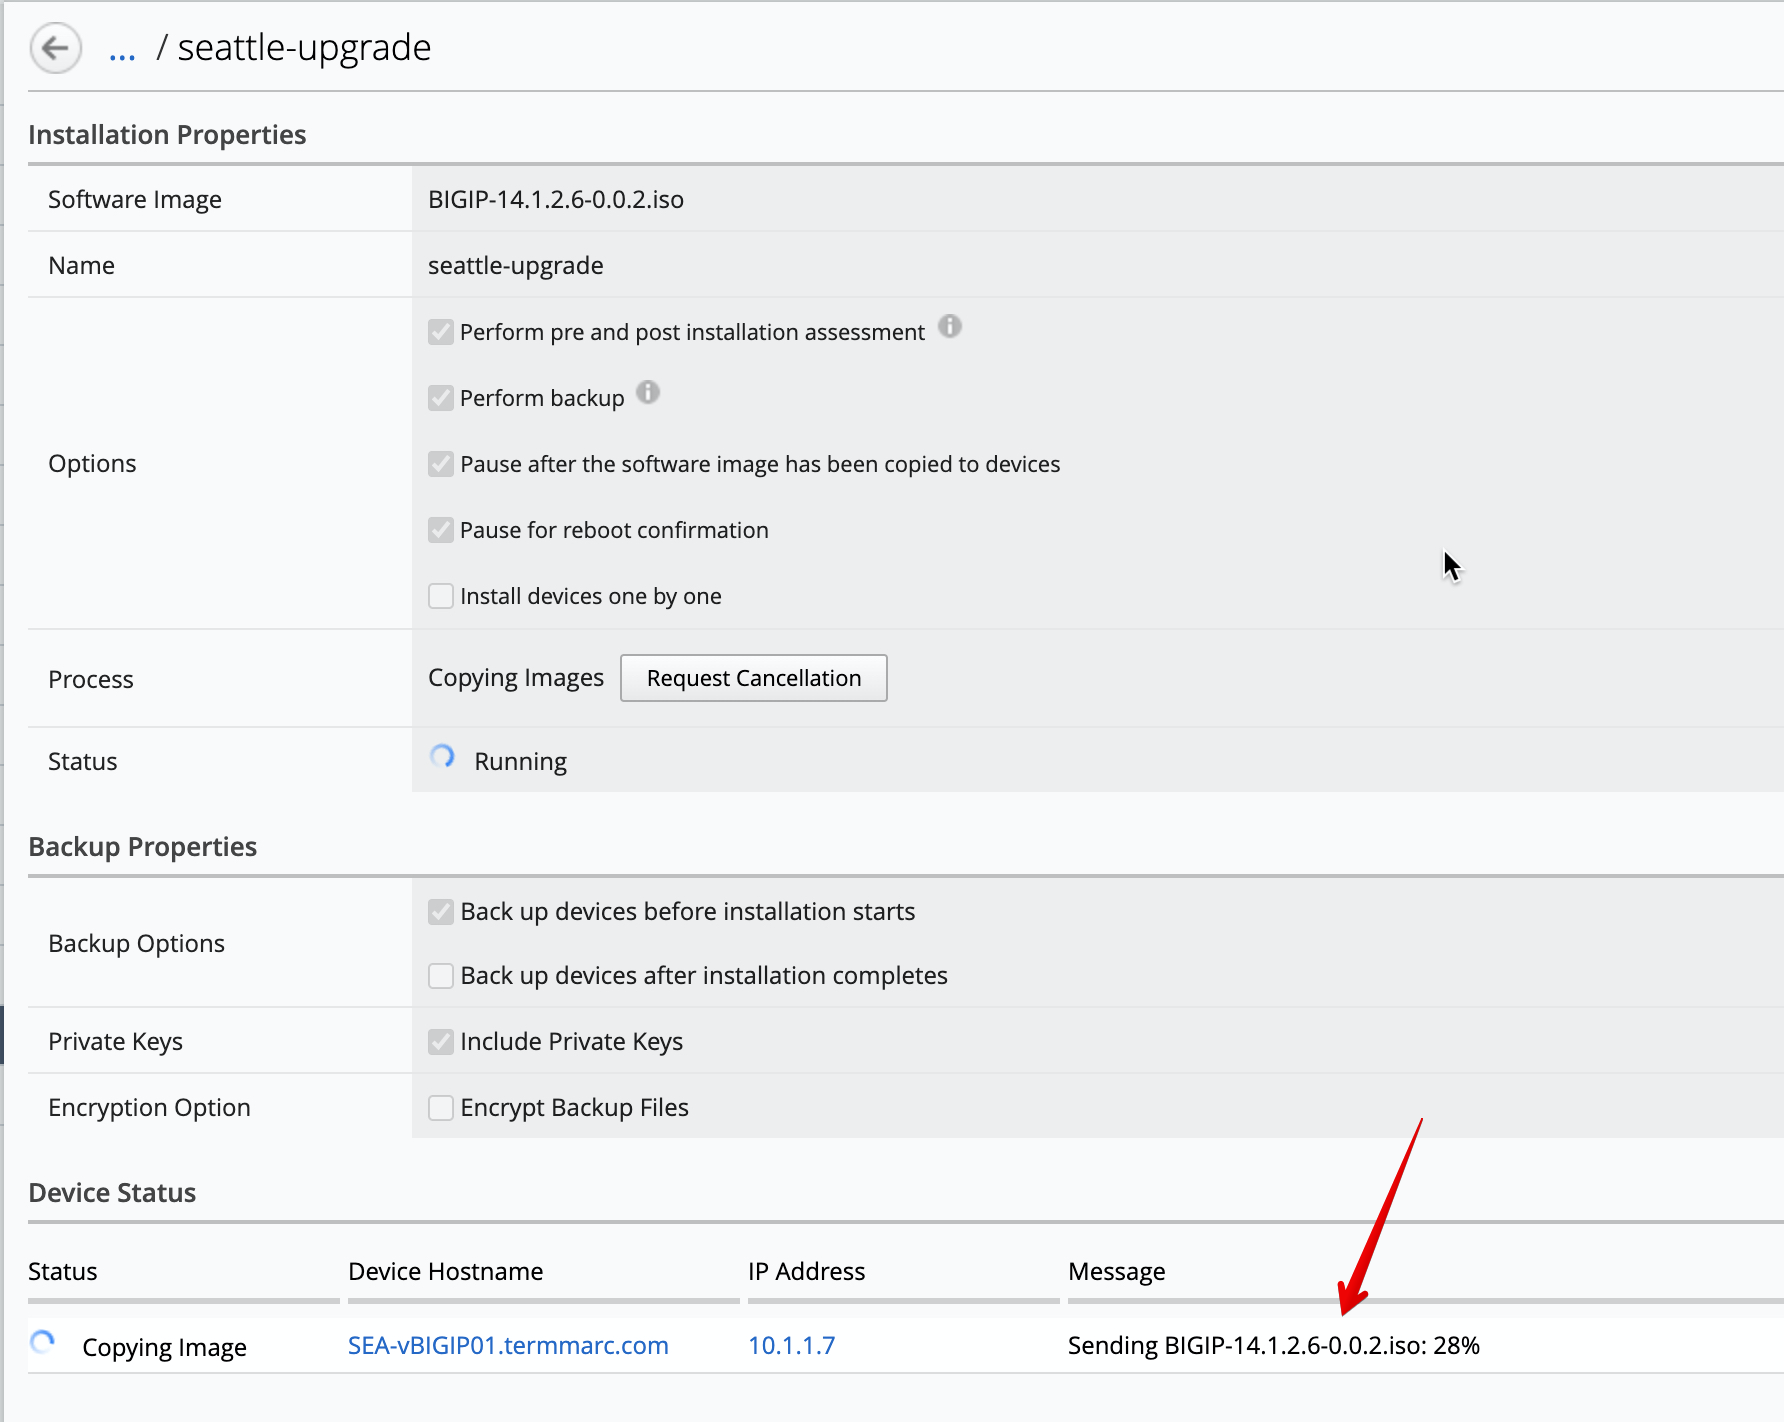
Note
If the required iso image already exists in the /shared/images directory of the target BIG-IP system, BIG-IQ skips the transfer of the iso file and proceeds with the next step.
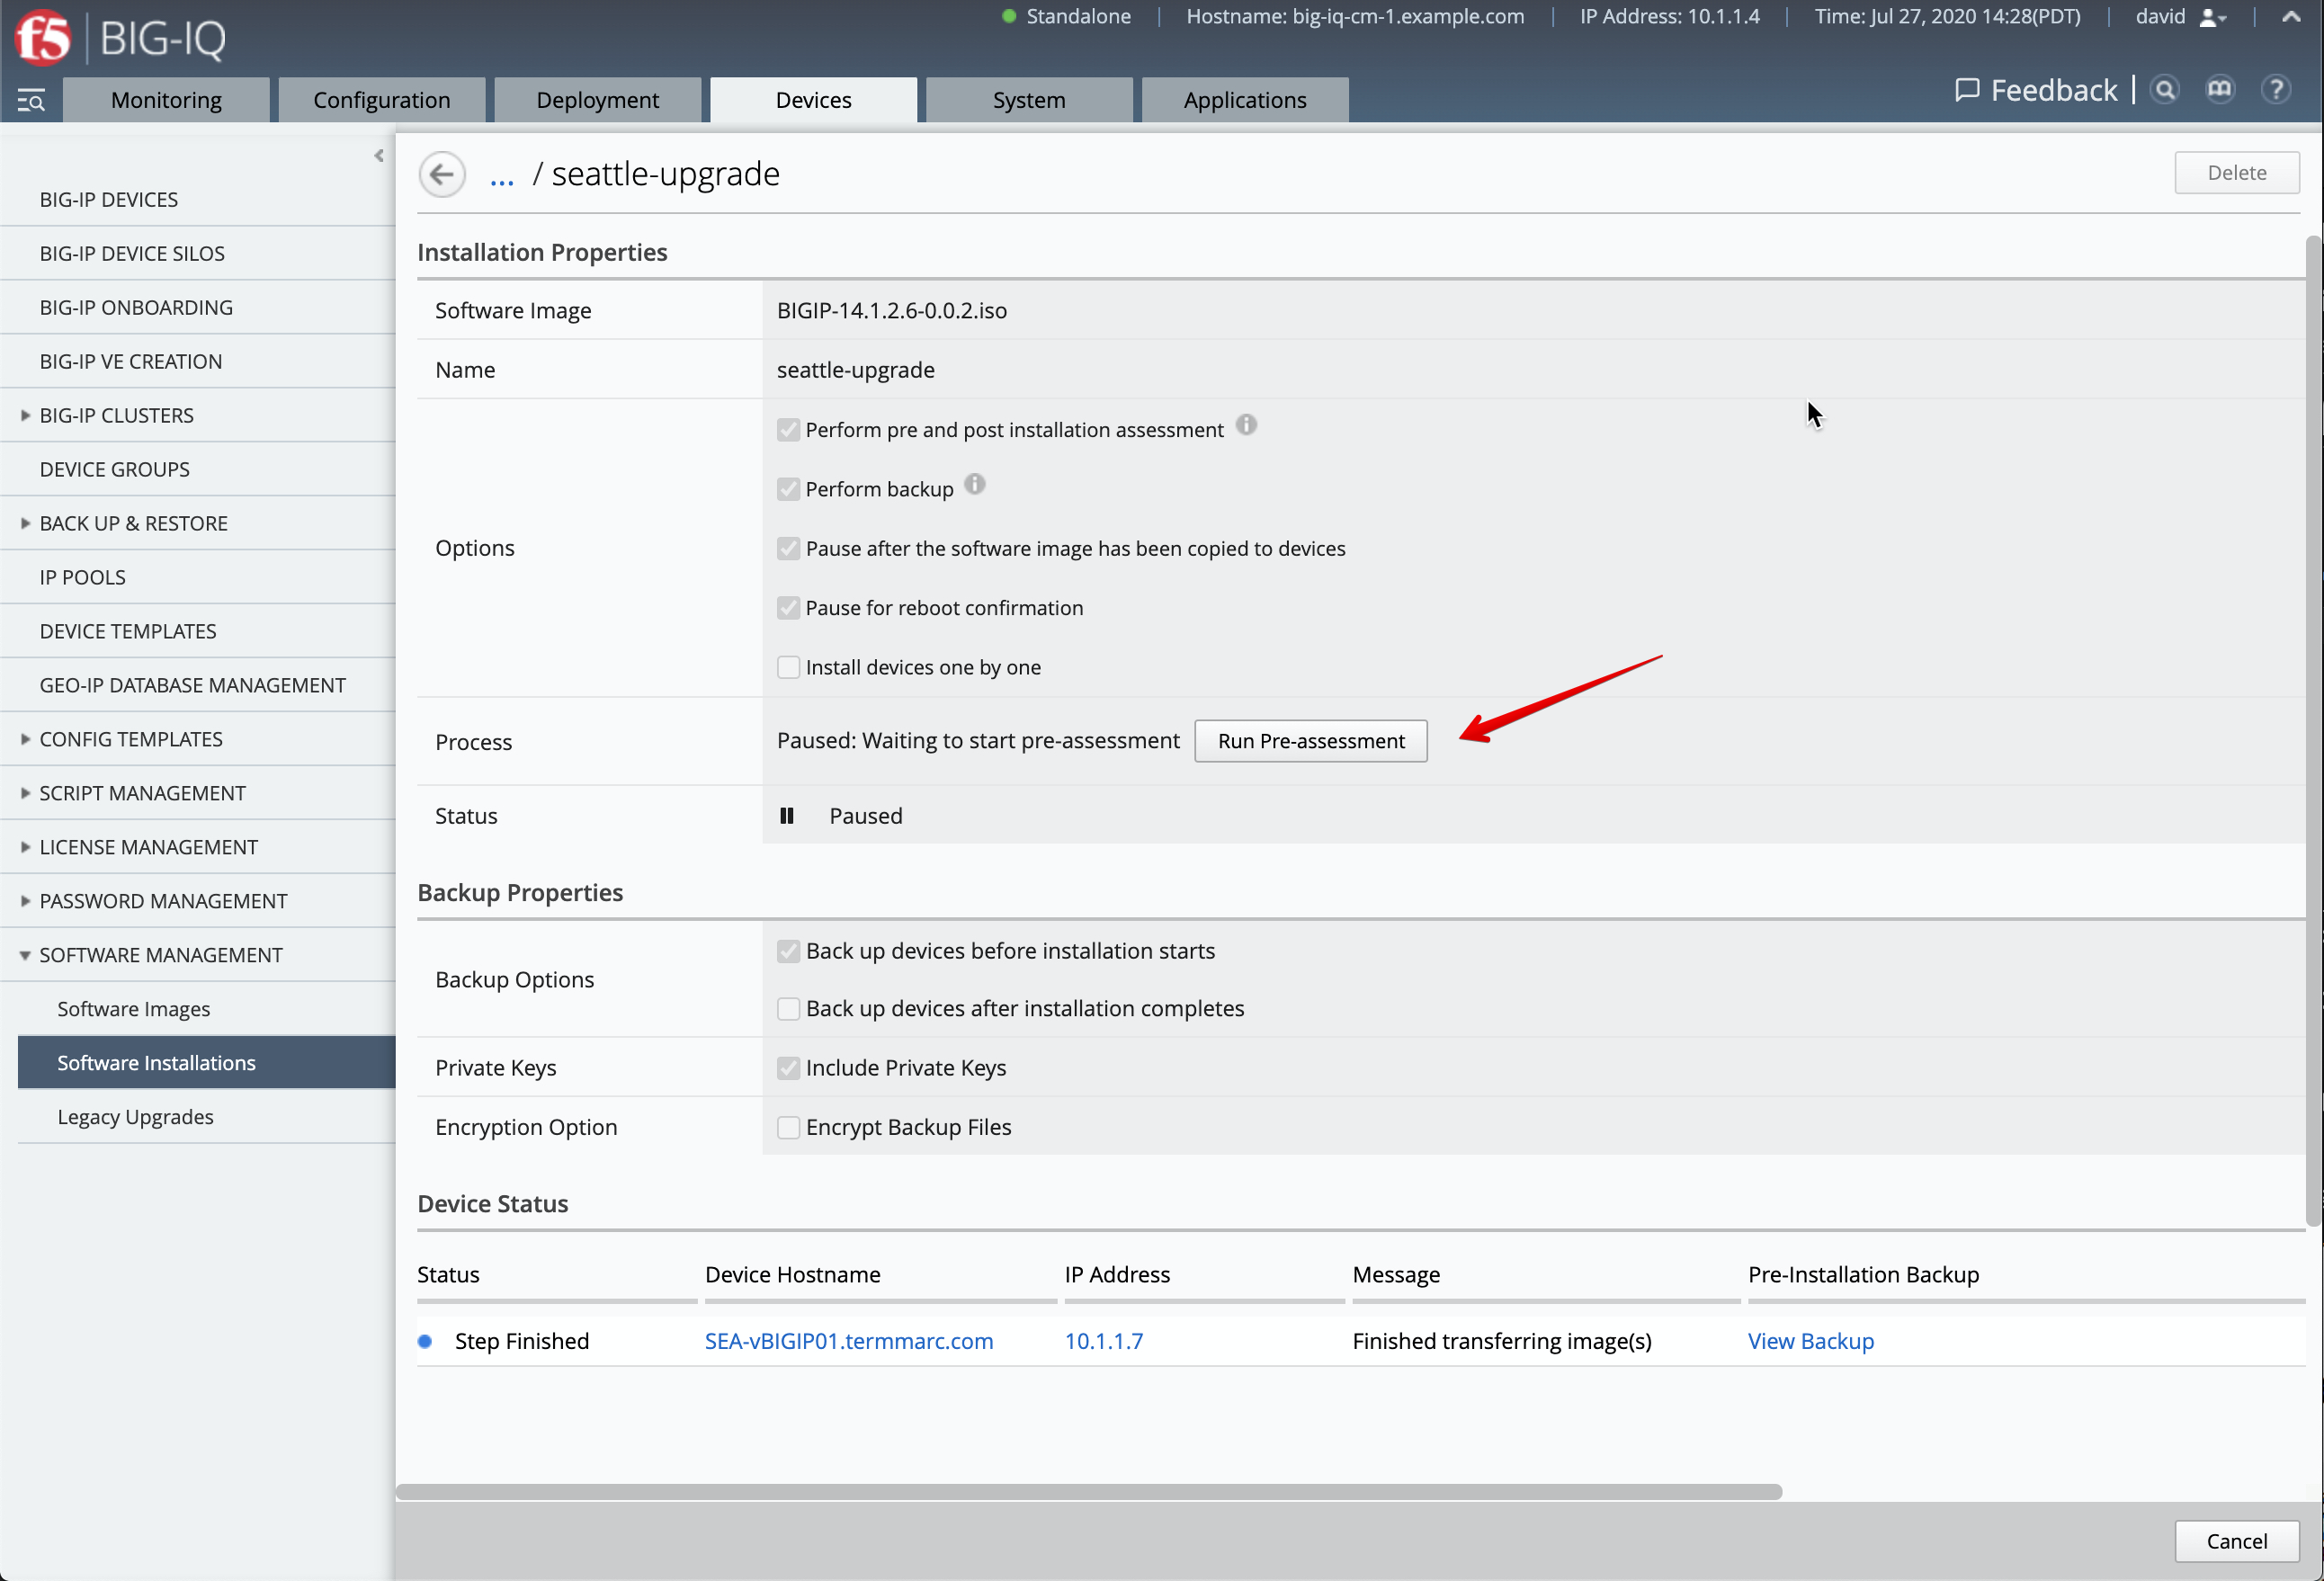
- Once the image transfer is completed, the next step is to take a ucs backup of the device. Click on Back Up Devices.

- Once the backup is completed, launch the Run Pre-assessment.
Select all the options.
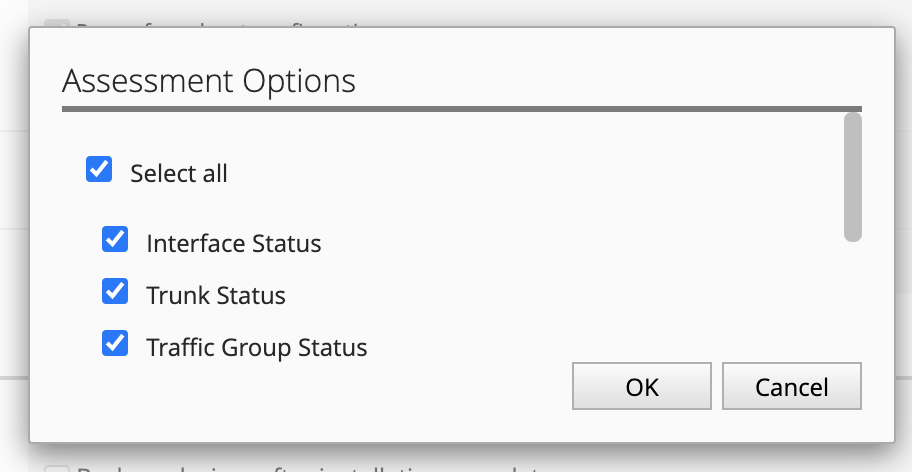
Then, press Continue.
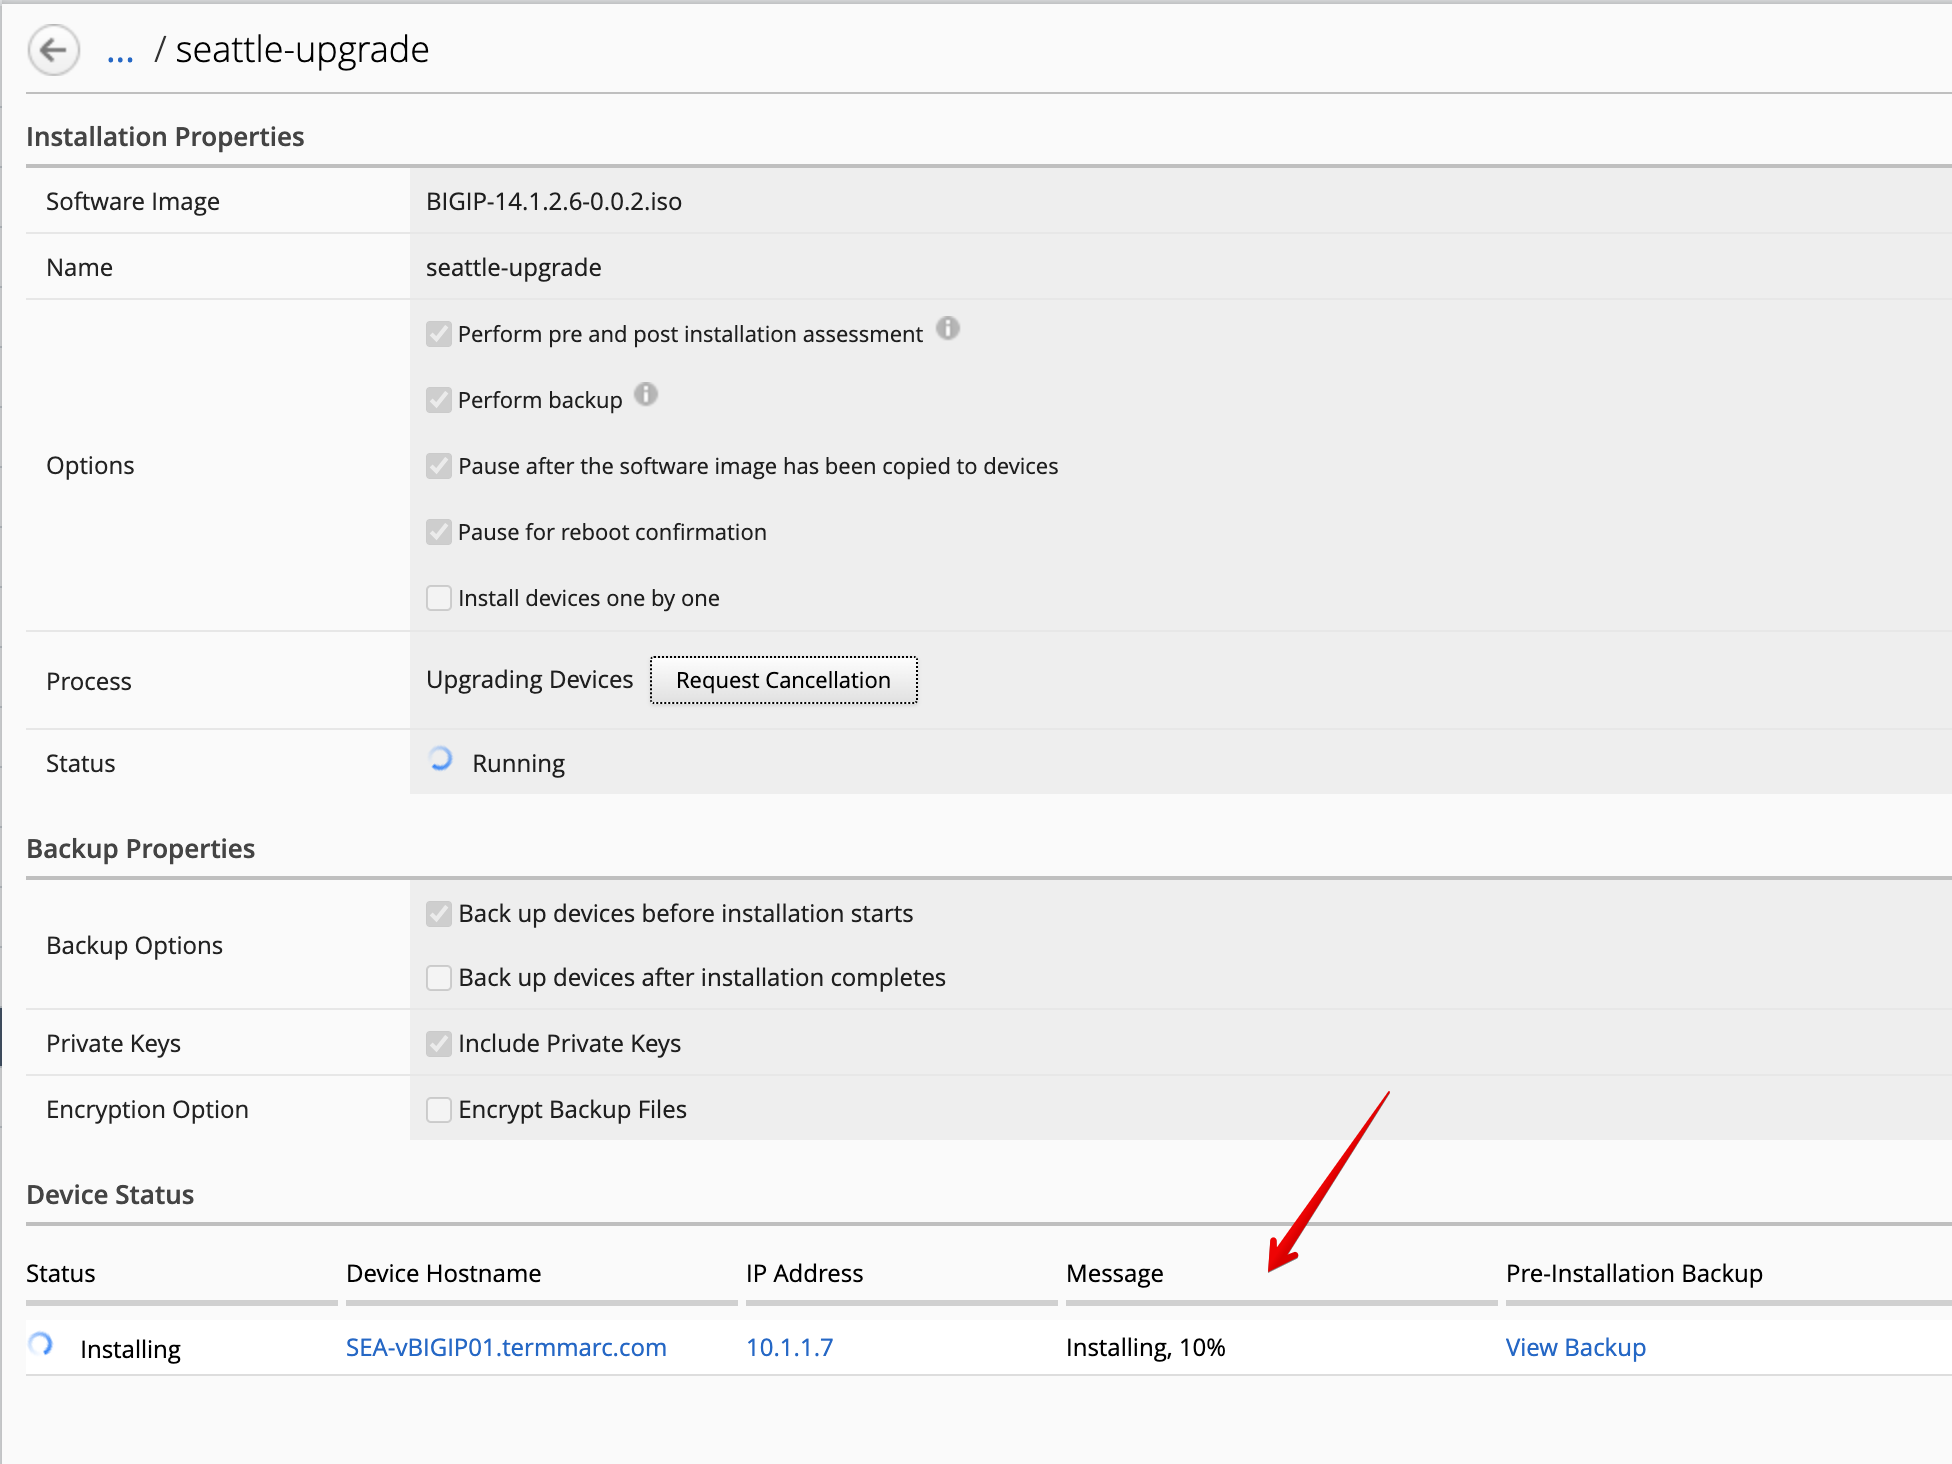
- The software upgrade is starting. This step is typically done during a maintenance window.
Note
Time to take a break, go for a coffee/tea (or do another lab not using SEA-vBIGIP01.termmarc.com)!
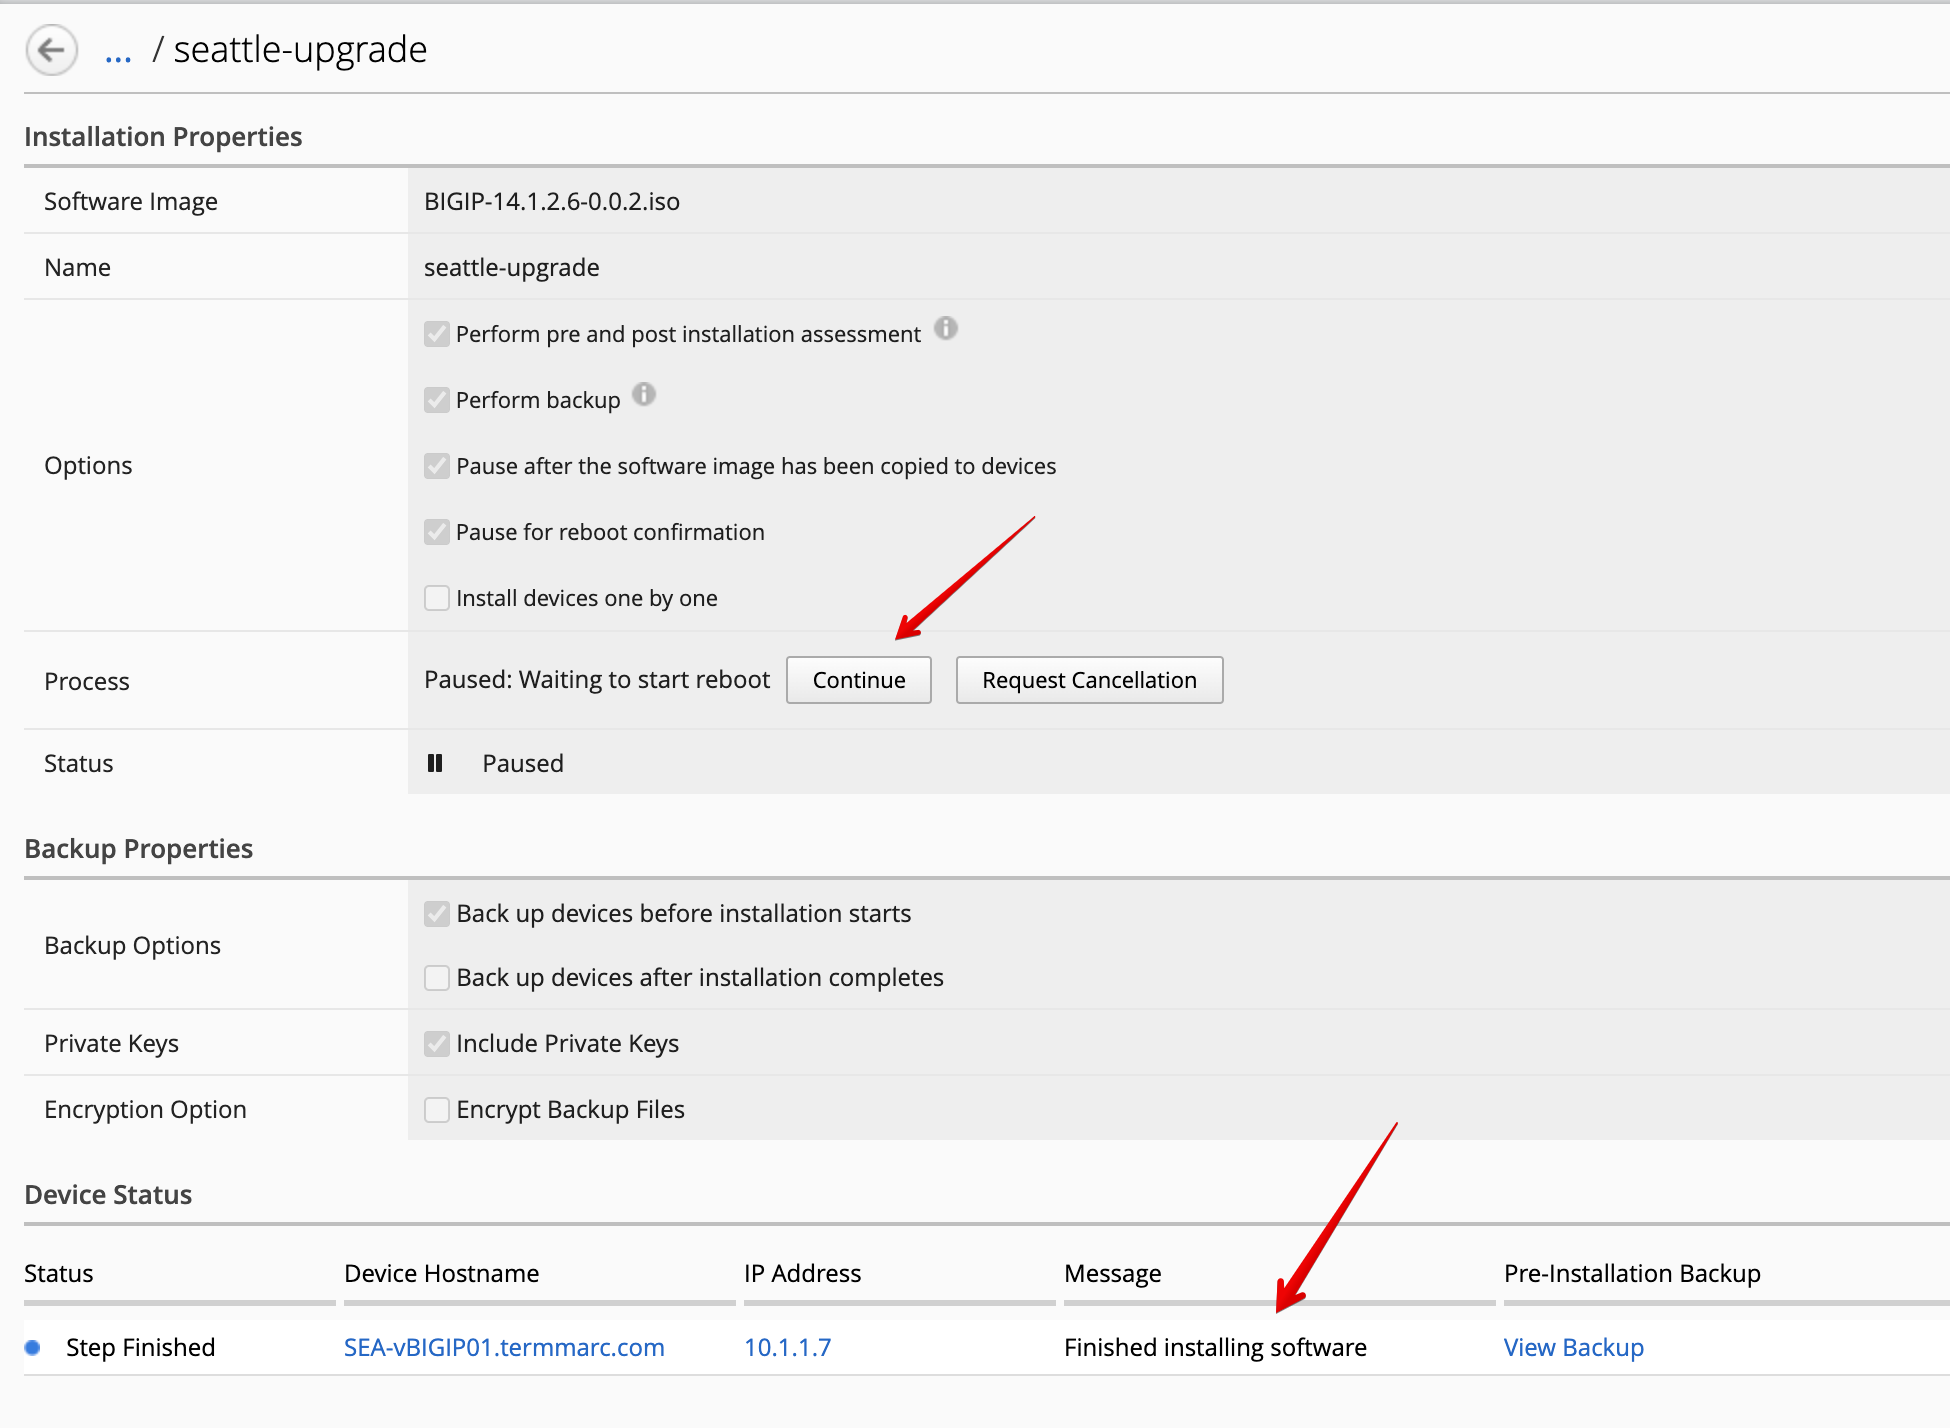
- Once the software installation is completed, proceed with the reboot. Click on Continue.
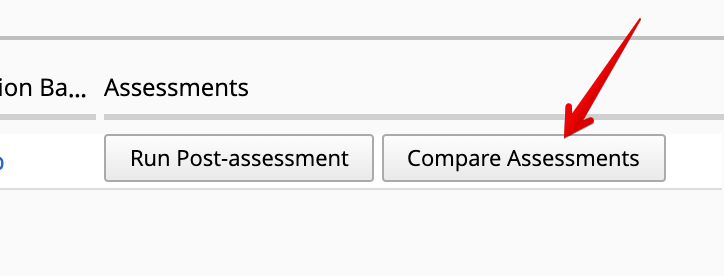
- After the reboot complete, click on Run All Post-Assessment.
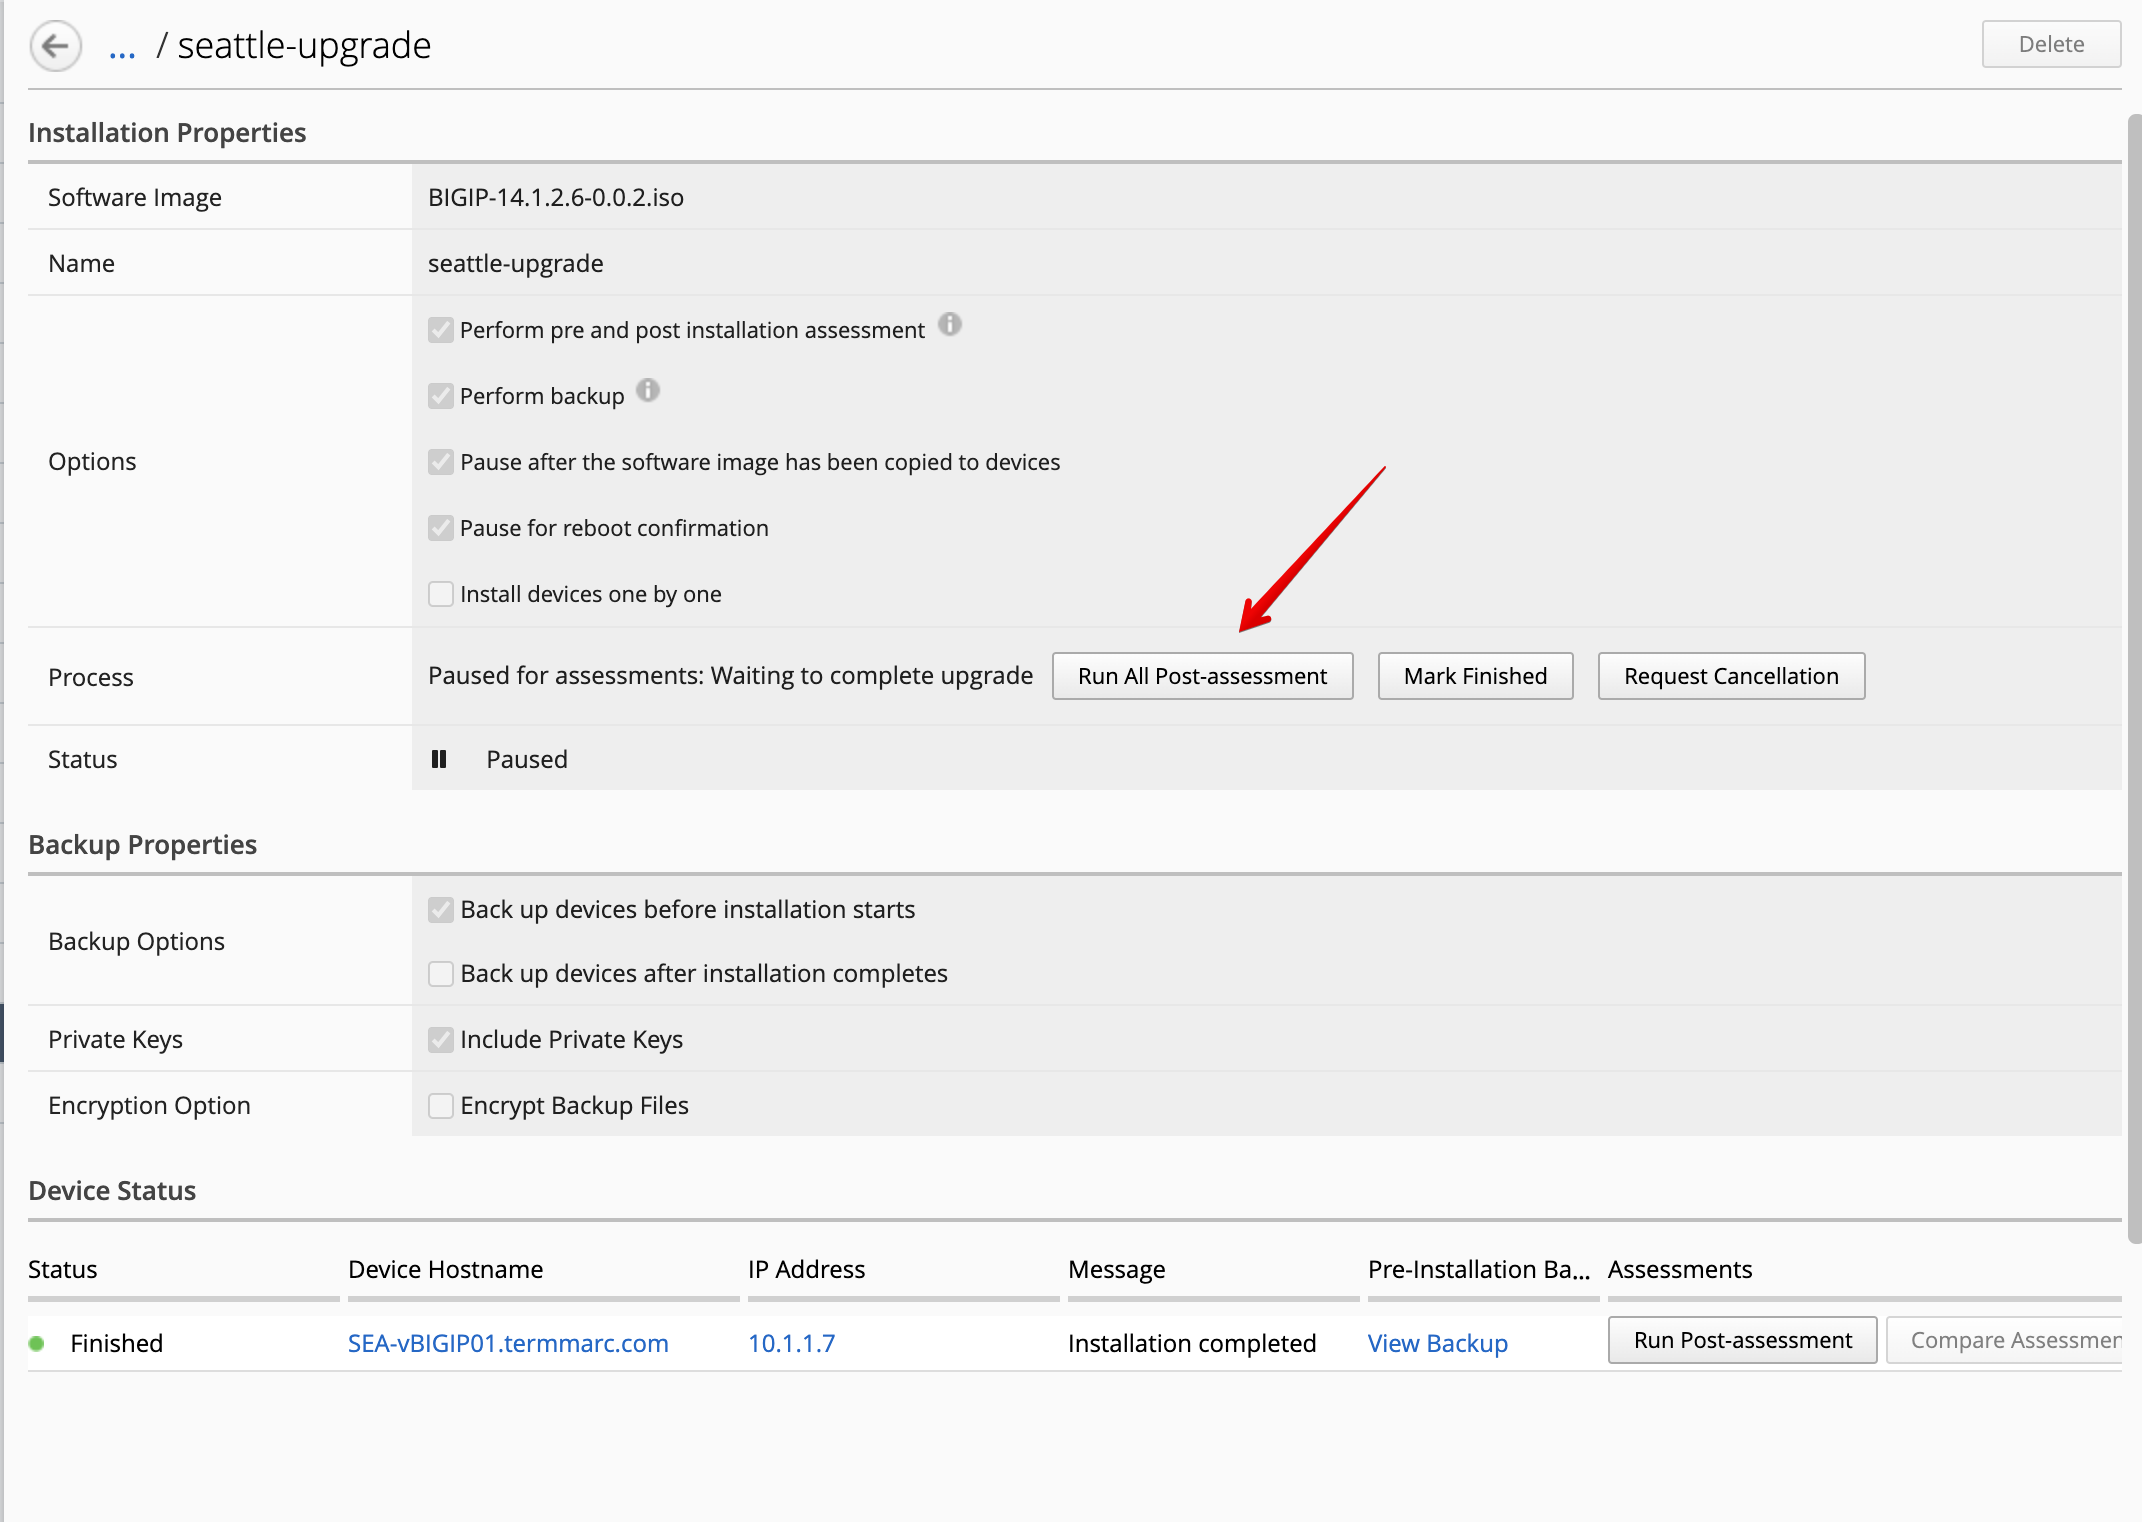
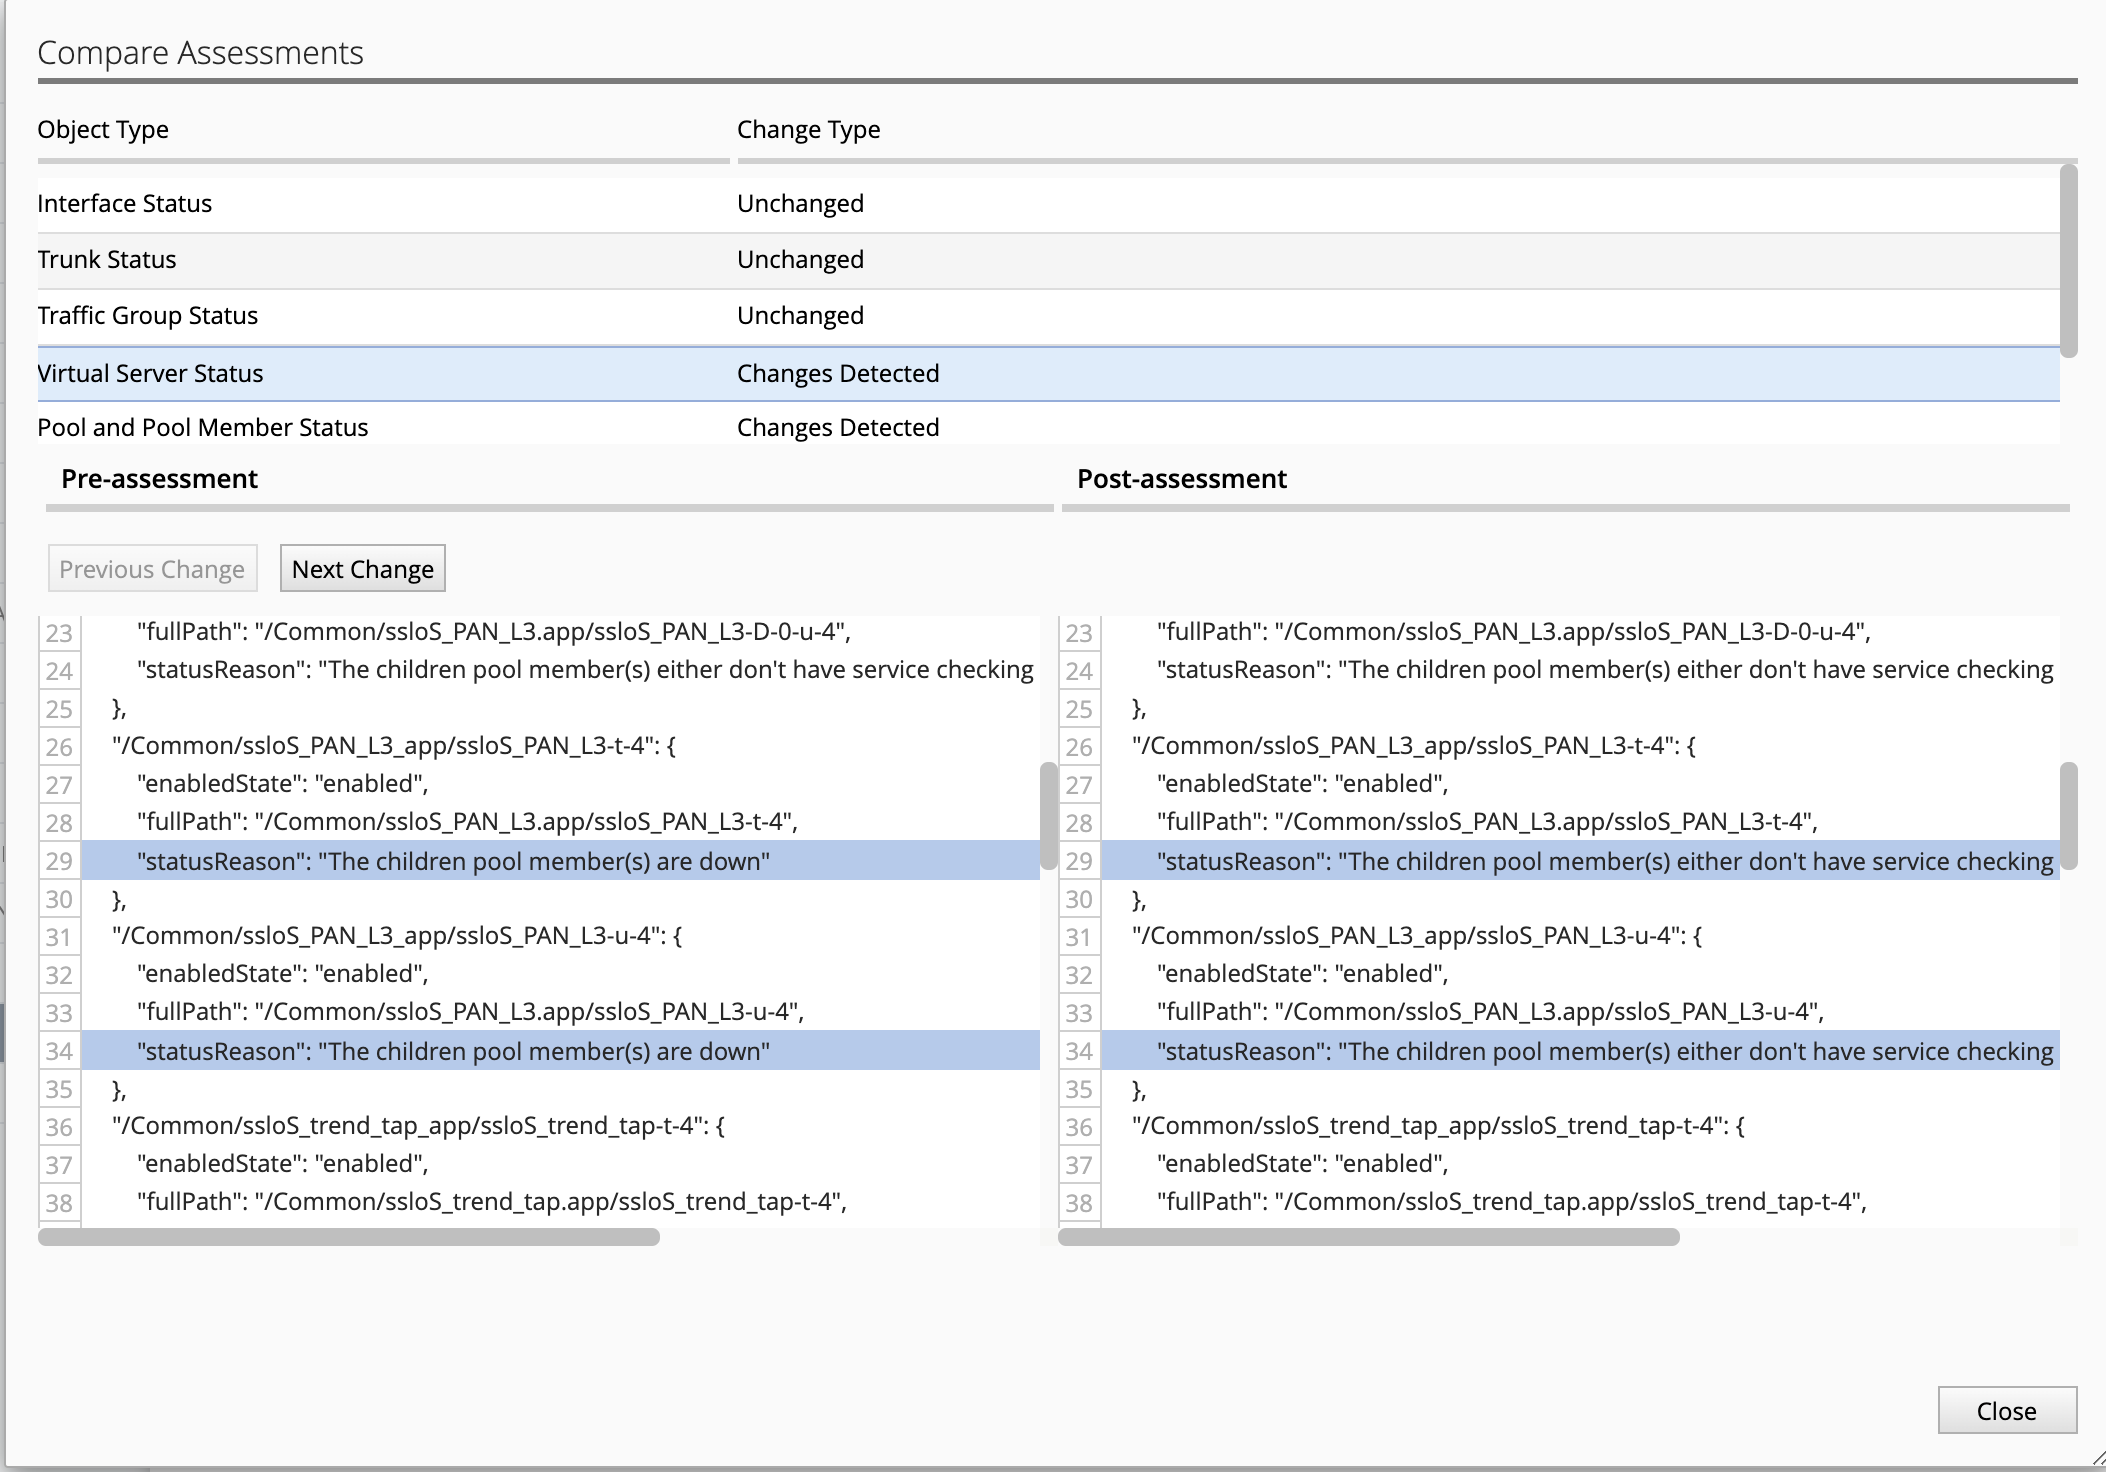
And Compare Assessment to see what LTM differs from prior upgrade.
Example of assessments comparison.
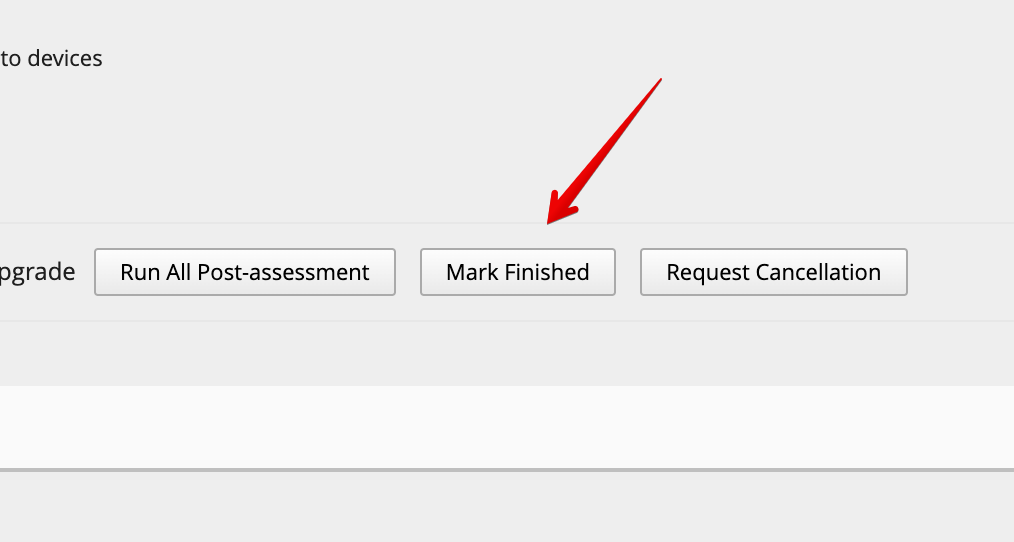
- Finally, when the Post-Assessment and software upgrade completed successfuly, click on Mark Finished.
- Go back to the Device tab click under services for SEA-vBIGIP01.termmarc.com then re-discover and re-import the LTM module on the BIG-IP, important step to perform after the BIG-IP upgrade.

Click on Re-discover first. Then once object discovery is completed, click on Re-import.
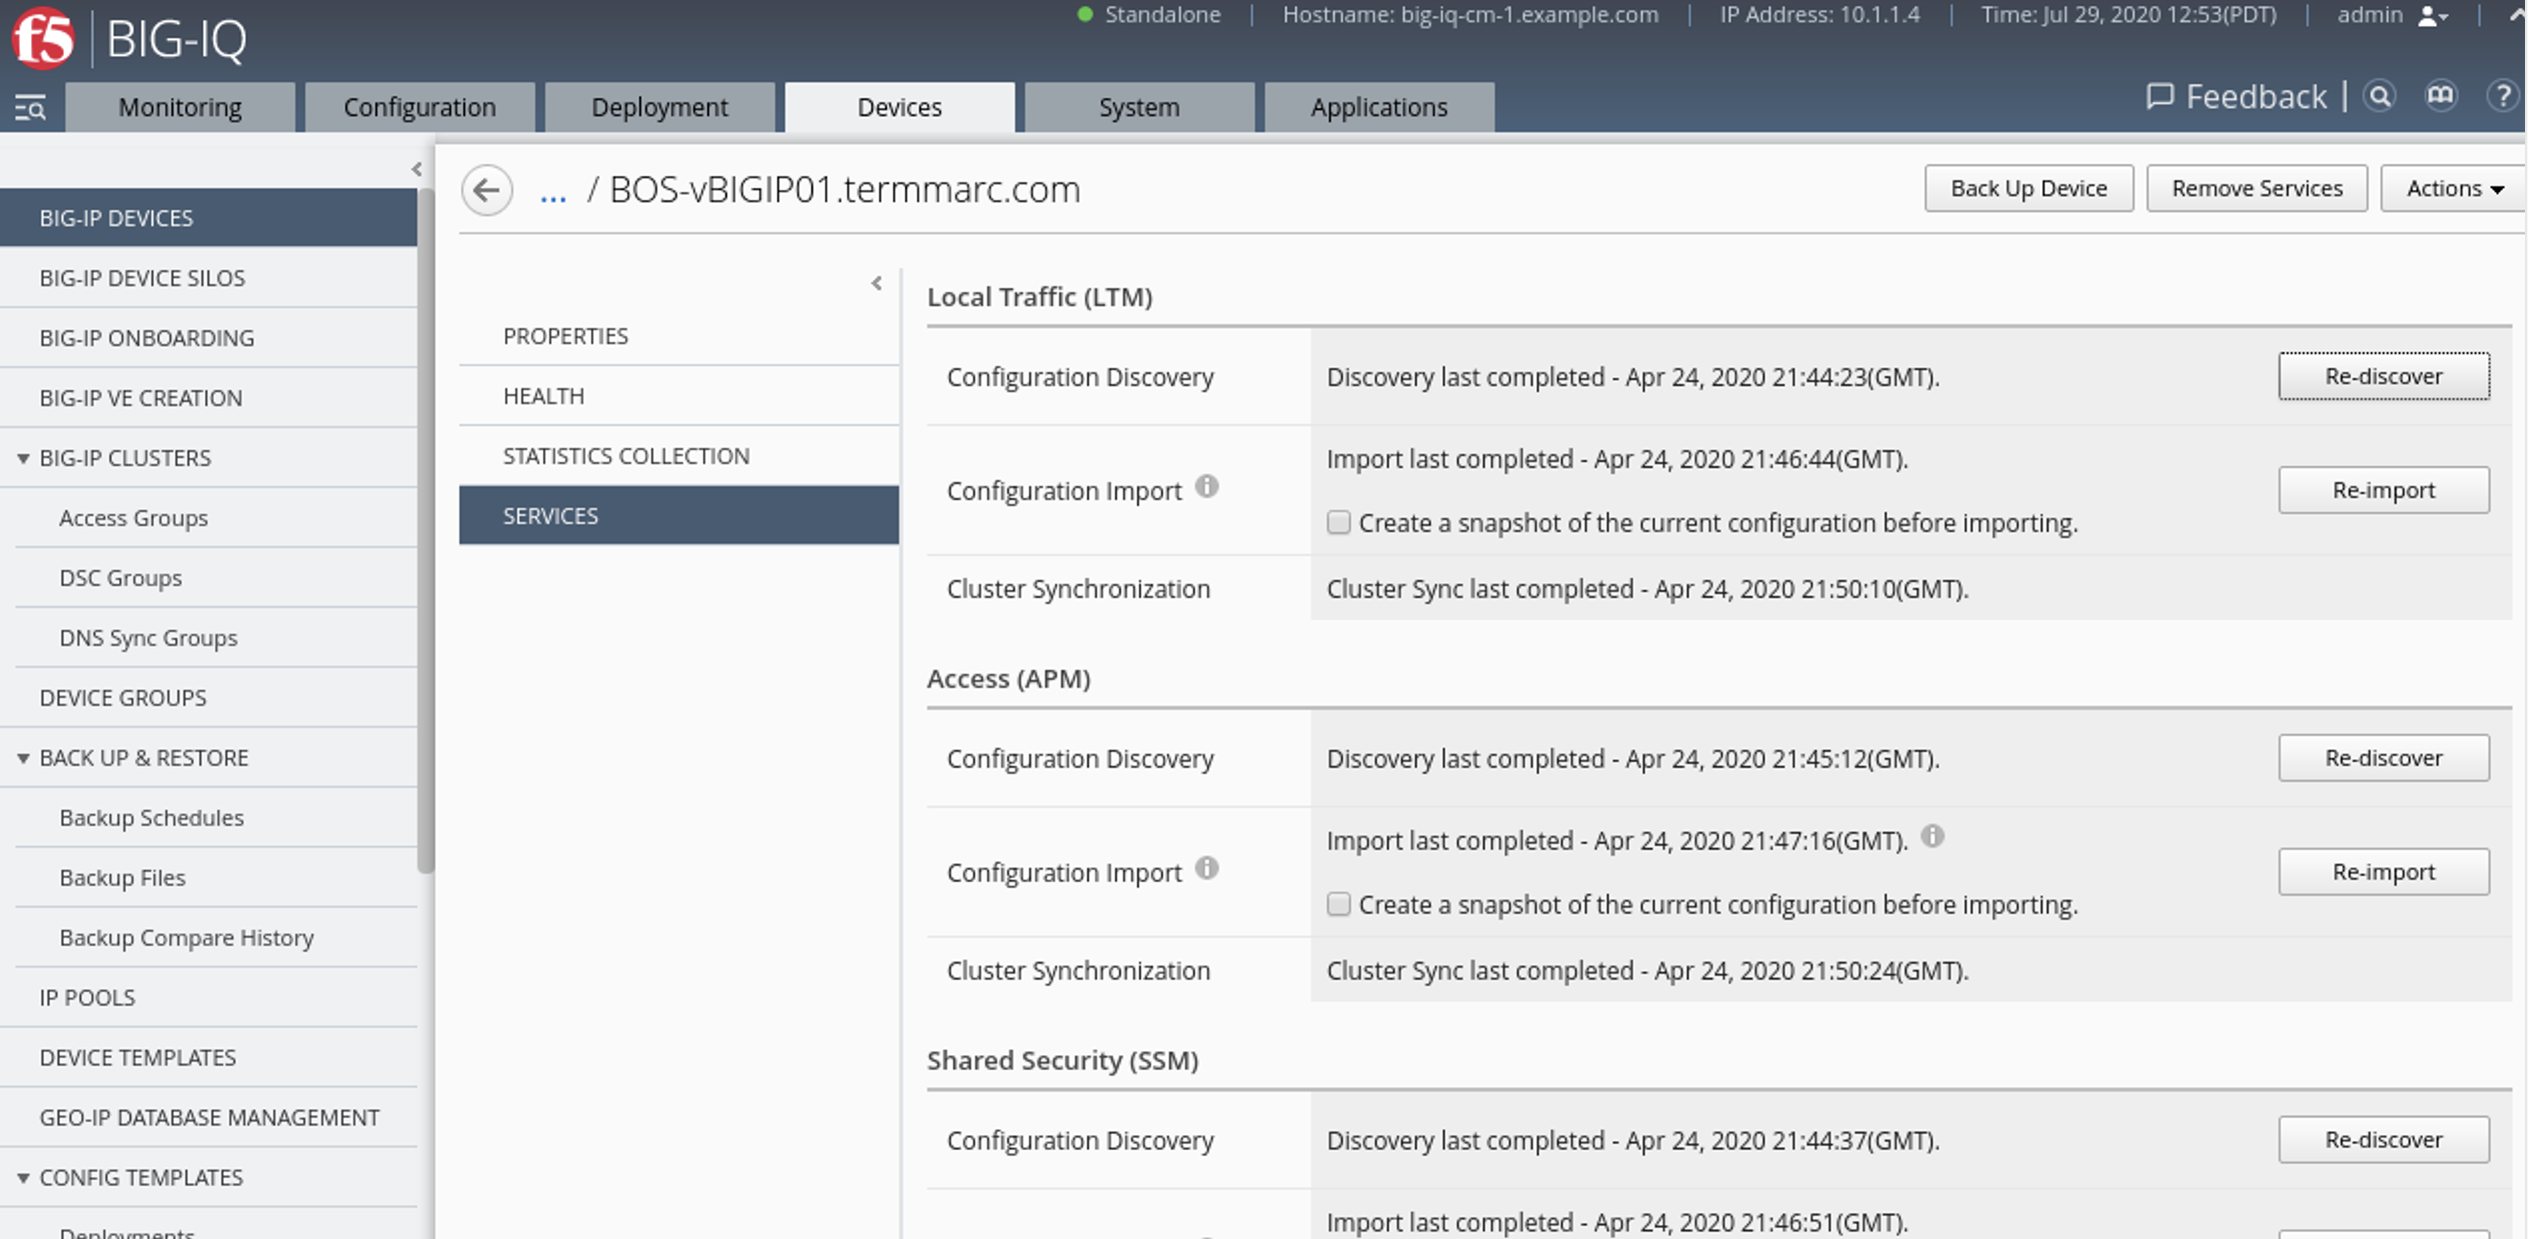
You should have the conflict resolution window showing up, choose Create Version.