NGINX Modern Apps > Class 2 - NGINX Plus CI/CD Lab > Module 2: Deploying NGINX Plus web server with CI/CD Source | Edit on
Lab 1: Make new code commit, push changes and deploy to Staging and Production
In this example, we will make a simple change in updating the phone image on the homepage of our website. We will then commit our changes and push the new code to our Gitlab repository; this will automatically trigger a CI/CD pipeline.
A successful build will result in storing the Docker container artifact in a private Container Registry; this is the new stable build of NGINX Plus containing the new web application code.
The last phase of the CI/CD Pipeline will deploy the new container to our Staging Server automatically but wait for a human trigger to deploy the containers to Production. Note that we will deploy four instances (four containers) to Production to illustrate NGINX Plus as a Load Balancer in the next exercise
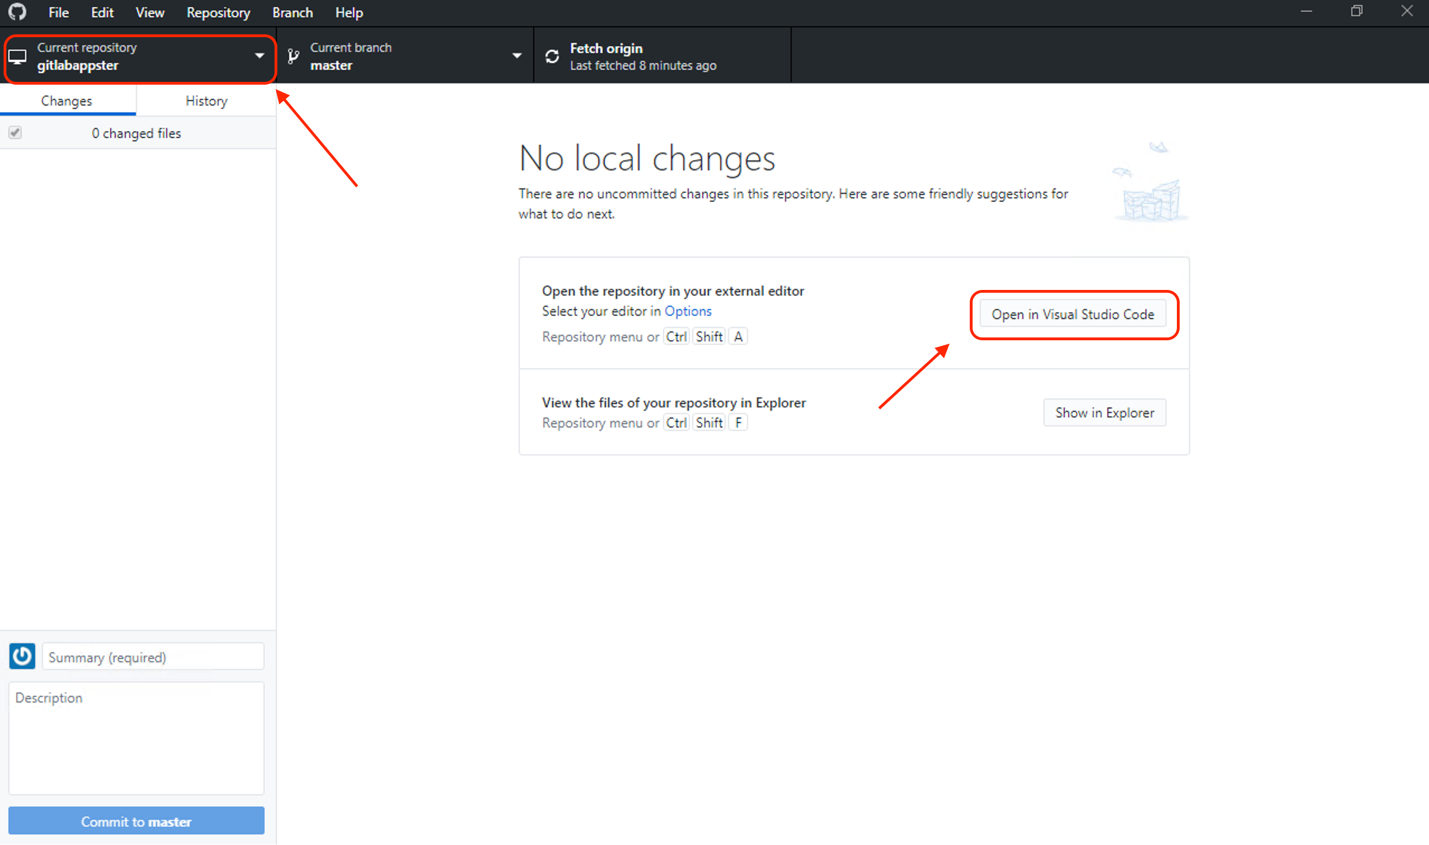
Open the GitHub Desktop client and make sure the current repository selected is
gitlabappsterFrom the same screen now click the “Open in Visual Studio Code” button to start editing our appster web application code
Now that Visual Studio Code is open, expand the tree under
gitlabappster->etc->nginx->html. Once the tree has been opened, findindex.htmlfile and right click on it. A menu will open up. Select: “Reveal in File explorer” to open it up in windows explorer.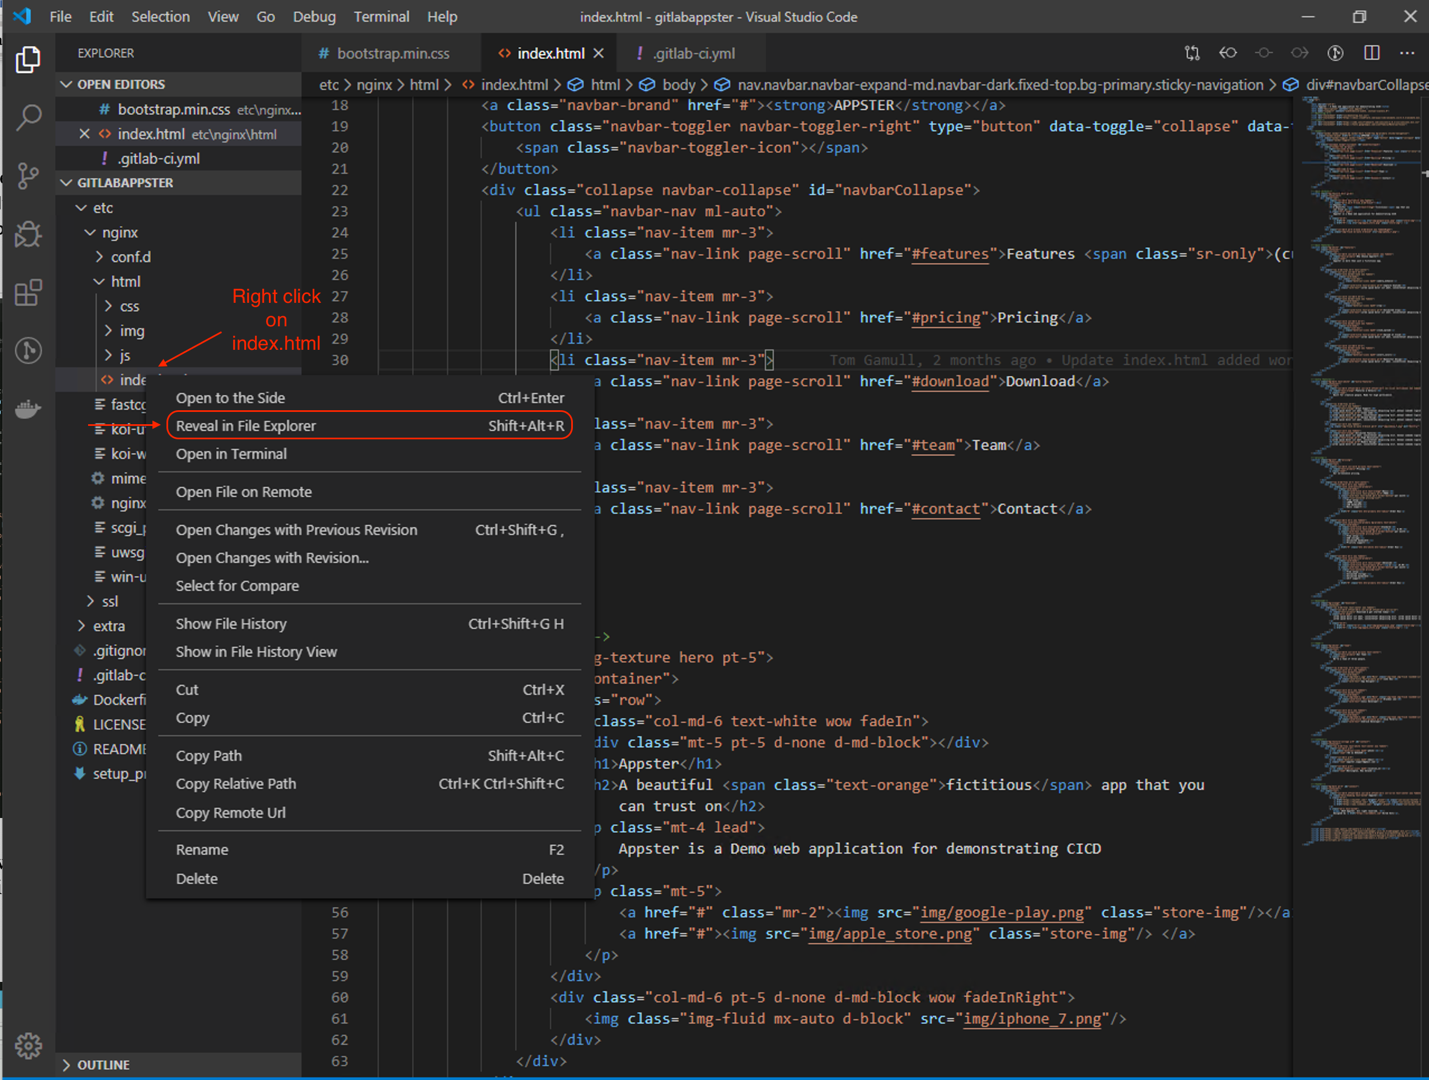
Once windows explorer has opened at the location of the file, you will see the folder with
index.htmllisted. Go ahead and double-clickindex.htmlto open that file in a browser (Google Chrome.)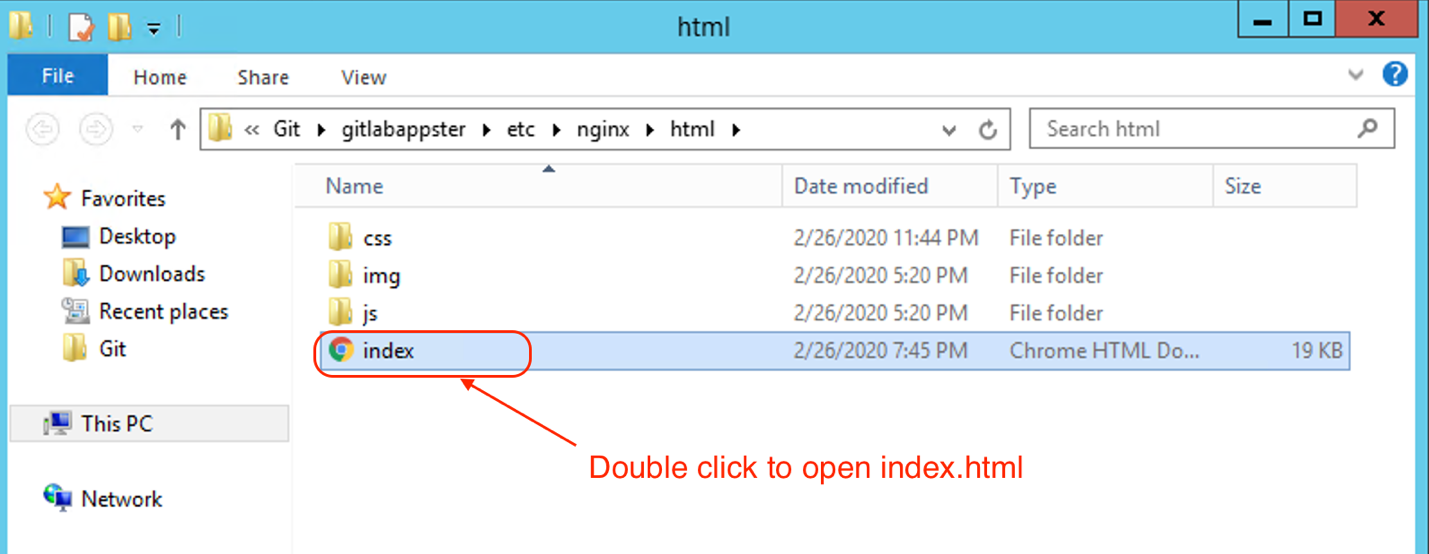
After the double-click on
index.html, and opening the webpage in the web browser, you will see the current webpage displaying the Appster application with a dated iPhone 7 image. Go ahead and leave this web browser page open.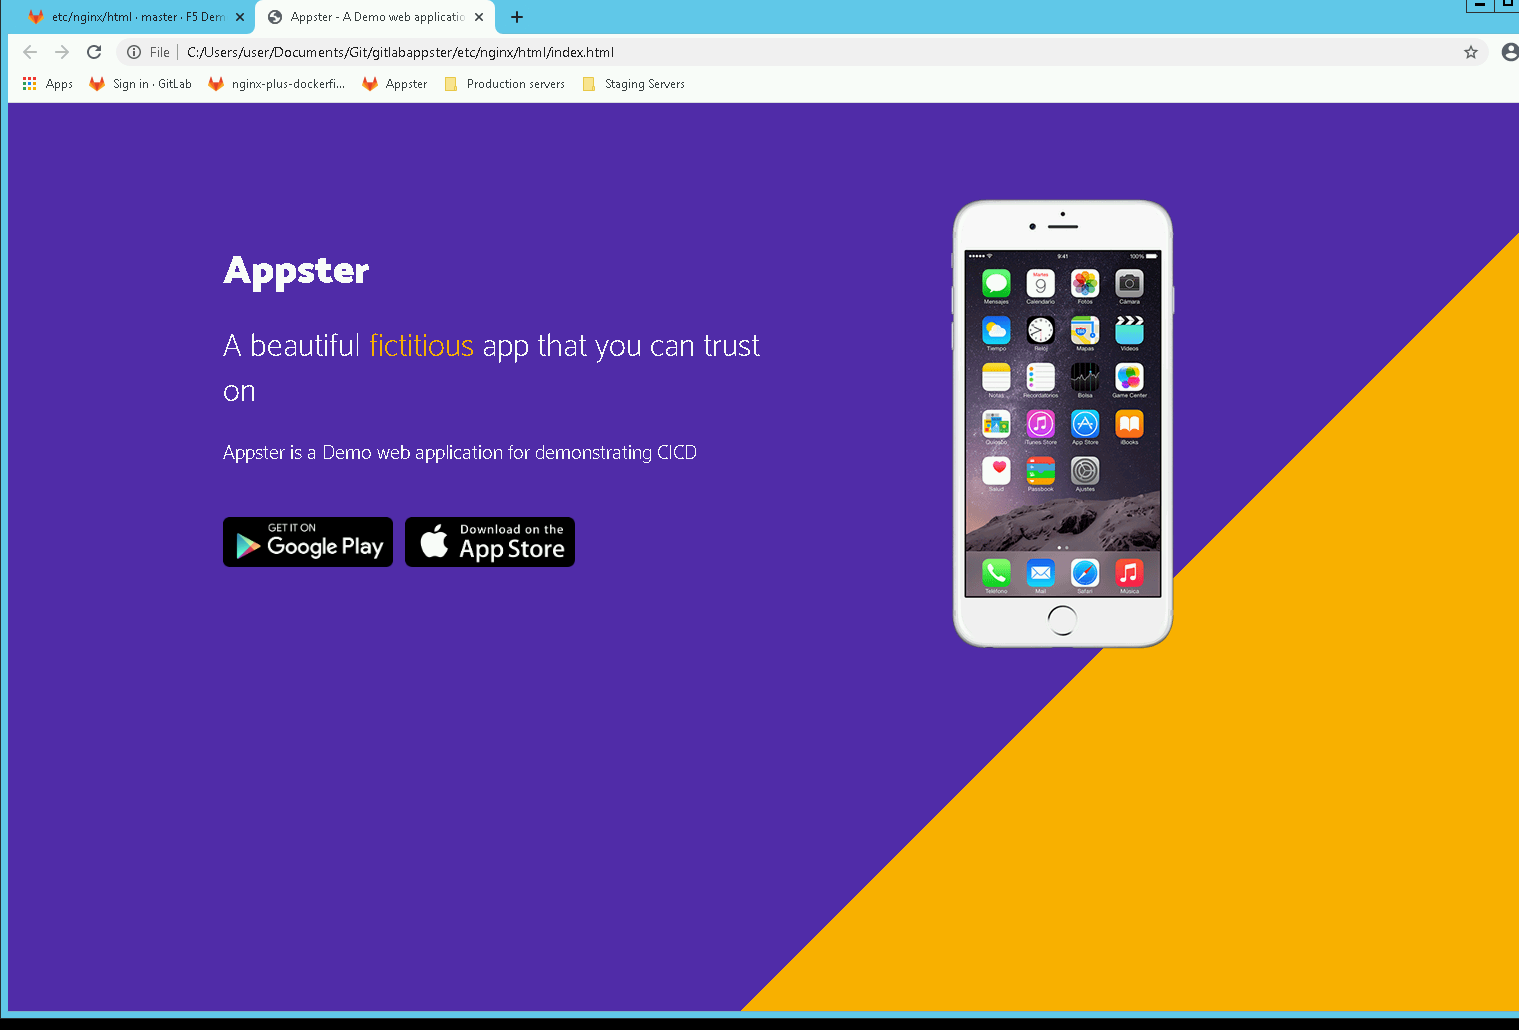
Go back to Visual Studio code editor to make edits to this file. This time, open that same
index.htmlfile (click to open it in visual studio code.)Once the file is open, we are now going to find and replace the current iPhone image (currently set to
iphone_7.pngand change it toiphone_x.pngHit Ctrl+F, which opens the find window and type iniphone_7.png. You should have two hits (just to the right of the find window).Search and replace all instances of
iphone_7.pngtoiphone_x.png. Update all two instances of that image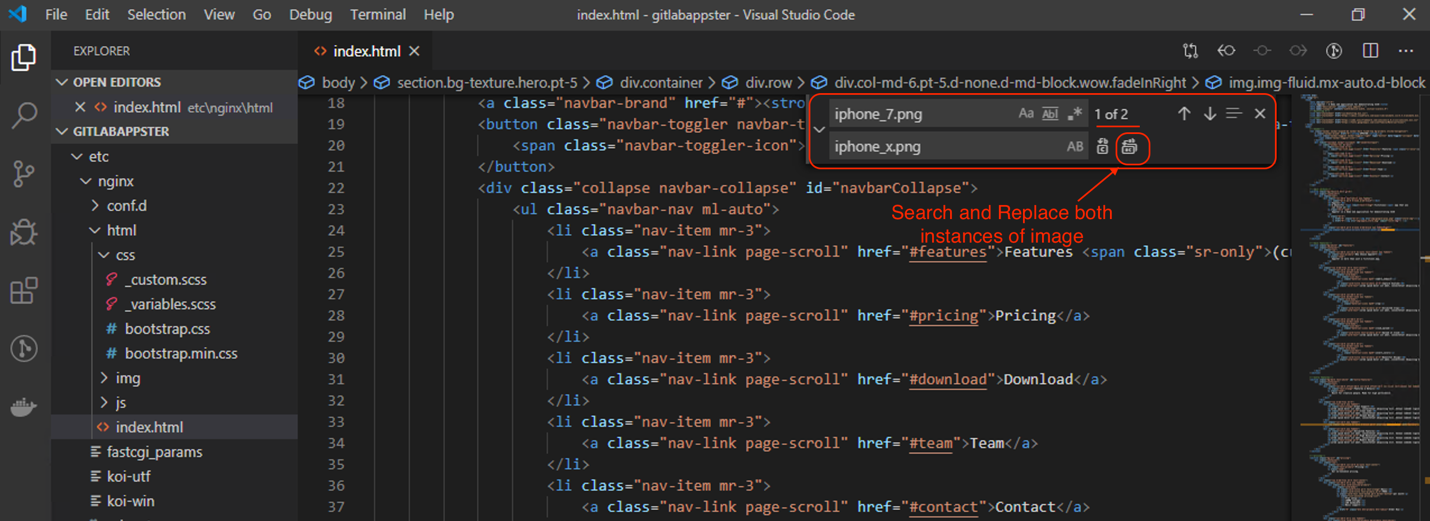
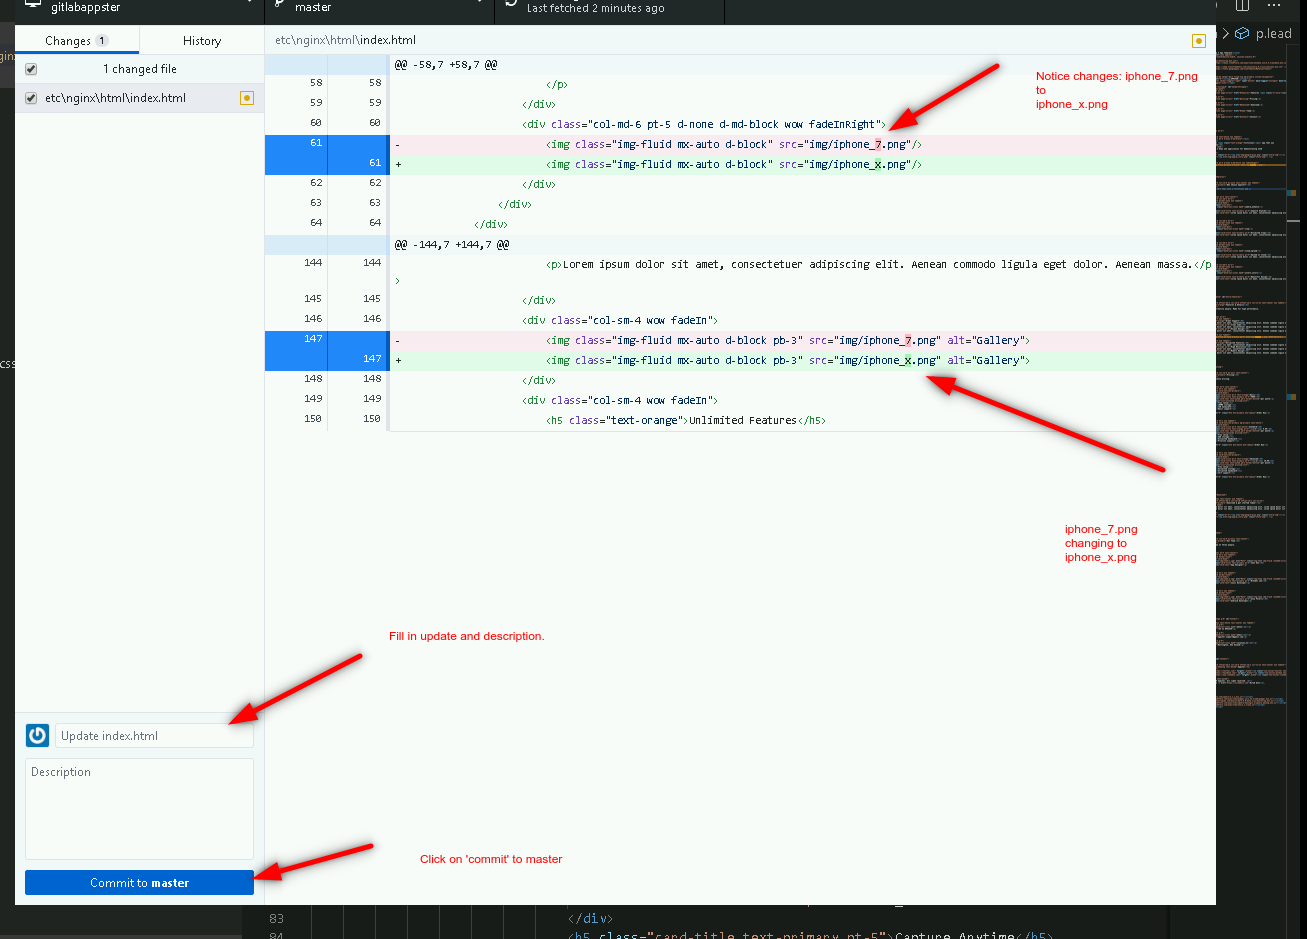
Once you have edited
index.htmland replaced both instances ofiphone_7.pngwithiphone_x.png, go ahead and save the file. You can navigate tofile->saveor you can use the shortcut, CTRL+S. (NOTE: Do not change the file name. Keep it the same.)Open or switch back to the GitHub Desktop Client and see the tracked changes made.
The GitHub Desktop Client has automatically tracked the changes that were made on
index.htmland is highlighting those exact changes,iphone_7.pngreplaced withiphone_x.png.We now can push these changes to our repository on GitLab. In the lower-left of the GitHub, Desktop Client provide a Commit title and notes before we can commit to master:
You can see two boxes. Go ahead and type in the title field: “update index.html”.
Additionally, you can provide notes as well, type in the notes field: “Update phone image”
Once you fill in both boxes, click on Commit to Master and on the next screen, press Push Origin to push the new code commit to our git repository on Gitlab.
After you click on Commit to Master, you will be taken to the next page where we push our changes to our repository. Go and click push origin, which will now push our modified
index.htmlfile to our GitLab repository.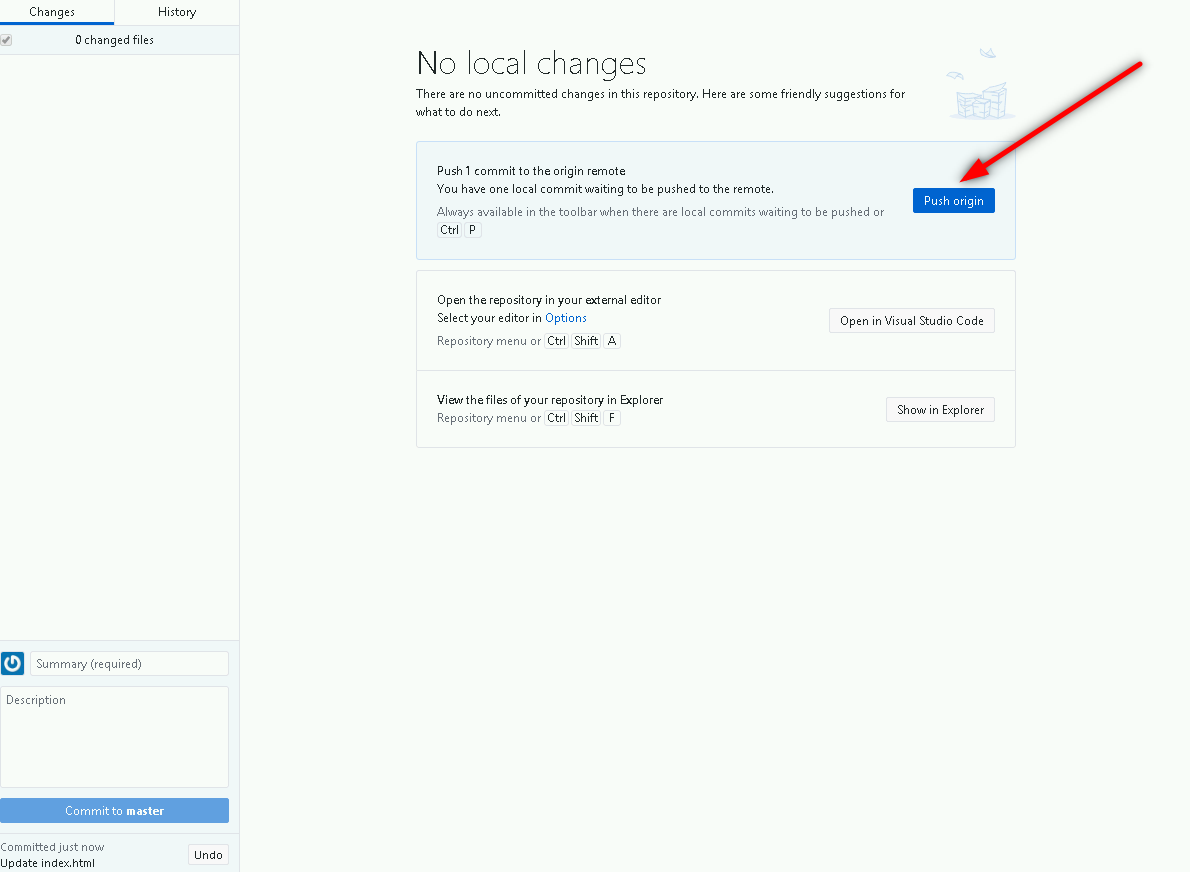
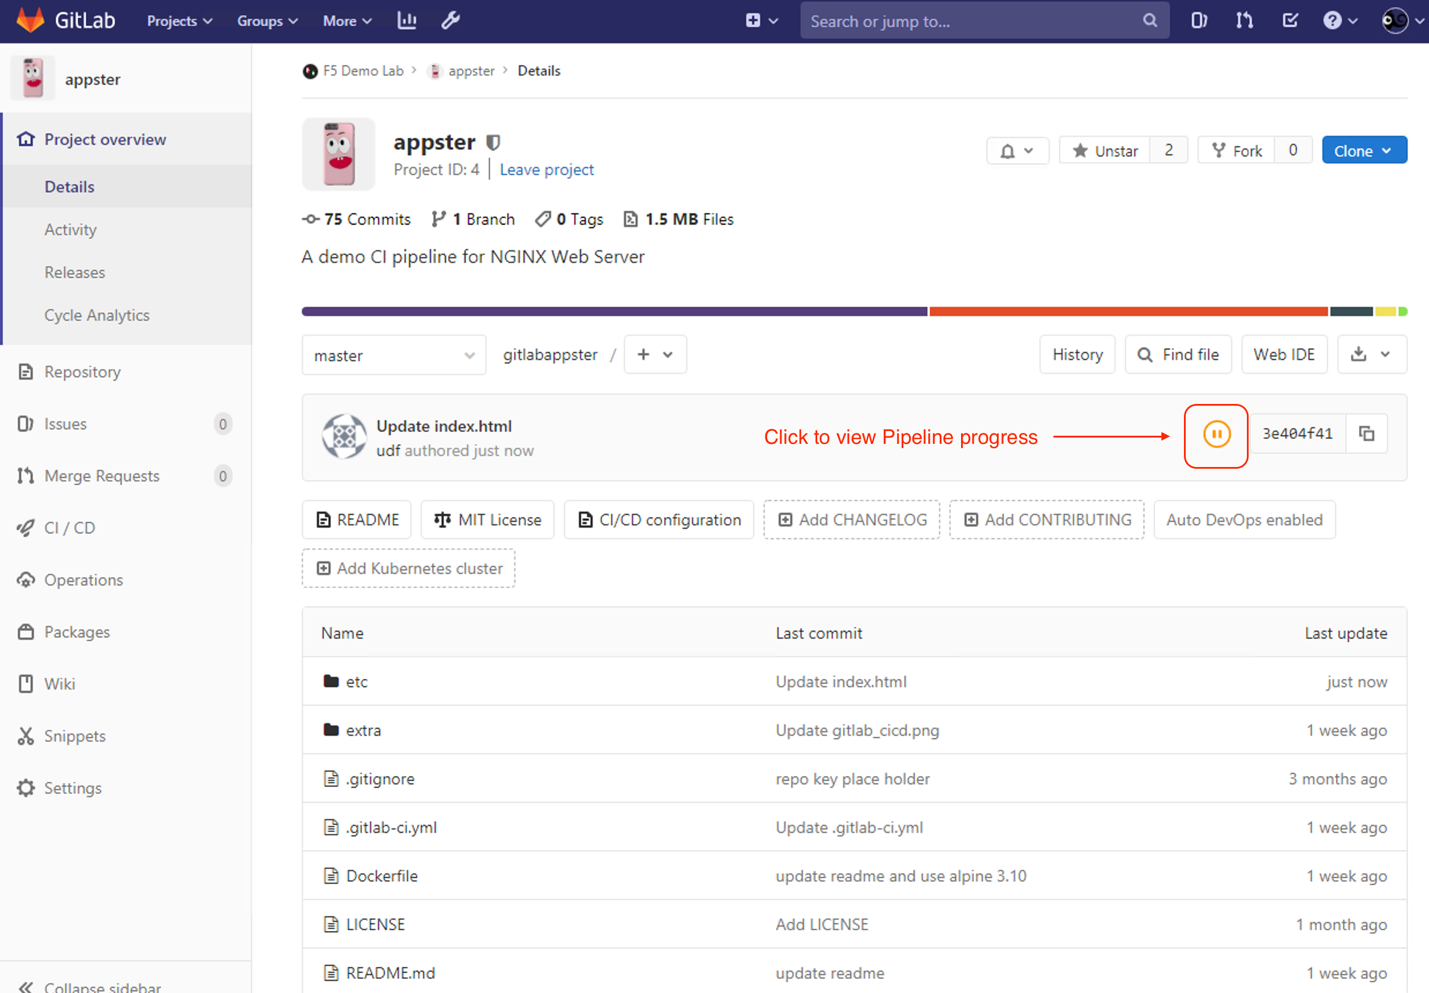
Open up the Appster repo on Gitlab, using the URI https://gitlab.f5.local/f5-demo-lab/gitlabappster or using the Appster shortcut provided. (udf/P@ssw0rd20) This is our repository, where we just pushed our modified
index.htmlfile to.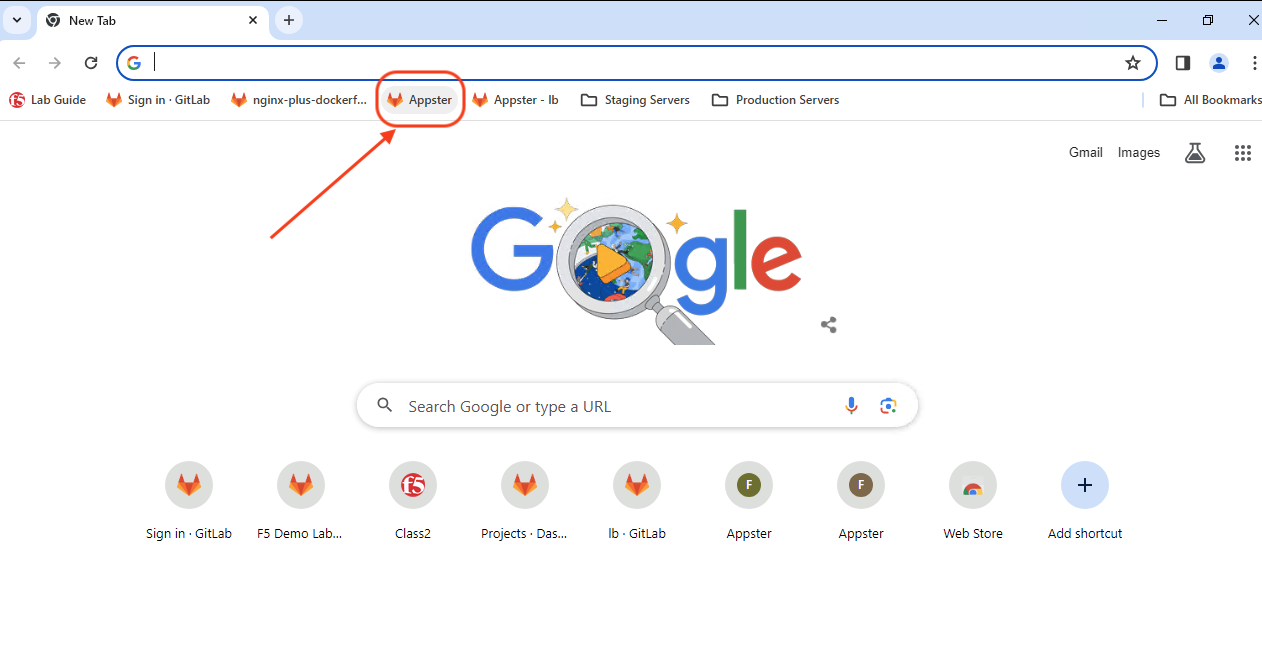
In the middle of the Appster repository, you will see the pipeline status icon next to the latest Commit SHA. When the pipeline is currently in progress, you will see an orange icon (waiting to start), blue circle (running) ), or a green check (passed). Hopefully, we don’t see a red icon, which indicates the pipeline has failed. We can click on the pipeline status icon to view the pipeline progress
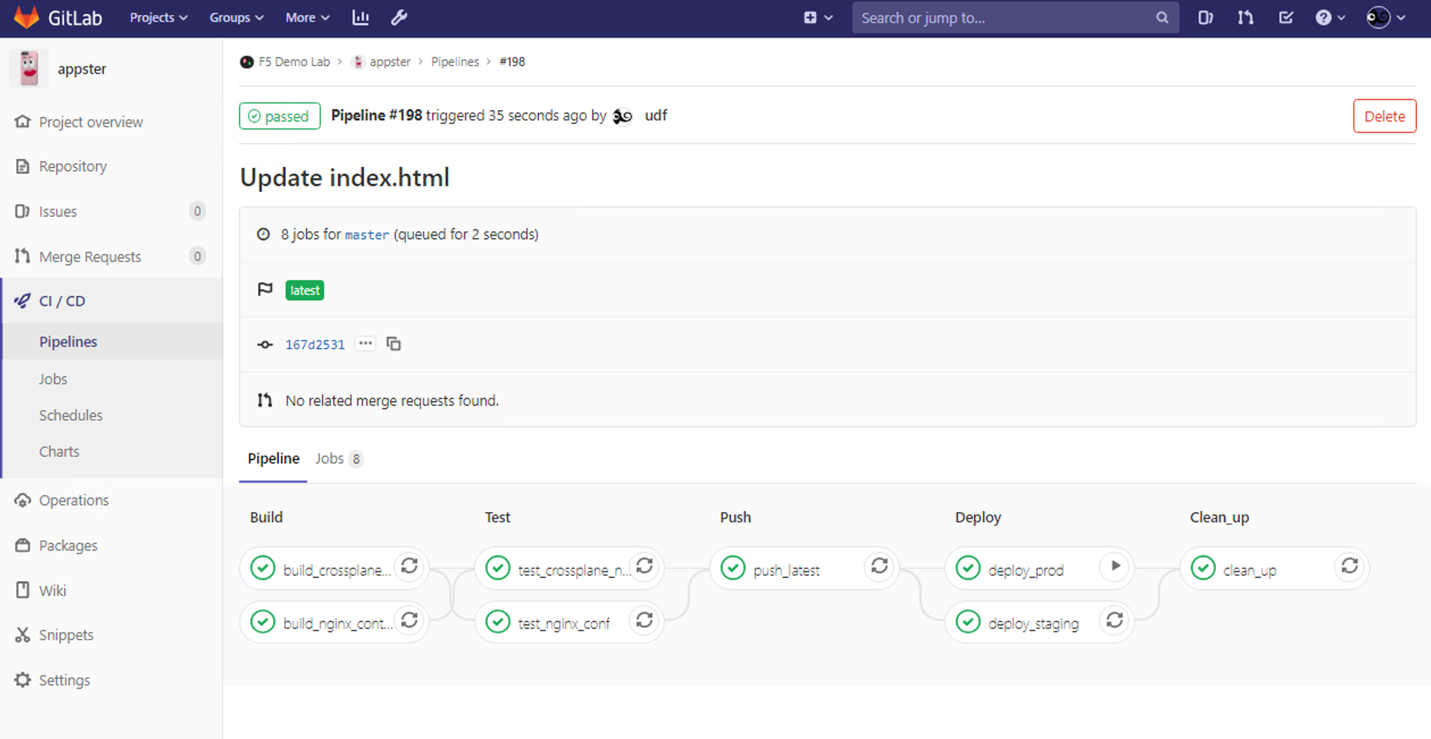
After clicking on the pipeline status icon, we can view the full pipeline. As you can see, we can now see our pipeline:
BUILD,TEST,PUSH,DEPLOY, andCLEANUP. This pipeline was automatically triggered after we submitted our changes to index.html (when we clicked push origin.) and we can see at a high level the stages in the pipeline progressing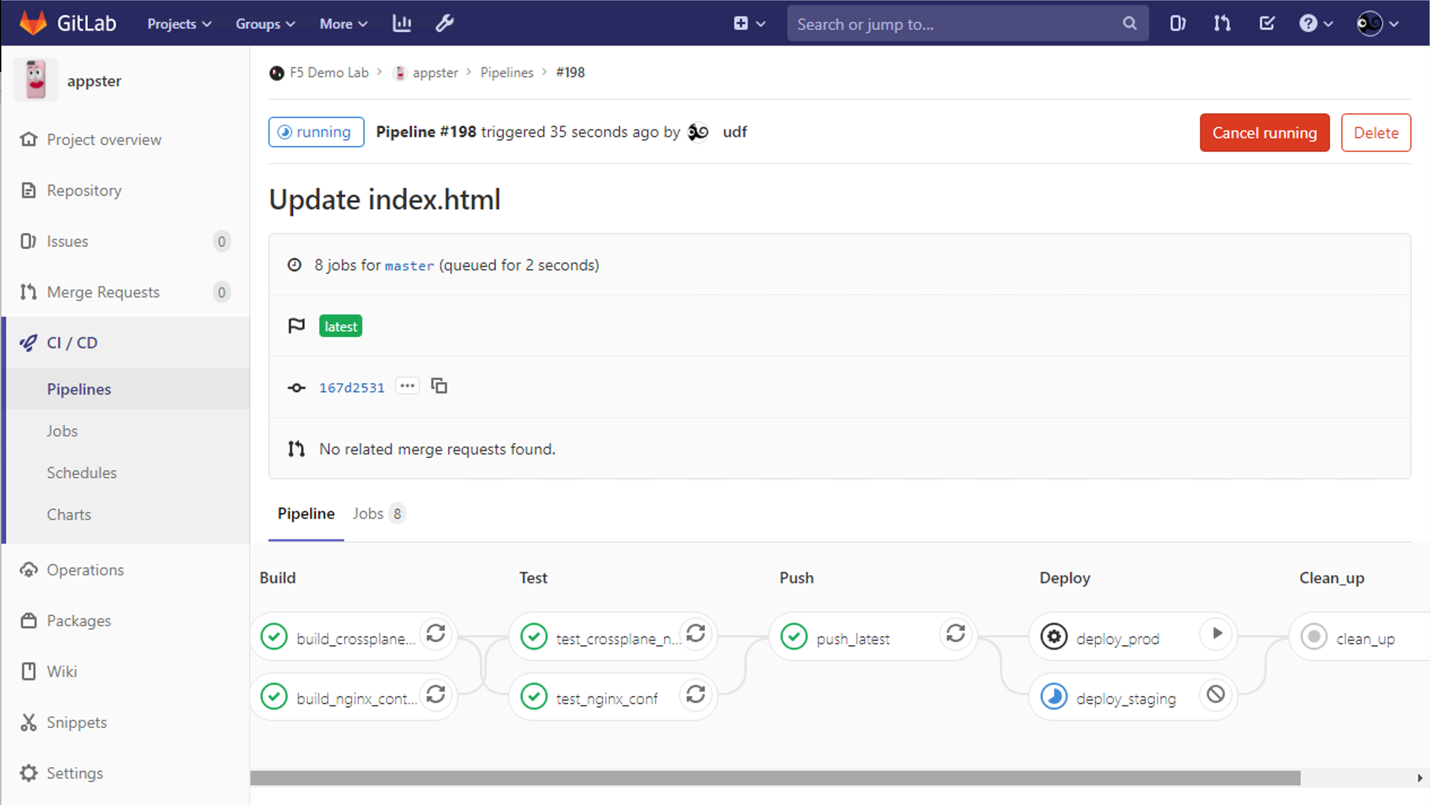
Attention
Stop: This is a good time to inspect the GitLab CI/CD Pipeline file, .gitlab-ci.yml, while waiting for the pipeline to complete.
- Look at the stage,
deploy_staging, and compare to the stage,deploy_prod, Do you seewhen: manual? This enforces a manual trigger to deploy to production! - In stages
deploy_staginganddeploy_prod:you will see manydockercommands executed as commands remotely using SSH. - In both stages,
deploy_staginganddeploy_prod,docker loginto our container registry anddocker pullto Pull the updated web server image. We then rundocker stopto stop our running web server container anddocker rmto delete this old container. Lastly we do adocker runto run the updated web server image. When we run multiple containers in production we can avoid an outage by performing cascading updates and use active health checks on the load balancer to avoid traffic sent to a down server.
As part of our Continuous Delivery, deployment to Staging is automatic, and Production is manual: we have purposely injected a human trigger for a deployment to Production
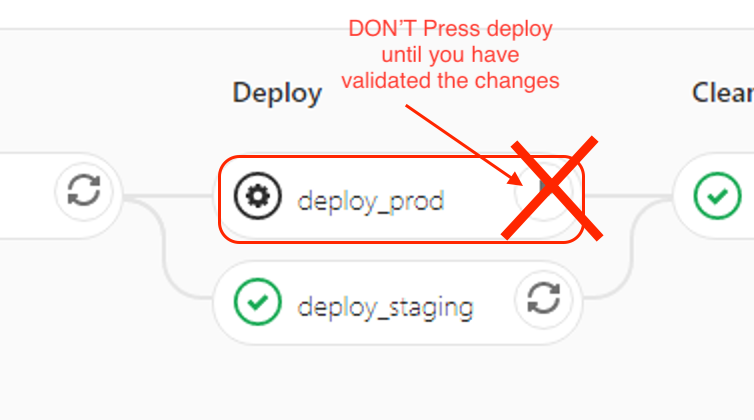
Note
Do not deploy to Production (play button) until code changes in staging have been validated!
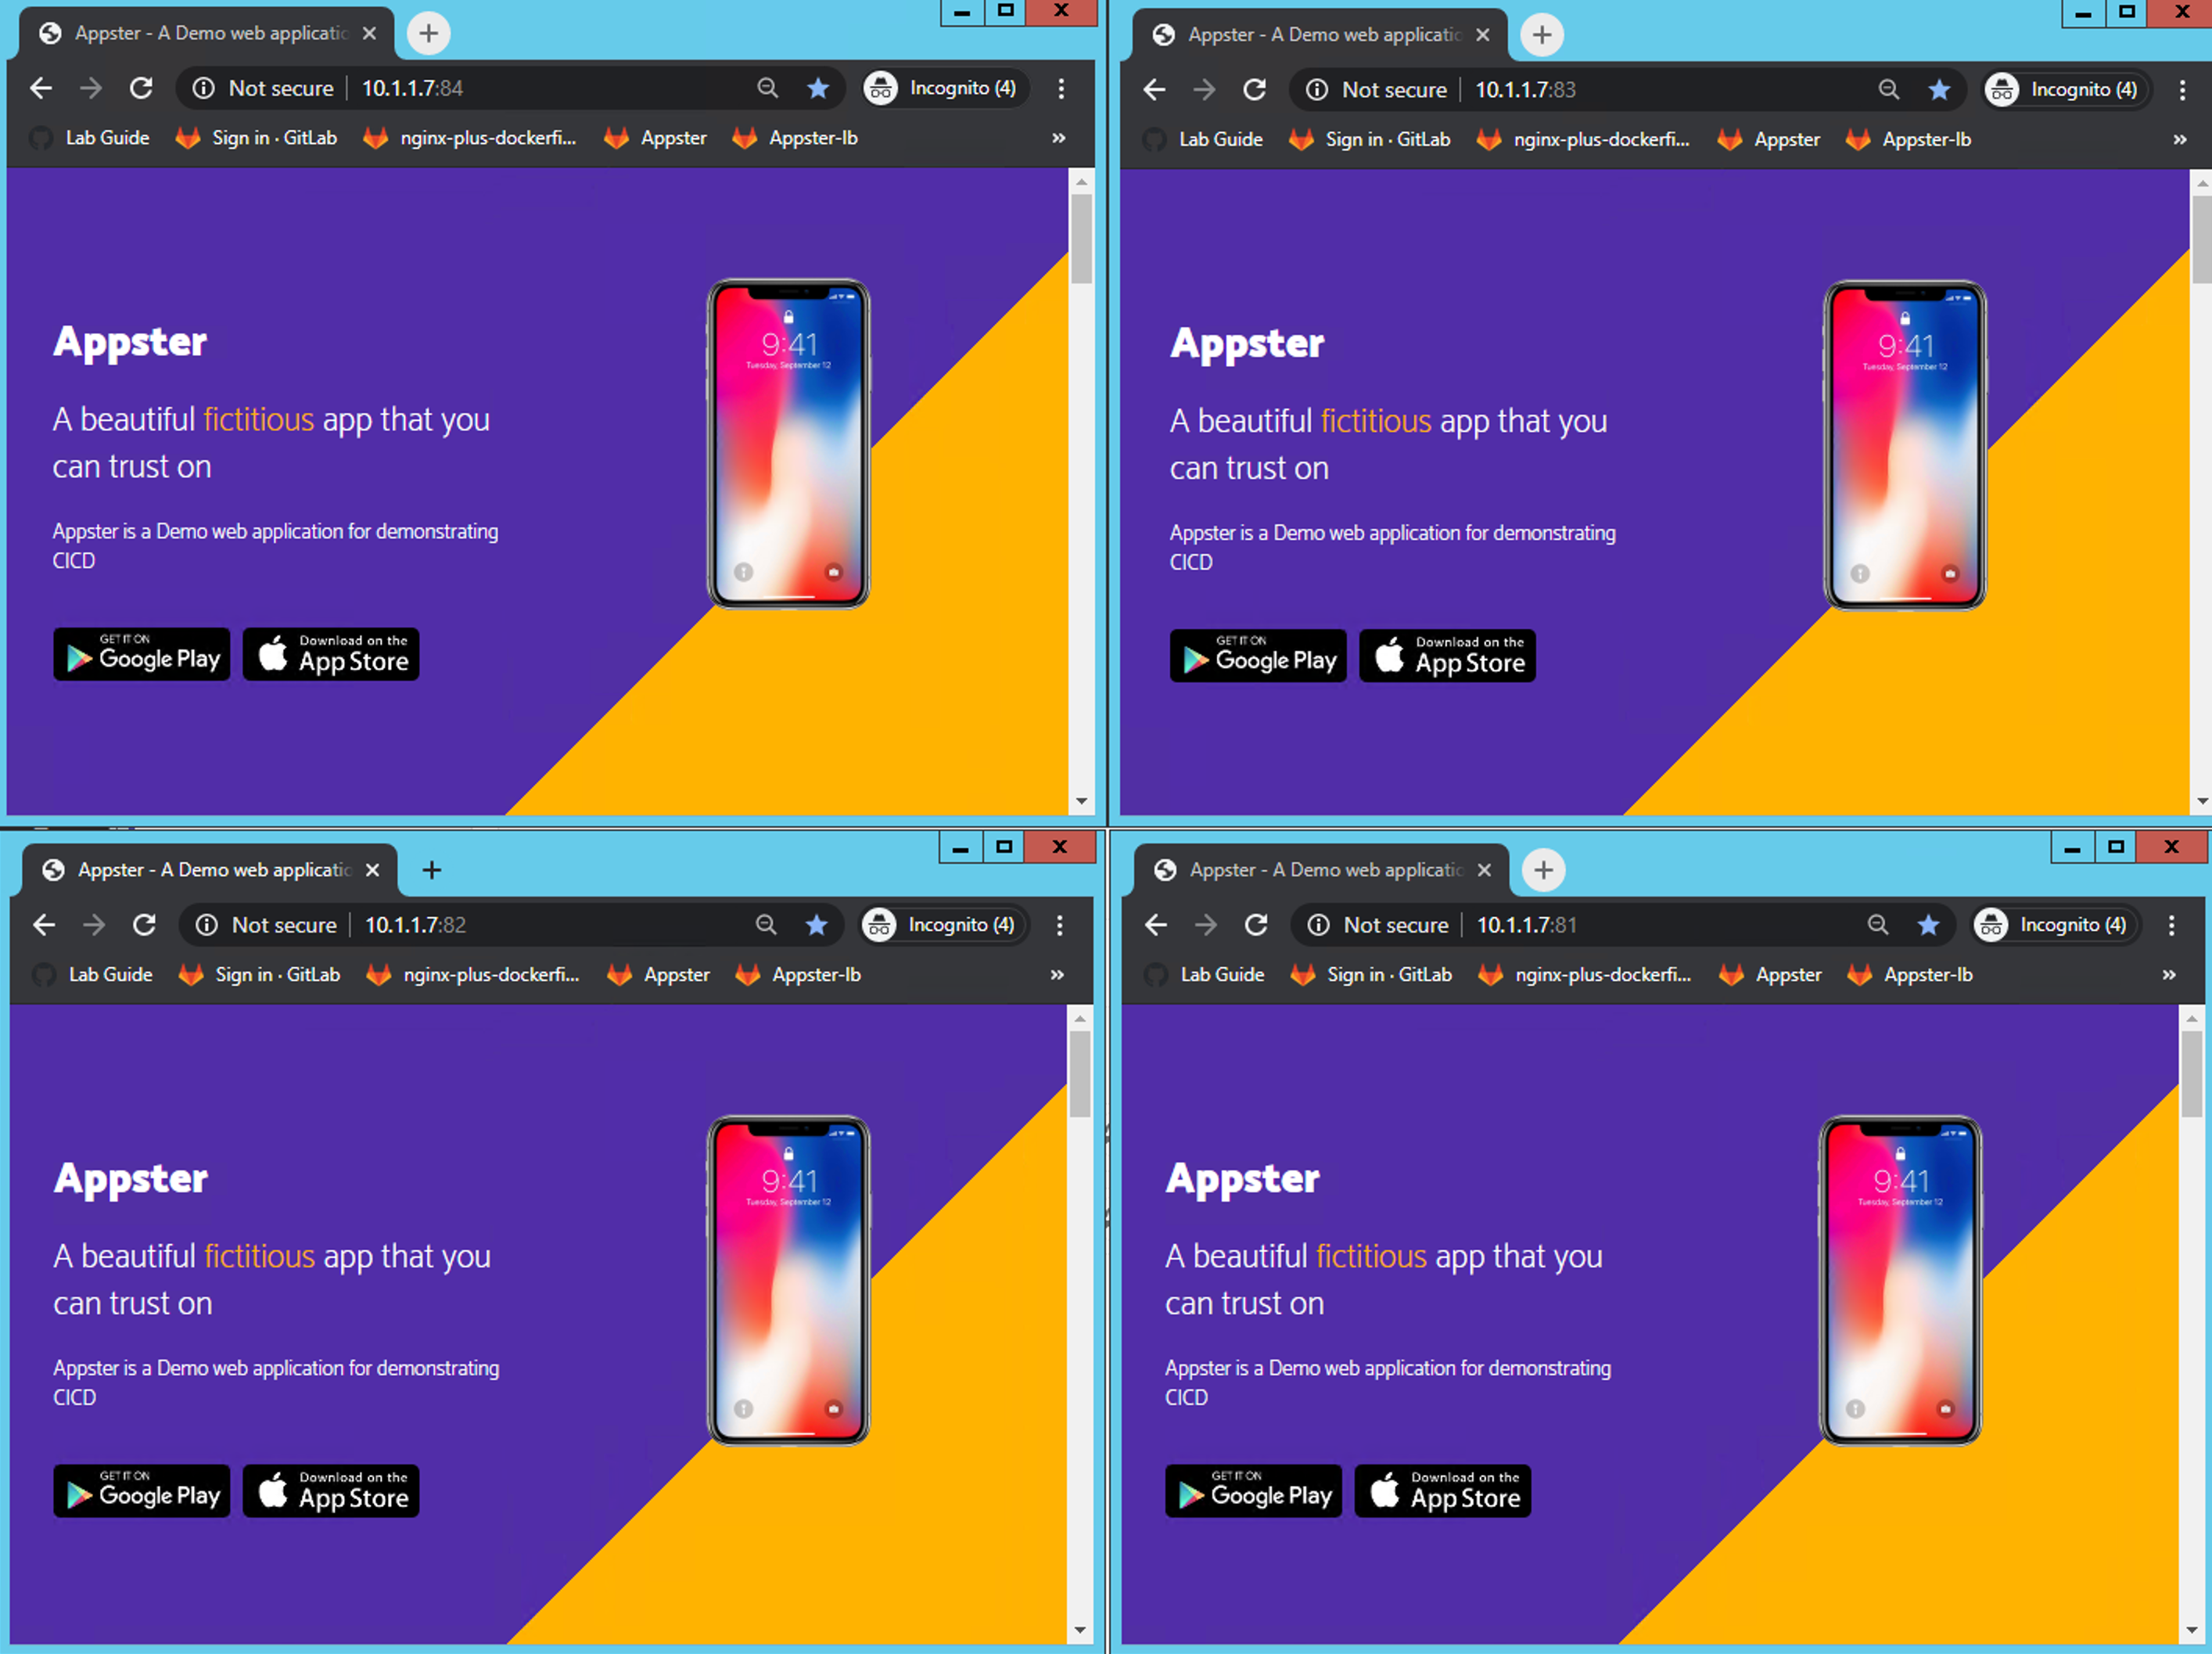
Browse to the server bookmarked as
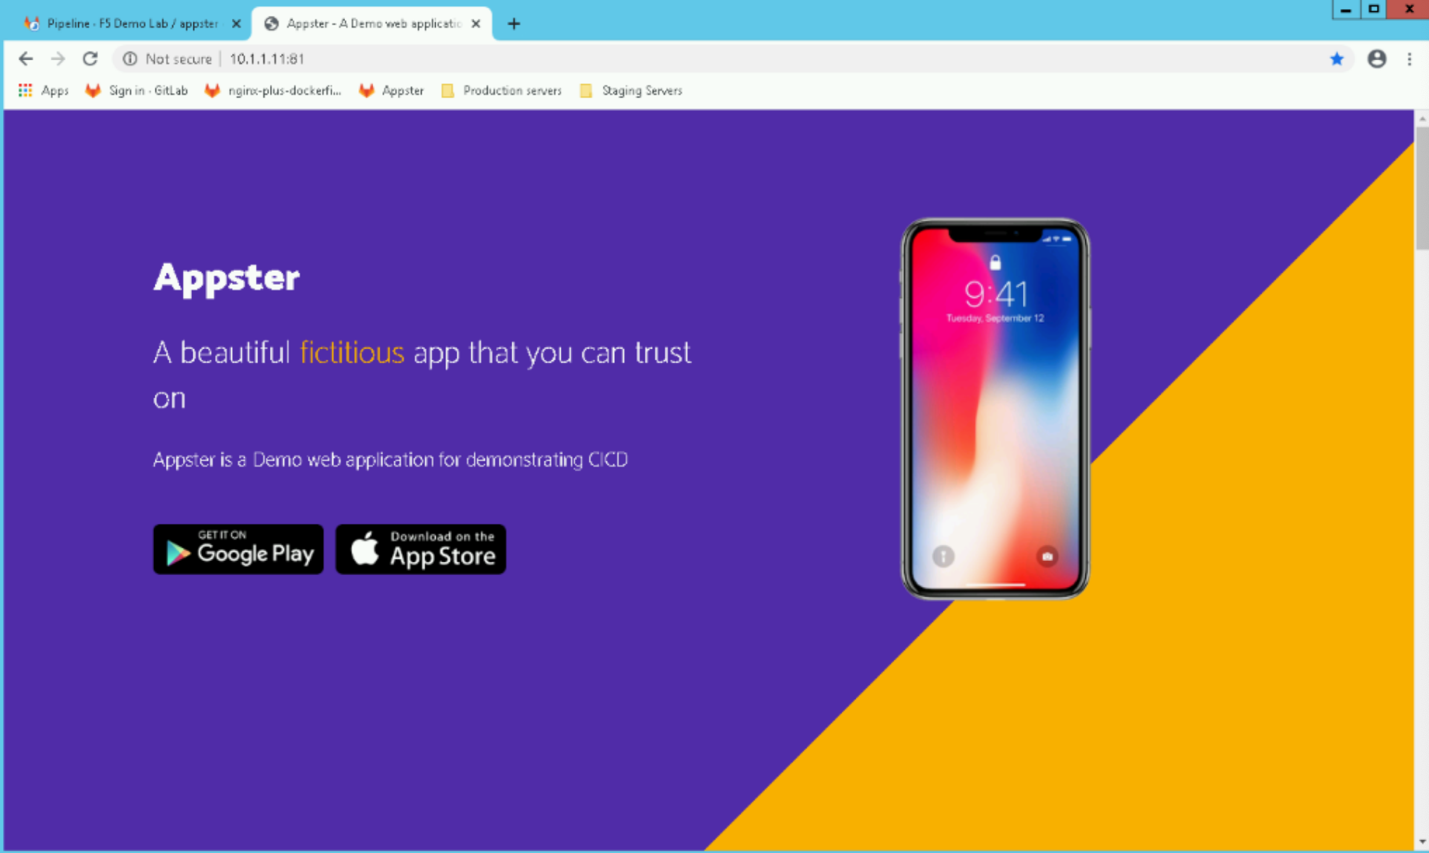
STAGING WEB - Appsterunder the “Staging Servers” bookmark folder to see the new web app code pushed to our Staging Server.Open the webpage in a New incognito window (Ctrl + Shift + N) to bypass browser cache and view changes.

After new code commit (notice the updated phone image):
Note
Ignore the bookmarks STAGING LB - Appster and PROD LB - Appster for now - we will set this up in a later exercise.
If our code changes pushed to staging are successful and the changes are validated, we can now deploy to Production:
Under the
DEPLOYstage, we have the option to deploy to Production manually. Go ahead and click on the little Play button that is on thedeploy_prodstage of the pipeline. This trigger will now deploy our new Docker image to Production, with. the new code showing the updated image,iphone_x.png.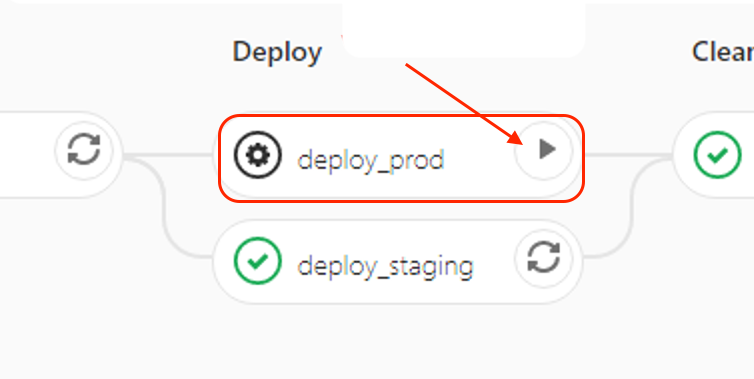
If our deployment to Production is successful you would now see the new web app code now deployed on all four Production web servers; we can see that on any Web Servers bookmarked as
PROD WEB - Appster-red,PROD WEB - Appster-yellow,PROD WEB - Appster-greenandPROD WEB - Appster-blueunder the Production Servers bookmark folder.