F5 BIG-IP SSL Orchestrator Training Lab > All SSL Orchestrator Lab Guides > SSLO 101: Essential SSL Visibility with SSL Orchestrator (Agility 2022 | 2 hours) > 3. Create a Transparent Forward Proxy SSLO Source | Edit on
3.18. Add the remaining services (optional - time permitting)
This lab will create one of each remaining type of security service.
Return to SSL Orchestrator Guided Configuration.
Click on the sslo_demoL3 topology.
In the configuration summary, find the row labeled Service and click on the pencil at the far right.
Click Add Service, then select a service from the catalog.
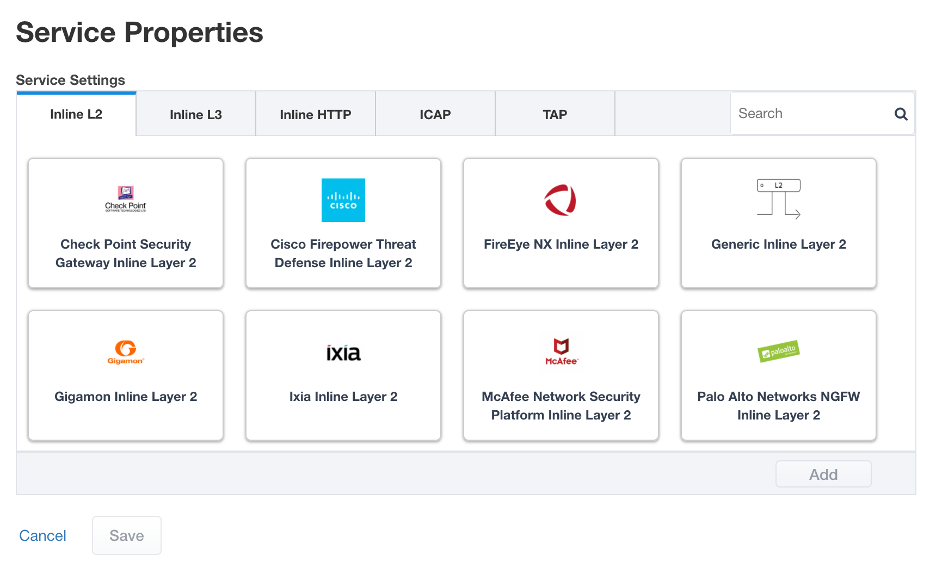
click Add at bottom right, or simply double-click the service to go to its configuration page.
3.18.1. Inline layer 2 service
Select the FireEye NX Inline Layer 2 service from the catalog and click Add, or simply double-click the FireEye NX Inline Layer 2 service (or any other Inline Layer 2 service in the catalog).
Name - provide a unique name to this service (example "FireEye").
Network Configuration - paths define the network interfaces that take inspectable traffic to the inline service and receive traffic from the service. Click Add.
Ratio - inline security services are natively load balanced, so this setting defines a ratio, if any for the load balanced pool members. Enter 1.
From BIGIP VLAN - this is the interface taking traffic to the inline service. Select the Create New option, enter a unique name (ex. FireEye_in), select the F5 interface connecting to the inbound side of the service, and add a VLAN tag value if required. For this lab, select interface 1.4 without a VLAN tag.
To BIGIP VLAN - this is the interface receiving traffic from the inline service. Select the Create New option, enter a unique name (ex. FireEye_out), select the F5 interface connecting to the outbound side of the service, and add a VLAN tag value if required. For this lab, select interface 1.5 without a VLAN tag.
Click Done.
Device Monitor - security service definitions can use specific custom monitors. For this lab, leave it set to the default /Common/gateway_icmp.
Service Action Down - SSLO also natively monitors the load balanced pool of security devices, and if all pool members fail, can actively bypass this service (Ignore), or stop all traffic (Reset, Drop). For this lab, leave it set to Ignore.
Enable Port Remap - this setting allows SSLO to remap the port of HTTPS traffic flowing across this service. This is advantageous when a security service defines port 443 traffic as encrypted HTTPS and natively ignores it. By remapping HTTPS traffic to a different port number, the security service will inspect the traffic. For this lab, enable (check) this option and enter a Remap Port value of 8080.
iRules - SSLO allows for the insertion of additional iRule logic at different points. An iRule defined at the service only affects traffic flowing across this service. It is important to understand, however, that these iRules must not be used to control traffic flow (ex. pools, nodes, virtuals, etc.), but rather should be used to view/modify application layer protocol traffic. For example, an iRule assigned here could be used to view and modify HTTP traffic flowing to/from the service. Additional iRules are not required here so leave this empty.
Click Save.
3.18.2. Inline layer 3 service
Click on Add Service.
Select the Generic Inline Layer 3 service from the catalog under "Inline L3" tab and click Add, or simply double-click it.
Name - enter a unique name to this service (example "IPS").
IP Family - this setting defines the IP family used with this layer 3 service. Leave it set to IPv4.
Auto Manage Addresses - when enabled the Auto Manage Addresses setting provides a set of unique, non-overlapping, non-routable IP addresses to be used by the security service. If disabled, the To and From IP addresses must be configured manually. It is recommended to leave this option enabled (checked).
Attention
In environments where SSLO is introduced to existing security devices, it is a natural tendency to not want to have to move these devices. And while SSLO certainly allows it, by not moving the security devices into SSLO-protected enclaves, customers unintentionally run the risk of exposing sensitive decrypted traffic to other devices that may be connected to these existing networks. As a security best practice, it is highly recommended to remove SSLO-integrated security devices from existing networks and place them entirely within the isolated enclave that is created and maintained by SSLO.
To Service Configuration - the "To Service" defines the network connectivity from SSLO to the inline security device.
To Service - with the Auto Manage Addresses option enabled, this IP address will be pre-defined, therefore the inbound side of the service must match this IP subnet. With the Auto Manage Addresses option disabled, the IP address must be defined manually. For this lab, leave the 198.19.64.7/25 address intact.
VLAN - select the Create New option, provide a unique name (ex. IPS_in), select the F5 interface connecting to the inbound side of the service, and add a VLAN tag value if required. For this lab, select interface 1.3 and VLAN tag 60.
Service Down Action - SSLO also natively monitors the load balanced pool of security devices, and if all pool members fail, can actively bypass this service (Ignore), or stop all traffic (Reset, Drop). For this lab, leave it set to Ignore.
L3 Devices - this defines the inbound-side IP address of the inline layer 3 service, used for routing traffic to this device. Multiple load balanced IP addresses can be defined here. Click Add, enter 198.19.64.30, then click Done.
Device Monitor - security service definitions can use specific custom monitors. For this lab, leave it set to the default /Common/gateway_icmp.
From Service Configuration - the "From Service" defines the network connectivity from the inline security device to SSLO.
From Service - with the Auto Manage Addresses option enabled, this IP address will be pre-defined, therefore the outbound side of the service must match this IP subnet. With the Auto Manage Addresses option disabled, the IP address must be defined manually. For this lab, leave the 198.19.64.245/25 address intact.
VLAN - select the Create New option, provide a unique name (ex. IPS_out), select the F5 interface connecting to the outbound side of the service, and add a VLAN tag value if required. For this lab, select interface 1.3 and VLAN tag 70.
Enable Port Remap - this setting allows SSLO to remap the port of HTTPS traffic flowing across this service. This is advantageous when a security service defines port 443 traffic as encrypted HTTPS and natively ignores it. By remapping HTTPS traffic to a different port number, the security service will inspect the traffic. For this lab, enable (check) this option and enter a Remap Port value of 8181.
Manage SNAT Settings - SSLO offers an option to enable SNAT (source NAT) across an inline layer 3/HTTP service. The primary use case for this is horizontal SSLO scaling, where independent SSLO devices are scaled behind a separate load balancer but share the same inline layer 3/HTTP services. As these devices must route back to SSLO, there are now multiple SSLO devices to route back to. SNAT allows the layer 3/HTTP device to know which SSLO sent the packets for proper routing. SSLO scaling also requires that the Auto Manage option be disabled, to provide separate address spaces on each SSLO. For this lab, leave it set to None.
iRules - SSLO allows for the insertion of additional iRule logic at different points. An iRule defined at the service only affects traffic flowing across this service. It is important to understand, however, that these iRules must not be used to control traffic flow (ex. pools, nodes, virtuals, etc.), but rather should be used to view/modify application layer protocol traffic. For example, an iRule assigned here could be used to view and modify HTTP traffic flowing to/from the service. Additional iRules are not required in this lab, so leave this empty.
Click Save.
3.18.3. Inline HTTP service
An inline HTTP service is defined as an explicit or transparent proxy for HTTP (web) traffic.
Click on Add Service.
Select the Cisco WSA HTTP Proxy service from the catalog under "Inline HTTP" tab and click Add, or simply double-click it.
Name - provide a unique name to this service (example "Proxy").
IP Family - this setting defines the IP family used with this layer 3 service. Leave it set to IPv4.
Auto Manage Addresses - when enabled the Auto Manage Addresses setting provides a set of unique, non-overlapping, non-routable IP addresses to be used by the security service. If disabled, the To and From IP addresses must be configured manually. It is recommended to leave this option enabled (checked).
Attention
In environments where SSLO is introduced to existing security devices, it is a natural tendency to not want to have to move these devices. And while SSLO certainly allows it, by not moving the security devices into SSLO-protected enclaves, customers unintentionally run the risk of exposing sensitive decrypted traffic to other devices that may be connected to these existing networks. As a security best practice, it is highly recommended to remove SSLO-integrated security devices from existing networks and place them entirely within the isolated enclave that is created and maintained by SSLO.
Proxy Type - this defines the proxy mode that the inline HTTP service is in. For this lab, set this option to Explicit.
To Service Configuration - the "To Service" defines the network connectivity from SSLO to the inline security device.
To Service - with the Auto Manage Addresses option enabled, this IP address will be pre-defined, therefore the inbound side of the service must match this IP subnet. With the Auto Manage Addresses option disabled, the IP address must be defined manually. For this lab, leave the 198.19.96.7/25 address intact.
VLAN - select the Create New option, provide a unique name (ex. Proxy_in), select the F5 interface connecting to the inbound side of the service, and add a VLAN tag value if required. For this lab, select interface 1.3 and VLAN tag 30.
Service Down Action - SSLO also natively monitors the load balanced pool of security devices, and if all pool members fail, can actively bypass this service (Ignore), or stop all traffic (Reset, Drop). For this lab, leave it set to Ignore.
Security Devices - HTTP Proxy Devices - this defines the inbound-side IP address of the inline HTTP service, used for passing traffic to this device. Multiple load balanced IP addresses can be defined here. For a transparent proxy HTTP service, only an IP address is required. For an explicit proxy HTTP service, the IP address and listening port is required. Click Add, enter 198.19.96.30 for the IP Address, and 3128 for the Port, then click Done.
Device Monitor - security service definitions can use specific custom monitors. For this lab, leave it set to the default /Common/gateway_icmp.
From Service Configuration - the "From Service" defines the network connectivity from the inline security device to SSLO.
From Service - with the Auto Manage Addresses option enabled, this IP address will be pre-defined, therefore the outbound side of the service must match this IP subnet. With the Auto Manage Addresses option disabled, the IP address must be defined manually. For this lab, leave the 198.19.96.245/25 address intact.
VLAN - select the Create New option, provide a unique name (ex. Proxy_out), select the F5 interface connecting to the outbound side of the service, and add a VLAN tag value if required. For this lab, select interface 1.3 and VLAN tag 40.
Manage SNAT Settings - SSLO offers an option to enable SNAT (source NAT) across an inline layer 3/HTTP service. The primary use case for this is horizontal SSLO scaling, where independent SSLO devices are scaled behind a separate load balancer but share the same inline layer 3/HTTP services. As these devices must route back to SSLO, there are now multiple SSLO devices to route back to. SNAT allows the layer 3/HTTP device to know which SSLO sent the packets for proper routing. SSLO scaling also requires that the Auto Manage option be disabled, to provide separate address spaces on each SSLO. For this lab, leave it set to None.
Authentication Offload - when an Access authentication profile is attached to an explicit forward proxy topology, this option will present the authenticated username value to the service as an X-Authenticated-User HTTP header. For this lab, leave it disabled (unchecked).
iRules - SSLO allows for the insertion of additional iRule logic at different points. An iRule defined at the service only affects traffic flowing across this service. It is important to understand, however, that these iRules must not be used to control traffic flow (ex. pools, nodes, virtuals, etc.), but rather should be used to view/modify application layer protocol traffic. For example, an iRule assigned here could be used to view and modify HTTP traffic flowing to/from the service. Additional iRules are not required, however, so leave this empty.
Click Save.
3.18.4. TAP service
A TAP service is a passive device that simply receives a copy of traffic.
Click on Add Service.
Select the Cisco Firepower Threat Defense TAP service from the catalog under "TAP" tab and click Add, or simply double-click it.
Name - provide a unique name to this service (example "TAP").
Mac Address - for a tap service that is not directly connected to the F5, enter the device's MAC address. For a tap service that is directly connected to the F5, the MAC address does not matter and can be arbitrarily defined. For this lab, enter 12:12:12:12:12:12.
VLAN - this defines the interface connecting the F5 to the TAP service. Click Create New and provide a unique name (ex. TAP_in).
Interface - select the 1.6 interface without a tag.
Enable Port Remap - this setting allows SSLO to remap the port of HTTPS traffic flowing to this service. For this lab, leave the option disabled (unchecked).
Click Save.
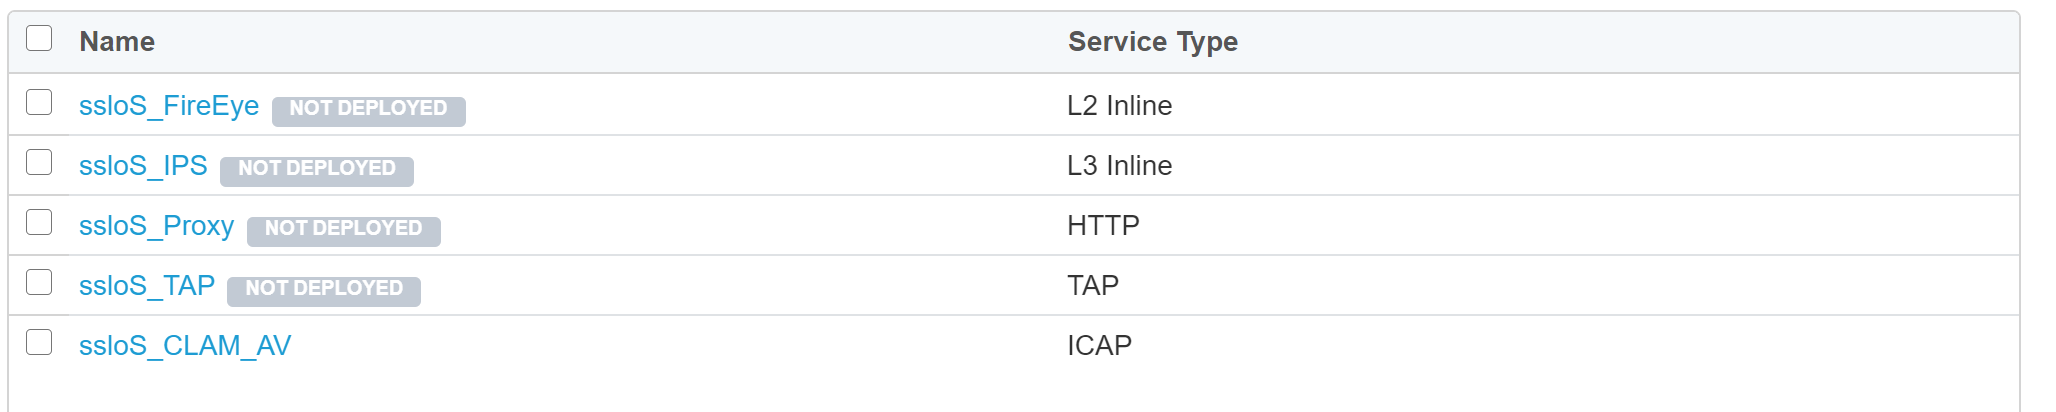
The Services for this lab have now been configured.
Click Save & Next to continue to the next stage.
In the next section, you will associate these new services to service chains.