F5 BIG-IQ Centralized Management Lab > BIG-IQ All Labs > Class 5: BIG-IQ Device Management > Module 8: Declarative Onboarding and VE Creation on AWS Source | Edit on
Lab 8.5: Deploy BIG-IP in AWS and configure App Services using Ansible, BIG-IQ & Automation Tool Chain
Note
Estimated time to complete: 20 minutes
In this lab, we are going to deploy a new BIG-IP in AWS and deploy an HTTPS offload Application Service using BIG-IQ and Automation Tool Chain.
- This lab will be using following F5 Ansible Galaxy roles:
- bigiq_create_ve ansible Role: Create a BIG-IP VE (Virtual Edition) from BIG-IQ in AWS, Azure or VMware.
- atc_deploy ansible Role: Allows AS3 and DO declarations to be sent to automation tool chain service.
- ansible.builtin.uri ansible Module: Interacts with web services, create SSL cert & key on BIG-IQ
- bigiq_pinning_deploy_objects ansible Role: Pin objects (e.g. Cert & Key) on BIG-IQ and deploy it to BIG-IP(s).
- bigiq_move_app_dashboard ansible Role: Move Application Service(s) in BIG-IQ Application Dashboard.
Lab environment access
If you have not yet visited the page Getting Started, please do so.
Workflow
- Create VPN between F5 Lab and AWS
- Create BIG-IP VE using bigiq_create_ve
- Onboard BIG-IP using atc_deploy
- Create SSL Certificate and Key on BIG-IQ using ansible.builtin.uri
- Deploy SSL objects to BIG-IP using bigiq_pinning_deploy_objects
- Create AS3 Application Service HTTPS offload using atc_deploy
- Organized Application Service in BIG-IQ Application Dashboard using bigiq_move_app_dashboard
- Your HTTPS offload Application Service is now up and ready to serve traffic
All steps from 2 to 3 are handed in an simple Ansible playbook where creation & deployments of the BIG-IP and its configuration is automated.
Tasks
- If not already done, run through Lab 8.1 Prepare your AWS Account.
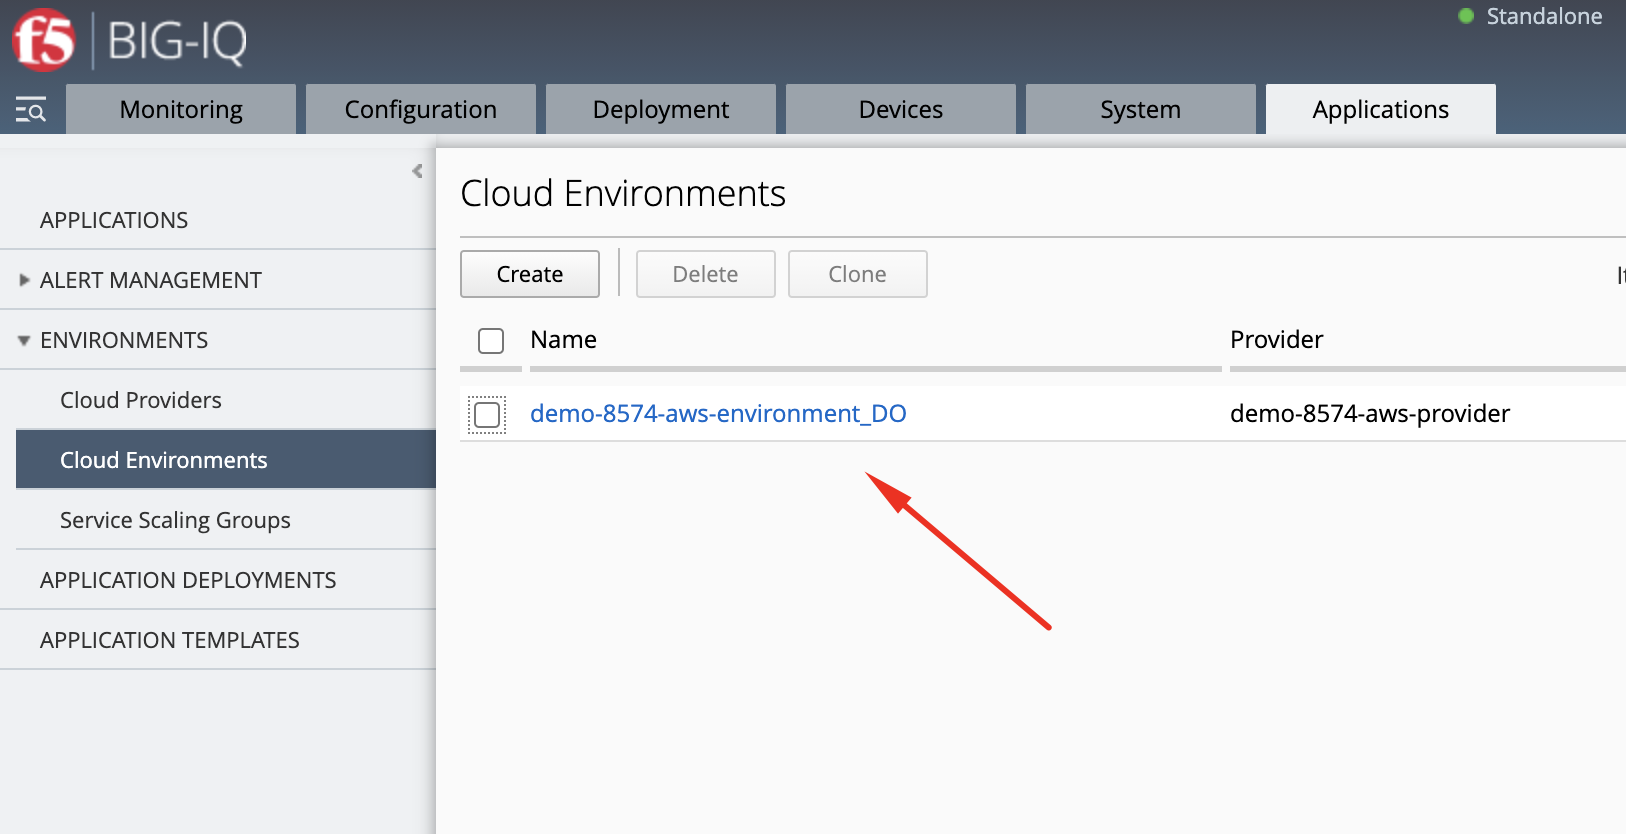
- Login as david and navigate to Applications > Environments > Cloud Environments
Connect via
SSHorWeb Shellto the system Ubuntu Lamp Server. (if you use the Web Shell, login as f5student first: su - f5student) andcd /home/f5/f5-ansible-bigiq-ve-creation-do-demo vi bigiq_create_ve_and_app_services_aws.yml
Update Cloud Environment variable in the playbook:
cloud_environment: "demo-8574-aws-environment_DO"
You also have the option to change few variables such as VE name, VE password, tenant, app service name, Common Name (CN) of the SSL certificate:
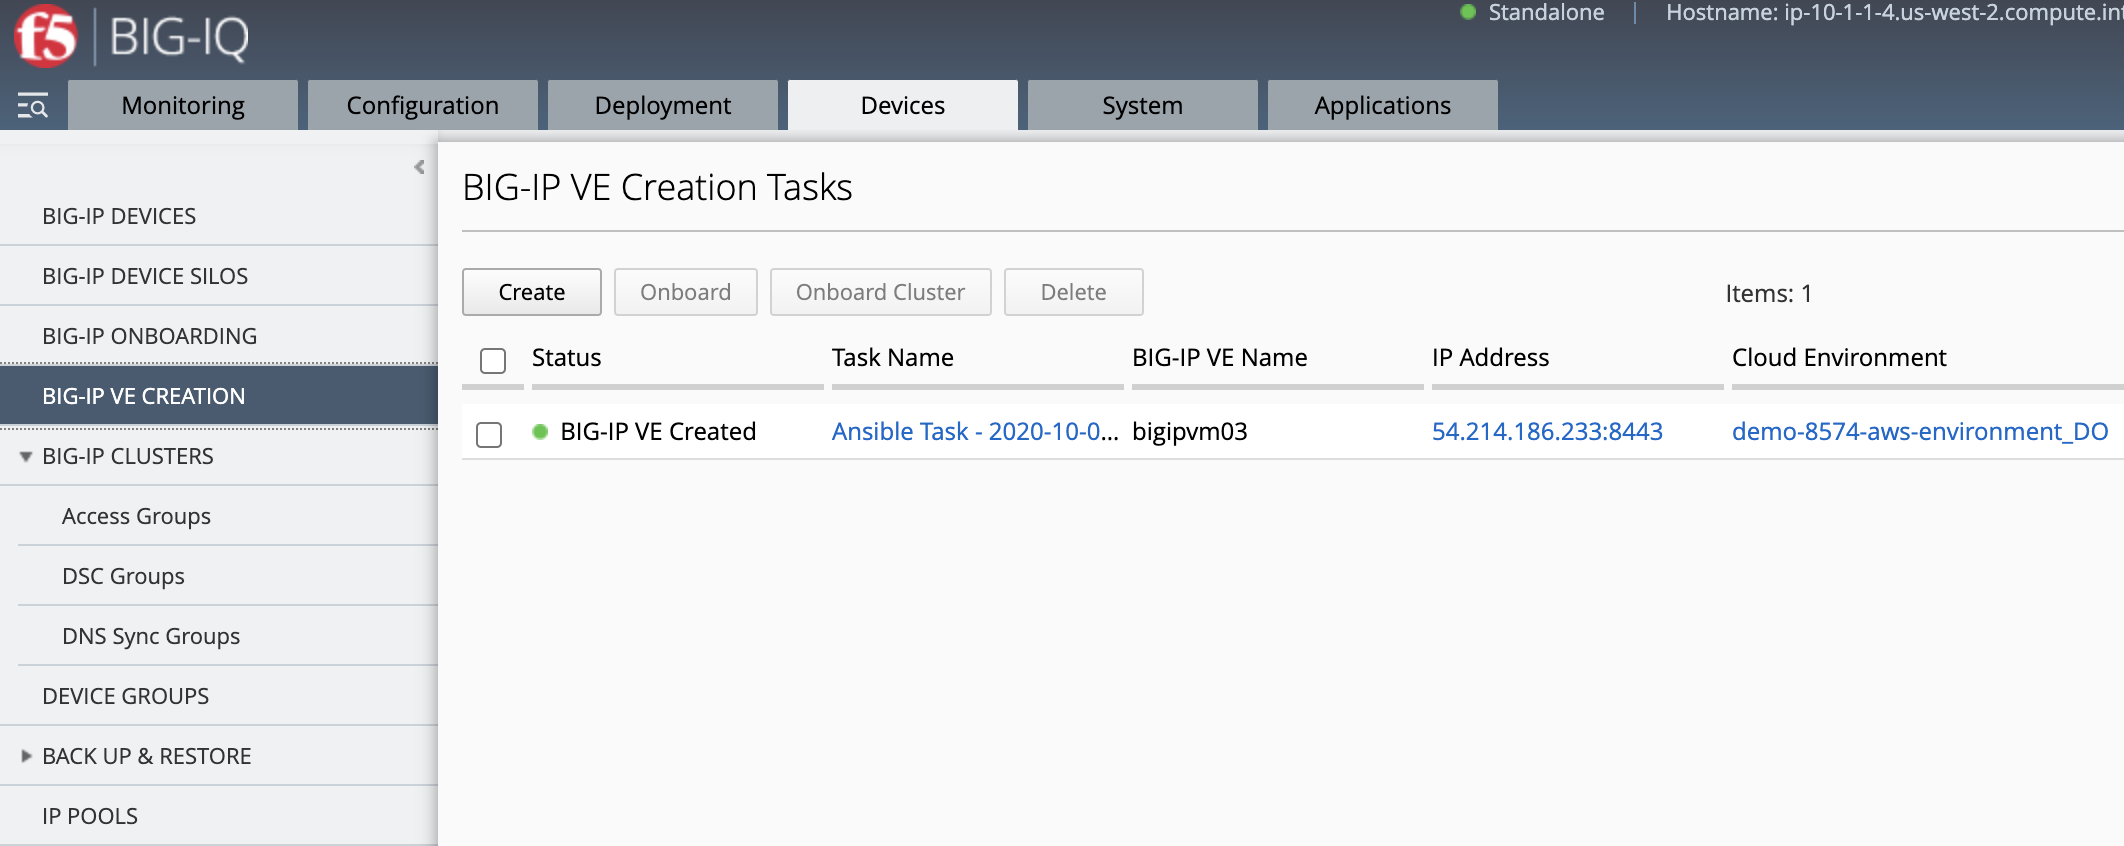
veName: "bigipvm03"
vePassword: "u7BnD@4f5"
tenant: "aws"
appName: "webAppServiceHttp2"
cn: "webapp-aws"
You can look at the details of the Ansible Playbook source on the GitHub repository.
build the ansible runner container:
docker build -t f5-ansible-runner .
Check ansible version and galaxy roles installed:
./ansible_helper ansible-playbook --version
./ansible_helper ansible-galaxy list
Now, let’s execute the playbook:
./ansible_helper ansible-playbook /ansible/bigiq_create_ve_and_app_services_aws.yml -i /ansible/hosts
Note
Add -vvv if you want to get the debug output.
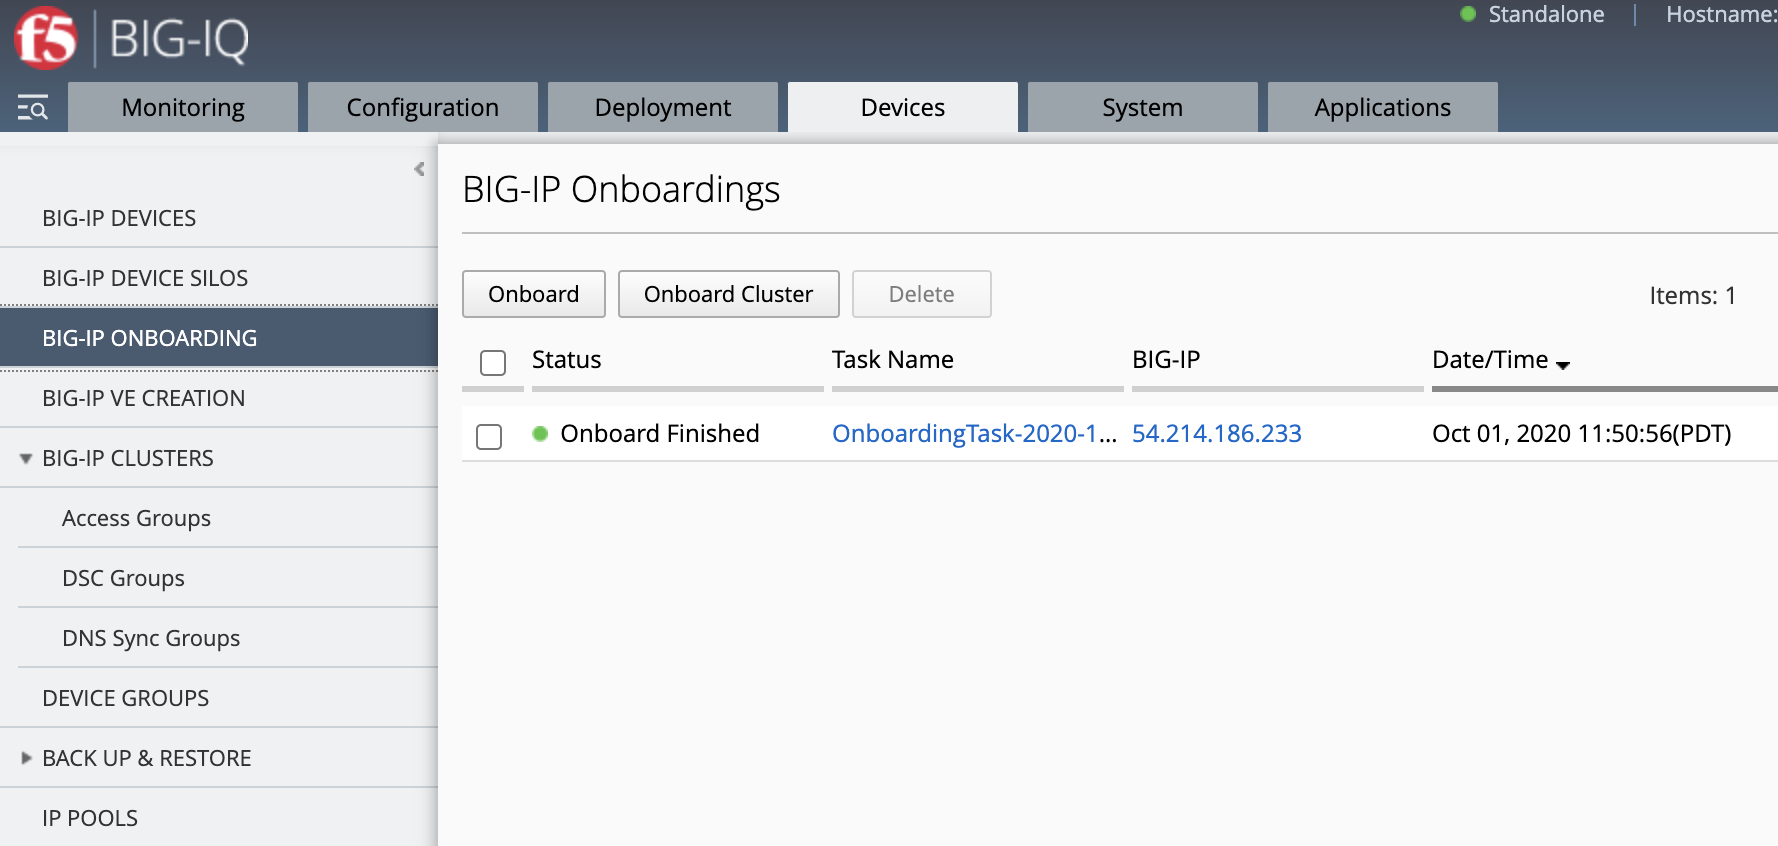
- Let’s now review everything which was created by the playbook.
Devices > BIG-IP VE Creation
Devices > BIG-IP VE Onboarding
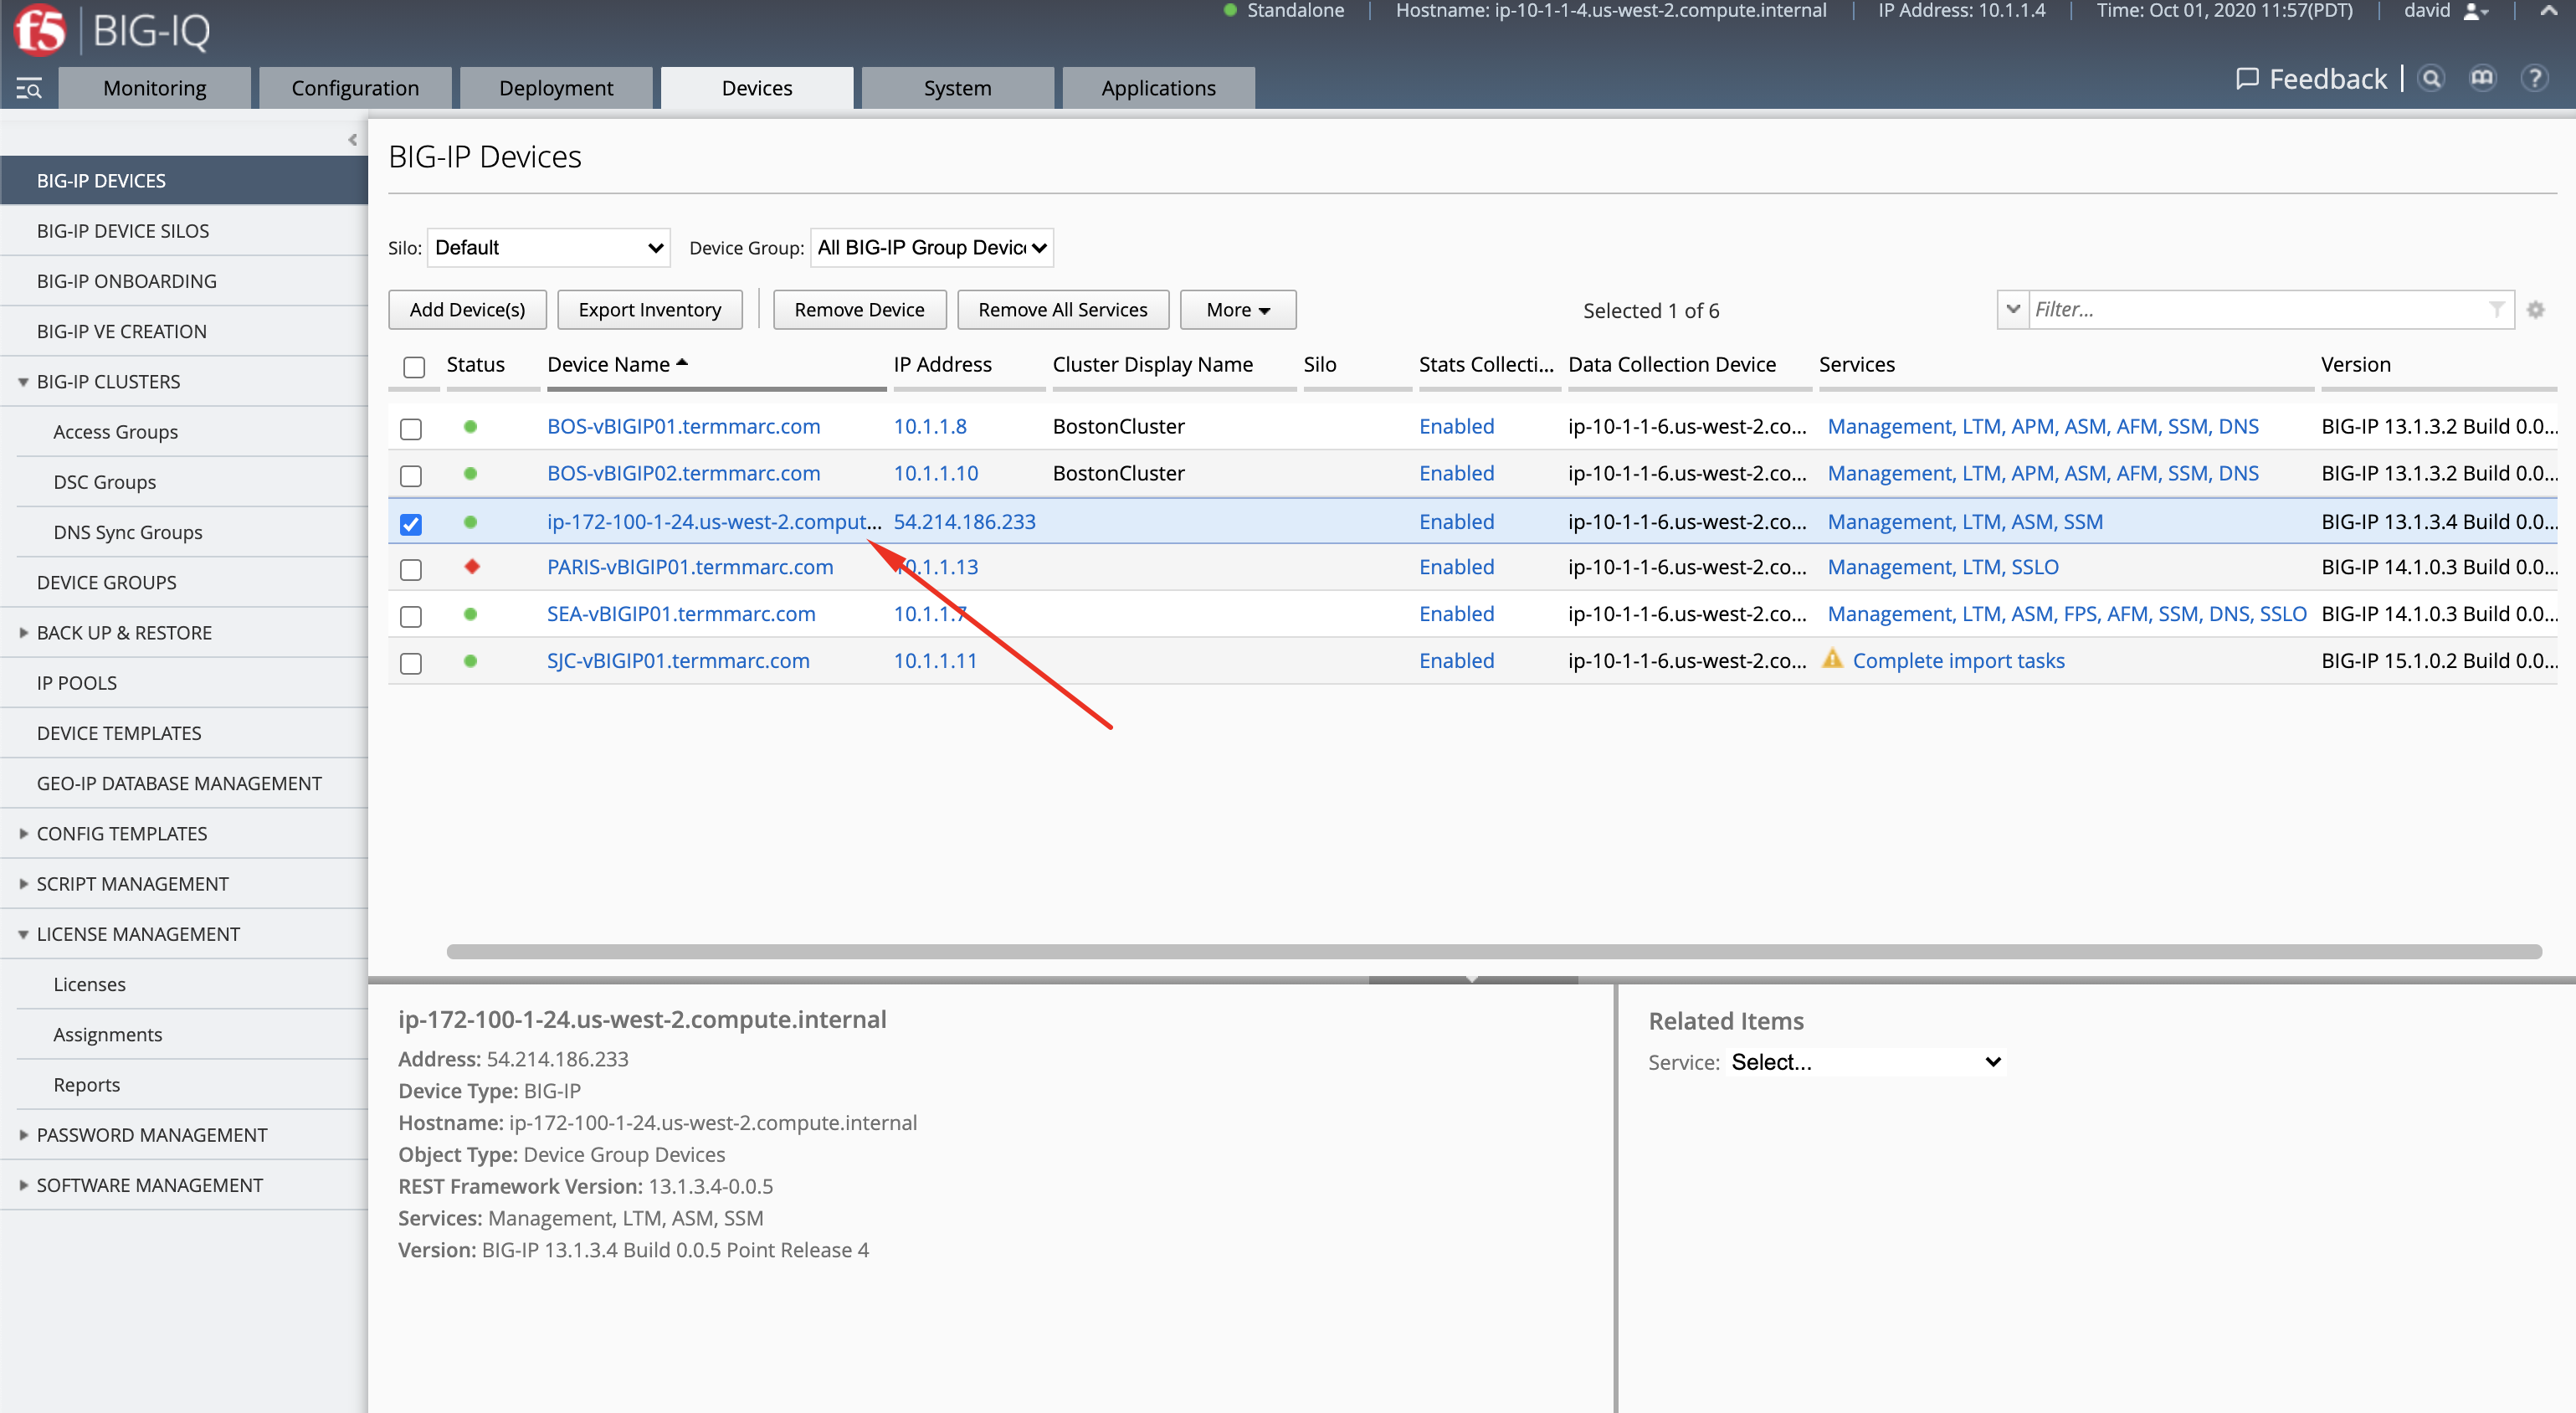
Devices > BIG-IP Devices
Log in to your AWS console to the EC2 Dashboard and look for the VE created.

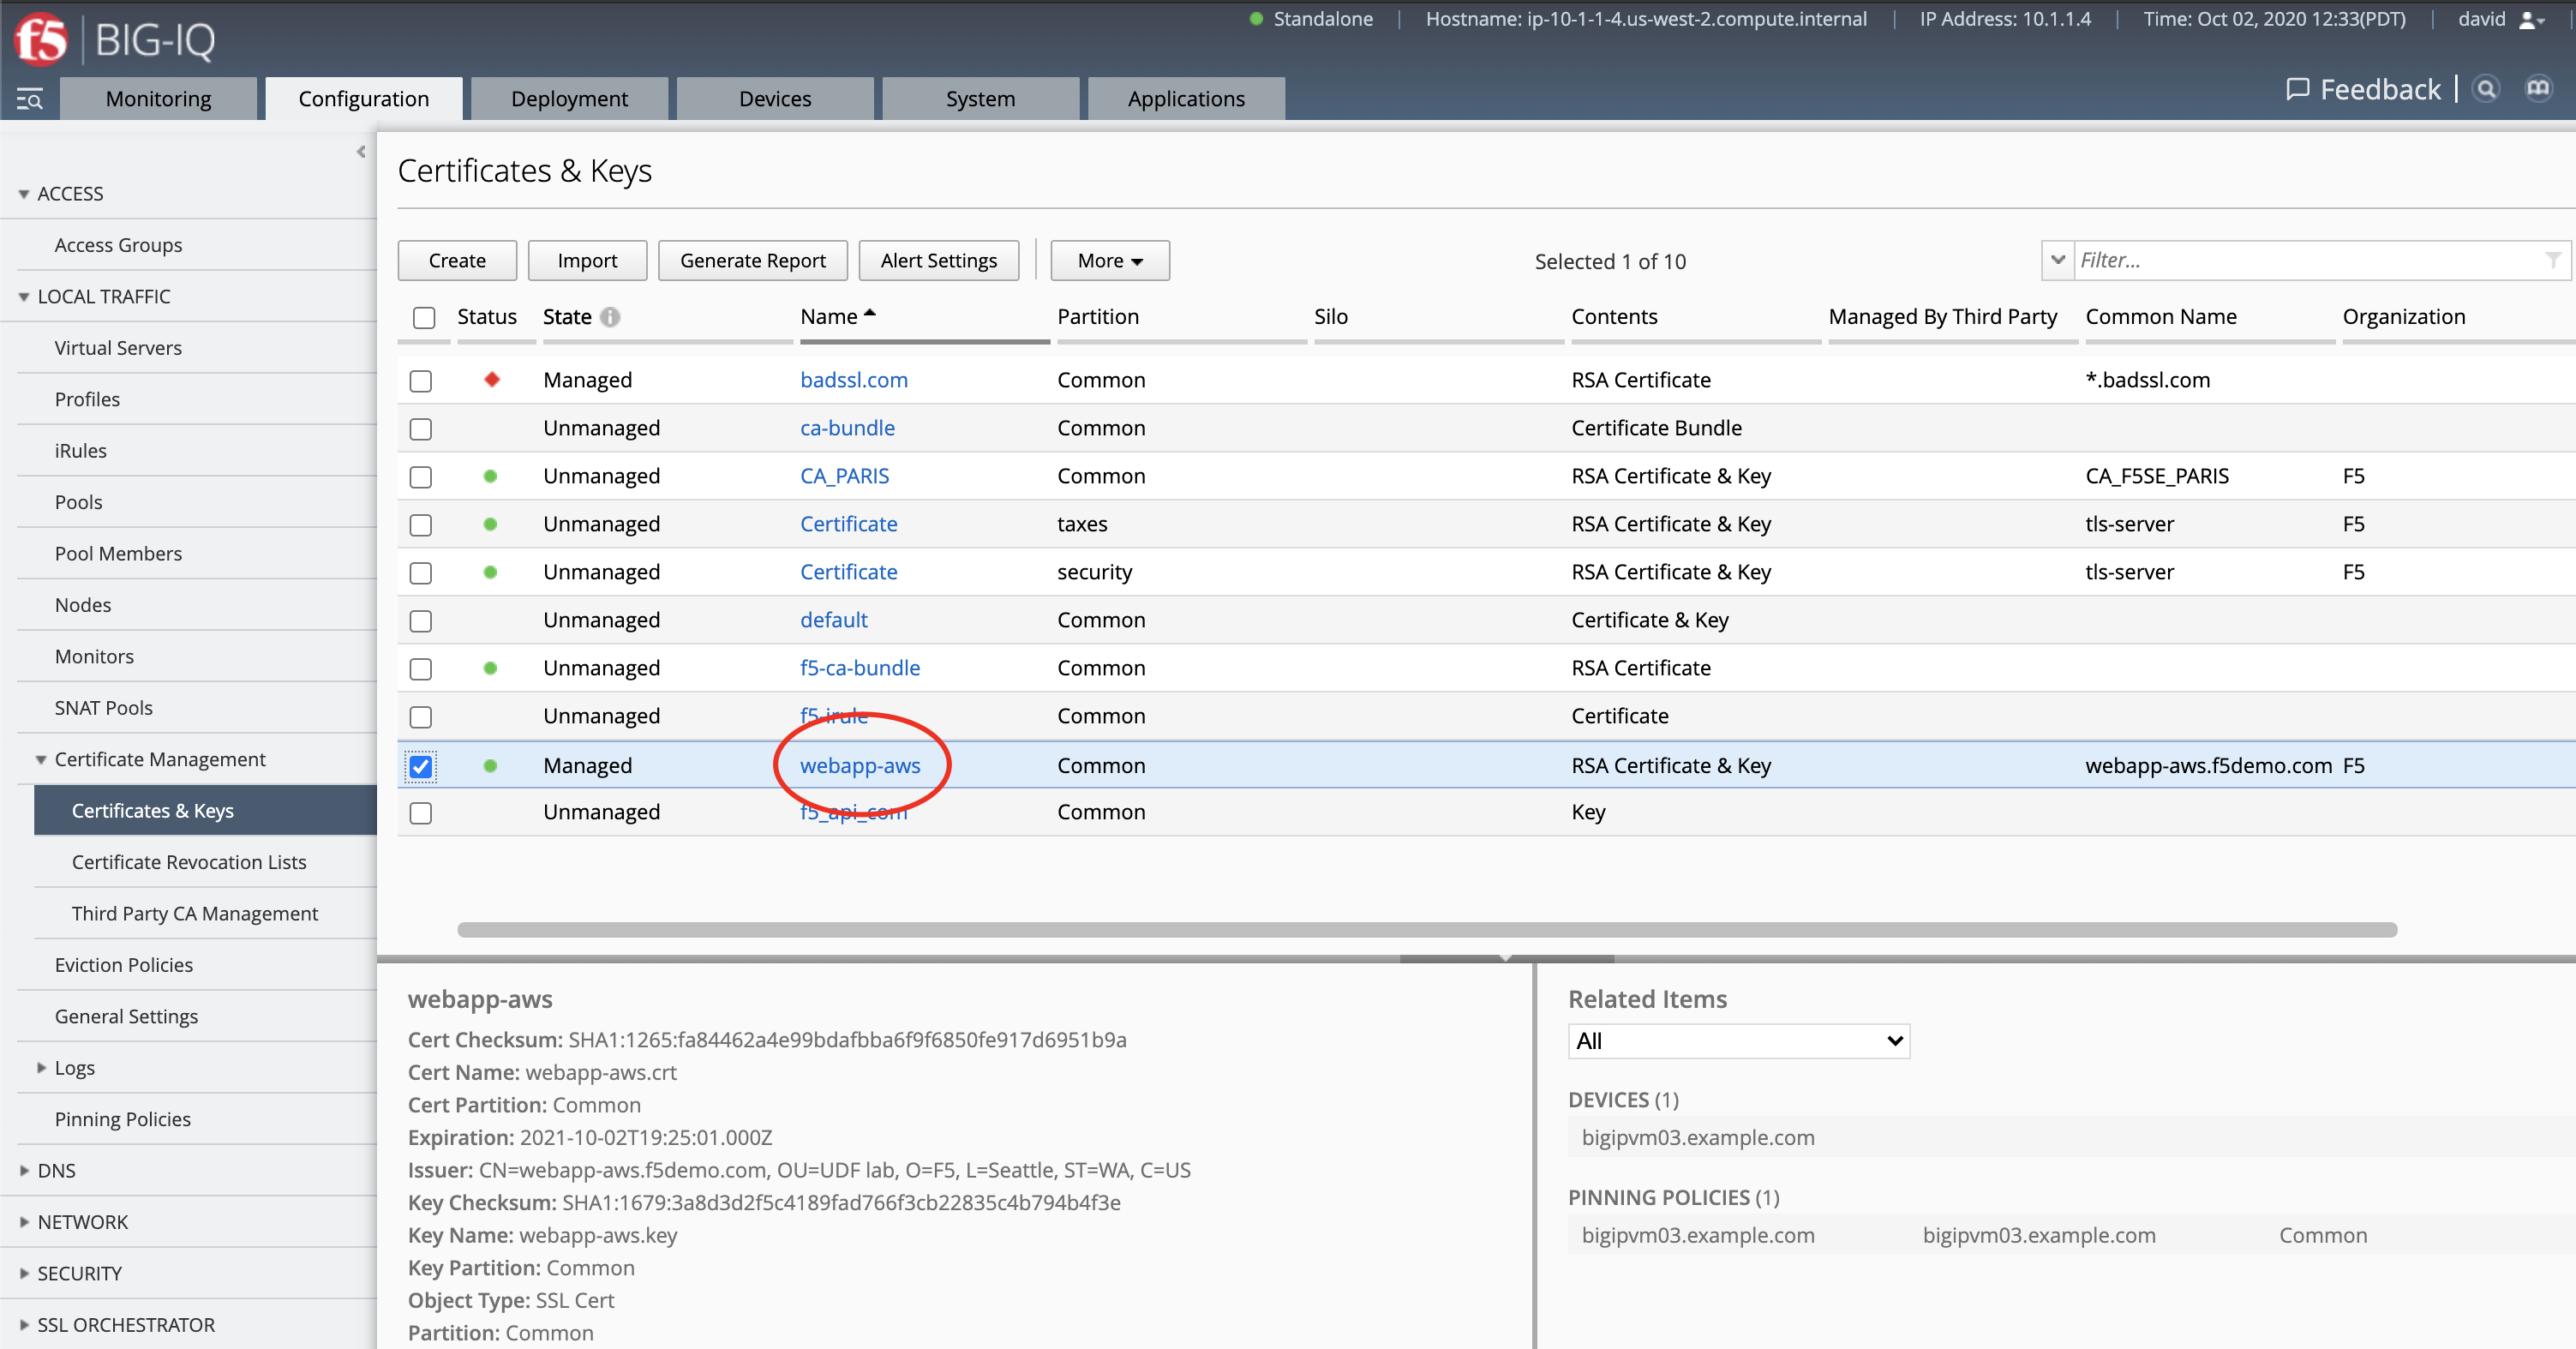
Configuration > Local Traffic > Certificate Management > Certificates & Keys
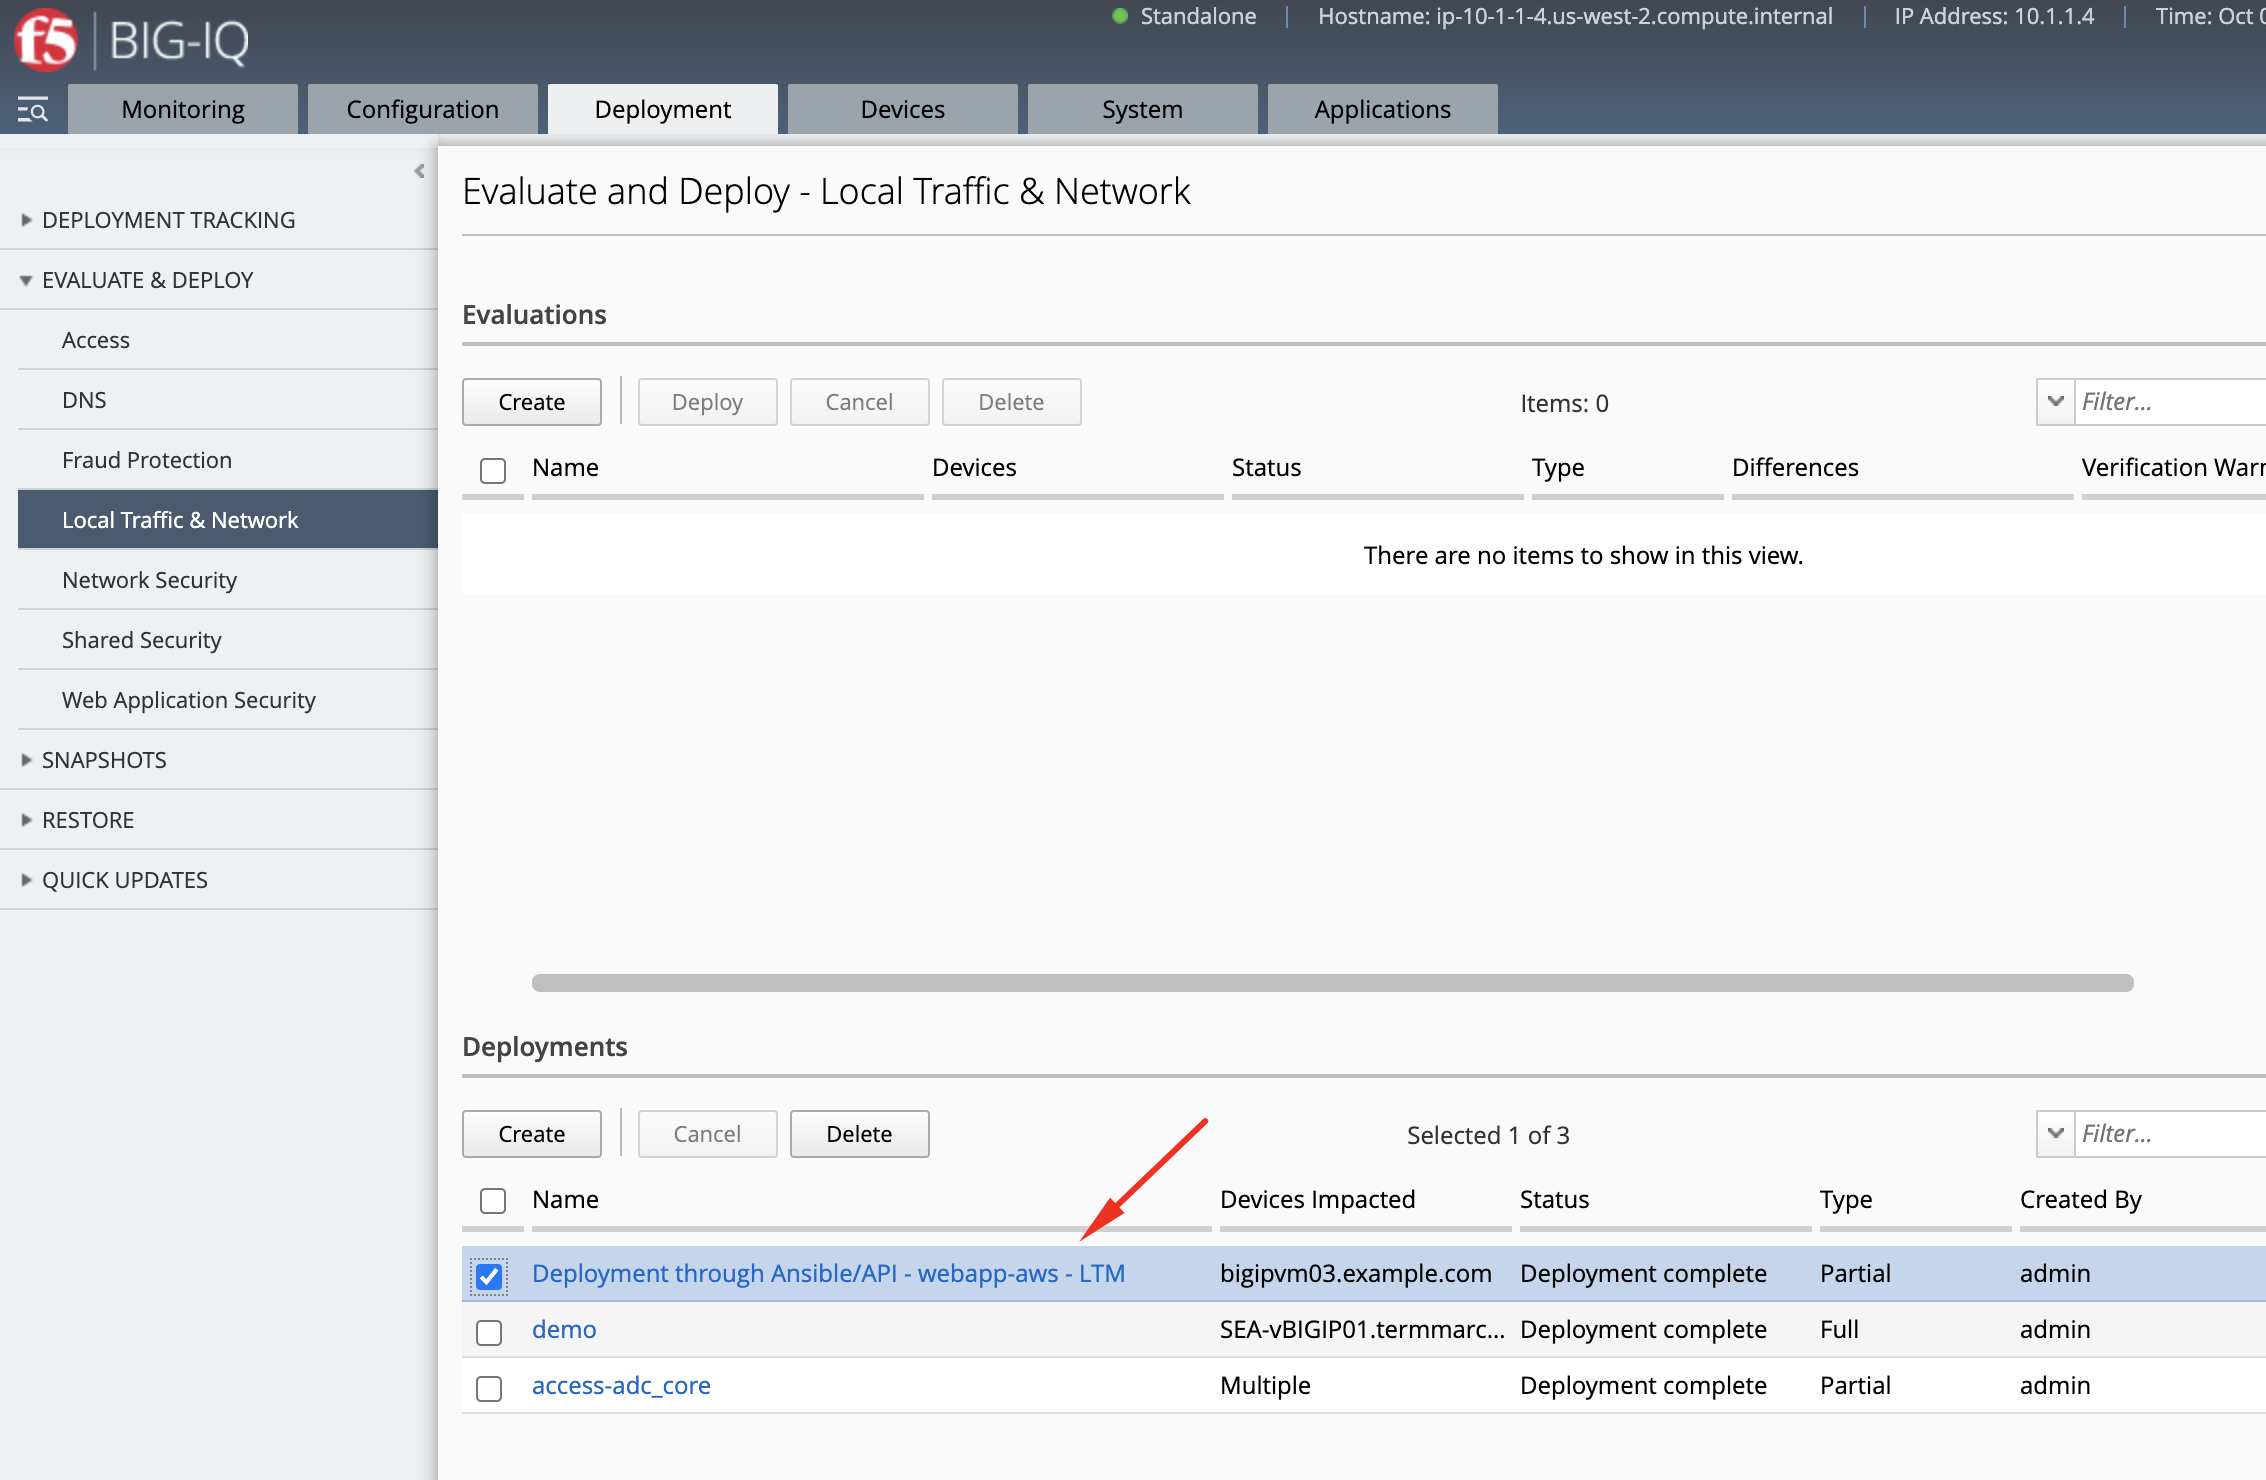
Deployments > Evaluate & Deploy > Local Traffic & Network
- Test the application service by opening a browser and typing the Virtual Server IP address/port
https://54.214.186.233. You should see the Hello, World website.

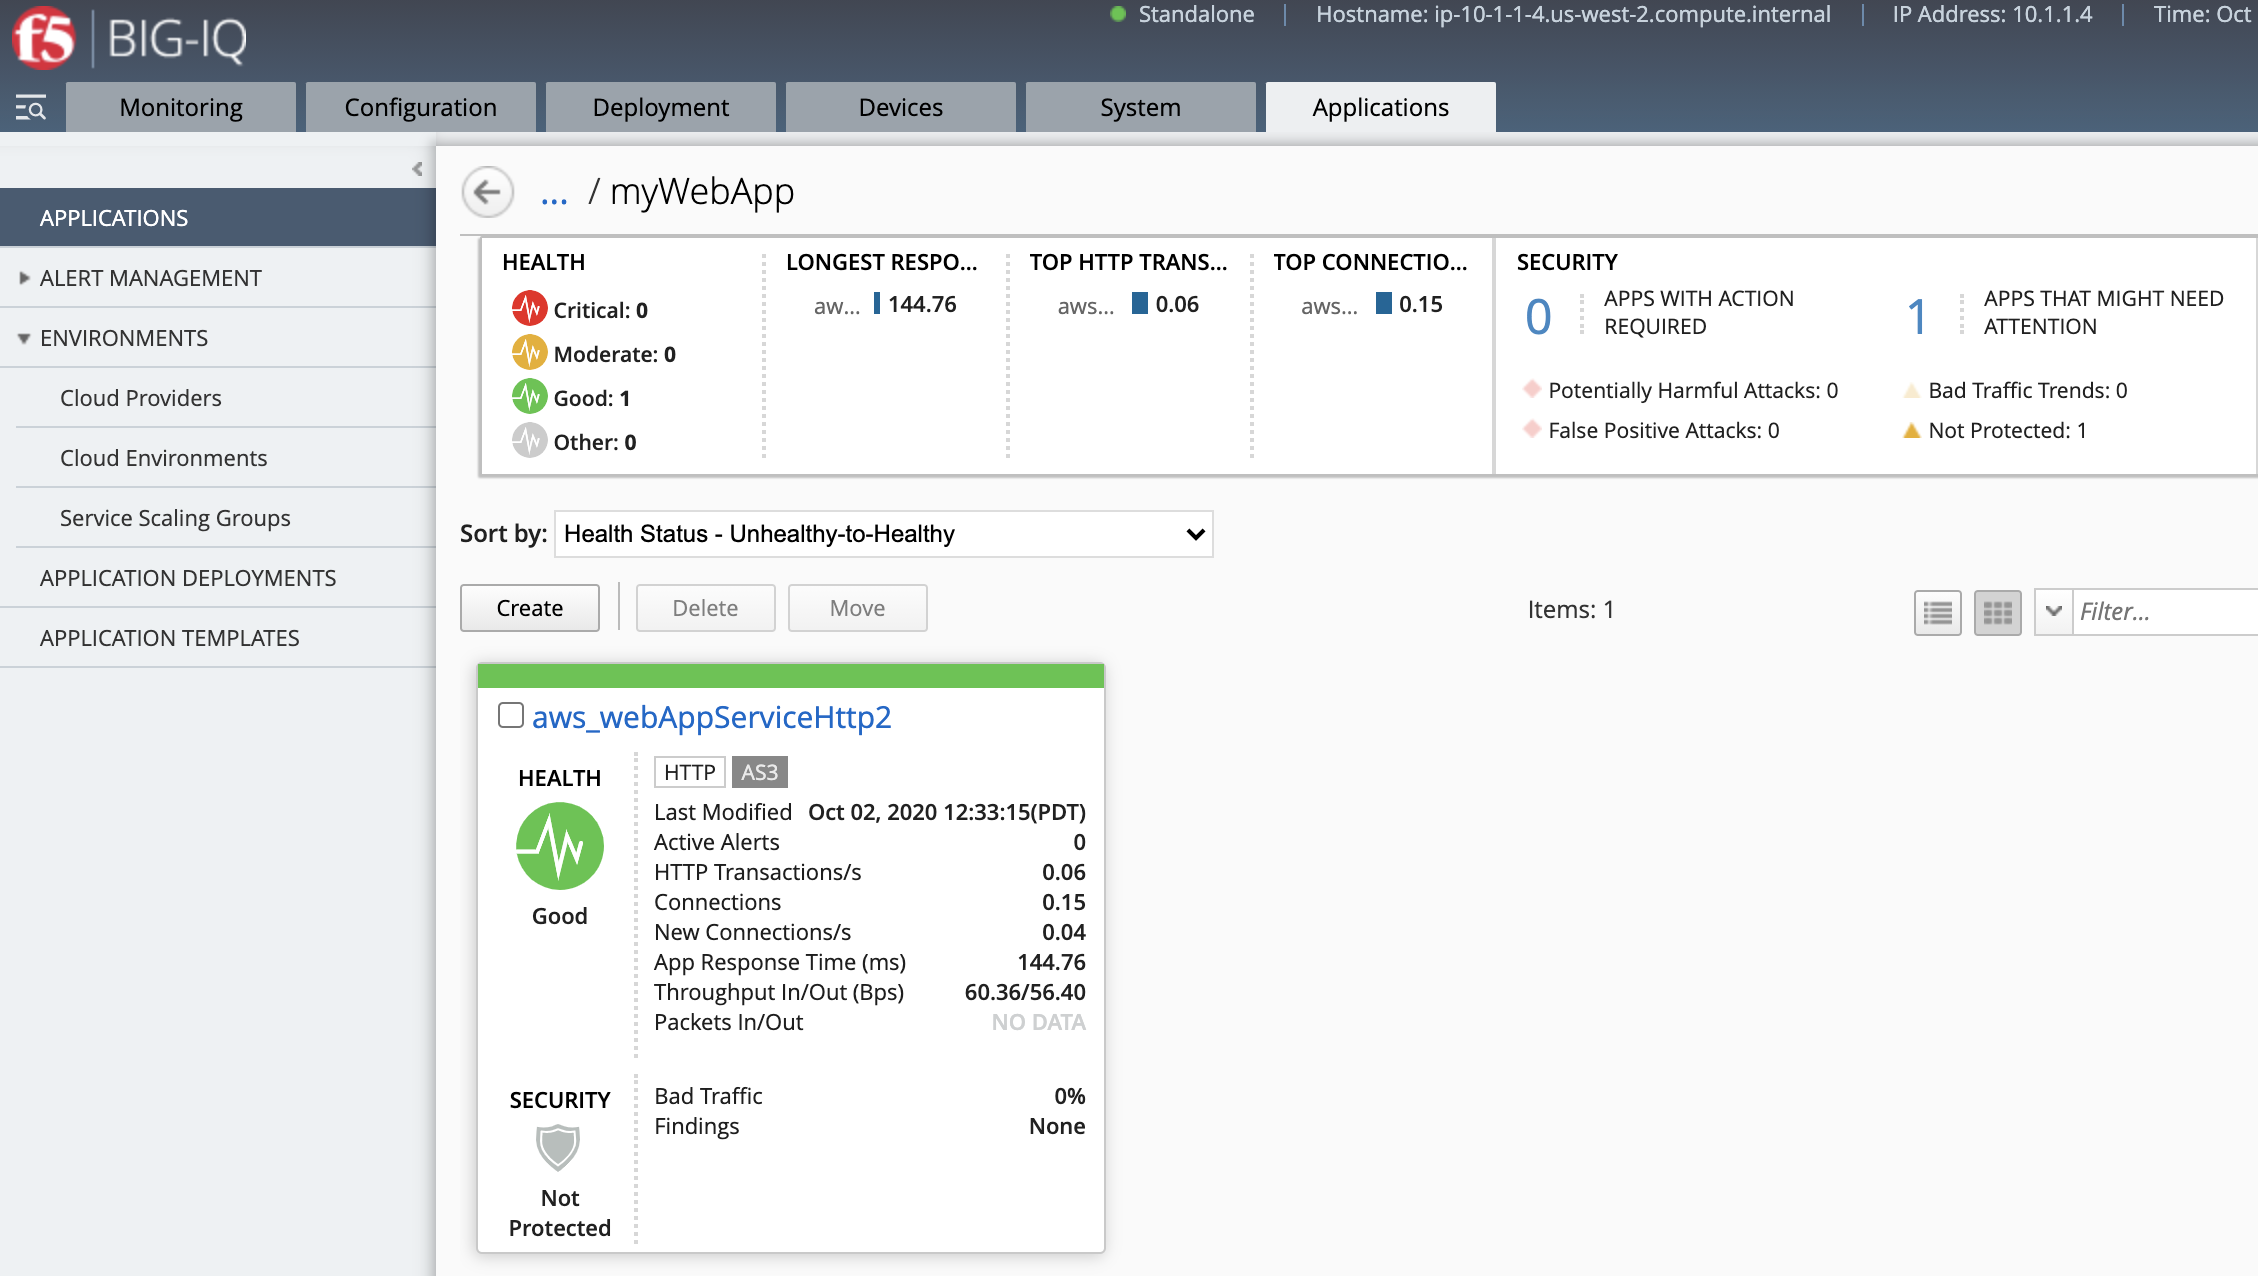
- Go back on the BIG-IQ application dashboard and look at the HTTP analytics.