Automation, Orchestration & DevOps > Class 1: Programmability BIG-IP Rest Structure and Concepts Documentation! > Module 1: Imperative Automation with the BIG-IP and iControl Rest Source | Edit on
Lab 1.6: Build a Basic LTM Config using REST Transactions
In this lab, we will build a basic LTM Config using iControlRest Transactions.
Task 1 - Create a Transaction
Transactions are beneficial in cases where you would like to have discrete REST operations to act as a batch operation. As a result, the nature of a transaction is that either all the operations succeed or none of them do (all-or-nothing). This is very useful when we are creating a configuration that is linked together because it allows the rollback of operations in case one fails. All the commands issued are queued one after the other in the Transaction. We will also review how to change the order of a queued command or remove a single command from the queued list before committing.
Note
Transactions are essential to ensure that an Imperative process is Atomic in nature.
Warning
Transactions have a default timeout of 120 seconds. Taking longer than the timeout period to execute a transaction will result in the automatic deletion of the Transaction. To avoid having to redo the steps in this task, please first read through the steps below and execute each of them promptly.
Perform the following steps to complete this task:
Expand the
Lab 1.6 - Build a Basic LTM Config using Transactionsfolder in the Postman collection: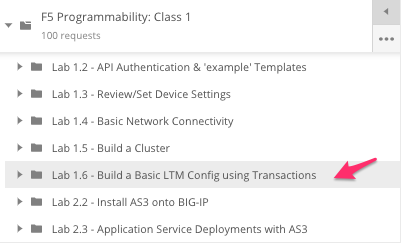
Click the
Step 1: Create a Transactionrequest. Examine the URL and JSON Body. We will send aPOSTto the/mgmt/tm/transactionendpoint with an empty JSON body to create a new transaction.
Click the Send button to send the request. Examine the response and find the
transIdattribute. Additionally, notice that there are timeouts for both the submission of the Transaction and how long it would take to execute. Please be aware that upon exceeding thetimeoutSecondsperiod, thetransIdwill be silently removed: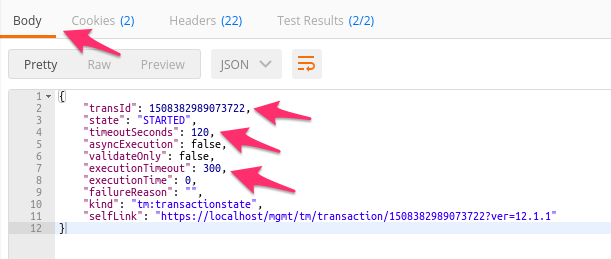
The
transIdvalue has been automatically populated for you in thebigip_transaction_idenvironment variable: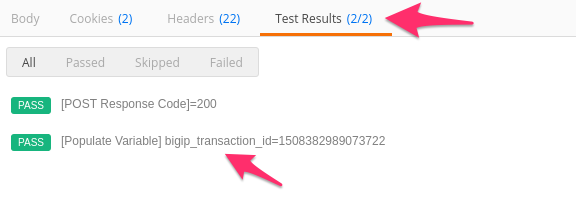
Click the
Step 2: Add to Transaction: Create a HTTP Monitorrequest in the folder. This request is similar to a non-transaction enabled request in terms of thePOSTrequest method, URI, and JSON body. The difference is that a header namedX-F5-REST-Coordination-Idwith the value of thetransIdattribute is added to the Transaction:
Click the Send button and examine the response.
Examine and click Send on Steps 3-6 in the folder.
Click
Step 7: View the Transaction Queue. Examine the request type and URI and click Send. This request allows you to see the current list of ordered commands in the Transaction.
Task 2 - Modify a Transaction
Click the
Step 8: View Queued Command 4 from Transactionrequest in the folder. Examine the request method and URI. We willGETcommand number 4 from the transaction queue.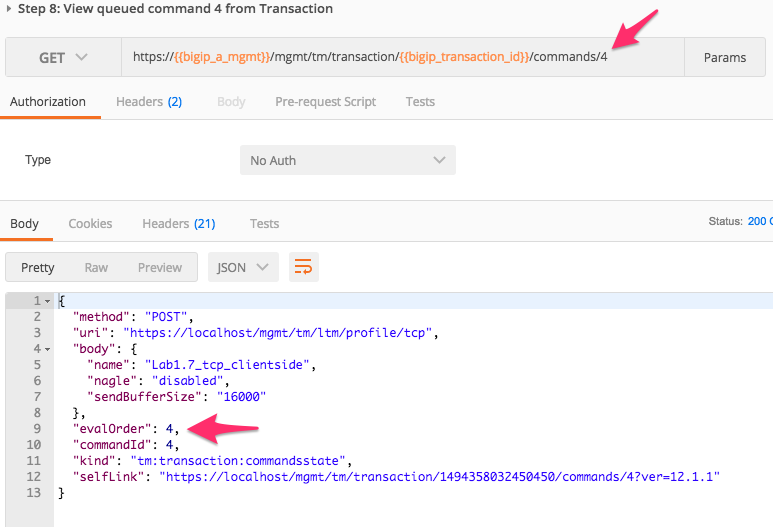
Click the
Step 9: Change Eval Order 4 -> 1request in the folder. Examine the request method, URI, JSON body, then click Send. We will PATCH our transaction resource and change the value of theevalOrderattribute from4to1to move to the first position of the transaction queue: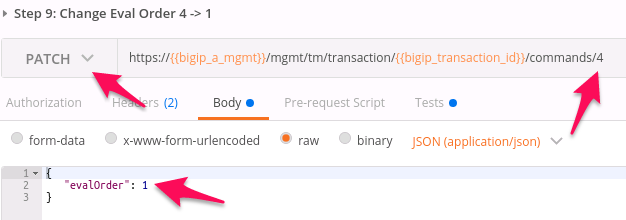
Note
Requests in the ordered transaction queue must obey the order of operations present in the underlying BIG-IP system.
Warning
When sending the Header
X-F5-REST-Coordination-Id, the system assumes that you want to ADD an entry in the transaction queue. You MUST remove this header if you want to issue any other transaction queue changes (such as deleting an entry from the queue, changing the order, or committing a transaction). If you fail to remove the header, the system will respond with a400HTTP error code with the following error text:"message": "Transaction XXXXX operation .... is not allowed to be added to Transaction."Click the
Step 10: View the Transaction Queue Changesrequest in the folder. Verify that command number4has moved into position1and the order of all other commands has been updated accordingly.
Task 3 - Commit a Transaction
Click the
Step 11: Commit the Transactionrequest in the folder. Examine the request type, URI, and JSON body. We willPATCHour transaction resource and change the value of thestateattribute to submit the Transaction: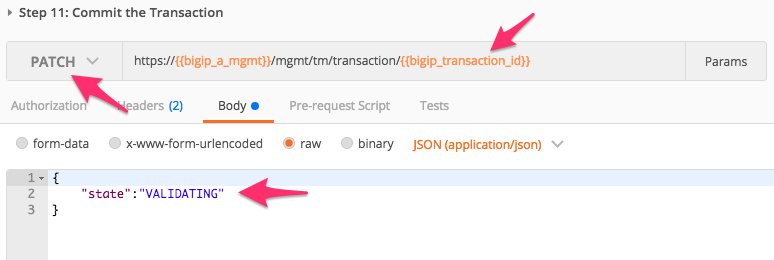
Click the Send button and examine the response. The
statemay already beCOMPLETED. However, it is a good practice to explicitly check for this.Click the
Step 12: View the Transaction Statusrequest in the folder and click the Send button. Verify that thestateof the Transaction isCOMPLETED.You can verify the configuration was created on the BIG-IP device via the BIG-IP A GUI bookmark or at
https://10.1.1.7.Verify that the virtual server works by opening
http://10.1.10.120or using theModule 1 VIP01bookmark in Chrome web browser